MAINTENANCE
ME12002
Purging Air from the Fuel System: John Deere Engine Model 4045TF270 (SN AC02633 and up)
6. Actuate the fuel pump backing pump lever (3) until there are no more air bubbles in the fuel. See Figure 2-28.
NOTICE: There should be resistance while
WARNING
performing step 6. If there is no resistance, activate the starter for a few seconds. Do NOT run the engine.
DO NOT bleed air on a hot engine. Spilled fuel can cause a fire.
7. Retighten the vent plug (1) and keep operating the fuel pump backing pump lever (3) until the pumping effect is no longer felt. See Figure 228.
If the fuel tank is run dry, or if the fuel filter, water separator or fuel lines are replaced, trapped air must be removed, or bled, from the fuel system.
8. Press the fuel pump backing pump lever (3) toward the engine as far as possible. See Figure 2-28.
Bleed air from the fuel system according to the following steps:
Purging Air from the Fuel System: Yanmar Engine Model 4TNE106T-NS (SN AB00473-AB03158)
1. Check the fuel filter/water separator for water or dirt, empty it if necessary. 2. Drain and discard water according to local regulations.
If the fuel tank has been run dry, or the fuel filter or fuel lines have been replaced, trapped air will have to be removed, or bled, from the fuel system. 1. Turn the fuel filter valve (Figure 2-29) to the open position (vertical).
1
2. While operating the priming lever on the fuel injector pump, loosen the air bleeding screw (A, Figure 2-29) on the fuel filter. When fuel starts flowing from the bleeder valve (A) without any air or bubbles, tighten the bleeder screw (A).
3
3. Repeat step 2 for bleeder screws B, C, D and E (Figure 2-29).
2
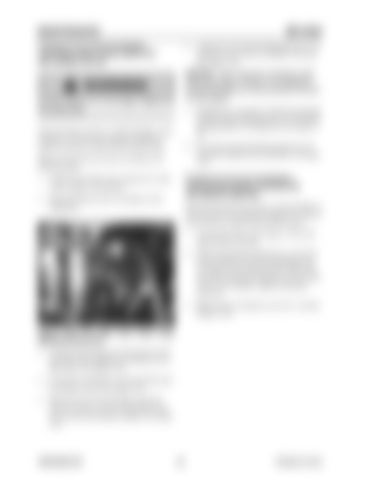
Figure 2-28 Fuel Filter Vent, Drain Plug, Backing Pump Lever 3. Loosen the drain plug (2) at the bottom of the fuel filter/water separator by turning it two or three times. See Figure 2-28. 4. Loosen the vent plug (1) on the fuel filter base by turning it twice. See Figure 2-28. 5. Drain the water from the bottom until fuel starts to run out. As soon as fuel starts to run out, close the drain plug (2) tightly. See Figure 2-28.
909768/BP1207
46
Printed in U.S.A


