2 minute read
MAINTENANCEME12002 HydraulicPumpPartInspection


Part NameProblemCorrective Action
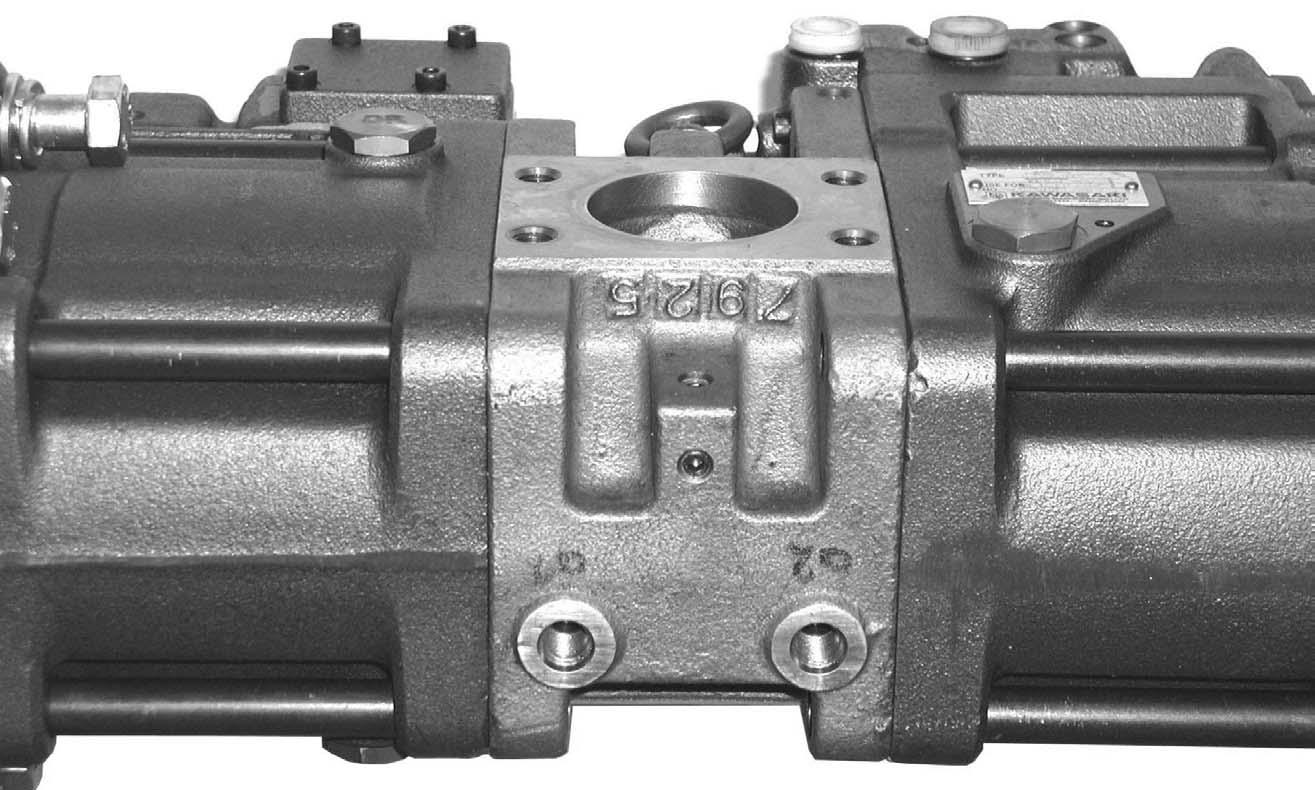
Cylinder
Scratches, discoloration, cracks, erosion, wear or seizure on sliding surface or bores. Replace rotating group
Scratches, wear, cracks or seizures on sliding surface.
PistonReplace rotating group
Indentation, cracks or dents on neck
Scratches, indentation, erosion, wear or scuffing on sliding surface.
ShoeReplace rotating group
Wear, scuffing or deformation on shoe surface.
Indentation or crack around caulked area.
Scratches, discoloration, scuffing or seizure at shoe plate location surface.
Swash plate supportReplace swash plate support
Scratches, wear, scuffing or seizure at pillow bearing sliding surface.
Scratches, erosion, wear, scuffing or seizure at sliding surface.
Shoe plateReplace shoe plate
Scratches, discoloration, scuffing or seizure at mounting surface.
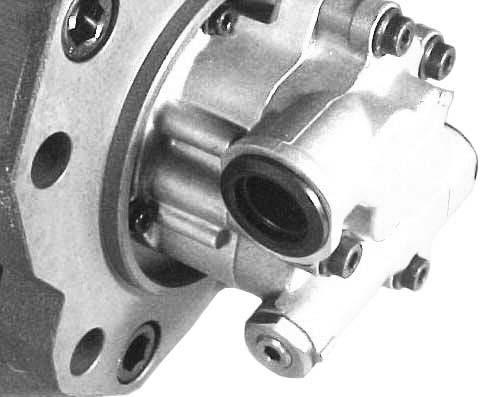
Regulator
Any malfunction that has been isolated to the regulator.
Replace with a completely new, previously tested and set up regulator assembly
HydraulicPumpPressureChecklistMeasurements
AdjustingtheMainPressureLimitingValve (MR)
1.Remove and retain both nuts from the main pressure limiting valve (MR) and secure the adjustment screw for working hydraulic E1 into the block. See Figure 2-8.
2.Position the driving unit (e.g. drive with the dozer blade against a wall).
3.Set adjustment screw E2 pressure for driving to 4641 psi (320 bar)1. See Figure 2-8.
4.Secure adjustment screw E2 and its nut. See Figure 2-8.
5.Set the pressure for working hydraulic with adjustment screw E1 to 4351 psi (300 bar)1, by extending the boom all the way. See Figure 28.
6.Secure adjustment screw E1. See Figure 2-8.
7.Install nuts removed in step 1. See Figure 2-8.

MainPressureLimitingValve(MR)Function

While driving, the pressure automatically increases to 4641 psi (320 bar)1 and moves piston K to the right against the spring (internal hole in the main valve block). This increases main pressure while driving. See Figure 2-8.
1. The settings can be changed. See “Hydraulic System Specifications” on page7.
Warning
Thehydraulictankisunderpressure.Fluid leaksfromhydraulichosesorpressurized componentscanbedifficulttosee,but pressurizedoilcanhaveenoughforcetopierce theskinandcauseseriousinjury.
Alwaysuseapieceofwoodorcardboardto checkforsuspectedhydraulicleaks.Neveruse yourhands.Obtainimmediatemedicalattentionifpressurizedoilpiercestheskin.Failure toobtainpromptmedicalassistancecould resultingangreneorotherseriousdamageto tissue.
CheckingHydraulicOilLevel:New Style
1.Position the excavator on a level surface.
2.Fully extend the bucket and boom, retract the arm and position as shown in Figure 2-9.
3.Lower bucket and dozer blade to the ground. See Figure 2-9. Engage the parking brake. Shut-off the engine. Remove the ignition key and take it with you.
5.Check the hydraulic oil level sight gauge (1). See Figure 2-12. Oil level should be between black and red marks on the sight gauge. If hydraulic oil is required, proceed to step 6. Close the hydraulic valve cover.

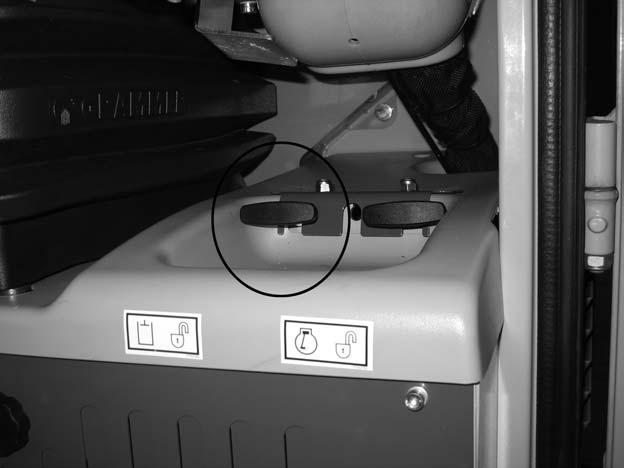
Figure 2-9 Excavator Position for Checking and Changing Hydraulic Oil
4.Pull the hydraulic valve cover latch. See Figure 2-10. Exit the cab and open the hydraulic valve cover. See Figure 2-11.
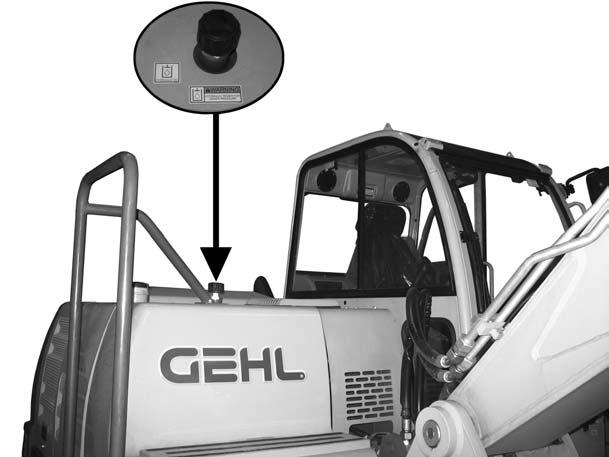
6.Slowly open the hydraulic oil filler cap to relieve pressure, then remove cap. See Figure 2-13.
4.Check the hydraulic oil level indicator. Oil level should be between black and red marks on sight gauge. If hydraulic oil is required, proceed to step 5.
7.Add hydraulic oil until oil level is between red and black marks on sight gauge (1). See Figure 2-12. Open the hydraulic valve cover to check the oil level. See Figure 2-11.
8.Reinstall and securely tighten the filler cap.
9.Close the hydraulic valve cover.
10.Start the engine and let it idle for a few minutes.
11.Check hydraulic functions.
12.Repeat this procedure to recheck the hydraulic oil level.
CheckingHydraulicOilLevel:OldStyle
1.Position the machine on a level surface.
5.Slowly open the hydraulic oil filler cap to relieve pressure, then remove cap.
6.Add hydraulic oil until oil level is between red and black marks on sight gauge.
7.Re-install hydraulic oil filler cap and tighten securely.
8.Start engine and let idle for a few minutes.
9.Check hydraulic functions. Re-check hydraulic oil level.
Figure 2-14 Checking and changing Hydraulic Oil
2.Fully extend the bucket and boom, and retract arm as shown in Figure 2-14.
3.Lower bucket and dozer blade to the ground. See Figure 2-14. Turn off the machine.