Toyota Orderpicker Model 7BPUE15 Service Manual
Section 7. Component Procedures Control Handle
spring with the tangs straddling the pot bracket pin. See Figure 7-16.
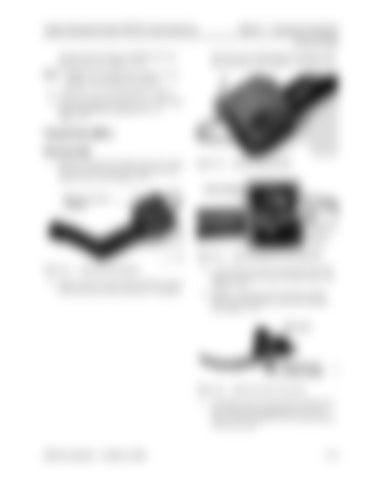
pull the travel pot/bracket assembly from the enclosure. See Figures 7-23 and 7-24.
NOTE: Replace the spring if the tangs are not parallel. Do not bend the spring.
8. Install the two remaining fiber washers. 9. Install the lift/lower knob. See "Lift/Lower Knob Installation/Adjustment" on page 7-21.
Travel Pot (VR 1 ) Disassembly 1. Remove the four hex head cap screws from the front of the travel pot enclosure and remove cover. See Figure 7-22.
Figure 7-23.
Travel Pot Bracket Screws
Figure 7-24
Travel Pot Enclosure (Cover Removed)
R e m o v e screws
Figure 7-22.
Travel Pot Cover Removal
2. Remove the two pan head machine screws from the back of the enclosure. Carefully
3. Loosen the set screw on the gear two full turns and slide the gear off the shaft. See Figure 7-25.
-
4. Remove retaining nut and lock washer from pot and separate from the bracket. See Figure 7-25.
Figure 7-25.
Travel Pot/Bracket Disassembly
5. Carefully remove heat shrink tubing from the terminals and identify the wires so they can be installed in the same location on the new pot.
00700-CL222-05, 1 5 March 2005


