
1 minute read
Section


Drive Motor
12. If pinion needs to be installed: a. Clean threads using thread primer (P/N 00590 - 04963 - 71). b. Install the key and gear. c. Apply adhesive (P/N 00590 - 04964 - 71)to the threads. d. Torque the nut to 45 ft. lbs. (63 Nm).
13. Install a new gasket to the motor flange.
14. Install drive motor.
15. Install cam rings (if previously installed) and secure motor to drive unit with cap screws (13 mm socket). See Figure 7 - 56.
16. Install dipstick. See Figure 7 - 56.
17. Install steer motor and connect wires to steer power head.
18. Install brake if previously removed and connect wires.
19. Connect power cables to drive motor. See Figure 7 - 56.
20. Install tractor covers. See "Tractor Covers" on page 7 - 11.
21. Connect power and test truck operation before returning to service.
Electrical Components
Electrical Components Lift Motor Lift Motor Removal
1. Turn key switch OFF and disconnect battery.
2. Remove tractor covers. See "Tractor Covers" on page 7- 11.
NOTE: In the next steps you will need a 5 gallon (19 liter) capacity container.
3. Drain hydraulic fluid. See "Hydraulic Figure 7 - 58. Pump-to-Motor Connection Fluid" on page 7-60.
4. Disconnect hoses from pump. installation
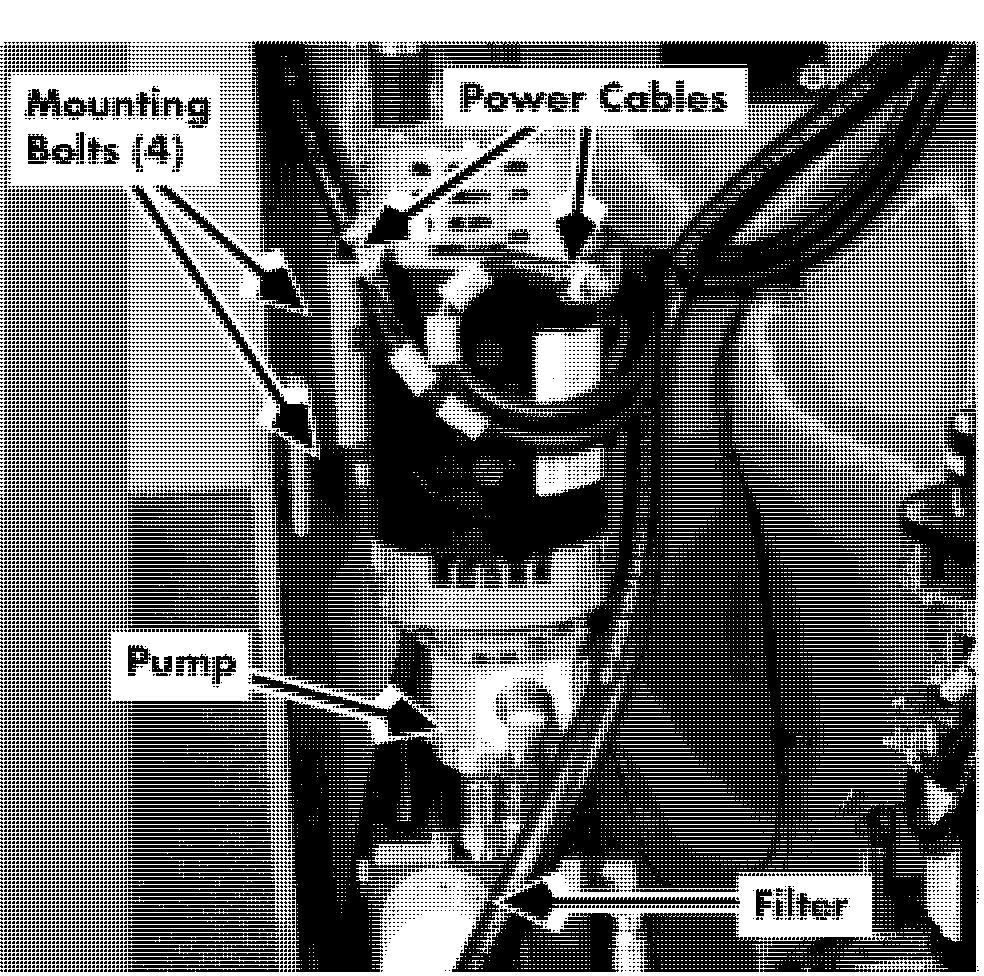
5. Use two-wrench method to disconnect
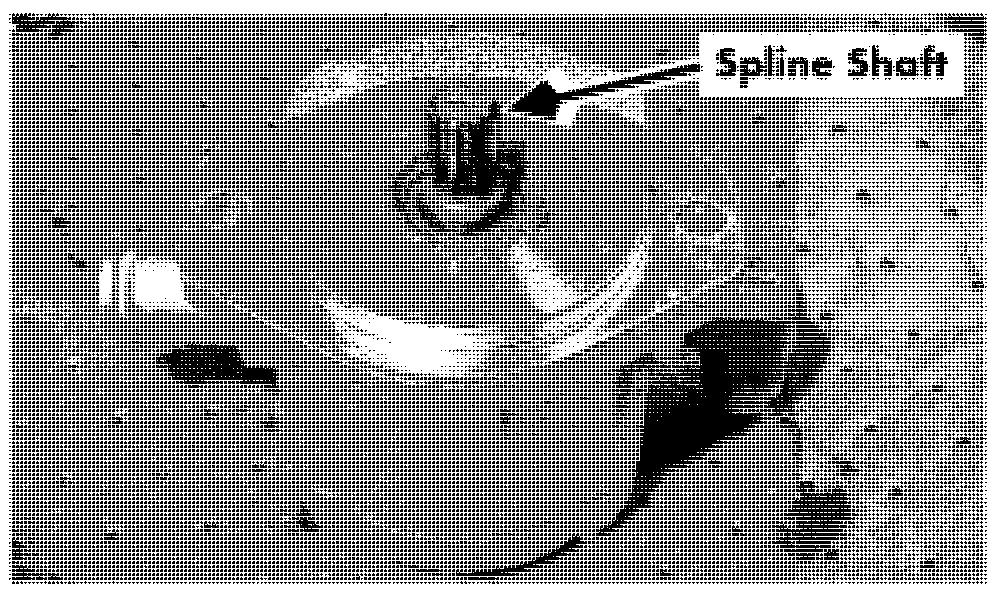
1. Add anti-seize compound (P/N power cables from lift motor. See 00590-04836-71) to spline shaft of pump Figure 7-57. before mounting to motor. See
Figure 7-59.
2. Mount pump to motor. See Figure 7-58.

3. Install four bolts to fasten the motor to its bracket on the tractor frame.
6. Remove the four bolts that hold motor to
4. Connect power cables. See Figure 7-57
5. Attach hoses.
6. Replace hydraulic filter. See Figure 7-57. bracket. See Figure 7-57.
7. Insert drain plug in drain hose and fill the
7. Lift out motor and pump assembly. hydraulic reservoir with new fluid. See
NOTE: Rest the motor on the bracket lip. "Lubrication Specification Chart" on page A-2.
8. Remove pump from motor. See Figure 7-58.
8. Connect battery and turn key switch ON.
9. Test lift functions.
10. Install tractor and top covers.


