3 minute read
Static Safety


Electronic circuit boards and devices used on this truck can be damaged by the discharge of static electricity, called electrostatic discharge.
Static charges can accumulate from normal operation of the truck as well as movement or contact between non - conductive materials (plastic bags, synthetic clothing, synthetic soles on shoes, styrofoam coffee cups, etc.).
Accumulated static can be discharged through human skin to a circuit board or component by touching the parts. Static discharge is also possible through the air when a charged object is placed close to another surface at a different electrical potential. Static discharge can occur without you seeing or feeling it.
Static Safety
Whenever working on or near static - sensitive electronics, always use static discharge precautions.
1. Place a static discharge wrist strap around your wrist. Connect the ground lead to the wrist strap connector.
2. Plug the ground cord into the ESD plug on the electrical assembly panel or the console panel. See Figure 2 - 1 and Figure 2-2.

3. Before removing or installing static - sensitive components, place them on a properly grounded static mat. See Figure 2 - 3.
4. To transport static - sensitive components, including failed components being returned place the components in an anti - static bag or box (available from your Toyota Dealer).
The wrist strap and associated accessories should be tested monthly to verify they are working properly. A bad static discharge wrist band will not alert you that it is bad.
Figure 2 - 3 shows the components of the Toyota anti - static field service kit, part number 00590 - 04849 - 71. The kit includes a wrist strap, ground cord and static - dissipative work surface (mat). Follow the instructions packaged with this kit.
Section 2. Safety Toyota Orderpicker Model 7BPUE15 Service Manual
Static Safety
Wrist Strap \
Static-Dissipative Work Surface
Ground Cord straps are available in quantities of 25, as part number 00590-04848-7 1.

A wrist strap tester is available as part number 00590-04850-71.
Contact your authorized Toyota Dealer for information.
Jacking Safety
Sometimes you may need to jack the truck up from the floor to perform maintenance procedures. When doing so, observe the proper safety precautions:
1. Lower the forks completely. Remove any load.
2. Place all controls in neutral.
3. Block the wheels to prevent movement of the vehicle.

4. Disconnect the battery connector.
5. Place the jack under the designated jacking points listed in the following procedures.
Tractor
Jacking Safety
Acaution
Use care when jacking the tractor on wire-guided trucks. Sensors are installed under the bumper. See Figure 2-4.
Use extreme care whenever the truck is jacked up. Keep hands and feet clear from the vehicle while jacking the truck. After the truck is jacked, place solid blocks beneath it to support it. DO NOT rely on the jack alone to support the truck.
Operator Platform
1. Using the lift button, raise the operator platform until you have enough clearance for your procedure.
2. Place a safety stand or block between the carriage and a baseleg and carefully lower the operator platform onto the safety stand.
3. Turn the key switch OFF and disconnect the battery.
Only jack in these areas, no more than 1 /2 in. (1 3mm) off the floor.
1. Place the jack at the designated jacking point. See Figure 2-4.

2. Jack one side of the truck so that the drive tire is off the floor approximately 1 inch (25.4 mm).
3. Block that side of the truck in place.
4. Jack up the other side of the truck level with the first side.
5. Block that side of the truck in place.
NOTE: After working on a vehicle, test all controls and functions to assure proper operation.
Jacking Safety
Baseleg
1. Place the jack at the designated jacking point. See Figure 2-5.
2. Jack the baseleg until you have enough clearance to replace the load wheel.
Tie-Down for Transport
Vertical Transport
To transport this lift truck in an over - the - road vehicle or rail car, follow these steps:
1. Lower operator platform and locate truck in center of transport vehicle.
2. Turn key switch OFF and disconnect battery.
NOTE: If guide rollers are present, place straps through guide rollers and secure to floor; proceed to step 4.
3. If guide rollers (used for rail guidance) are not present:
Tie-Down for Transport
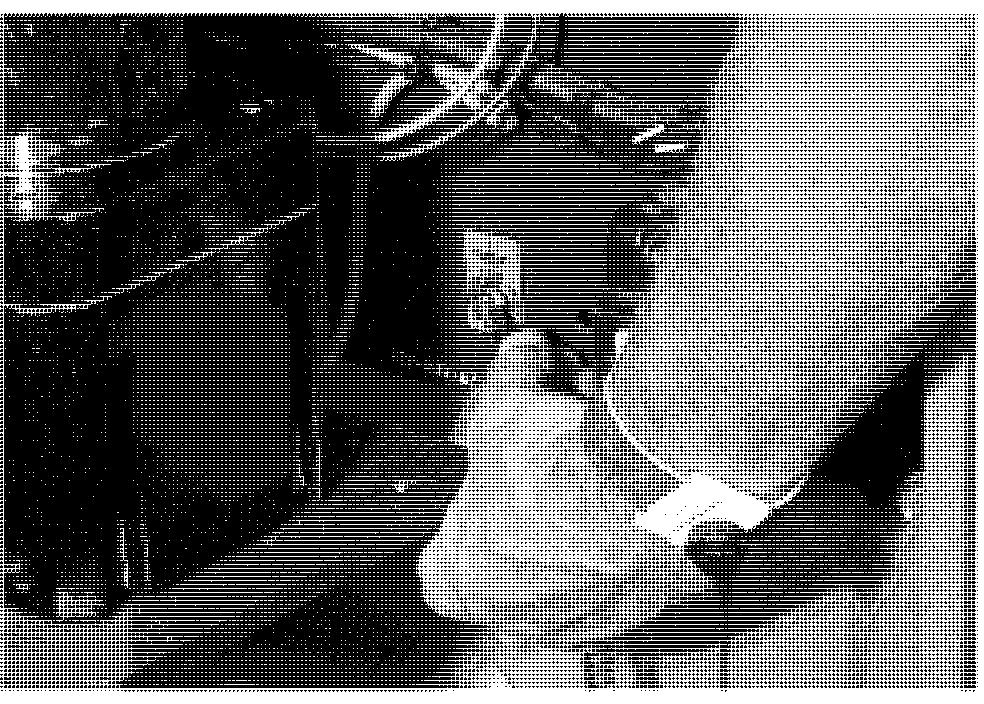
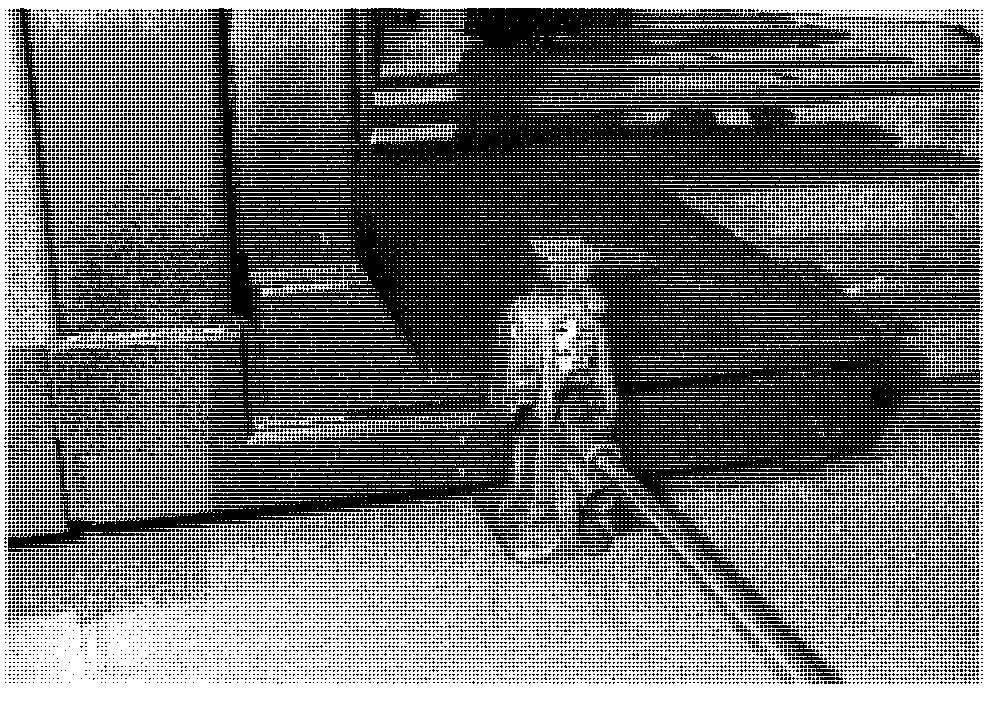
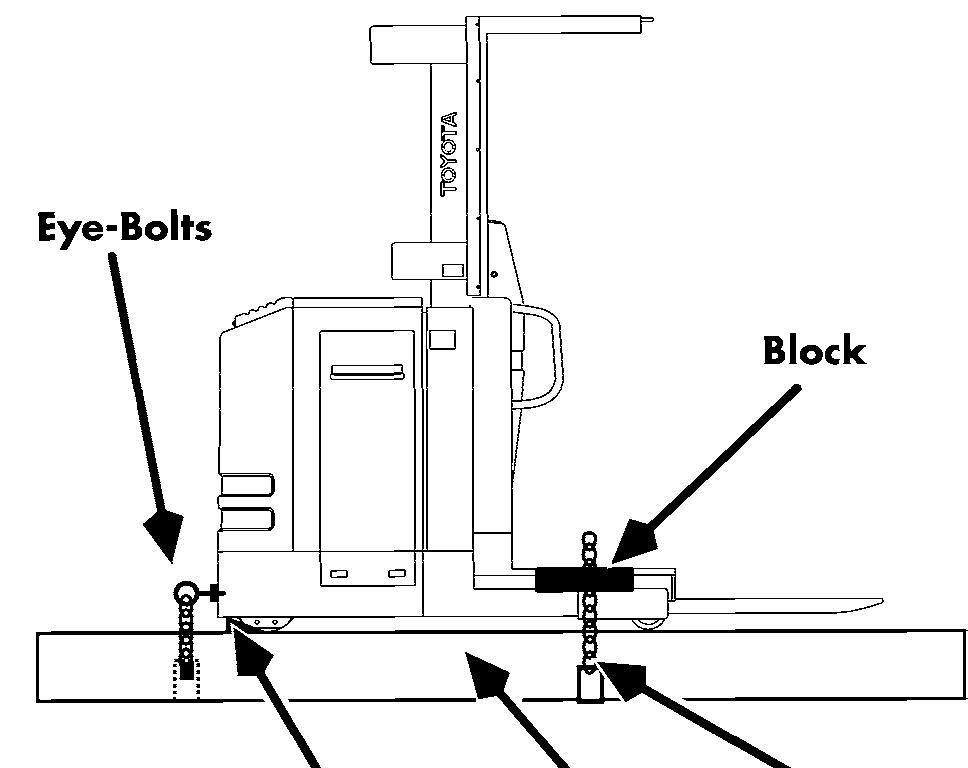
a. Install eye-bolts (3/4 in. [19 mm] thread size) in holes in the bumper. See Figure 2 - 6.

b. Secure chain ti-on1 ye-bolts to vehicle bed. See Figure 2 - 7.
4. Strap truck ti-on1 Ijumpcr or guide roller to tloor of transport vehicle. See Figure 2-7.
5. Chock tlrive wheel to prevenr rractor-firs1 movement. See Figlire 2 -7.
6. Place block Ijctwccn ljasclcg and platbrm,
7.5 in. (190.5 cm) from front edge of platform. See Figure 2 - 7.
7. Position additional adjustable chain or strap perpendicular to forks over operator's platform and attach it to vehicle bed. This will prevent tip-over during transportation. See Figure 2 - 7.
Horizontal Transport
1. Remove forks from carriage.
2. Replace cap and screen in hydraulic reservoir with shipping cap and screws.
3. Band down carriage and battery rollers.
4. Remove dipstick, and plug drive unit.
5. Remove the bottom two bumper plate bolts (to be replaced during shipping).
6. Use two hoists in conjunction and lay truck on cradle.
7. Install long bolts through the holes in the bumper and secure to cradle.
8. Band truck to cradle.
9. Secure forks to cradle below mast.


