Maintenance — Engine Cooling System Changing the Inner Filter Element
Engine Cooling System
1. Complete all steps in “Accessing the Outer and Inner Filter Elements” on page 22.
Checking Coolant Level
2. Remove the outer filter element.
1. Perform the “Mandatory Procedure” on page 4.
Safety
Shutdown
3. Before removing the inner filter element from the housing, clean away any dirt built up in the housing. Leave the inner filter element installed during this step to prevent debris from entering the engine intake manifold.
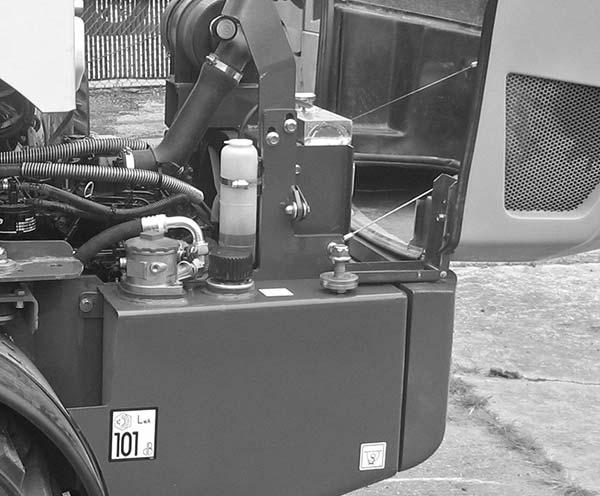
2. Open the engine cover (2, Figure 6). Check the coolant level in the expansion reservoir (1, Figure 6). The expansion reservoir must be 1/3 to 1/2 full for a cold engine and 2/3 to 3/4 full for a hot engine.
4. Remove the inner filter element. 5. Check the inside of the housing for any damage that may interfere with the elements.
1
6. Be sure that the element sealing surfaces are clean. 7. Install the new inner filter element. 8. Reinstall/replace the outer filter element. 9. Latch the clamps to secure the element cover.
2
10. Check the hose connections and be sure they are all clamped and tightened properly. Figure 6 – Cooling System (AL 500 Series shown) 1. Expansion Reservoir 2. Engine Cover
WARNING Do not remove the cap when the coolant is hot. Serious burns may occur. 3. Slowly loosen the cap and allow pressure to escape. 4. Completely remove the cap and add coolant as necessary. See “Fluid Capacities/Lubricants” on page 11 for coolant specification. 5. Reinstall the radiator cap.
PRINTED IN U.S.A.
23
50940008/AP0311