1 minute read
Drive Control System— Pedal Calibration Procedure


Forcing Pedal Parameter Calibration
When the PLUS+1 module is replaced, pedals will automatically be out-of-calibration.
When pedal mechanical components and/or the electronic pedal sensor are replaced, however, they will register as being in-calibration even though they will not be.
After replacing pedal mechanical components and/or the electronic pedal sensor, pedal calibration must be manually forced as follows:
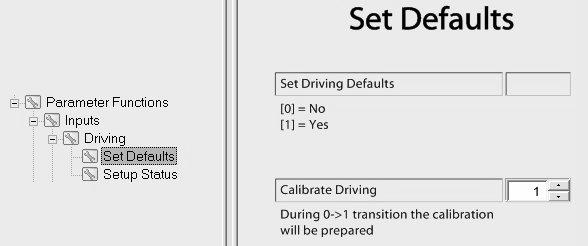
1.The Set Defaults window can be accessed through the “Diagnostic Navigator”: “Parameter Functions > Inputs > Driving > Set Defaults.”
Pedal Calibration Data
Pedal calibration data can be accessed through the “Diagnostic Navigator”: “Log Functions > Calibration > Pedal Data.”
2.Use the up and down arrows (A) to select “1” in the Calibrate Driving field.
3.Click the button to send the “1” value to the module.
The Pedal Data window displays the current pedal calibration data and status. Status values for both the brake/inch (Inching) and speed control (Driving) pedals are displayed: a.This status flag displays real-time pedal calibration point status: b.This status flag indicates pedal calibration status.
•A red “No point calibr” flag indicates the pedal requires calibration.
•A yellow “Calibr. started” flag indicates pedal calibration is under way.
•A green “All points calibr.” flag indicates the pedal is properly calibrated.
•A red “Go to Zero” flag indicates that at least one of the pedal reference points is out of calibration.
4.Use the up and down arrows (A) again to select “0” in the Calibrate Driving field.
5.Click the button again to send the “0” value to the module.
6.Proceed to “Pedal Calibration Procedure” on page181.
•A green “Calibration completed” flag indicates the pedal is properly calibrated.
Electrical System — Battery Removal
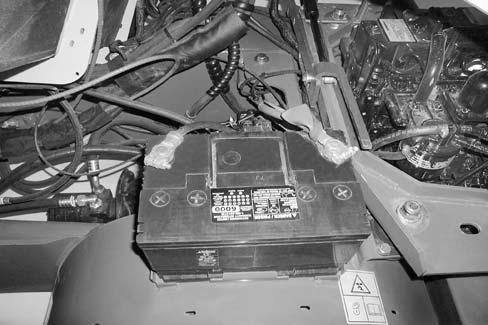
CHAPTER 10 — ELECTRICAL SYSTEM
Battery Removal
STEP 1
Tilt the platform. See “Tilting the Platform” on page61.
STEP 2
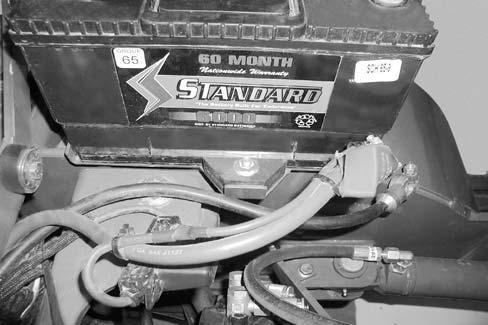
Remove the negative (1) and positive (2) battery cables.
Warning
Sparks or flame can cause hydrogen gas in a battery to explode. To prevent an explosion, do the following:
When you disconnect the battery cables, always disconnect the negative (-) battery cable first.
When you connect the battery cables, always connect the negative (-) battery cable last.
Do not short circuit the battery posts with metal items.
Do not weld, grind or smoke near a battery.
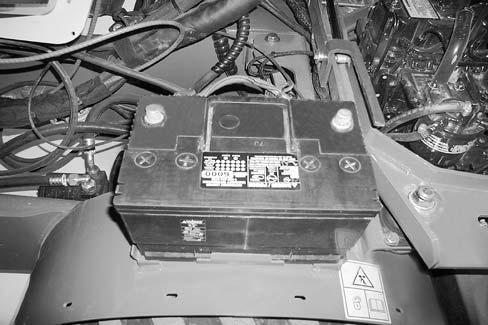
STEP 3
Remove battery hold-down and bolt (3).
STEP 4
Remove the battery (4) from the machine.