Eaton Fuller Heavy Duty FRLO-16410C Transmissions TRSM0580 Service Manual - PDF DOWNLOAD

Page 25

Preventive Maintenance Oil Leak Inspection Process Inspect for Oil Leak Determine if it is a Weep or a Leak Weep: Stained, damp, no drips, light oil film, dirt adhered to the contaminated area. Gasket

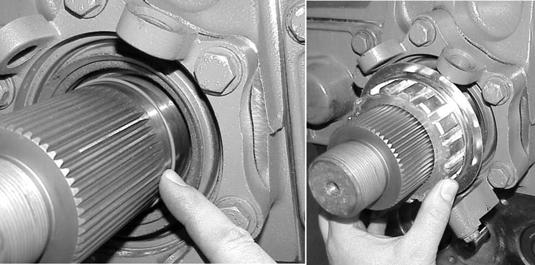
Leak: Extremely wet or dripping of oil in the contaminated area. Rear Seal

Leak

Step 1 1. Clean suspected oil weep area with a clean dry cloth or mild soluble degreaser. 2. Ensure lube is to proper level. 3. Notify the customer that it is only a weep and it is not considered to be detrimental to the life of the transmission. 4. Repair is complete.

1. Do not repair: Rear seal is designed to allow minimal seepage (refer to Roadranger TCSM-0912 Seal Maintance Guide).

1. Determine the origin of the leak path. 2. If origin of leak is obvious skip to Step 3. 3. If the origin of the oil leak is not obvious then use either of the two following steps to determine the oil leak:

2. Ensure lube is to proper level.

Note: Do not use a high pressure spray washer to clean the area. Use of a high pressure spray may force contamination into the area of concern and temporarily disrupt the leak path. i. Clean area with a clean dry cloth or mild soluble degreaser and fill the transmission to the proper lube level. OR ii. Clean the area as noted above and insert tracer dye into the transmission lube and fill transmission to proper lube level.

Step 2 Operate vehicle to normal transmission operating temperature and inspect the area for oil leak(s) visually or if tracer dye was introduced use an UVL (Ultraviolet Light) to detect the tracer dye’s point of origin. Note: When inspecting for the origin of the leak(s) make sure the assumed leak area is not being contaminated by a source either forward or above the identified area such as the engine, shift tower, shift bar housing, top mounted oil cooler, etc...

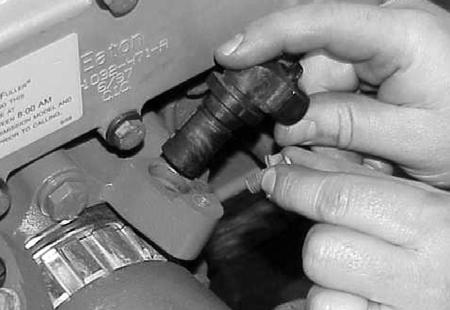
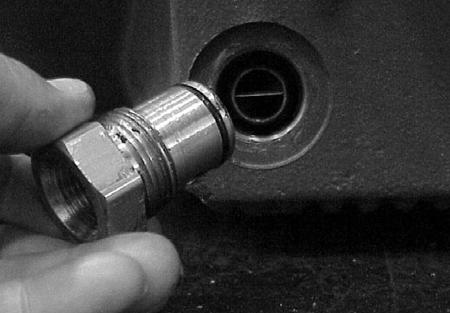
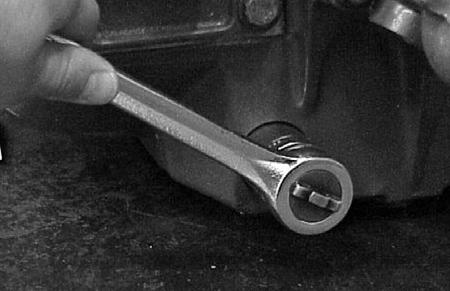
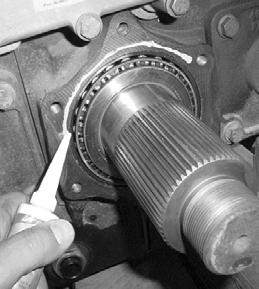
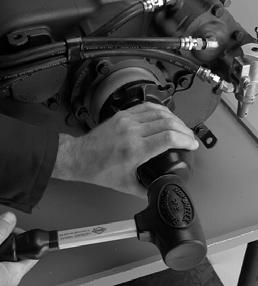
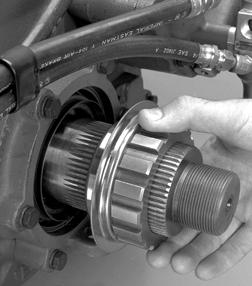
Step 3 Once the origin of the leak is identified, repair the oil leak using proper repair procedures from the designated model service manual.

Step 4 After the repair is completed, verify the leak is repaired and operate the vehicle to normal transmission operating temperature. Inspect repaired area to ensure oil leak has been eliminated. If the leak(s) still occurs, repeat steps or contact the Roadranger Call Center at 1-800-826-4357.

19


Turn static files into dynamic content formats.

Create a flipbook

Articles inside

How to Install Output Yoke

1min
page 142

M/S Endplay Shimming Procedure

3min
pages 143-146

How to Install the Auxiliary Countershaft Bearing Cover

1min
page 140

How to Assemble Input Shaft and Oil Pump

1min
pages 137-139

ing / Front CoverHow to Assemble Clutch Hous

1min
pages 135-136

How to Install Output Bearing Cover

1min
page 134

How to Assemble and Install Front Countershaft Assembly

1min
page 133

How to Assemble and Install the Shift Shaft

1min
pages 127-128

How to Assemble and Install Reverse Idler

1min
pages 125-126

How to Install Cooler and Fittings How to Assemble and Install Auxiliary

1min
page 113

Countershaft

2min
pages 120-122

Countershaft

1min
pages 92-93

Input Shaft and Oil Pump How to Remove and Disassemble Clutch

2min
pages 86-88

How to Remove Output Bearing Cover

1min
page 91

for OverhaulHow to Orient Transmission

1min
page 85

Bearing Cover

1min
page 67

How to Remove Output Yoke

1min
page 82

How to Install the Oil Cooler Fitting How to Remove the Auxiliary Countershaft

1min
page 65

How to Remove the Oil Cooler Fitting

1min
page 64

How to Install the Output Bearing Cover

1min
pages 62-63

How to Remove the Output Bearing Cover

1min
pages 60-61

How to Install the Output Shaft Oil Seal - Magnetic Speedometer

1min
pages 58-59

Magnetic Speedometer

1min
pages 56-57

How to Install the Air Filter/Regulator

1min
page 40

How to Install the Shift Knob How to Remove the Gear Shift Lever/Remote

1min
page 42

Reverse Switch Operation and Testing

1min
page 50

Timing Procedures

3min
pages 34-36

RTV Sealant Application Procedures

1min
pages 26-27

Serial Tag Information and Model Nomenclature

1min
pages 12-14

Preventive Maintenance

1min
pages 23-24

Recommended Tools

3min
pages 20-22

Torque Chart

2min
pages 15-16

onGeneral Service Practices and Part Inspecti

7min
pages 7-10

Purpose and Scope of Manual

1min
page 11

Oil Leak Inspection Process

1min
page 25

Lubrication Information

2min
pages 17-19
Issuu converts static files into: digital portfolios, online yearbooks, online catalogs, digital photo albums and more. Sign up and create your flipbook.