7 minute read
onGeneral Service Practices and Part Inspecti

General Service Practices and Part Inspection Safety
Always keep personal safety in mind when working on heavy truck transmissions. Do not ignore common sense.
Use appropriate safety equipment including: • Safety glasses • Safety shoes • Gloves • Proper transmission jack or lift with safety chains • Guards and protective devices for presses, pullers, and drivers. • Wheel chocks
Disassembly Tips
Cleanliness
The workplace must be clean to prevent dirt or other foreign material from contaminating the transmission during repairs. Dirt is abrasive and can damage bearings. Eaton® recommends cleaning the outside of the unit before beginning disassembly.
Disassembling Assemblies
As components are removed from assemblies, lay the parts on a clean bench in the order in which they are removed. By laying the parts out in order, they are less likely to be lost, and reassembly will be easier.
If bearings are to be reused, they must be removed with the proper bearing pullers, or they can be damaged. After removing bearings, carefully wash and lubricate them, and wrap them protectively in clean shop rags or towels until they are to be installed in the transmission.
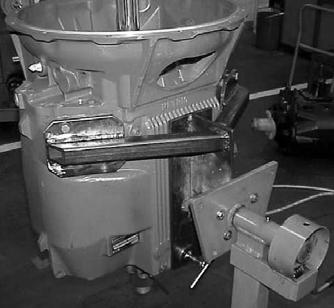
Input Shaft Removal
The input shaft assembly contains the transmission lube pump. The special procedure for removal and disassembly is located in the “Transmission Overhaul Procedures” section.
Snap Ring Removal
Snap rings should be removed with snap ring pliers to avoid overstretching or deforming them.
Removing Parts Using Tools
Use care when removing parts with pullers or drivers to prevent damage to components. Never apply force to driven parts after they stop solidly. Eaton® recommends using only soft hammers, soft bars, mauls, and the special tools indicated in the procedures for all disassembly work.
Marking Parts
To aid in reassembly and prevent unnecessary work, use a toolmaker’s die to mark the countershaft parts and rear bearing cover to indicate position. Mark the countershaft parts, including the countershaft, gears, bearings, and shims, as “upper” or “lower”. Mark the rear bearing cover to indicate the original position to the cover.
Parts Cleaning
DO NOT USE GASOLINE TO CLEAN PARTS AS IT IS HIGHLY EXPLOSIVE. Clean bearings and ground or polished parts in a cleaning solvent. To prevent corrosion, DO NOT clean ground or polished parts in a hot solution tank, with water, or in alkaline solutions. Housings can be cleaned with a cleaning solvent or in a hot solution tank with a mild alkaline solution. Dry and oil parts immediately after removal to prevent machined surfaces from corroding. Be careful cleaning aluminum parts; some cleaning solutions may damage them.
WARNING
Inspection
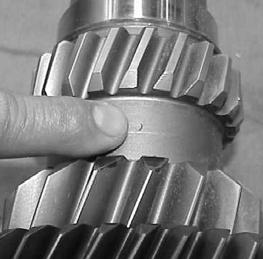
Gears
Inspect gear teeth for frosting, pitting, spalling, or other damage. Gears with frosting can usually be reused. Often, frosting on gears heals with continuous use of the transmission and more serious pitting does not occur. Gears with light pitting can have considerable life left and can also be reused. For gears with severe pitting, spalling, damage, or confirmed noise issues, the complete gear set (mainshaft gear and both countershaft gears) must be replaced.
Inspect the internal clutching teeth for excessive wear or rounding. Replace the gear and sliding clutch if necessary.
For additional information on wear of gear teeth, including full color photographs, refer to Eaton® Fuller® publication TRSM0913, Understanding Spur Gear Life.
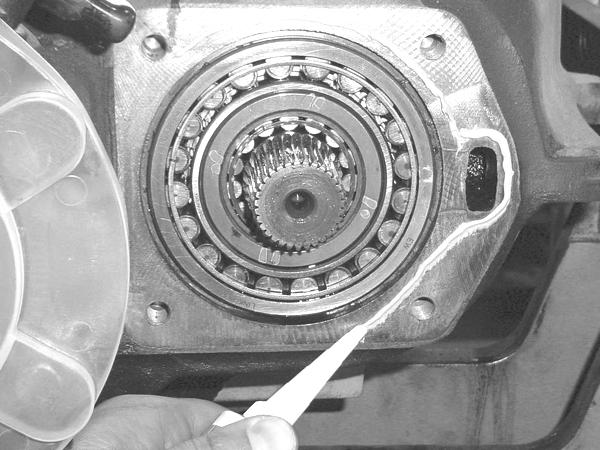
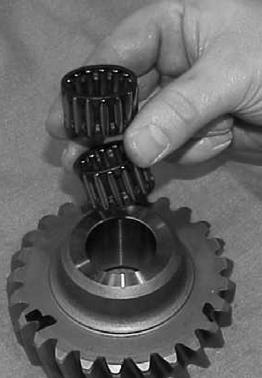
Bearings
Inspect balls, rollers, races, and thrust surfaces for pitting, spalling, or discoloration. Check for excessive axial (up and down) or radial (side-to- side) play. Replace the bearings as necessary.
Lubricate bearings with clean oil and rotate them to check for tightness or roughness. Replace the bearings as necessary.
Splined Shafts
Inspect splines for twisting, cracking, or wear. Replace splined shafts as necessary. Note: Worn splines may indicate excessive torsional vibration. Make sure the vehicle system is corrected to prevent recurring damage to the transmission.
Thrust Washers
Inspect thrust washers for wear or scoring, and replace them as necessary.
Snap Rings
Inspect snap rings for wear, twisting, stretching, or other damage. Snap rings must fit tightly in their grooves. Replace them as necessary.
Housings
Inspect housings for cracks. Replace any cracked housings.
Inspect threaded holes for damage, and repair them as necessary.
Inspect bearing bores for wear. Light wear is acceptable. Housings with moderate to heavy wear in the bearing bores must be replaced.
Sliding Clutches
Inspect the clutching teeth for excessive wear or rounding. Light wear or rounding is acceptable. Replace clutches with moderate to heavy tooth wear.
Inspect the yoke slots of the clutches for excessive wear. Replace worn clutches.
Range Synchronizer
Inspect the friction material for excessive wear of damage. Replace the synchronizer as necessary.
Inspect the blocker pins for excessive wear on the chamfered corners, looseness, or torsional vibration damage. If the blocker pins are damaged, replace the range synchronizer.
Fit the low and high range synchronizers in their respective gears. Check for synchronizer bottoming on or in the gears. If bottoming occurs, replace the synchronizer assembly.
Inspect the synchronizer mating surface on the gears for signs of excessive heat. If signs of excessive heat are present, replace the synchronizer assembly.
Clutch Housing
Inspect the pilot diameter where the clutch housing mates with the engine. Replace the clutch housing if the pilot diameter is excessively worn.
Inspect the bushings for the clutch release linkage. Replace the bushings if they are worn.
O-Rings and Seals
Inspect o-rings and seals for wear, gouges, or permanent set, and replace them as necessary.
Shifting Mechanism
Inspect the shift yokes for excessive wear in the fork area. Light wear is acceptable. Replace any moderately or heavily worn shift yokes.
Inspect the shift shaft for burrs or raised metal, and check the notches for excessive wear. Repair or replace parts as necessary.
Inspect the shift shaft, shift block, bias plate, shift key, detent key, plungers, and actuator parts for excessive wear or scoring. Replace any of these parts as necessary.
Range Cylinder Assembly
Inspect the O-rings and piston seal for wear, damage, or permanent set, and replace them as necessary.
Inspect the piston bar, piston bores, and cylinder bores for wear or scoring. Replace any of these parts as necessary.
Shift Lever
Inspect the shift lever tip and spade pin groove for wear. Replace the parts as necessary.
Inspect the spade pin bore in the shift lever housing for excessive wear. Replace the housing as necessary
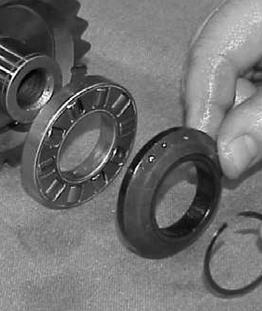
Input Shaft Seal
The input shaft seal is a lip type seal. Inspect the input shaft grooves and the inside of the front bearing cover for damage. Replace any damaged parts.
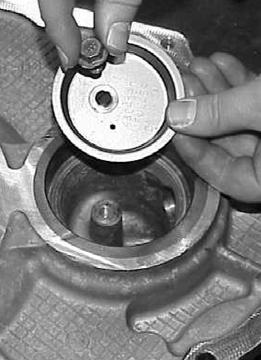
Front Bearing Cover
If an input-shaft-mounted clutch brake is used on the transmission, inspect the clutch brake mating surface on the front bearing cover for excessive wear. Replace the front bearing cover if the mating surface is excessively worn.
Gasket Surfaces
Inspect flanges and gasket surfaces for burrs, nicks, and scratches. Repair or replace parts as necessary.
Output Seal System
Inspect the output seal mating surface for wear, scratches, burrs, or other damage. Replace the seal surface if it is worn or damaged. Do not attempt to salvage the seal surfaces with crocus cloth, filing, etc.
For additional information, refer to the Eaton/Fuller® brochure TCSM-0912 “Seal Maintenance Guide”.
Reassembly Tips
Cleanliness
Make sure that parts are kept clean during reassembly. Prevent dirt or other foreign material from contaminating the transmisssion. Dirt is abrasive and can damage bearings.
Use lint-free shop rags when handling and cleaning parts. Too much lint inside the transmission can clog the oil pump pickup screen.
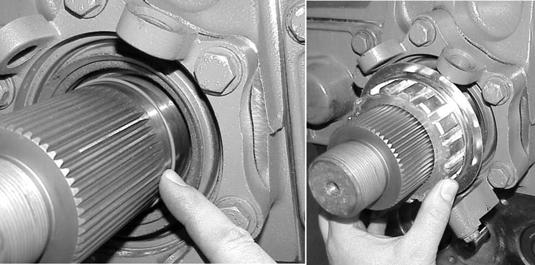
Bearing Installation
To avoid damaging bearings, use a driver that contacts both the inner and outer race of the bearing. If the bearing balls/rollers or bearing cage is damaged, the bearing must be replaced.
Capscrews
Make sure the threaded holes are clean and free of debris. If necessary, use a tap to clean the threads.
Make sure the capscrew threads are in good condition. If necessary, replace the capscrew.
Use a thread seal/locker compound on all capscrews. Use Eaton® Fuller® P/N 71295 thread sealant of equivalent.
Torque all capscrews to the recommended tightness.
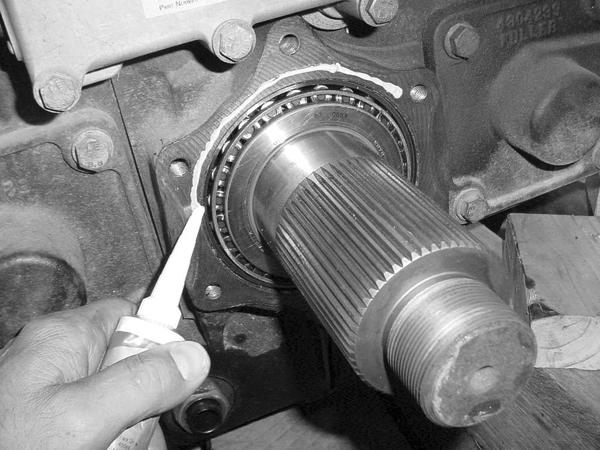
Initial Lubrication
Unless stated specifically, lubricate all mating or sliding parts with transmission oil.
Lubricate all bearings with transmission oil.
Air System Lubrication
Lubricate all air system O-rings, seals, and cylinders with a light coating of silicone lubricant such as Eaton® Fuller® P/N 71203 (8fl.oz.) or P/N 71206 (0.14 fl.oz/).
Snap rings
Eaton® recommends using new snap rings for reassembly. A properly installed snap ring fits tightly in its groove and cannot be easily rotated. All loose or overstretched snap rings must be replaced.