Mack Truck MAXITORQUE TRANSMISSIONS T313–T318(L)(LR)(21)(L21)(LR21) Service Manual(10-123)

Page 208

REPAIR INSTRUCTIONS 8. Tip the No. 1 (upper left, when viewed from the rear) front countershaft into position as described earlier for the No. 3 (lower) countershaft.

521

9. Install the reverse idler gear and thrust washer into the opening next to the No. 1 (upper left) front countershaft. Roll the idler gear and thrust washer into position. 10. Install the reverse idler shaft. Align the flat on the end of the shaft with the mark previously made along the edge of the shim pack. 11. While maintaining mark alignment, use a brass hammer to tap the reverse idler shaft into the case. To ease installation of the mainshaft, do not drive the reverse idler shaft all the way into the case at this time. Leave approximately 1/2 inch of the shaft protruding above the case as shown in Figure 520.

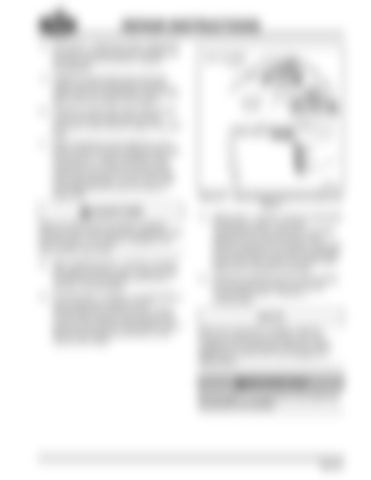
Make sure that the thrust washer is aligned correctly with the idler shaft while tapping the idler shaft into place. If not aligned, damage to the thrust washer may result. 12. After installing the No. 1 and No. 3 reverse idler gears and idler shafts, install the front countershaft rear bearings onto the No. 1 and No. 3 countershafts. 13. To hold the No. 1 and No. 3 countershafts in place, temporarily install the front countershaft rear bearing covers. Position 1/2-inch thick spacers (nuts) between the bearing covers and the transmission case to allow for the temporary protrusion of the reverse idler shafts.

Figure 521 — Bearing Covers Temporarily Installed with Spacers

14. With the No. 1 and No. 3 front countershafts temporarily in place, move both countershafts as far rearward as possible, against the rear bearing covers. This provides clearance for mainshaft installation and Lo-speed gear and reverse speed gear positioning. Also, position the reverse idler gears as far rearward as possible. 15. Install the mainshaft into the case by lifting the mainshaft into position and in gear contact with the No. 1 and No. 3 countershafts.

Before the mainshaft is installed, slide the Lo/reverse sliding clutch forward until it fully engages the Lo-speed gear. Slide the reverse speed gear forward until it fully engages the sliding clutch.

Reverse gear is not secured to the shaft and can fall off if not careful.

Page 201

Turn static files into dynamic content formats.

Create a flipbook

Articles inside

REPAIR INSTRUCTIONS

1min
pages 229-230

REPAIR INSTRUCTIONS

1min
page 228

REPAIR INSTRUCTIONS

1min
page 227

REPAIR INSTRUCTIONS

1min
page 226

REPAIR INSTRUCTIONS

1min
page 225

REPAIR INSTRUCTIONS

1min
page 224

REPAIR INSTRUCTIONS

1min
page 223

REPAIR INSTRUCTIONS

1min
pages 221-222

REPAIR INSTRUCTIONS

1min
page 220

REPAIR INSTRUCTIONS

1min
page 219

REPAIR INSTRUCTIONS

1min
page 218

REPAIR INSTRUCTIONS

1min
page 217

REPAIR INSTRUCTIONS

1min
pages 215-216

REPAIR INSTRUCTIONS

1min
page 214

REPAIR INSTRUCTIONS

1min
page 211

REPAIR INSTRUCTIONS

1min
pages 209-210

REPAIR INSTRUCTIONS

1min
page 208

REPAIR INSTRUCTIONS

1min
page 207

REPAIR INSTRUCTIONS

1min
page 206

REPAIR INSTRUCTIONS

1min
page 205

REPAIR INSTRUCTIONS

1min
pages 186-187

REPAIR INSTRUCTIONS

1min
pages 183-184

REPAIR INSTRUCTIONS

1min
page 182

REPAIR INSTRUCTIONS

1min
page 181

REPAIR INSTRUCTIONS

1min
pages 179-180

REPAIR INSTRUCTIONS

1min
page 177

REPAIR INSTRUCTIONS

1min
page 174

REPAIR INSTRUCTIONS

1min
page 165

REPAIR INSTRUCTIONS

1min
page 164

REPAIR INSTRUCTIONS

1min
pages 162-163

REPAIR INSTRUCTIONS

1min
page 160

REPAIR INSTRUCTIONS

1min
page 157

REPAIR INSTRUCTIONS

1min
page 156

REPAIR INSTRUCTIONS

1min
page 155

REPAIR INSTRUCTIONS

1min
page 151

REPAIR INSTRUCTIONS

1min
pages 145-146

REPAIR INSTRUCTIONS

1min
page 142

REPAIR INSTRUCTIONS

1min
pages 135-137

REPAIR INSTRUCTIONS

1min
page 134

REPAIR INSTRUCTIONS

1min
page 133

REPAIR INSTRUCTIONS

1min
pages 131-132

REPAIR INSTRUCTIONS

1min
pages 125-127

REPAIR INSTRUCTIONS

1min
pages 123-124

REPAIR

1min
pages 121-122

REPAIR INSTRUCTIONS

1min
pages 119-121

REPAIR INSTRUCTIONS

1min
page 115

REPAIR INSTRUCTIONS

1min
pages 105-106

REPAIR INSTRUCTIONS

1min
page 75

REPAIR INSTRUCTIONS

1min
pages 72-74

REPAIR INSTRUCTIONS

1min
page 68

REPAIR INSTRUCTIONS

1min
page 67

REPAIR INSTRUCTIONS

1min
page 66

REPAIR INSTRUCTIONS

1min
page 65

REPAIR INSTRUCTIONS

1min
pages 63-64

REPAIR INSTRUCTIONS

1min
page 59

REPAIR INSTRUCTIONS

1min
page 57

MAINTENANCE

1min
page 55

MAINTENANCE

1min
page 54

MAINTENANCE

1min
page 53

TROUBLESHOOTING

1min
page 51

TROUBLESHOOTING

1min
page 50

TROUBLESHOOTING TROUBLESHOOTING CHARTS

1min
page 49

DESCRIPTION AND OPERATION

2min
pages 33-36

DESCRIPTION AND OPERATION

4min
pages 31-32

DESCRIPTION AND OPERATION

2min
pages 29-30

DESCRIPTION AND OPERATION

1min
pages 27-28

DESCRIPTION AND OPERATION

3min
pages 25-26

INTRODUCTION

1min
pages 12-14

INTRODUCTION

1min
page 11

INTRODUCTION SAFETY INFORMATION

2min
pages 9-10

ATTENTION

1min
pages 3-4
Issuu converts static files into: digital portfolios, online yearbooks, online catalogs, digital photo albums and more. Sign up and create your flipbook.