REPAIR INSTRUCTIONS 7. Lubricate all bearing cups and cones with the recommended gear oil, in preparation for the following bearing preload adjustment procedure.
353
8. Position the output housing assembly in a hydraulic press. Setting Rear Output Housing Bearing Preload With Collapsible Spacer
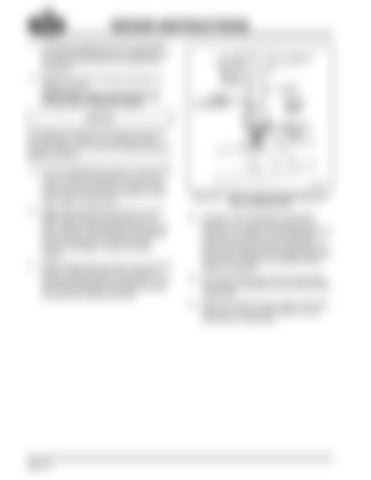
The following procedure may require more than one attempt to achieve the required bearing preload. Make sure to have extra new collapsible spacers on hand. 9. For the collapsible-type spacer, wrap several turns of cord around the pilot area of the output housing and attach a spring tension scale, such as J 8129 or equivalent, to the cord. Refer to Figure 353. 10. Begin pressing the bearing cone over the shaft while moving the housing up and down. Watch press gauge pressure during this procedure. Stop pressing immediately when all end play is removed. Gauge pressure will begin to climb when this occurs. 11. While maintaining crush load, use the spring tension scale and test for the amount of bearing preload resistance required to rotate the housing. Maintain a steady pull on the housing while reading the scale.
Figure 353 — Setup for Bearing Preload Adjustment Using Collapsible Spacer
12. Increase crush load slowly until rolling torque of 1.5–5 pounds of resistance is achieved, then stop! If rolling torque exceeds 5 pounds of resistance, the collapsible spacer has been crushed too far and must be removed. Replace with a new spacer and repeat the procedure until desired rolling torque is achieved. 13. Set output shaft aside with the associated synchronizer assembly components for later reassembly. 14. Place the output housing, spacer and outer bearing on a clean work surface for later transmission reassembly.
Page 144
