Maintenance and servicing work Setting the lubrication and break times Break times and lubrication times are set with the notched switches (S and P) in the window of the controls.
Break time Lubrication time
S
P
L B A
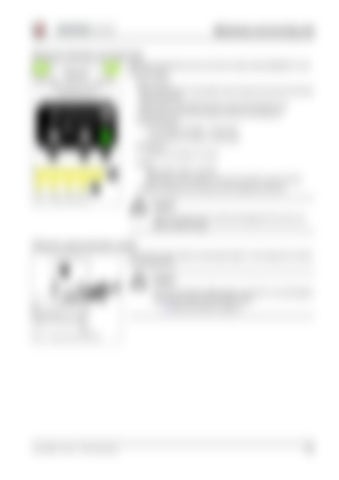
Adjust as follows: • Remove the red frame on the protective motor housing of the pump with a flat screwdriver to set the time • Slacken the four cross-slotted screws and remove the transparent cover • Set the break time P and the lubrication time S with a flat screwdriver Lubrication times (S): 1 to 16 minutes (16 notches, 1 minute each) 2 to 32 minutes (16 notches, 2 minutes each) Break time (P): 0.5 to 8 h (16 notches, 0.5 h each) LED (L) (B) lubrication system in operation (A) lubrication under progress: 0.5 seconds LED ON/0.5 seconds LED OFF • Install the transparent cover (window) once the settings are carried out
Fig. 60: Setting the lubrication times
Caution! Water can penetrate into the controls and damage them if the cover is not fitted and closed correctly!
Filling the central lubrication system The lubrication system is filled via conical grease nipple 1 or a fill coupling with a manual or pneumatic grease gun. 1
Caution! Use only commercially available greases up to NLGI-Kl. 2 to avoid damage to the lubrication system and the lubrication points! – see Fluids and lubricants on page 3-4
Fig. 61: Filling the central lubrication system
Serv-HB 34900/01 – Edition 1.0 * 34901_0320_Wartung.fm
3-41


