Ej ecting Th e Bale (With Accessory Bale Bumper)
A WA RNING Bales made with the Round Baler are LARGE, CYLINDRICAL and HEAVY! Serious personal Injury or property damage could result If the Bales are NOT carefully and properly handled! NEVER eject or store Bales where they could possibly roll downhill! The following procedure should be followed, in the sequence given, for ejecting a bale from a Baler that is equipped with the accessory Bale Bumper:
NOTE:
With the accessory B3.le Bumper installed, the Baler does NOT have to be moved, to provide for pUI/-ahead clearance after the bale is ejected. The Bumper causes the ejected bale to rol/ away from the Baler, about 10 feet on level ground, which is far enough to allow the Rear Door to close, without strik ing the ejected bale. 1.
The PTO MUST be left engaged while ejecting the bale. However, if desired, the PTO may be operated at a slower speed.
A DANG ER
DIFFICULT BALING CONDITIONS It is sometimes difficult to form bales when the crop is exceptionally short, slick and/or dry. Oats, straw and corn stalks are some examples. Use the following methods to help overcome difficult bale forming problems:
Material Preparation - Cut the material as long as possible. The longer the material, the easier it is for the bale to form and stay together after it is ejected. - Prepare heavy, tight, even windrows. Fluffy, uneven windrows can cause feeding problems, requiring reduced ground speed until the bale is rolling. - Rake several smaller windrows into a full Pickup width size windrow.
Operating Characteristics - Increase the ground speed, to maintain a constant flow of feed into the Baling Chamber. - After the bale begins to rotate in the Bale Chamber, reduce PTO speed. This will reduce the bale tum bling action and therefore, cut down on material loss.
BE SURE everyone Is clear of the Rear Door BEFORE attempting to open or close It.
- Use more wraps of twine, than used in normal bale wrapping, but, do NOT wrap too close to the bale ends. Move the twine Guide Rod(s) in, toward the center hole(s), if the twine is slipping off the end(s) of the bale.
2.
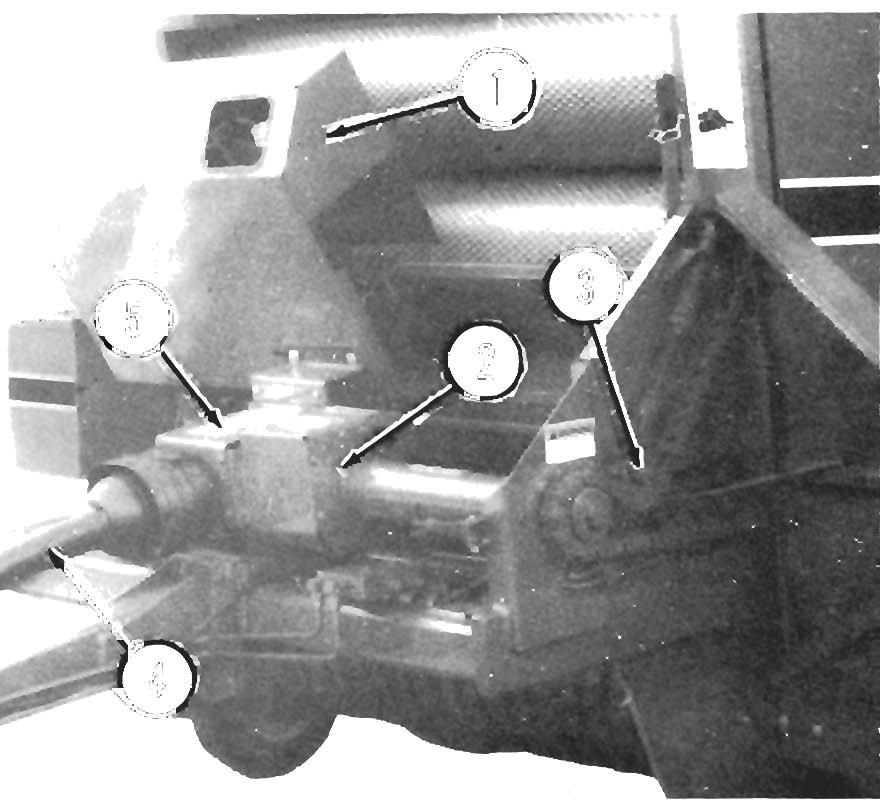
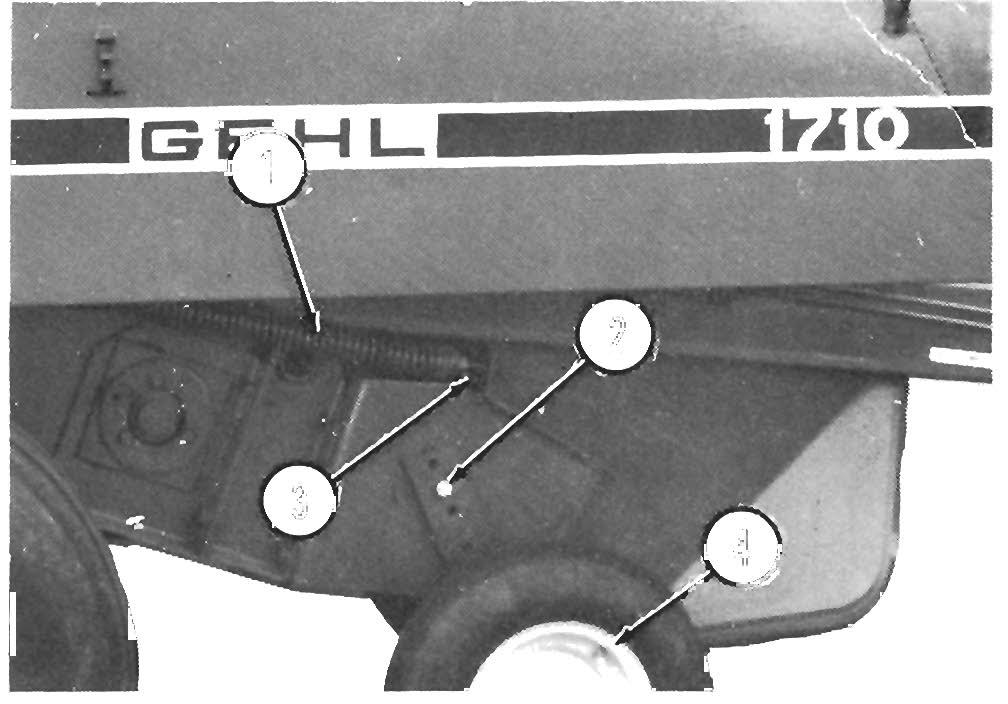
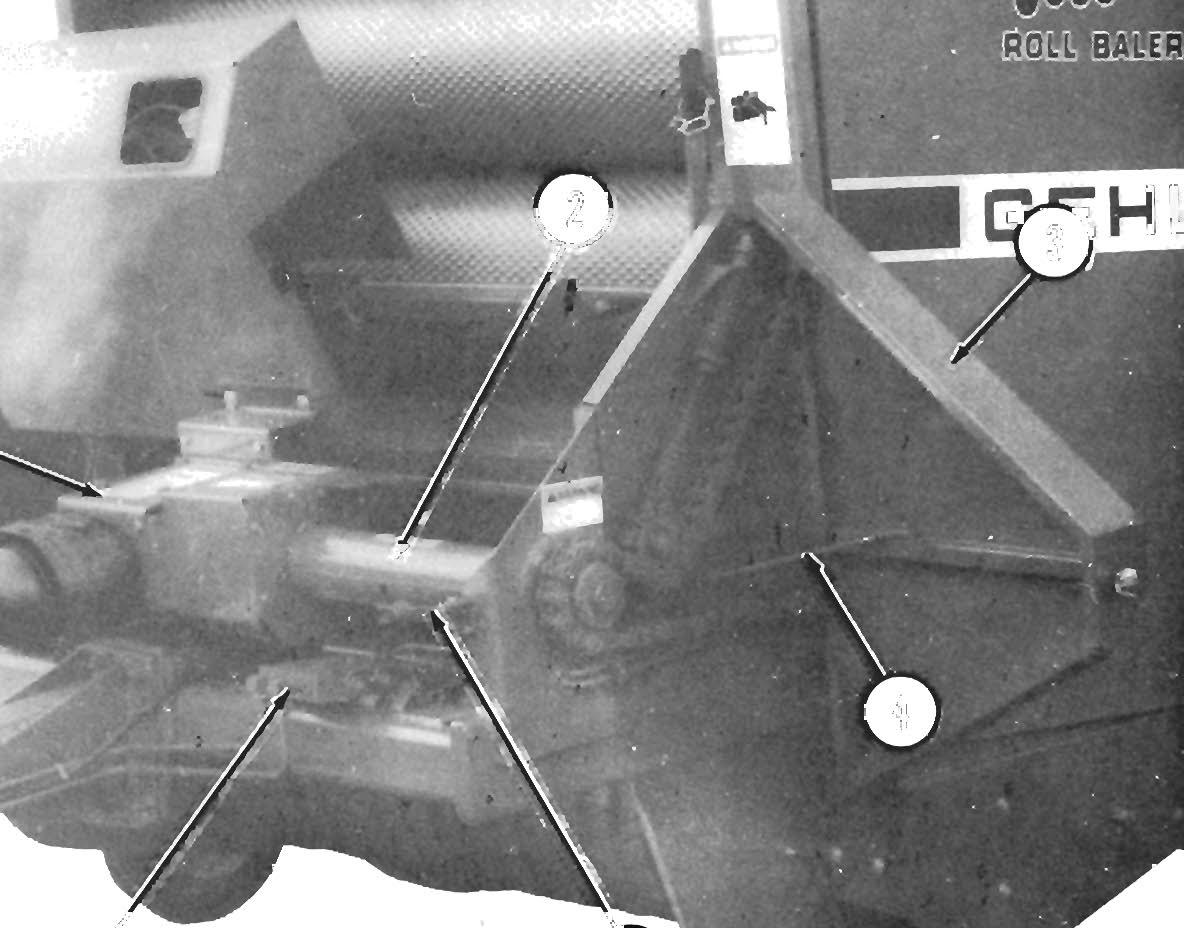
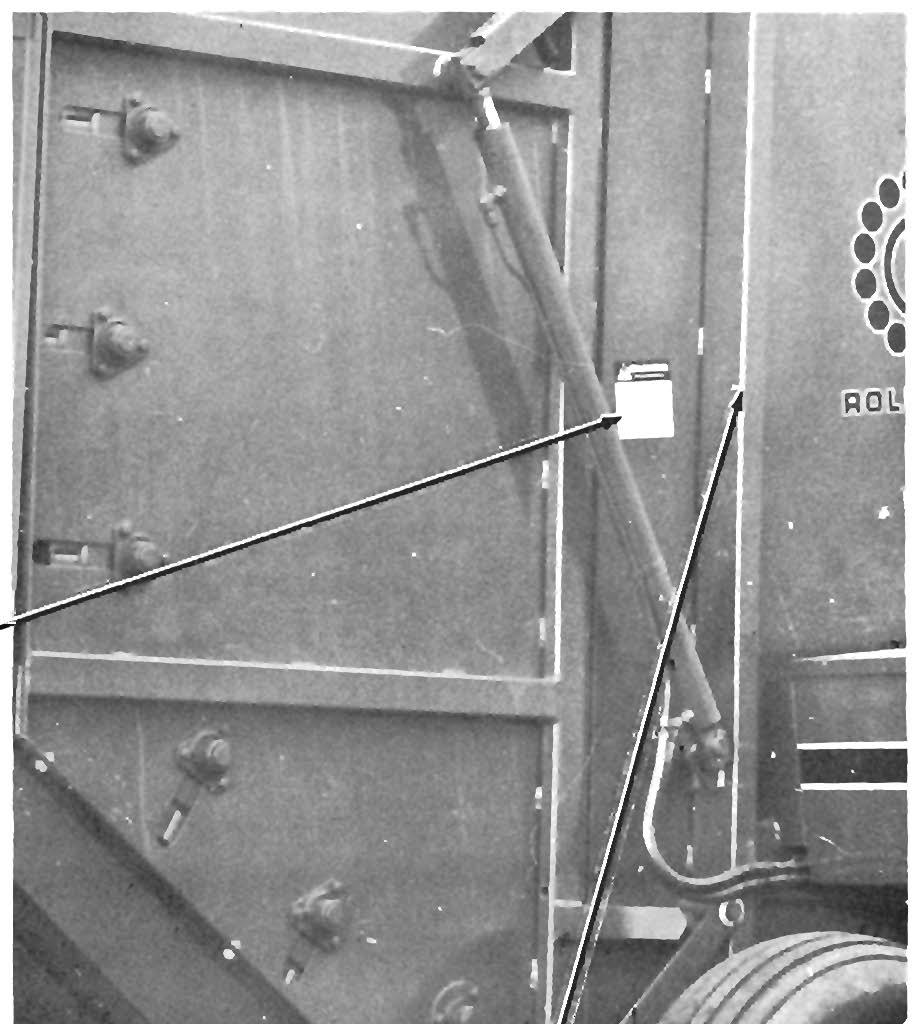
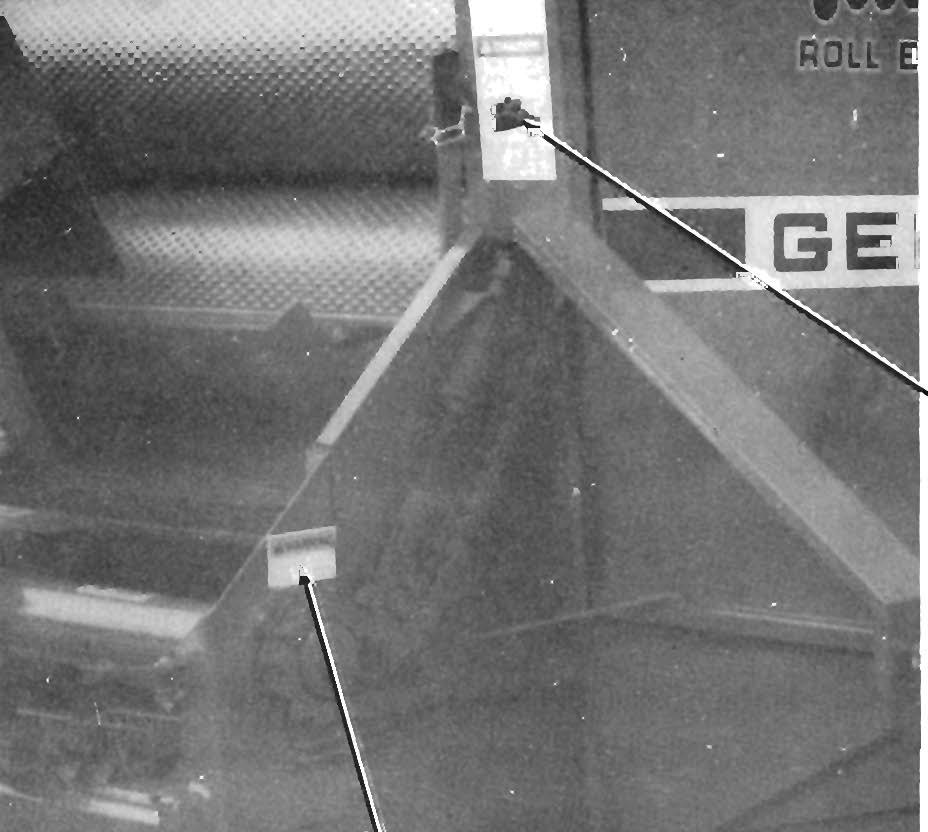
THROAT GUIDE BAFFLE (Fig. 6-5)
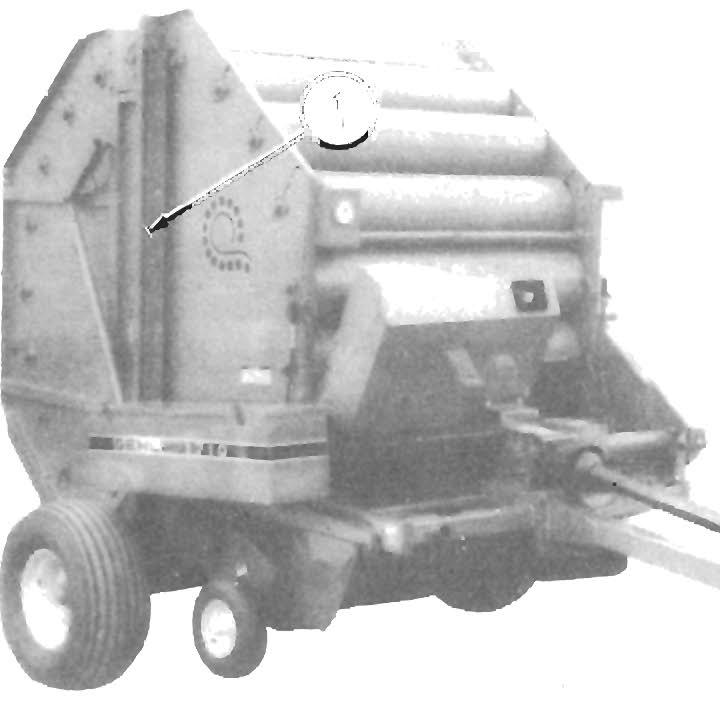
Activate the tractor hydraulics control lever and fully extend the Door Cylinders to open the Rear Door.
3.
The bale is discharged, by the rotating Rollers, onto the Bale Bumper, which causes the bale to roll away from the Baler about 10 feet (3 meters) on level ground.
4.
After the bale has been ejected, activate the trac tor hydraulics control lever and retract the Door Cylinders, to close the Rear Door. After the Door has closed, continue to activate the control lever, to build up Rear Door pressure, until the Pressure Gauge reading is in the GREEN area or above.
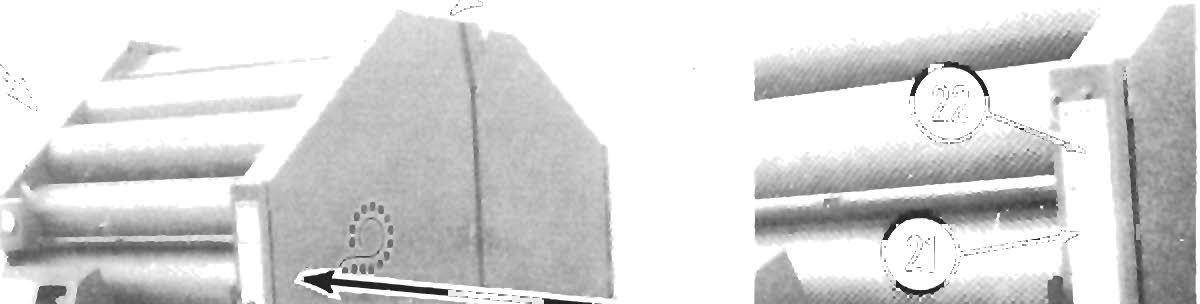
For improved performance when baling dry short materials, like straw and grass hays, use the Throat Guide Baffle, supplied with the Baler. The Baffle is stored against the vertical channel in the center of the Baler right side. When installed, the Baffle prevents crop material from falling back out of the Bale Chamber and onto the rear of the Pickup assembly. This helps to prevent plugging at the rear of the Pickup area. Adjust the Throat Guide Baffle for 1/16" clearance to the Roller outside diameter.
27