4 minute read
A W A R NING


Bales made with the Round Baler are LARGE, CYLINDRICAL and HEAVY! Serious personal Injury or property damage could result If the Bales are NOT carefully and properly handled! NEVER eject or store Bales where they could possibly roll downhill!
The following procedure should be followed, in the sequence given, for ejecting a bale from a Baler that is equipped with the accessory Bale Bumper:
NOTE: With the accessory B3.le Bumper installed, the Baler does NOT have to be moved, to provide for pUI/-ahead clearance after the bale is ejected. The Bumper causes the ejected bale to rol/ away from the Baler, about 10 feet on level ground, which is far enough to allow the Rear Door to close, without striking the ejected bale.
1. The PTO MUST be left engaged while ejecting the bale However, if desired, the PTO may be operated at a slower speed.
Difficult B A Ling Condition S
It is sometimes difficult to form bales when the crop is exceptionally short, slick and/or dry. Oats, straw and corn stalks are some examples Use the following methods to help overcome difficult bale forming problems:
Material Preparation
- Cut the material as long as possible. The longer the material, the easier it is for the bale to form and stay together after it is ejected.
- Prepare heavy, tight, even windrows. Fluffy, uneven windrows can cause feeding problems, requiring reduced ground speed until the bale is rolling .
- Rake several smaller windrows into a full Pickupwidth size windrow.
Operating Characteristics
- Increase the ground speed, to maintain a constant flow of feed into the Baling Chamber.
- After the bale begins to rotate in the Bale Chamber, reduce PTO speed. This will reduce the bale tumbling action and therefore, cut down on material loss.
BE SURE everyone Is clear of the Rear Door BEFORE attempting to open or close It.
2. Activate the tractor hydraulics control lever and fully extend the Door Cylinders to open the Rear Door.
3. The bale is discharged, by the rotating Rollers, onto the Bale Bumper, which causes the bale to roll away from the Baler about 10 feet (3 meters) on level ground
4. After the bale has been ejected, activate the tractor hydraulics control lever and retract the Door Cylinders, to close the Rear Door. After the Door has closed, continue to activate the control lever, to build up Rear Door pressure, until the Pressure Gauge reading is in the GREEN area or above.
- Use more wraps of twine, than used in normal bale wrapping, but, do NOT wrap too close to the bale ends. Move the twine Guide Rod(s) in, toward the center hole(s), if the twine is slipping off the end(s) of the bale.
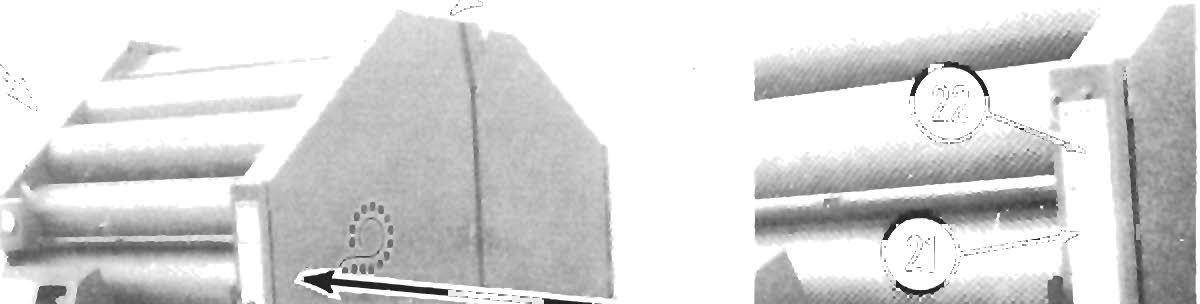
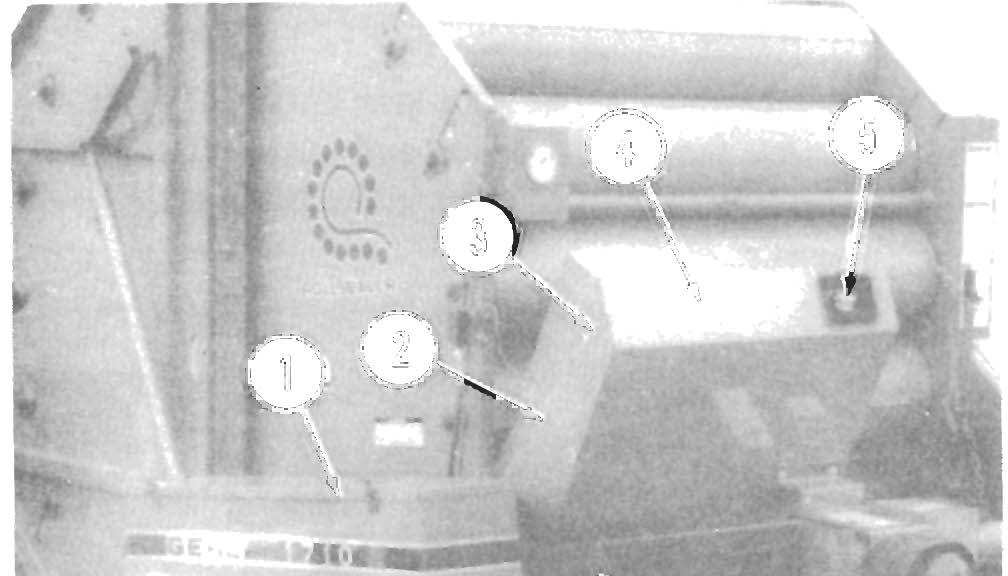
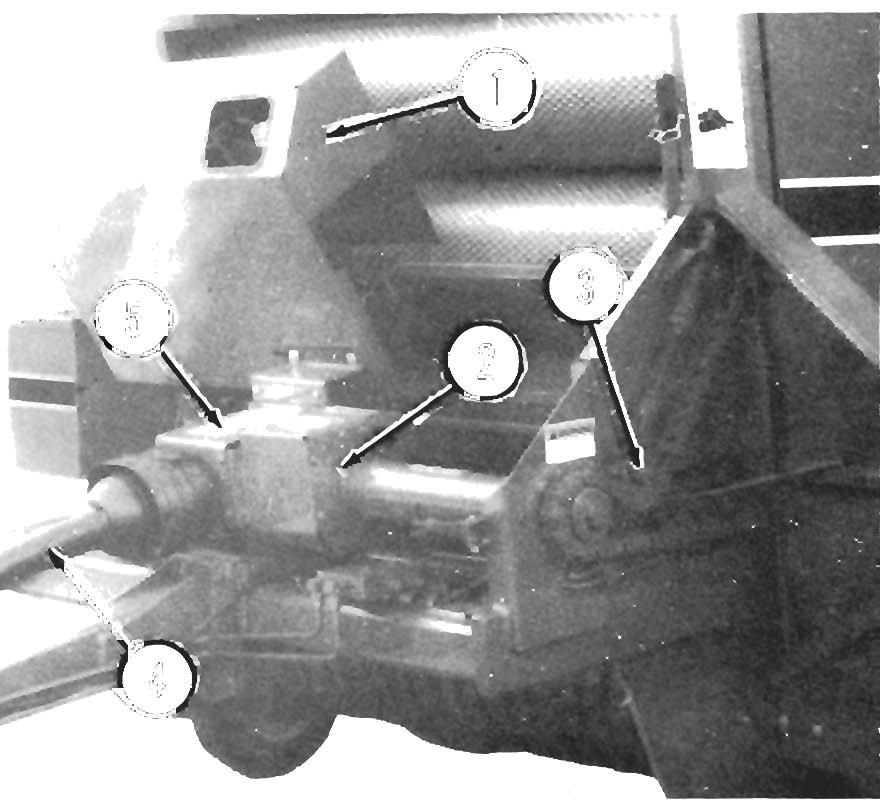
THROAT GUIDE BAFFLE (Fig. 6-5)
For improved performance when baling dry short materials, like straw and grass hays, use the Throat Guide Baffle, supplied with the Baler. The Baffle is stored against the vertical channel in the center of the Baler right side.
When installed, the Baffle prevents crop material from falling back out of the Bale Chamber and onto the rear of the Pickup assembly. This helps to prevent plugging at the rear of the Pickup area. Adjust the Throat Guide Baffle for 1/16" clearance to the Roller outside diameter.
NOTE: ONL Y use the Throat Guide Baffle when baling very dry straw or short, dry and grassy hay. The Baffle prevents the bale from bulging out of the throat area and possibly plugging the area at the rear of the Pickup. The Throat Guide Baffle MUST be removed when baling normal materials, to prevent material build-up, which can cause driveline loading and possible fire.
Awarning
ALWAYS use BOTH Rear Door Cylinder Locks when Installing, removing or checking the Throat Guide Baffle. Failure to heed, could result In death or serious Injury!
Awarning
Improper Installation, adjustment or use of the Throat Guide Baffle may cause a fire which could result In machine damage and death or serious Injury.
Refer to the "Preparing for Field Operation" Chapter for procedures to properly install the Throat Guide Baffle.
BALE HANDLING & STORAGE
A Wa R Ni Ng
Bales made with the Round Baler are LA RGE , CYLINDRICAL and HEAVY! Serious per sonal Injury or property damage could result If the Bales are NOT carefully and properly handled! NEVER eject or store Bales where they could possibly roll downhill!
Because the bales made with the Baler are cylindrical and very heavy, special care MUST be exercised when ejecting and storing them, to keep them from starting to roll. When the bale is moved, make sure the original (flat) bottom of the bale remains at the bottom, to help prevent rolling.
When moving a bale to a storage area, observe the following recommendations, to minimize crop loss:
1. Select a well-drained area, with complete exposure to the sunlight, for storing the bale. Do NOT store the bale on plastic sheeting, or a similar material, because it will hold pockets of water.
2. If possible, place the ends of the bale in a north and south direction, so that the sun can dry-out the cylindrical surface of the bale, as it travels from east to west.
3. Where space allows, set several bales in a row with their ends pushed tightly together, to form a long cylinder. Make sure that you do NOT form a water dam, by using to many bales in a row, without skipping a space. Also, make sure to maintain a clear path for the water to travel away from the bales.
4. Maintain enough distance between rows so that one row does NOT overshadow the other and cut down its exposure to full sunlight.
OVERLOAD PROTECTION Rub ber Coupler
The Drive Line is protected from high shock loads by a Rubber Coupler on the Output Shaft of the Gearbox. The Coupler functions as a cushioning shock absorber. In general, keep the PTO running at all times while baling. Since the Baler runs with NO pressure on the material until the bale becomes full-size, there is NO need to stop the Baler. Continuously running the PTO while baling, as opposed to stopping and starting, also helps to reduce parts wear and early failure.
NOTE: To avoid damaging the Baler Drive Line, slow tractor RPM to 1400 or less BEFORE engaging PTO. Then, engage PTO slowly. In addition, NEVER disengage the PTO quickly with a full bale in the Chamber. The mass of a rotating bale may cause a complete Drive Line reversal. When using a tractor equipped with a PTO brake mechanism, BE SURE to slow-down the engine speed BEFORE disengaging the PTO
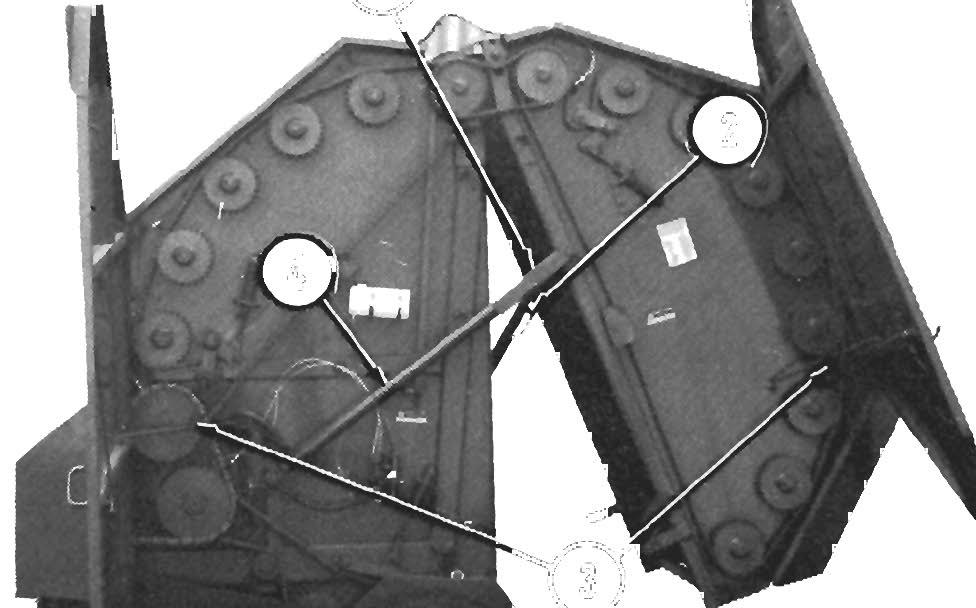
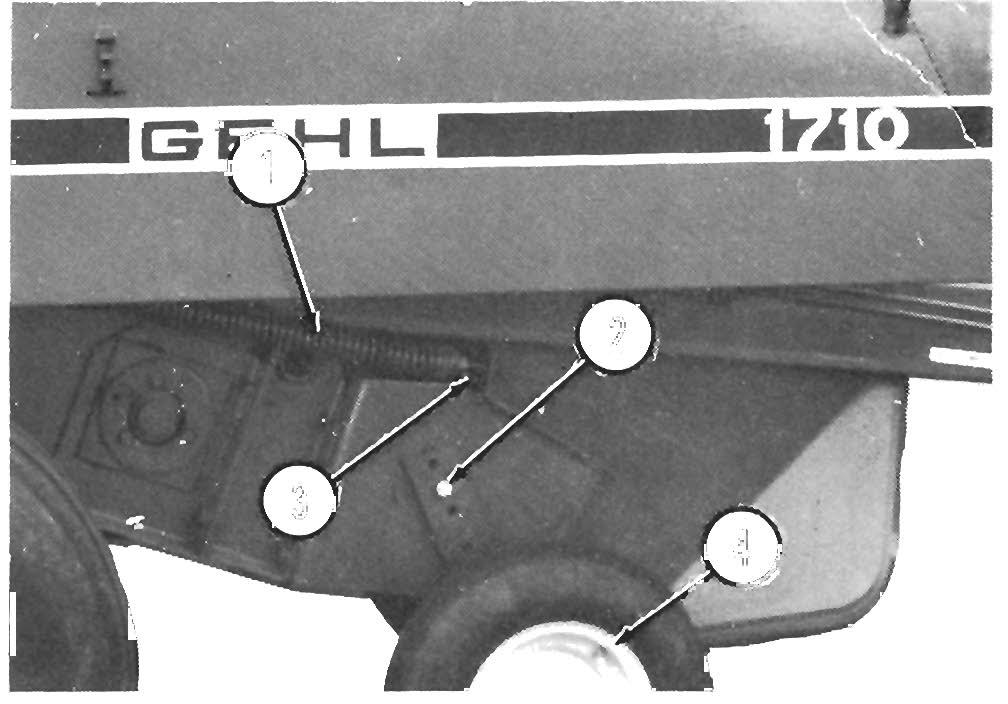
Pickup Clutch (See Fig. 6-1)
Overload protection to the Pickup Drive is provided by the ratchet-type Pickup Clutch. The Clutch is designed to slip when the Pickup becomes plugged.