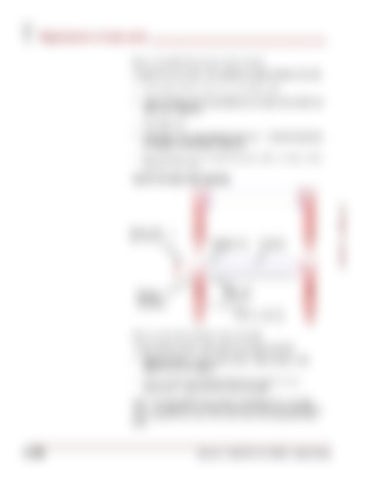
Replacement of wear parts _____________________________________ How to assemble the conveyor chain sections To assemble the conveyor chain sections proceed as follows (Fig. 86): Lay conveyor chain sections on a clean flat surface. Insert connector pins through flight end and align holes in spiral pin with holes in flight bar. Insert spiral pin. Drive spiral pin in with a hammer and punch. Ensure that spiral pin is recessed on both sides of flight bar. Repeat the previous assembly instructions until the complete chain has been assembled.
Extended pin connecting link Spiral pin (4)
Block link assembly
Flight bar
Side bar
6 link chain section
How to remove the conveyor chain assembly To remove the conveyor chain assembly proceed as follows: Release tension on the conveyor chain. (See Conveyor chain adjustment in this chapter). At the chain disassembly/assembly point, raise the chain a minimum of 3”high and block it under the flight. Note: There are notches in the frame on both sides of the conveyor deck. The notches are to provide access to the conveyor chain during disassembly and assembly. This is the chain disassembly/assembly point.
________________________________________________________________ 5.108 Bucyrus –Model 7MFBHM-48DD Feeder Breaker
© BUCYRUS AMERICA, INC.
Fig: 86: Conveyor chain assembly


