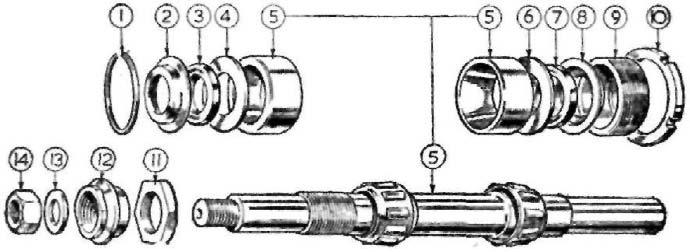
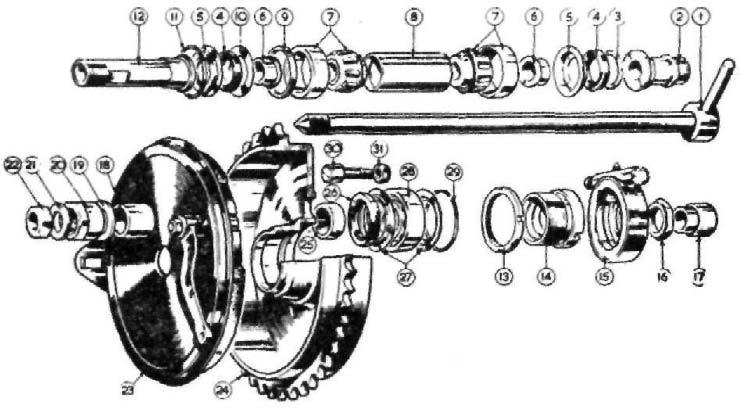
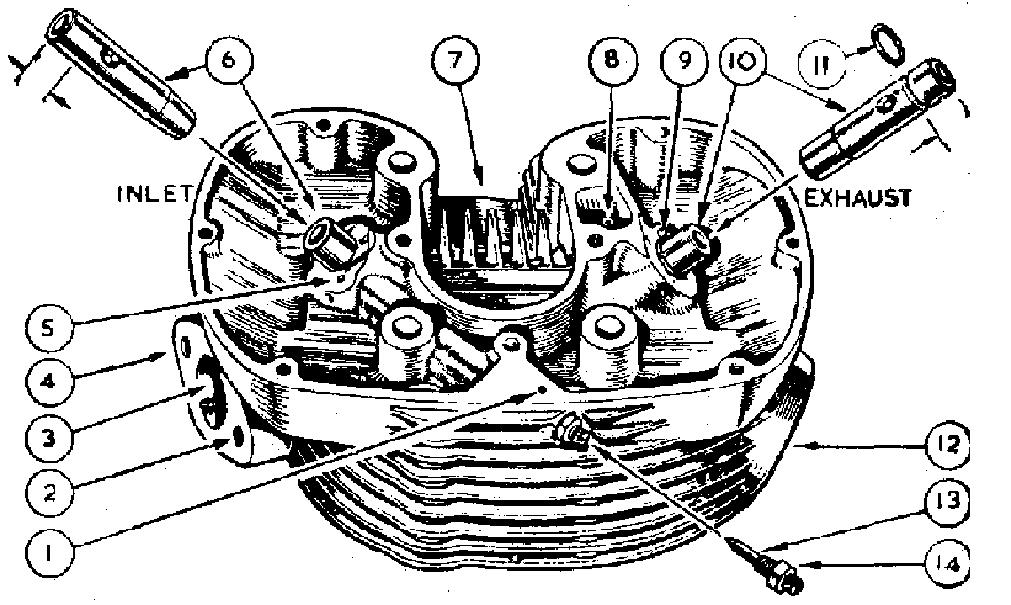
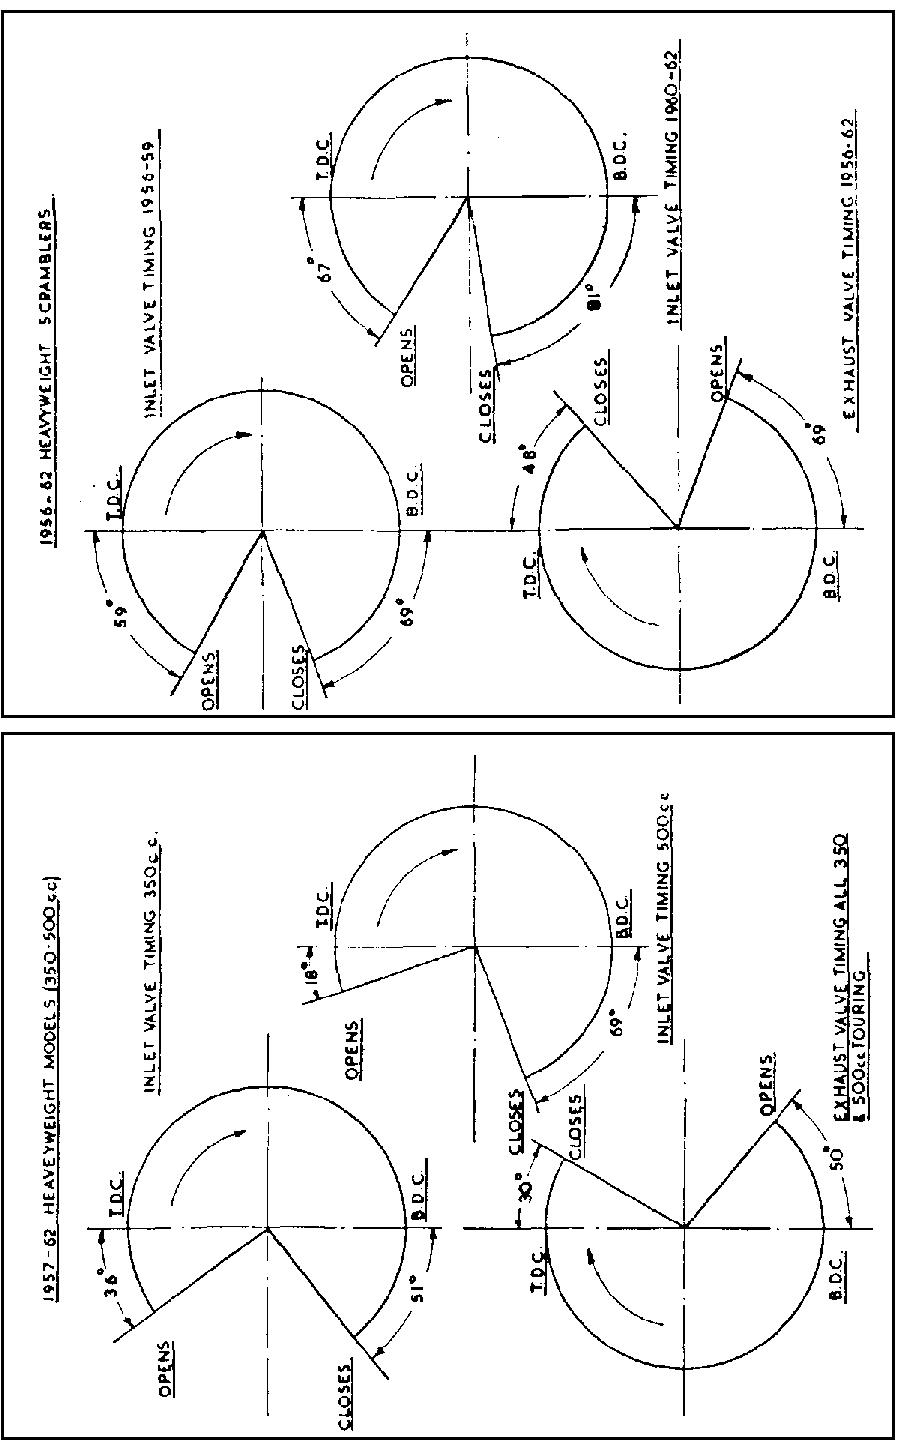
TRANSMISSION Heavyweight Models Front chain adjustment. The Scrambler Models use a chain adjuster on each side of the gear box, to prevent the gear box from moving. Remove the engine plate cover, also inspection cap on chaincase. Slack off the clamp bolt. To tighten the chain: Screw down the adjusting bolt. Press down the rear chain to pull the gear box backwards, Check the chain tension, which, if correct, should have a whip of a". If the chain is too tight, unscrew the adjusting bolt a little at a time, until the adjustment is correct. Check the tension in several places. Chains do not always stretch evenly. Retighten the nuts. Now check the rear chain adjustment. Chain case oil level. With the machine vertical and on both road wheels, the bottom run of the chain should just touch the oil. Rear chain adjustment (quickly detachable wheel). To take up slack or tighten the rear chain and with the machine on the central stand; Release slightly the spindle nut (22) and the dummy spindle nut (20). Run back the lock nuts on the two chain adjusting bolts through fork ends, unscrew each adjusting bolt a trifle at a time, also an equal amount, until the chain whip taken in the centre of the bottom chain run is 1 8". Check the tension in one or more places. As an alternative and possibly the best method is to have this adjustment made with the machine on its road wheels and the rider seated, when the chain whip should be ½". Retighten the release nuts when the adjustment is correct, then check the rear brake adjustment, which will be affected when the wheel position is altered. Rear chain adjustment (non-quickly detachable wheel). Release the spindle nut (1) and adjust the chain as already described, Removing the front chain. Follow details for removing engine from frame. When refitting the chain the closed end of the spring link should face the direction of rotation, Removing the rear chain. The rear chain is closely shrouded by the chain guard, which leaves little room to operate, other than releasing the chain guard from its fixings. If a new chain is to be fitted, disconnect the connecting link in the fitted chain and connect it to the new chain at the top run. Select a neutral position in the gear box then with the left hand holding the bottom chain run and the top with the right hand, the new chain can be pulled into position until the chain joint is accessible, when the connecting link can be fitted. NOTE—The closed end of the spring link should face the direction of rotation. If a second chain is not available, use a piece of string 10 ft. long, take out the connecting link and pass one end of the string through the link hole. Pull on the string until both ends meet and tie them together. Pull on the bottom run of the chain, with one hand, keeping the string taut with the other hand. 100
AJS 16 16S 16C 16CS 16MS 16MC 16MCS 1957-1966 Service Manual -pdf download


Issuu converts static files into: digital portfolios, online yearbooks, online catalogs, digital photo albums and more. Sign up and create your flipbook.