AIR CLEANER SERVICE (CONT’D) Replacing The Filter Elements (Cont’d) Figure 170
Inner Filter Only replace the inner filter under the following conditions: 2 1
•
Replace the inner filter every third time the outer filter is replaced.
•
After the outer filter has been replaced, press the button (Item 2) [Figure 167] on the condition indicator and start the engine. Run at full rpm, then reduce engine speed and stop the engine. If the red ring shows in the condition indicator, replace the inner filter.
Figure 171
P113583
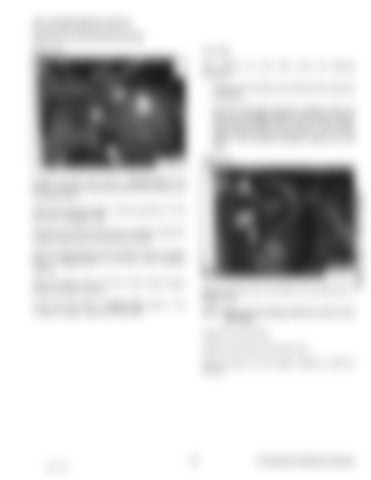
Position the dust cover (Item 1) [Figure 170] to the housing. Rotate the housing clockwise until the latch is at the top as shown. Secure the dust cover (Item 1) and by pushing in on the latch (Item 2) [Figure 170]. Check the air intake hose and the air cleaner housing for damage. Make sure all connections are tight. After the outer filter has been replaced, press the button (Item 2) [Figure 167] on the end of the condition indicator.
P113585
Start the engine. Run at full rpm, then reduce engine speed and stop the engine.
Remove the dust cover, outer filter and inner filter (Item 1) [Figure 171].
If the red ring (Item 1) [Figure 167] shows in the condition indicator, replace the inner filter.
NOTE: Make sure all sealing surfaces are free of dirt and debris. Install the new inner filter. Install the outer filter and the dust cover. Press the button on the condition indicator to reset the red ring.
113 115 of 178
E19 Operation & Maintenance Manual
Dealer Copy -- Not for Resale
1


