7 minute read
FUEL SYSTEM (CONT’D)


Filling The Fuel Tank
Figure172
Warning
AVOID INJURY OR DEATH
Stop and cool the engine before adding fuel. NO SMOKING! Failure to obey warnings can cause an explosion or fire.
W-2063-0807
Warning
AVOID INJURY OR DEATH
The fuel cap uses the start key to unlock the fuel cap. Remove the fuel fill cap (Item 1) [Figure172]
Use a clean, approved safety container to add fuel. Add fuel only in an area that has a free movement of air and no flames or sparks. NO SMOKING!
Install and tighten the fuel fill cap. Clean up any spilled fuel.
See the service schedule for the service interval when to remove water from or replace the fuel filter. (See SERVICE SCHEDULE on Page 103.)
NOTE:When filling the fuel tank, with the left console raised, turn the start switch to the ON position. As fuel is added to the tank, a buzzer will beep and the closer the tank gets to full, the quicker the beeps. When the tank is full, the buzzer will sound continuously. Stop fueling when buzzer sounds continuously. Turn the start switch OFF.
Always clean up spilled fuel or oil. Keep heat, flames, sparks or lighted tobacco away from fuel and oil. Failure to use care around combustibles can cause explosion or fire.
W-2103-0508
FUEL SYSTEM (CONT’D)
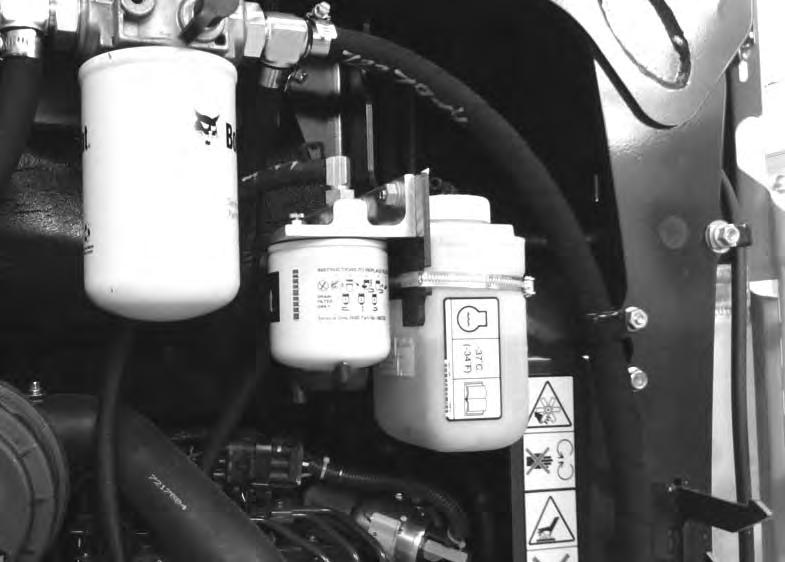
Fuel Filter
Removing Water
Open the tailgate. (See TAILGATE on Page 109.)
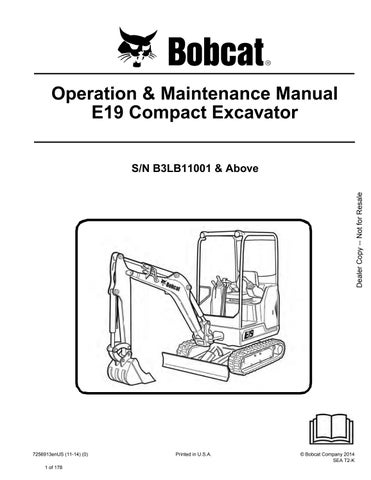
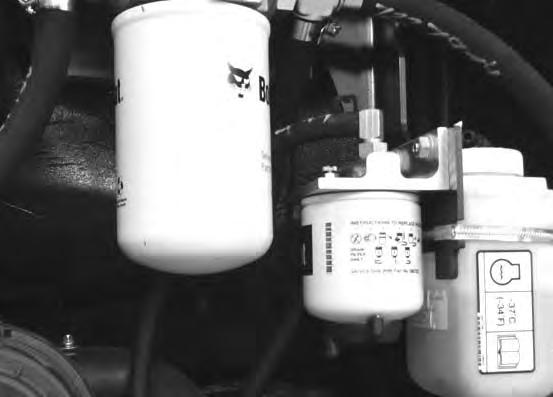
Figure 173
Loosen the drain (Item 1) [Figure 173] at the bottom of the filter to drain water from the filter into a container.
Inspect the fuel pre-filter (Item 3) [Figure 173] daily for moisture and contamination. Replace as necessary.
Clean up any spilled fuel.
Replacing Elements
Remove and replace the fuel pre-filter (Item 3) [Figure 173]
Remove the filter (Item 2) [Figure 173]
Clean the area around the filter housing. Put clean oil on the seal of the new filter. Install the fuel filter and hand tighten.
Remove the air from the fuel system. (See Removing Air From The Fuel System on Page 117.)
Warning
Avoid Injury Or Death
Diesel fuel or hydraulic fluid under pressure can penetrate skin or eyes, causing serious injury or death. Fluid leaks under pressure may not be visible. Use a piece of cardboard or wood to find leaks. Do not use your bare hand. Wear safety goggles. If fluid enters skin or eyes, get immediate medical attention from a physician familiar with this injury.
W-2072-0807
Draining The Fuel Tank
See the service schedule for the correct service interval. (See SERVICE SCHEDULE on Page 103.)
The fuel tank can be drained in several ways. See below.
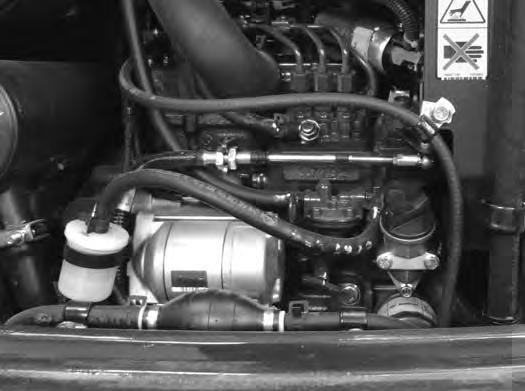
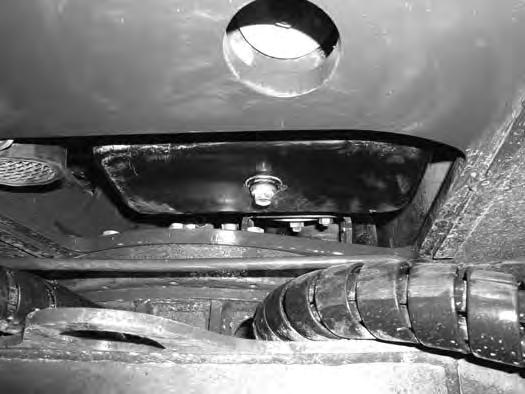
Figure174
Rotate the upperstructure so the fuel tank drain plug (Item 1) is located between the rear tracks. Remove the drain plug (Item 1) [Figure174]
Drain the fuel into the container.
Reuse, recycle or dispose of fuel in an environmentally safe manner.
Reinstall the drain plug.
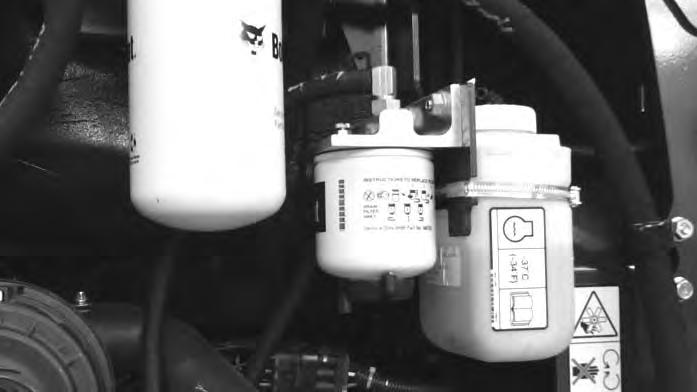
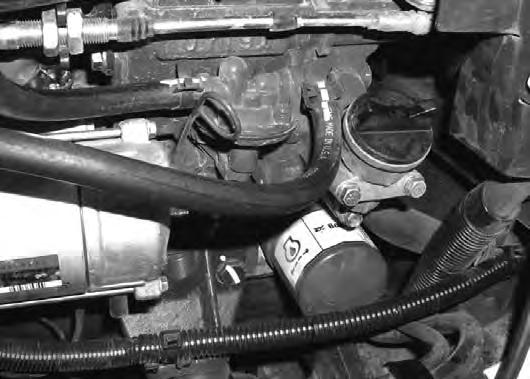
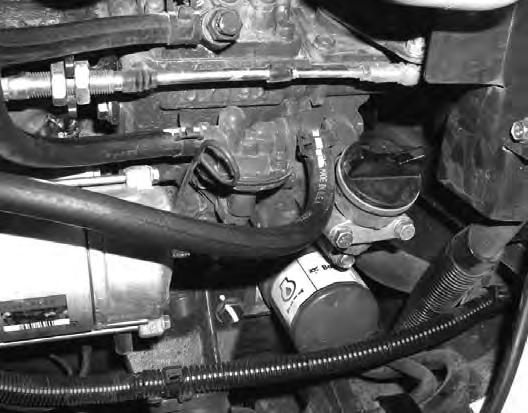
Figure175
Second option for draining tank. Remove the fuel hose (Item 1) at the fuel pump. Route the hose out of the engine compartment and into a container. Squeeze the primer bulb (Item 2) [Figure175] to start a siphon and drain the tank.
Reinstall the fuel hose (Item 1) [Figure175]
FUEL SYSTEM (CONT’D)
Removing Air From The Fuel System
After replacing the fuel filter or when the fuel tank has run out of fuel, air must be removed from the fuel system before starting the engine.
Open the tailgate. (See Opening And Closing on Page 109.)
Warning
Avoid Injury Or Death
Diesel fuel or hydraulic fluid under pressure can penetrate skin or eyes, causing serious injury or death. Fluid leaks under pressure may not be visible. Use a piece of cardboard or wood to find leaks. Do not use your bare hand. Wear safety goggles. If fluid enters skin or eyes, get immediate medical attention from a physician familiar with this injury.
Open the fuel filter vent (Item 1) [Figure176] and operate the hand pump (priming bulb) (Item 1) [Figure177] until the fuel flows from the vent (Item 1) [Figure176] with no air bubbles.
Close the vent (Item 1) [Figure176]
Start the engine. It may be necessary to open the vent (Item 2) [Figure177] (at the fuel injection pump) briefly until the engine runs smoothly.
Engine Lubrication System
Checking And Adding Engine Oil
Check the engine oil after every 8 - 10 hours of operation and before starting the engine. (See SERVICE SCHEDULE on Page 103.)
Figure178
Open the tailgate and remove the dipstick (Item 1) [Figure178]
Keep the oil level between the marks on the dipstick.
Use a good quality motor oil that meets the correct API Service Classification.
Engine Oil Chart

Figure179
ENGINE OIL RECOMMENDED SAE VISCOSITY NUMBER (LUBRICATION OILS FOR DIESEL ENGINE CRANKCASE)
TEMPERATURE RANGE ANTICIPATED BEFORE NEXT OIL CHANGE (DIESEL ENGINES MUST USE API CLASSIFICATION CI-4 OR BETTER)
[1] Synthetic Oil - Use recommendation from Synthetic Oil Manufacturer.
Use good quality engine oil that meets API Service Classification of CI-4 or better [Figure179]
Warning
Avoid Injury Or Death
Always clean up spilled fuel or oil. Keep heat, flames, sparks or lighted tobacco away from fuel and oil. Failure to use care around combustibles can cause explosion or fire.
W-2103-0508
ENGINE LUBRICATION SYSTEM (CONT’D)
Removing And Replacing Oil And Filter
See the service schedule for the service interval for replacing the engine oil and filter. (See SERVICE SCHEDULE on Page 103.)
Rotate upperstructure so that the oil drain plug is between the rear tracks.
Run the engine until it is at operating temperature. Stop the engine.
Open the tailgate. (See Opening And Closing on Page 109.)
Place a container under the oil pan. Remove the drain plug (Item 1) [Figure180] from the bottom of the engine oil pan.
Recycle or dispose of used oil in an environmentally safe manner.
Remove
Use a genuine Bobcat replacement filter. Put clean oil on the filter gasket. Install the filter and hand tighten.
Install and tighten the drain plug (Item 1) [Figure180]
Remove the fill cap (Item 2) [Figure181]
Put oil in the engine. (See Checking And Adding Engine Oil on Page 118.)
Install the fill cap (Item 2) [Figure181]
Start the engine and let it run for several minutes.
Stop the engine. Check for leaks at the oil filter. Check the oil level.
Add oil as needed if it is not at the top mark on the dipstick.
Engine Cooling System
Check the cooling system every day to prevent overheating, loss of performance or engine damage. (See SERVICE SCHEDULE on Page 103.)
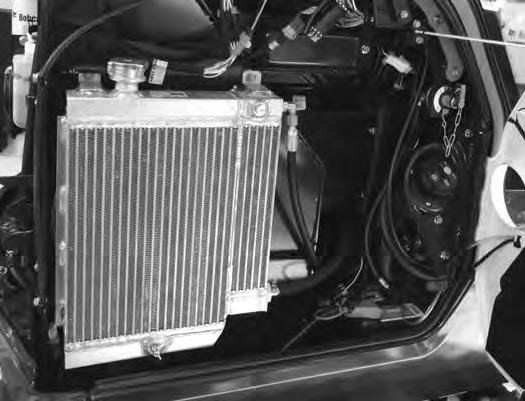
Cleaning
NOTE:This excavator uses a pusher fan so flow through the radiator / oil cooler will be from inside the engine compartment to outside the right cover. When cleaning the radiator, clean both the inside and outside surfaces of the radiator / oil cooler.
Open the tailgate. (See Opening And Closing on Page 109.)
Open the right side cover. (See Opening And Closing on Page 110.)
NOTE:Allow the cooling system and engine to cool before servicing or cleaning the cooling system.
Use air pressure or water pressure to clean the radiator / oil cooler (Item 1) [Figure182] (both inside and outside surfaces). Be careful not to damage fins when cleaning.
Close the right side cover. (See Opening And Closing on Page 110.)
Close the tailgate. (See Opening And Closing on Page 109.)
ENGINE COOLING SYSTEM (CONT’D)
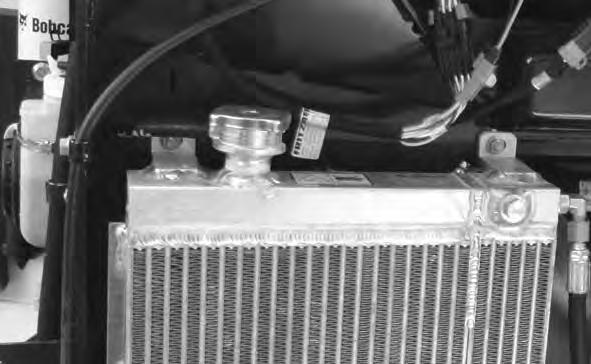
Checking Level
Warning
AVOID BURNS
Do not remove radiator cap when the engine is hot. You can be seriously burned.
W-2070-1203
Warning
AVOID INJURY OR DEATH
Wear safety glasses to prevent eye injury when any of the following conditions exist:
•When fluids are under pressure.
•Flying debris or loose material is present.
•Engine is running.
•Tools are being used.
Important
AVOID ENGINE DAMAGE
W-2019-0907
Open the tailgate. (See Opening And Closing on Page 109.)
Figure183
P113587
Check the coolant level in the coolant recovery tank (Item 1) [Figure183].
The coolant level must be filled so it is within the MAX / MIN line marked the coolant recovery tank.
NOTE:The cooling system is factory filled with propylene glycol (purple color). DO NOT mix propylene glycol with ethylene glycol.
Always use the correct ratio of water to antifreeze.
Too much antifreeze reduces cooling system efficiency and may cause serious premature engine damage.
Too little antifreeze reduces the additives which protect the internal engine components; reduces the boiling point and freeze protection of the system.
Always add a premixed solution. Adding full strength concentrated coolant can cause serious premature engine damage.
I-2124-0497
ENGINE COOLING SYSTEM (CONT’D)
Removing And Replacing Coolant
See the service schedule for correct service intervals. (See SERVICE SCHEDULE on Page 103.)
Stop the engine. Open the tight side cover. (See Opening And Closing on Page 110.)
Warning
AVOID BURNS
Do not remove radiator cap when the engine is hot. You can be seriously burned.
W-2070-1203
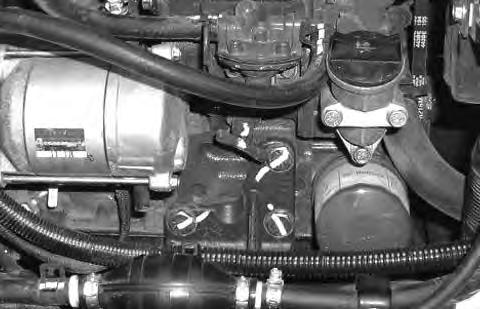
Install a hose on the drain valve located at the engine block by the end of the started. Open the drain valve (Item 1) [Figure186] and drain the coolant into a container.
After all the coolant is removed, close both drain valves. Recycle or dispose of the used coolant in an environmentally safe manner.
Mix the coolant in a separate container. (See Capacities on Page 169.)
When the engine is cool, loosen and remove the coolant fill cap (Item 1) [Figure184]
Figure185
Install a hose on the drain valve at the bottom of the radiator. Open the drain valve (Item 1) [Figure185] and drain the coolant into a container.

NOTE:The cooling system is factory filled with propylene glycol (purple color). DO NOT mix propylene glycol with ethylene glycol.
The correct mixture of coolant to provide a -37°C (-34°F) freeze protection is 5 L propylene glycol mixed with 4,4 L of water OR 1 U.S. gal propylene glycol mixed with 3.5 qt of water.
Add premixed coolant, 47% water and 53% propylene glycol to the coolant tank until the coolant level reaches the lower marker on the tank.
Use a refractometer to check the condition of propylene glycol in your cooling system.
Add premixed coolant until the level is correct. Install the coolant fill cap.
Run the engine until it is at operating temperature. Stop the engine. Check the coolant level when cool. Add coolant as needed. Install the coolant fill cap.
Close the tailgate.