8 minute read
1.3 Removing and installing silencer


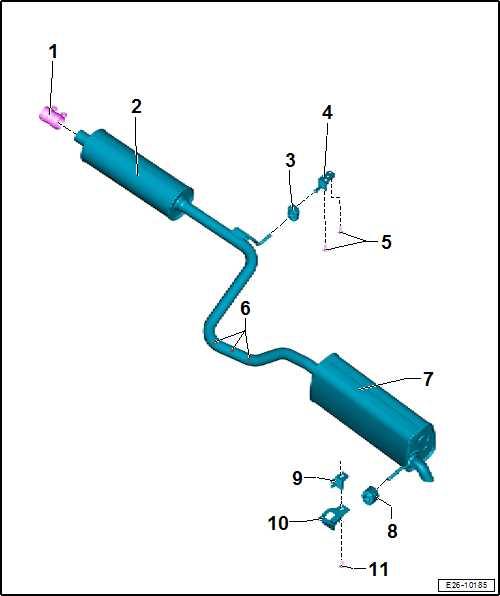
1 - Clamp ❑ Fitting position ⇒ “1.6 Installation posi‐tion of clamp”, page 453 ❑ Position ⇒ page 454 ❑ Specified torque ⇒ page 454 2 - Front silencer ❑ Removing and installing ⇒ “1.3.2 Removing and installing front silencer, Ibiza 2018, Arona”, page 446 3 - Mounting ❑ Renew if damaged 4 - Support 5 - Securing bolt
Protected by copyright. Copying for private or commercial purposes, in part or in whole, is not permitted unless authorised by SEAT S.A. SEAT S.A does not guarantee or accept any liability with❑ 20 Nm respect to the correctness of information in this document. Copyright by SEAT S.A.6 - Separating point ❑ Separating ⇒ “1.2.2 Separating ex‐haust pipes from silenc‐ers, Ibiza 2018, Arona”, page 441 7 - Rear silencer ❑ Removing and installing ⇒ “1.3.5 Removing and installing back silencer, Ibiza 2018, Arona”, page 450 8 - Mounting ❑ Renew if damaged 9 - Support 10 - Support 11 - Securing bolt ❑ 20 Nm

1.1.3 Assembly overview - silencer, Toledo 2013, Ibiza 2016
Note
♦ After working on the exhaust system, ensure that the system is not under tension
♦ and that there is sufficient clearance to the bodywork. ♦ If necessary, loosen double clamp(s). Align silencer and ex‐haust pipe so that sufficient clearance is maintained to the bodywork and the support rings are evenly loaded. ♦ Renew self-locking nuts. ♦ Before installing, coat threads of lock nuts and stud bolts with high-temperature paste according to TL 521 12.
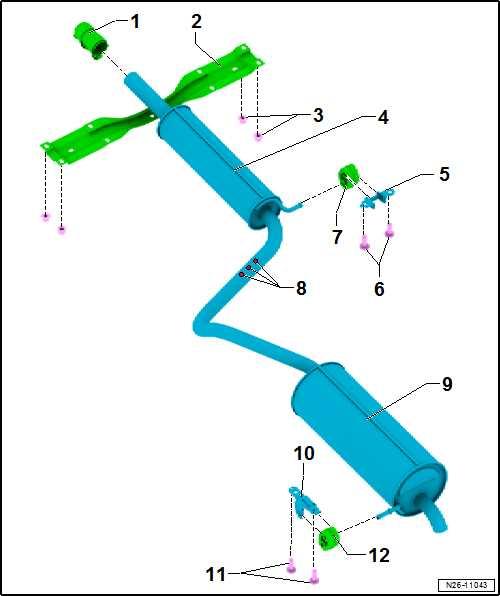
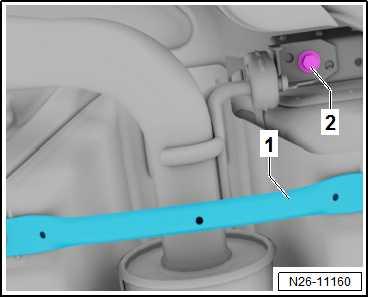
1 - Clamp ❑ Fitting position ⇒ “1.6 Installation posi‐tion of clamp”, page 453 ❑ Position Protected by copyright. Copying for private or commercial purposes, in part or in whole, is not⇒ page 454 permitted unless authorised by SEAT S.A. SEAT S.A does not guarantee or accept any liability with respect to the correctness of information in this document. Copyright by SEAT S.A.❑ Specified torque ⇒ page 454 2 - Tunnel cross-piece ❑ Note installation posi‐tion (mark before re‐moval, if necessary). ❑ Removal and installa‐tion ⇒ General body re‐pairs, exterior; Rep. gr. 50 ; Underbody protec‐tion; Heat shields – as‐sembly overview 3 - Securing nuts ❑ 20 Nm
4 - Front silencer ❑ Removing and installing ⇒ “1.3.3 Front silencer removing and installing, Toledo 2013, Ibiza 2016”, page 447 5 - Support 6 - Bolts ❑ 23 Nm
7 - Mounting ❑ Renew if damaged 8 - Separating point ❑ Separating ⇒ “1.2.3 Separating exhaust pipes from silencers, Toledo 2013, Ibiza 2016”, page 443 9 - Rear silencer ❑ Removing and installing ⇒ “1.3.6 Back silencer - removing and installing, Toledo 2013, Ibiza 2016”, page 451
10 - Support 11 - Securing bolts ❑ 23 Nm
12 - Mounting ❑ Renew if damaged
1.2 Disconnecting exhaust pipes/silencers
⇒ “1.2.1 Disconnecting exhaust pipes/silencers, Ateca, Leon 2013”, page 440 ⇒ “1.2.2 Separating exhaust pipes from silencers, Ibiza 2018, Ar‐ona”, page 441 ⇒ “1.2.3 Separating exhaust pipes from silencers, Toledo 2013, Ibiza 2016”, page 443
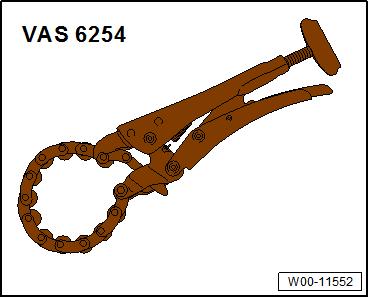
Special tools and workshop equipment required ♦ Chain-type pipe cutter - VAS 6254-
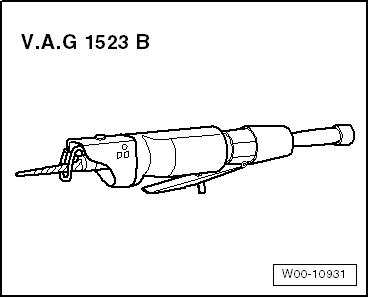
♦ Body saw - V.A.G 1523B-
Protected by copyright. Copying for private or commercial purposes, in part or in whole, is not permitted unless authorised by SEAT S.A. SEAT S.A does not guarantee or accept any liability with respect to the correctness of information in this document. Copyright by SEAT S.A.
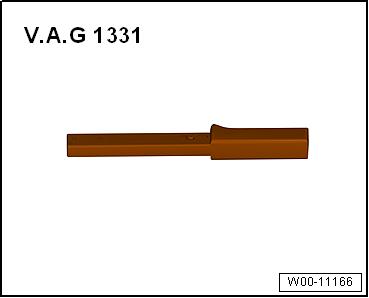
♦ Torque wrench - V.A.G 1331-
CAUTION
Risk of injury caused by flying metal shavings. Risk of injury and irritation to eyes and skin. – Wear protective goggles. – Wear protective gloves.
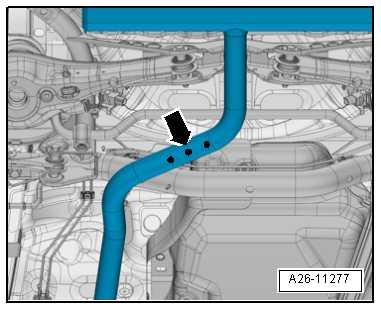
♦ Separating points are provided in the exhaust system for the individual removal of exhaust system parts. ♦ The separating points are indicated with markings on the out‐side of the exhaust pipe. Separating point on rear silencer – Cut through exhaust pipe at centre separating point -upper arrow- at right angles, e.g. with pneumatic sabre saw V.A.G 1523B- or chain pipe cutter - VAS 6254- . – Cut through exhaust pipe at right angles at cutting point -arrows- using chain pipe cutter - VAS 6254- . – Note installation position of clamp ⇒ Fig. ““Installation position of rear clamp”“ , page 437
Protected by copyright. Copying for private or commercial purposes, in part or in whole, is not permitted unless authorised by SEAT S.A. SEAT S.A does not guarantee or accept any liability with respect to the correctness of information in this document. Copyright by SEAT S.A.
Special tools and workshop equipment required ♦ Chain-type pipe cutter - VAS 6254-
♦ Body saw - V.A.G 1523B-
♦ Torque wrench - V.A.G 1331-
CAUTION
Risk of injury caused by flying metal shavings. Risk of injury and irritation to eyes and skin. – Wear protective goggles. – Wear protective gloves.
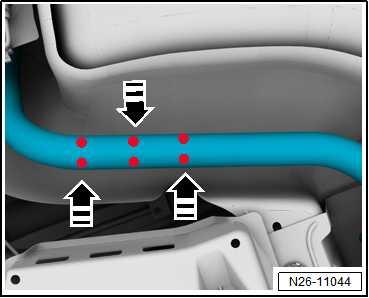
♦ Separating points are provided in the exhaust system for the individual removal of exhaust system parts. ♦ The separating points are indicated with markings on the out‐side of the exhaust pipe. Separating point on rear silencer – If fitted, remove underbody cladding ⇒ General body repairs, exterior; Rep. gr. 66 ; Underbody cladding; Overview of fitting locations - underbody trim panels . – Cut through exhaust pipe at centre separating point -upper arrow- at right angles, e.g. with pneumatic sabre saw V.A.G 1523B- or chain pipe cutter - VAS 6254- .
Protected by copyright. Copying for private or commercial purposes, in part or in whole, is not permitted unless authorised by SEAT S.A. SEAT S.A does not guarantee or accept any liability with respect to the correctness of information in this document. Copyright by SEAT S.A.
– Position repair double clamp centrally between outer markings -lower arrow-.
– Take installation position of clamp into account ⇒ “1.6 Installation position of clamp”, page 453 .

1.2.3 Separating exhaust pipes from silenc‐Protected by copyright. Copying for private or commercial purposes, in part or in whole, is noters, Toledo 2013, Ibiza 2016 permitted unless authorised by SEAT S.A. SEAT S.A does not guarantee or accept any liability with respect to the correctness of information in this document. Copyright by SEAT S.A.Special tools and workshop equipment required ♦ Chain-type pipe cutter - VAS 6254-
♦ Body saw - V.A.G 1523B-
♦ Torque wrench - V.A.G 1331-
CAUTION
Risk of injury caused by flying metal shavings. Risk of injury and irritation to eyes and skin. – Wear protective goggles. – Wear protective gloves.
♦ Separating points are provided in the exhaust system for the individual removal of exhaust system parts. ♦ The separating points are indicated with markings on the out‐side of the exhaust pipe. Separating point on rear silencer – Cut through exhaust pipe at centre separating point -upper arrow- at right angles, e.g. with pneumatic sabre saw V.A.G 1523B- or chain pipe cutter - VAS 6254- . – Position repair double clamp centrally between outer markings -lower arrow-.
– Take installation position of clamp into account ⇒ “1.6 Installation position of clamp”, page 453 .
Protected by copyright. Copying for private or commercial purposes, in part or in whole, is not permitted unless authorised by SEAT S.A. SEAT S.A does not guarantee or accept any liability with respect to the correctness of information in this document. Copyright by SEAT S.A.
1.3 Removing and installing silencer
⇒ “1.3.1 Removing and positioning front silencer, Ateca, Leon 2013”, page 444 ⇒ “1.3.2 Removing and installing front silencer, Ibiza 2018, Aro‐na”, page 446 ⇒ “1.3.3 Front silencer - removing and installing, Toledo 2013, Ibiza 2016”, page 447 ⇒ “1.3.4 Removing and positioning back silencer, Ateca, Leon 2013”, page 449 ⇒ “1.3.5 Removing and installing back silencer, Ibiza 2018, Aro‐na”, page 450 ⇒ “1.3.6 Back silencer - removing and installing, Toledo 2013, Ibiza 2016”, page 451
Special tools and workshop equipment required ♦ Torque wrench - V.A.G 1331-
Removing Separating point without clamp – Separate rear silencer from front silencer ⇒ “1.2.1 Disconnecting exhaust pipes/silencers, Ateca, Leon 2013”, page 440 . – Remove noise insulation ⇒ General body repairs, exterior; Rep. gr. 66 ; Underbody trim; Assembly overview - underbody trims .
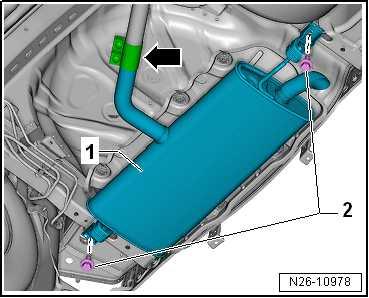
Separating point with clamp – Unscrew the nuts at the rear of the tunnel bridge -1- and re‐move the tunnel bridge ⇒ Body Repairs; Rep. gr. 66 ; Under‐body panelling; removing and installing the tunnel bridge .
– Loosen clamp -1- between catalytic converter and front si‐lencer, and push it in direction of travel -arrow-.
– Loosen clamp -arrow- between front and rear silencer -1- and push in the opposite direction.
Note

Protected by copyright. Copying for private or commercial purposes, in part or in whole, is not permitted unless authorised by SEAT S.A. SEAT S.A does not guarantee or accept any liability with respect to the correctness of information in this document. Copyright by SEAT S.A.
Disregard item -2-.