3 minute read
6.3 Assembly overview - engine (motor) control unit


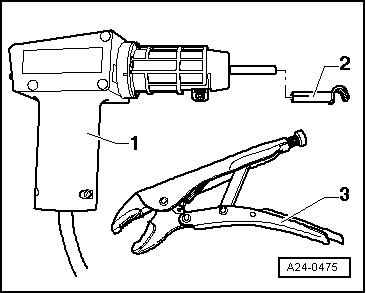
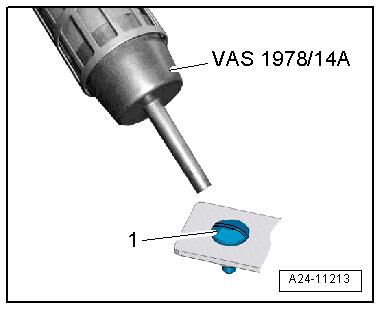
♦ Hot air blower - VAS 1978/14A- -item 1- with nozzle -2- from wiring harness repair set - VAS 1978 B-
♦ Small grinder (commercially available) ♦ Vehicle diagnostic tester Removing
Note
♦ If the engine control unit - J623- needs to be renewed, connect ⇒ Vehicle diagnostic tester and perform “Guided functions, Renewing engine control unit”. ♦ If renewed, the engine control unit - J623- must be adapted to the electronic immobilizer ⇒ Vehicle diagnostic tester “Guided functions”.
Note
The protective housing is secured with shear-head bolts. The shear-head bolts cannot be removed without being damaged. Protected by copyright. Copying for private or commercial purposes, in part or in whole, is not permitted unless authorised by SEAT S.A. SEAT S.A does not guarantee or accept any liability with Use e.g. the axial grinder - VAS 6682- or a commercially available angle grinder to remove the shear-head bolts. If the protective respect to the correctness of information in this document. Copyright by SEAT S.A.housing is damaged, it must be renewed.
– Switch off ignition and remove key from ignition lock.

Note
♦ If the engine (motor) control unit comes into contact with the positive battery terminal, permanent damage to the engine (motor) control unit will be the consequence. ♦ Therefore, disconnect the battery before removing the engine control unit ⇒ Electrical system; Rep. gr. 27 ; Battery; Dis‐connecting and connecting battery .
To remove protective housing -1-, unscrew shear bolts -arrowsas follows:
Note
Cover the area around the engine control unit, and protect it from flying sparks.
– Make groove (for a screwdriver) in head of shear bolt -1- using a small grinder -2-.
Note
The threads of the shear bolts are secured with locking fluid. To unscrew these bolts, the threads must therefore be heated with the hot air blower.
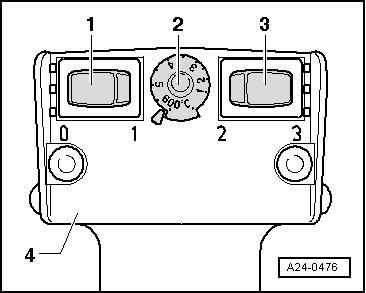
– Set the hot air blower as shown in illustration. In other words, set potentiometer for temperature regulation -2- to maximum heating output and 2-stage switch for air volume -3- to position 3.
NOTICE
Risk of damage to adjacent components caused by hot air blower. Risk of overheating. – If necessary, cover adjacent components.

– Heat head of shear bolt -1- for approx. 20 to 30 seconds.
Protected by copyright. Copying for private or commercial purposes, in part or in whole, is not permitted unless authorised by SEAT S.A. SEAT S.A does not guarantee or accept any liability with respect to the correctness of information in this document. Copyright by SEAT S.A.
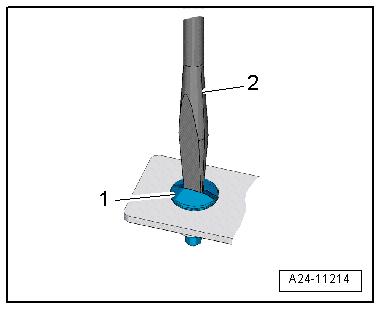
– Unscrew shear bolt -1- with screwdriver -2-.
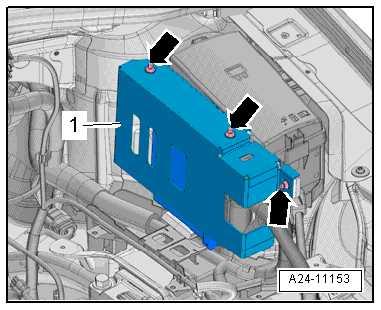
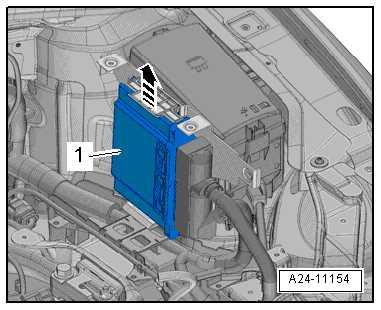
– Release catches in direction of -arrow- and remove engine control unit - J623- -1-.
– Release and pull off connectors for engine (motor) control unit - J623- .
Installing Installation is in the reverse sequence of removal. Observe the following: – It is essential that the engine control unit - J623- be provided with the protective housing again. – Clean threaded holes for shear-head bolts from locking fluid residue. A thread chaser is suitable for cleaning. – Use new bolts.
After having installed the new engine control unit, the following work must be carried out:
– Connect battery ⇒ Electrical system; Rep. gr. 27 ; Battery; Disconnecting and connecting battery . – Connect vehicle diagnostic tester . – Switch on ignition and select the following menu options on vehicle diagnostic tester :
Protected by copyright. Copying for private or commercial purposes, in part or in whole, is not permitted unless authorised by SEAT S.A. SEAT S.A does not guarantee or accept any liability with respect to the correctness of information in this document. Copyright by SEAT S.A.
♦ 01 - Engine electronics
♦ Guided Functions
♦ 01 - Renew engine/motor control unit
6.2.2 Removing and installing engine/motor control unit - J623- with anti-theft coding, Ibiza 2018, Arona
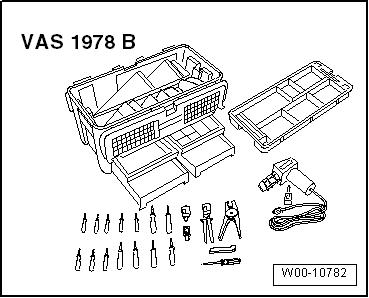
Special tools and workshop equipment required ♦ Wiring harness repair kit - VAS 1978 B-