10 minute read
1.5 Removing and installing engine support


Version 2
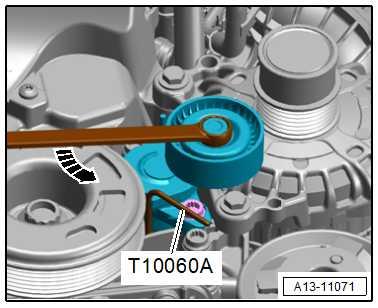
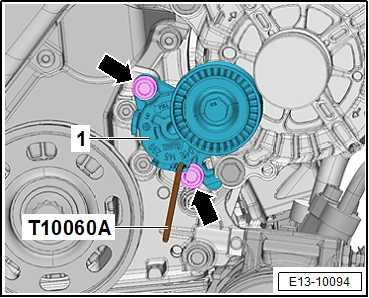
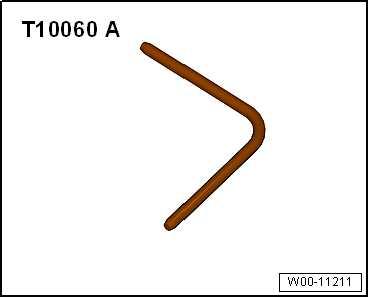
– Turn tensioning device in -direction of arrow-, and pull out locking pin - T10060 A- . Continued for all vehicles
– Release tensioner.
– Check that poly V-belt is properly seated. – Start engine and check that poly V-belt runs properly. Specified torques ♦ Securing bolts for noise insulation ⇒ General body repairs, exterior; Rep. gr. 66 ; Noise insulation; Assembly overview noise insulation
♦ Noise insulation assembly bolts, Toledo 213, Ibiza 2016 ⇒ General body works, exterior; Rep. gr. 50 ; Underbody pro‐tection; Assembly overview: underbody protection
⇒ “1.3.1 Removing and installing tensioner for poly V-belt, vehi‐cles without air conditioner compressor”, page 116 ⇒ “1.3.2 Removing and installing tensioner for poly V-belt, vehi‐cles with air conditioner compressor”, page 117
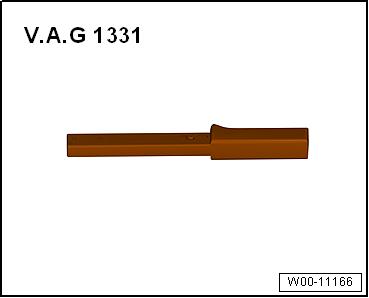
Special tools and workshop equipment required ♦ Torque wrench - V.A.G 1331-
Protected by copyright. Copying for private or commercial purposes, in part or in whole, is not permitted unless authorised by SEAT S.A. SEAT S.A does not guarantee or accept any liability with respect to the correctness of information in this document. Copyright by SEAT S.A.
♦ Ratchet 1/2" x 9-12" Ref.(735/10) - VAG 1331/1-


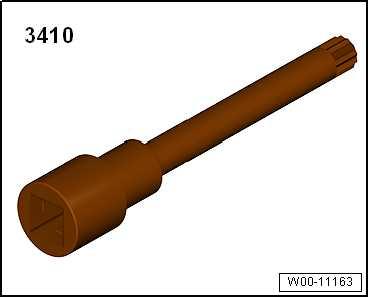
♦ Wrench - 3410-
Removing – Remove poly V-belt from tensioner ⇒ “1.2.1 Removing and installing poly V-belt, vehicles without air conditioner compressor”, page 113 . – Unscrew bolts -arrows- with special wrench - 3410- , detach tensioning device -1- from poly V-belt. Installing Install in reverse order of removal, observing the following: – Install poly V-belt ⇒ “1.2.1 Removing and installing poly V-belt, vehicles without air conditioner compressor”, page 113 . Specified torques ♦ ⇒ “1.1.1 Assembly overview - poly V-belt drive, vehicles with‐out air conditioner compressor”, page 109 ♦ Securing bolts for noise insulation ⇒ General body repairs, exterior; Rep. gr. 66 ; Noise insulation; Assembly overview noise insulation
♦ Noise insulation assembly bolts, Toledo 213, Ibiza 2016 ⇒ General body works, exterior; Rep. gr. 50 ; Underbody pro‐tection; Assembly overview: underbody protection
Protected by copyright. Copying for private or commercial purposes, in part or in whole, is not permitted unless authorised by SEAT S.A. SEAT S.A does not guarantee or accept any liability with respect to the correctness of information in this document. Copyright by SEAT S.A.
Special tools and workshop equipment required ♦ Torque wrench - V.A.G 1331-
♦ Ratchet 1/2" x 9-12" Ref.(735/10) - VAG 1331/1-
♦ Wrench - 3410-
Removing – Remove poly V-belt from tensioner ⇒ “1.2.2 Removing and installing poly V-belt, vehicles with air conditioner compressor”, page 114 . – Unscrew bolts -arrows- with special wrench - 3410- , detach tensioning device -1- from poly V-belt. Installing Install in reverse order of removal, observing the following: – Install poly V-belt ⇒ “1.2.2 Removing and installing poly V-belt, vehicles with air conditioner compressor”, page 114 . Specified torques ♦ ⇒ “1.1.2 Assembly overview - poly V-belt drive, vehicles with air conditioner compressor”, page 111 ♦ Securing bolts for noise insulation ⇒ General body repairs, exterior; Rep. gr. 66 ; Noise insulation; Assembly overview noise insulation
♦ Noise insulation assembly bolts, Toledo 213, Ibiza 2016 ⇒ General body works, exterior; Rep. gr. 50 ; Underbody pro‐tection; Assembly overview: underbody protection
Protected by copyright. Copying for private or commercial purposes, in part or in whole, is not permitted unless authorised by SEAT S.A. SEAT S.A does not guarantee or accept any liability with 1.4 respect to the correctness of information in this document. Copyright by SEAT S.A. Removing and installing vibration damp‐er
Special tools and workshop equipment required
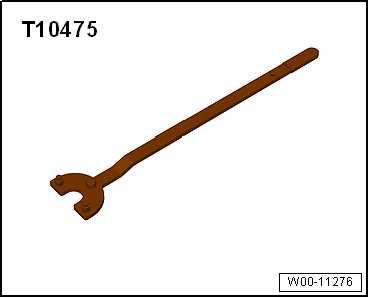
♦ Counter-hold tool - T10475-
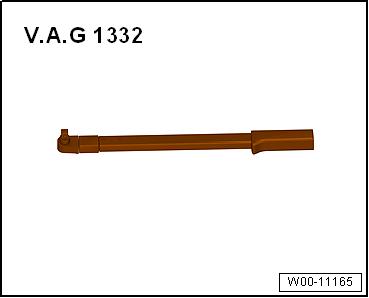
♦ Torque wrench - V.A.G 1332-
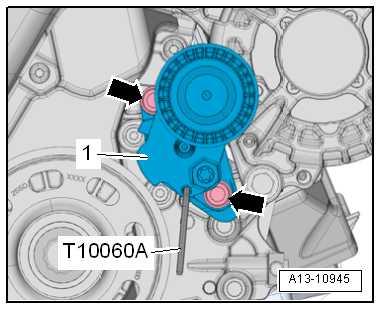
♦ Counter-hold tool - T10060A-
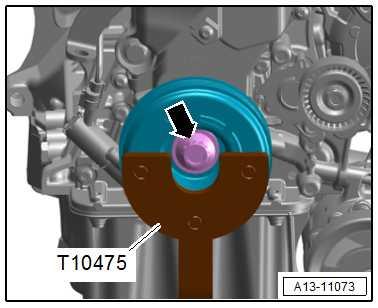
Removing – Remove poly V-belt ⇒ “1.2 Removing and installing poly-V belt”, page 113 . – Move crankshaft and camshafts to »TDC position« ⇒ “4.7 Setting piston to TDC position”, page 155 . – Convert counterhold tool - T10475- with inserts -T10475/1and -T10475/2- as shown in illustration.

Protected by copyright. Copying for private or commercial purposes, in part or in whole, is not permitted unless authorised by SEAT S.A. SEAT S.A does not guarantee or accept any liability with respect to the correctness of information in this document. Copyright by SEAT S.A.
– Loosen bolt -arrow- for vibration damper using counterhold T10475- .
– Remove bolt and take off vibration damper.
Note
♦ To avoid disturbing valve timing, do not turn the crankshaft when the vibration damper has been removed. ♦ If the vibration damper cannot be reinstalled immediately, tem‐porarily lock the crankshaft pulley in place using the centre bolt.
Installing
Note
♦ If a further tightening angle is specified for certain bolts, these must be renewed.
♦ All contact surfaces between bolt, poly V-belt pulley and crank‐shaft sprocket must be free of oil and grease.
Protected by copyright. Copying for private or commercial purposes, in part or in whole, is not permitted unless authorised by SEAT S.A. SEAT S.A does not guarantee or accept any liability with respect to the correctness of information in this document. Copyright by SEAT S.A.
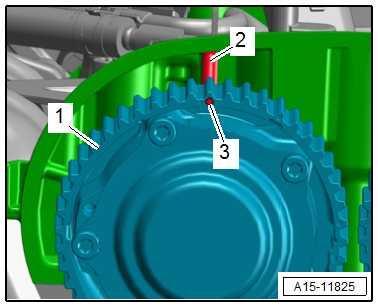
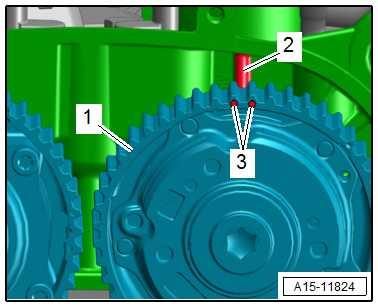
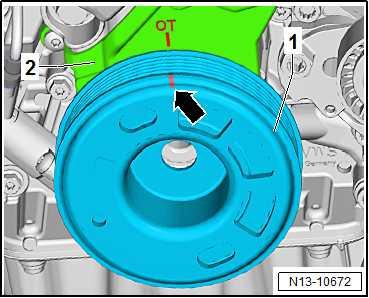
• The markings -3- on the inlet cam actuator -1- must be properly aligned with web -2- on the camshaft housing. • The marking -3- on the exhaust cam actuator -1- must be properly aligned with web -2- on the camshaft housing. • Check the position of the crankshaft before fitting the vibration damper -1-. • The marking on the crankshaft pulley -2- must be properly aligned with the »TDC marking« on the lower toothed belt guard -3-. • The marking -arrow- on the vibration damper -1- must be properly aligned with the “TDC marking” on the lower toothed belt cover -2-.

– Fit vibration damper, oil threads of bolt for vibration damper and screw it in to stop by hand. – Tighten bolt -arrow- for vibration damper using counterhold T10475- .
Carry out the remaining installation in reverse sequence, noting the following: – Install poly V-belt ⇒ “1.2 Removing and installing poly-V belt”, page 113 . Specified torques ♦ Securing bolt for vibration damper ⇒ “1.1 Assembly overview - poly V-belt drive”, page 109 ♦ Securing bolts of noise insulation ⇒ General body repairs, exterior; Rep. gr. 66 ; Noise insulation; Assembly overview noise insulation
♦ Noise insulation assembly bolts, Toledo 2013, Ibiza 2016 ⇒ General body works, exterior; Rep. gr. 50 ; Underbody pro‐
Protected by copyright. Copying for private or commercial purposes, in part or in whole, is nottection; Assembly overview: underbody protection permitted unless authorised by SEAT S.A. SEAT S.A does not guarantee or accept any liability with respect to the correctness of information in this document. Copyright by SEAT S.A.
⇒ “1.5.1 Engine support- removing and installing, Leon 2013, Ibi‐za 2018, Arona”, page 122 ⇒ “1.5.2 Engine supports - removing and installing, Toledo 2013, Ibiza 2016”, page 127
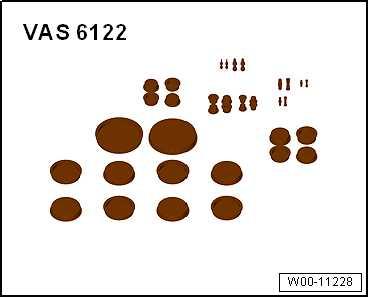
Remove engine support ⇒ page 122 . Separate the engine support to free some space ⇒ page 124 Special tools and workshop equipment required ♦ Engine bung set - VAS 6122-
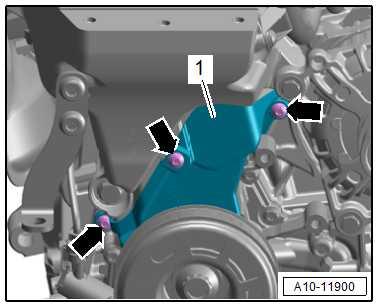
Remove engine support. – Remove engine mounting ⇒ “2.2 Removing and installing motor mounting”, page 73 . – Unscrew bolts -1, 2- and remove bracket -arrow-.
– Unscrew bolt -1-.
Note
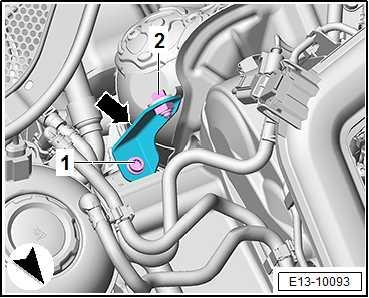
Protected by copyright. Copying for private or commercial purposes, in part or in whole, is not permitted unless authorised by SEAT S.A. SEAT S.A does not guarantee or accept any liability withDisregard item -2-.respect to the correctness of information in this document. Copyright by SEAT S.A.

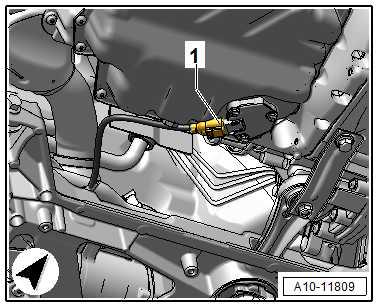
– Detach hoses from retainer -3-.
– Remove bolt -2-.
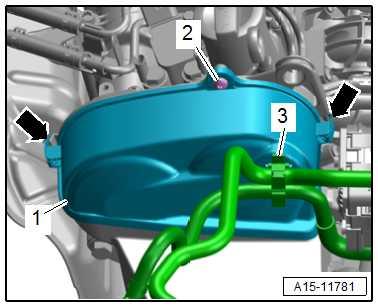
– Release clips -arrows-, and remove upper toothed belt guard -1-.
– Remove tensioner for poly V-belt ⇒ “1.3 Removing and installing tensioner for poly V-belt”, page 116 .
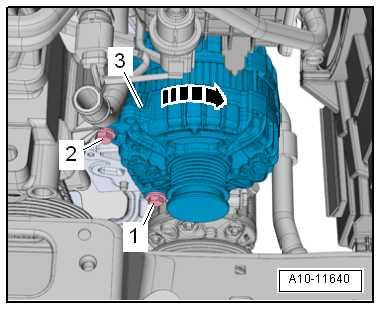
– Loosen bolt -1-, but do not unscrew.
– Remove bolt -2-.
– Swivel alternator -3- -in the direction of the arrow-.
– Remove pendulum support ⇒ “2.4 Removing and installing pendulum support”, page 84 .
– Disconnect electrical connector -1- on oil level and oil temper‐ature sender - G266- .
– Unplug electrical connector -2-.
Note
Protected by copyright. Copying for private or commercial purposes, in part or in whole, is not permitted unless authorised by SEAT S.A. SEAT S.A does not guarantee or accept any liability with respect to the correctness of information in this document. Copyright by SEAT S.A.
-Items 1, 3- can be disregarded.
– Remove bolts -arrows- for toothed belt cover (bottom) -1-.
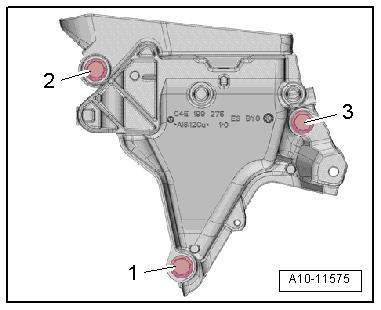
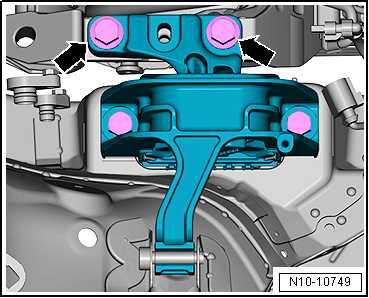
– Unscrew bolts -1, 2 and 3- and detach engine support up‐wards.
Protected by copyright. Copying for private or commercial purposes, in part or in whole, is not permitted unless authorised by SEAT S.A. SEAT S.A does not guarantee or accept any liability with respect to the correctness of information in this document. Copyright by SEAT S.A.
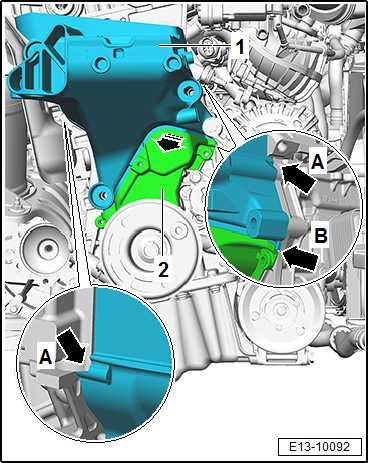
– Separate lower protector -2- -in the direction of the arrow- to free the assembly support -1-. – Separate and free the engine support, follow points -arrows A, B-. Remove engine support upwards.
Separate the engine support to free some space – Support engine in its installation position ⇒ “2.5 Supporting engine in installation position”, page 87 . – Unscrew the bolts -arrows- from the gearbox mounting.
– Unscrew bolts -1, 2- and remove bracket -arrow-.
– Unscrew bolt -1-.
Note
Disregard item -2-.
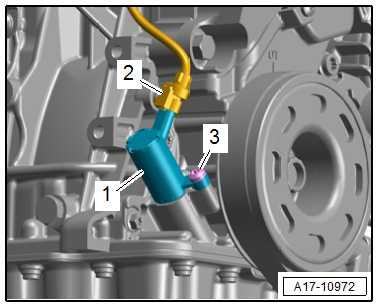
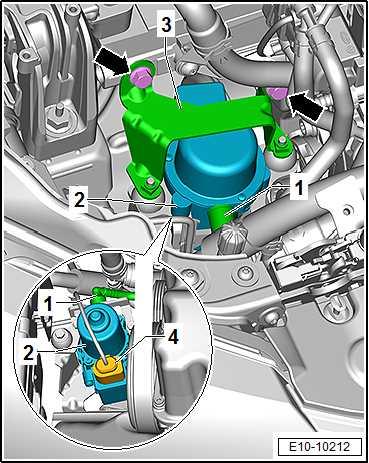
– Pull vacuum line -1- off vacuum pump for brakes - V192- -2and remove.
Protected by copyright. Copying for private or commercial purposes, in part or in whole, is not permitted unless authorised by SEAT S.A. SEAT S.A does not guarantee or accept any liability with respect to the correctness of information in this document. Copyright by SEAT S.A.– Remove bolts -arrows-.
– Pull connector -4- from the vacuum pump for brakes - V192-2-.
– Remove bracket with the vacuum pump for brakes - V192- .
– Detach hoses from retainer -3-.
– Remove bolt -2-.
– Release clips -arrows-, and remove upper toothed belt guard -1-.
– Remove tensioner for poly V-belt ⇒ “1.3 Removing and installing tensioner for poly V-belt”, page 116 .


