9 minute read
2.3 Removing and installing gearbox mounting


12 - Bolt ❑ Renew after removal ❑ 50 Nm +90°
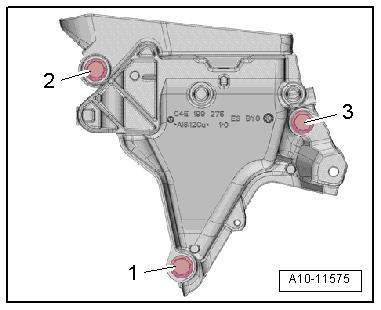
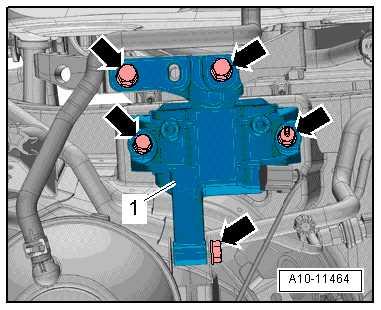
13 - Gearbox mounting ❑ Removing and installing ⇒ “2.3.2 Removing and installing gearbox mounting, Ibiza 2018, Arona”, page 80 14 - Bolt ❑ Renew after removal ❑ 3 off ❑ 40 Nm +90°
15 - Gearbox bracket
Engine support - specified torque and tightening sequence
Note
Risk of damage to threads by starting bolts at an angle.
– Tighten bolts in stages in the sequence shown.
Stage Bolts Specified torque/turning further angle 1. -1 … 3- 7 Nm 2. -1 … 3- 40 Nm 3. -1 … 3- Turn 90° further
Pendulum support - specified torque and tightening sequence
Note
Protected by copyright. Copying for private or commercial purposes, in part or in whole, is not permitted unless authorised by SEAT S.A. SEAT S.A does not guarantee or accept any liability with respect to the correctness of information in this document. Copyright by SEAT S.A. If a further tightening angle is specified for certain bolts, these must be renewed.
– Tighten bolts in stages in the sequence shown:
Sta ge
1.
2.
3. Bolts
-2- and -3-
-4-
-2-, -3- and -4Specified torque/turning further angle
50 Nm
130 Nm
Turn 90° further

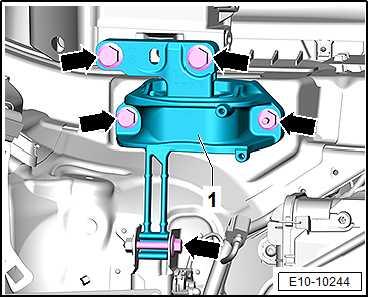
1 - Engine support ❑ Specified torque and tightening sequence ⇒ page 73 2 - Bolt ❑ Renew after removal ❑ Tightening sequence ⇒ page 73 . 3 - Engine mounting ❑ With support arm ❑ Do not separate engine mounting and support arm ❑ Removing and installing ⇒ “2.2.3 Engine mount‐ing - removing and in‐stalling, Toledo 2013, Ibiza 2016”, page 75 4 - Bolt ❑ Renew after removal ❑ 20 Nm +90°
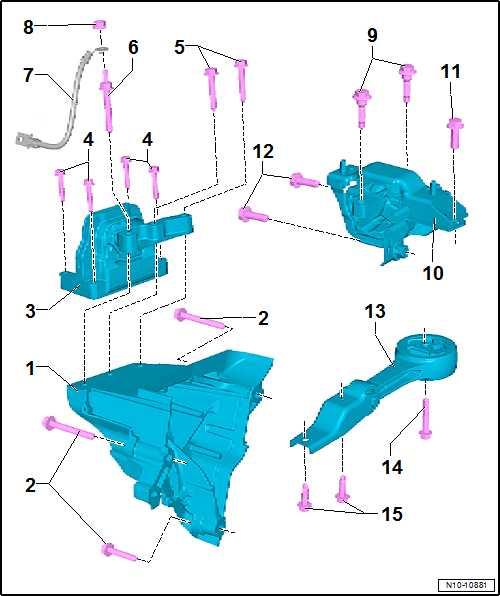
5 - Bolt
Protected by copyright. Copying for private or commercial purposes, in part or in whole, is not permitted unless authorised by SEAT S.A. SEAT S.A does not guarantee or accept any liability with ❑ Renew after removal respect to the correctness of information in this document. Copyright by SEAT S.A.❑ 30 Nm +90°
6 - Centre hex stud ❑ Renew after removal ❑ 30 Nm +90°
7 - Earth strap ❑ Make sure the contact surfaces are free of dirt and corrosion ❑ Clean as necessary 8 - Nut ❑ For securing earth strap ❑ 20 Nm
9 - Bolt ❑ Renew after removal ❑ 40 Nm +90°
10 - Gearbox mounting ❑ With support arm ❑ Removing and installing ⇒ “2.3.3 Gearbox mounting - removing and installing, Toledo 2013, Ibiza 2016”, page 82 11 - Bolt ❑ Renew after removal ❑ 50 Nm +90°
12 - Bolt ❑ Renew after removal ❑ 50 Nm +90°
13 - Pendulum support ❑ Removing and installing ⇒ “2.4.3 Pendulum support - removing and installing, Toledo 2013, Ibiza 2016”, page 86 14 - Bolt ❑ Renew after removal ❑ 40 Nm +90°
15 - Bolt ❑ Renew after removal ❑ 30 Nm +90°
Engine support - specified torque and tightening sequence
Note
♦ If specified torque and tightening sequence are not adhered to, used bolts may become loose. ♦ Protected by copyright. Copying for private or commercial purposes, in part or in whole, is notIf a further tightening angle is specified for certain bolts, these permitted unless authorised by SEAT S.A. SEAT S.A does not guarantee or accept any liability withmust be renewed. respect to the correctness of information in this document. Copyright by SEAT S.A.
– Tighten bolts in stages in the sequence shown.
Stage Bolts Specified torque/turning further angle 1. -1 … 3- 7 Nm 2. -1 … 3- 40 Nm 3. -1 … 3- Turn 90° further
2.2 Removing and installing motor mounting
⇒ “2.2.1 Engine mounting - removing and installing, Ateca, Leon 2013”, page 73 ⇒ “2.2.2 Removing and installing engine mounting, Ibiza 2018, Arona”, page 74 ⇒ “2.2.3 Engine mounting - removing and installing, Toledo 2013, Ibiza 2016”, page 75
Engine bung set - VAS 6122-
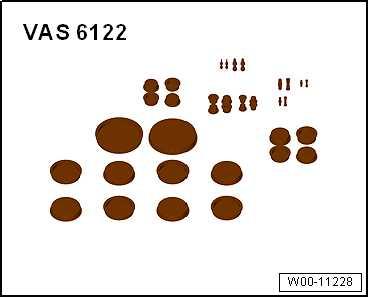
Removing – Unplug electrical connector -1-. – Open locking mechanism -3- and free the lines -2- of the fuel supply system and the activated charcoal filter, quick-release couplings ⇒ Rep. gr. 20 ; Quick-release couplings; quickrelease coupling: remove . – Seal open lines and unions with clean plugs from engine seal‐ing plug set - VAS 6122- . – Using a screwdriver, release fasteners -arrow- and move cool‐ant expansion tank to one side. Ateca
– Support engine in its installation position ⇒ “2.5.1 Supporting engine in installation position, Ateca”, page 87 . Leon 2013
– Support engine in its installation position ⇒ “2.5.2 Supporting engine in installation position, Leon 2013”, page 91 . Continued for all vehicles:
– Unscrew bolts -arrows- and remove engine mounting -1-. Installing Install in reverse order of removal, observing the following:
Note

– Checking adjustment of assembly mountings ⇒ “2.6 Assembly mountings - adjusting, Ateca, Leon 2013, Ibiza 2018, Arona”, page 106 . – Remove support bracket. Specified torques ♦ ⇒ “2.1.1 Assembly overview - assembly mountings, Ateca, Leon 2013”, page 67
Protected by copyright. Copying for private or commercial purposes, in part or in whole, is not permitted unless authorised by SEAT S.A. SEAT S.A does not guarantee or accept any liability with respect to the correctness of information in this document. Copyright by SEAT S.A. 2.2.2 Removing and installing engine mount‐ing, Ibiza 2018, Arona
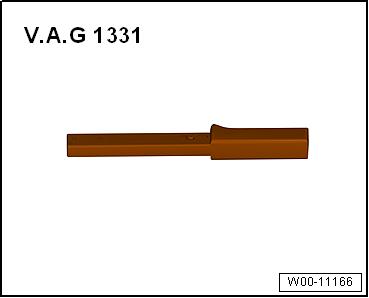
Special tools and workshop equipment required ♦ Torque wrench - V.A.G 1331-
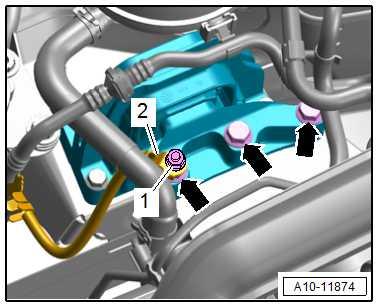
Removing – Open catch -3- and lay lines -2- of fuel supply system and ac‐tivated charcoal filter aside.
– Unplug electrical connector -1-. – Release catches in direction of -arrow- with a screwdriver and move coolant expansion tank to one side. Ibiza 2018
– Support engine in its installation position ⇒ “2.5.3 Supporting engine in installation position, Ibiza 2018”, page 93 . Arona
– Support engine in its installation position ⇒ “2.5.4 Supporting engine in installation position, Arona”, page 97 . Continued for all vehicles:
– Unscrew bolts -arrows- and remove engine mounting -1-. Installing Install in reverse order of removal, observing the following:
Note
Protected by copyright. Copying for private or commercial purposes, in part or in whole, is not permitted unless authorised by SEAT S.A. SEAT S.A does not guarantee or accept any liability with respect to the correctness of information in this document. Copyright by SEAT S.A.♦ Risk of damage to threads by starting bolts at an angle. ♦ Renew bolts that are tightened with turning further angle after each removal. ♦ Only remove support bracket - 10 - 222 A- when bolts on as‐sembly mounting have been tightened to specified torque.

– First screw in bolts -arrows- for engine mounting -1- onto stop by hand. – Tighten bolts -arrows⇒ “2.1.2 Assembly overview - assembly mountings, Ibiza 2018, Arona”, page 70 . – Checking adjustment of assembly mountings ⇒ “2.7 Assembly mounting setting - checking, Ateca, Leon 2013, Ibiza 2018, Arona”, page 108 . Specified torques ♦ ⇒ “2.1.2 Assembly overview - assembly mountings, Ibiza 2018, Arona”, page 70
Special tools and workshop equipment required
♦ Torque wrench - V.A.G 1331-
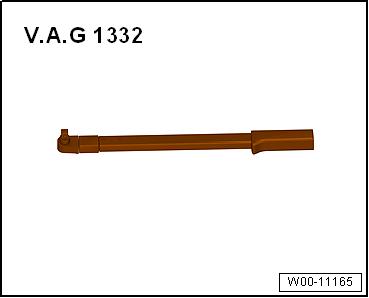
♦ Torque wrench - V.A.G 1332-
Protected by copyright. Copying for private or commercial purposes, in part or in whole, is not permitted unless authorised by SEAT S.A. SEAT S.A does not guarantee or accept any liability with respect to the correctness of information in this document. Copyright by SEAT S.A.
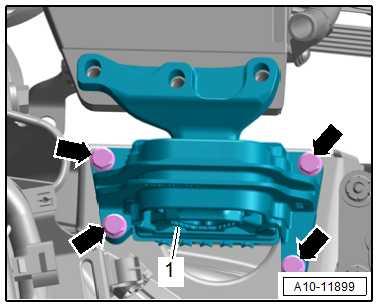
Removing – Remove bolts -arrows-.
– Lift coolant expansion tank until connector is accessible. – Disconnect connector -1- for coolant shortage indicator switch - F66- , and lay coolant expansion tank to one side. Toledo 2013
– Support engine in its installation position ⇒ “2.5.6 Supporting engine in installation position, Toledo 2013”, page 103 . Ibiza 2016
– Support engine in its installation position ⇒ “2.5.5 Supporting engine in installation position, Ibiza 2016”, page 102 . Continued for all vehicles:

– Unscrew nut -1-, and lay earth wire -2- to one side. – Unscrew bolts -arrows- for gearbox mounting support arm.
– Unscrew bolts -arrows- and remove engine mounting -1-. Installing
Note
♦ If specified torque and tightening sequence are not adhered to, used bolts may become loose. ♦ If a further tightening angle is specified for certain bolts, these must be renewed.
– Place engine mounting -1- onto longitudinal member. – First screw in bolts -arrows- as far as stop by hand. – Tighten bolts ⇒ “2.1.3 Assembly overview - assembly mountings, Toledo 2013, Ibiza 2016”, page 72 .
– First screw in bolts -arrows- for support arm of engine mount‐ing as far as stop by hand. • Make sure support arm is not twisted when bolts are tightened. – Tighten bolts -arrows⇒ “2.1.3 Assembly overview - assembly mountings, Toledo 2013, Ibiza 2016”, page 72 . – Fit earth strap -2- to stud, start nut -1-, and tighten it. – Remove support bracket. Carry out the remaining installation in reverse sequence, noting the following: Specified torques ♦ Securing bolts and securing nuts ⇒ “2.1.3 Assembly overview - assembly mountings, Toledo 2013, Ibiza 2016”, page 72
2.3 Removing and installing gearbox mounting
⇒ “2.3.1 Engine mounting - removing and installing, Ateca, Leon 2013”, page 77 Protected by copyright. Copying for private or commercial purposes, in part or in whole, is not permitted unless authorised by SEAT S.A. SEAT S.A does not guarantee or accept any liability with⇒ “2.3.2 Removing and installing gearbox mounting, Ibiza 2018, Arona”, page 80 respect to the correctness of information in this document. Copyright by SEAT S.A. ⇒ “2.3.3 Gearbox mounting - removing and installing, Toledo 2013, Ibiza 2016”, page 82
Special tools and workshop equipment required


