


“ARCHITECTURE CAN’T FULLY REPRESENT THE CHAOS AND TURMOIL THAT ARE PART OF THE HUMAN PERSONALITY, BUT YOU NEED TO PUT SOME OF THAT TURMOIL INTO THE ARCHITECTURE, OR IT ISN’T REAL.”
- FRANK STELLA
Hello, I am a first-year architecture student at the University of Oregon. My interest in architecture is that of holistic spaces that help to enhance the human experience through thoughtful design choices. I am also intrigued by how sustainability in architecture is linked to the flexibility of the space. Although new to the architecture field, I have previous experience in many different art mediums, such as photography, digital design, ceramics, mixed media, and 3D puzzle making. As I continue to learn, I am looking forward to understanding how light, material, texture, and compositional elements add to the character of the space.
Although I have experience using AutoCAD to create orthographic drawings, I am excited to explore other programs that are used in the professional field. I am eager to learn about the different ways of creating orthographic projections, through both digital and physical drafting and model-making. I am very passionate about spaces that are all-inclusive and can be used universally, which in turn creates sustainable places that have the potential to be used for generations. In the future, I hope to continue developing my skills and learning about the different techniques used to design the spaces in which we inhabit.
Portfolio : https://lilyvmaas.wixsite.com/mysite
Page 8-9
Module 1
Laser Cut Model of Primitive Solid
Page 14-15
Module 2
Page 10
Module 1
Laser Cut File
MoveEdge(X,YPlane)
MoveEdge(X,ZPlane) Move
Digital Primitive Rules
SolidPointsOnMove Point(X,YPlane)
MovePoint(X,ZPlane)
MoveFace(X,YPlane)
MoveFace(X,ZPlane)
MoveEdge(X,YPlane) SelectTwo
MoveEdge(X,ZPlane) SelectTwo
Page 16-21
Module 2
Digital Primitive Rules

Page 11
Module 1
Laser Cut Model
Page 22-25
Module 2
Digital Primitive Additives
Page 12
Module 1
Laser Cut Material
Page 26-27
Module 2
Digital Primitive Subtractive
Page 13
Module 1
Primitive Enclosure
Page 28-29
Module 2 Assembly Primitives

Page 30-33
Module 3
Topography
Page 52-55
Guest Lectures
Page 34-41
Module 3
Digital Frames
Page 56-59
Guest Lectures

SOFTWARE USED
Rhino 8
FABRICATION TIME
10 min. Laser Cutting
1 Hour Assembly
6 Hours Digitally Modeling
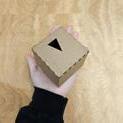
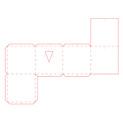
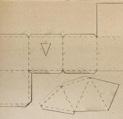
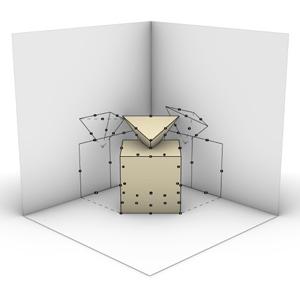
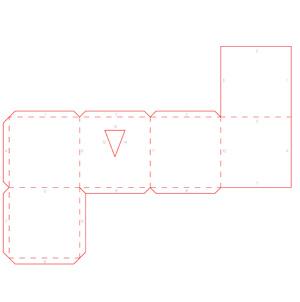
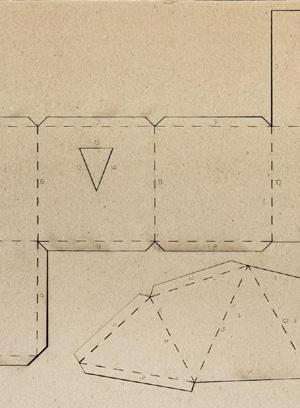
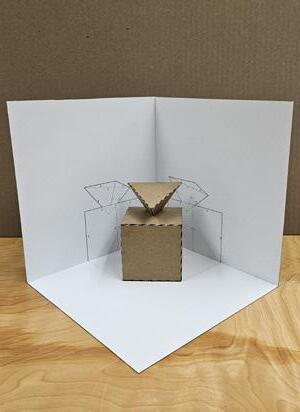
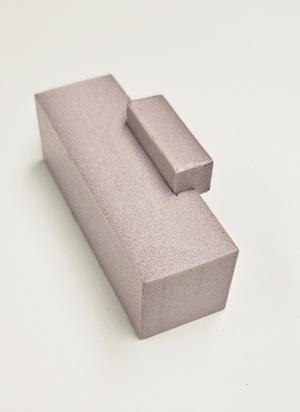
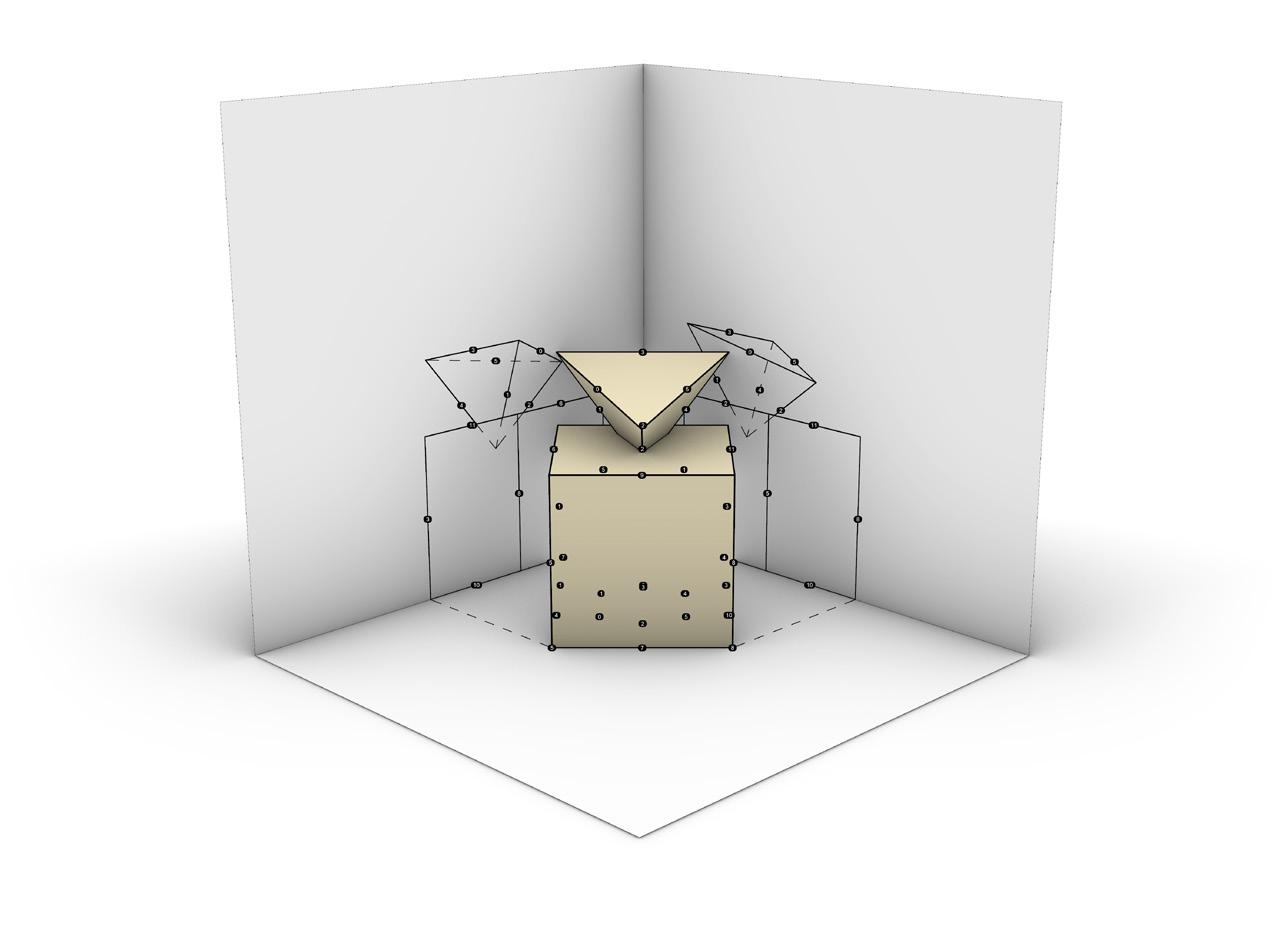
In this module, I explored the basics of 3D modeling in Rhino using the intersection of two primitive shapes. I chose to work with a pyramid intersecting the top of a cube. In Rhino, the first step was to create the shapes and arrange them so that they intersect. Next, I split the objects so that there would be a physical void in the cube for the pyramid to rest. Following that, I unrolled each shape so that they were in a 2D format. The next step was to prep the unrolled shapes for laser cutting, which included special line weights and creating tabs for 3D assembly. After the laser cut outline had been created, it was exported as its own file so that it could be sent to
MODELING MATERIALS
1/50” Chipboard
Box Cutter
Cutting Mat
Tacky Glue
Ruler
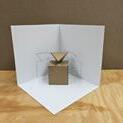
the laser cutter. After that, I created the base panels for the enclosure so that it would surround the two primitives. The next step was to create the 2D projection of the plan and elevation views. After these projections had been created, I oriented them onto the interior panels of the enclosure. Afterwards, I had prepared the panels of the enclosure to be printed out in a 2D format. The last digital step was to prepare the sides of the enclosure to be printed out so that they could be physically assembled. After everything was printed out and cut, the primitives and the enclosure were assembled.


While assembling the laser cut primitives, I noticed that some of the tabs were excessive for the cube. Looking back on it, I would have removed those excess tabs so that there would have been less steps for assembly. For the pyramid primitive, I found it difficult to create the tabs for the laser cut file because of the strange shape. Fortunately, I only had to alter one of the tabs on the pyramid so that the
shape would come together successfully. I assembled the shapes by first folding along the dotted lines and tabs. Then, I carefully applied glue to each of the tabs using a stick for precise placement. I performed a similar assembly process for the enclosure. I printed out the orthographic projections onto paper and then spray mounted them onto chipboard. I then glued together the enclosure so that it would stand upright.


While working digitally within Rhino, I found it to be a very trial-and-error process. I had particular difficulty while creating the images to export out of Rhino. I was experiencing some difficulty trying to get the print width to display properly on the primitive models. However, I was able to create the images despite this setback and display the correct line widths. Another thing I found difficult was assembling the physical primitives. I was being very cautious while gluing things together because I was afraid that something would tear. This was due to my unfamiliarity with the laser cutter and with using chipboard
for models. Although I took more time and caution than was needed, the model came together very successfully. If I were to repeat this project, I would experiment with other primitives, such as hexagons and spheres. I would also try to streamline the laser cutting process and create just enough tabs for a successful assembly.

FABRICATION TIME
4 Hour Assembly
10 Hours Digitally Modeling
MATERIALS
Rhino 8
XPS 1” Foam
Box Cutter
Utility Knife
Cutting Mat
Tacky Glue
Ruler
Sandpaper
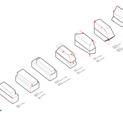
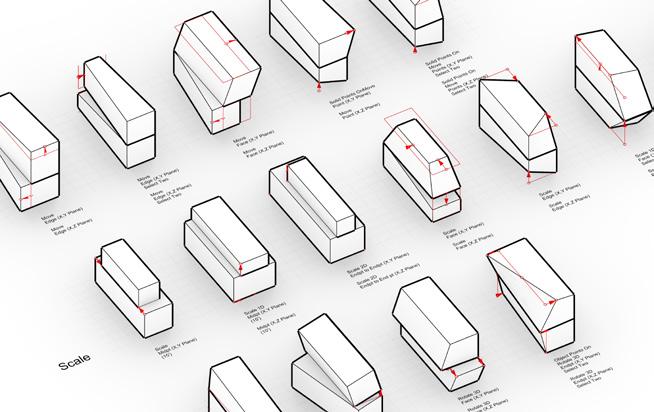
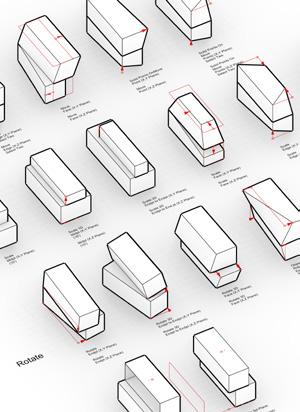
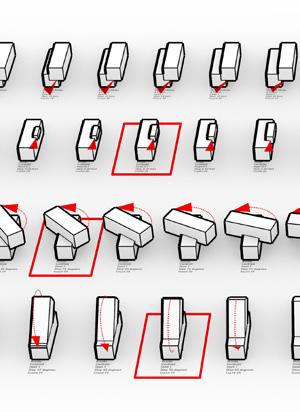
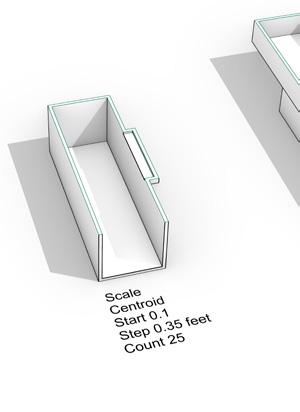
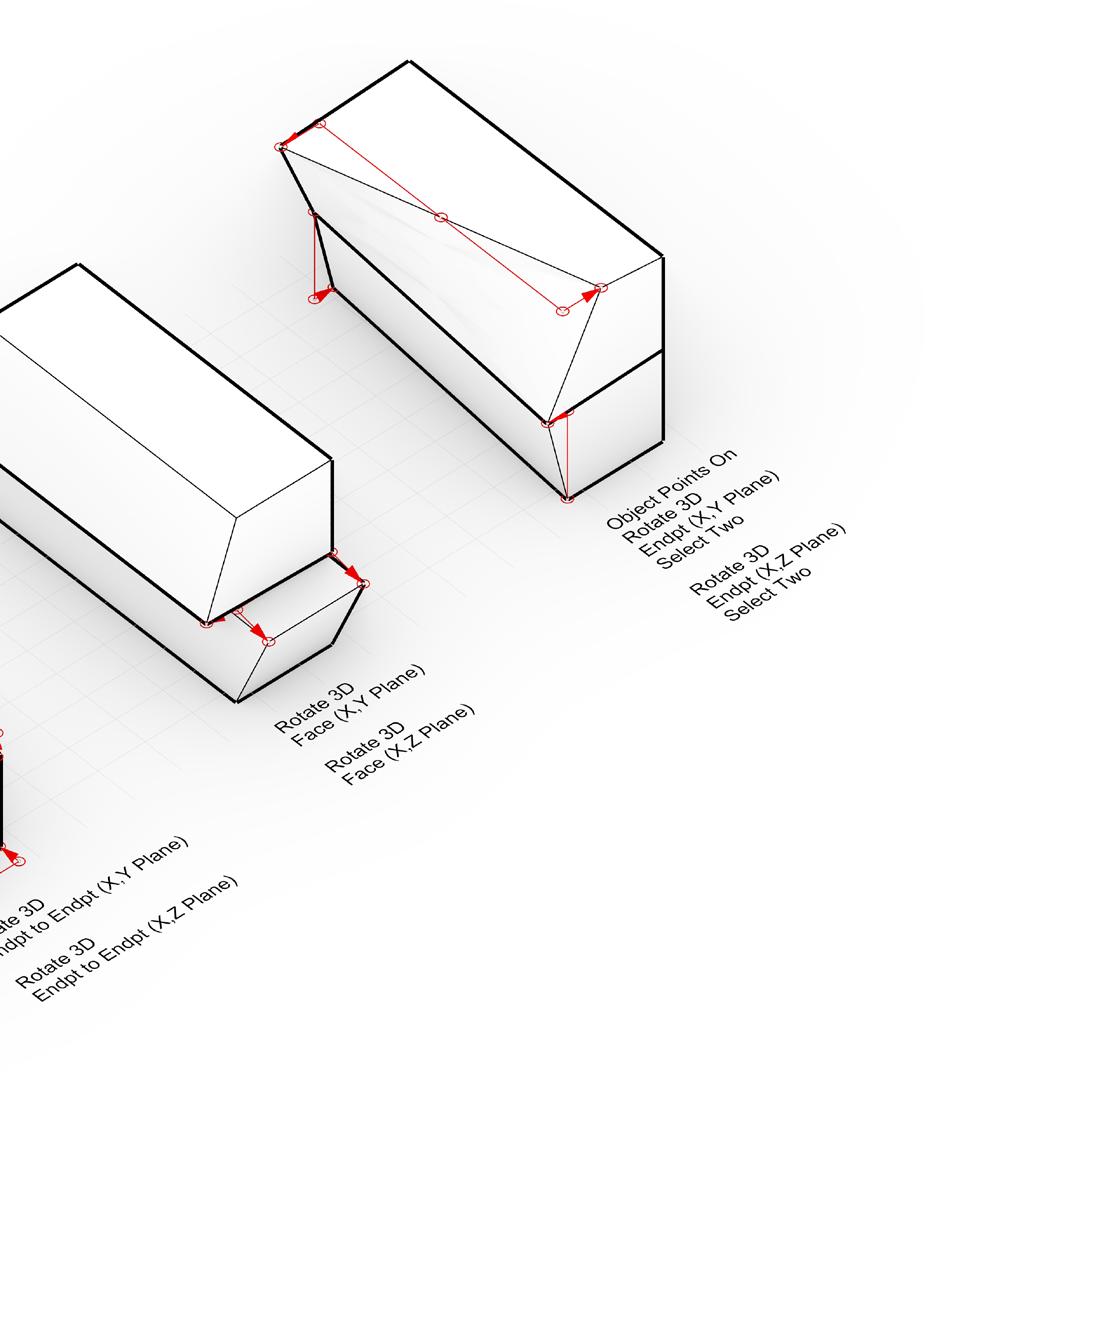
In this module, I began to dive deeper into 3D modeling using Rhino. I explored a variety of different commands and functions in order to manipulate the surfaces of objects. A 60’x20’x20’ rectangle was chosen to use as the base model to perform these command iterations with. The commands that were explored were move, scale, rotate, and mirror. A variety of commands within these four umbrella commands were discovered and used. For each 3D command model, the action was diagrammed using a red arrow to show how the rectangle was altered. Additionally, pseudo-code was placed
underneath each command iteration in order to clearly document the exact commands used and in what 3D plane these actions took place. I found that this system of notation was a very useful visual aid as it allowed me to understand how things were changing. Using commands to alter these rectangles was definitely a learning process, as I was not comfortable using Rhino in such a way when I first began this module. However, I was able to become proficient in implementing these commands to create complex structures from a simple rectangular shape.

MoveEdge(X,YPlane)
MoveEdge(X,ZPlane)
MoveEdge(X,YPlane) SelectTwoMoveEdge(X,ZPlane) SelectTwo
MoveFace(X,YPlane)MoveFace(X,ZPlane)
SolidPointsOnMove Point(X,YPlane)MovePoint(X,ZPlane)
SolidPointsOn MovePoints(X,YPlane) SelectTwoSolidPointsOn MovePoints(X,ZPlane) SelectTwo
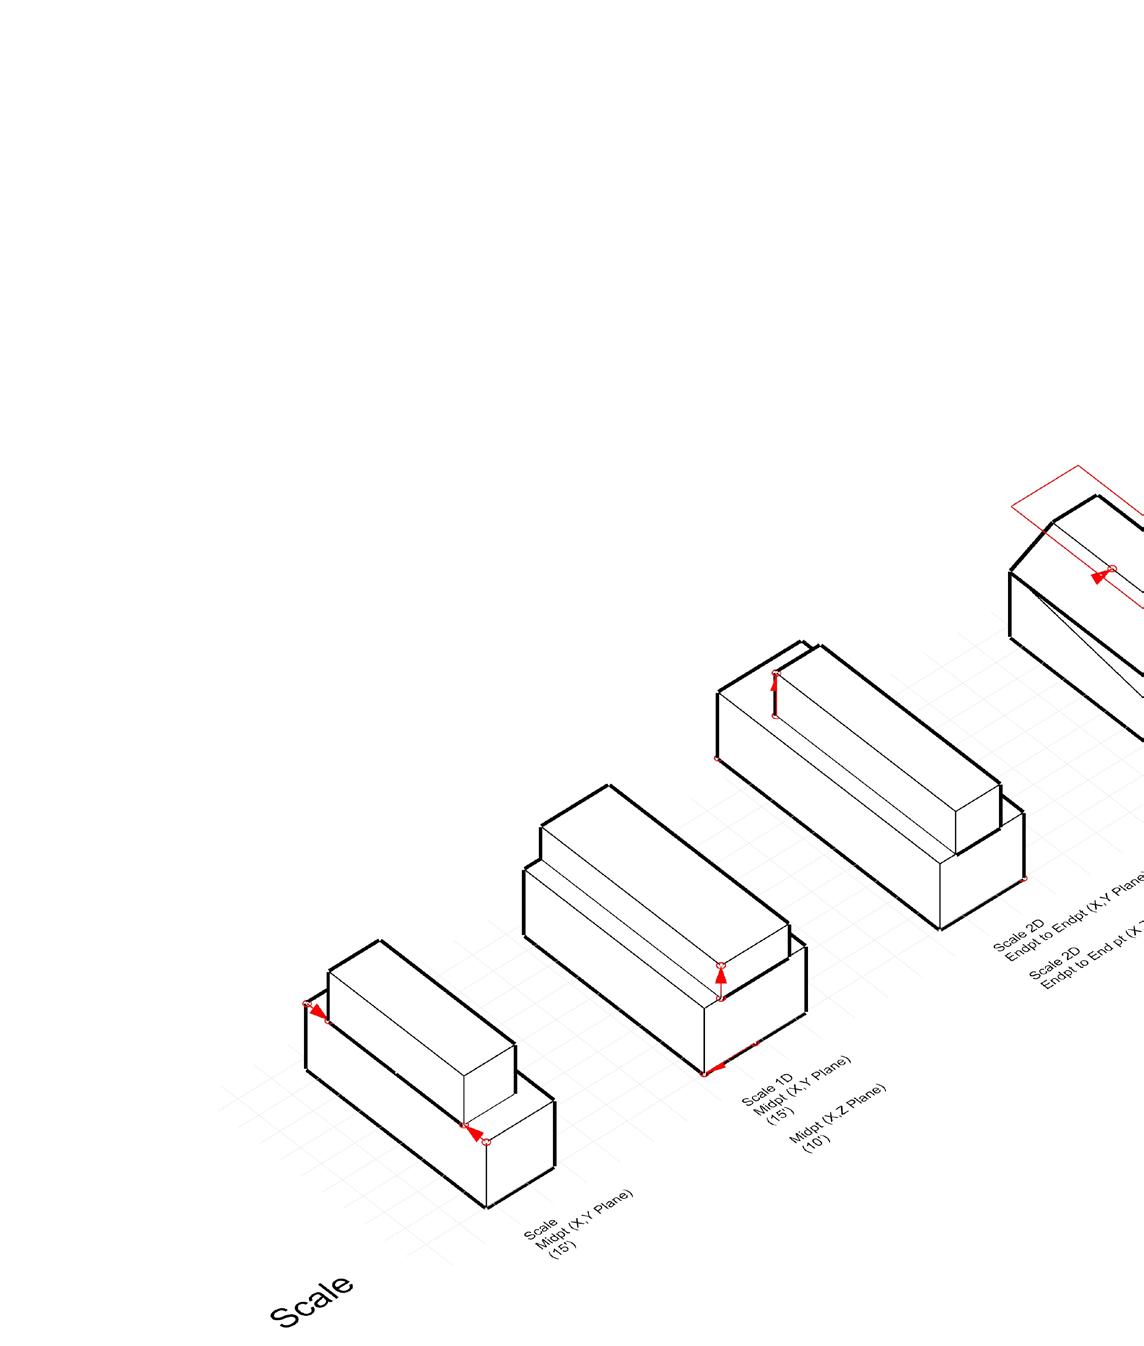
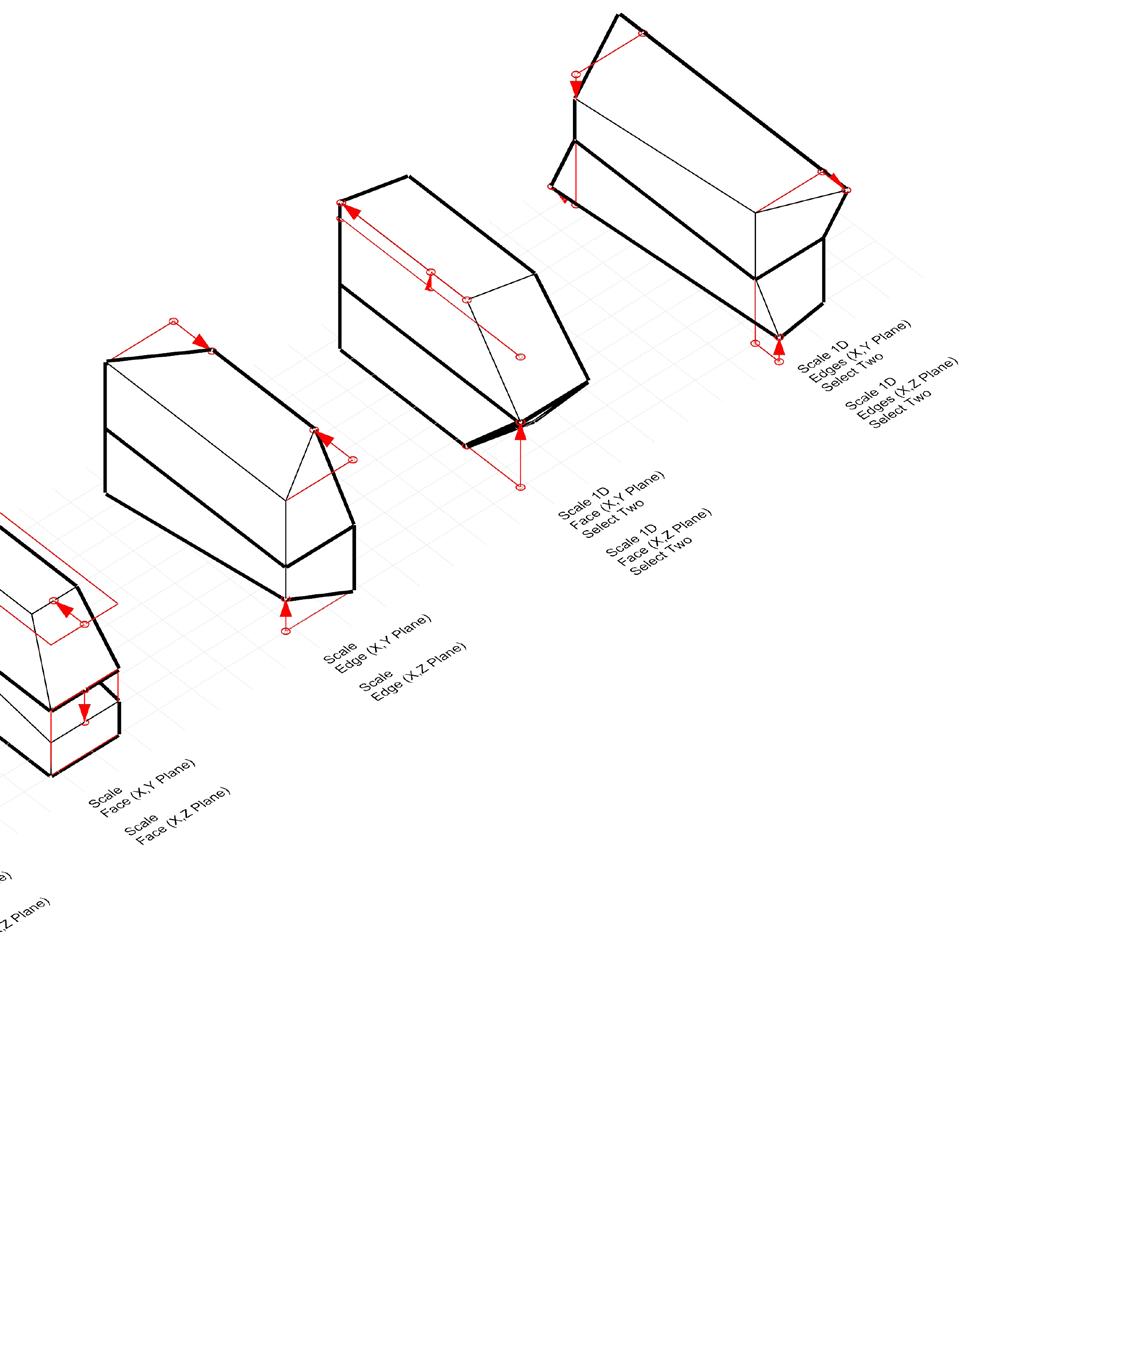
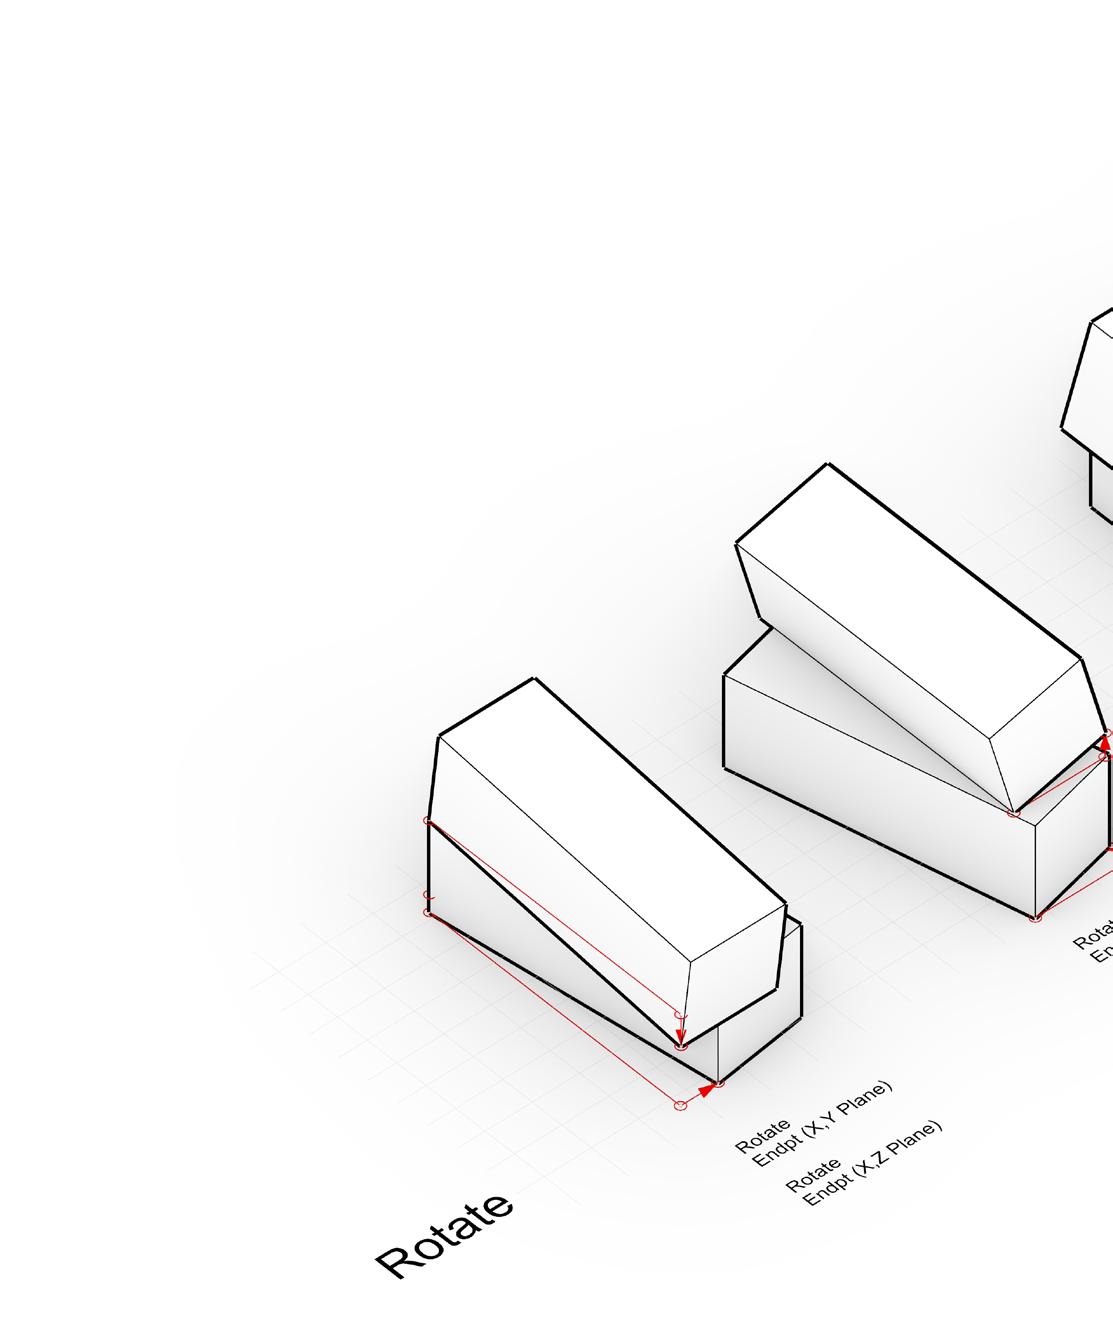
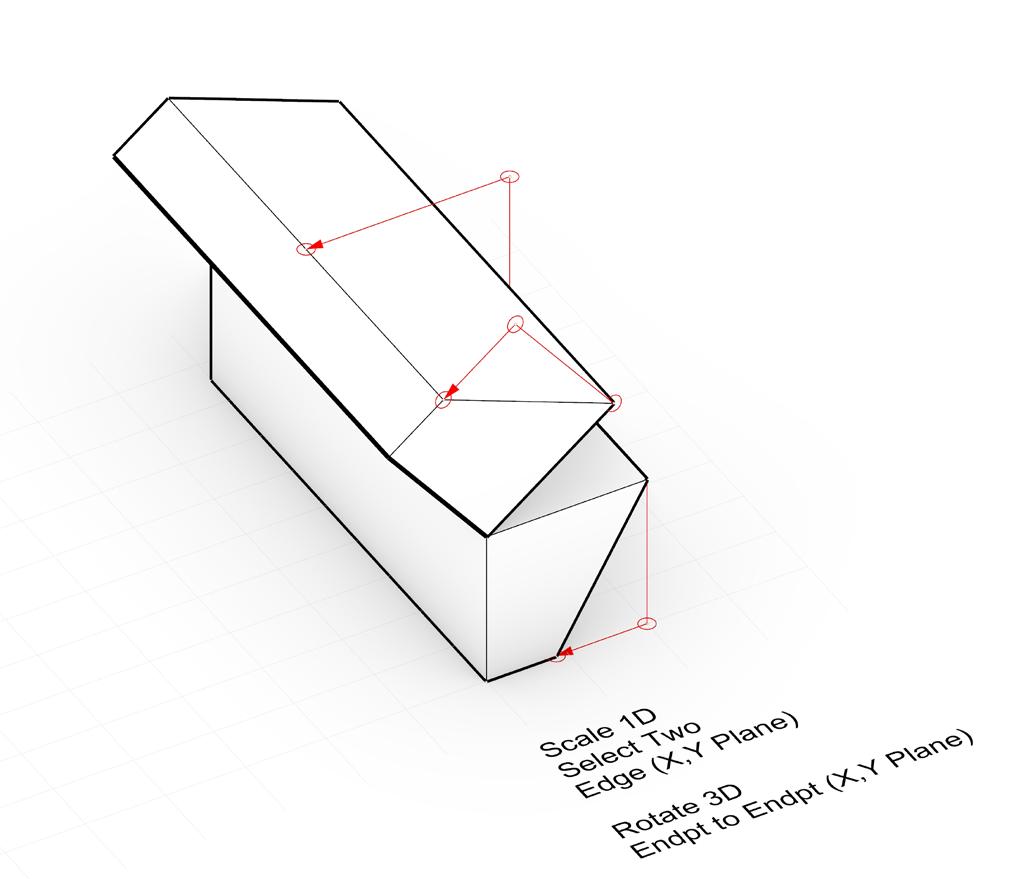
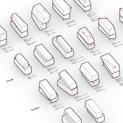
In this exercise, I created 20 different iterations using a combination of 2 commands. The commands used were the same four as mentioned previously, move, scale, rotate, and mirror. The combinations that I chose were scale and rotate, move and rotate, and move and scale, with six iterations explored per combination. The last two combinations out of the twenty were mirror and rotate, and mirror and move. I then explored how variations of these combinations could be used to create interesting shapes. Visual diagramming and pseudo-code was implemented for each iteration. Out
of these twenty iterations, my favorite was the combination shown above. This iteration uses scale 1D and rotate 3D. The scale command was used to move an edge of the bottom rectangle inwards, creating a trapezoidal shape. Then, the top rectangle was rotated 45 degrees using its endpoints. The gap between the two shapes, as a result of the rotate command, and the edge of the bottom rectangle, from the scale command, were particularly interesting. This arrangement is why I chose this combination of commands as my favorite out of these twenty iterations.


Move
Scale
Rotate Y,Z
Rotate X,Z
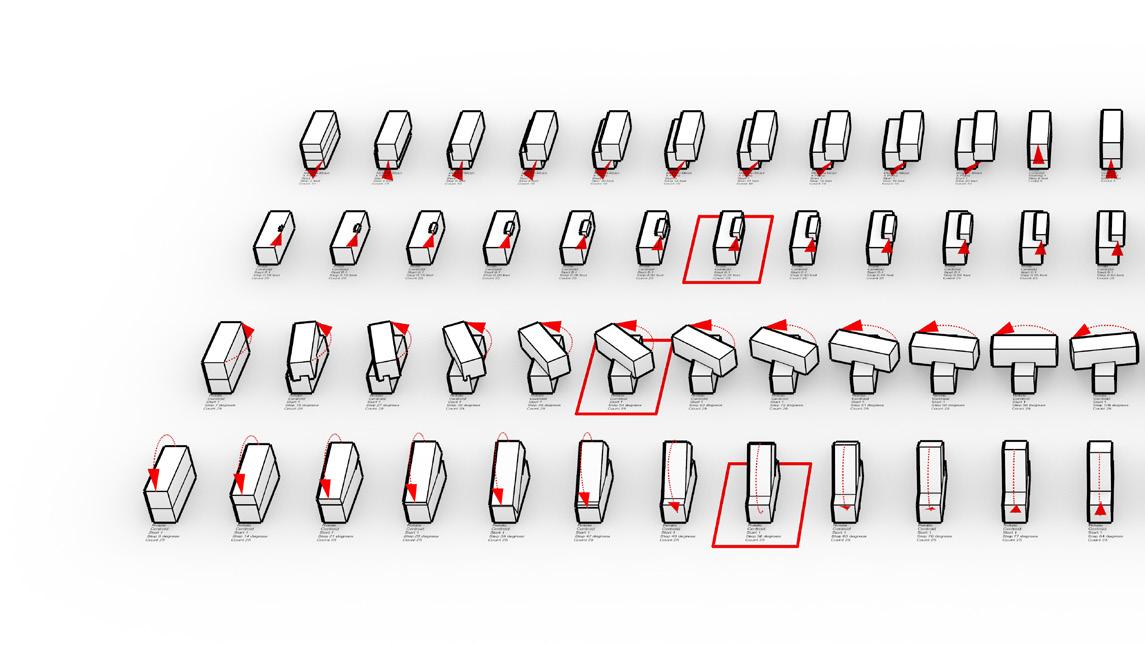
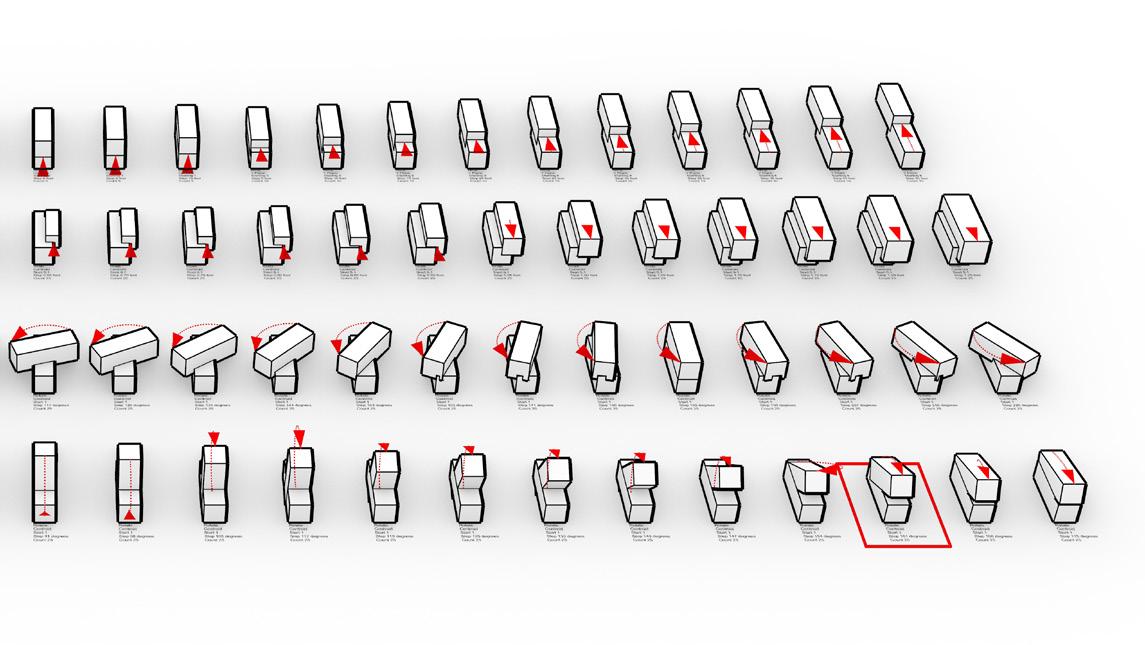
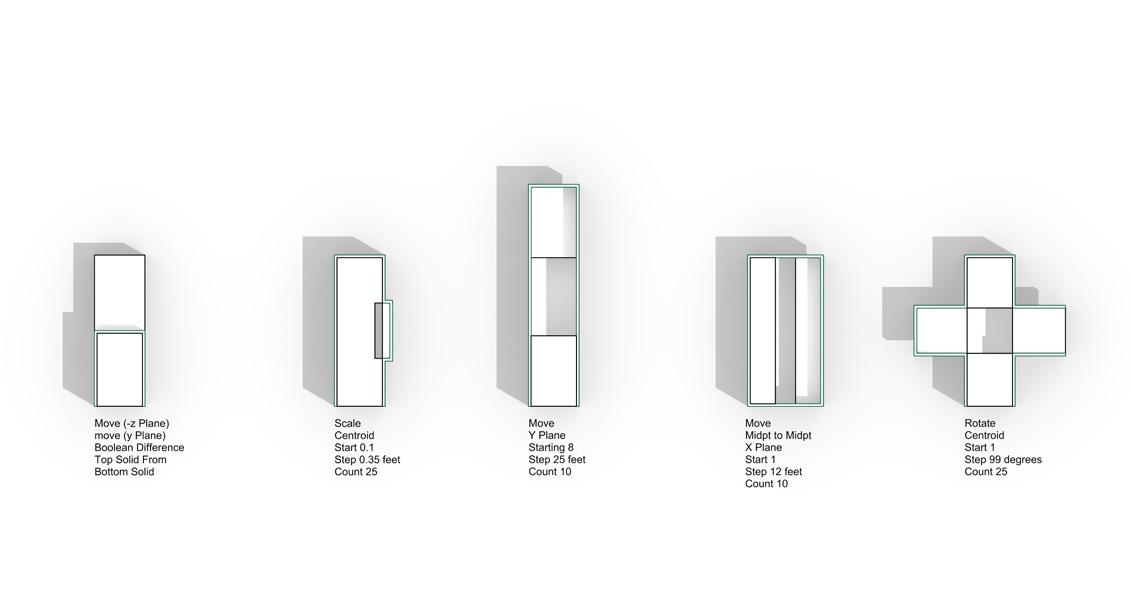
In this exercise, I used Grasshopper, a coding program embedded within Rhino, to create 100 different iterations of three commands. The four commands that I used were move, scale, and rotate (Y,Z plane), and rotate (X,Z plane). 25 iterations were created for each command. I found that Grasshopper was slightly difficult to work with due to my unfamiliarity with
the program. However, once I became more proficient with it, I was able to create different coding programs for each command. My favorite four from these 100 iterations are shown on the left, one of them being a scale iteration, one being a rotate (Y,Z), and the last two being rotate (X,Z). I chose these because they clearly represent the four different commands.
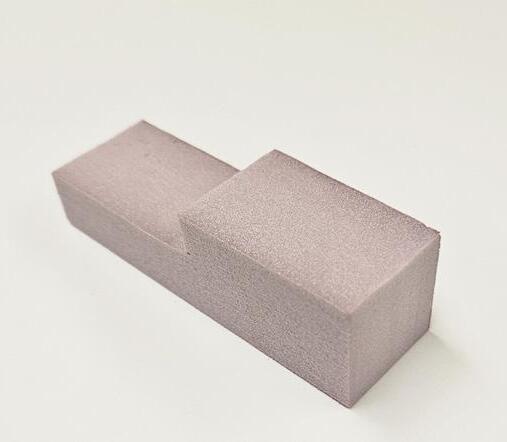
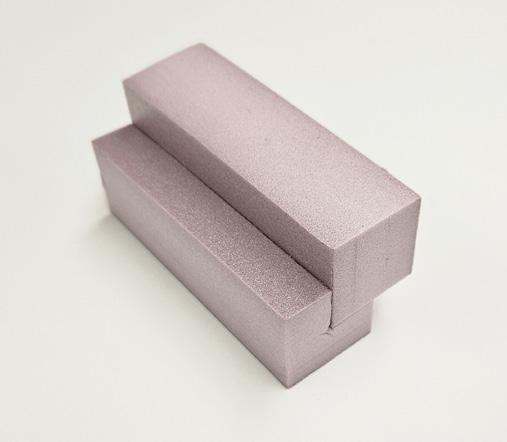
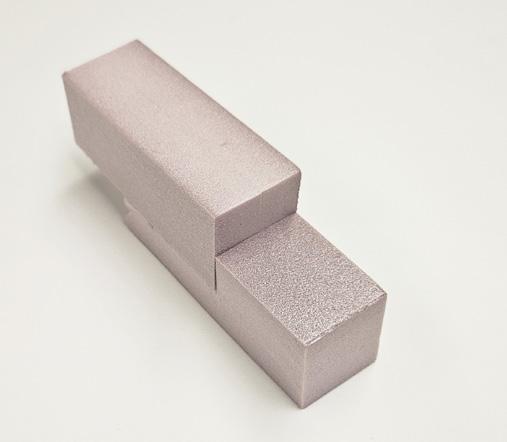
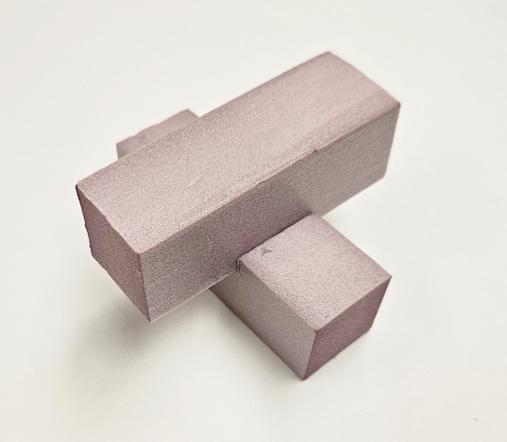
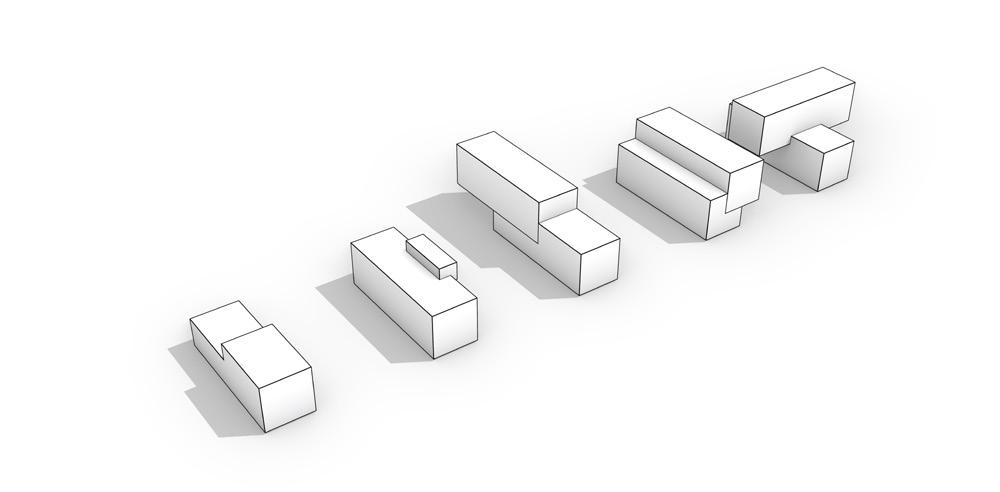
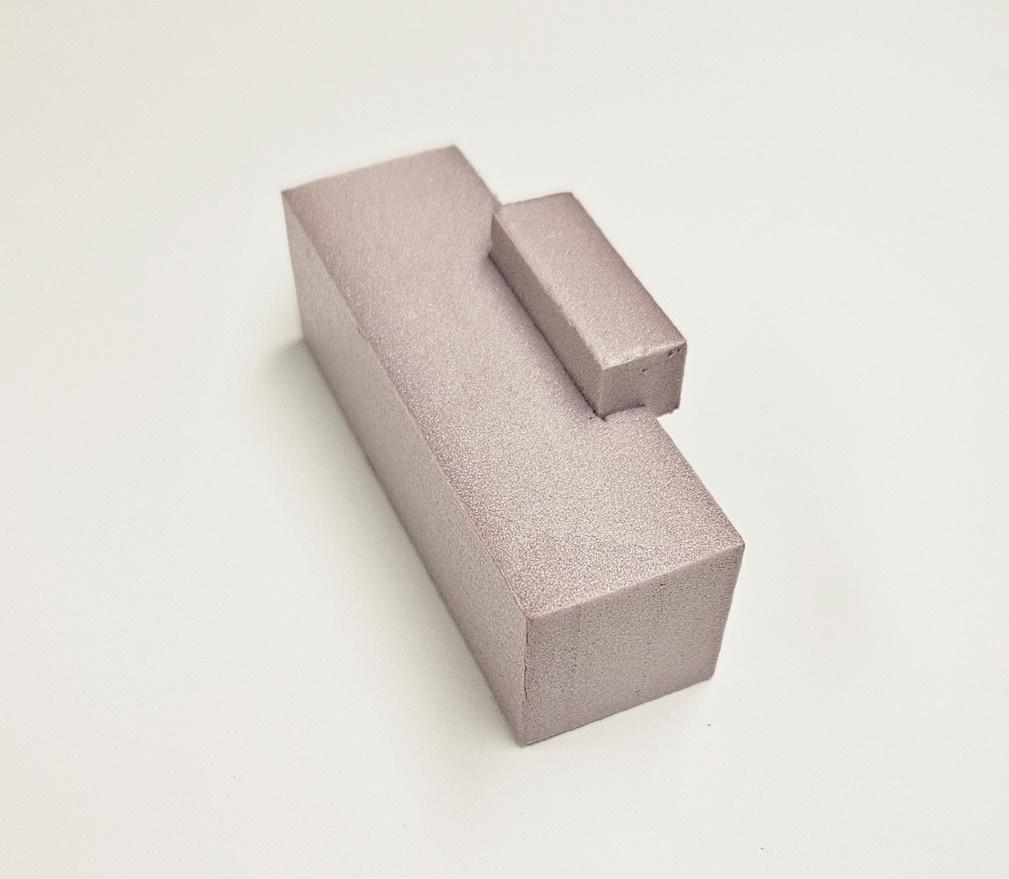
In this exercise, I chose four iterations from the Rules x 100 exercise, and one from the initial iteration series. These are my top five iterations from this module, which I then explored further using subtractive aggregations and physical massing models. Using the clipping plane in Rhino to view the insides of these shapes was very insightful, especially with
the use of the sun and how the shadows are created within these shapes. After these aggregations were completed, the next step was to model them using XPS 1” foam. I found it very difficult to work with this material because of its thickness, but it did provide me with a valuable learning experience. The models were created at a 1” = 20’-0” scale.


FABRICATION TIME
12 Hours Digitally Modeling
8 Hours Physically Modeling
MATERIALS
White Spray Paint
Acrylic Paint
1/48 Scale DS. Scale Figure
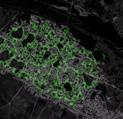
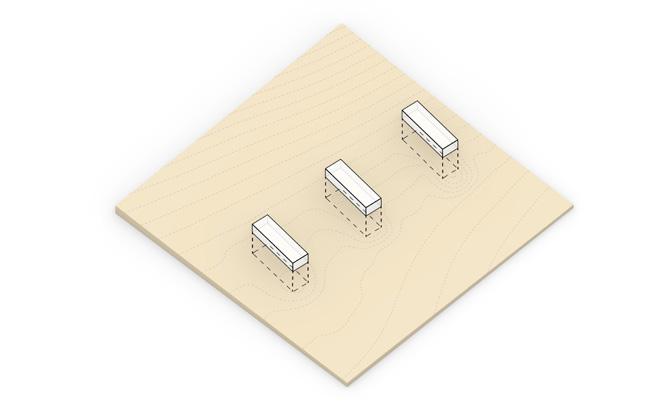
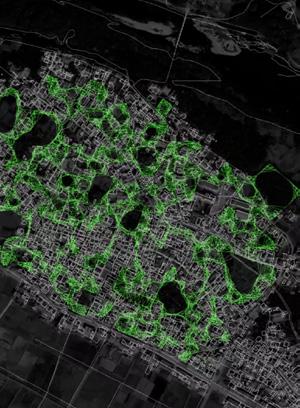
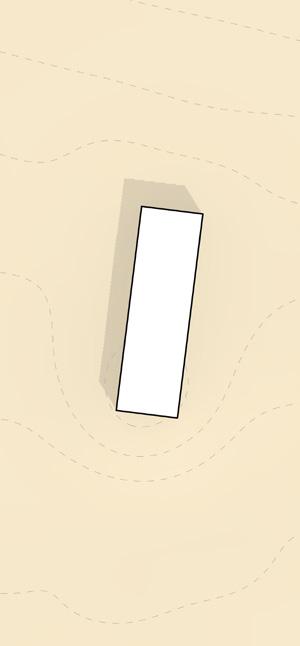
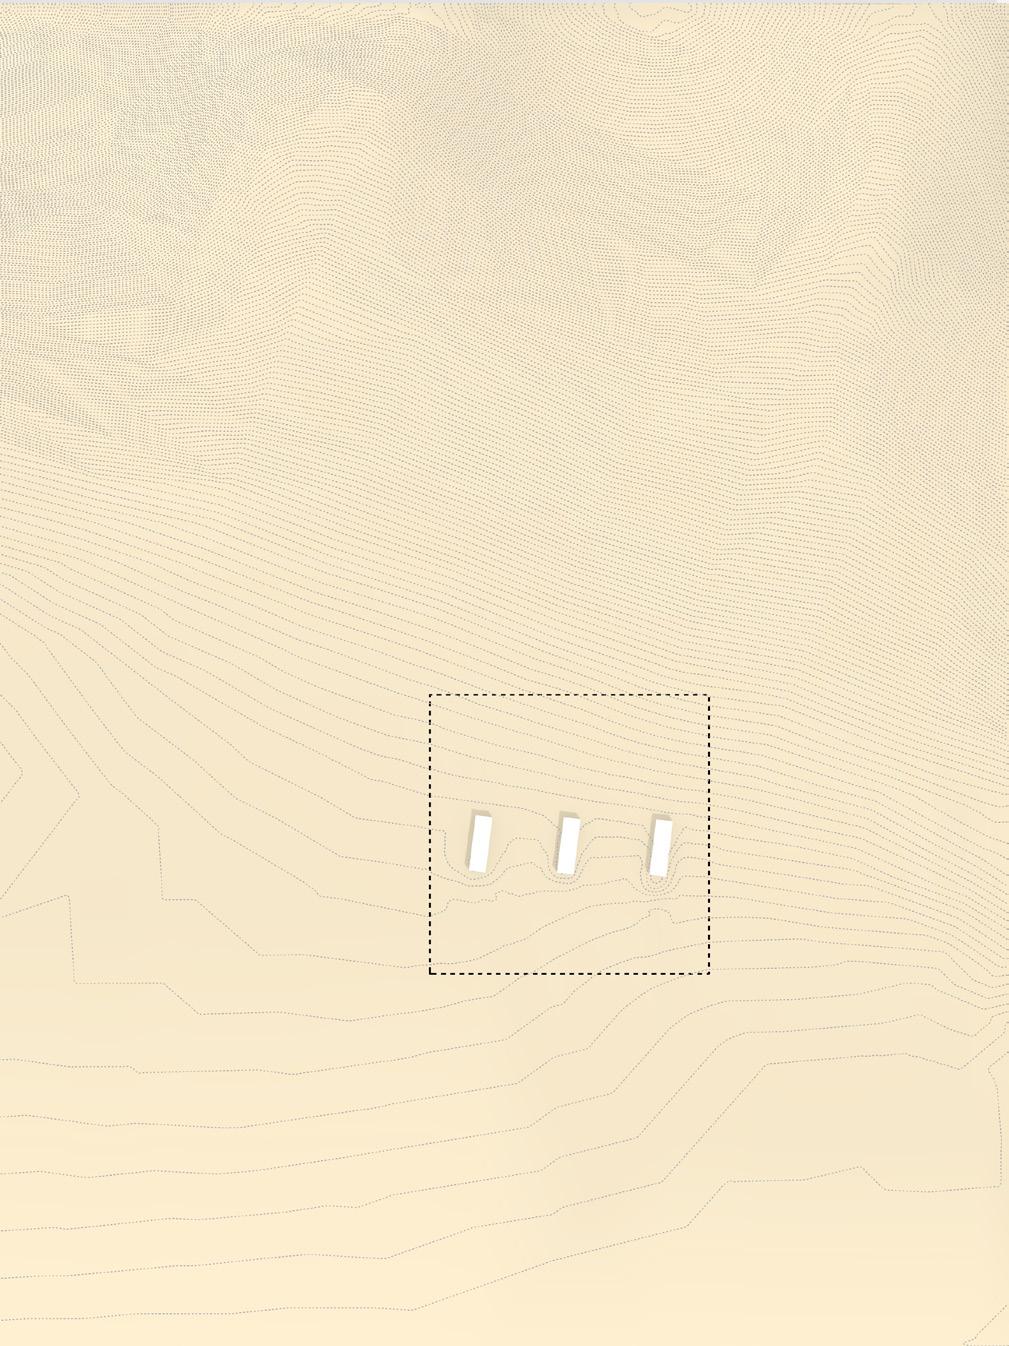
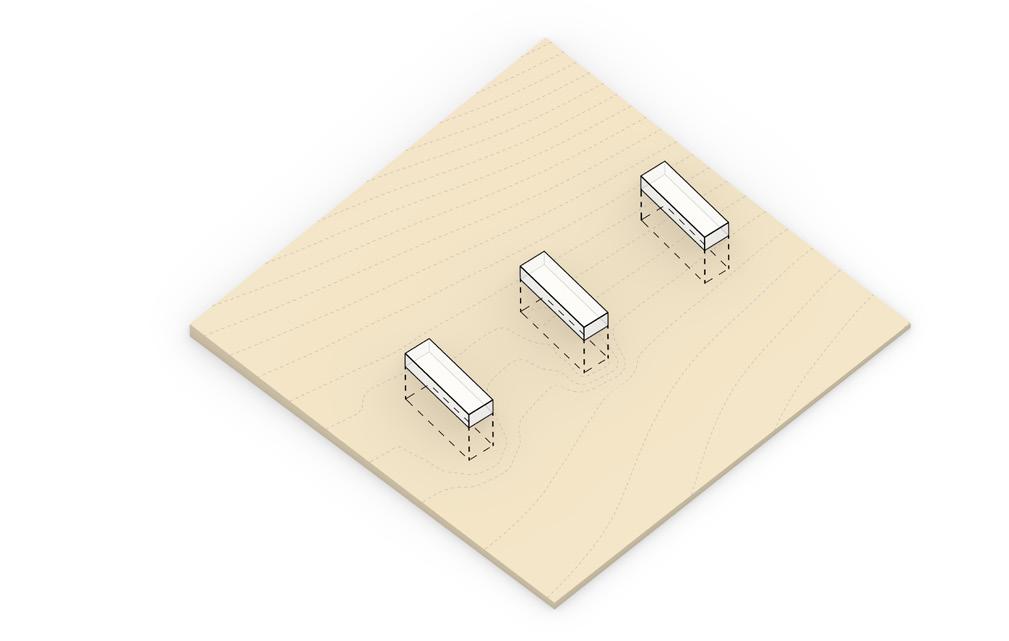
This module begins by exploring how to create a detailed topography in Rhino 8 from a site. I first outlined a section of the topography to manipulate in relation to three rectangular objects which are positioned perpendicular to the contour lines. After that section had been isolated, I performed three different ways of altering the topography and contour lines. The first was subtractive and removed
the part of the topography where the rectangles interacted. The next was an additive iteration, where the control points of the contour lines were used to change the topography. The last way was to alter the contour lines and then use the patch command to create a new topographic surface. I found that the last method was the most useful because it was the most adjustable and detailed to use.


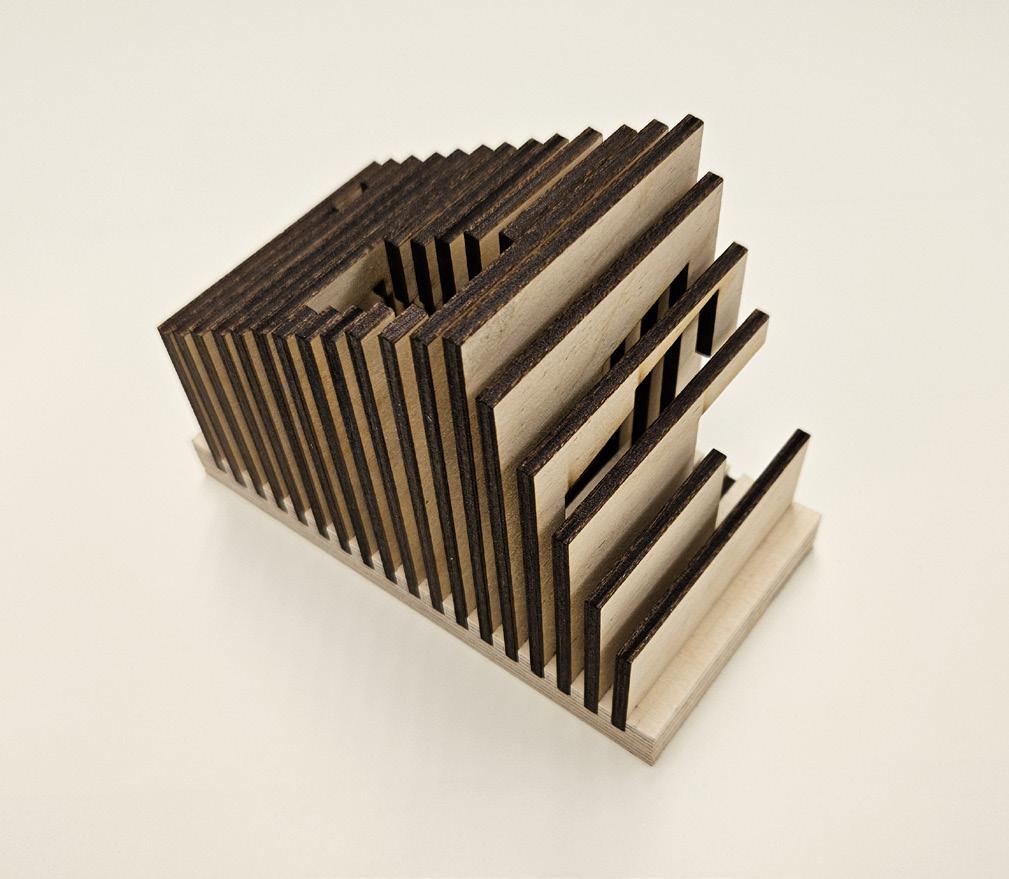
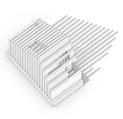
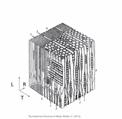
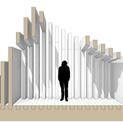
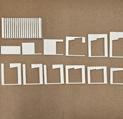
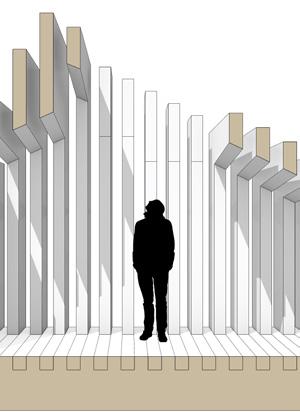
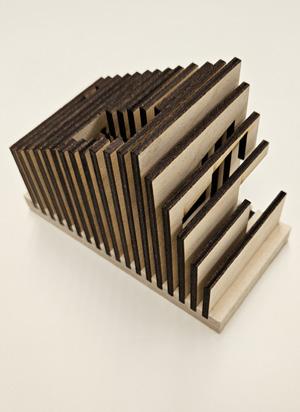
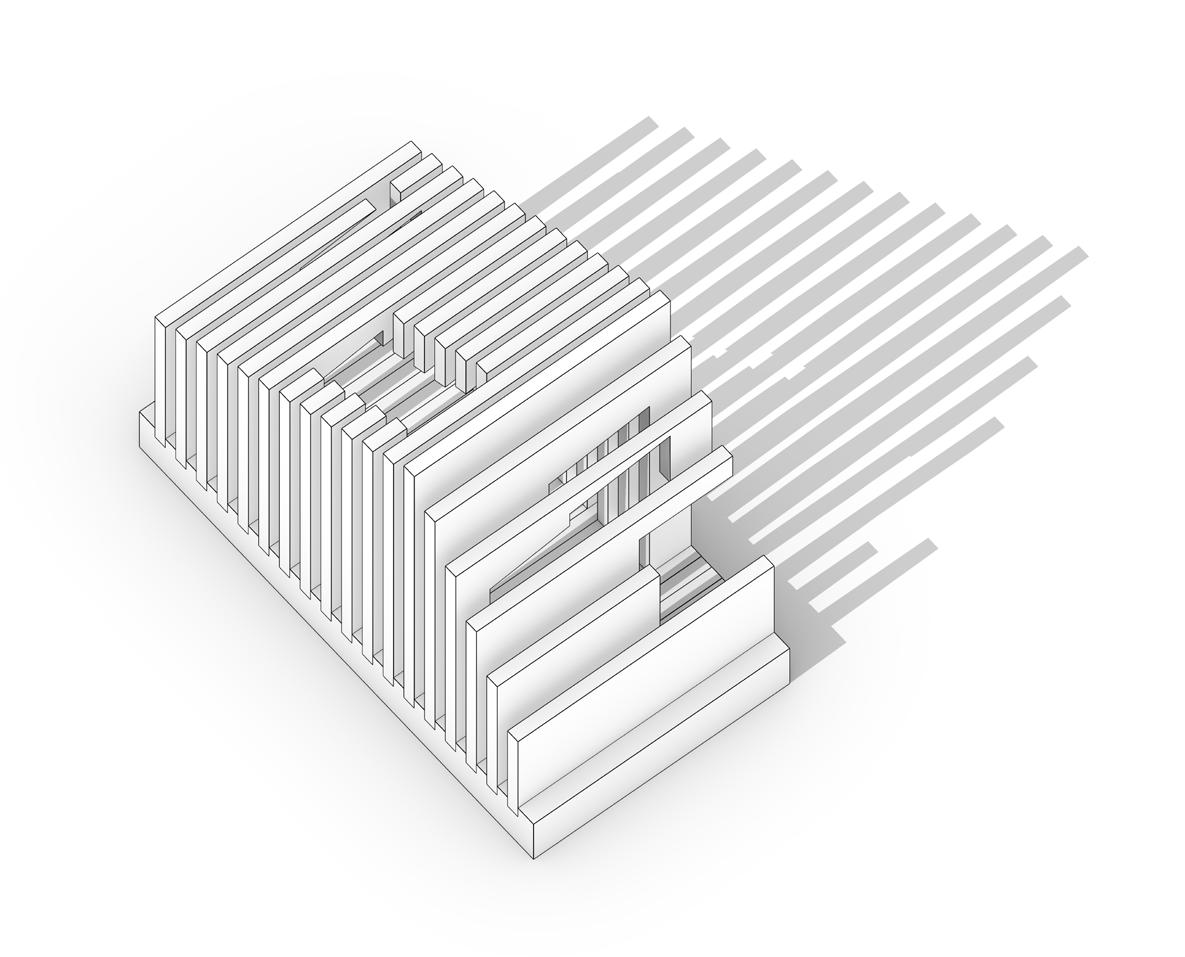
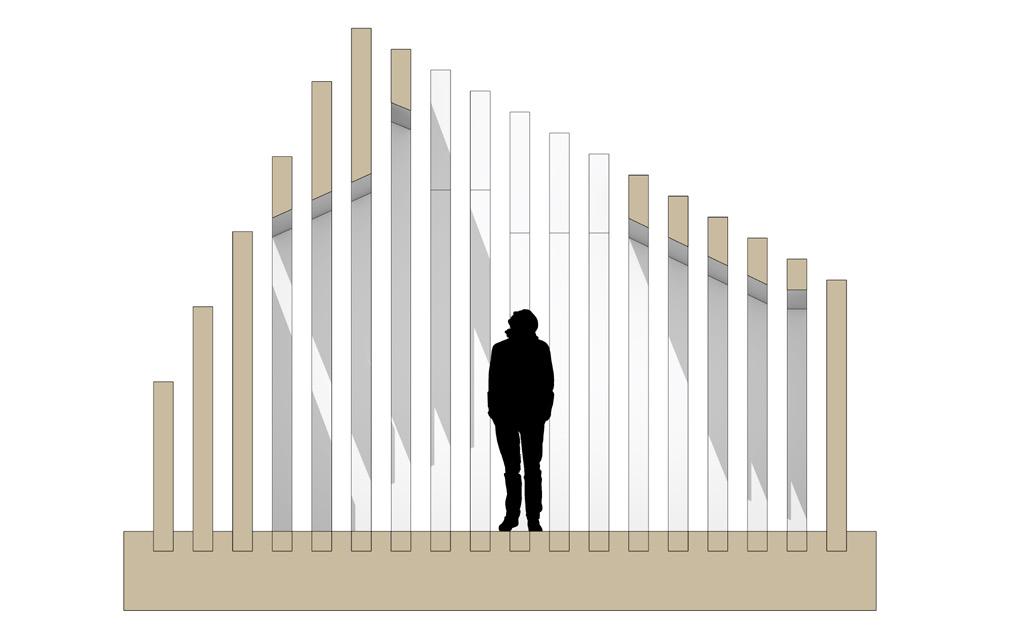
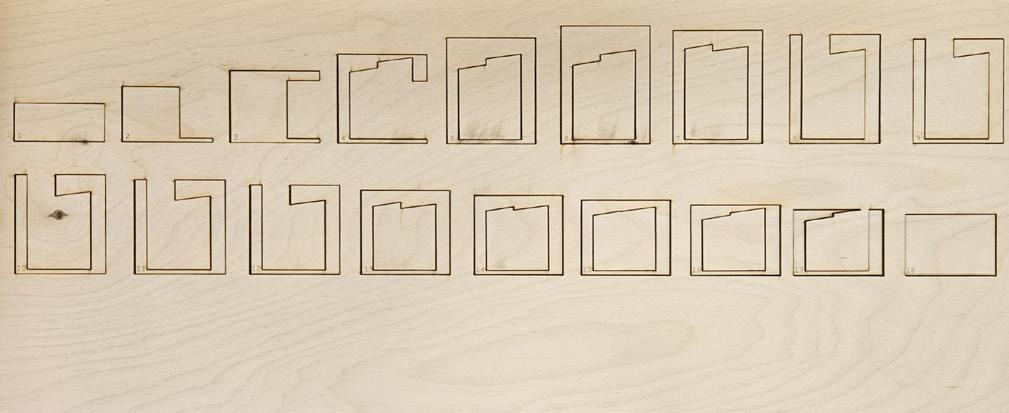
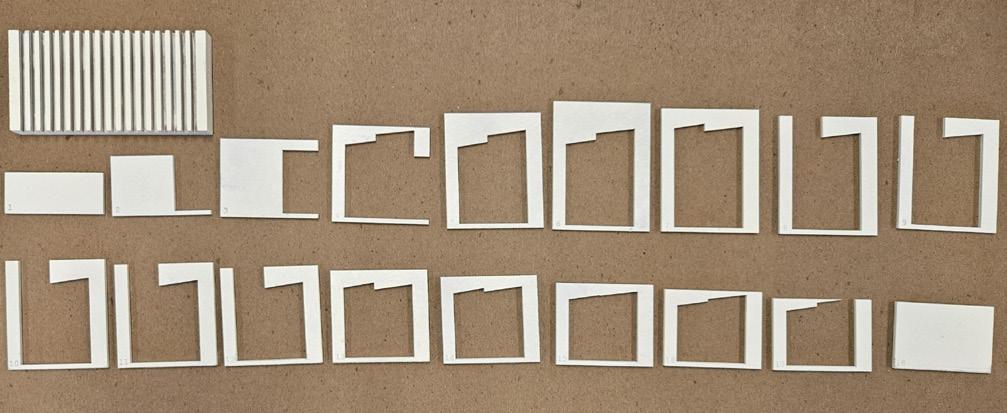
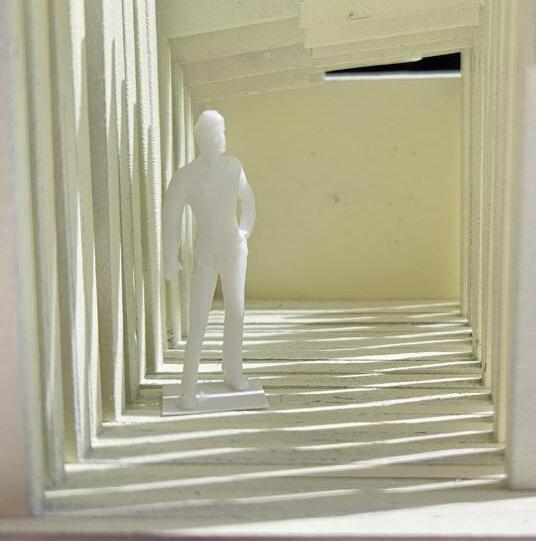
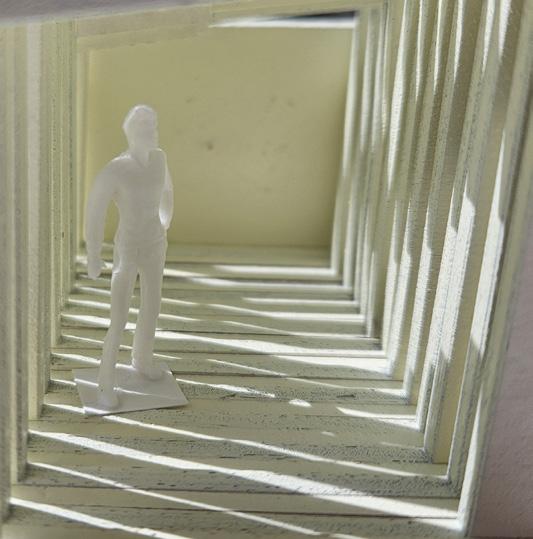
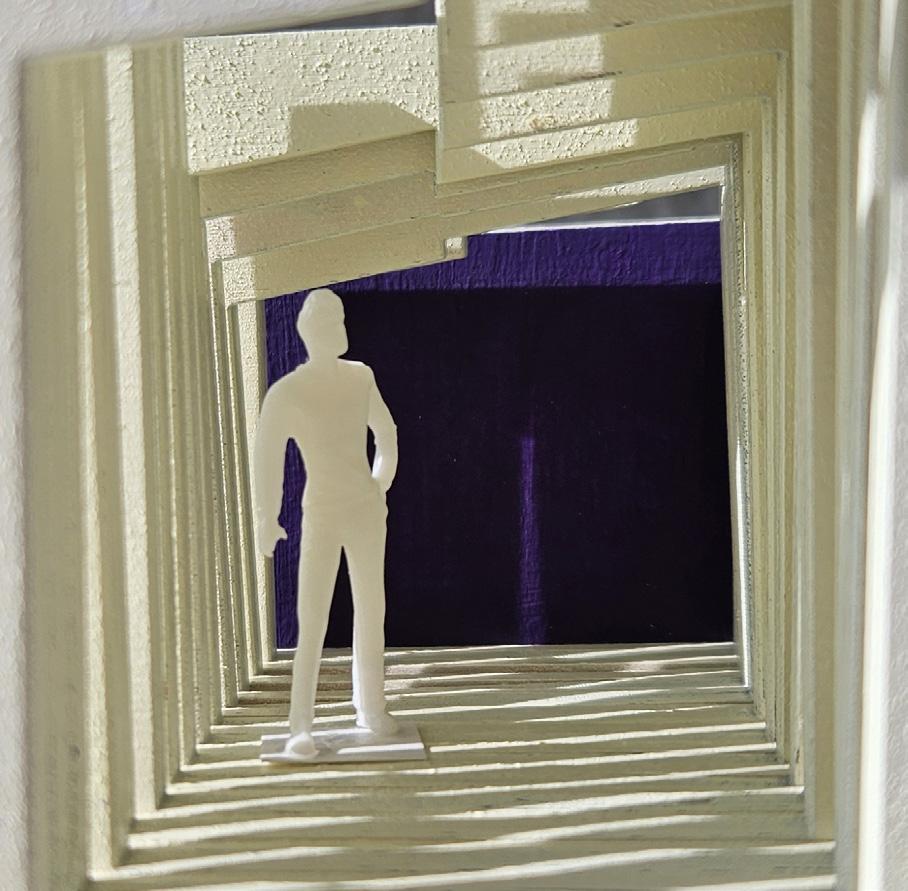
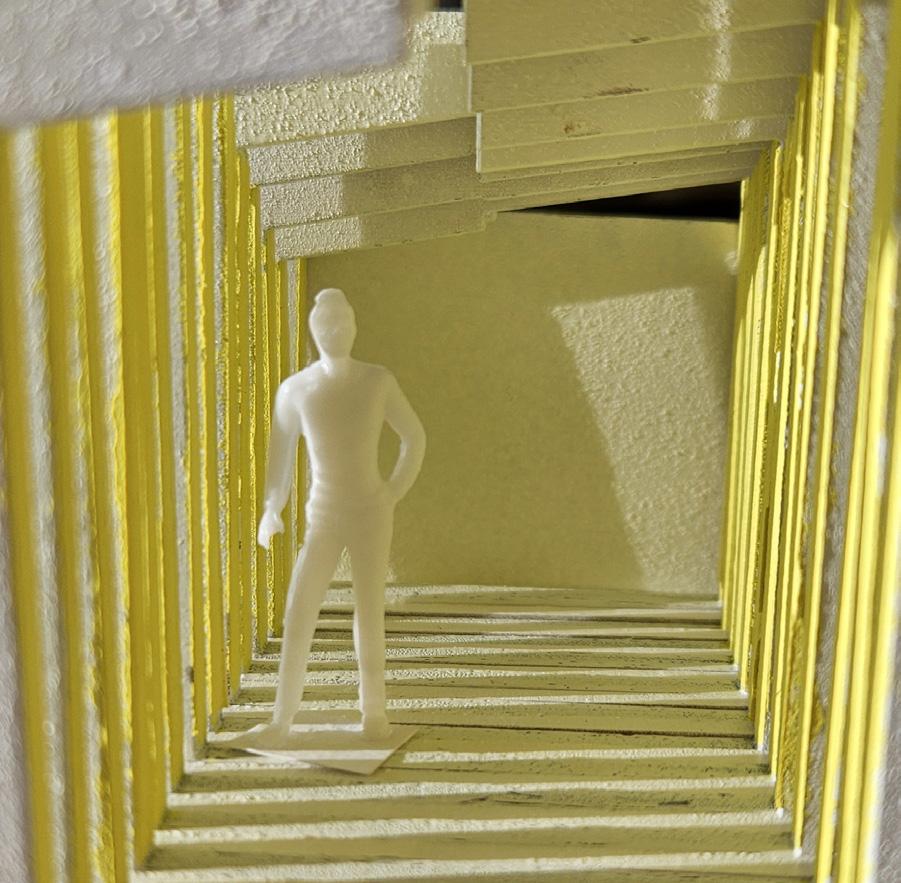
In this exercise, I explored how to create a digital model of frames through various boolean commands in Rhino, and then created a physical model through laser cutting. I found the digital part of this process to be a bit of a learning experience, although the steps were relatively straightforward. Creating a shape, running the contour command, and then extruding those curves is what allowed me to create the base frames of this model. The next step was to carve out various interior volumes using the
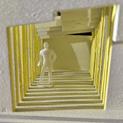
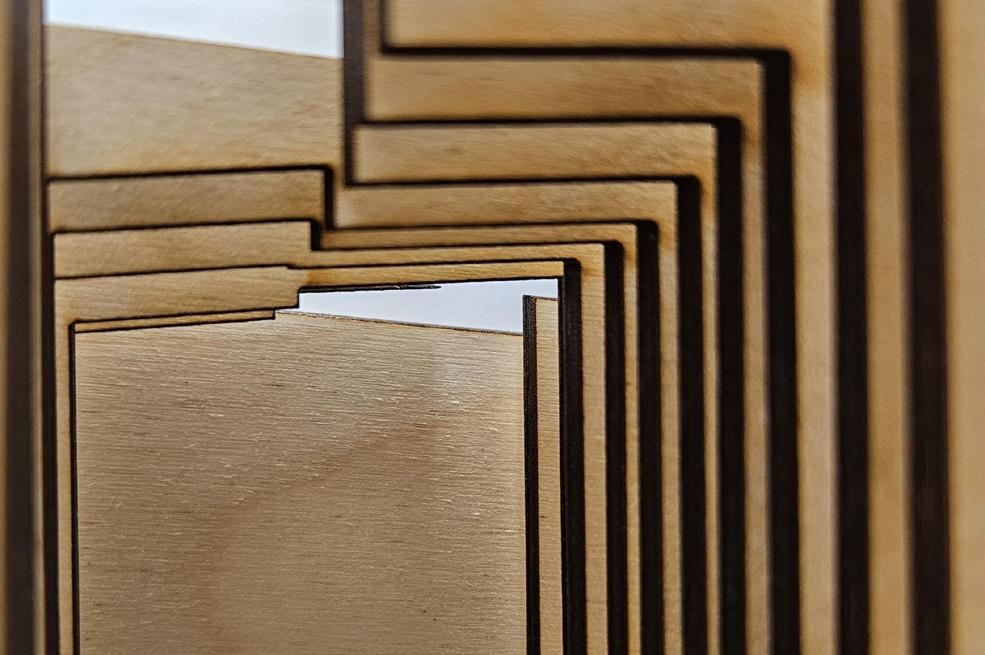
BooleanDifference command to make the space inhabitable. After the digital modeling process was complete, I used different rendering styles in Rhino to study how light travels through my model from different perspectives. Once the digital fabrication process was successfully finalized, I moved onto creating the physical model at a 1/4” scale. I had exported the frames from Rhino so that they could be laser cut using 1/8” Basswood. The base was created from sawing 16 notches out of a 1/2” piece of wood for the frames to slide into. The physical process was more time-consuming than it was difficult.


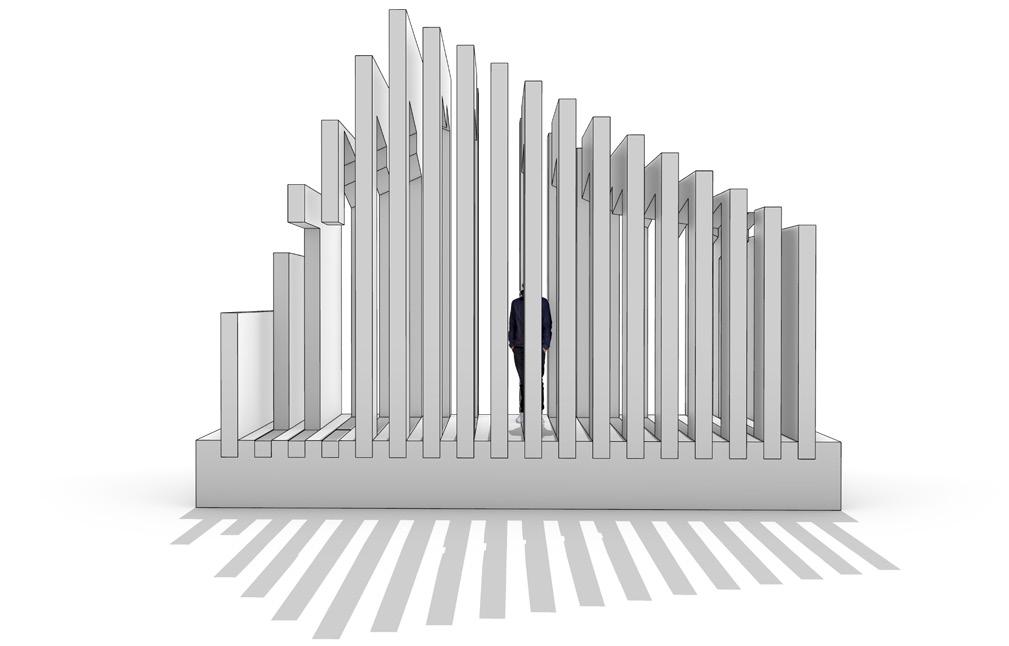
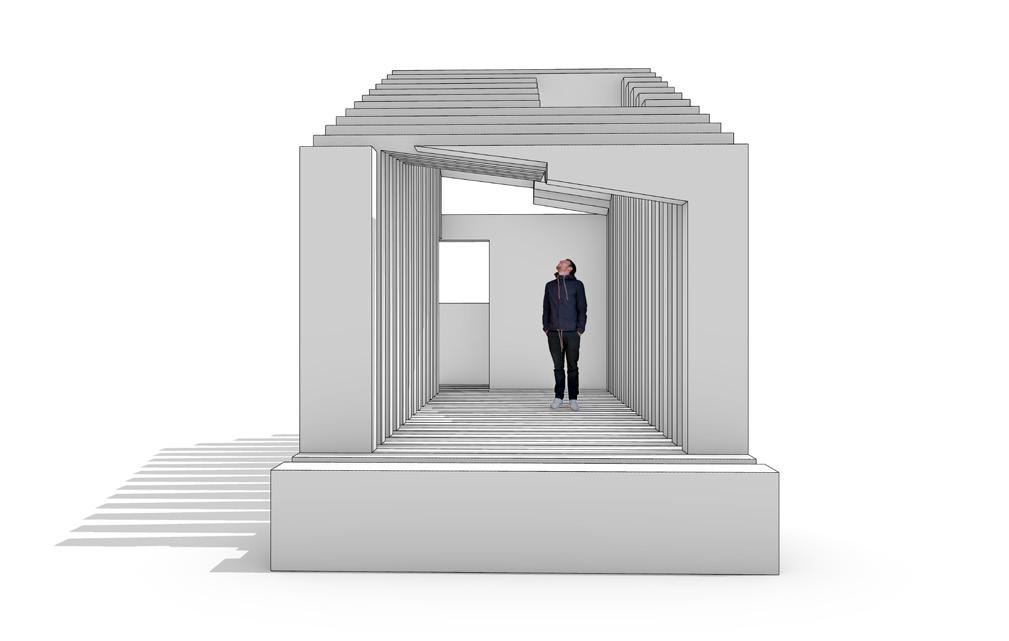


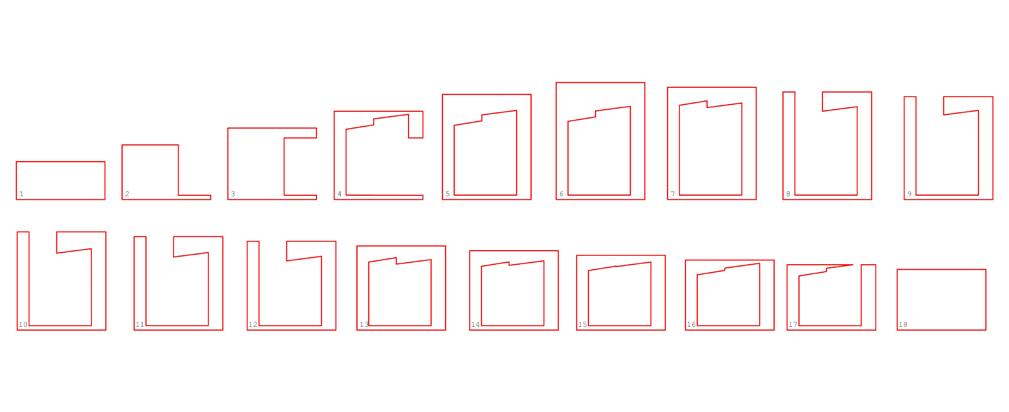
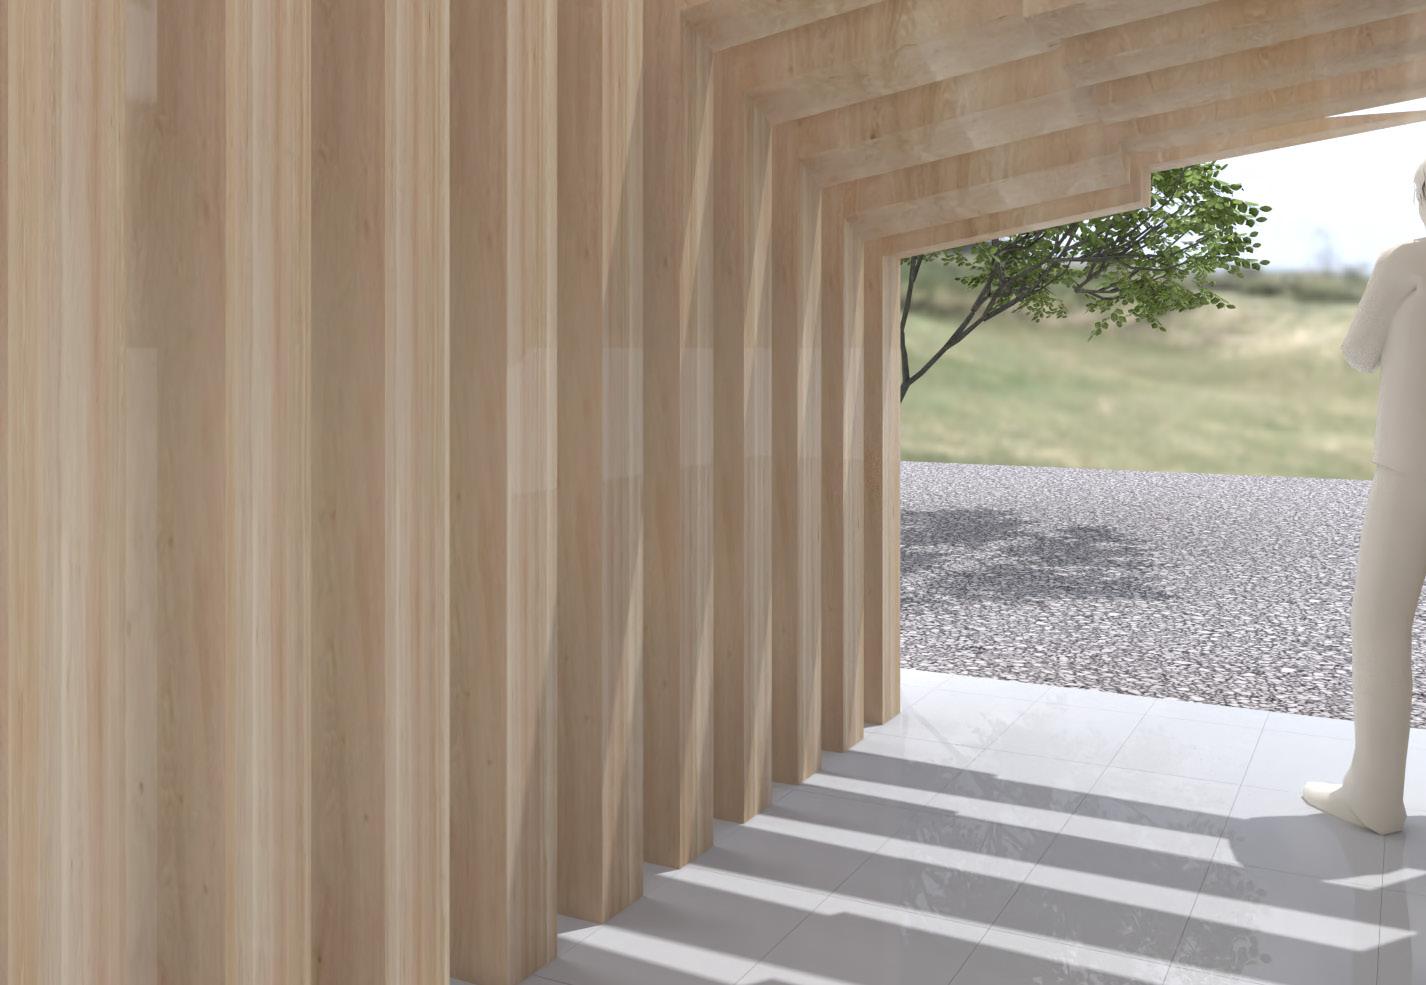
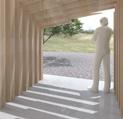
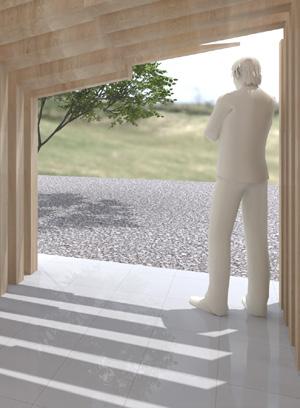
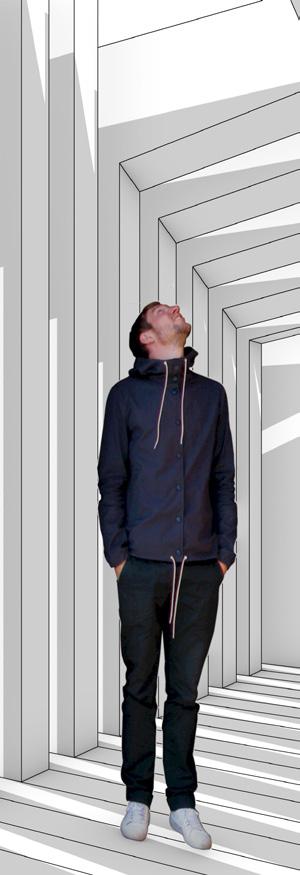
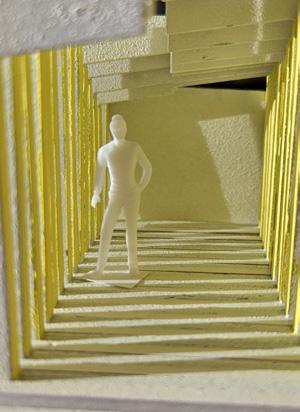
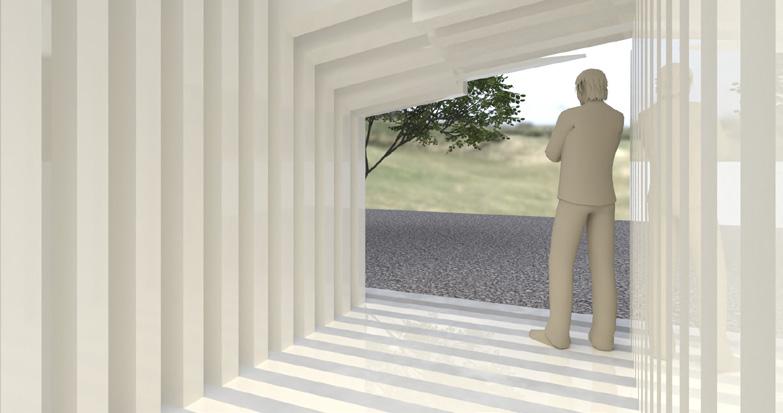
In this exercise, I learned to render my digital boolean frames model with a highlighted use of sunlight and textures through Rhino. In this rendering process, I learned about different types of lighting and how they affect the interior space of my model. I thought that the texturing part of the process was especially interesting in seeing how it affected the ambiance of the space itself and how the textures interacted with the sunlight. Another part of this process was bringing in 3D entourage models, such as the tree and the scale figure. Seeing the different
uses of the varying light renders was very intriguing in learning what style of light would be useful for a particular moment. Although tedious, the rendering process itself was quite rewarding. In terms of the framing of my renders, I wanted to focus on how the light came into the space and on the walls. For my physical model, I used two different colors to help create two distinct emotions within the space. The first color I used was purple, a cool colored hue, to try and evoke a soothing feeling within the space. The other color I used was a bright yellow, a warm color, to evoke a sense of energy in the space.
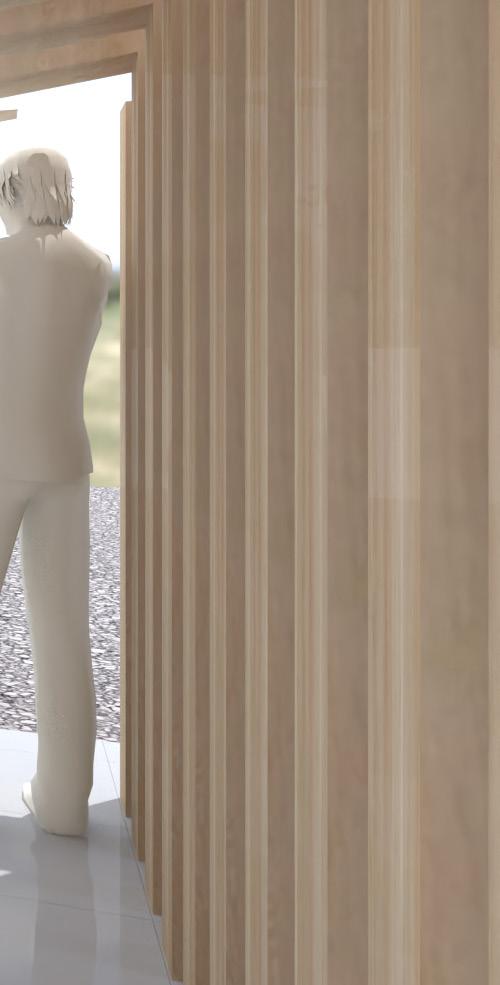
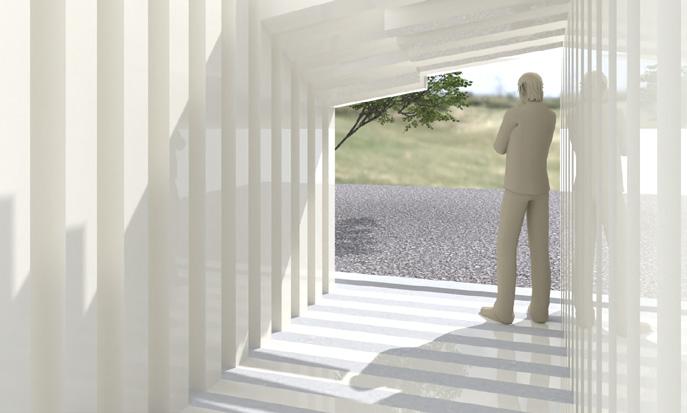

Images
Top Left: Sun & Material Render
Top Right: Sun Render
Lower Image: Skylight Render
Images Opposite Page
Top: Spot Light Render
Middle: Point Light Render
Lower: Rectangular Light Render




Week 02 Cory Olsen
Week 03 Nancy Cheng
Week 04 Dylan Wood
Week 05 Ignacio Lopez Buson
Week 06 Philip Speranza
Week 07 Siobhan Rockcastle
Throughout the term, we had the privilege of receiving six different guest lectures that covered a variety of topics relating to architecture. I found theses lectures to be interesting in their respective topics. I thought it was incredibly fortunate to hear from all these different professionals of their fields. Especially as a beginner in the architectural field, it was very inspiring to hear from the guest lecturers and to see all of the different avenues that one could choose to explore. One thing that I found as a constant between all the lecturers was the use of digital software, such as Revit and Rhino, to communicate the majority of their designs. Also, I noticed that each lecturer had their own unique style of
design, whether it was through the way that they chose to render their technical drawings and models or through the choice of software that they utilized. These guest lecturers helped me to understand more of the nuances of architecture and brought attention to some topics that I never would have sought out on my own. Another thing I found fascinating was that the same software and techniques that they are using in their professional work is the same that I am learning currently, which gives me insight into how far I can go with the development of my digital fabrication skills. As a current architecture student, I hope to have the opportunity to work with some of these lecturers in the future.

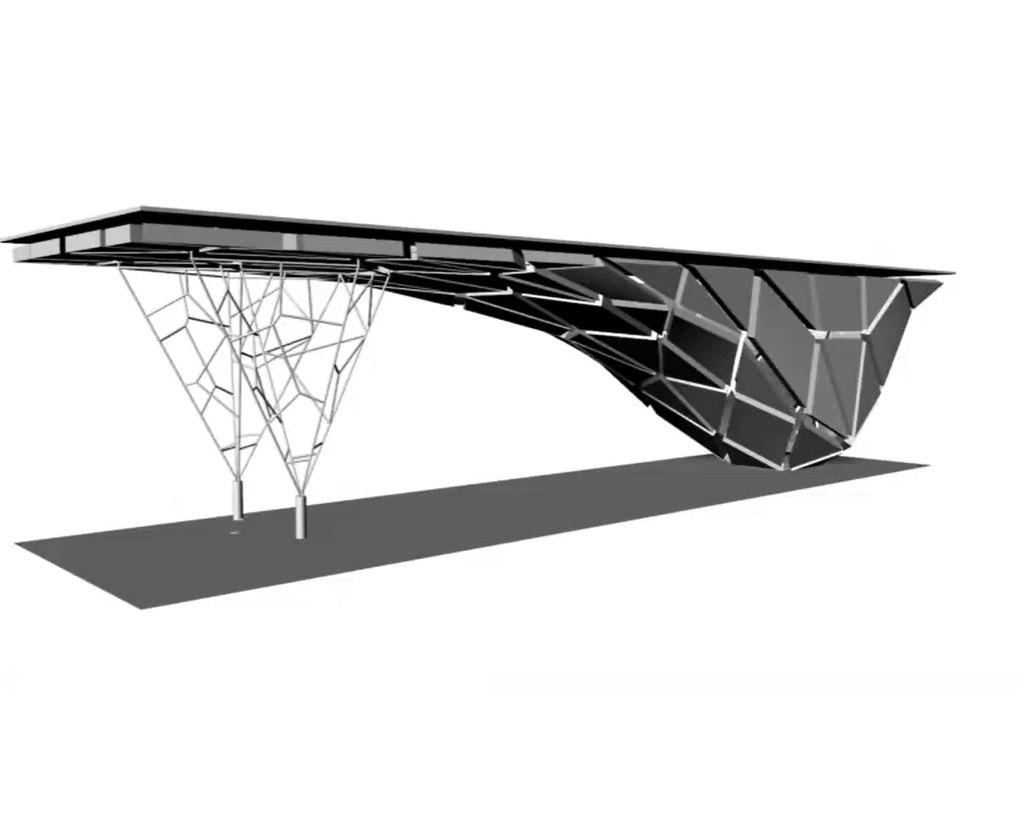
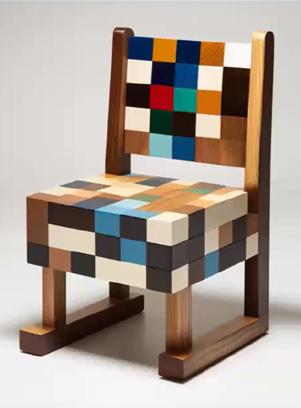
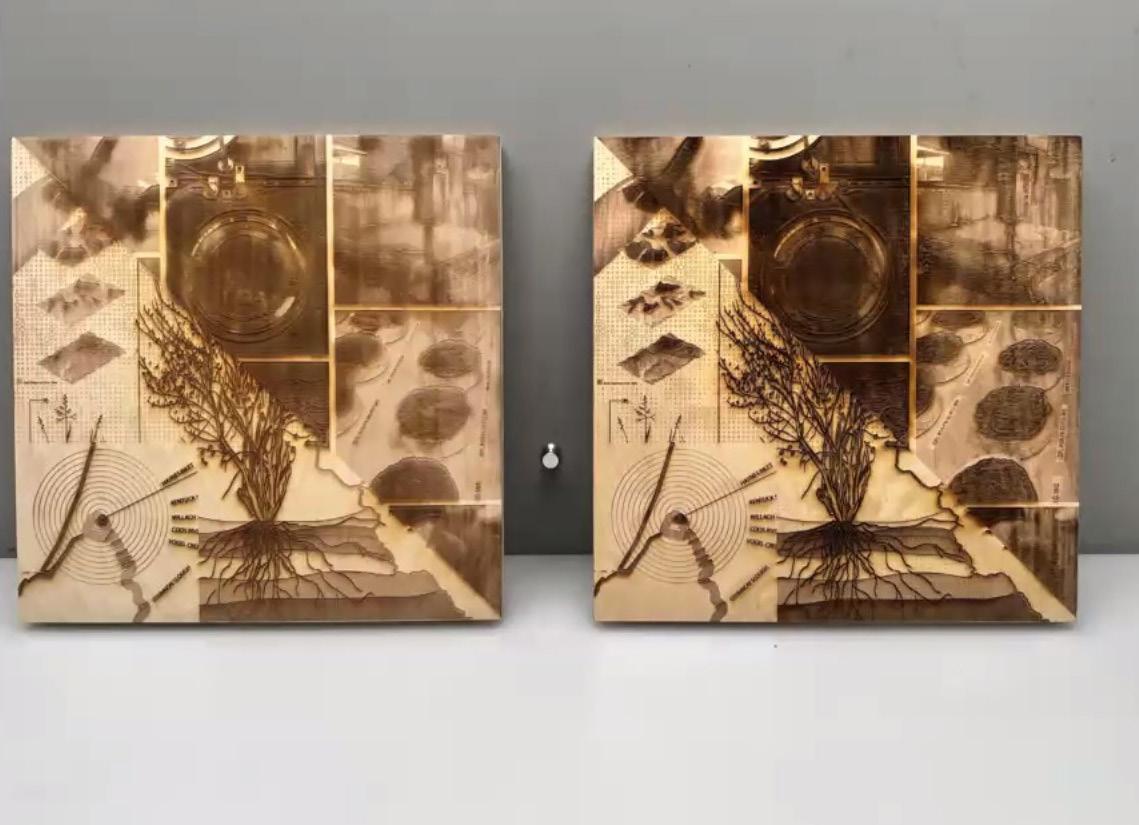
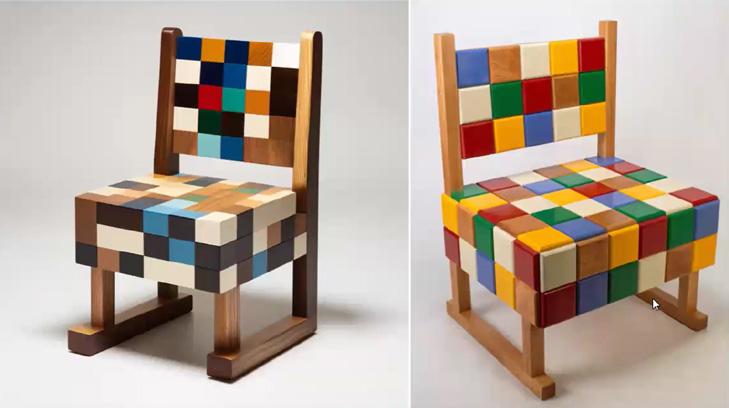
In Cory’s lecture about media and architecture, the three aspects that I found most interesting were using Grasshopper script to create a bench, how materials interact with laser etched text and graphics, and using generative AI as a tool for inspiration and then translating that inspiration into furniture. In the lecture, Cory went over how he converted a smooth shape into a lowpoly version using a Grasshopper script.
As a beginner in 3D modeling software, it was inspiring to see how professionals use
the same programs I’m using to create real-life models. The next aspect of Cory’s lecture that I found fascinating was how graphics could be translated onto wood material through laser etching. I thought it was interesting to see how different surface finishing on materials could affect the outcome of the laser etching, especially when it comes to the clarity of the graphics. The last aspect of the lecture that was interesting was how Cory used a generative AI called Midjourney to create different chairs inspired by certain artists. It was exciting to see how AI can be used as a tool in the design process.
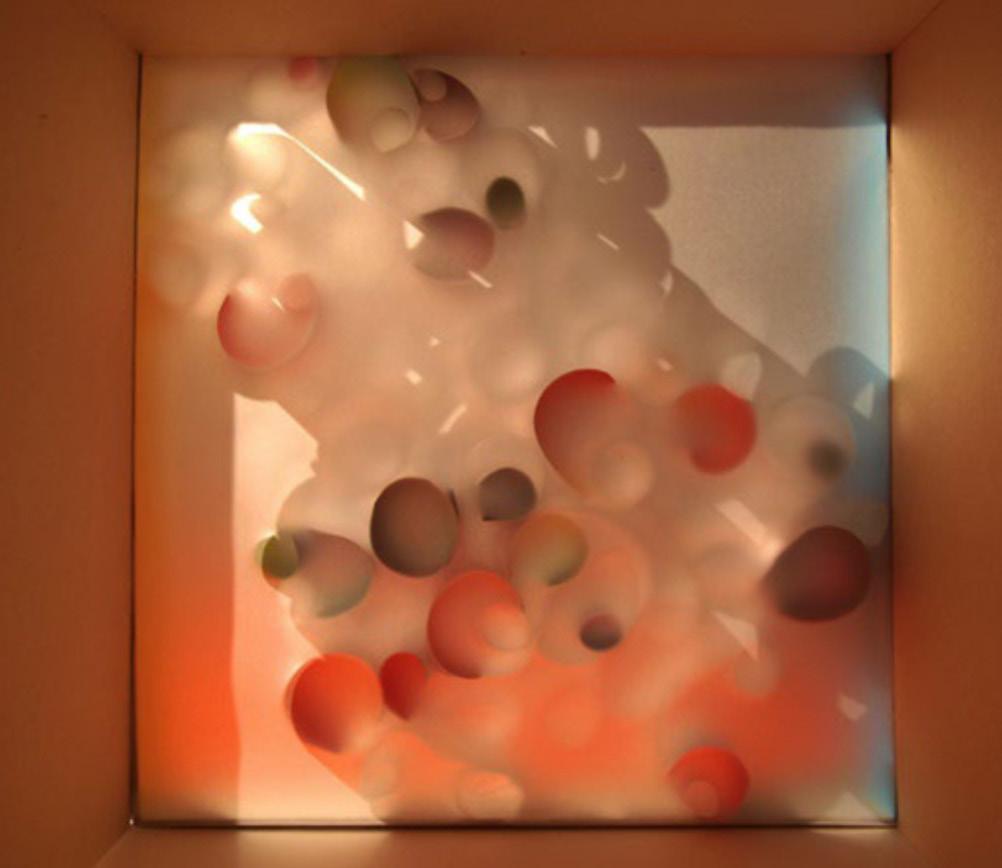
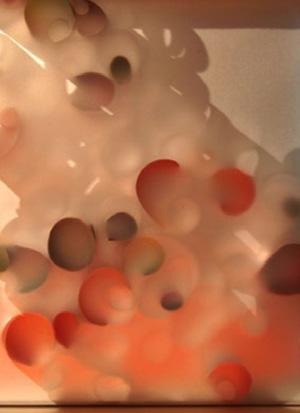
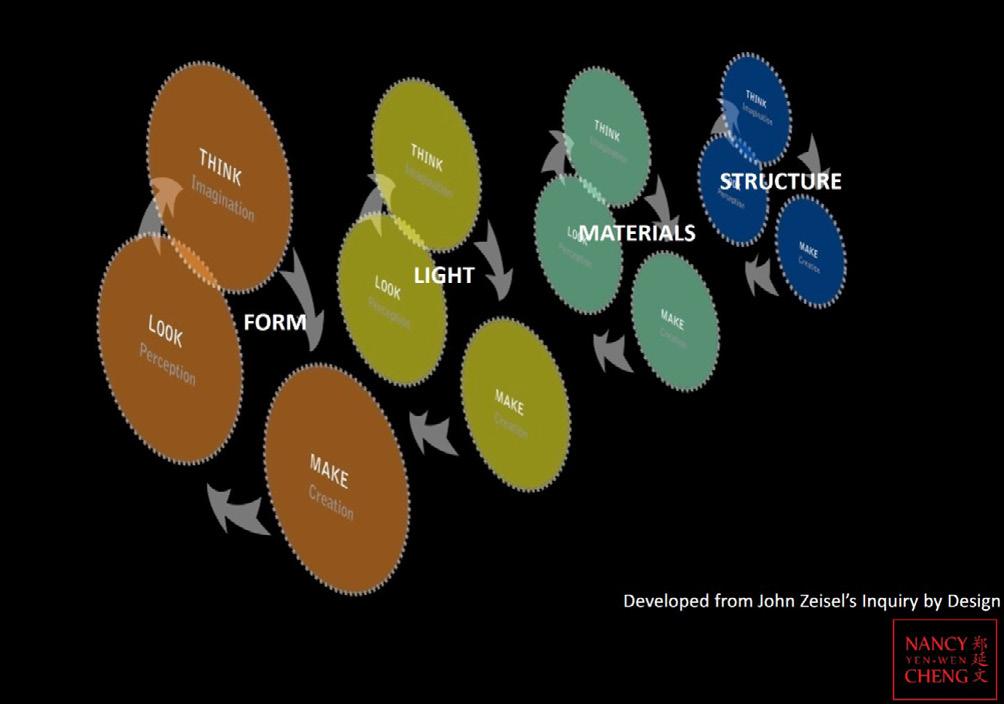
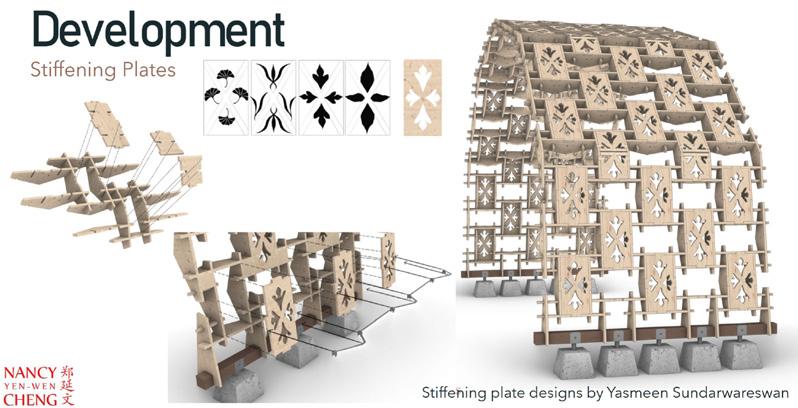
Nancy’s lecture explored how to shape light with cut and folded surfaces, as well as how to build for the circular economy. The first aspect of the lecture that I found interesting was how the use of light and color can change based on how light affects the bouncing of color. It was interesting to see how different colors were bounced around based on the season, even though the panel remained the same. The next aspect that I found interesting was the idea of iterative development through considerations being a multi-step process,
and is not as linear as one may think. I thought that it was a compelling way to treat the design process and to see just how many steps are involved, especially for iterative design. The last aspect of Nancy’s lecture that I found interesting was how architecture can be created to be reusable. Nancy addresses the growing problem of demolition, and how re-usable design can be a solution to this problem. She showcases a wooden arch that is able to be deconstructed, rebuilt, and made from limited materials. I thought it was very intriguing how we can create reusable and sustainable structures.

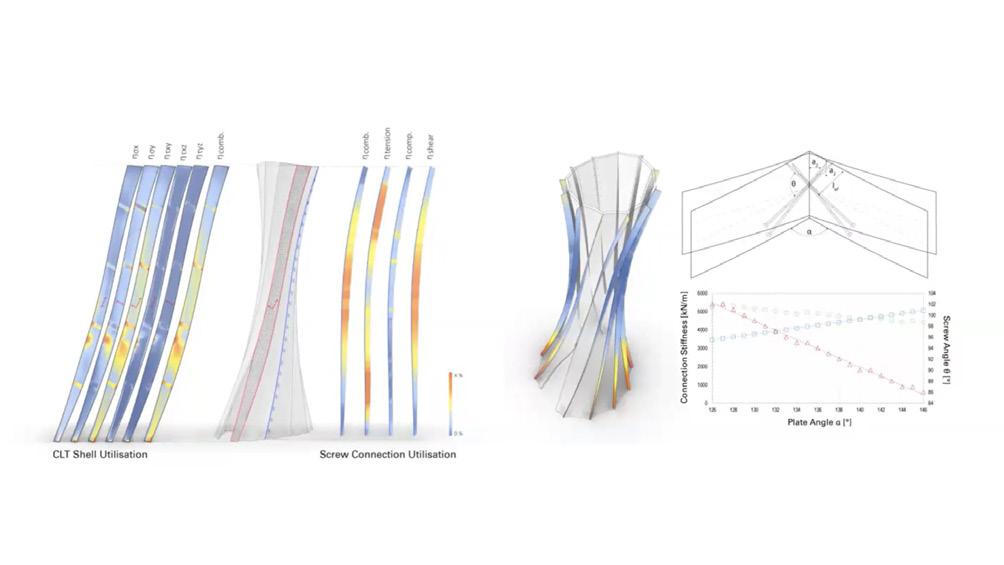
In Dylan’s lecture about building material intelligence, I found three certain aspects to be particularly interesting. The first aspect is about how some materials have inherent programming in terms of how it behaves, and how we can use those behaviors to our advantage. Dylan explains how this property in which it can change its shape based on moisture levels. I found this interesting because wood is naturally curvy and has to go through a flattening process to be used normally. The next intriguing aspect of his lecture was how
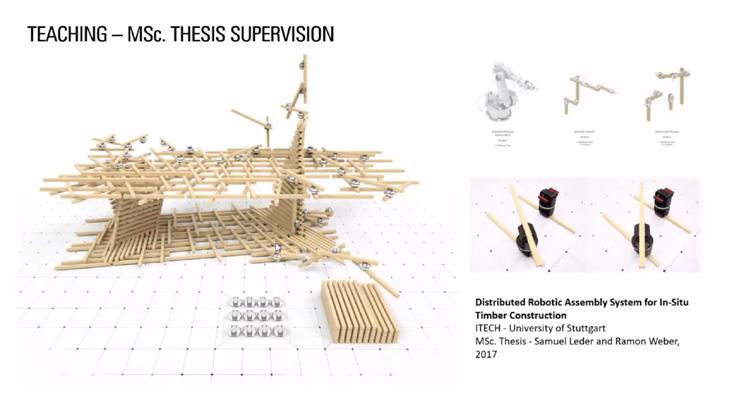
Dylan used this property to its fullest when designing a cylindrical column out of wood. He explains how the design team analyzed the structural integrity of the curved model and how wood factors into that analysis. This was interesting to me because it showed how shapes developed in a 3D modeling software can then be analyzed to predict how it would behave structurally. The last aspect of Dylan’s lecture that was fascinating to me was a project in which small robots were used to create large structures. In this project, he goes over how the small robots act like joints with very little infrastructure.
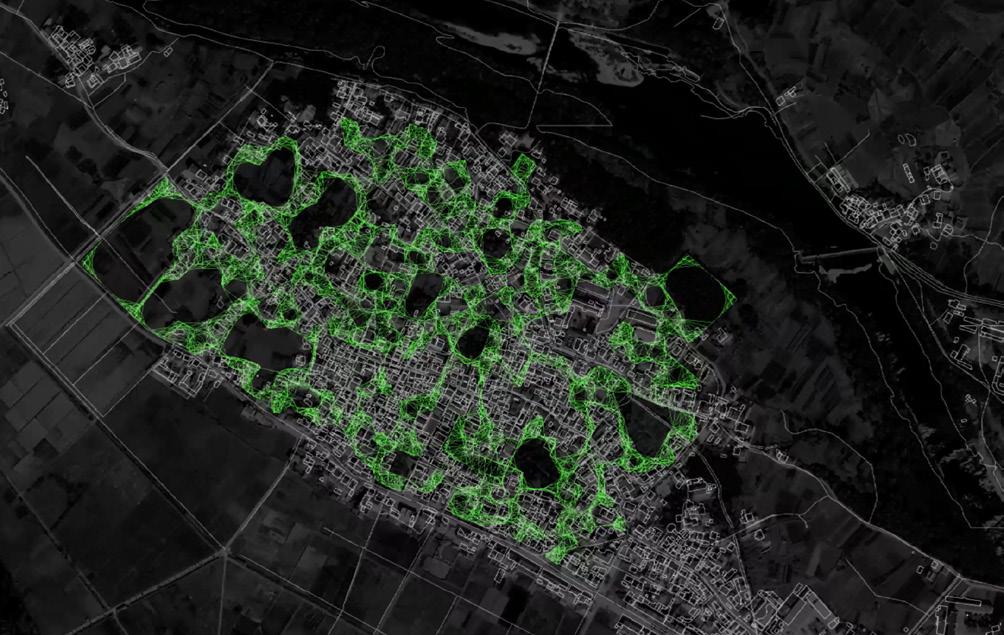
Buson’s lecture explored digital technologies in landscape architecture and the uses of digital modeling software. There were three distinctive aspects of his lecture that I found intriguing. The first was about the use of drones to collect data for topographic analysis and modeling. Buson explores how once the data has been collected, Grasshopper can be used to run different analyses on the chosen site to better understand the territory and how the environment works in that area. I thought that this was interesting because
of how many applications Grasshopper has that I was not aware of, especially in the perspective of using it to understand topographic conditions better. The next aspect that I found fascinating was using physical sand models of the site to create digital topography models which can then by analyzed by Grasshopper. The last part of the lecture that was interesting was Buson’s work creating and designing the seating outside of Hayward Field. I found it interesting how much research and detail went into the design of the bench, especially how Buson computed the perfect angle for sitting.


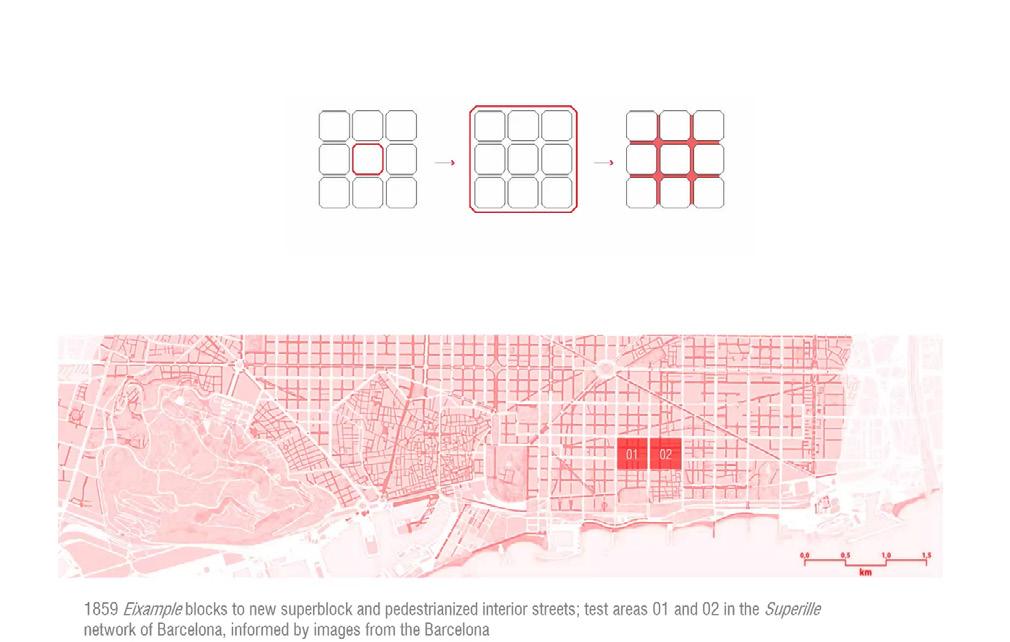
In Speranza’s lecture on fine-grained urbanism with data driven and design phenomena, I noticed that there were three specific points which stood out to me. The first was about how Speranza created a way to measure social cohesion and how to make outdoor spaces more pedestrian friendly. I thought that this aspect was particularly relevant because of how important it is to have walkable and accessible spaces in cities. The next point that I found intriguing was how Speranza used the Ladybug tool within
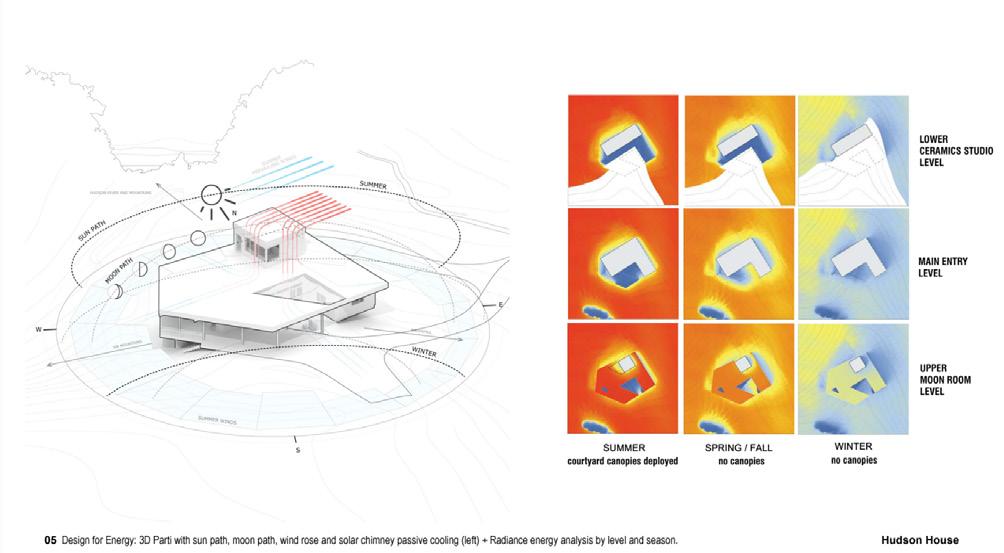
Rhino to simulate the sun and wind path for each season and how it changes from floor to floor of the Hudson House project. I learned that this type of environmental analysis is very important when designing a building and can lead to ideas of how to combat the given conditions. The last point that I found interesting was how Speranza was able to collect data on air pollution around a school using custombuilt sensors. I thought that this analysis was a fascinating tool to use in urban ecological design studies, especially when seeing the data provided by the two sensors placed in separate locations.

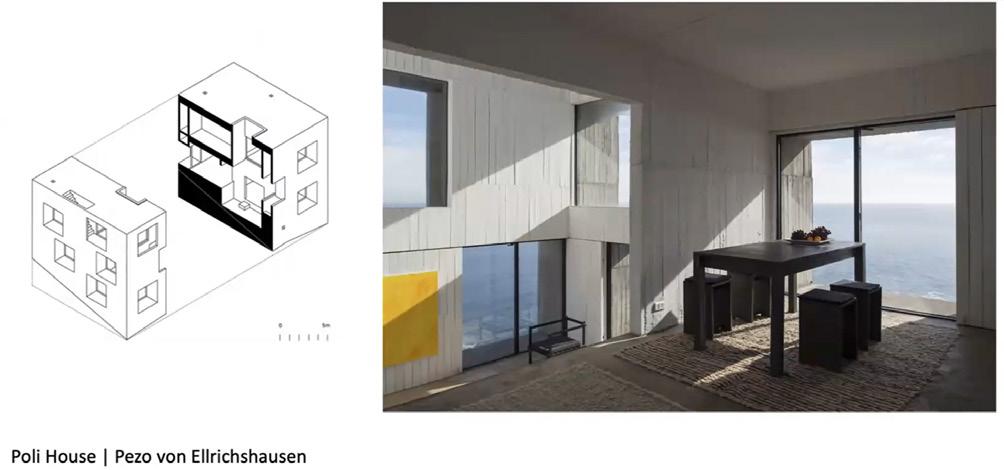
In Rockcastle’s lecture that explored the various nuances of modeling light, I found three certain aspects to be of particular interest. The first of these aspects is about filtering light from the side of the building. Rockcastle uses the example of the Poli House to show how the thickening of facades helps to filter light in a more natural way. With the addition of intentional texturing, the light is shaped in beautiful rays that come into the space gently. The next aspect that I found interesting was using real-time renderings from Revit
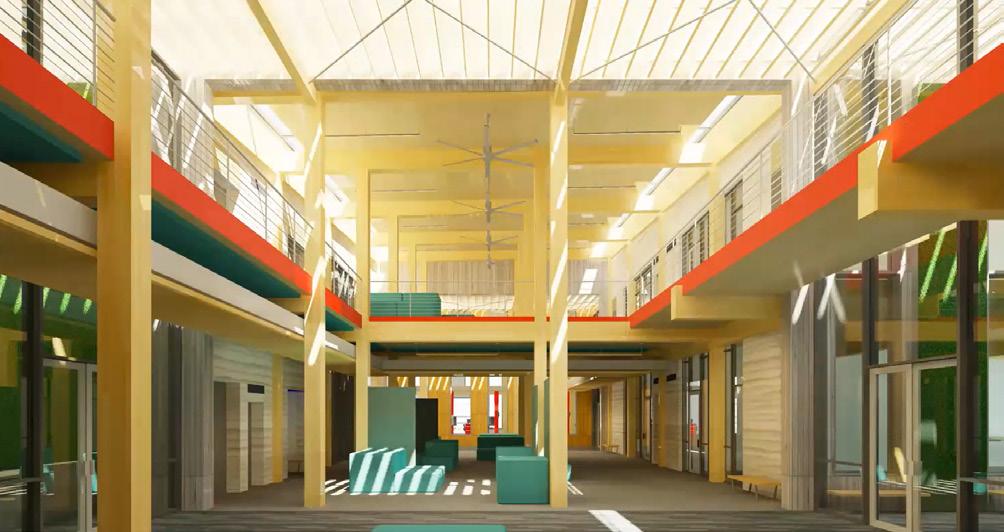
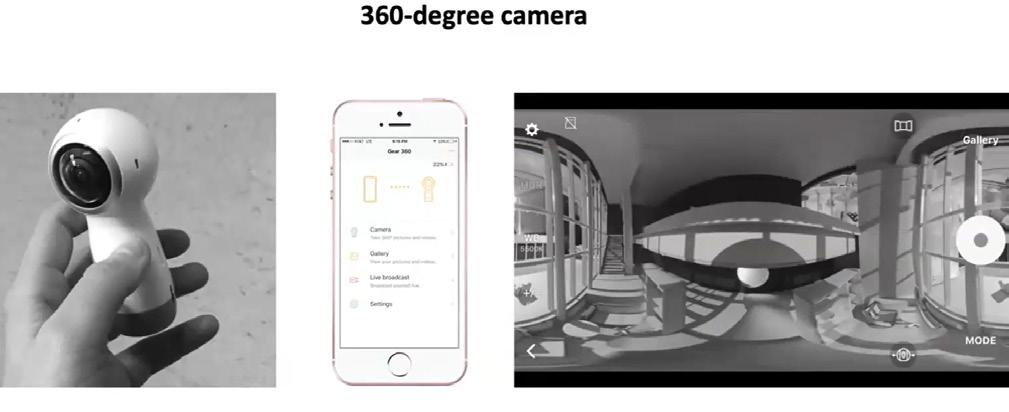
to help understand the ambiance of the space. Looking at a project from a terminal studio as an example, the student used the Climate Studio rendering tool within Revit to showcase how the sun enters and interacts with the interior space. I found that this rendering tool seemed to be very realistic and insightful as to what the actual space would look like in person. The last point from Rockcastle’s lecture which I thought was intriguing was the use of a 360-degree camera in modeling. This camera is incredibly interesting in terms of how to study the light and how it performs within the space.
Management Schedule
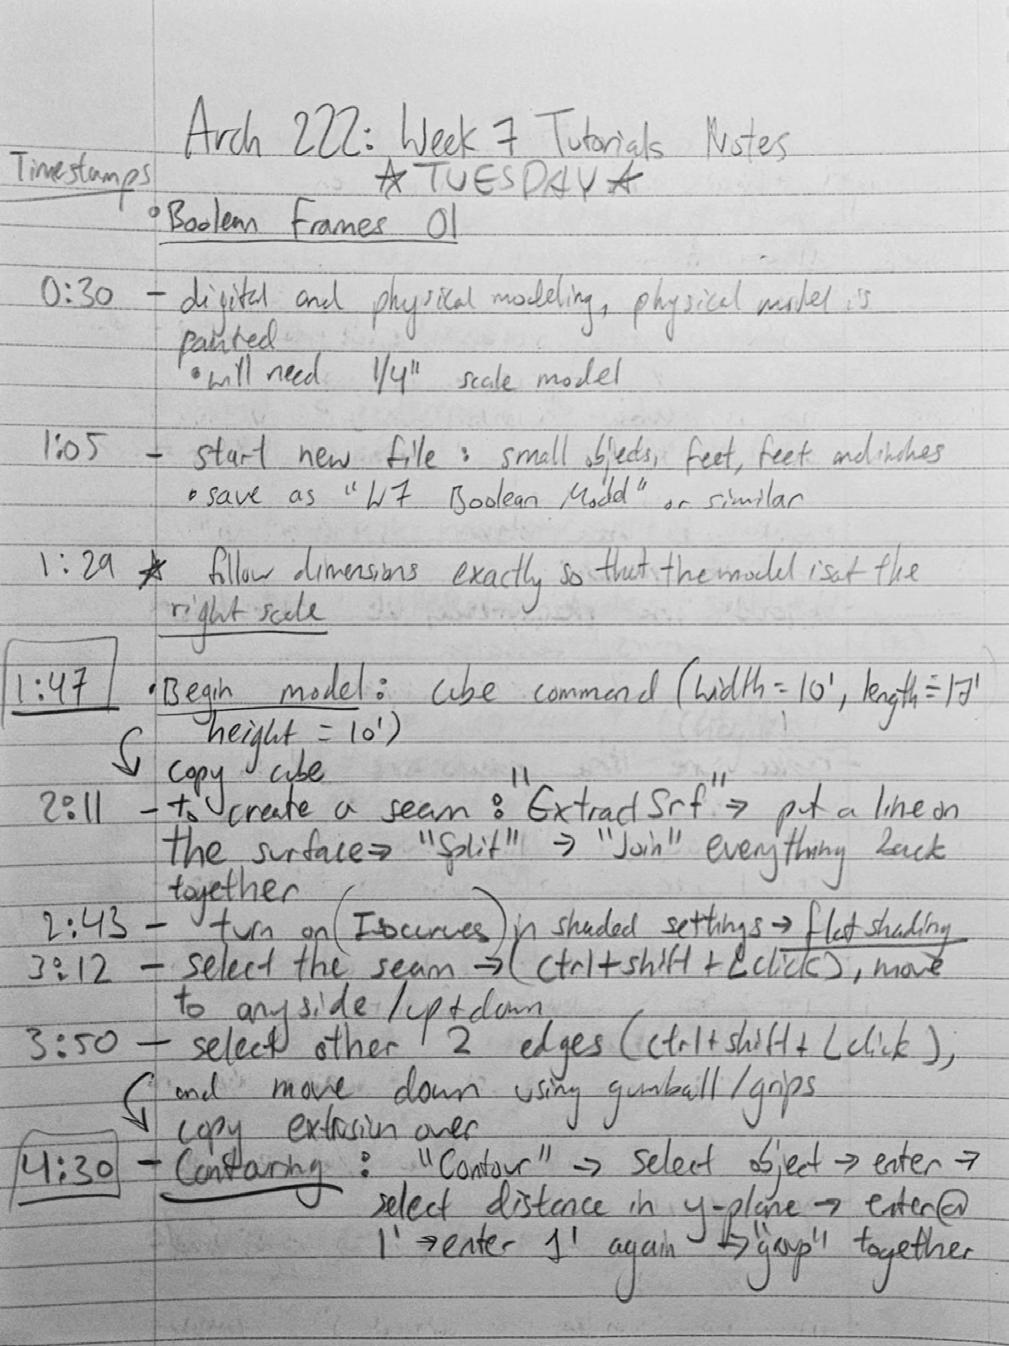
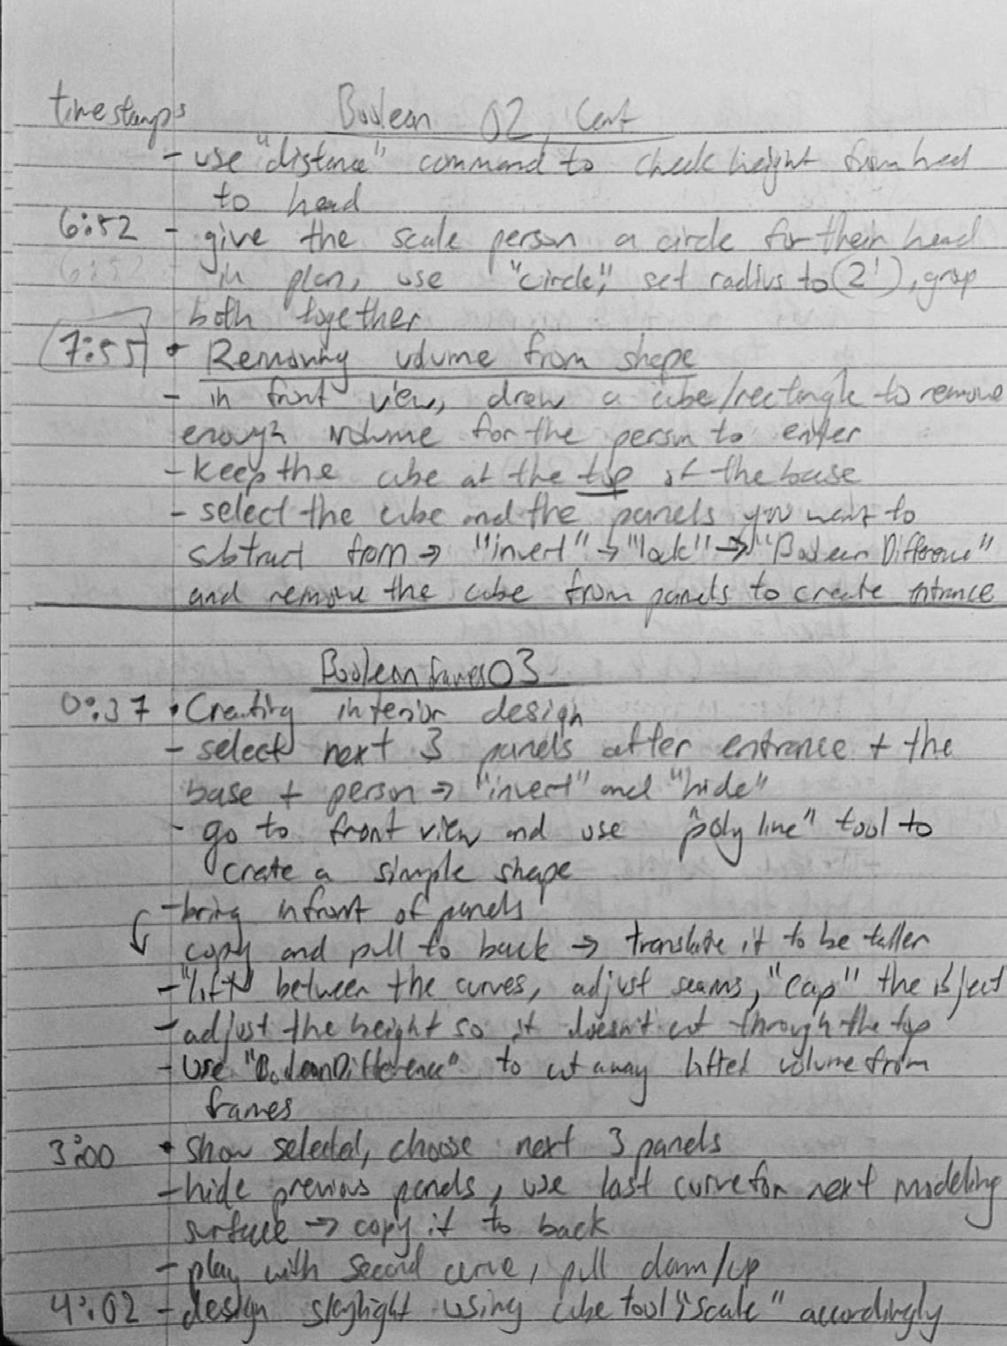
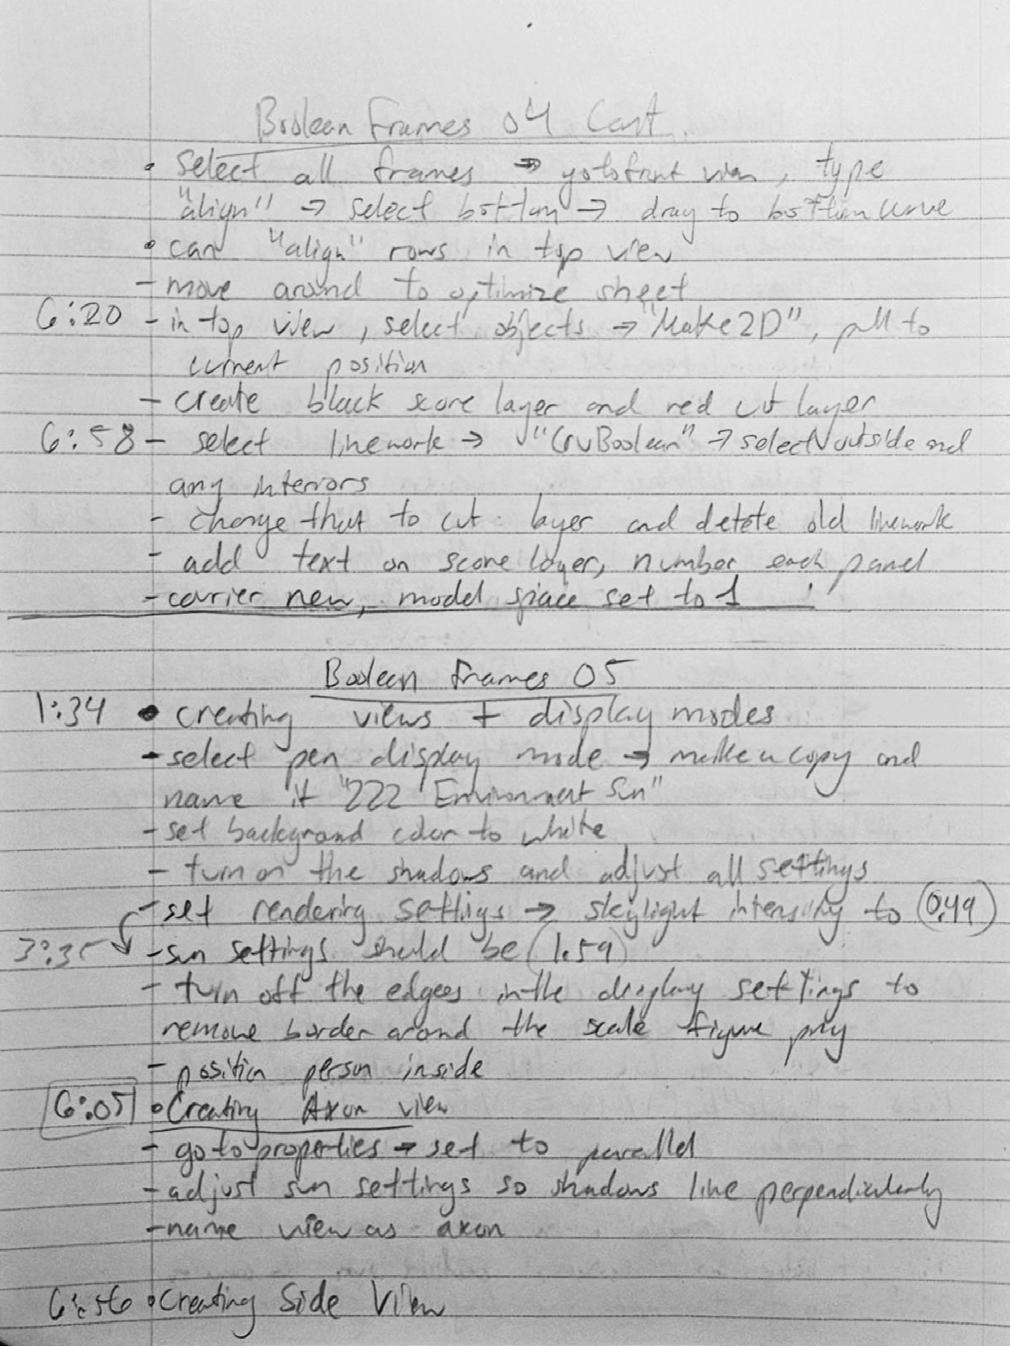
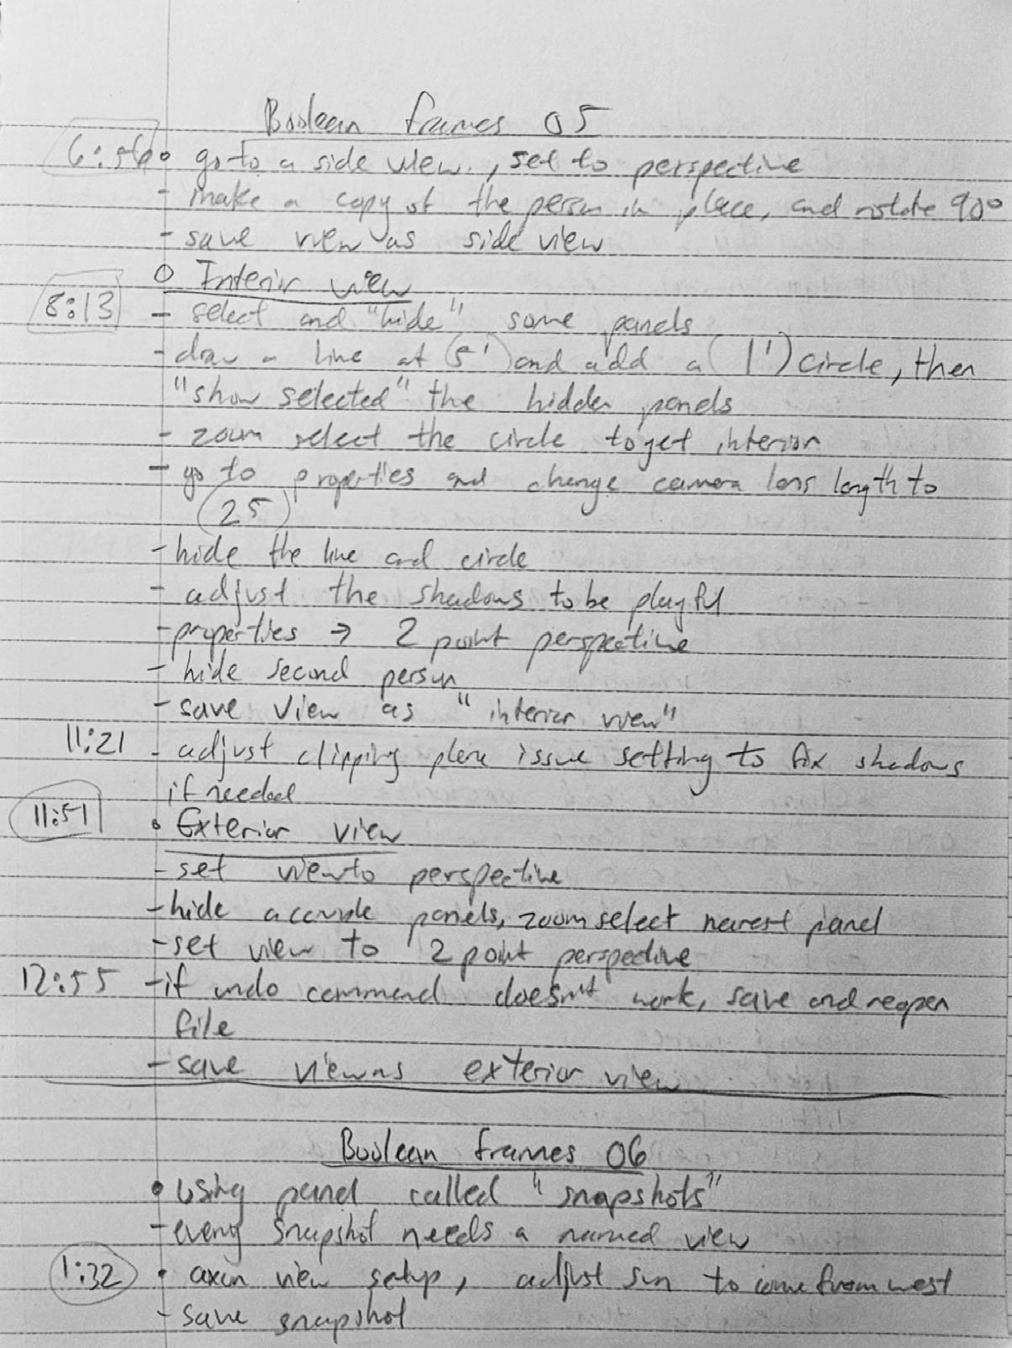
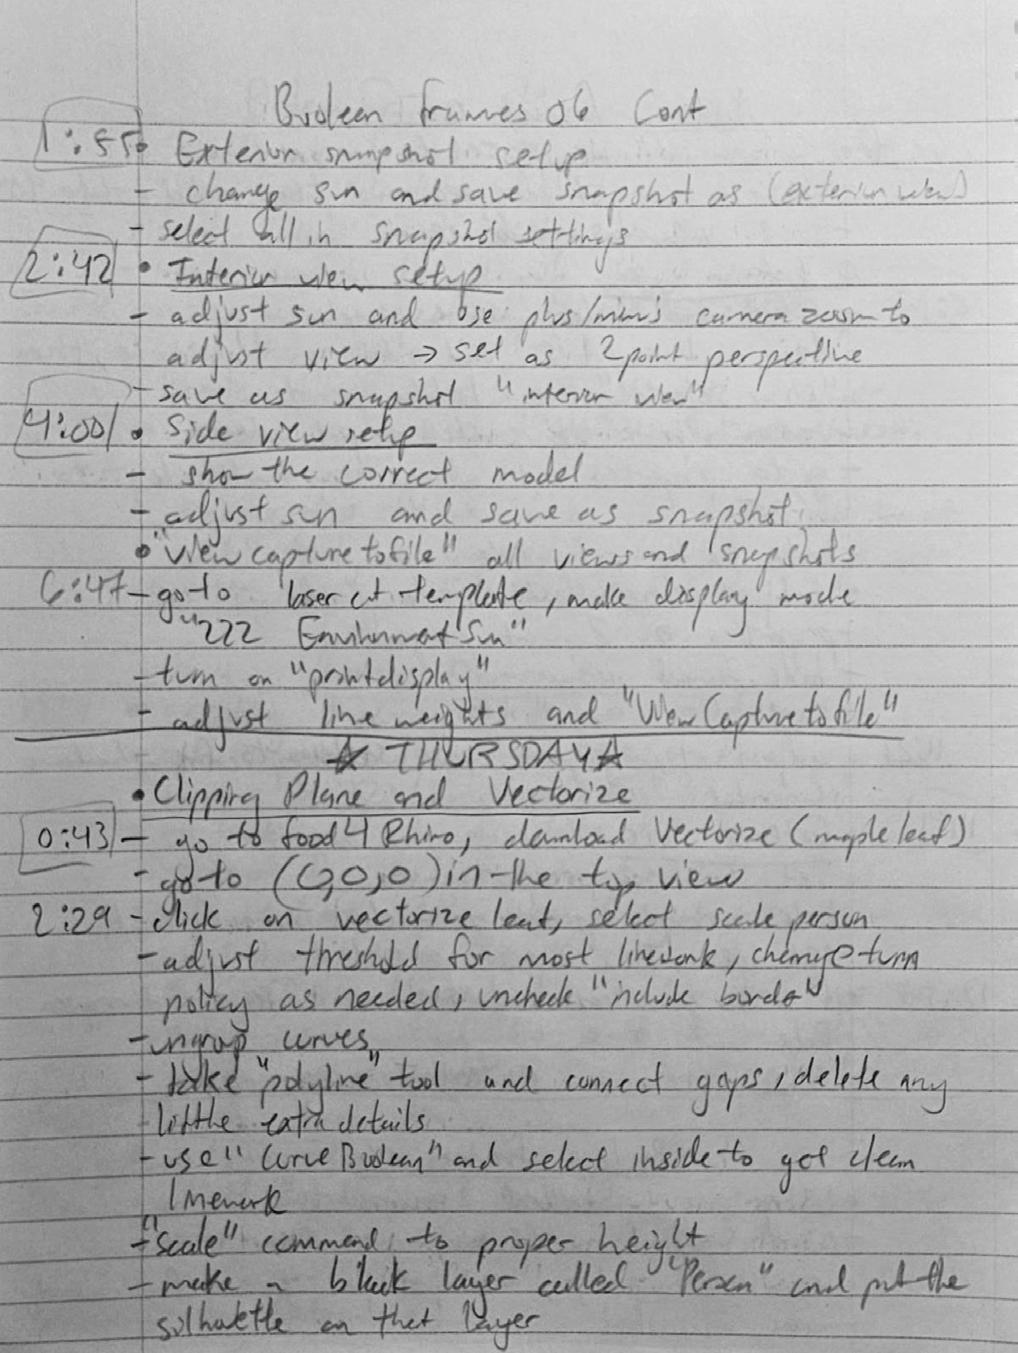
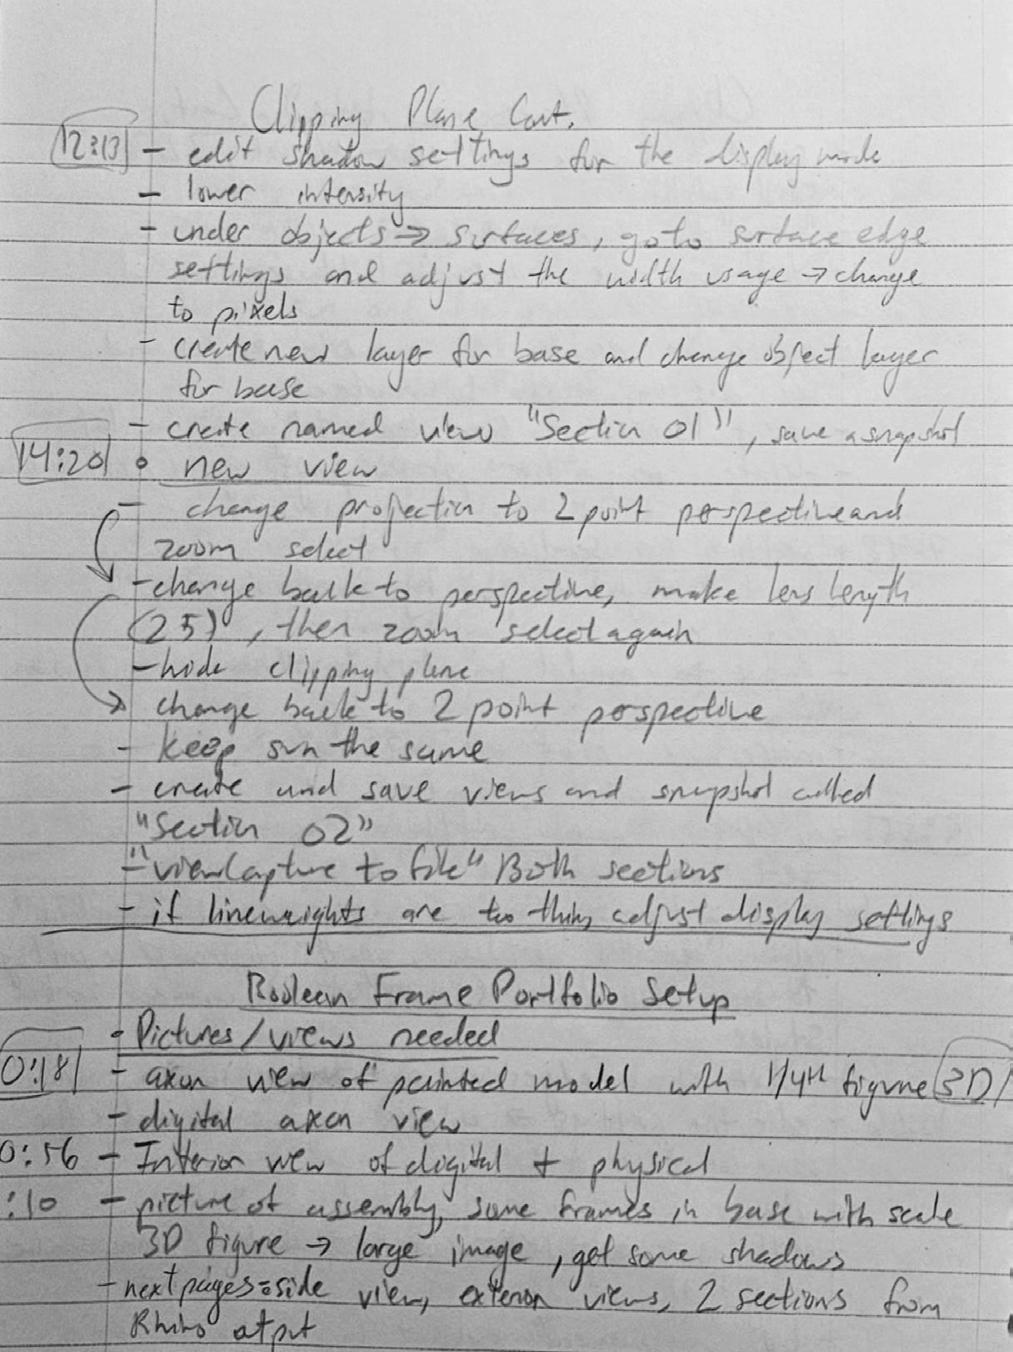
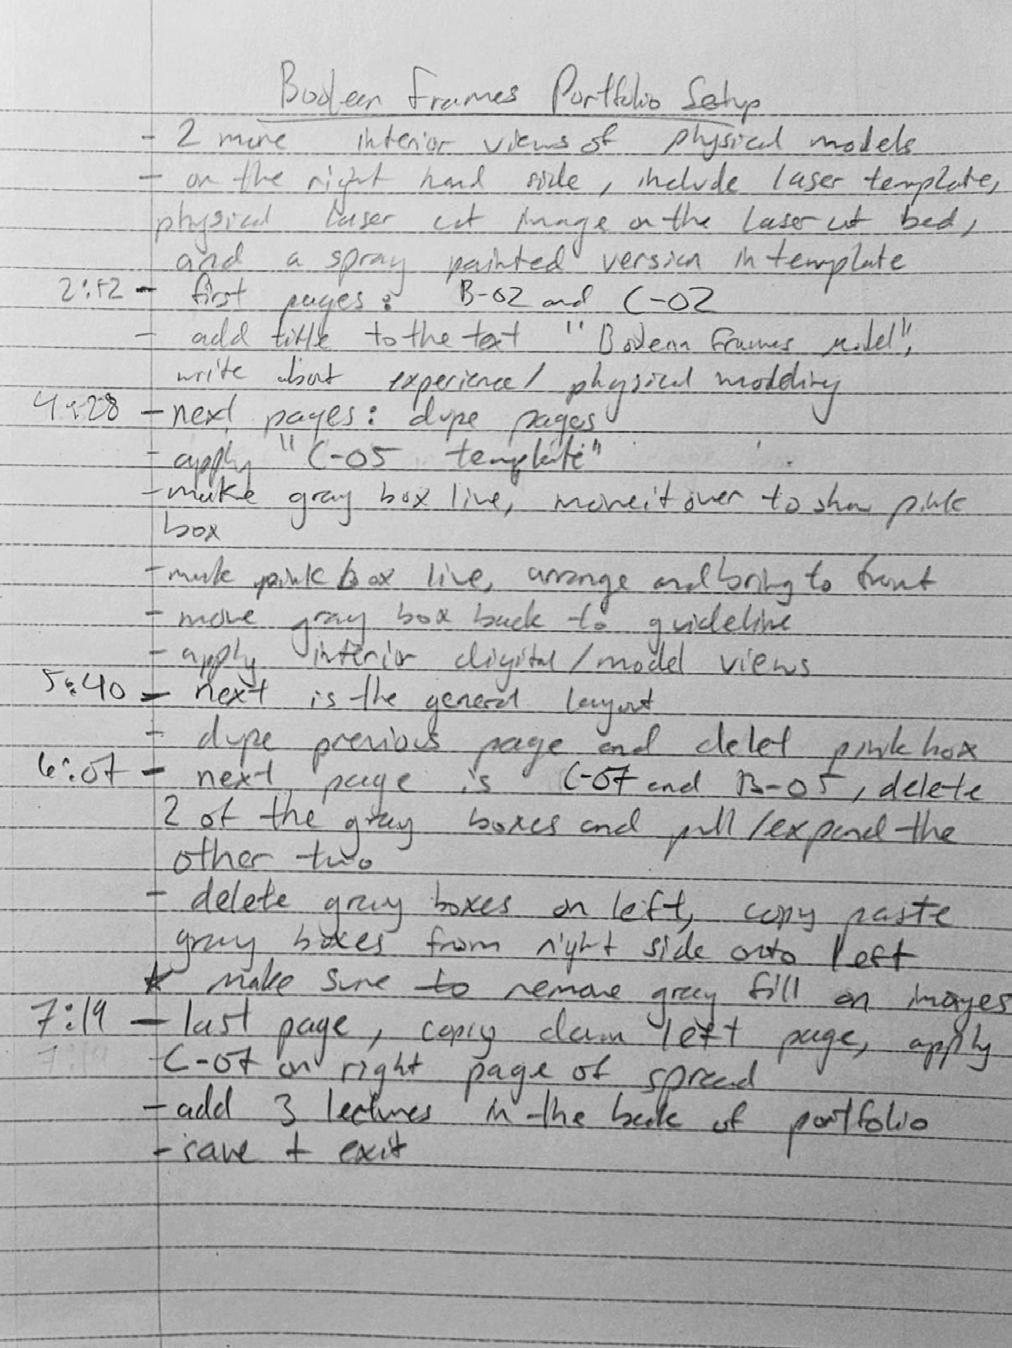
Handwritten Notes
Throughout the term, there were multiple opportunities for extra credit. The first of these was to create a weekly schedule for oneself with extreme detail. The schedule was to include the smallest of details and tasks, such as traveling and free time, so that there would be a clear division of time. I found this to be helpful in how much time I have to devote myself to one task or project. Mapping out my daily activities and seeing them laid out over the course of a week was an interesting process and made me really think about how I should divide up my time. This time management schedule is definitely an exercise that I
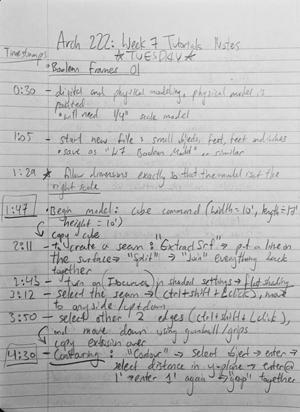
will carry with me throughout my life. The second major extra credit assignment was to take handwritten notes of one week’s worth of tutorials. I chose to document the tutorials of week seven, which covered how to create the Boolean frames model in Rhino. I documented the steps and commands covered in the tutorials, along with the timestamps of when those actions took place. I find handwritten notes to be extremely helpful as they solidify the information my brain is trying to absorb. Both of these extra credit exercises were beneficial to my time management skills and to my retaining of new information.
