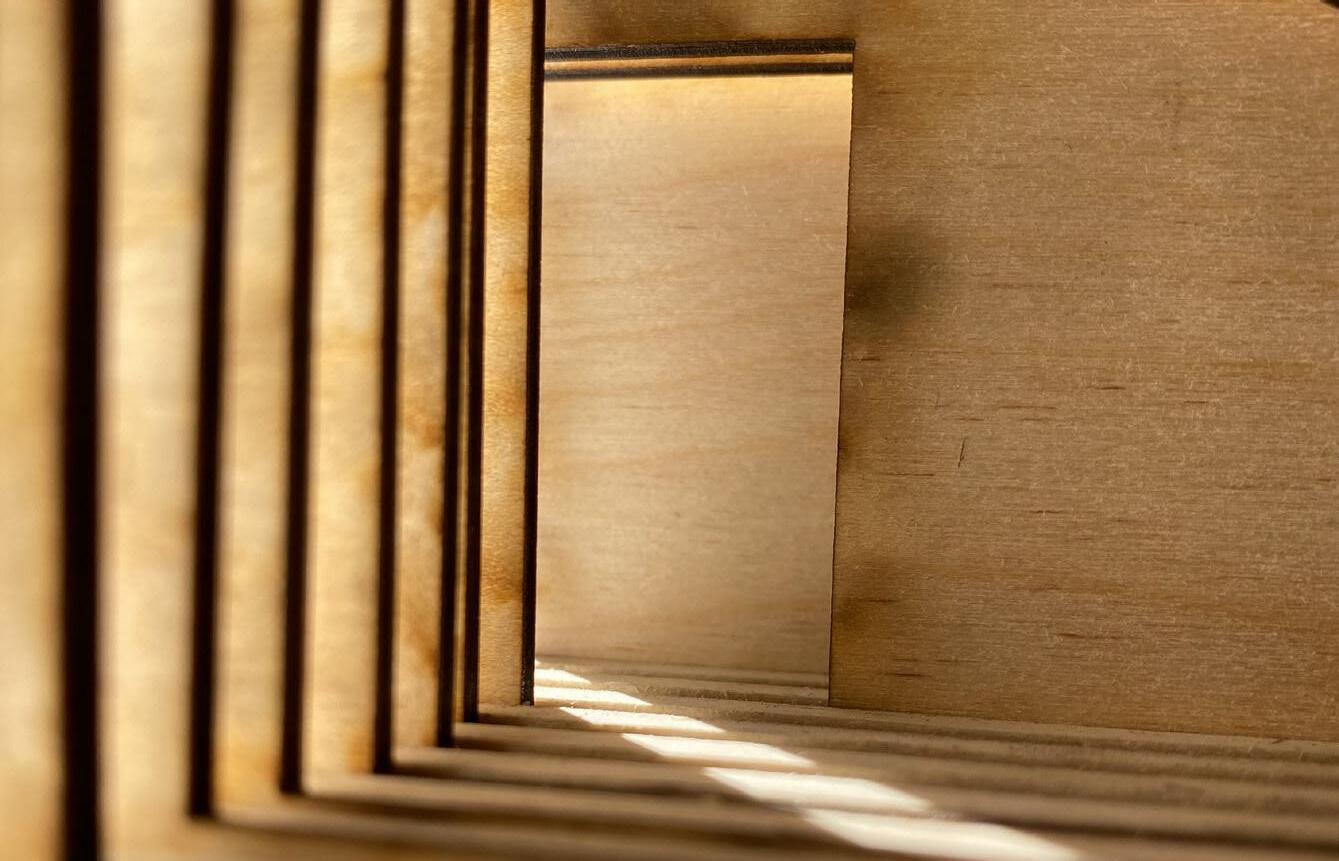
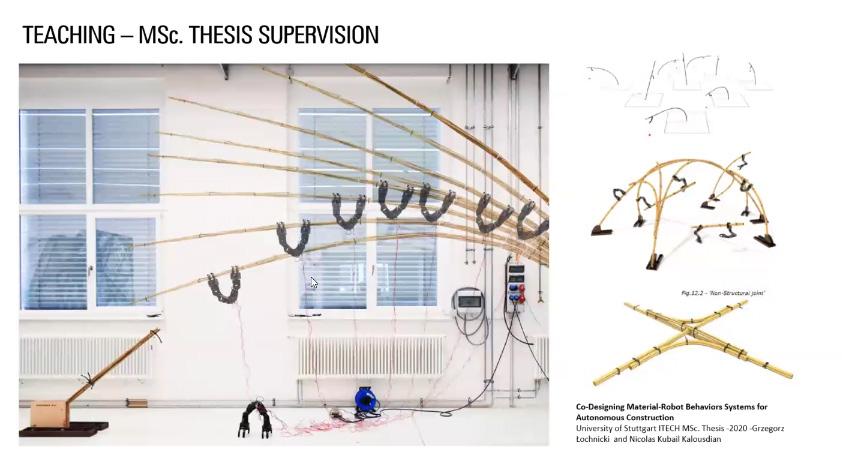
“DOOR DE BOMEN HET BOS NIET MEER ZIEN” - OVIDIUS
I am a first-year architecture student at the University of Oregon. I am Dutch, and love participating in various hobbies, such as Dungeons and Dragons, Sewing, and Theatre. I am a creative and love putting that energy into everything I do. My interests in the program stem from wanting to create experiential spaces and environments for people. I have started to incorporate this in my craft through equal attention to outdoor and indoor spaces. Professionally I am interested in working both in Architecture and Landscape Architecture. Over the first school year I have begun to relate storytelling to architectural buildings, learn and live studio culture, experience the inspirational aspects of reviews. I have also learned necessary drawing techniques, along with software like Illustrator, Photoshop, AutoCAD, InDesign, and Rhino. During this year I have been able to build up good time management, and an engaged work ethic. Aspects such as storytelling have improved my thinking of experiential spaces as you are describing what the building and environment are doing to improve people’s experiences. My participation in Dungeons and Dragons have helped encourage this storytelling aspect in my personal life.
I am looking forward to expanding my Digital knowledge base and incorporating storytelling and experiences in a digital setting.
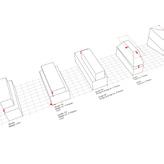
Page 8-9
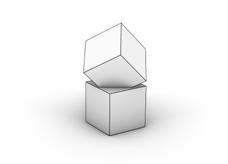
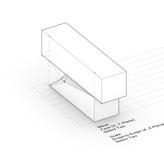
Module 1
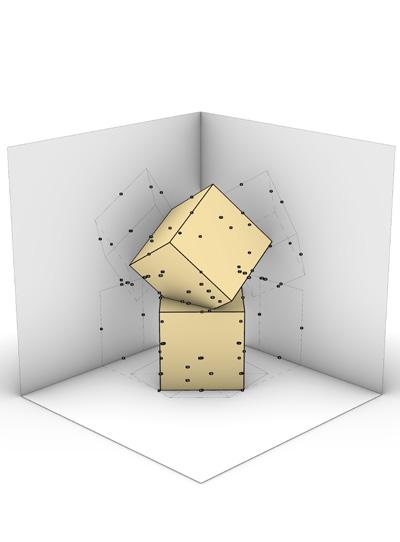
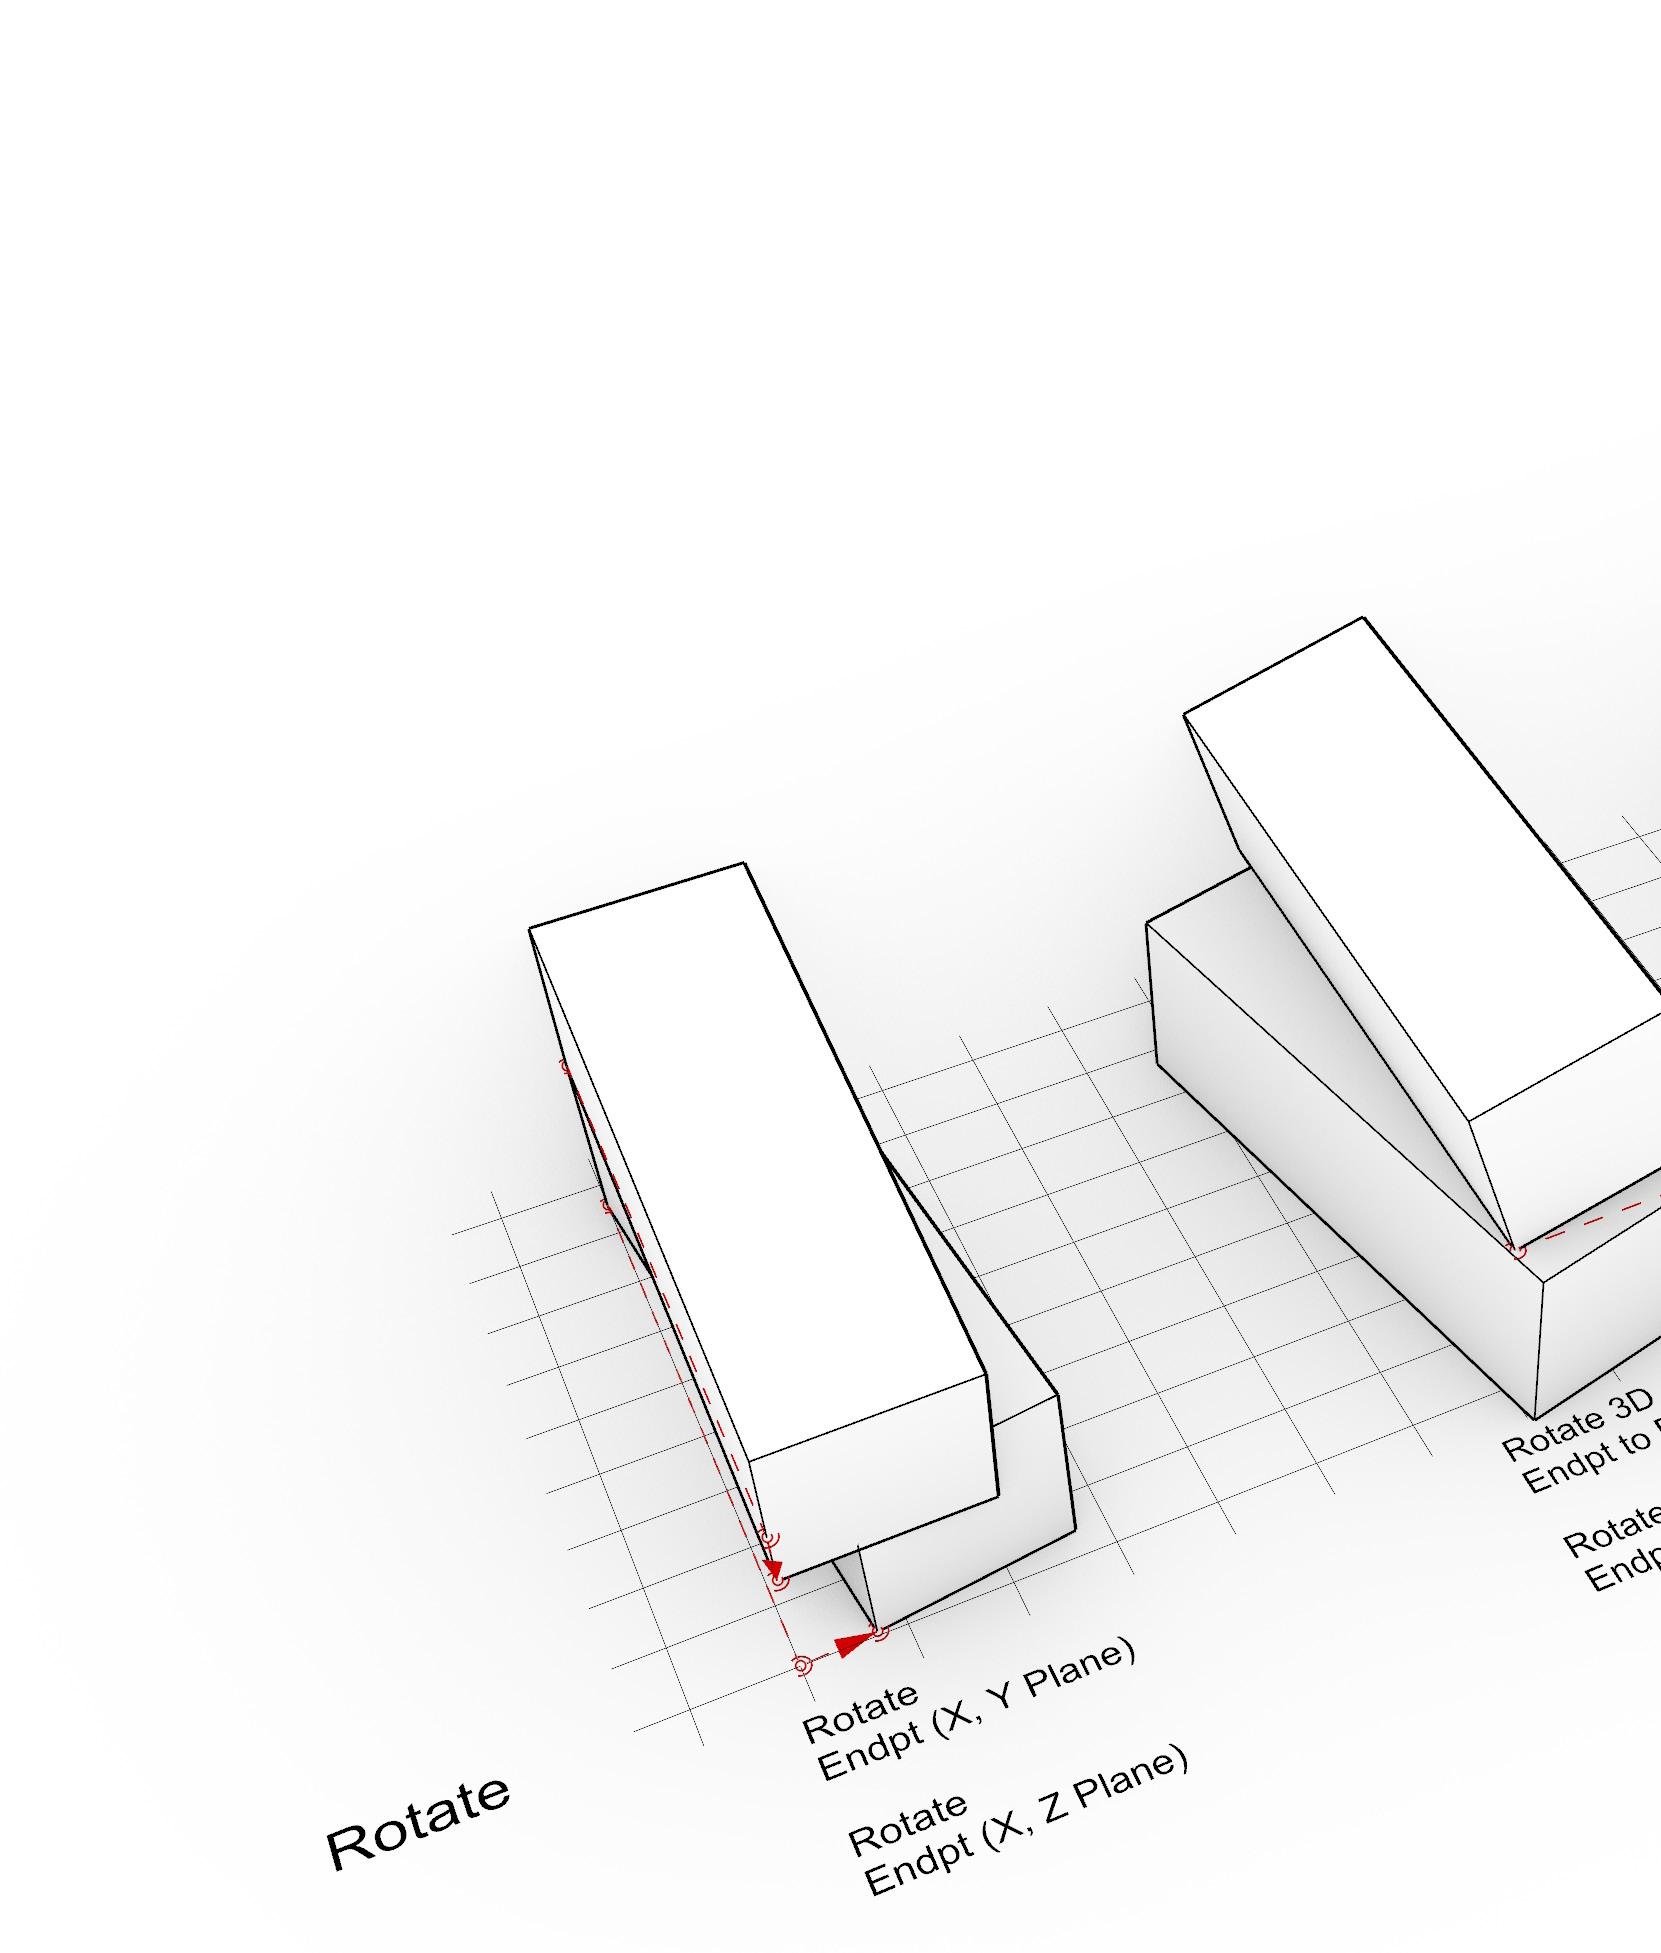
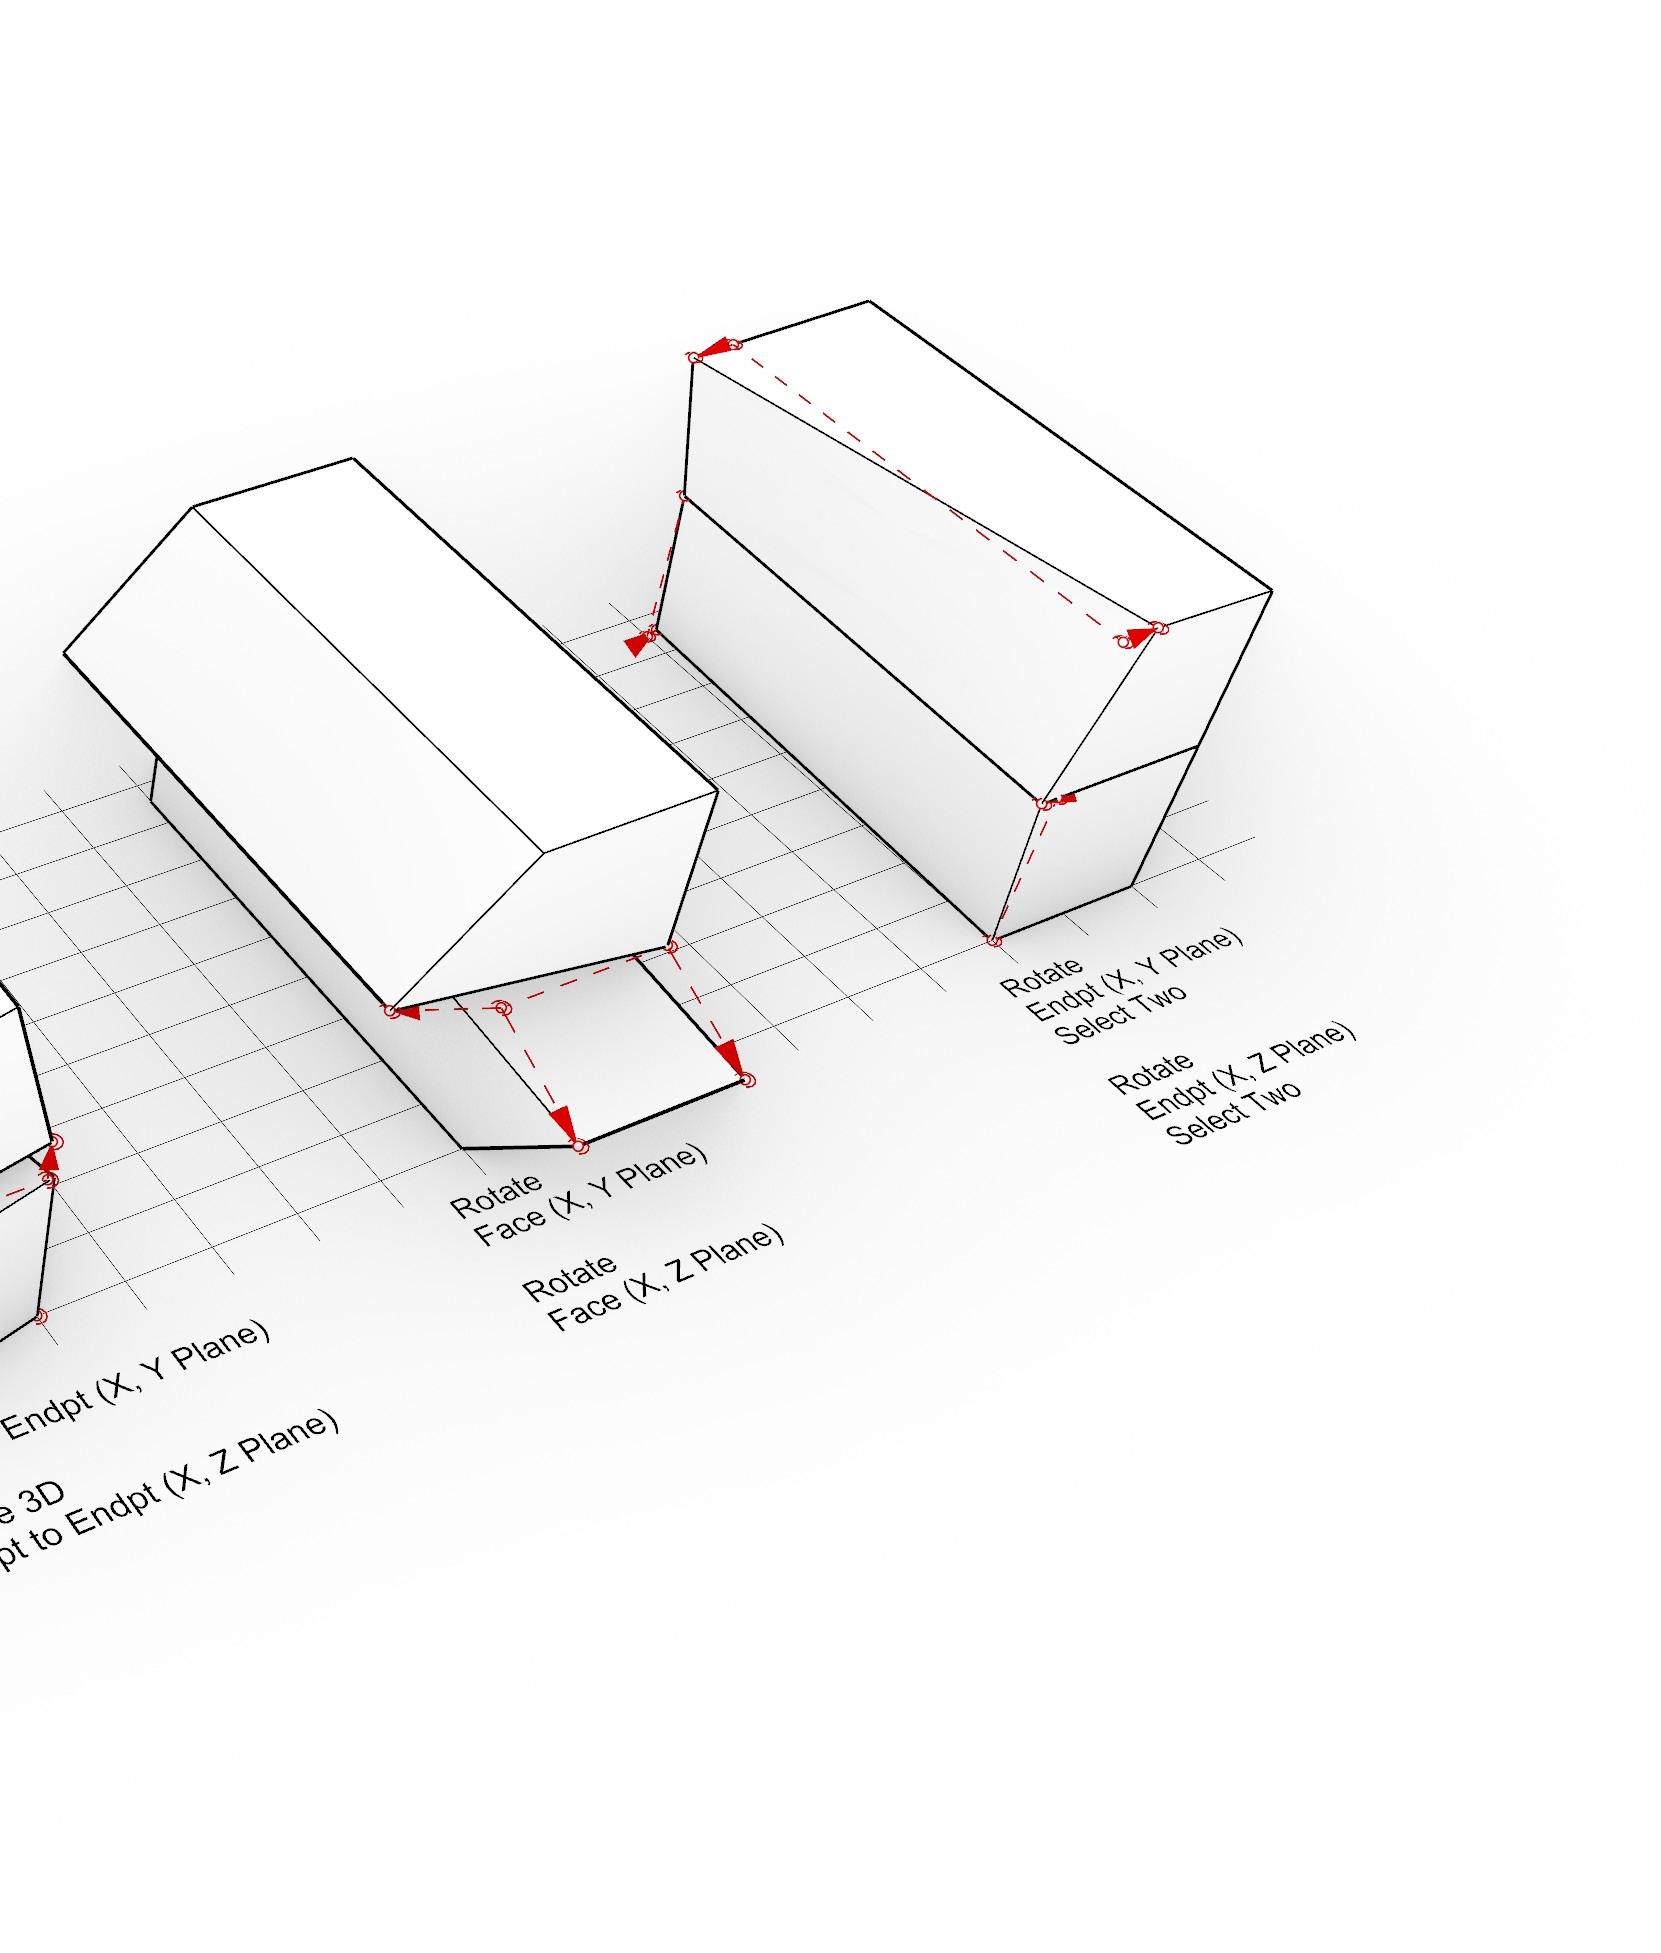
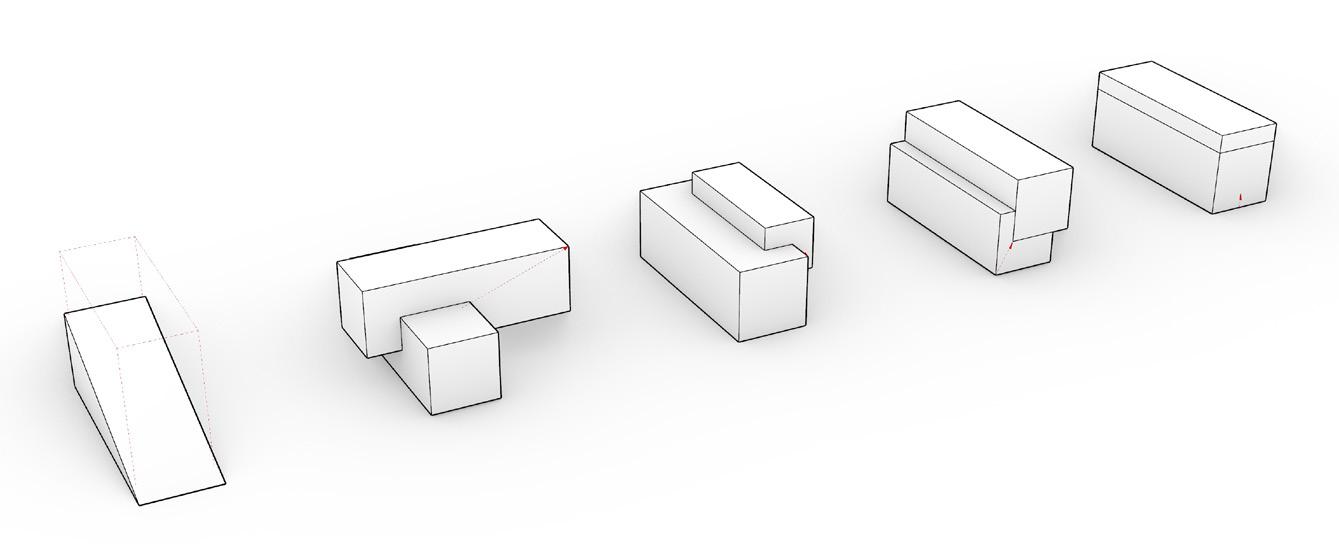
Digital Primitive Solid
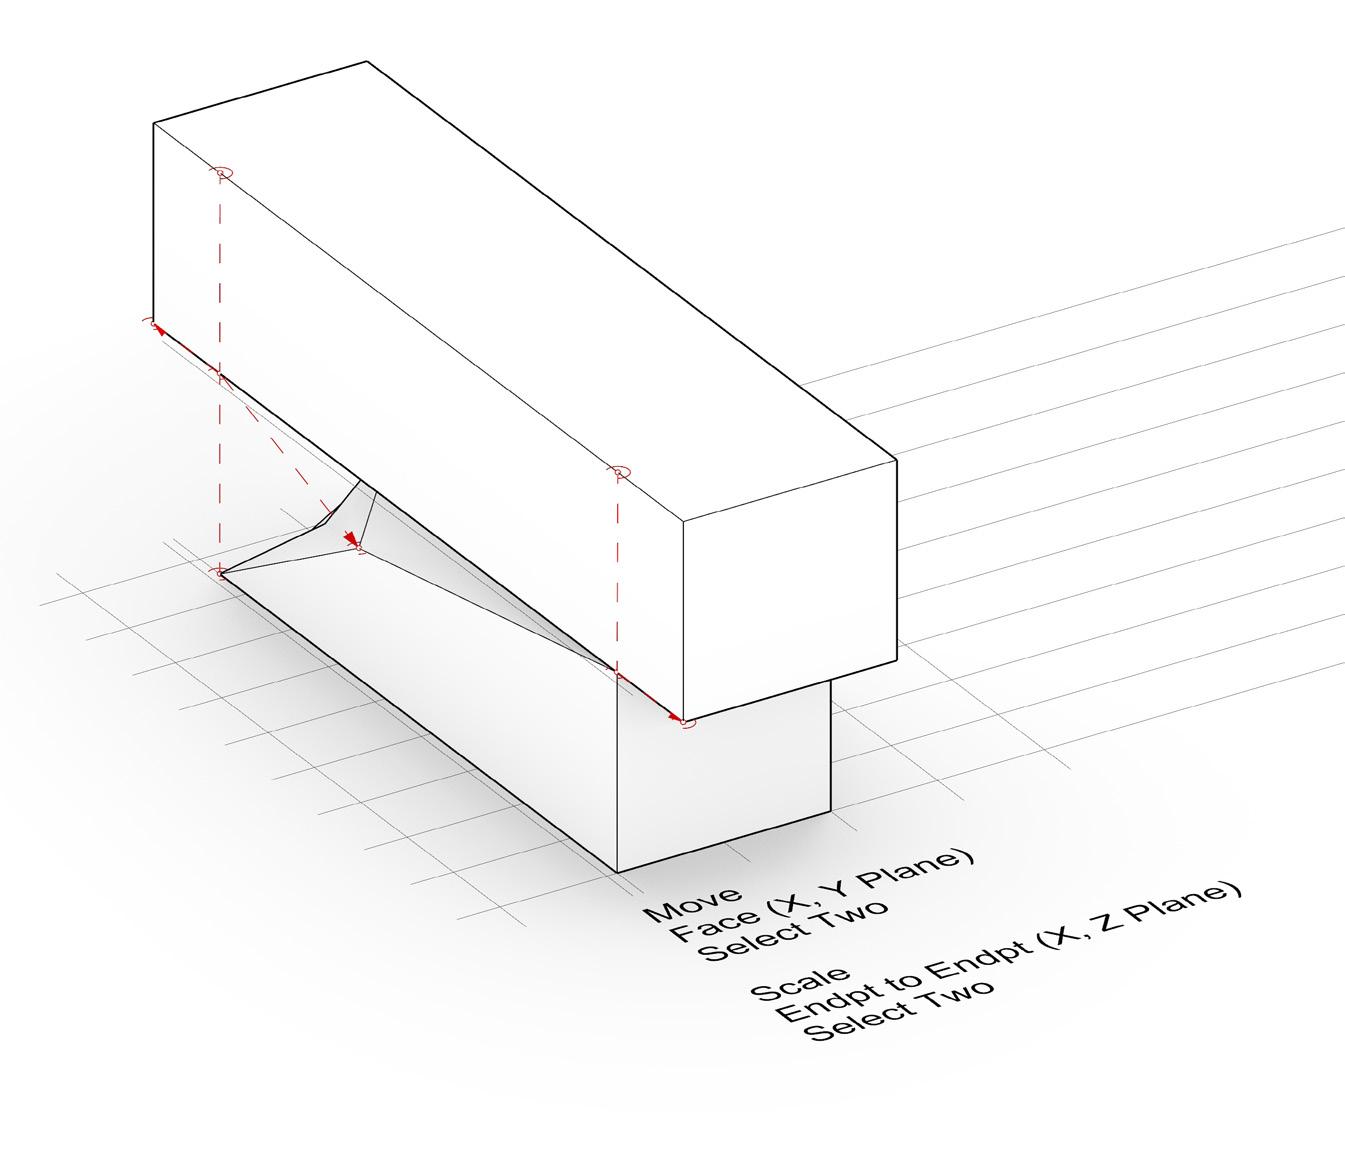
Move
Page 14-15
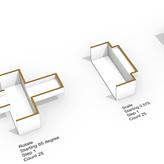
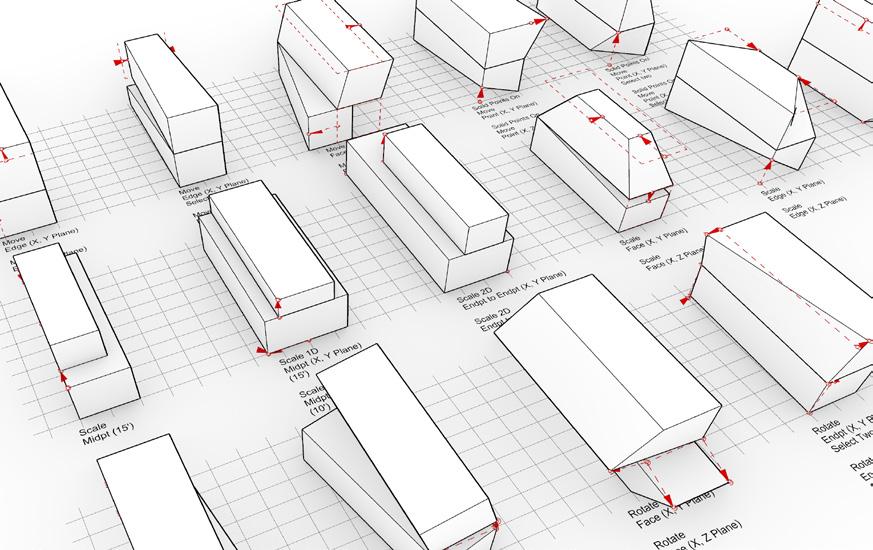
Module 2
Digital Primitive Rules
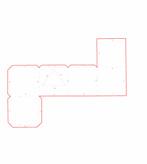
Page 10
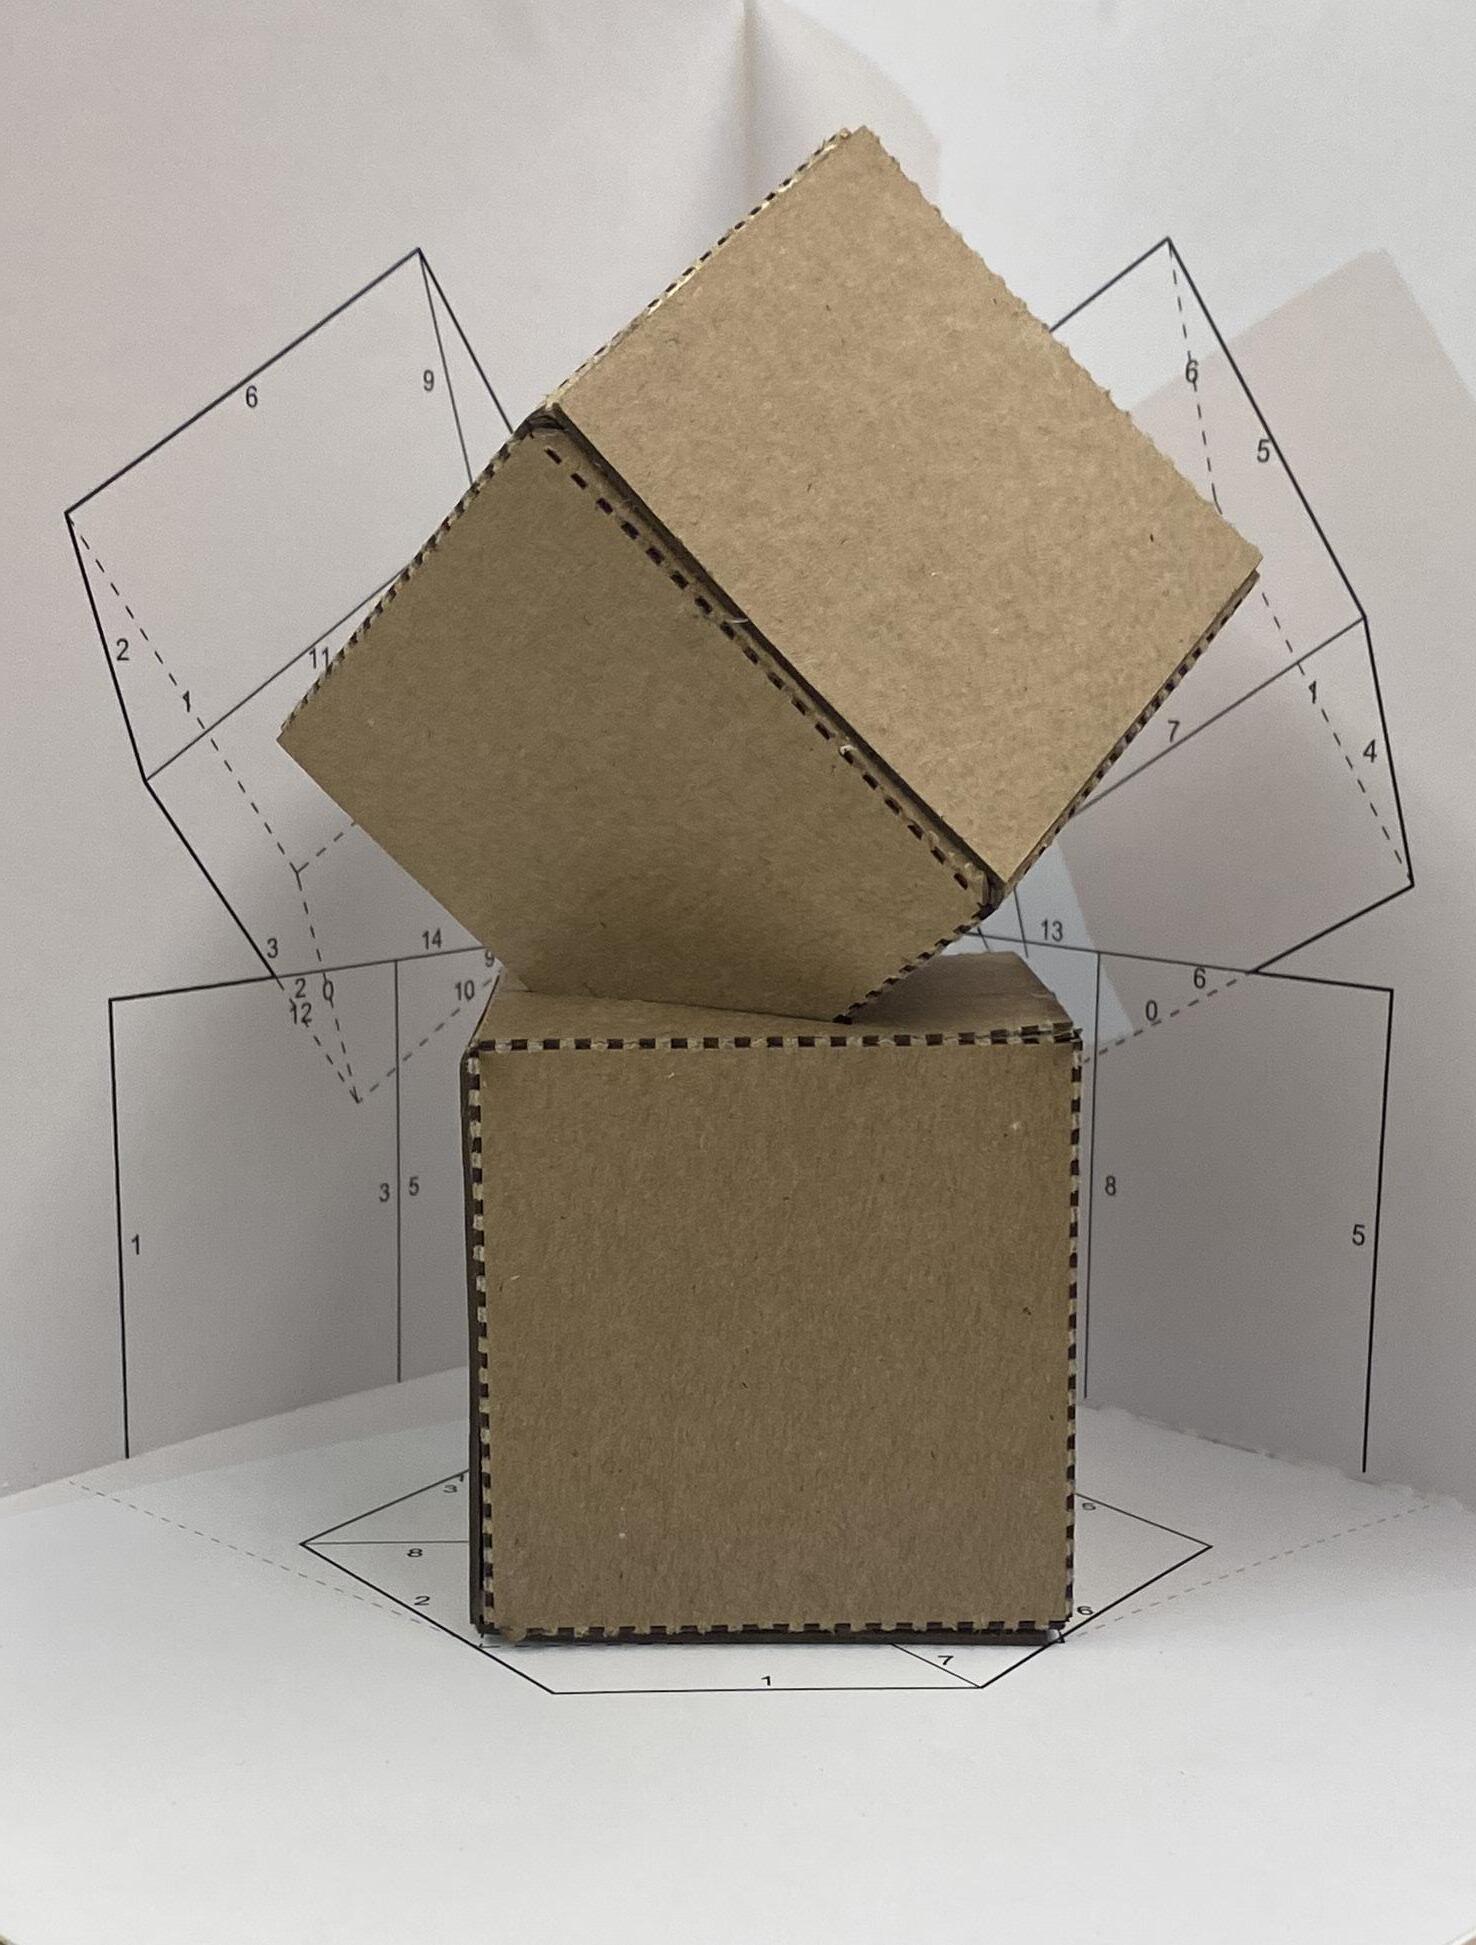
Module 1
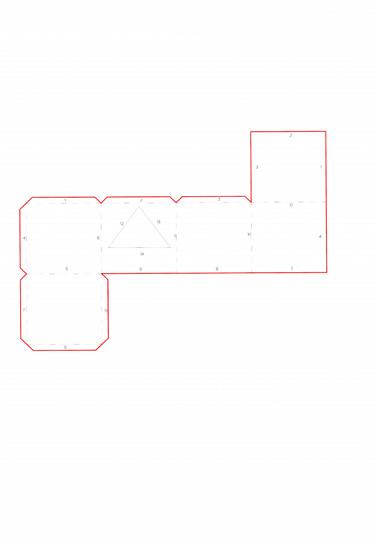
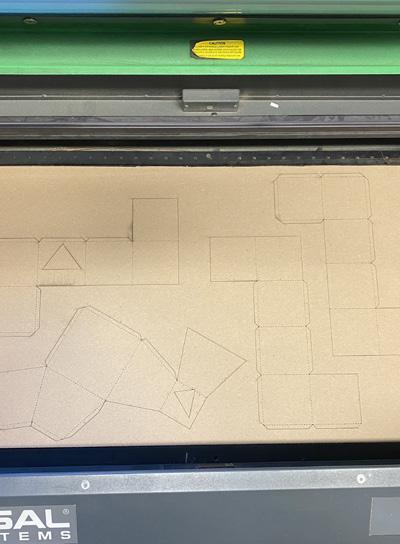
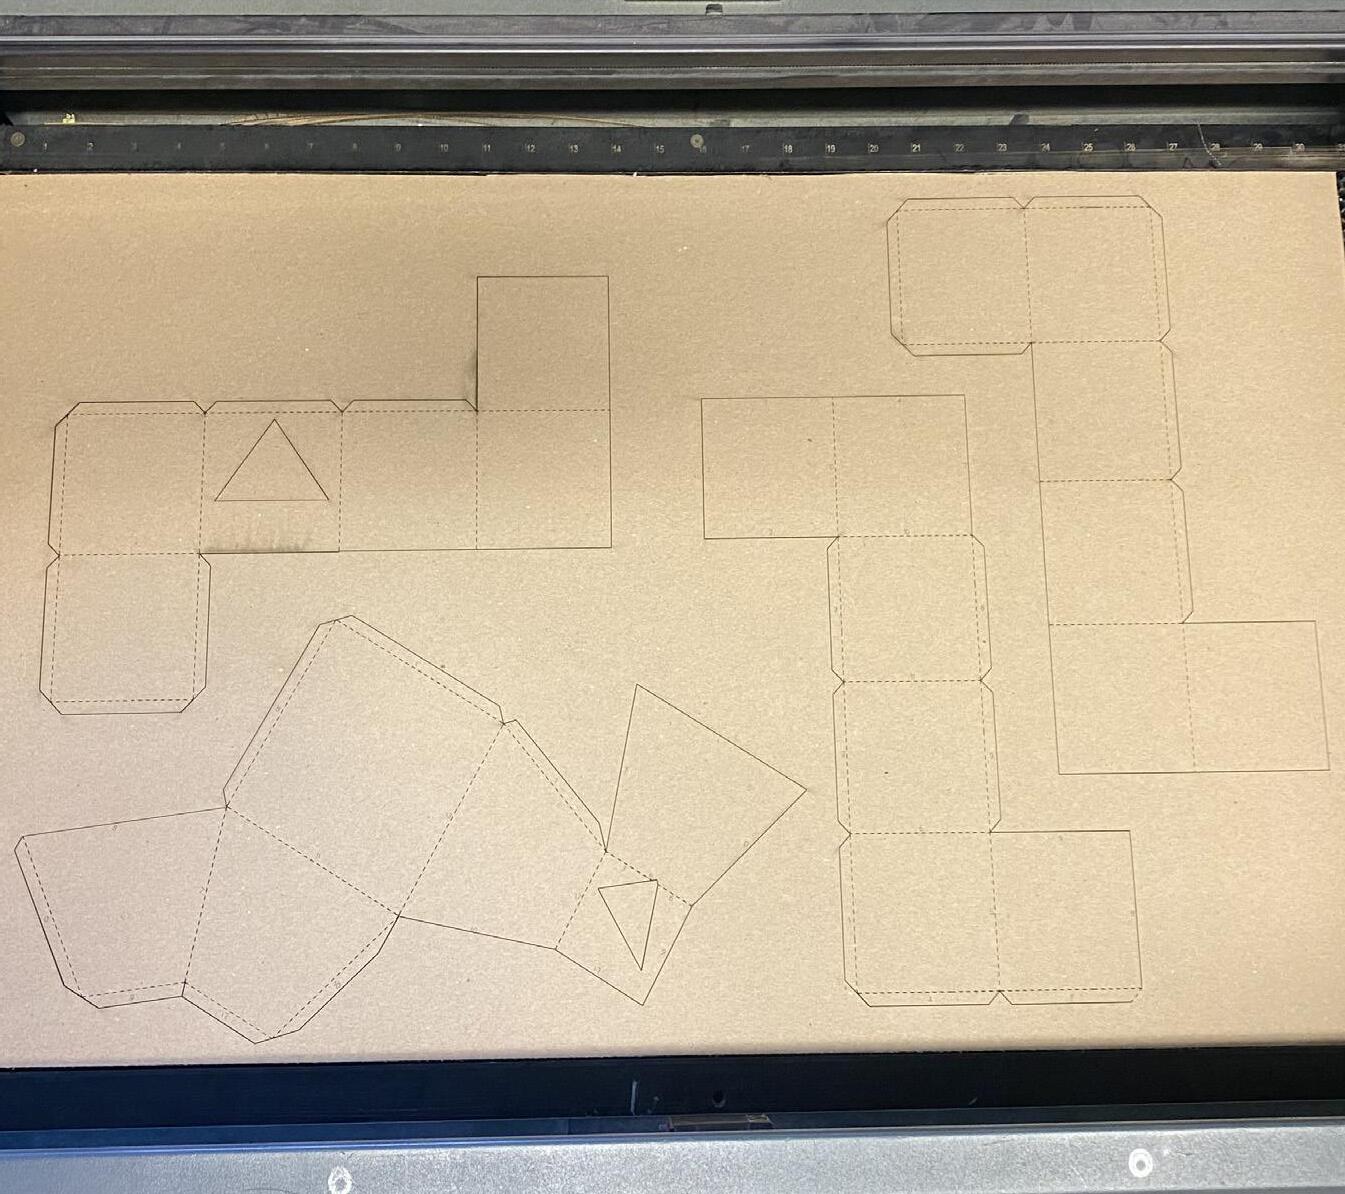
Laser Cut Template
MoveEdge(X,YPlane)
MoveEdge(X,ZPlane)
MoveEdge(X,YPlane) Selecttwo
MoveEdge(X,ZPlane) Selecttwo
Page 16-21
Module 2 Digital Primitive Rules
MoveFace(X,YPlane)
MoveFace(X,ZPlane)
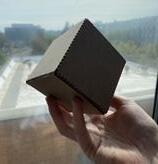
Page 11
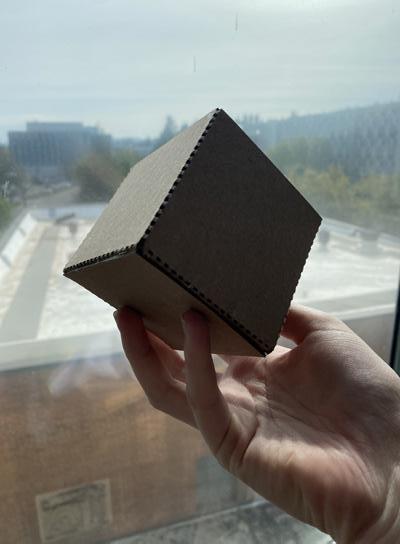
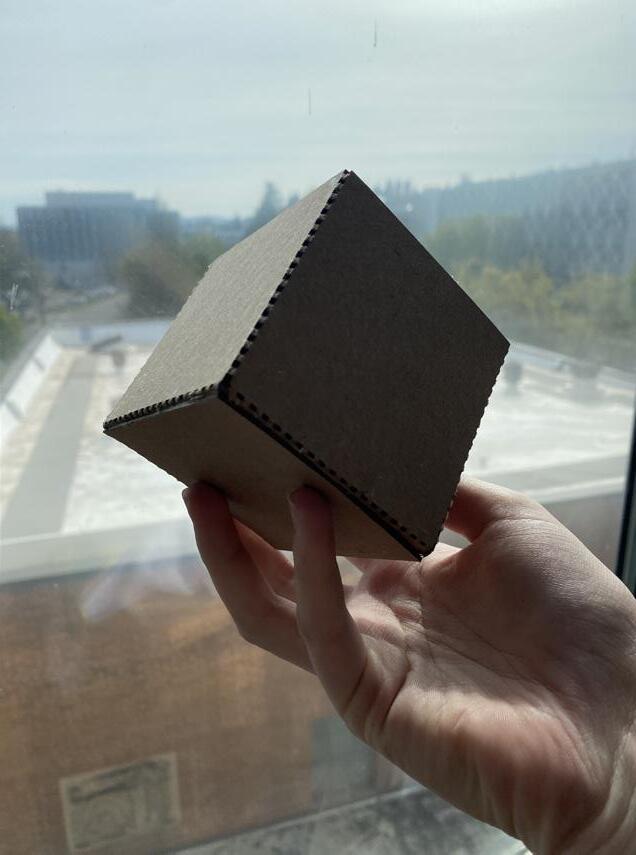
Module 1 Laser Cut Model
Page 22-25
Module 2
Digital Primitive Additive
Page 12
Module 1 Laser Cut Material
Page 26-27
Module 2
Digital Primitive Subtractive
Page 13
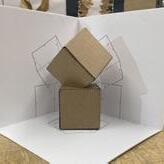
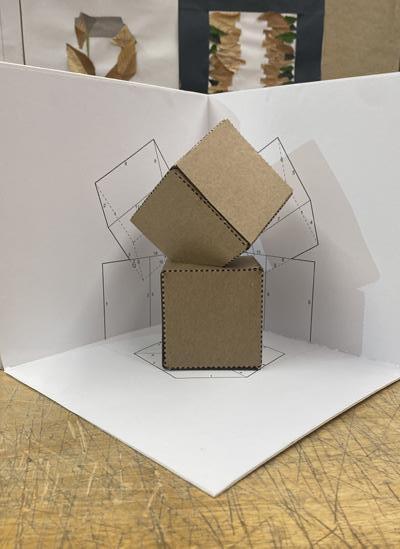
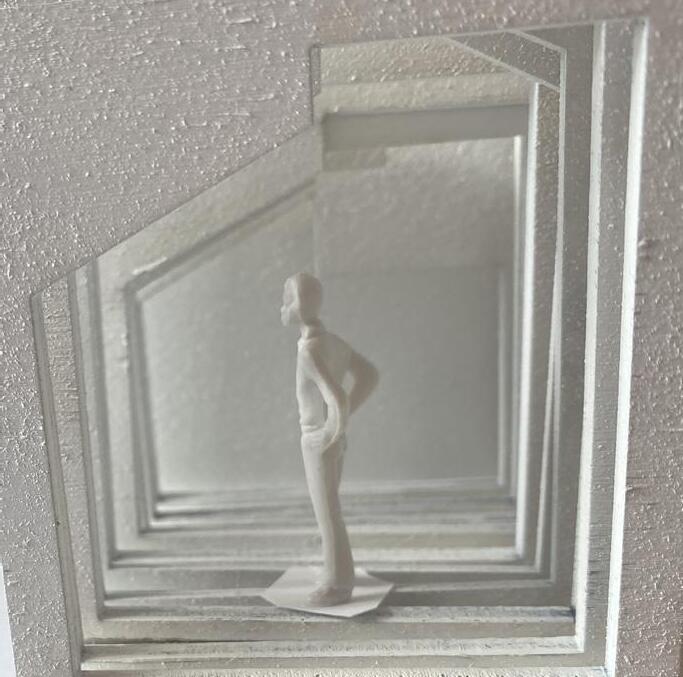
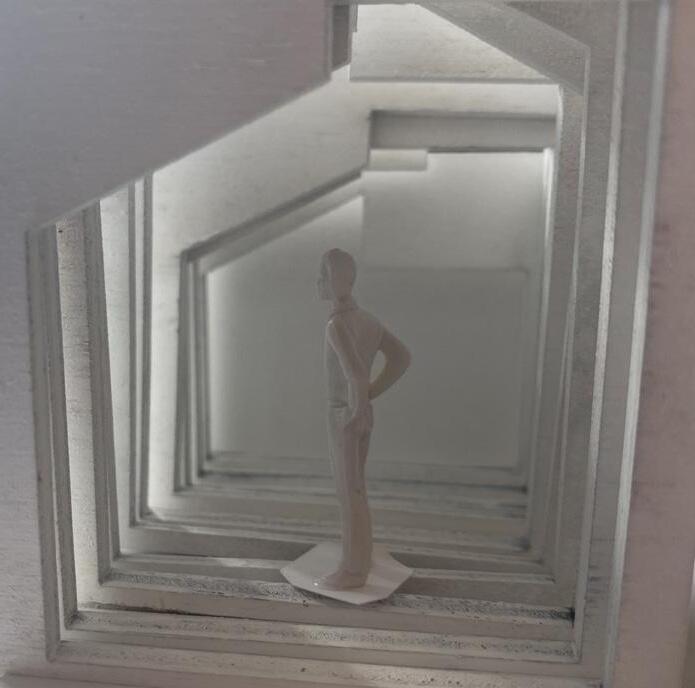
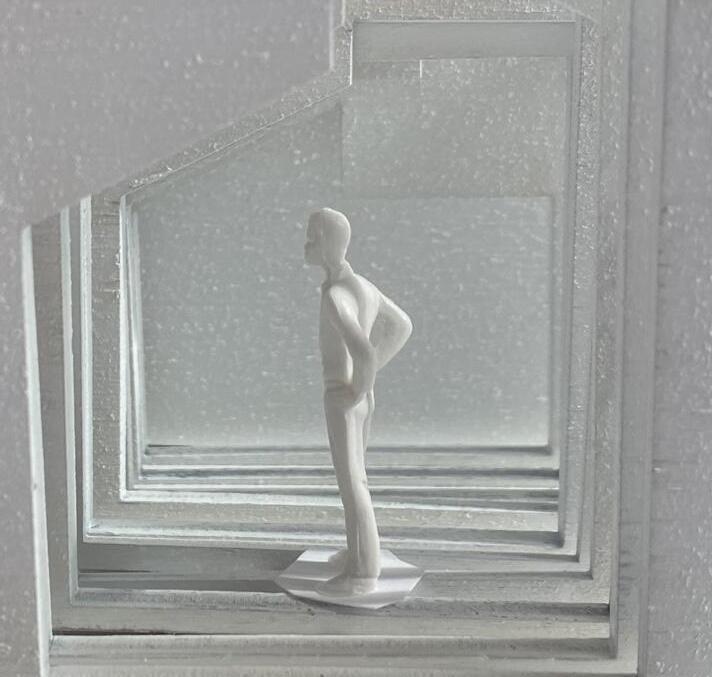
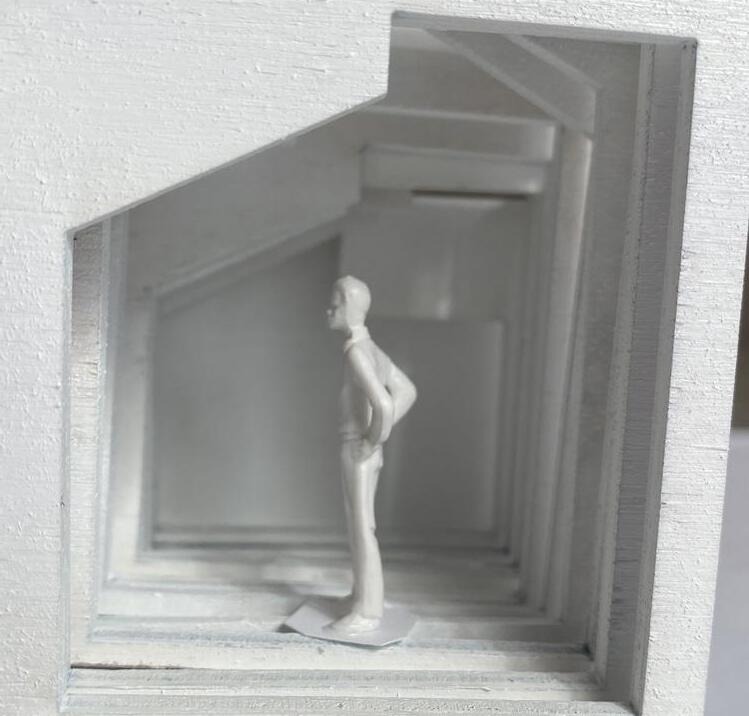
Module 1 Primitive Enclosure
Page 28-29
Module 2 Assembly Primitives
Page 30-33
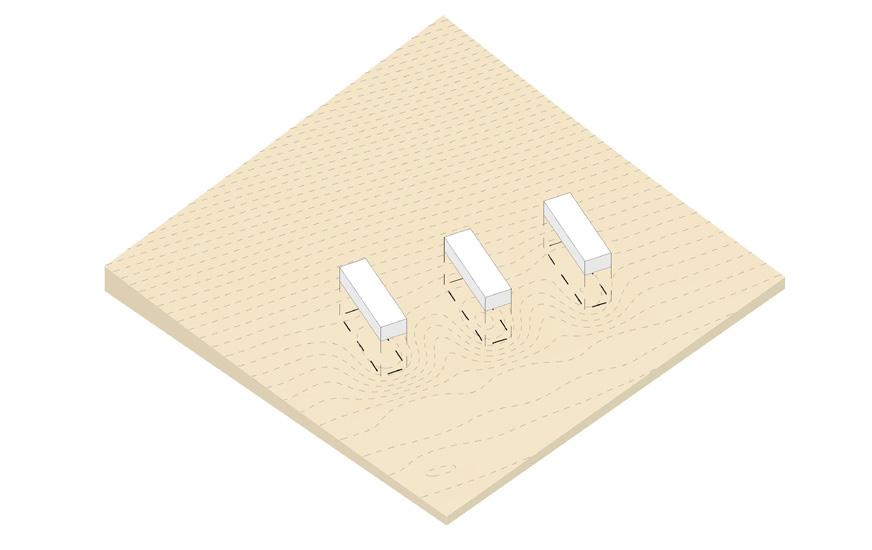
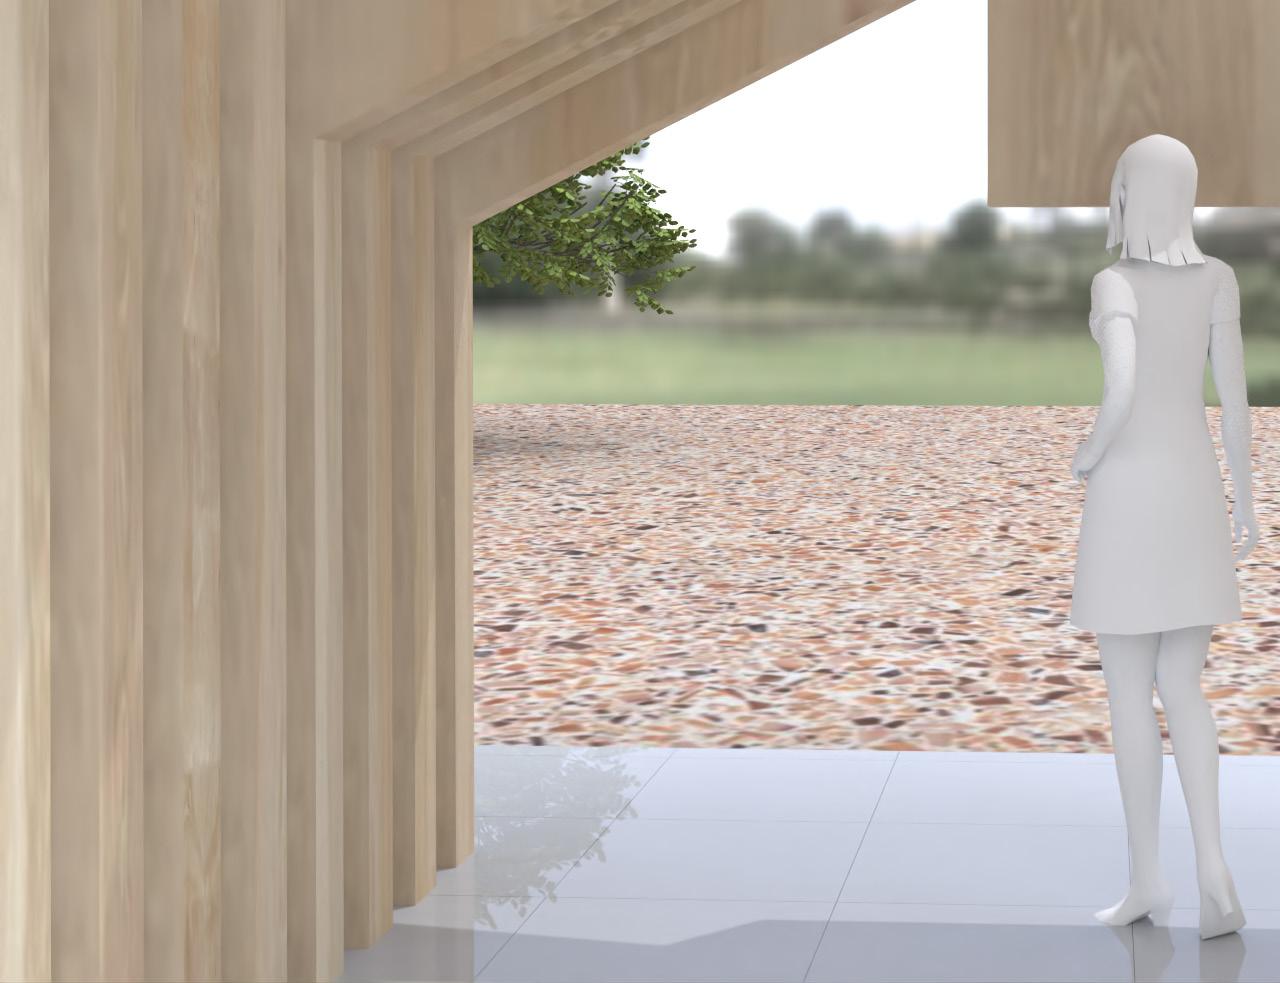
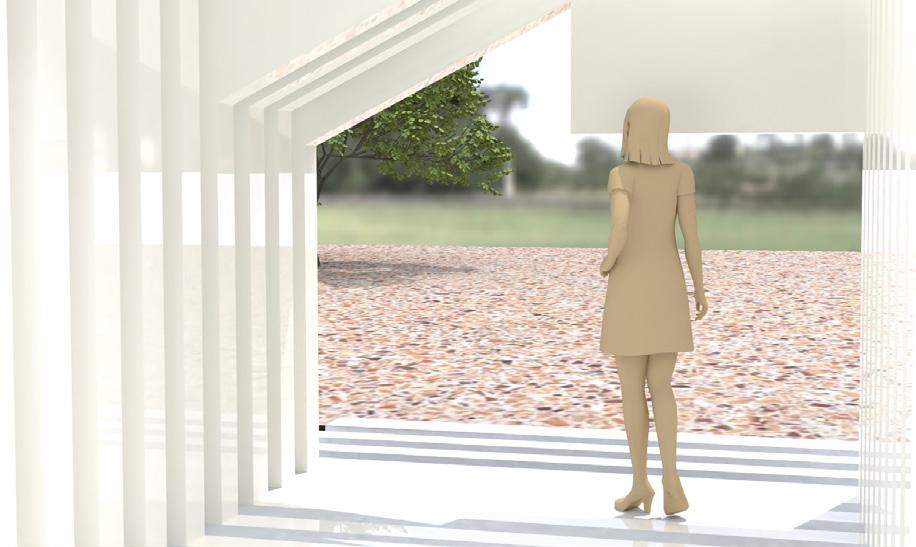
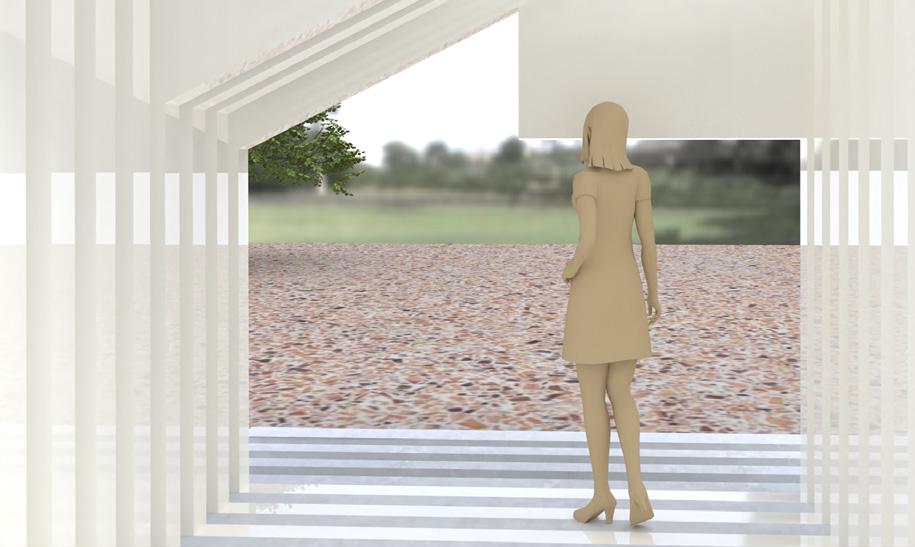
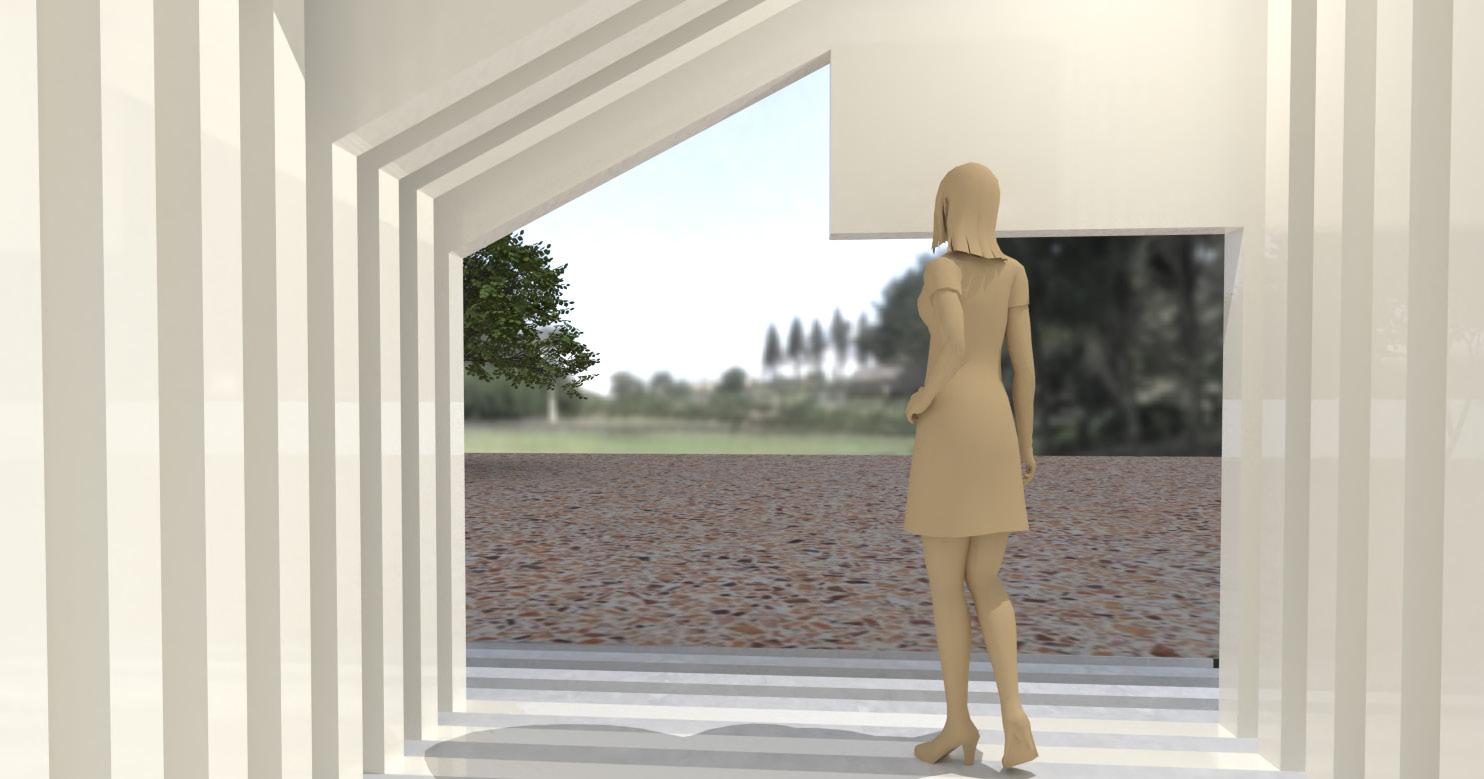
Module 3 Topography
Page 52-55
Guest Lectures
Page 34-41
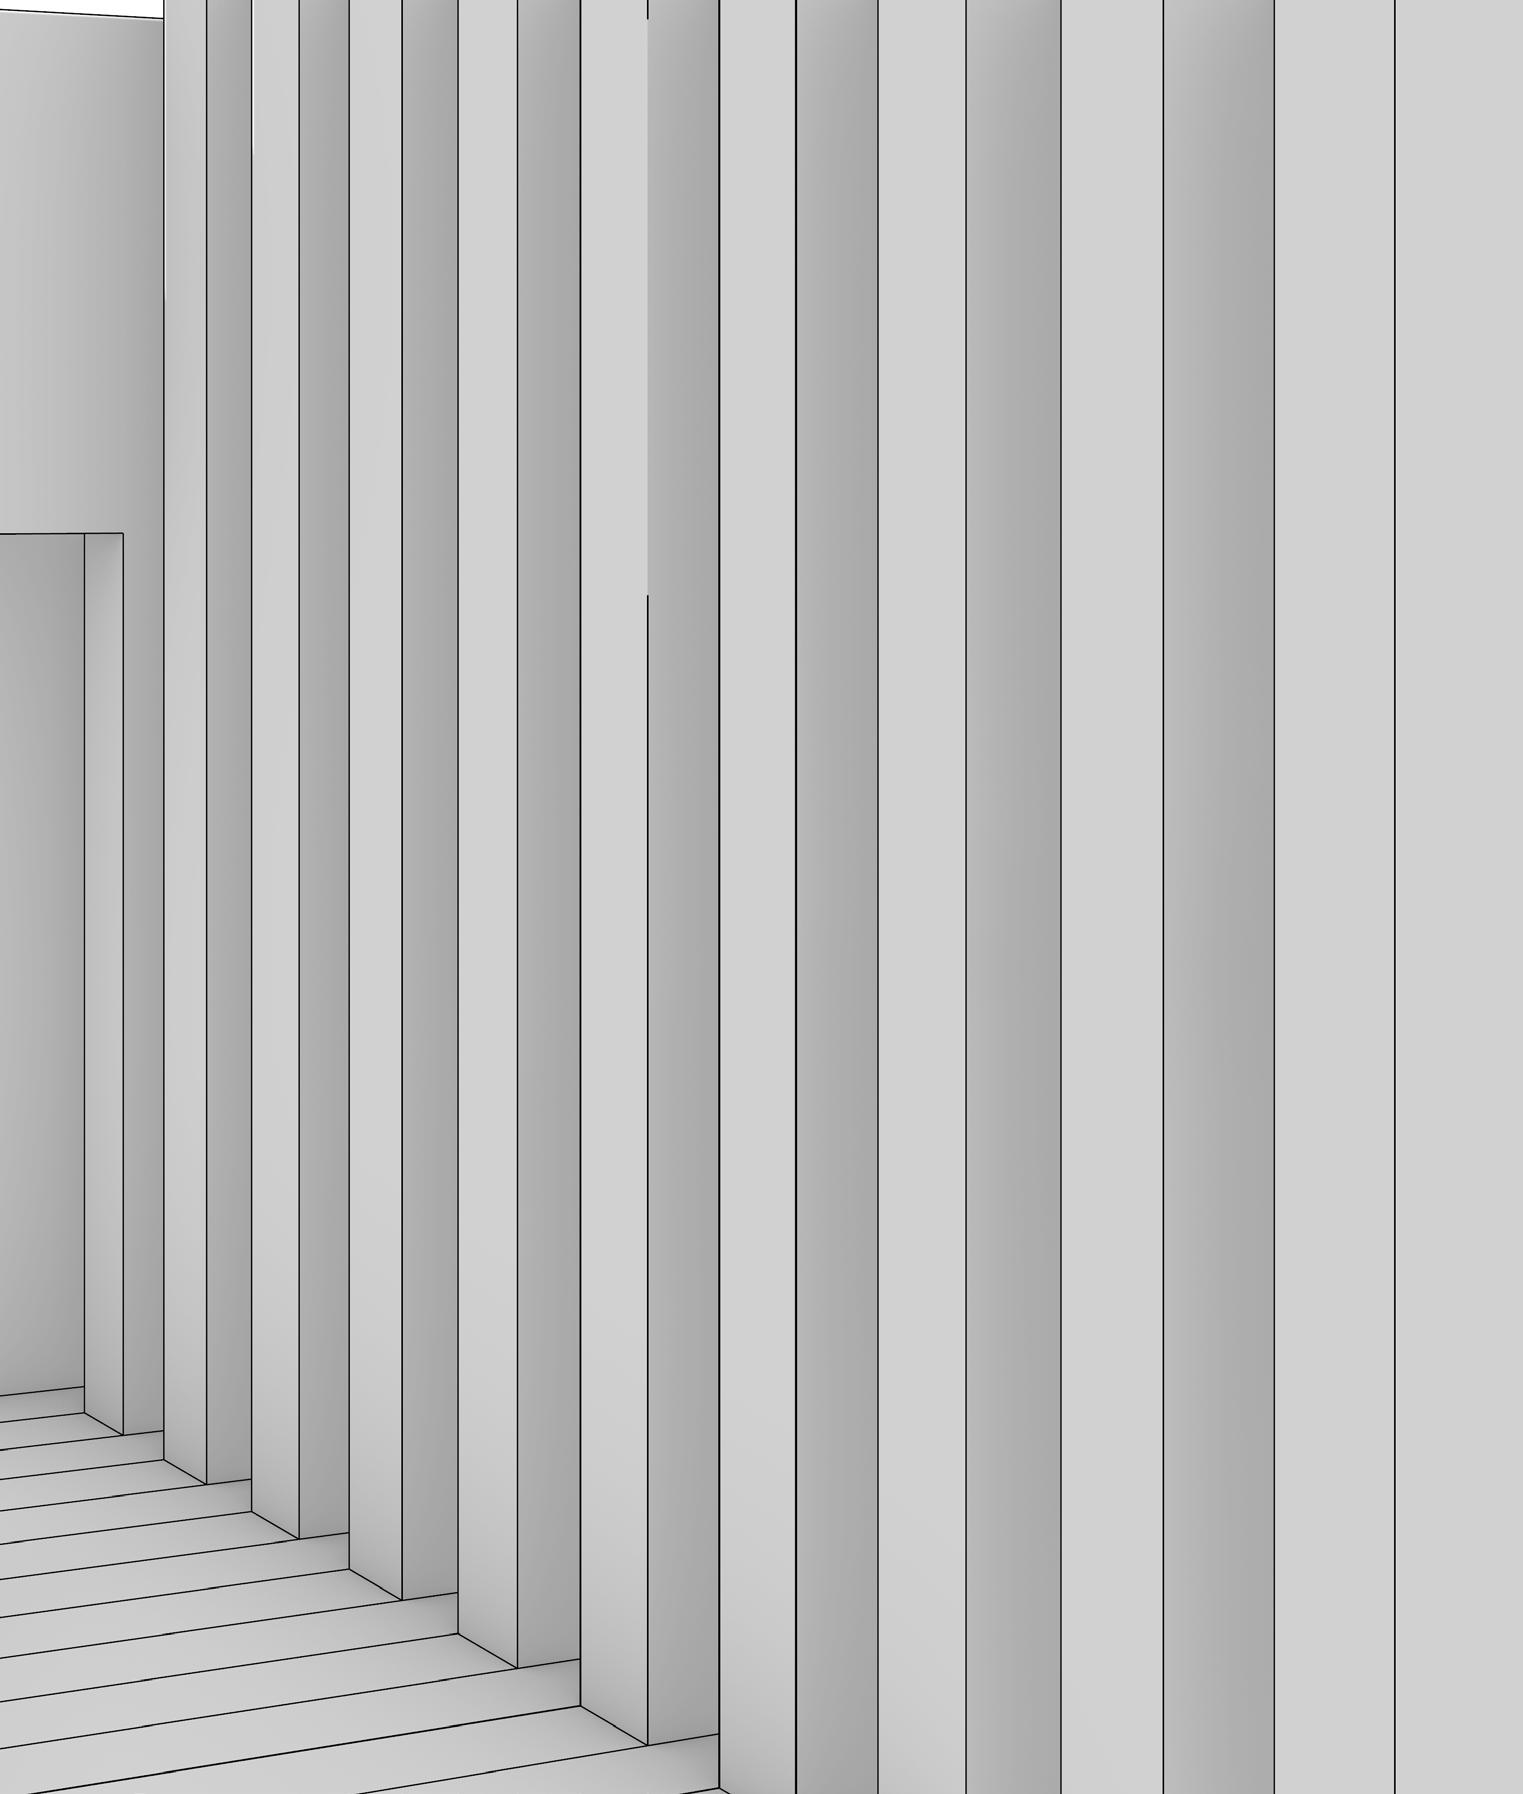
Module 3 Digital Frames
Page 56-57
Guest Lectures

SOFTWARE USED Rhino
FABRICATION TIME
30 min. Laser Cutting
1 Hour Assembly
14 Hours Digitally Modeling
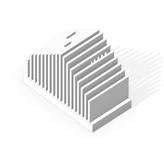
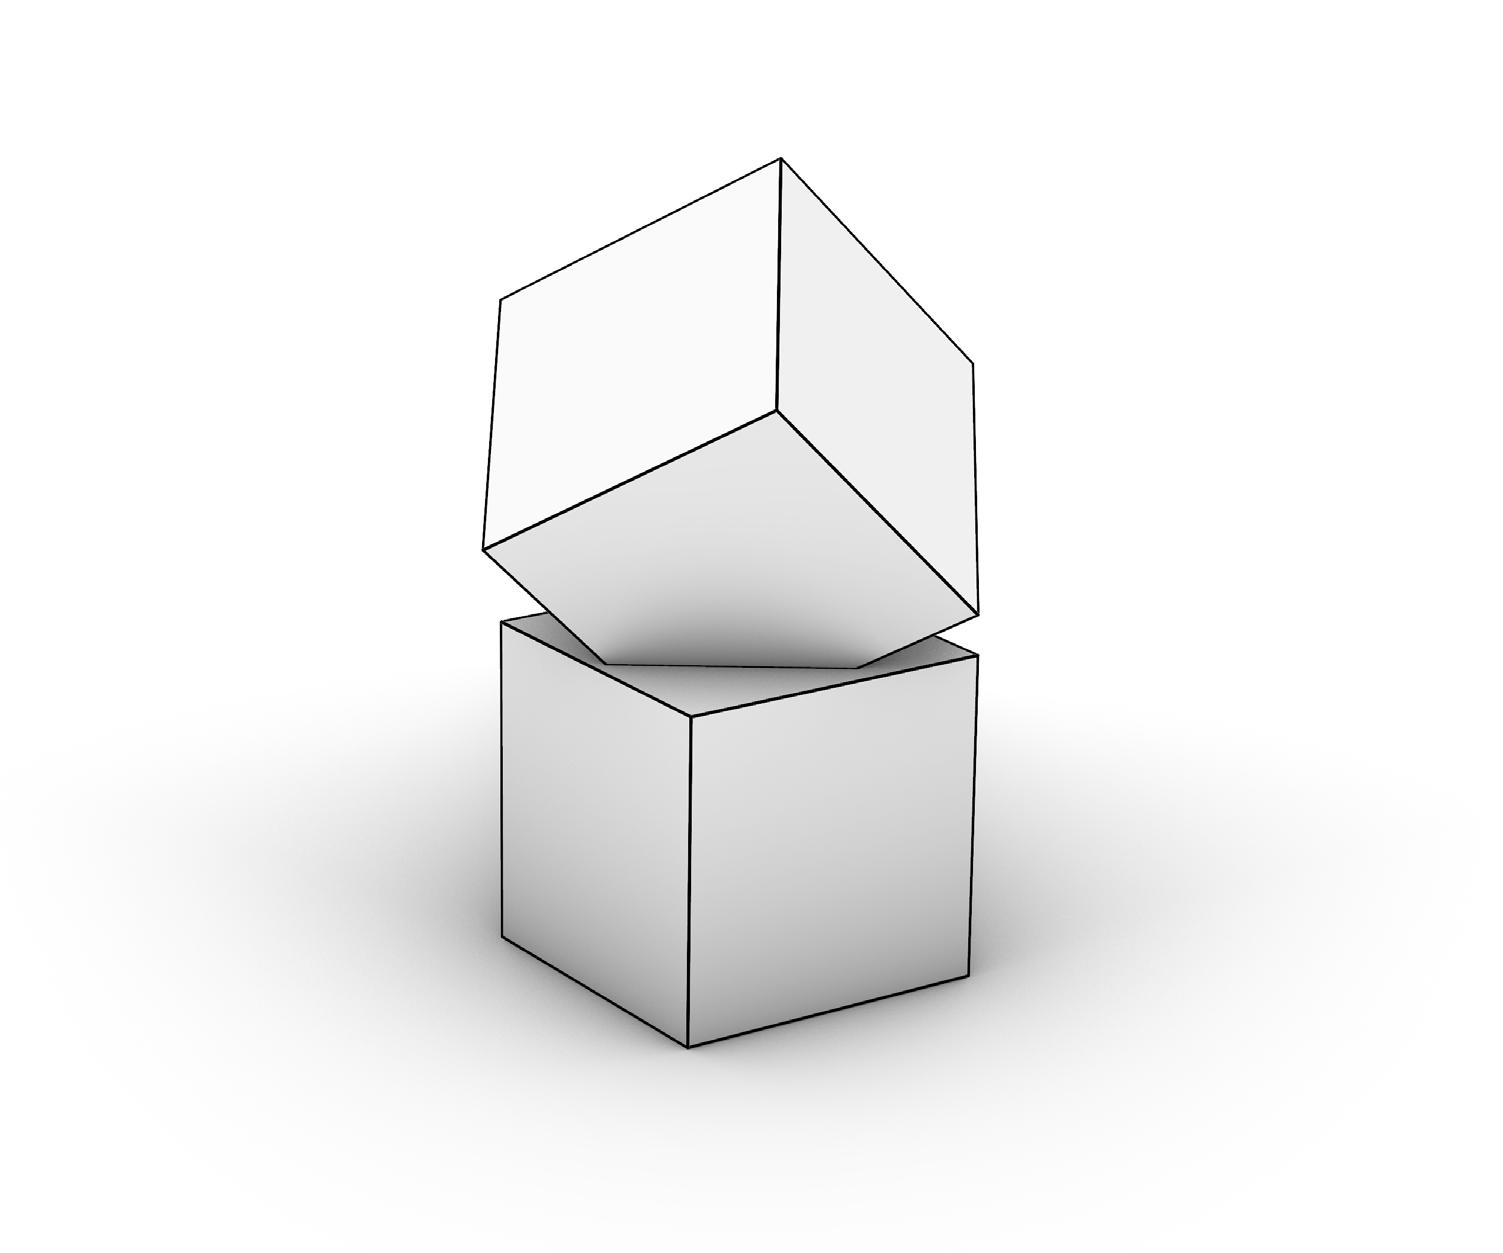
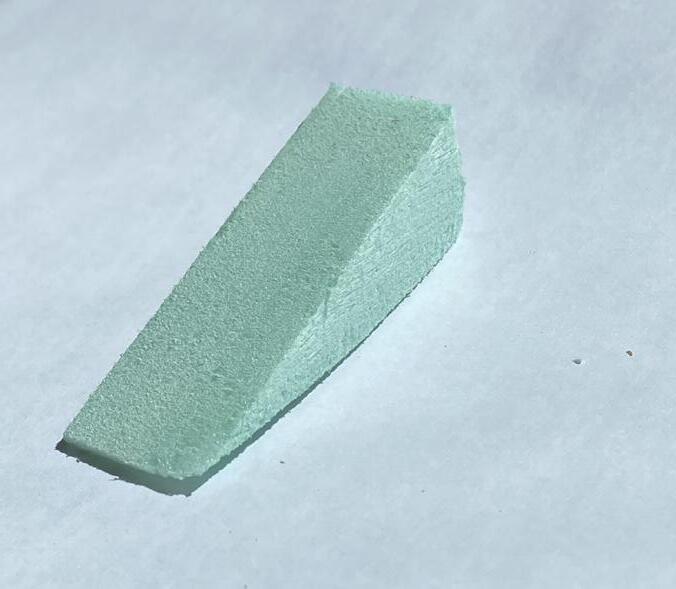
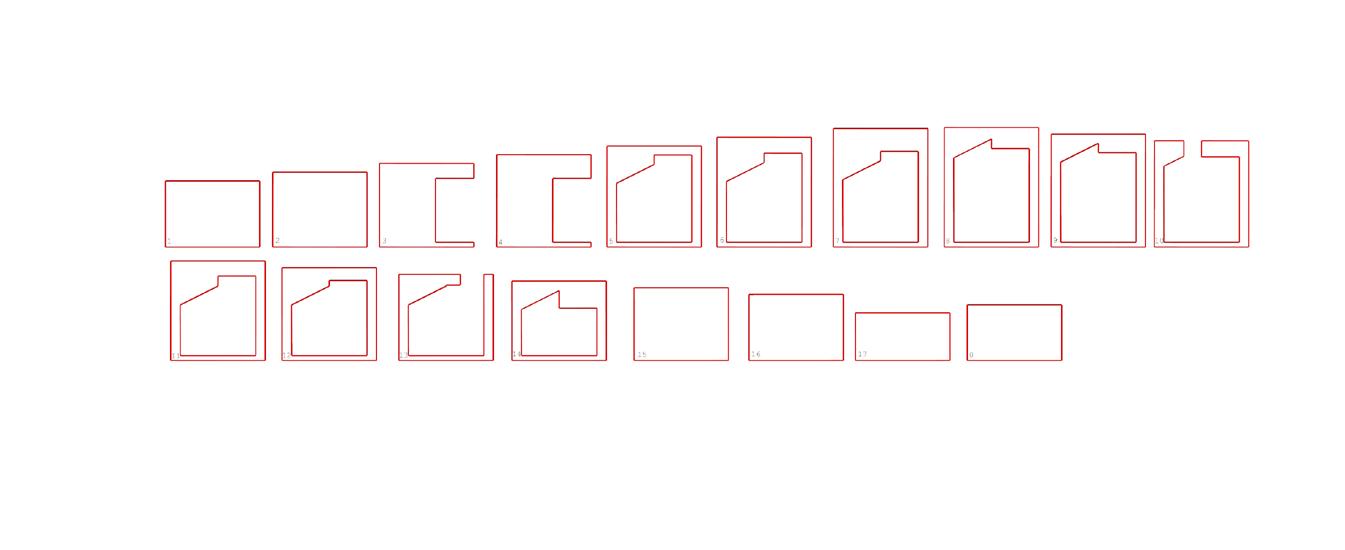
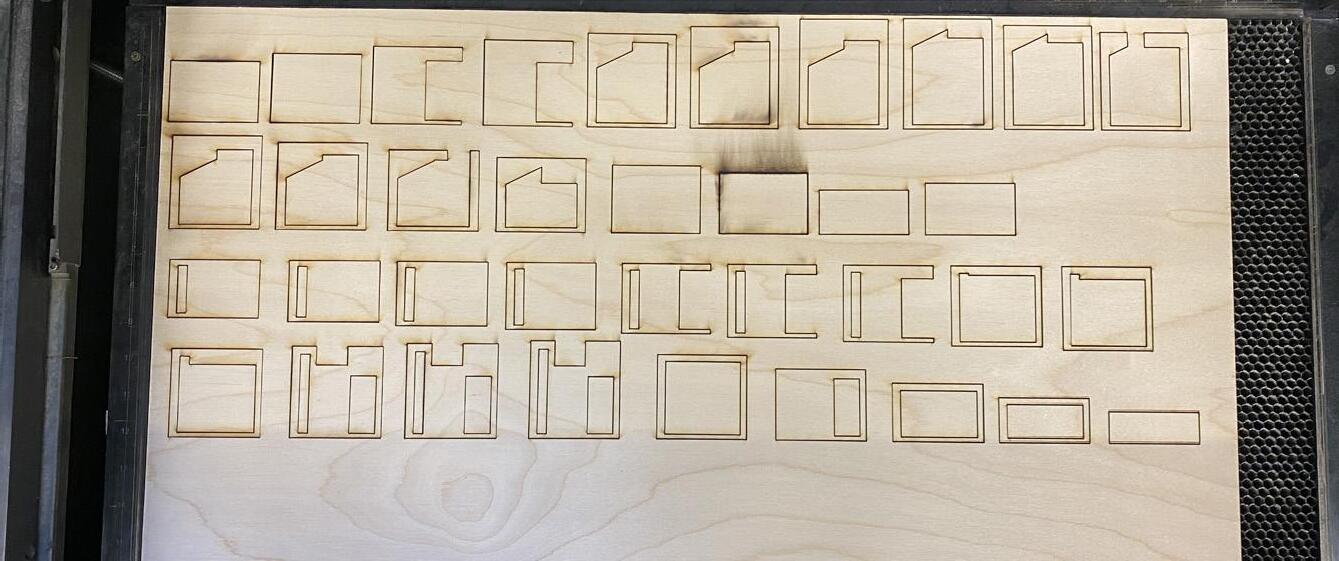
Module 1 is the first assignment of the ARCH 222 class, as well as my first-time learning and using Rhino.
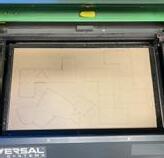
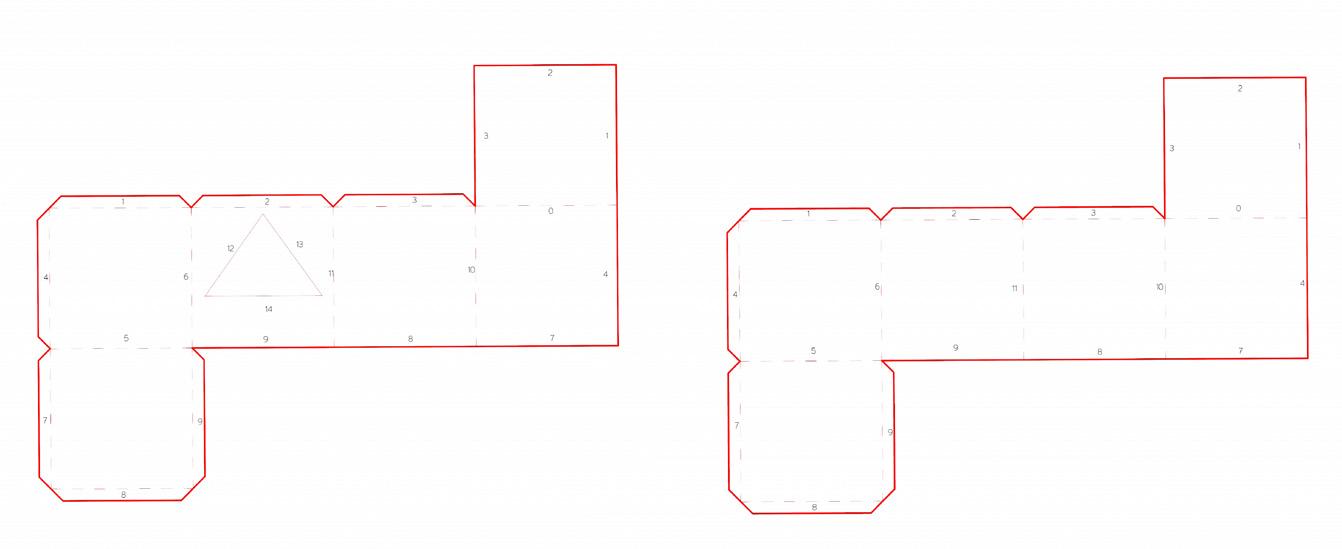
Step 1 of the laser cutting file consisted of placing boxes in Rhino and regulating their size to 3x3” boxes. After you stacked your primitive shapes, you split and unrolled them. This lets you move into 2D and line work. Which allowed you to create tabs and text features for your laser cut file. Step 4 ended by having you set up your file for exporting and setting up for laser cutting.
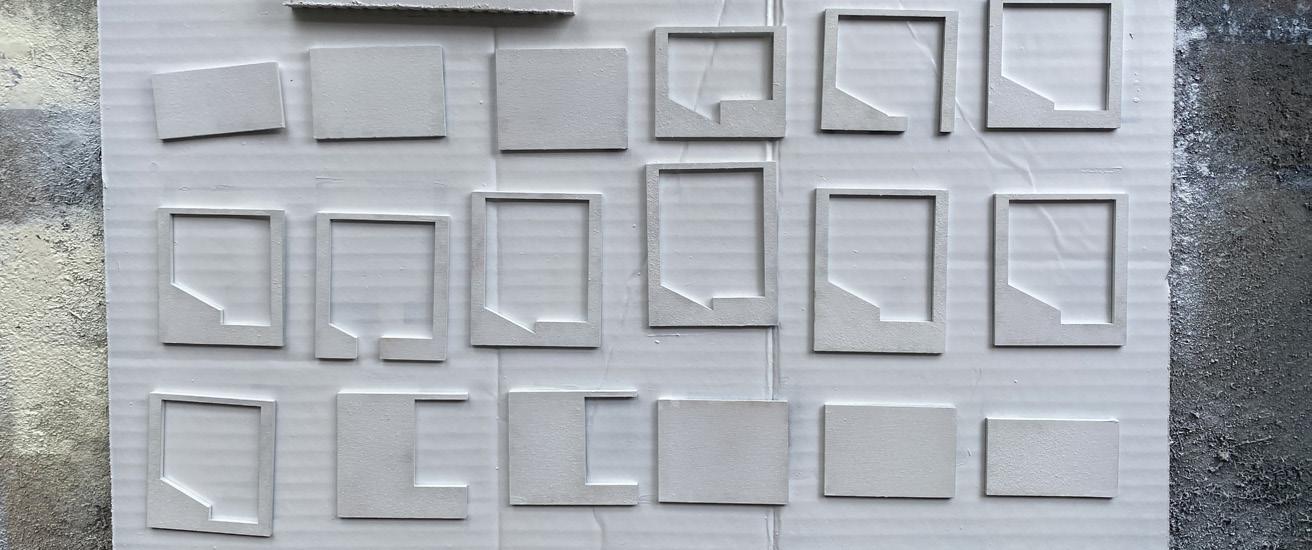
The laser cutting itself did not take long, and I was glad I was able to work with my group to learn how to print.
Creating the model itself did not take long,
MODELING MATERIALS
1/16 Chipboard
X-acto Blade
Cutting Mat
Tacky Glue
Spray Mount
4ply Museum Board
Printer Paper
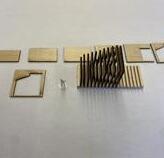
this process was done by folding each tab and following the scored lines first to make it flexible. Afterwards I applied tacky glue with an applicator stick to ensure clean lines. I taped the sides with drafting tape and let sit till the glue was dry. After I made sure to document my progress.
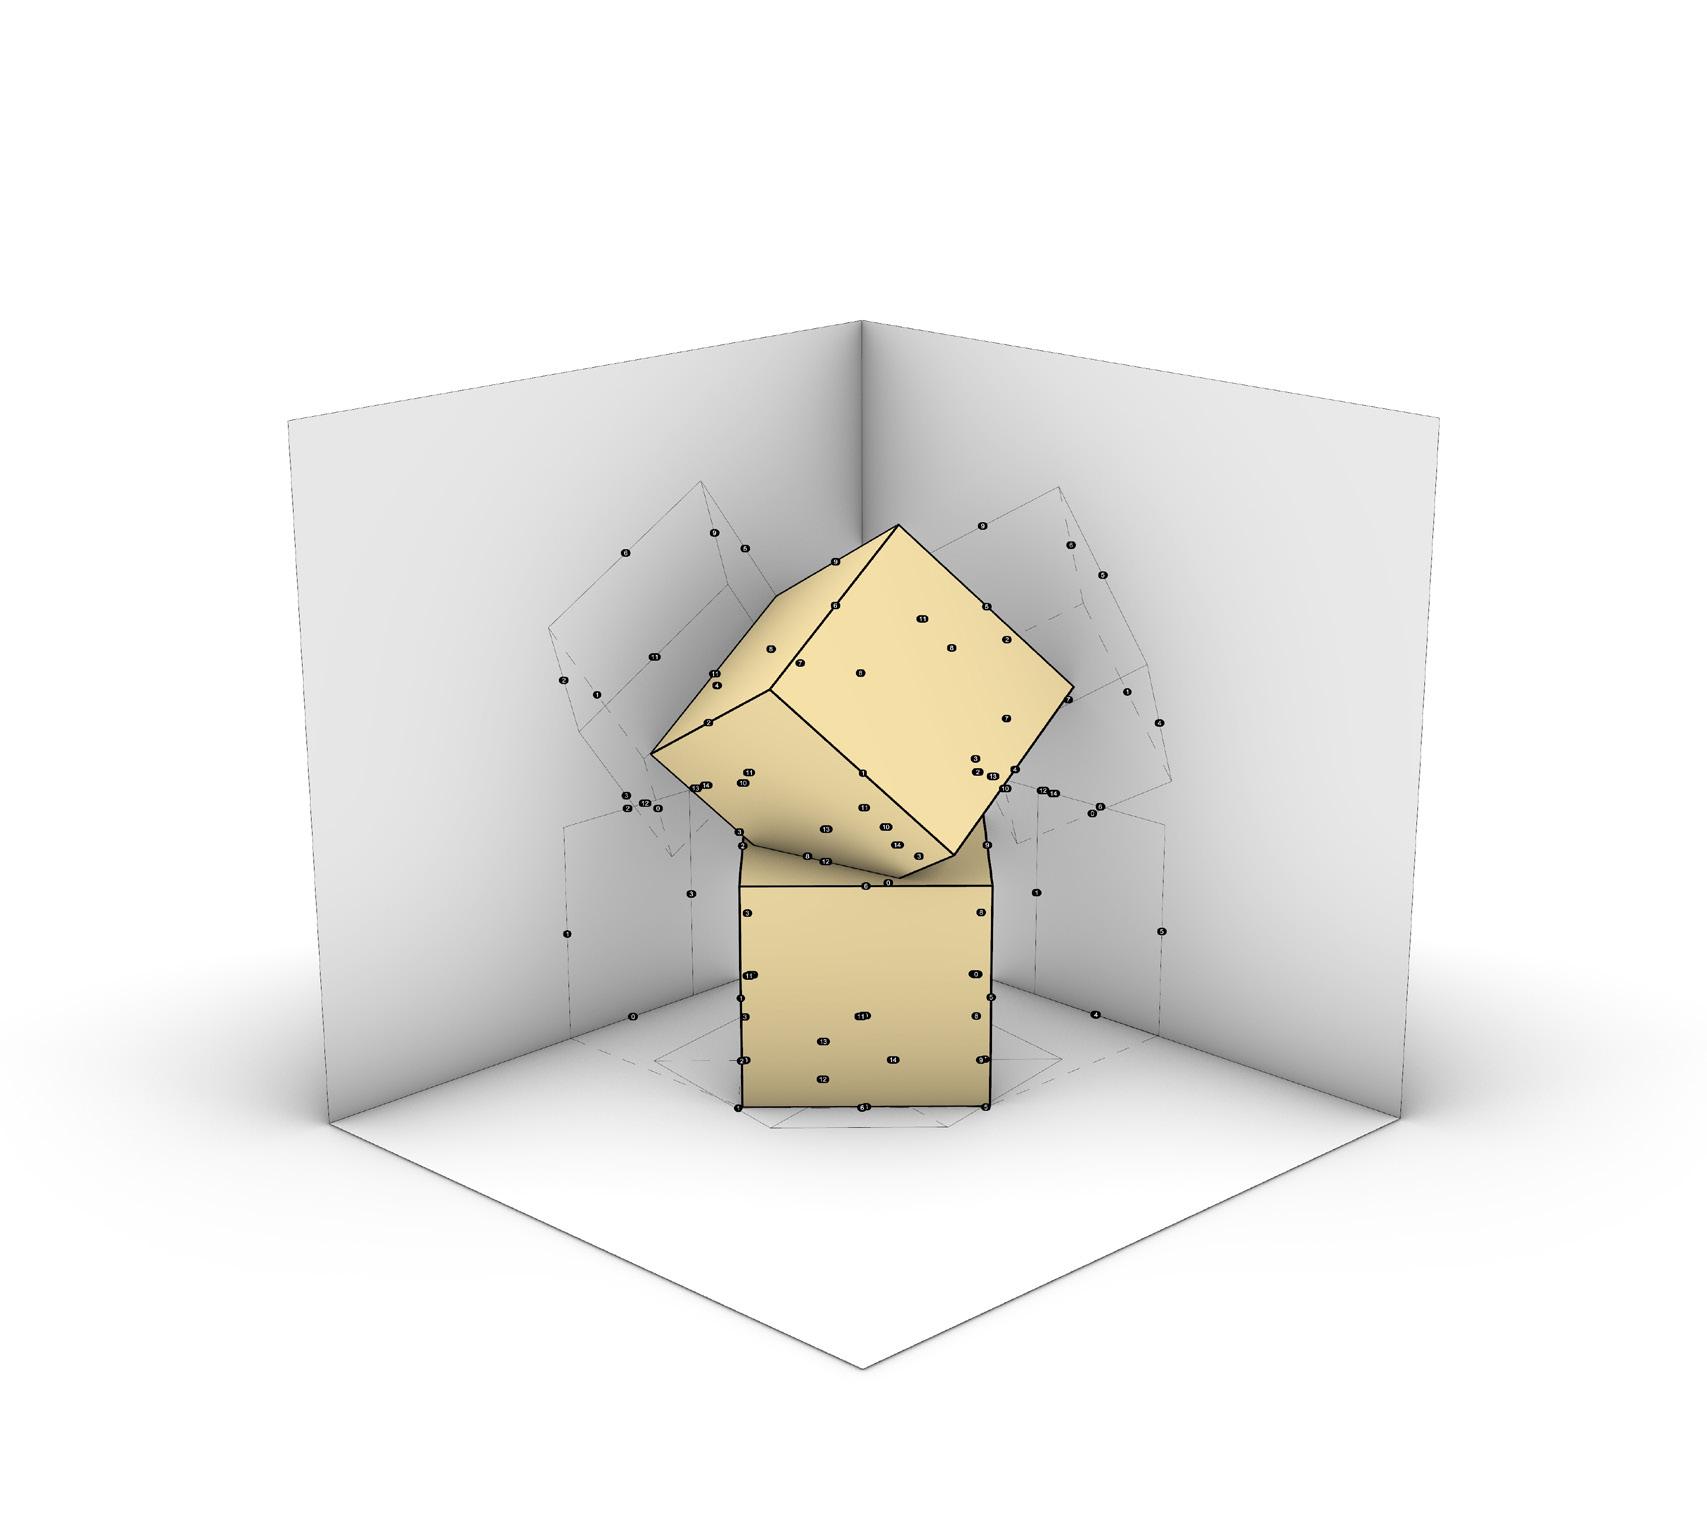
The enclosure file, however, was more complicated for me, I seemed to run into problems every step of the way.
Step 1 consisted of having your primitive blocks in view and creating an enclosure by extruding a curve. Next make 2D and unroll again like before to receive dots on the shapes. Then orient the camera view to the parallel surface of the enclosure and primitives, and unroll again. Lastly you orient it to 3pt, make 2D the line work on the enclosure and set it up for
printing.
Unfortunately, I realized that my 2D parallel surfaces were the mirrored version of my block. To solve this, I used the mirror function and re-placed the unrolled shapes on the enclosure.
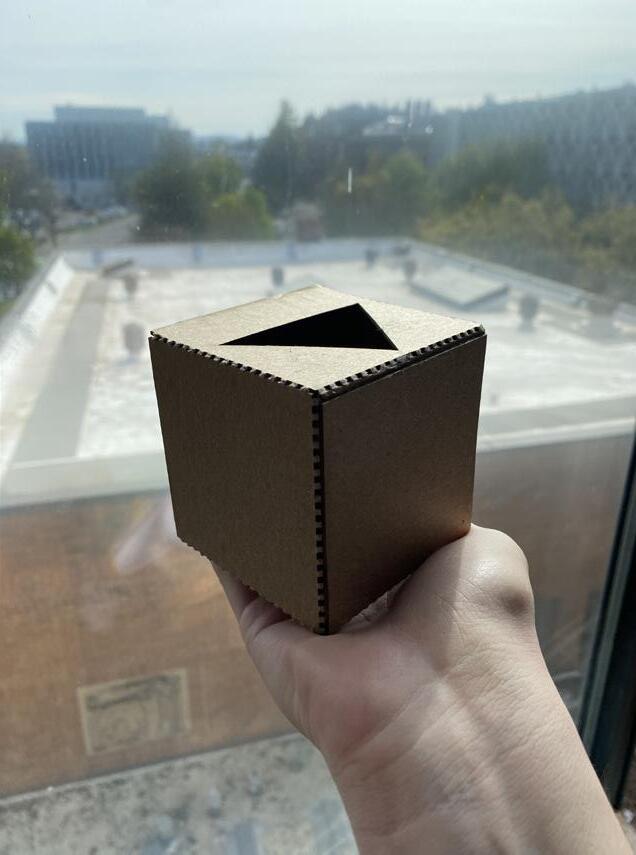
After printing the enclosure sheets, I spray mounted it onto museum board, and I asked a classmate for help taking photos. When I went to capture the images of my Rhino models I ran into a rendering issue. I ended up returning to studio to ask for my classmates’ advice. Because of that I was ultimately able to figure out that it was a display issue related to shadows. I messed around seeing if making changes in the display or render view would work. Eventually I opened the rendering view, and it displayed perfectly. This project was frustrating at times because of these time-consuming fixes. Ultimately, I believe this has helped me learn new things in the long run. Such as asking for help from
your peers because they want to support you, how to use the laser cutter and wood shop, and how to work with others through digital media.
SOFTWARE USED Rhino
Adobe InDesign
Adobe Illustrator
FABRICATION TIME
1 Hour Model Making
41 Hours Digitally Modeling
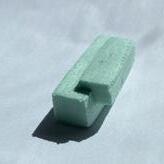
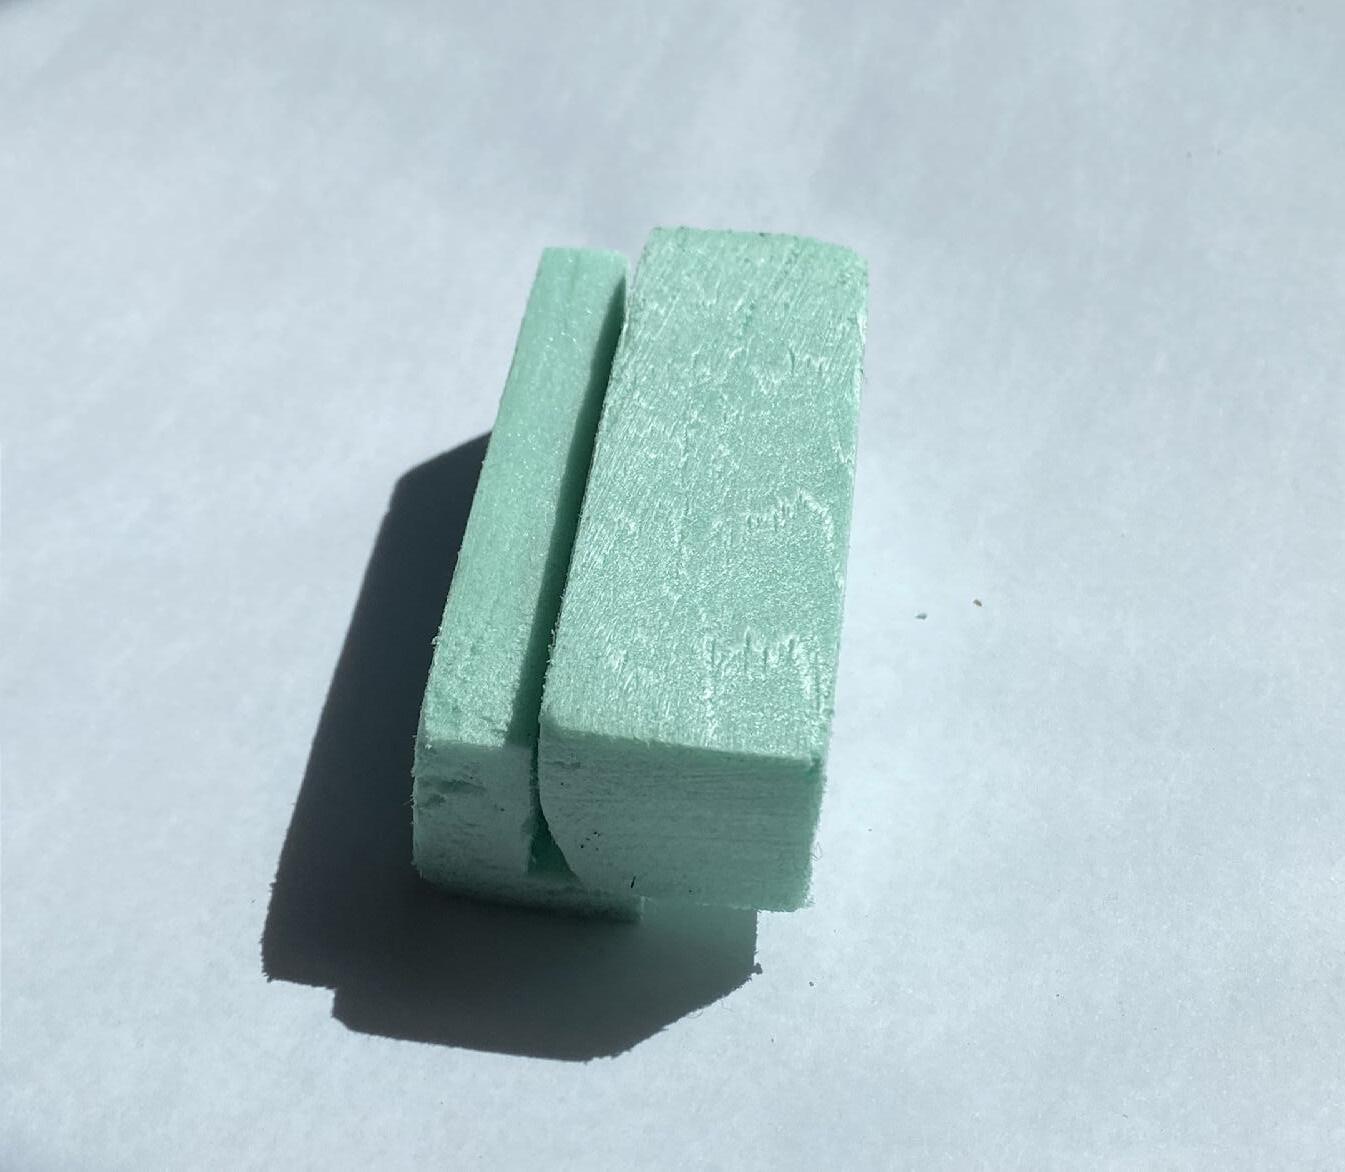
MATERIALS
Foam Board Insulation
Hot Glue
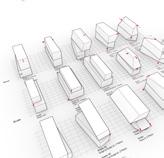
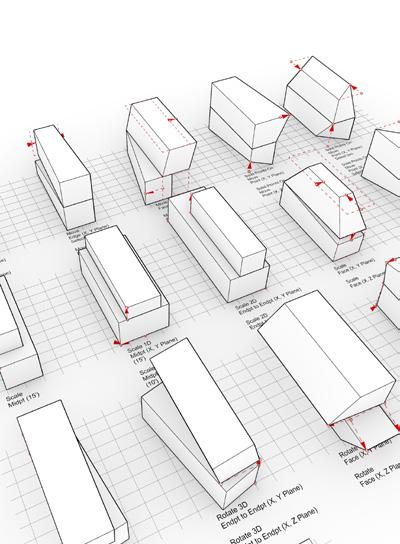
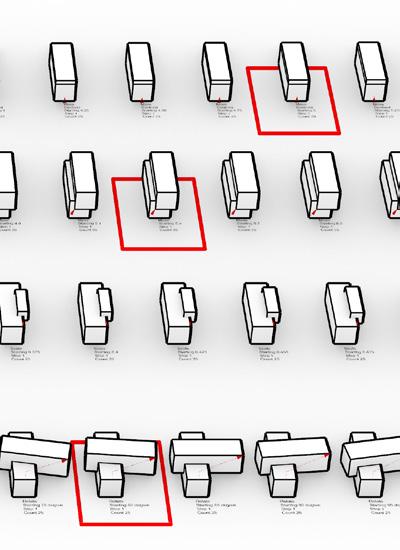
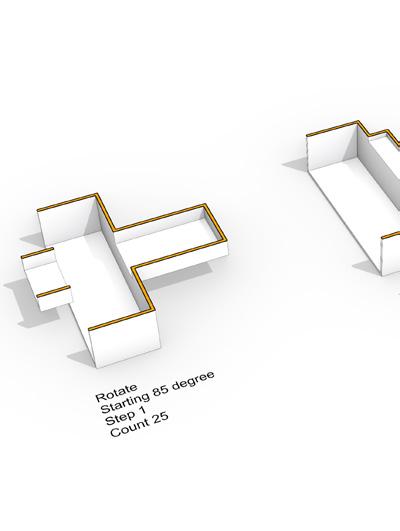
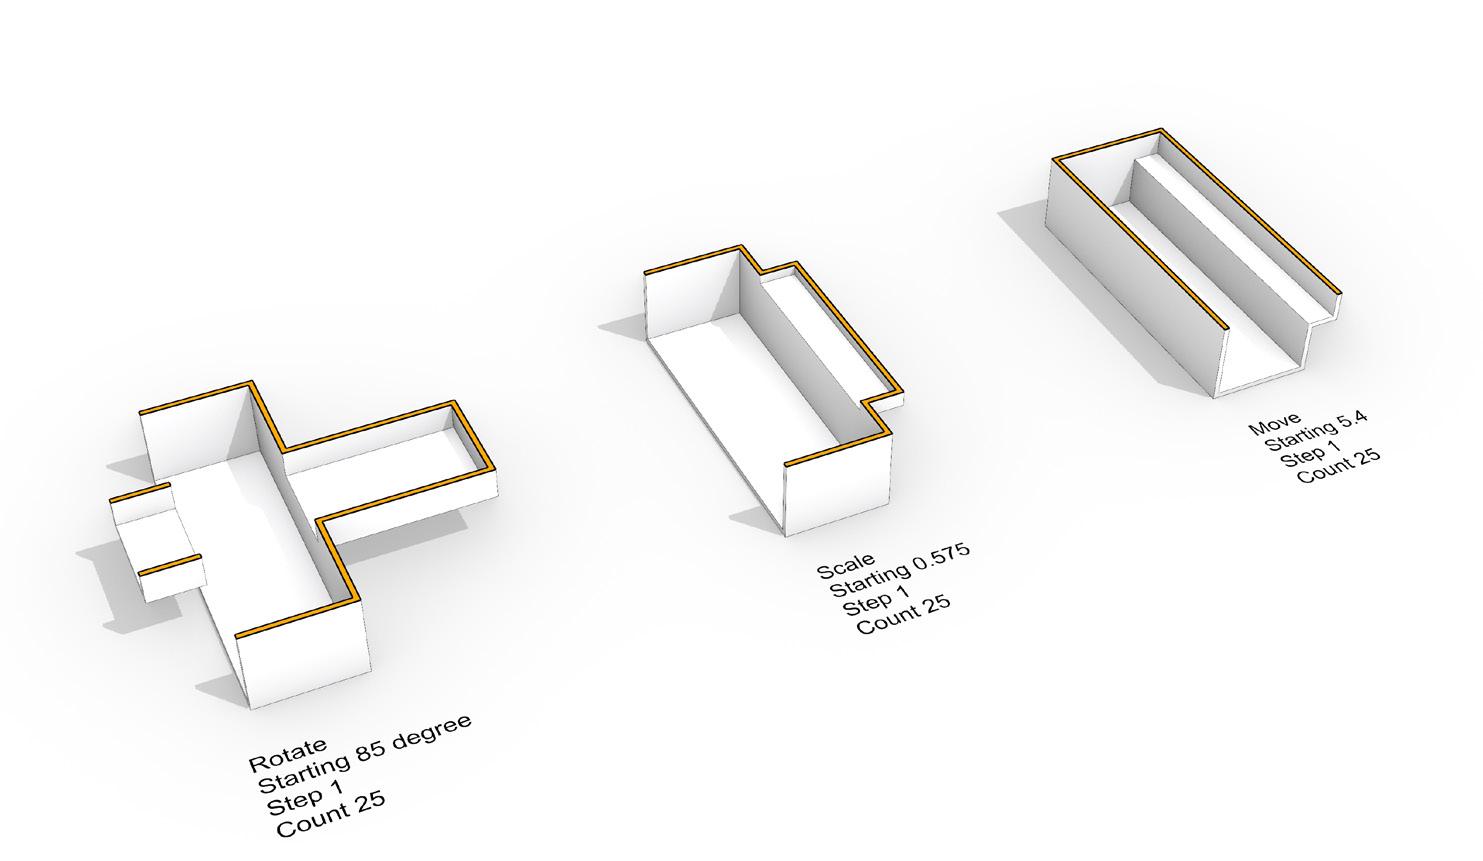
Module two was a long and hard process. It felt intimidating working with so many parts at first. But after the first two weeks, it started making sense I was moving faster in Rhino. Not saying that I did not make mistakes. Those happened.
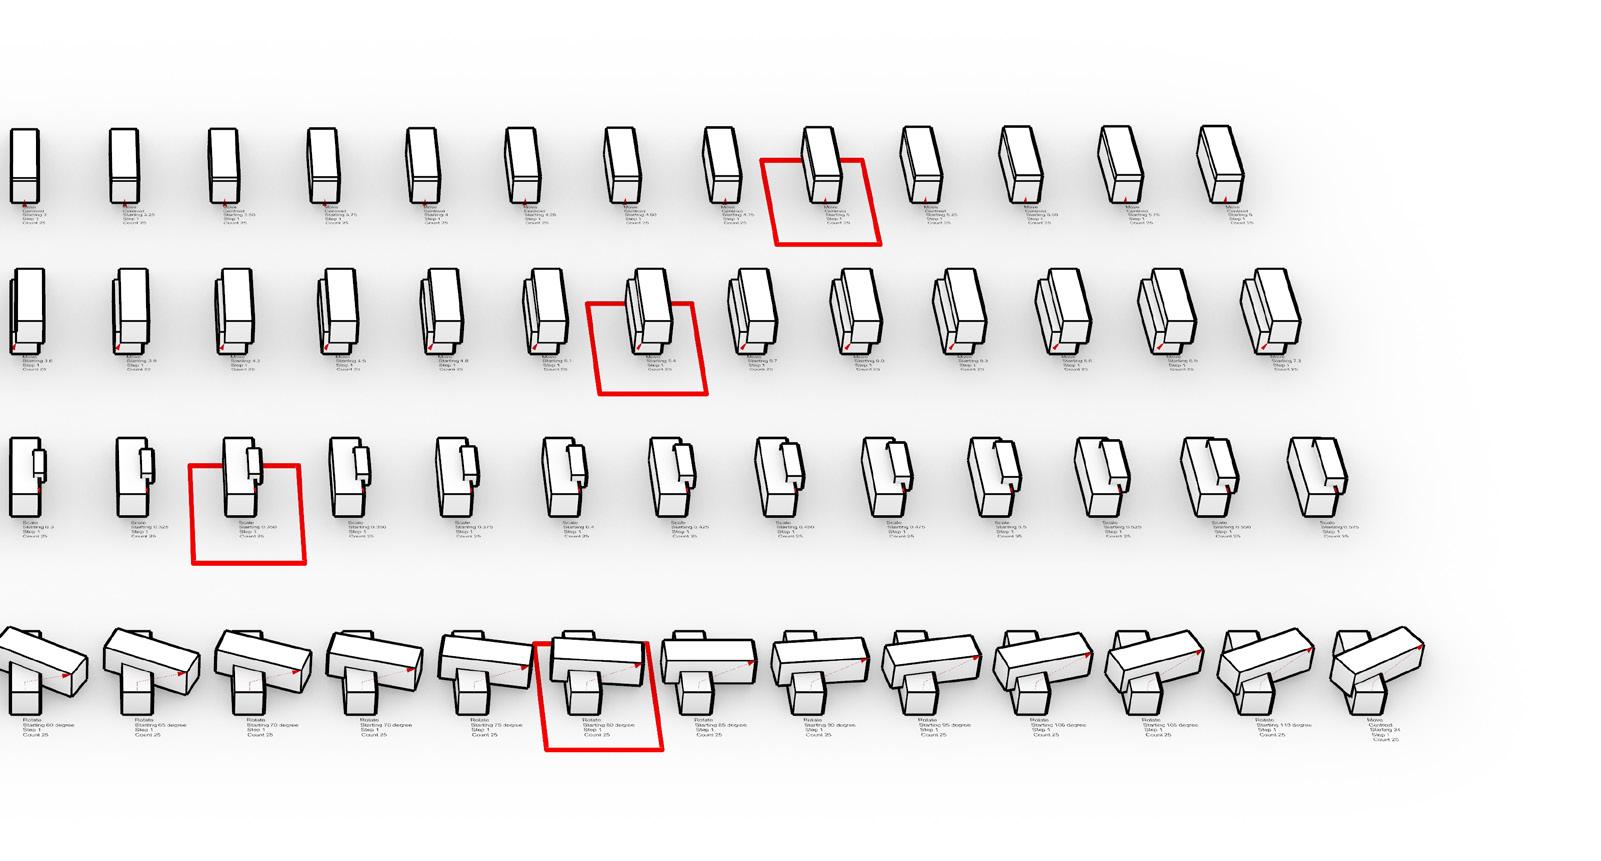
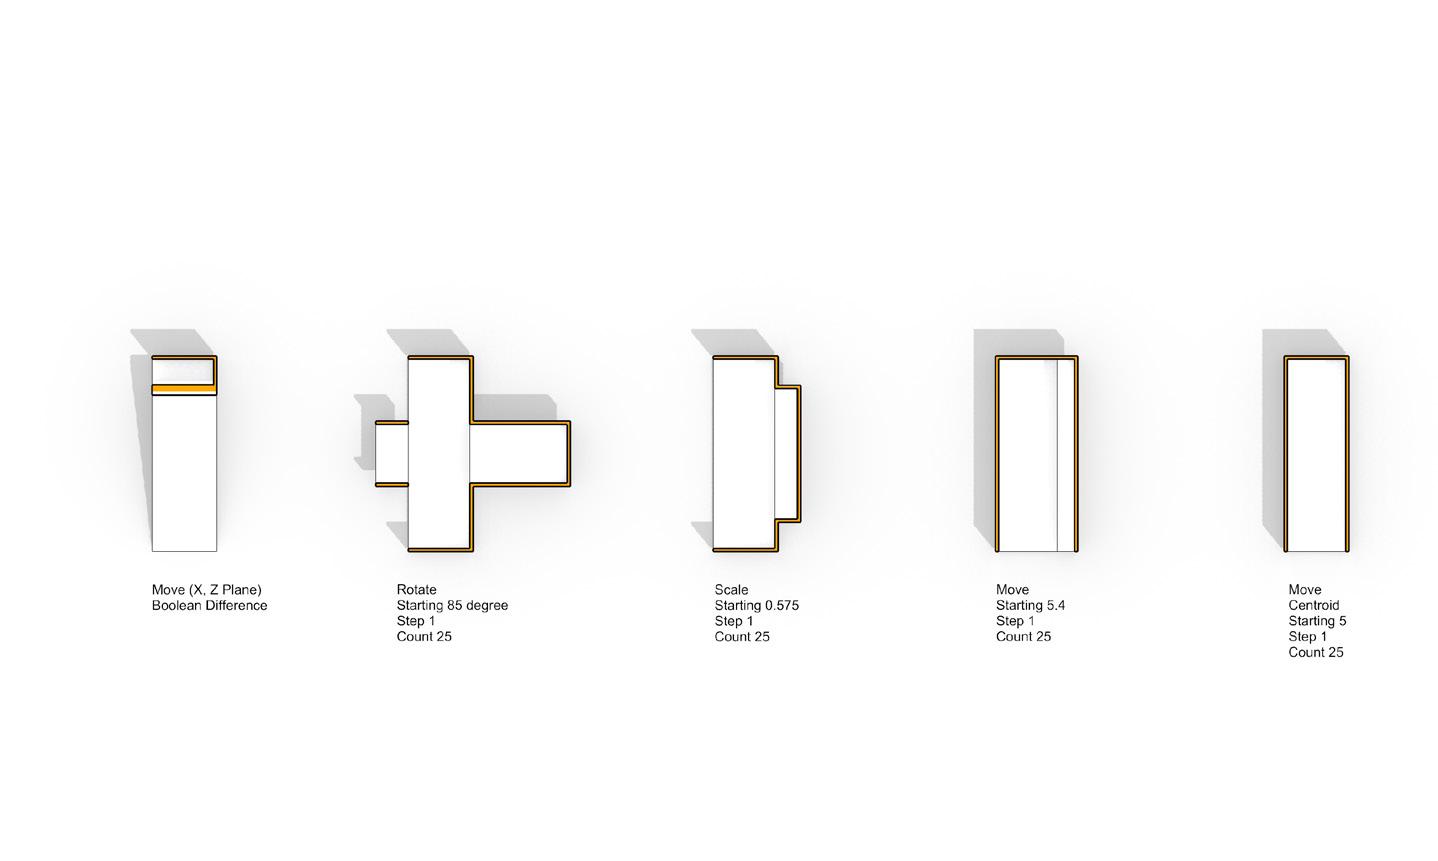
Module 2 consisted of learning the Move, Scale, Rotate, and Mirror command. After using those commands, you put them together in 25 different iterations. Next, I used Grasshopper for the first time. This was done with the same commands to make 100 iterations. That are also whole through Boolean union. After I made subtractive aggregations with offset and clipping planes. Moving in-between illustrator and Rhino. Afterwards I made templates
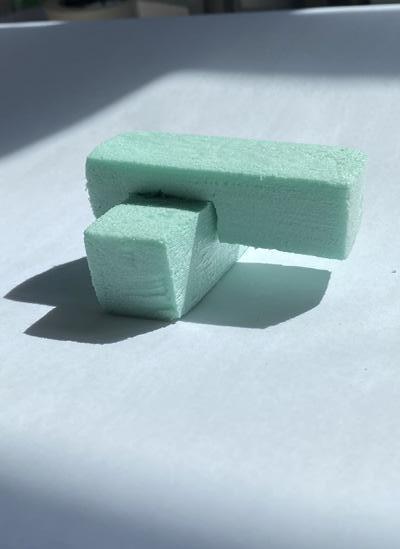
for 5 of the 100 to make a physical model out of.
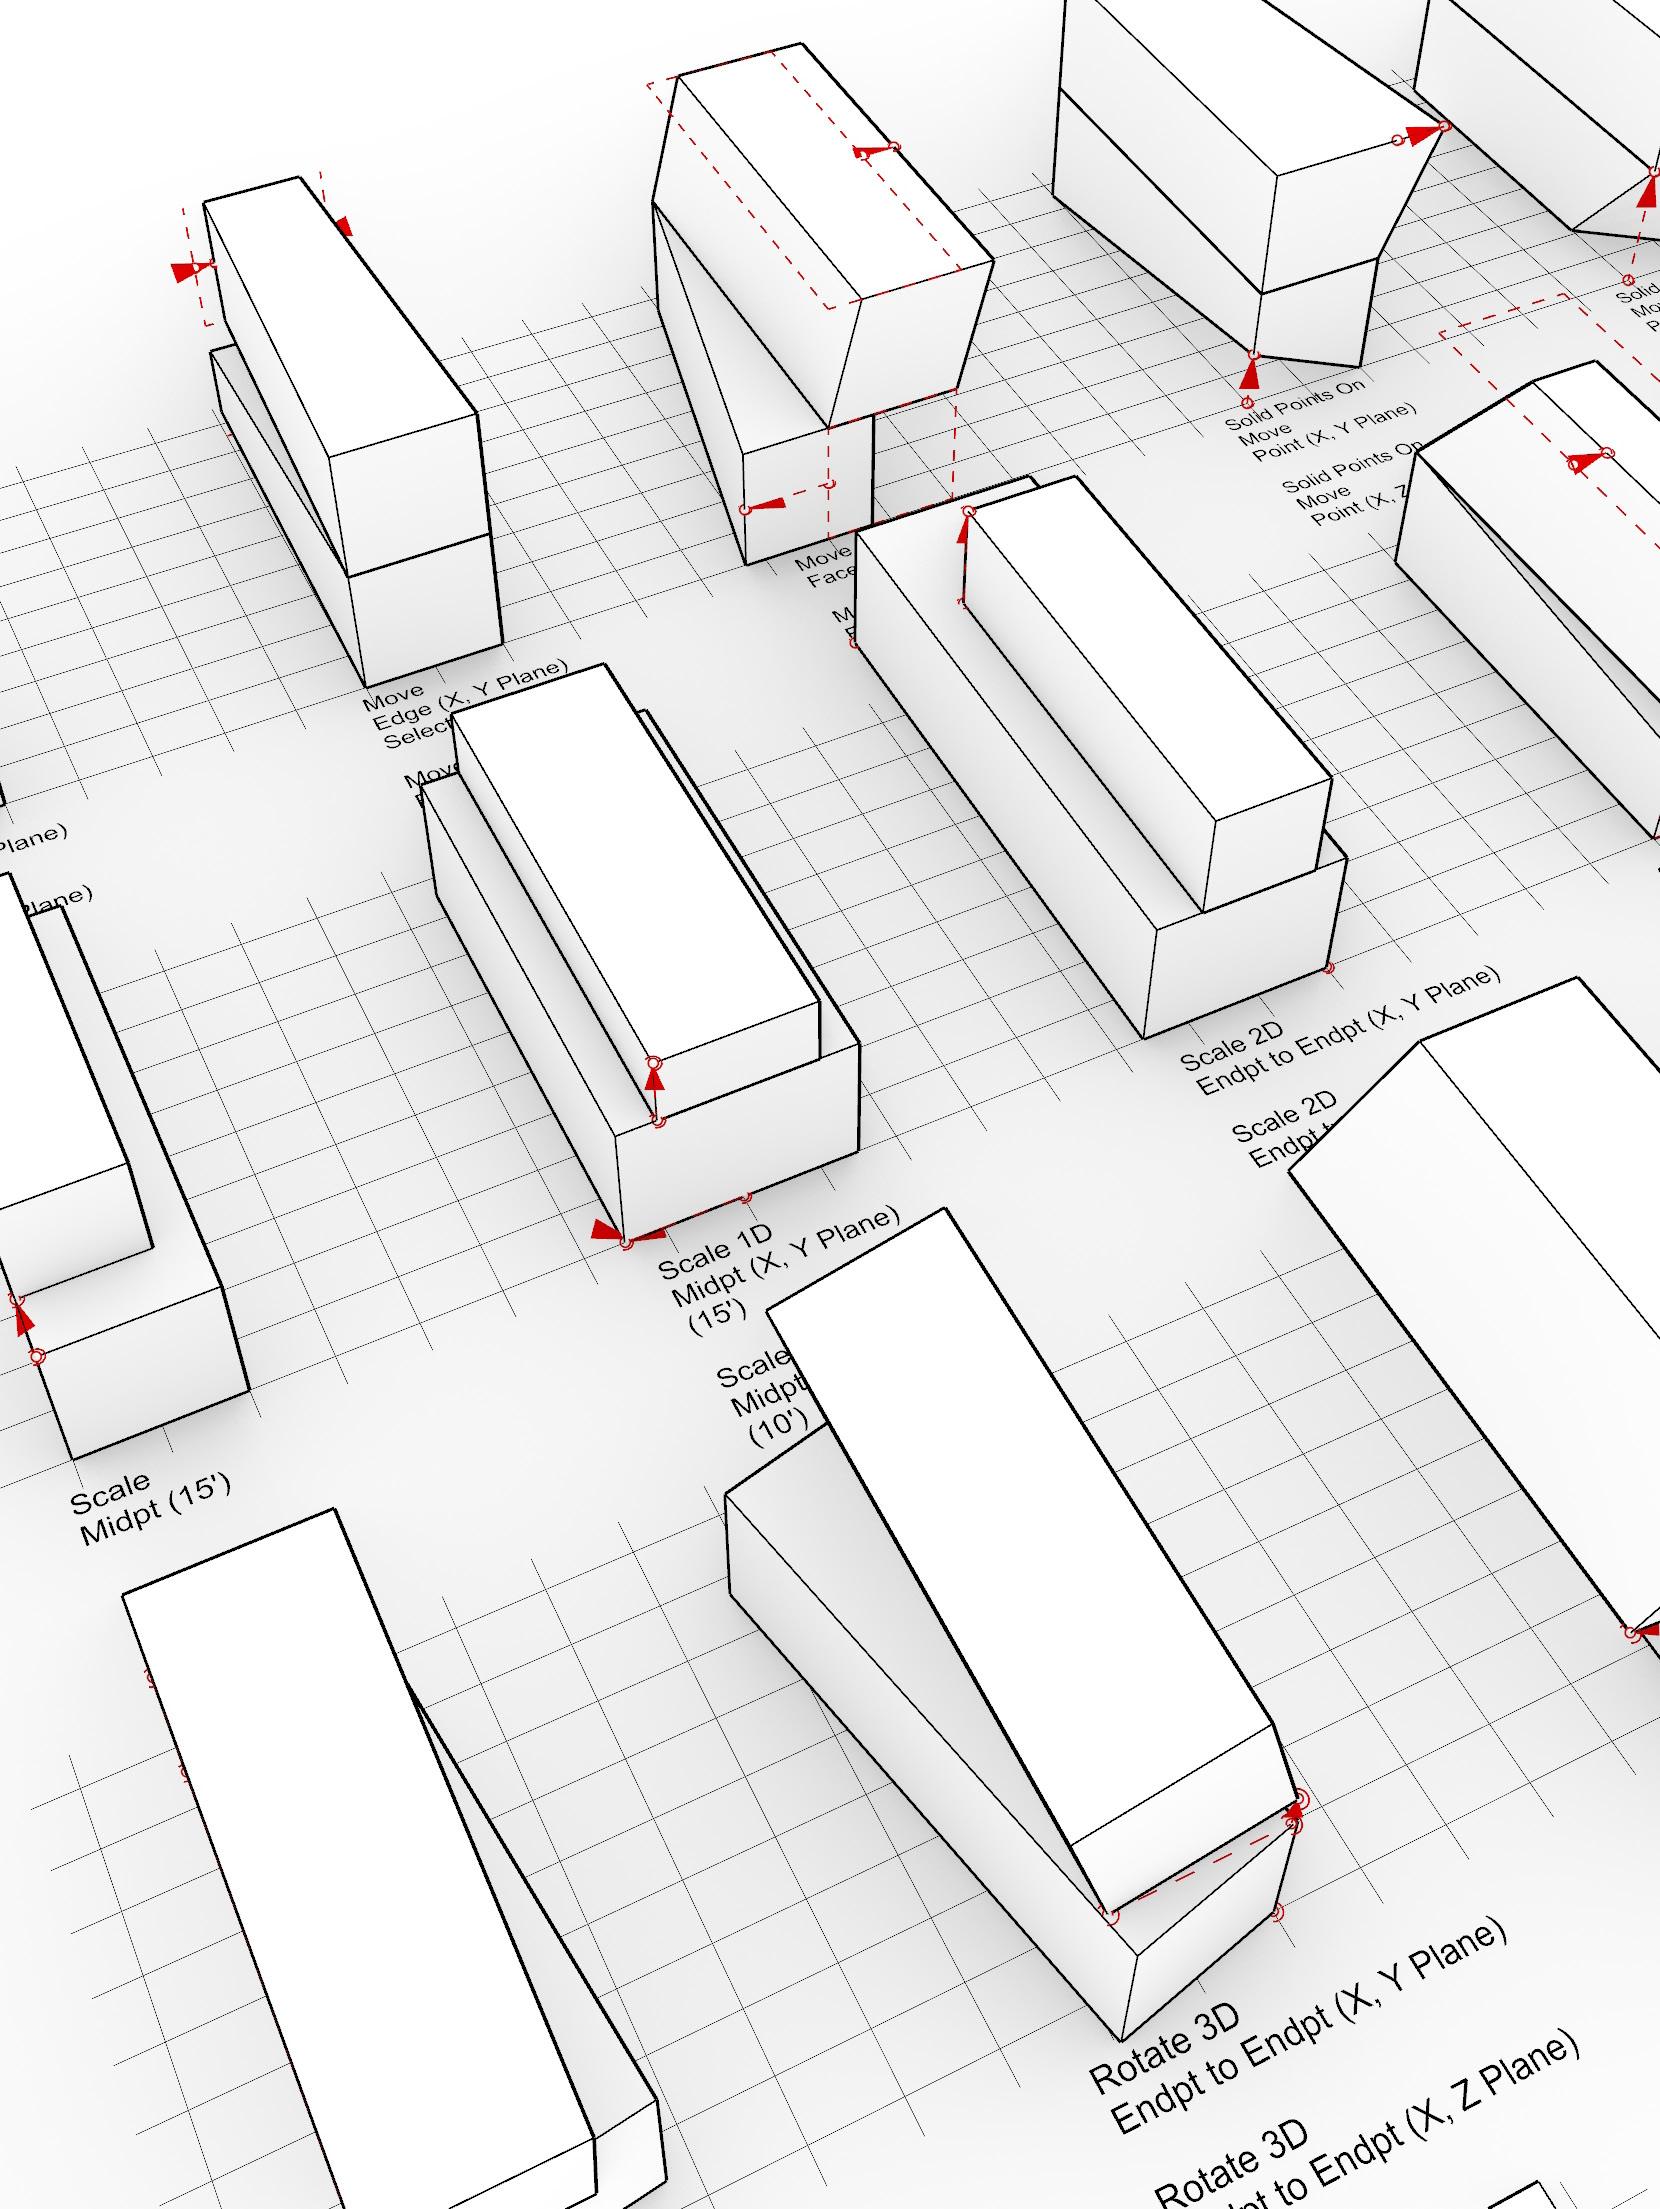
MoveEdge(X,YPlane) Selecttwo
MoveEdge(X,ZPlane) Selecttwo
MoveEdge(X,YPlane)
MoveEdge(X,ZPlane)
MoveFace(X,YPlane)MoveFace(X,ZPlane)
SolidPointsOn MovePoint(X,YPlane) SelecttwoSolidPointsOn MovePoint(X,ZPlane) Selecttwo SolidPointsOn MovePoint(X,YPlane) SolidPointsOn MovePoint(X,ZPlane)
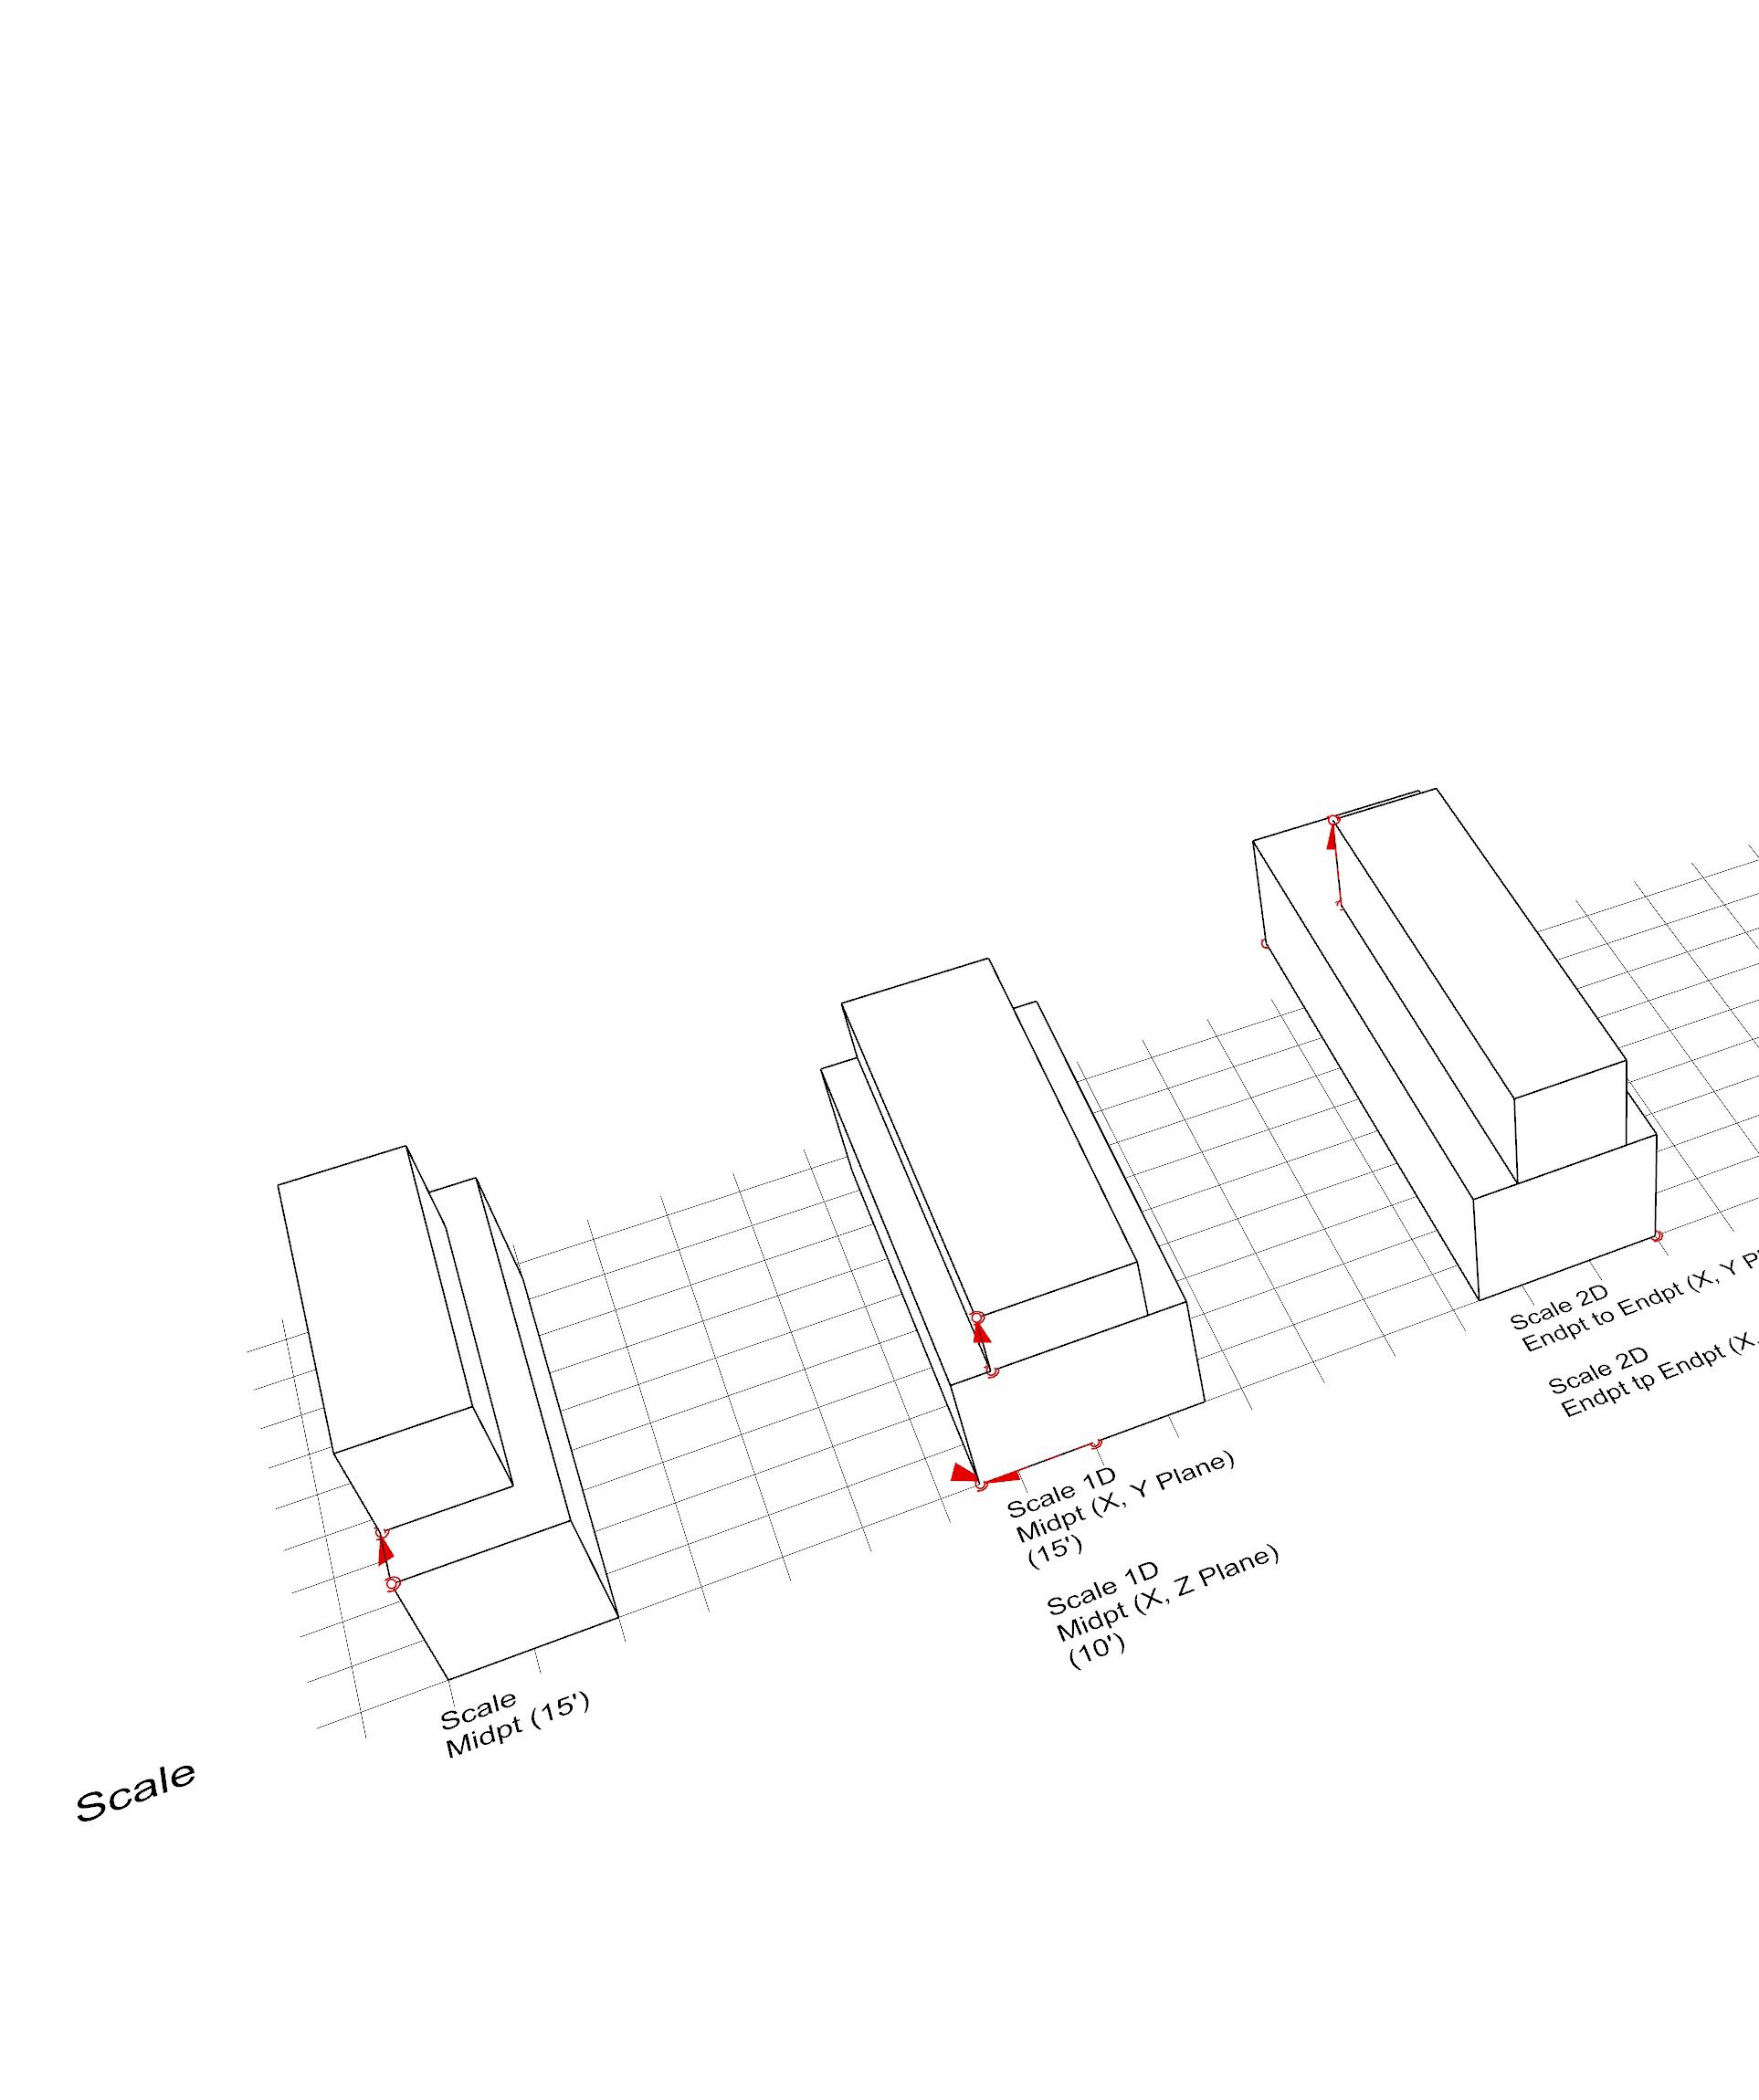
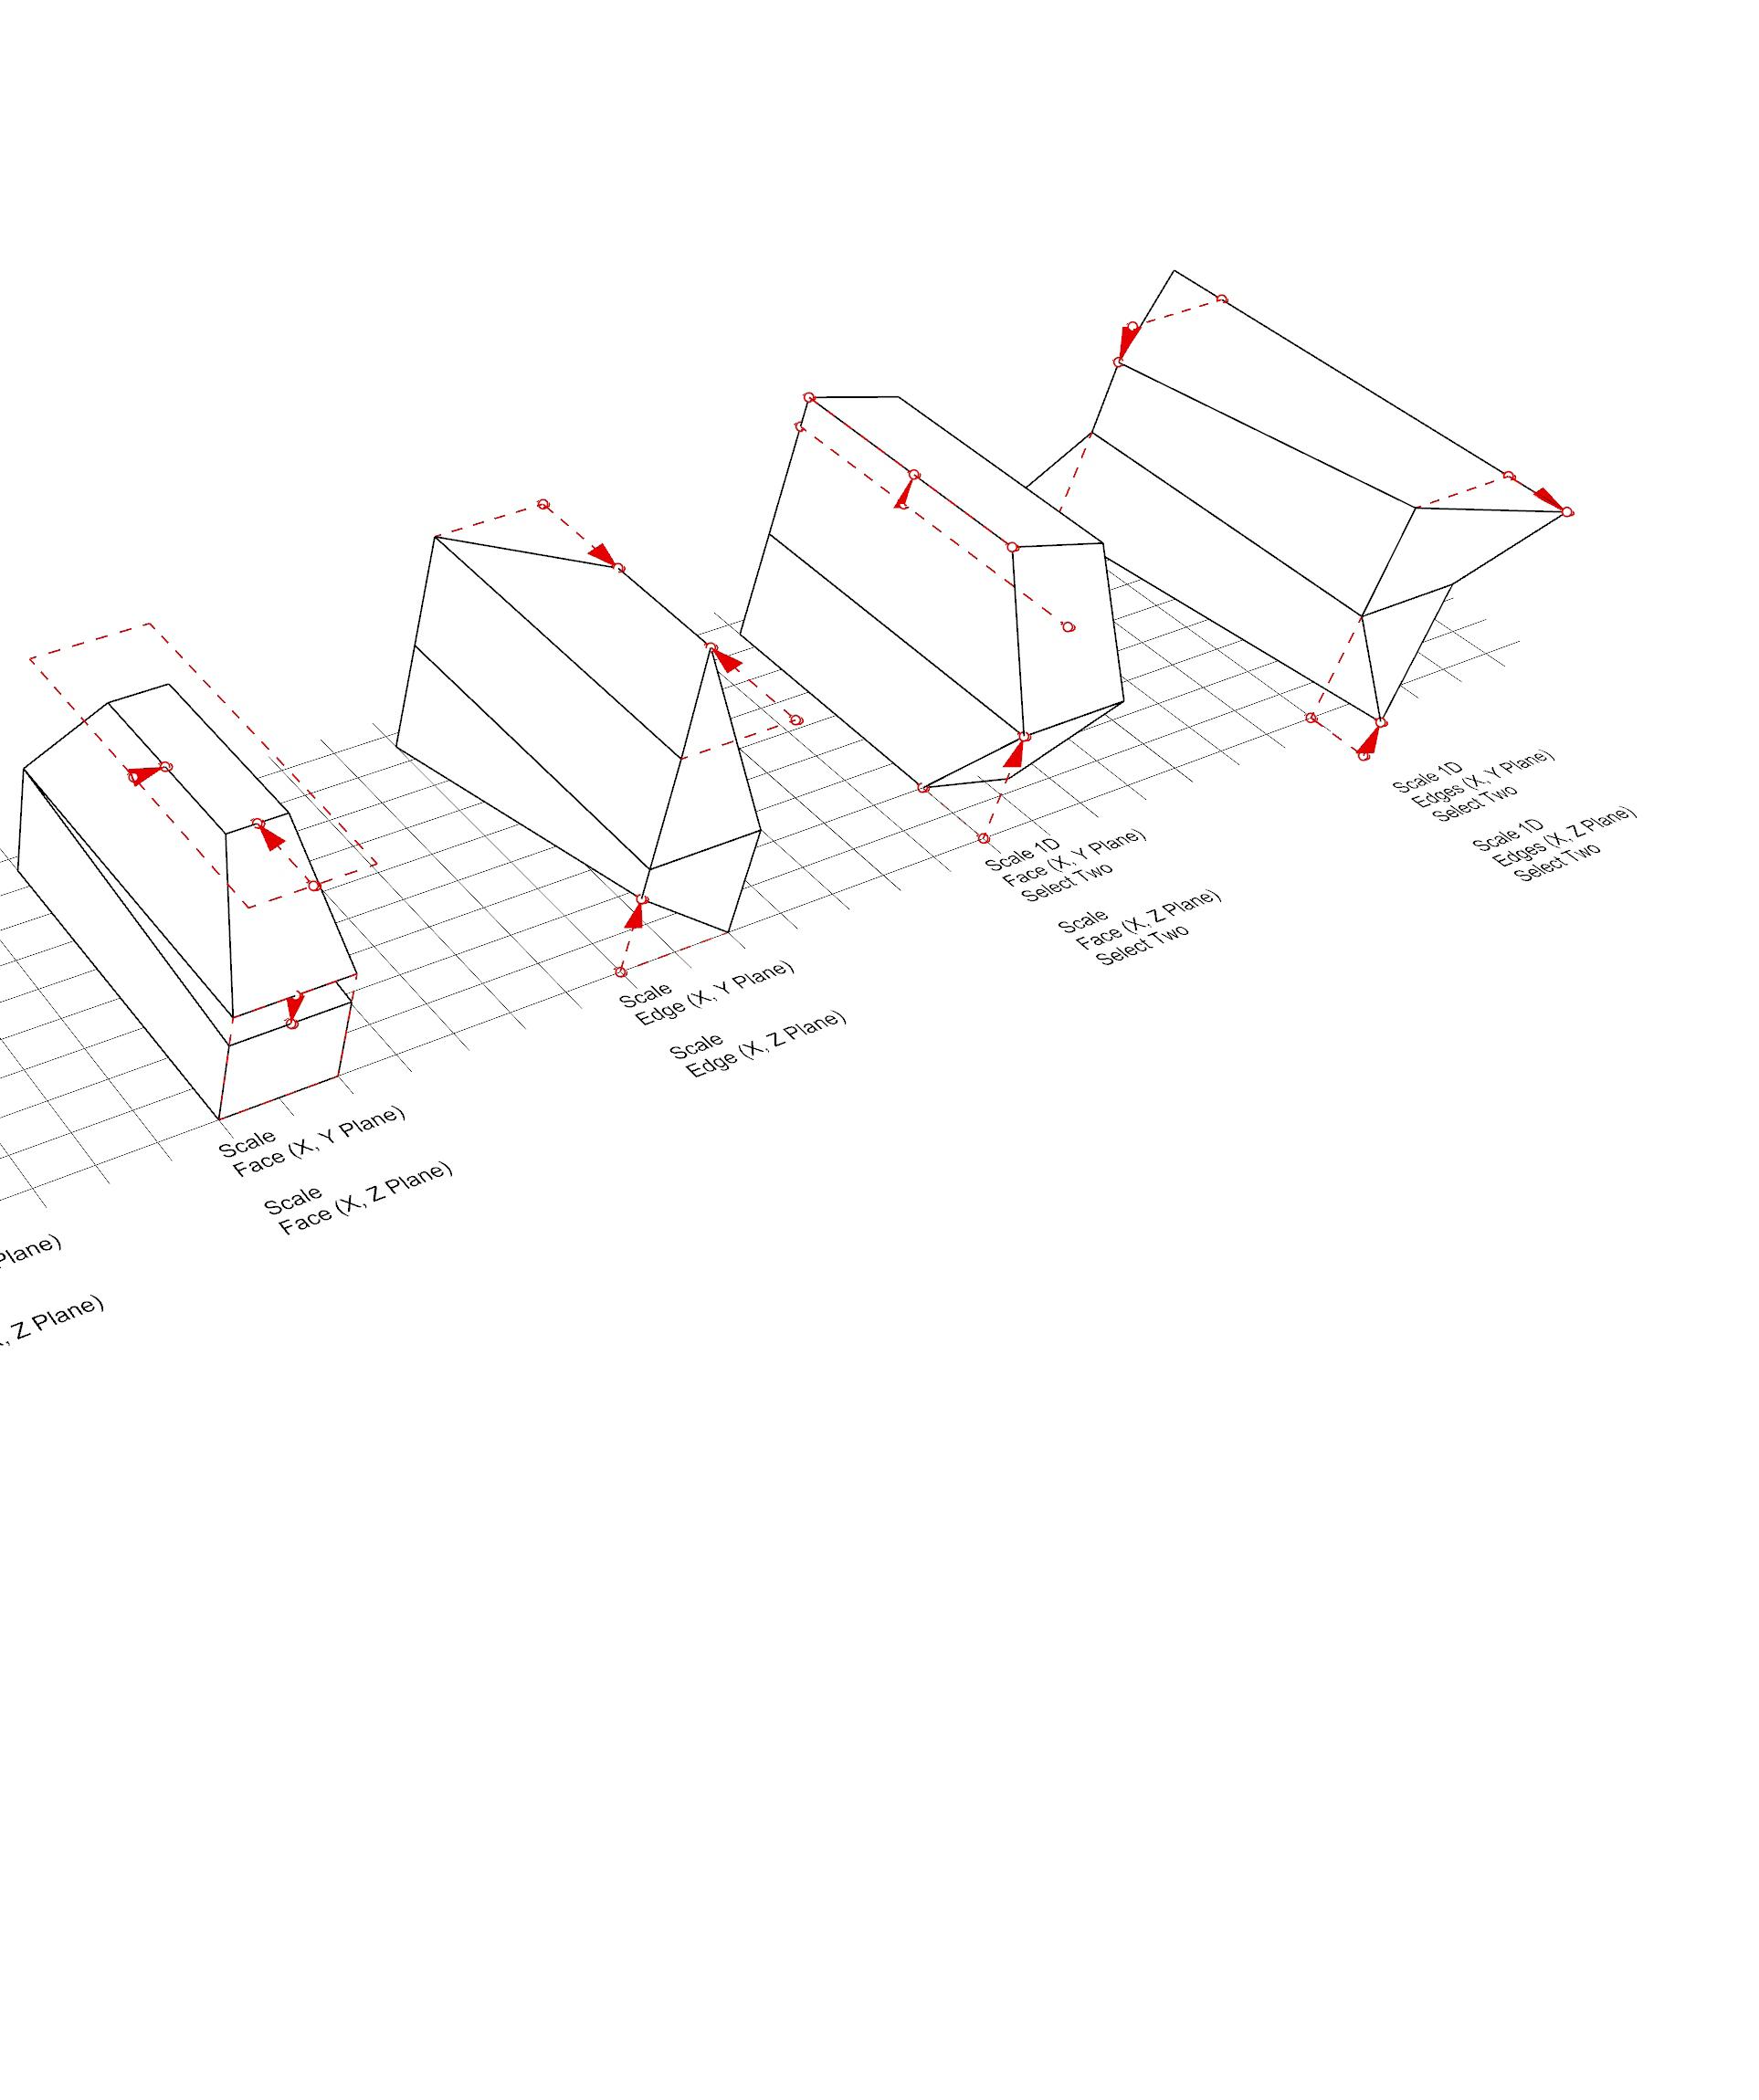
The different commands we learned were helpful, and I had already started using them in Module 1. I think the hardest part of M2 was the 25 iterations. It took a lot of time, upwards of 8 hours for just the 25. This was mostly due to needing to think about what to do for each command and diagramming too. I did not know about the right click of the mouse to keep the same action until all the way for the last 4. This would have saved me a lot of time in retrospect. It was difficult to realign the models, as I had placed them horizontally first. Although this was the case, I was able to fix it. Ultimately a lot of learning Rhino takes time, and with it you get better. It just may feel a little discouraging if you spend too much time
behind a computer. The 25 iterations also felt just like my calculus class, where you learn the hardest way (longest way) first and after the easier like using Grasshopper.
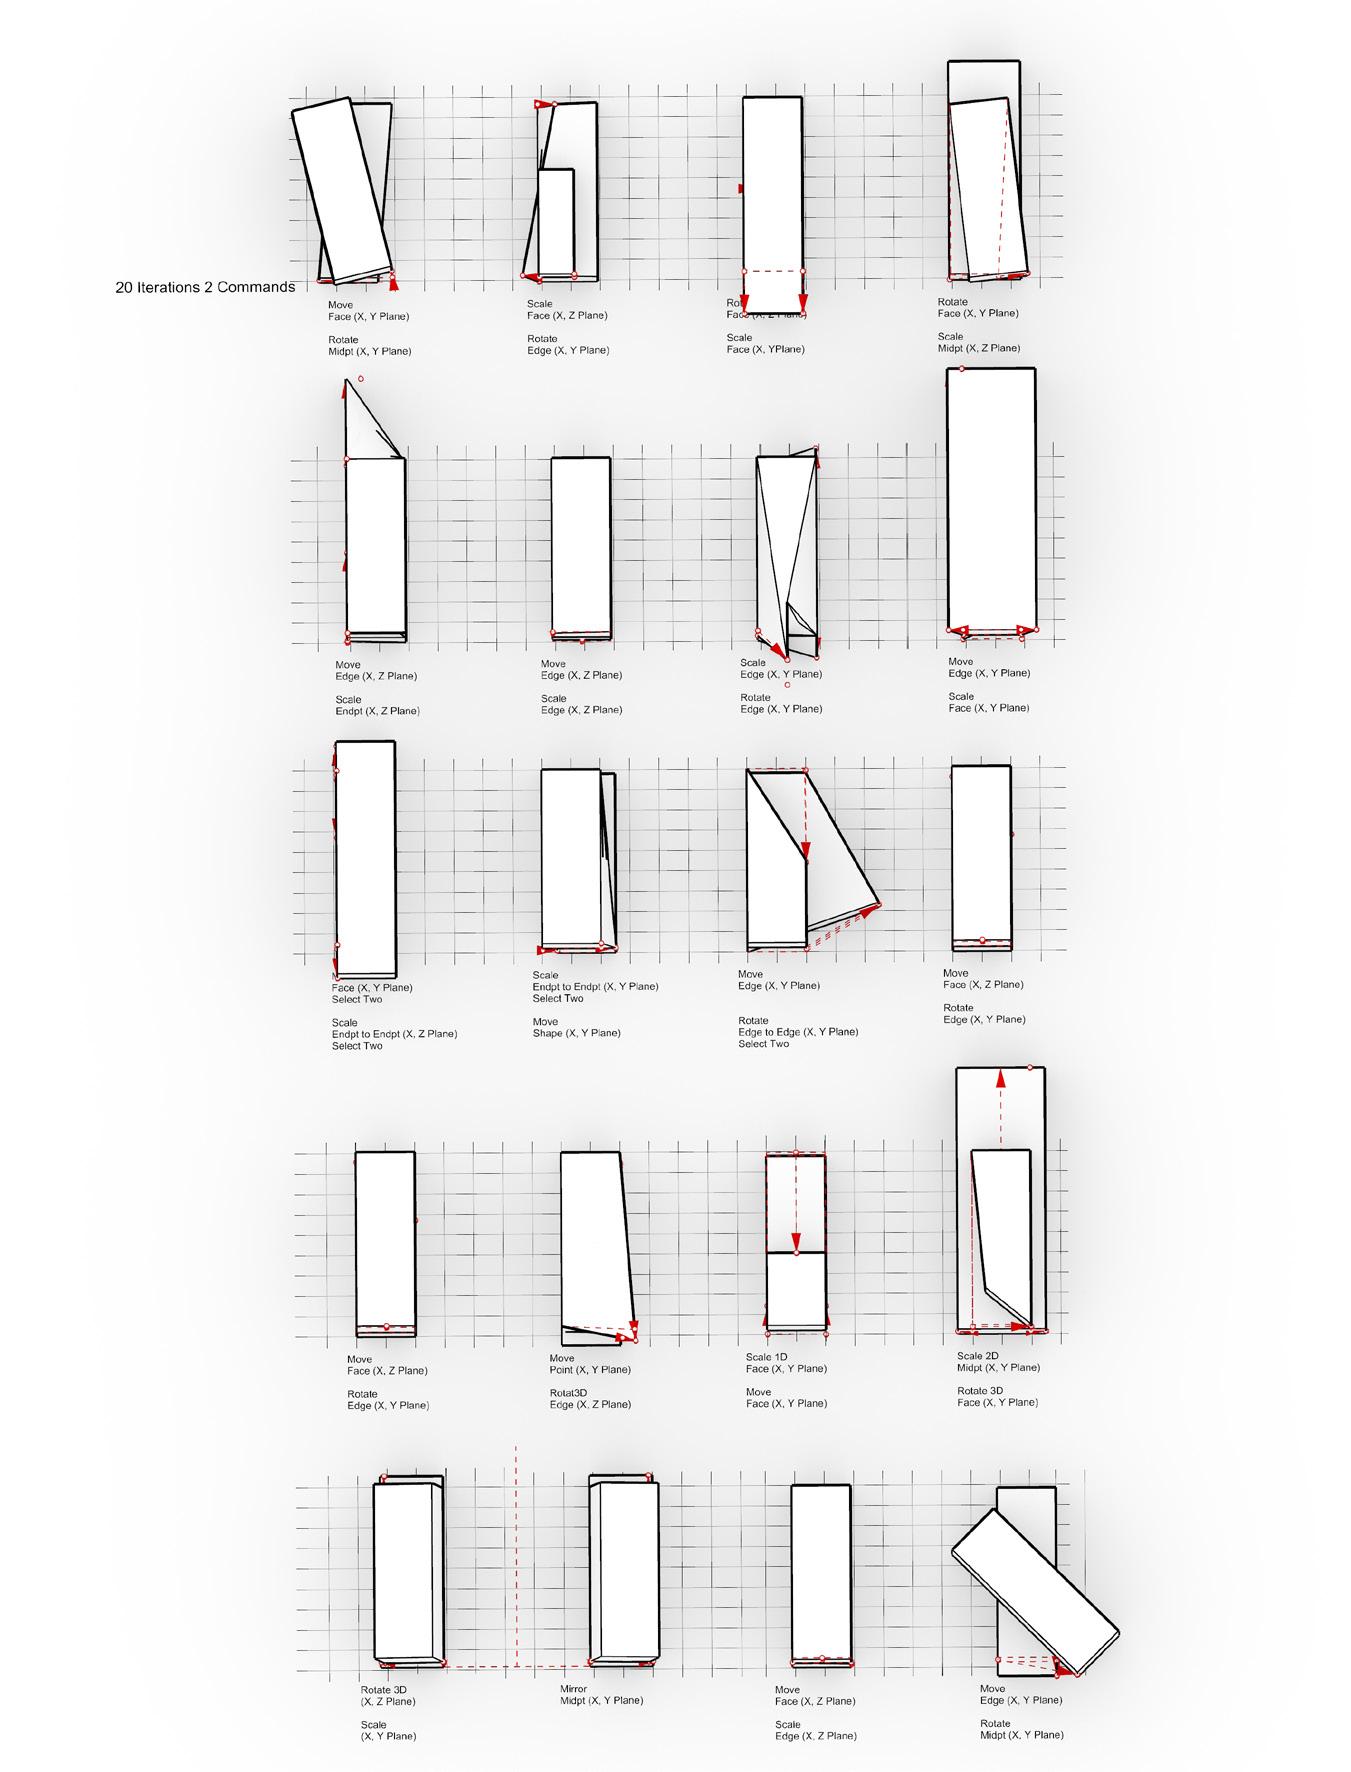
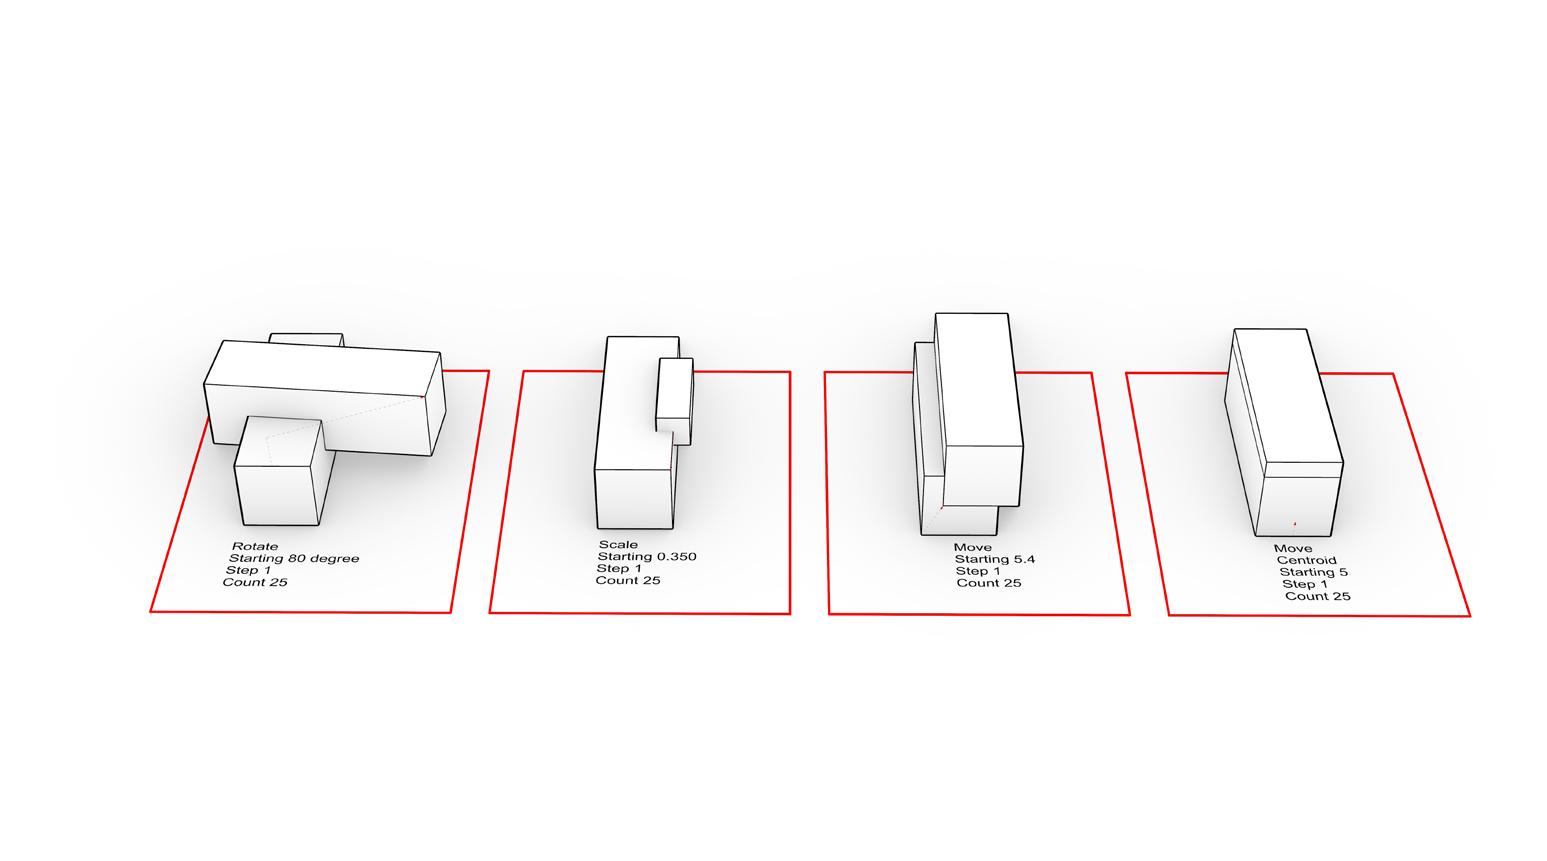
Move X, Z
Move X, Y
Scale
Rotate
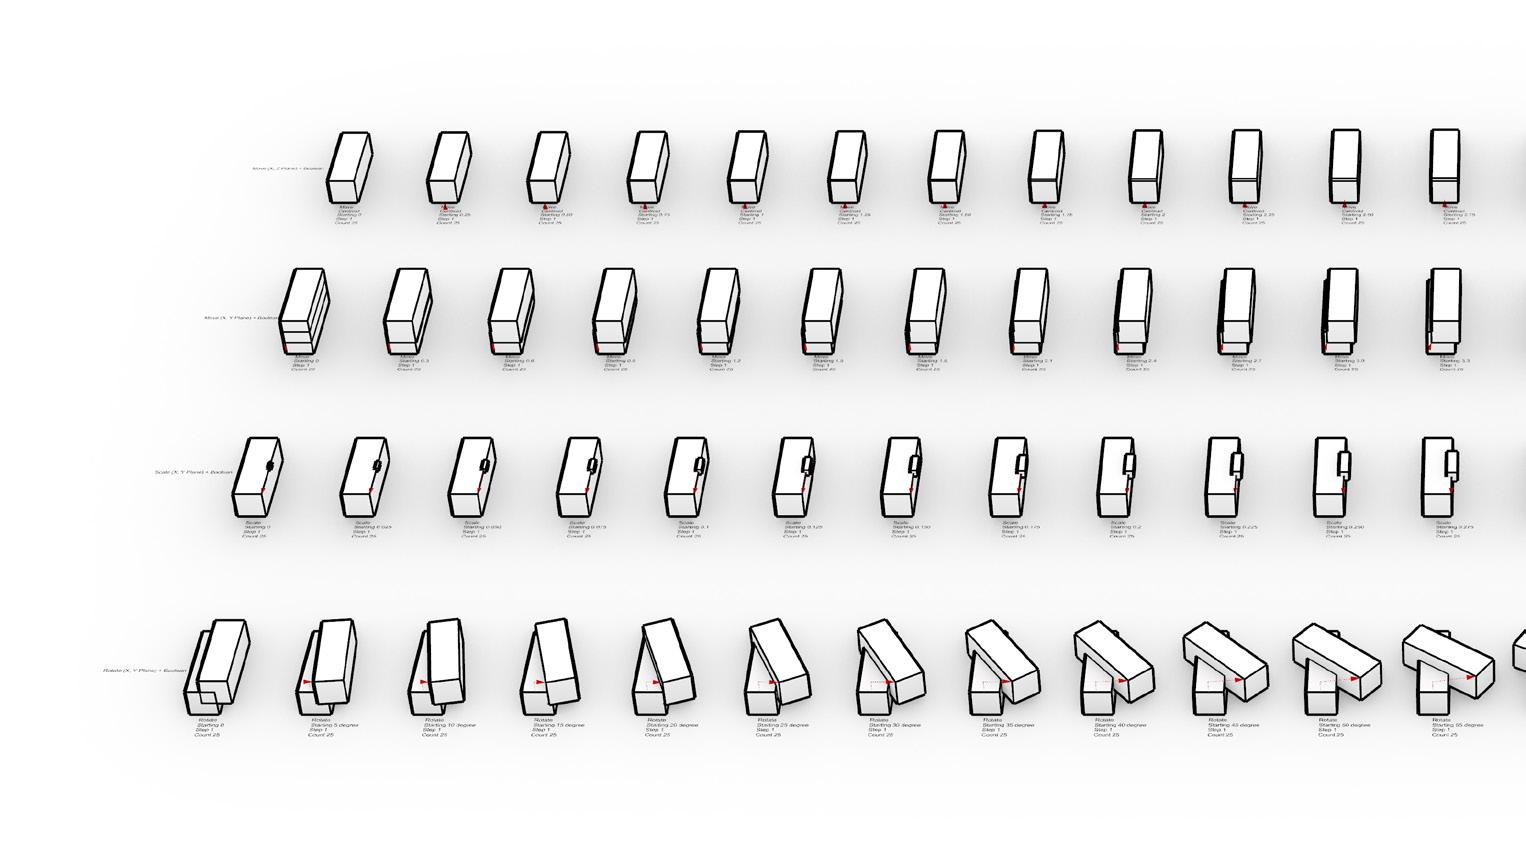
Grasshopper reminded me of the coding I did in high school. It is just visual coding. This helped me a lot and made me feel a bit more confident in starting this rule set. I felt the whole process went by quickly. I made 25 of Move XY, Move XZ, Rotate, and Scale.
I had one error though, which was figuring out how to save between the grasshopper file and Rhino. I learned from that to save more
frequently because I lost some work. I am glad that this week I went to a lot of office hours to receive help and feedback. This probably also made the process a lot easier.
I am excited about what we will learn with Grasshopper next because it was a useful tool.
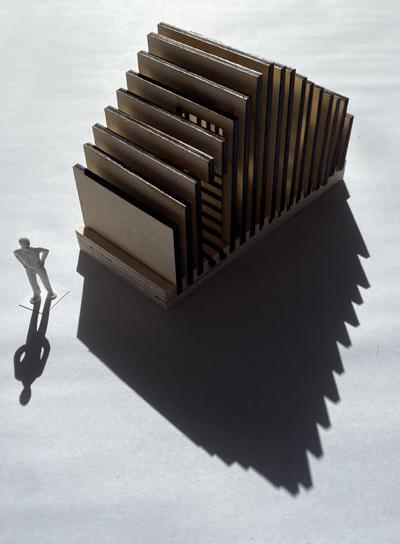
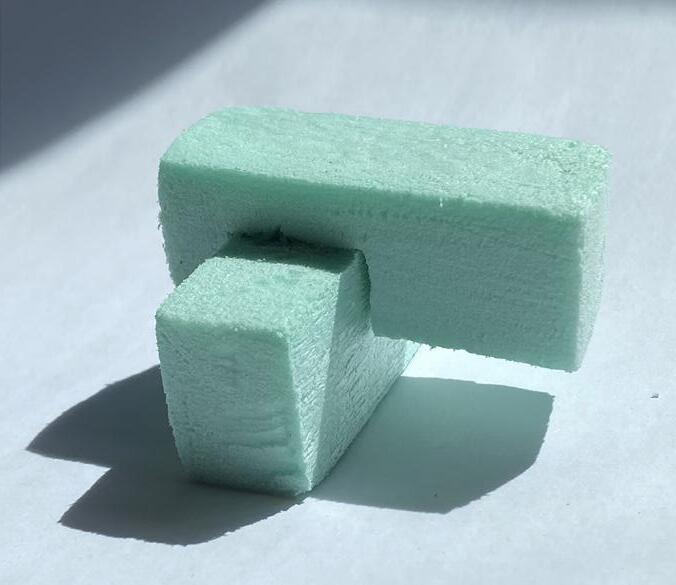
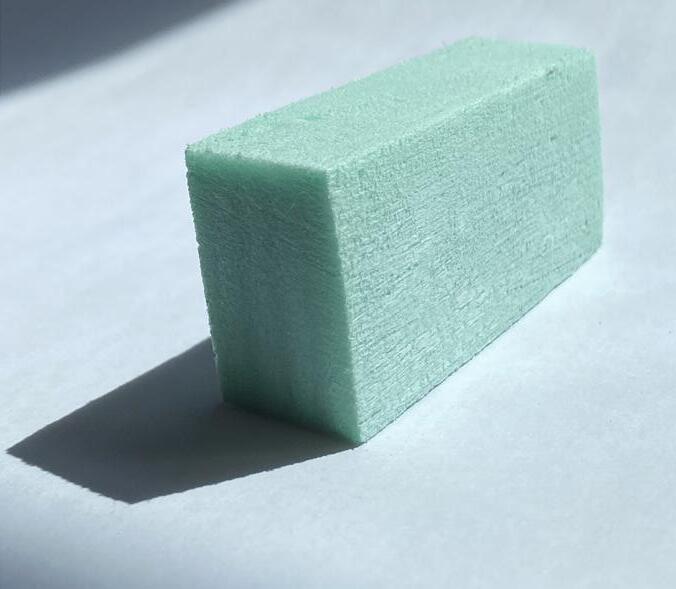
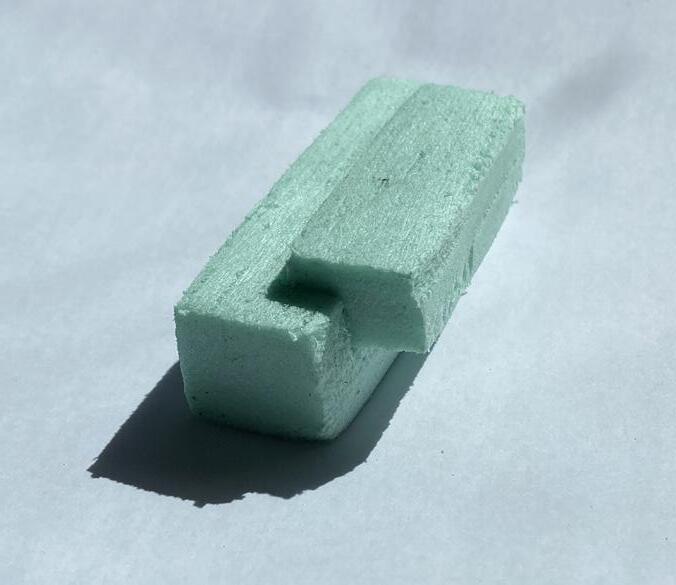
It was fun choosing which of the 100 would work best for physical modeling. Modeling was fairly easy; I received some tips about how to best work with the material which really helped. It did create a lot of dust, but cutting the material was easier than I thought. I enjoyed taking pictures of the models in the natural light and I put them on top of a clean sheet of paper. The subtractive aggregations were a little
harder as I had some problems with the clipping mask and fill. Ultimately it was a simple fix, but it still took a while to figure out what went wrong with the clipping mask. Similarly, I had this issue with the sun display, which ended up working fine.

FABRICATION TIME
3 Hour Model Making
30 Hours Digitally Modeling
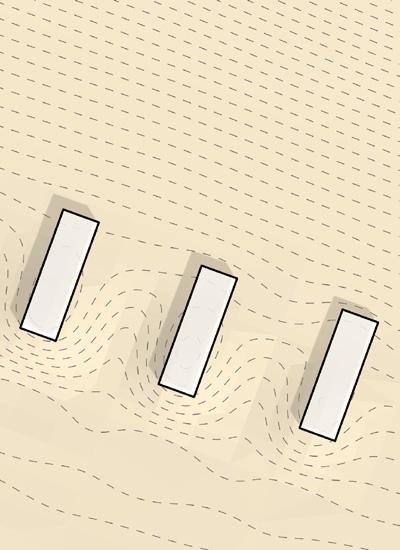
Module 3 has a large amount of variety with projects while still feeling very cohesive. Initially we started our on CAD Mapper to find the Dexter Reservoir location which we converted in Rhino and played around with contouring. Then we used various commands to insert three building shapes into the landscape. Where we cut into the landscape via subtraction or built up the ground. During this time I actually started getting sick, as it spread around studio, and I ended up taking it easy with the class. I needed to give myself time so that I can come back fe-
MATERIALS
Basswood 1/8”
Plywood 1/2”
1/4” 3D Figure
Spray Paint + Paint
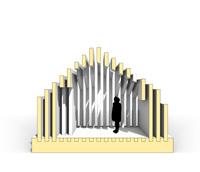
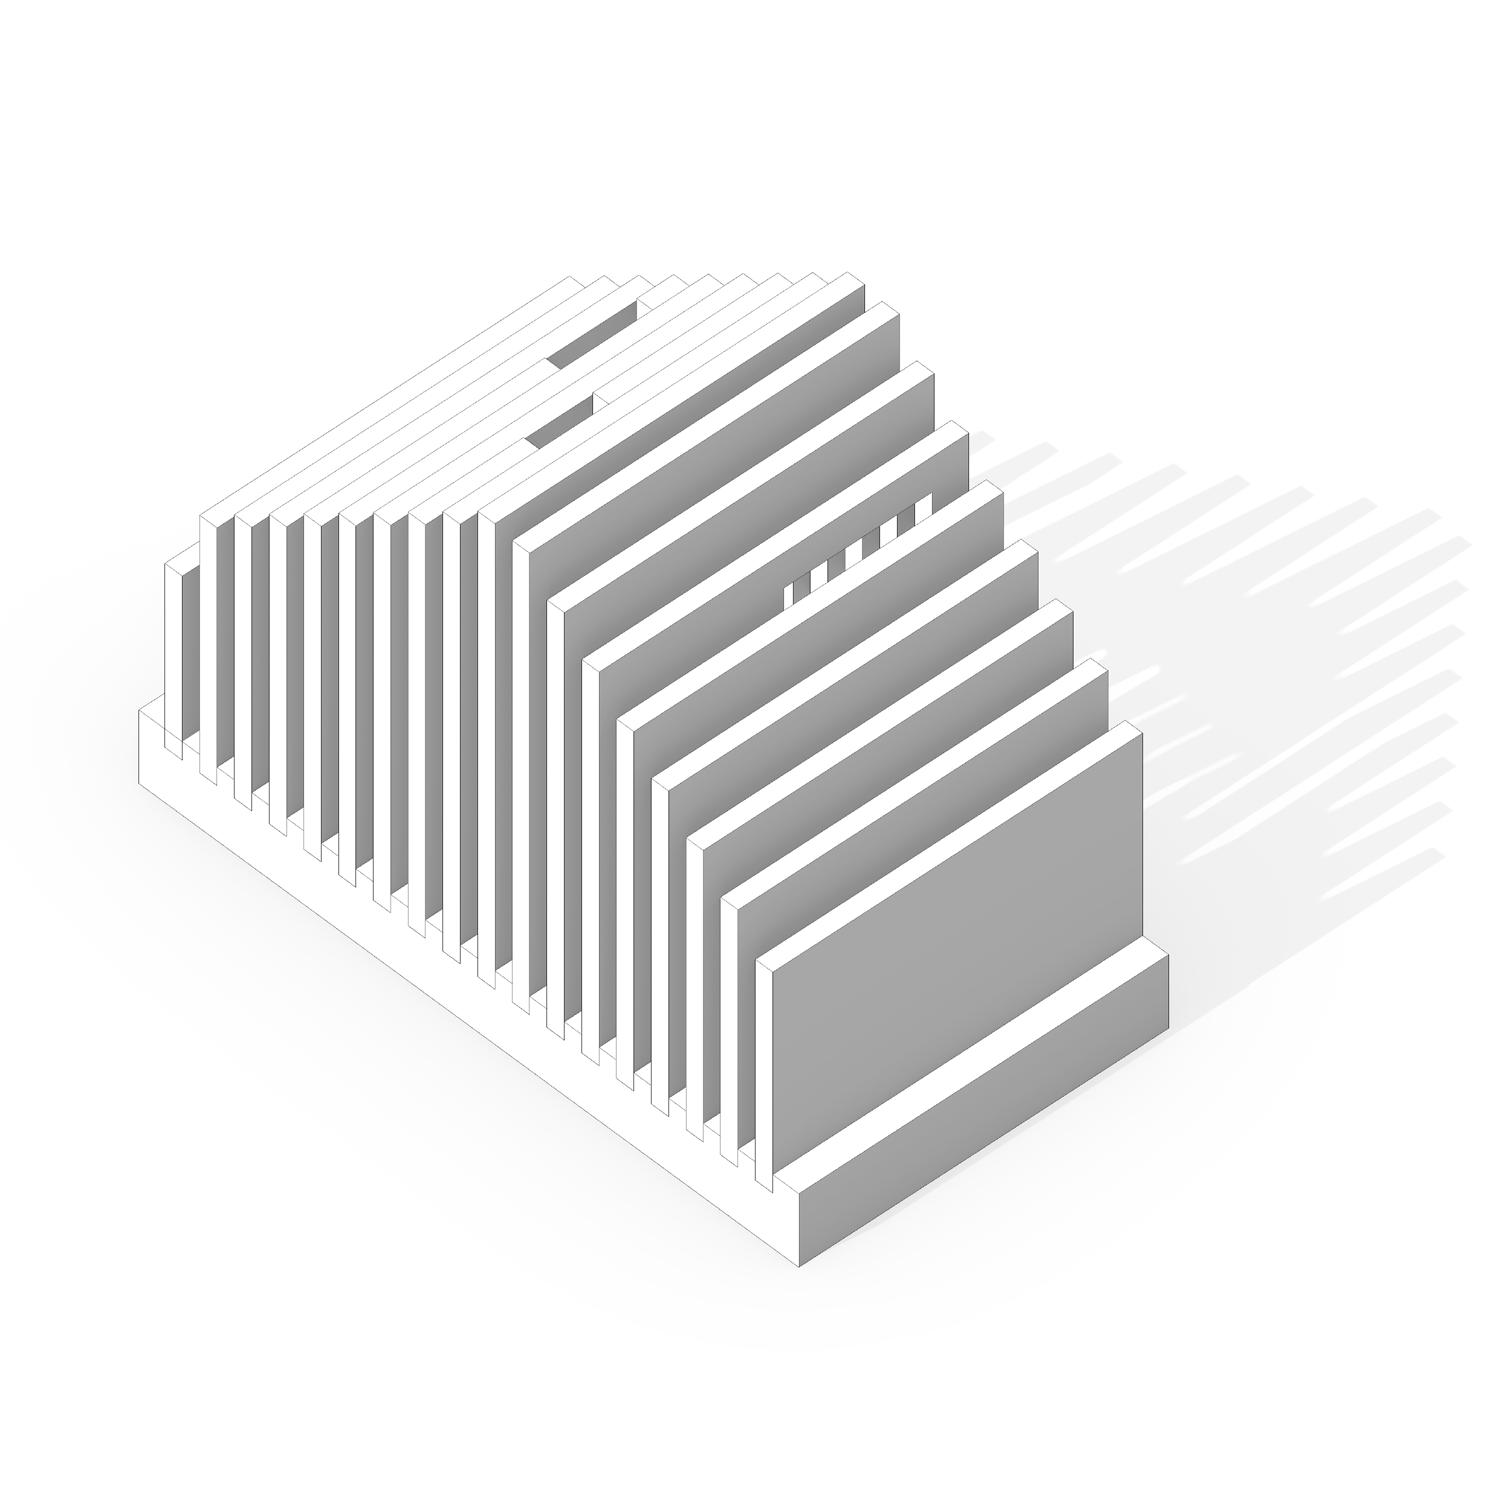
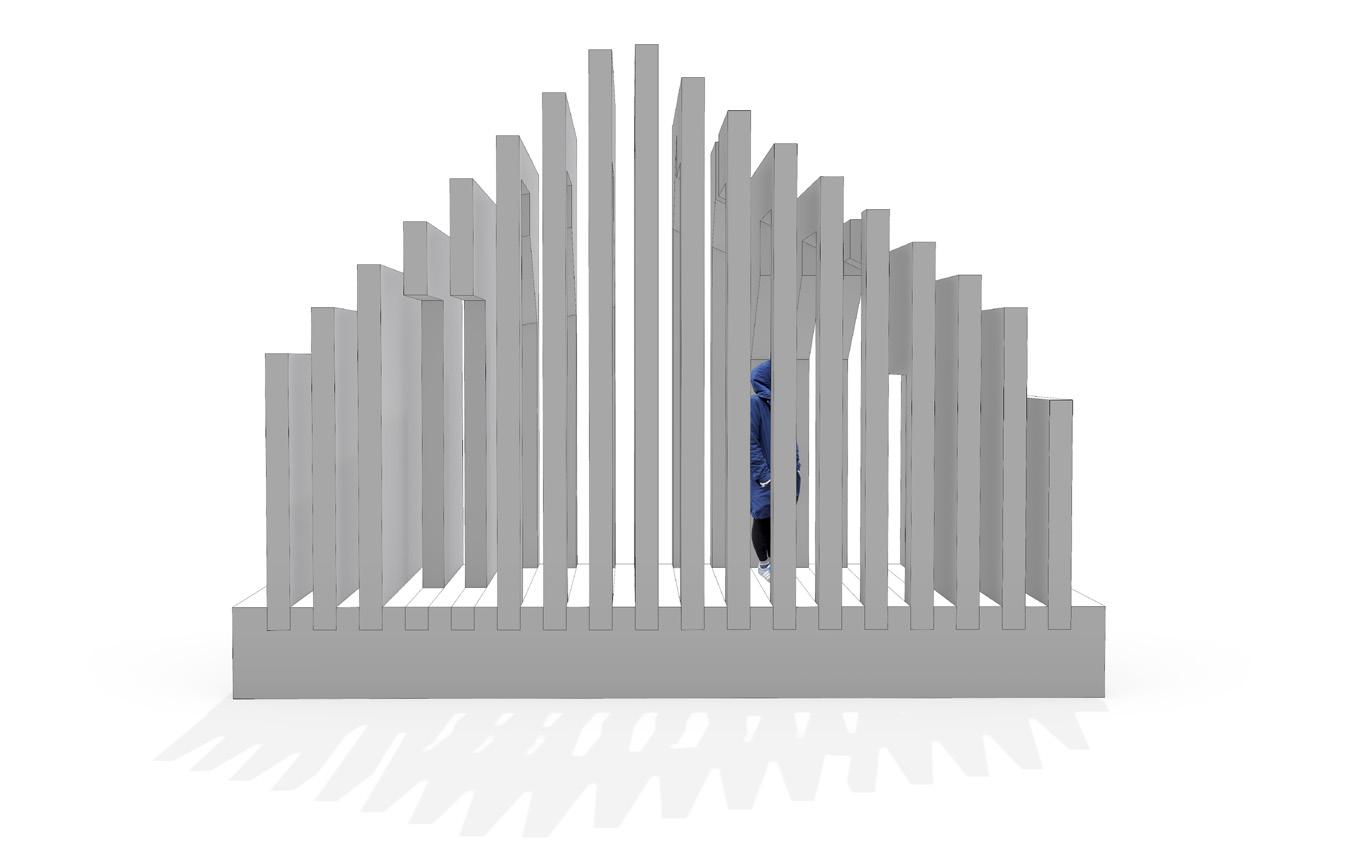
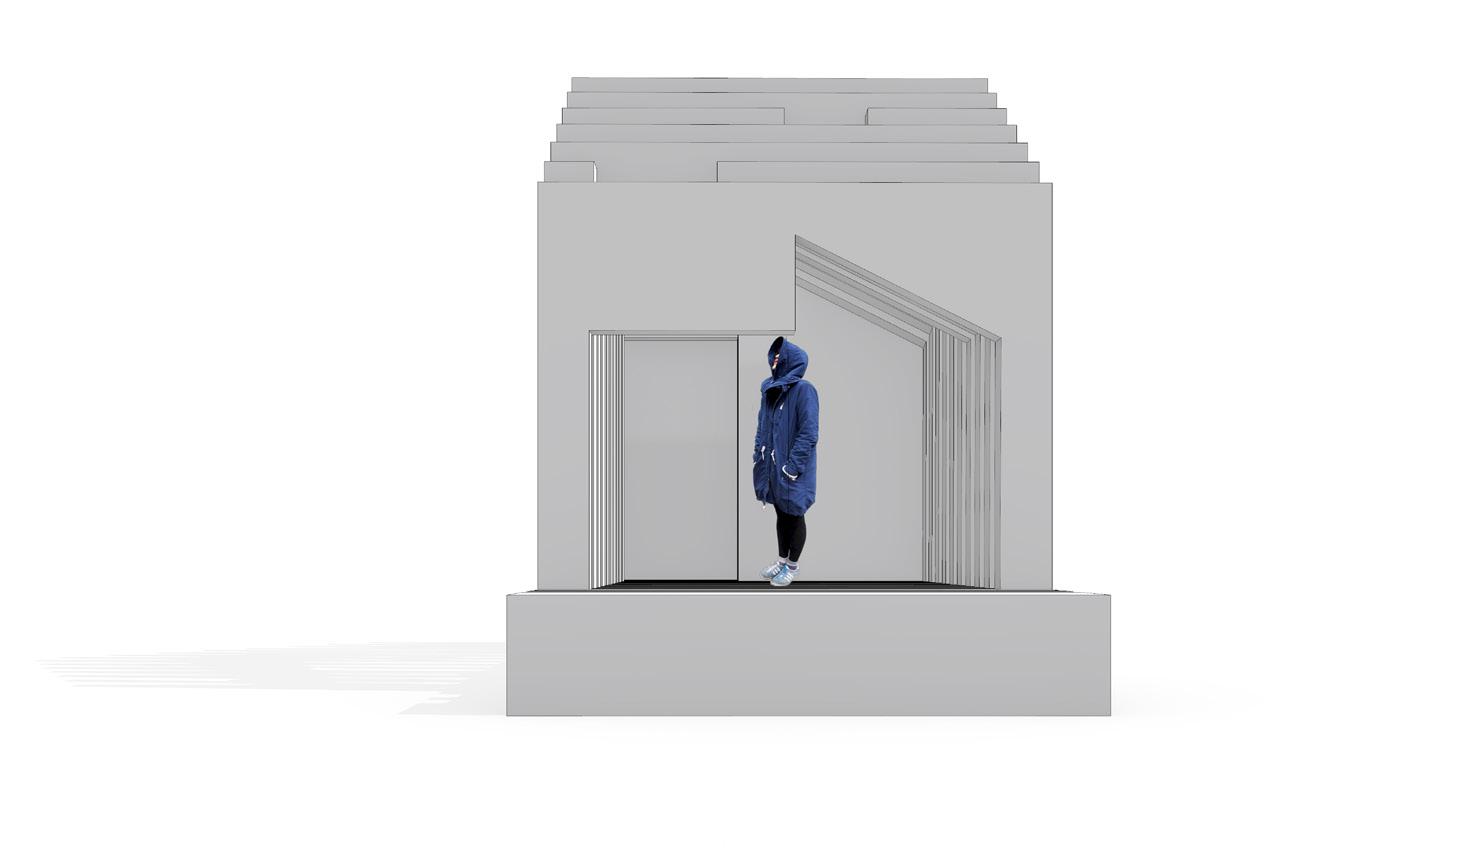
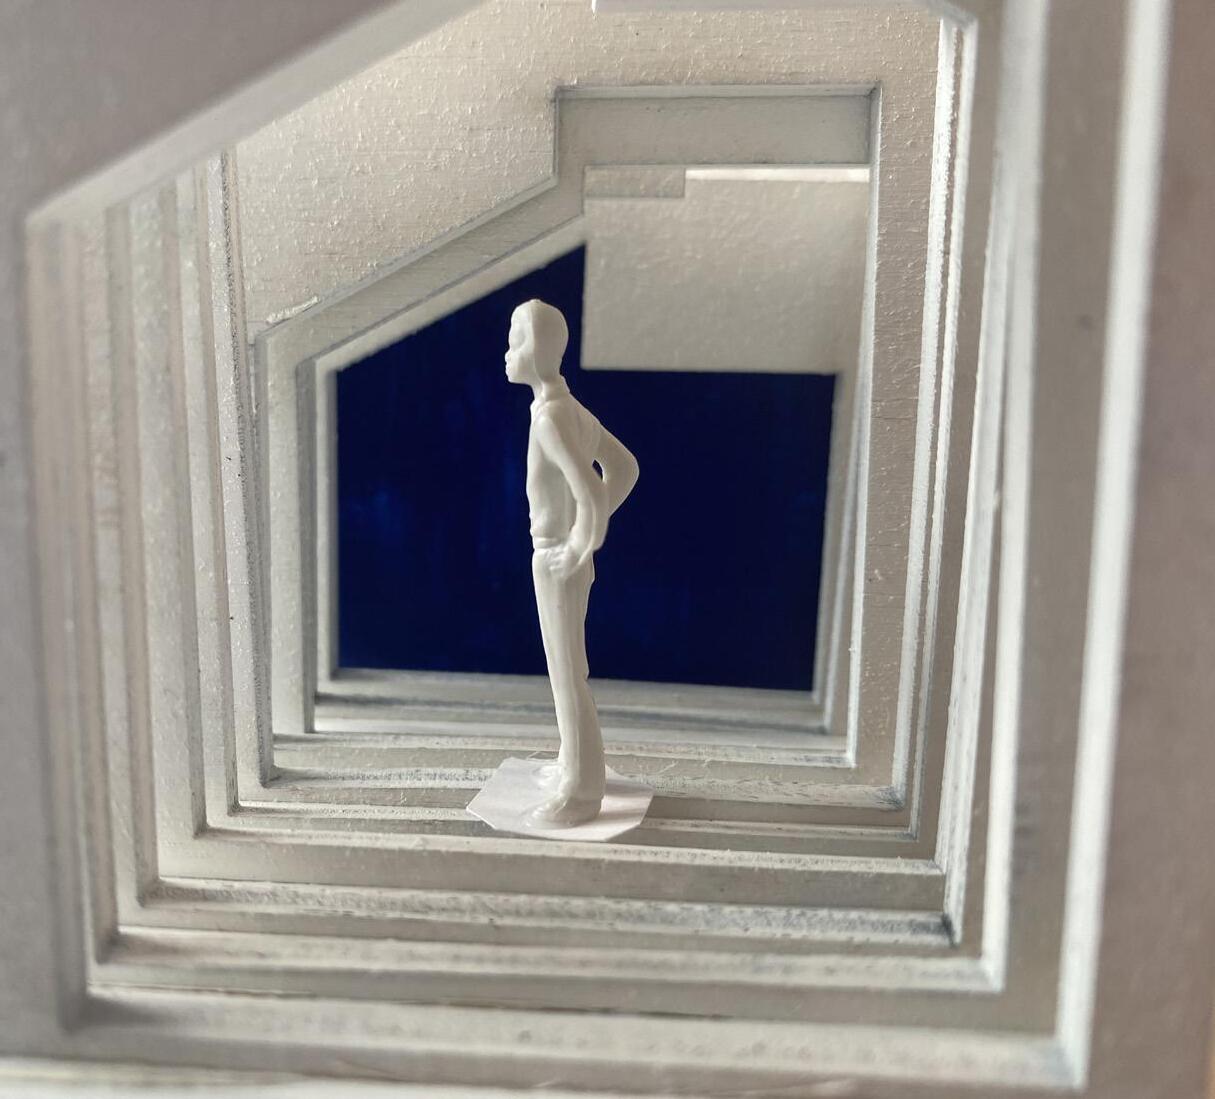
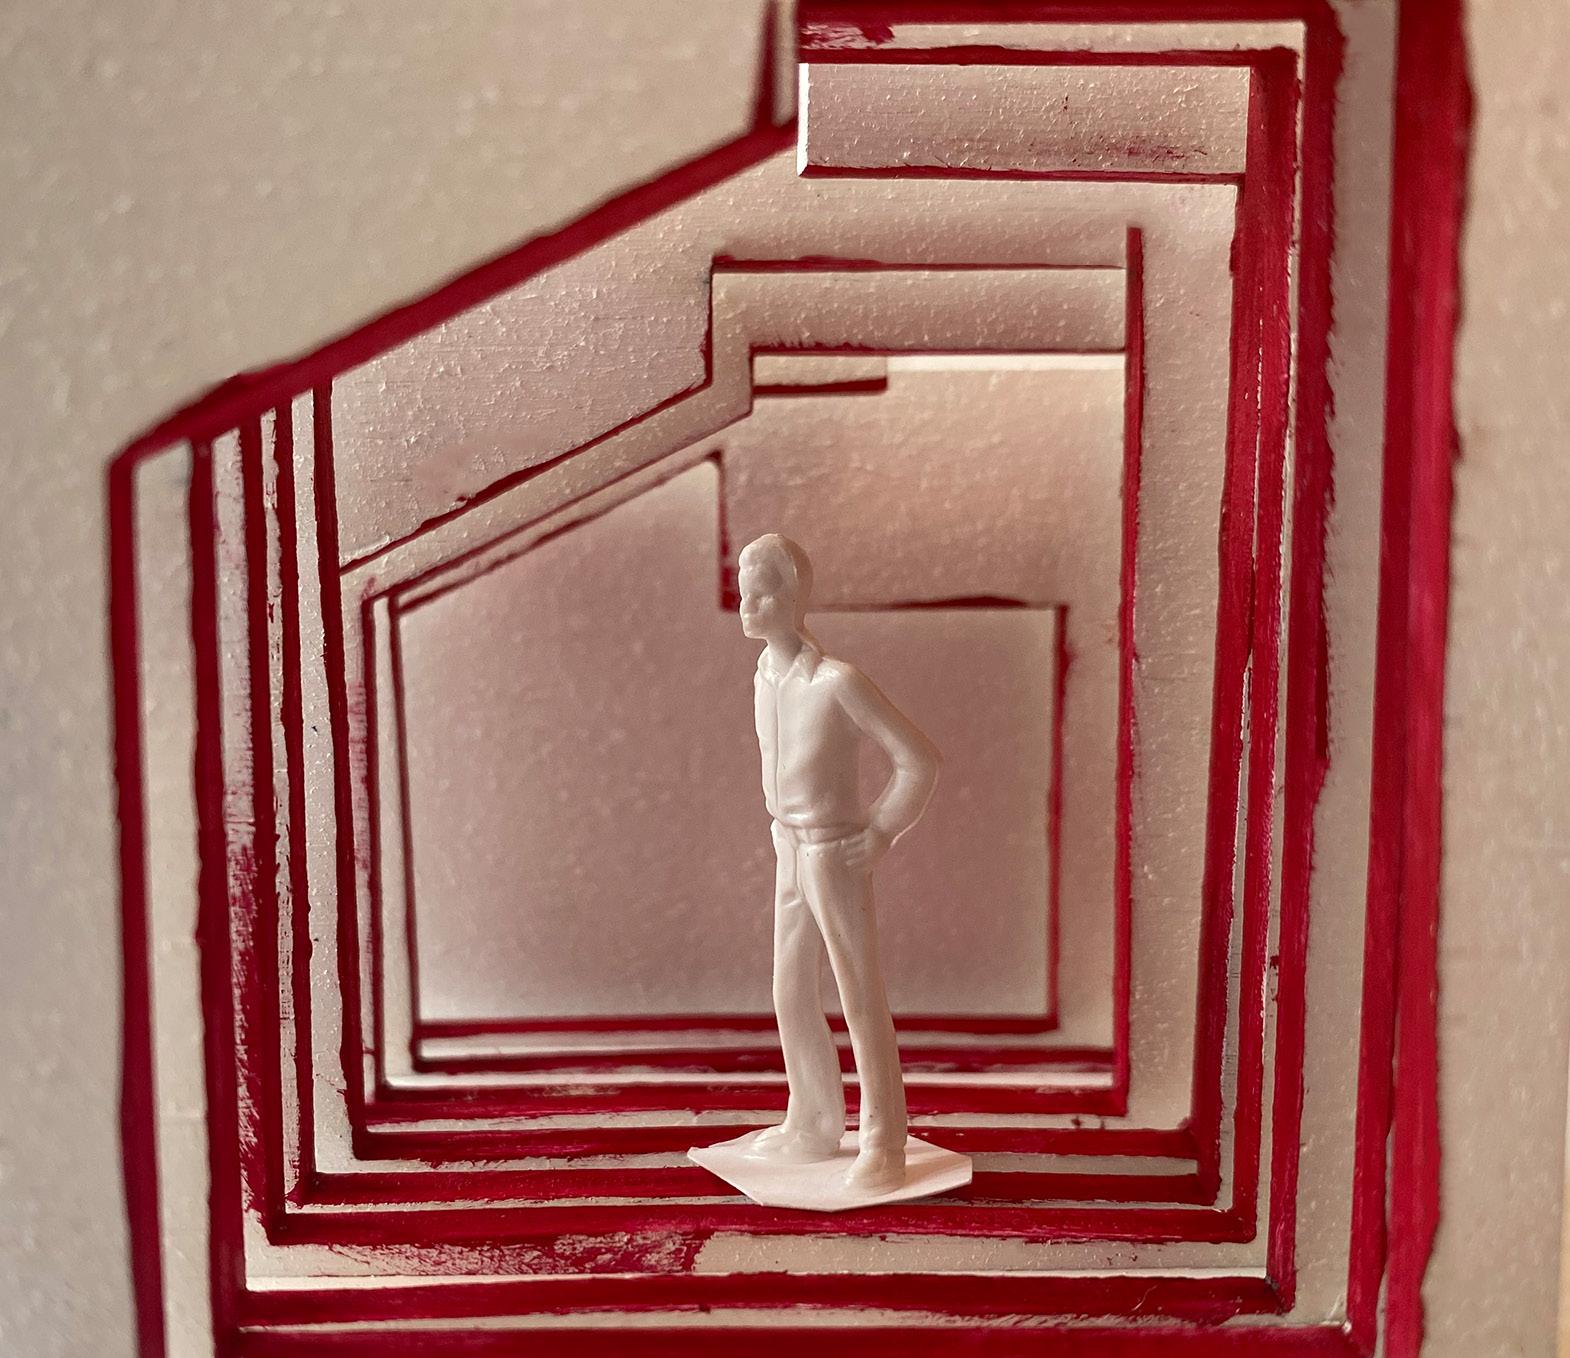
eling stronger. In the rest of the Module, we use the contouring techniques from this first phase in the Boolean Frames model, which we laser cut, spray painted, and rendered with different types of lighting settings
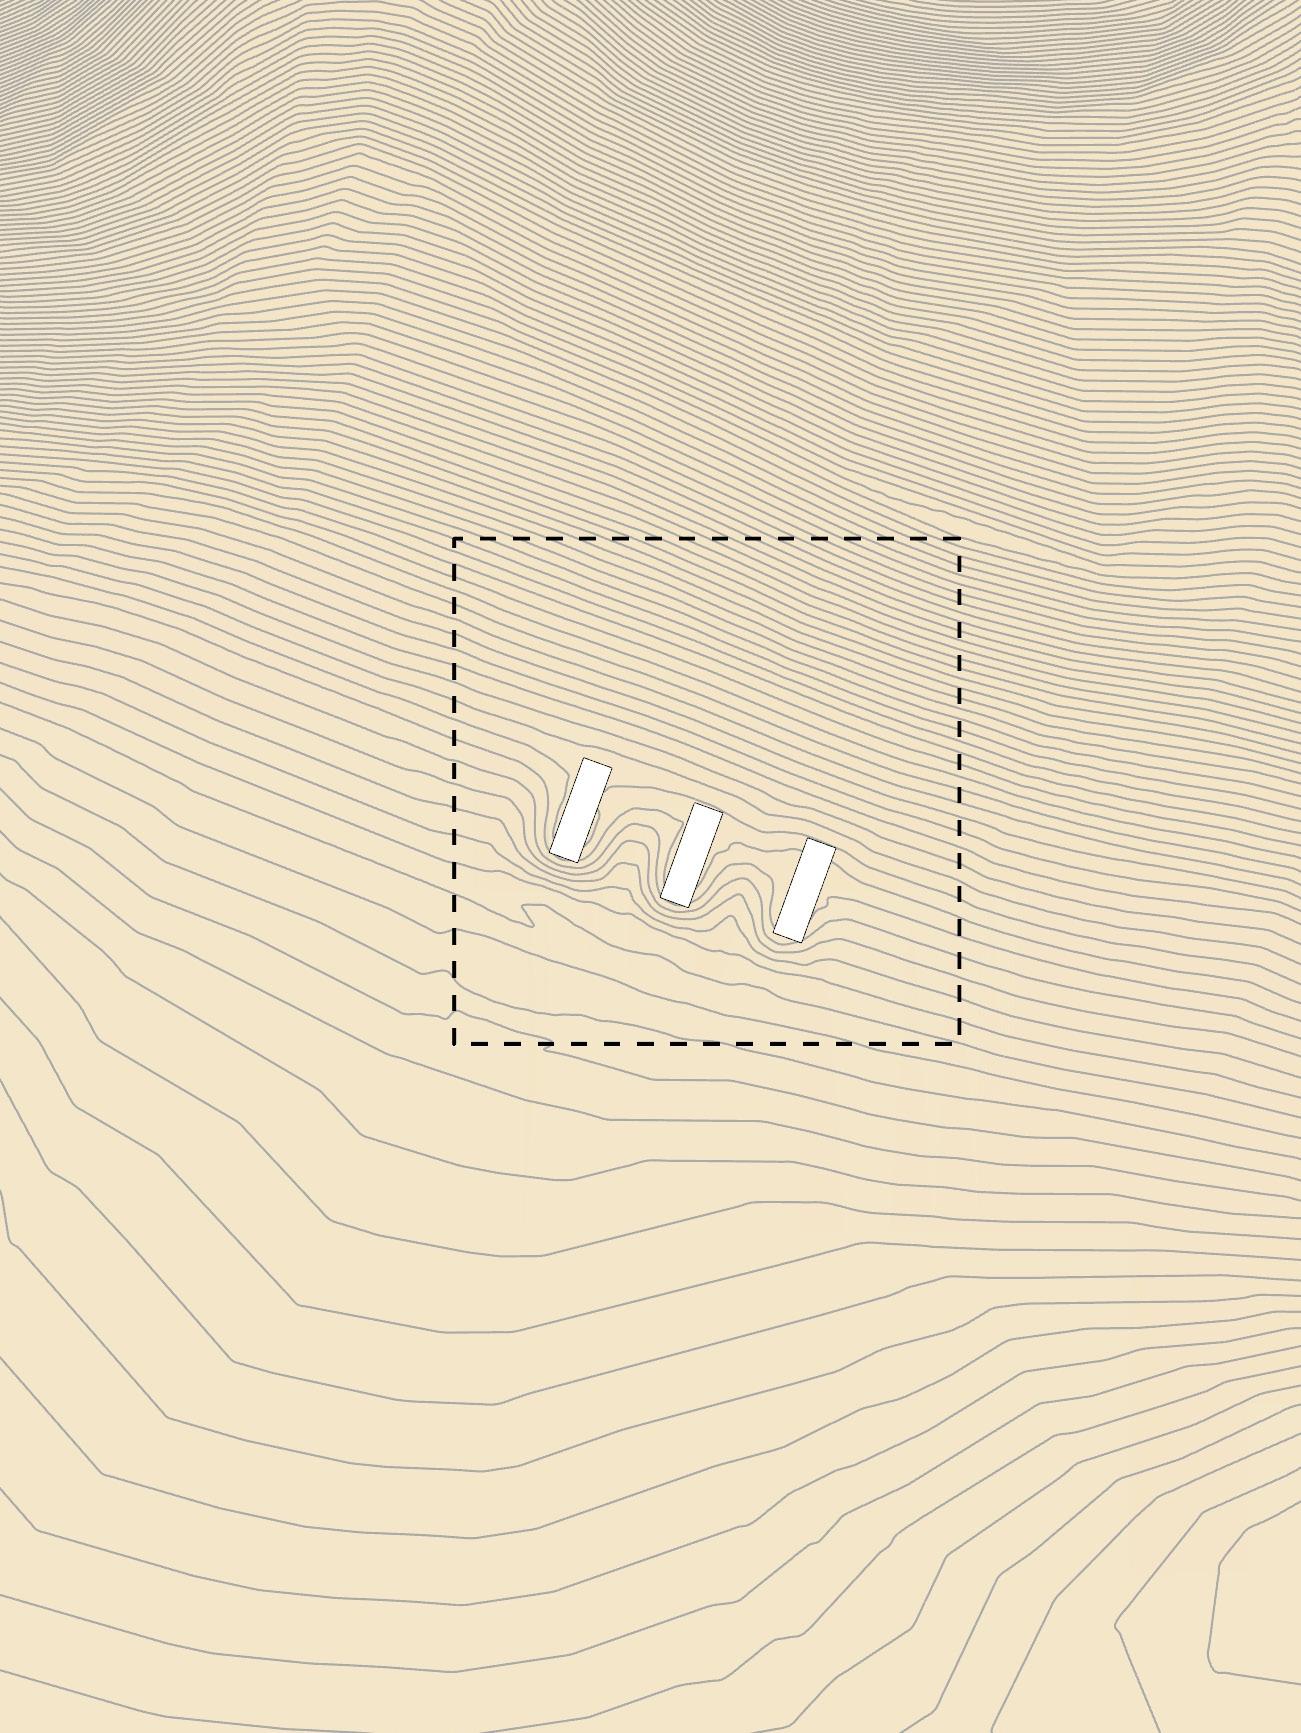
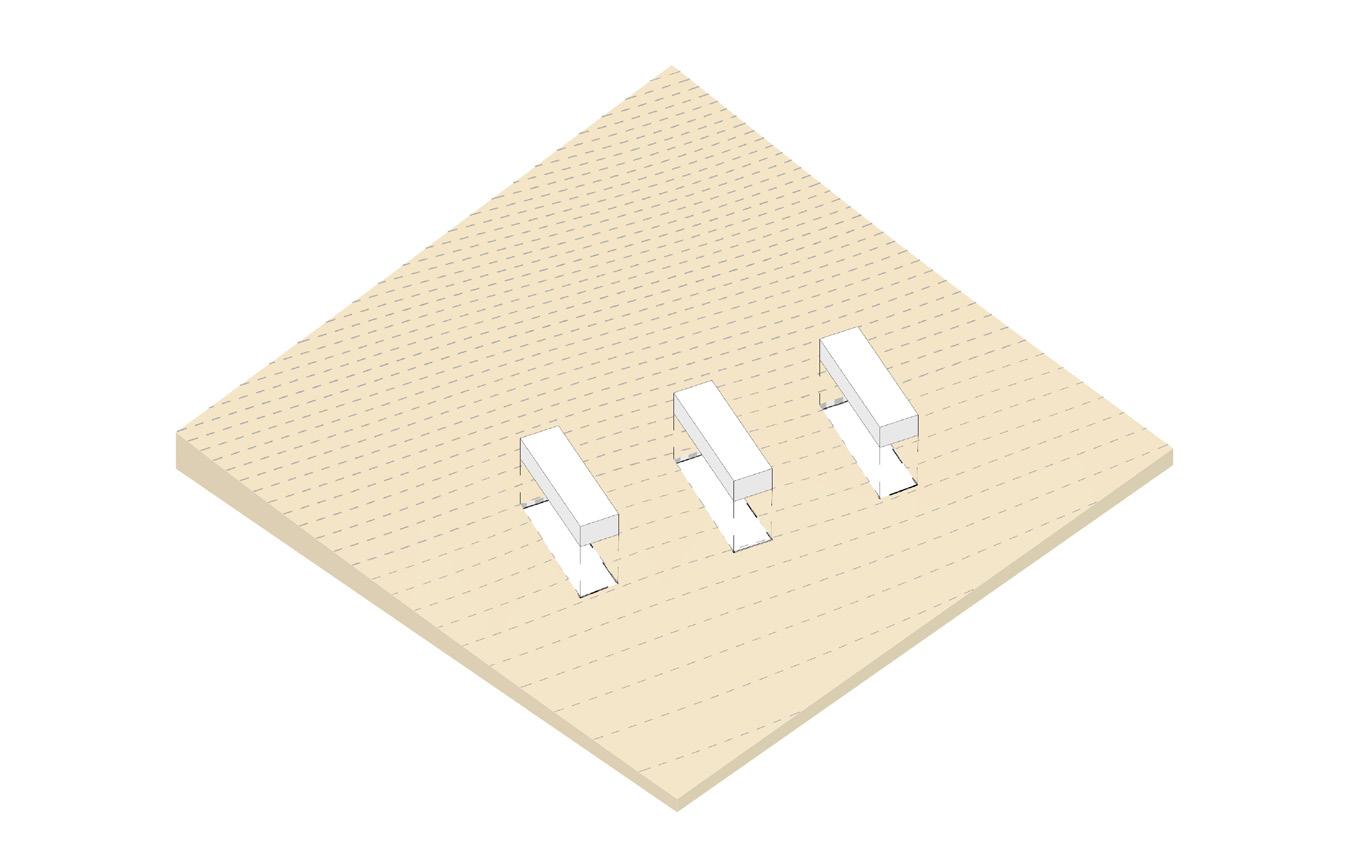

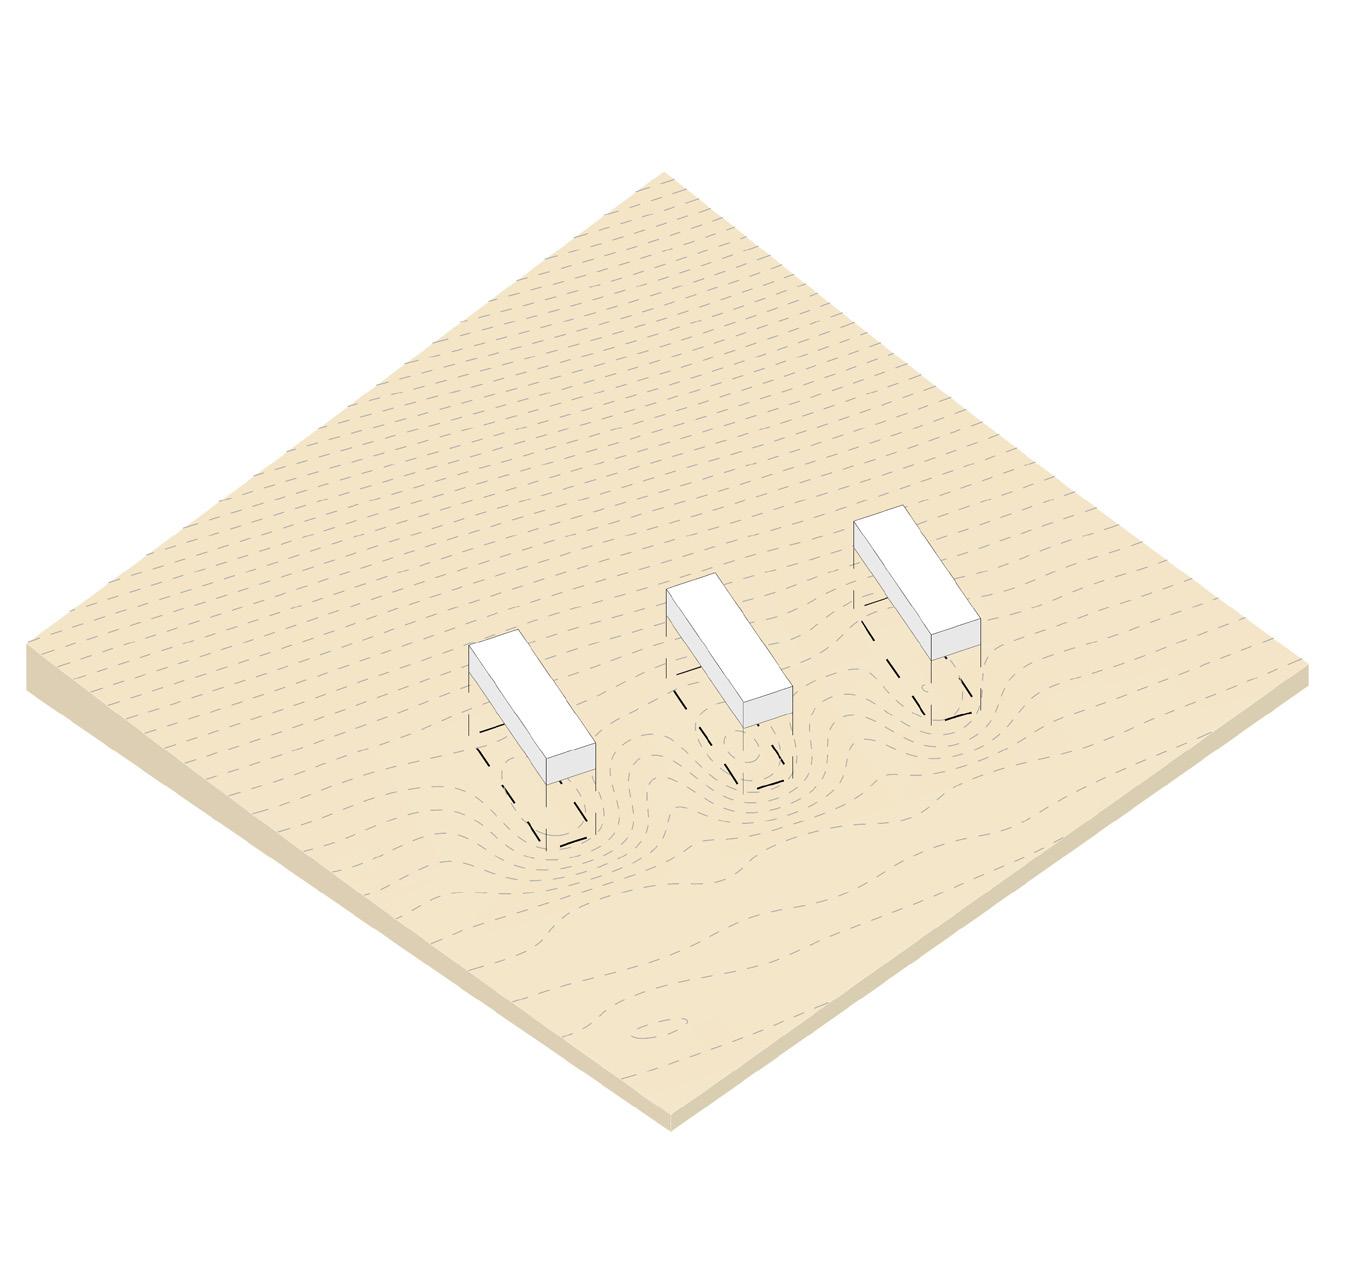

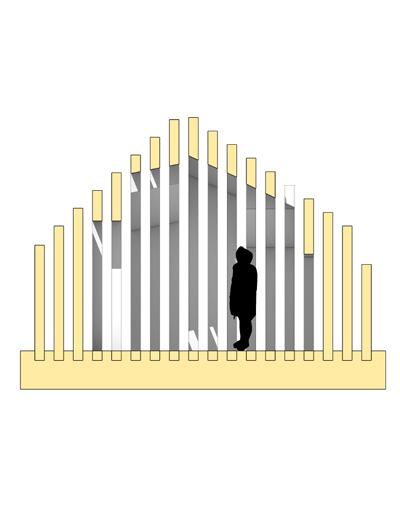
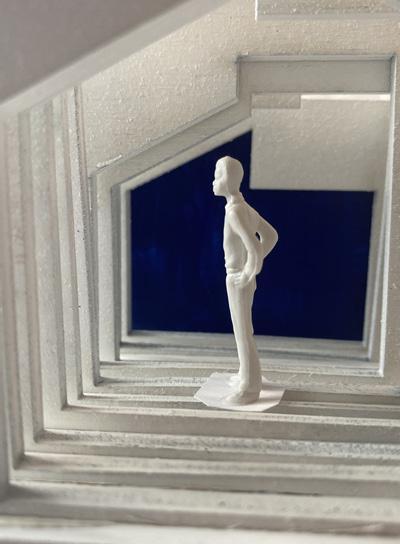
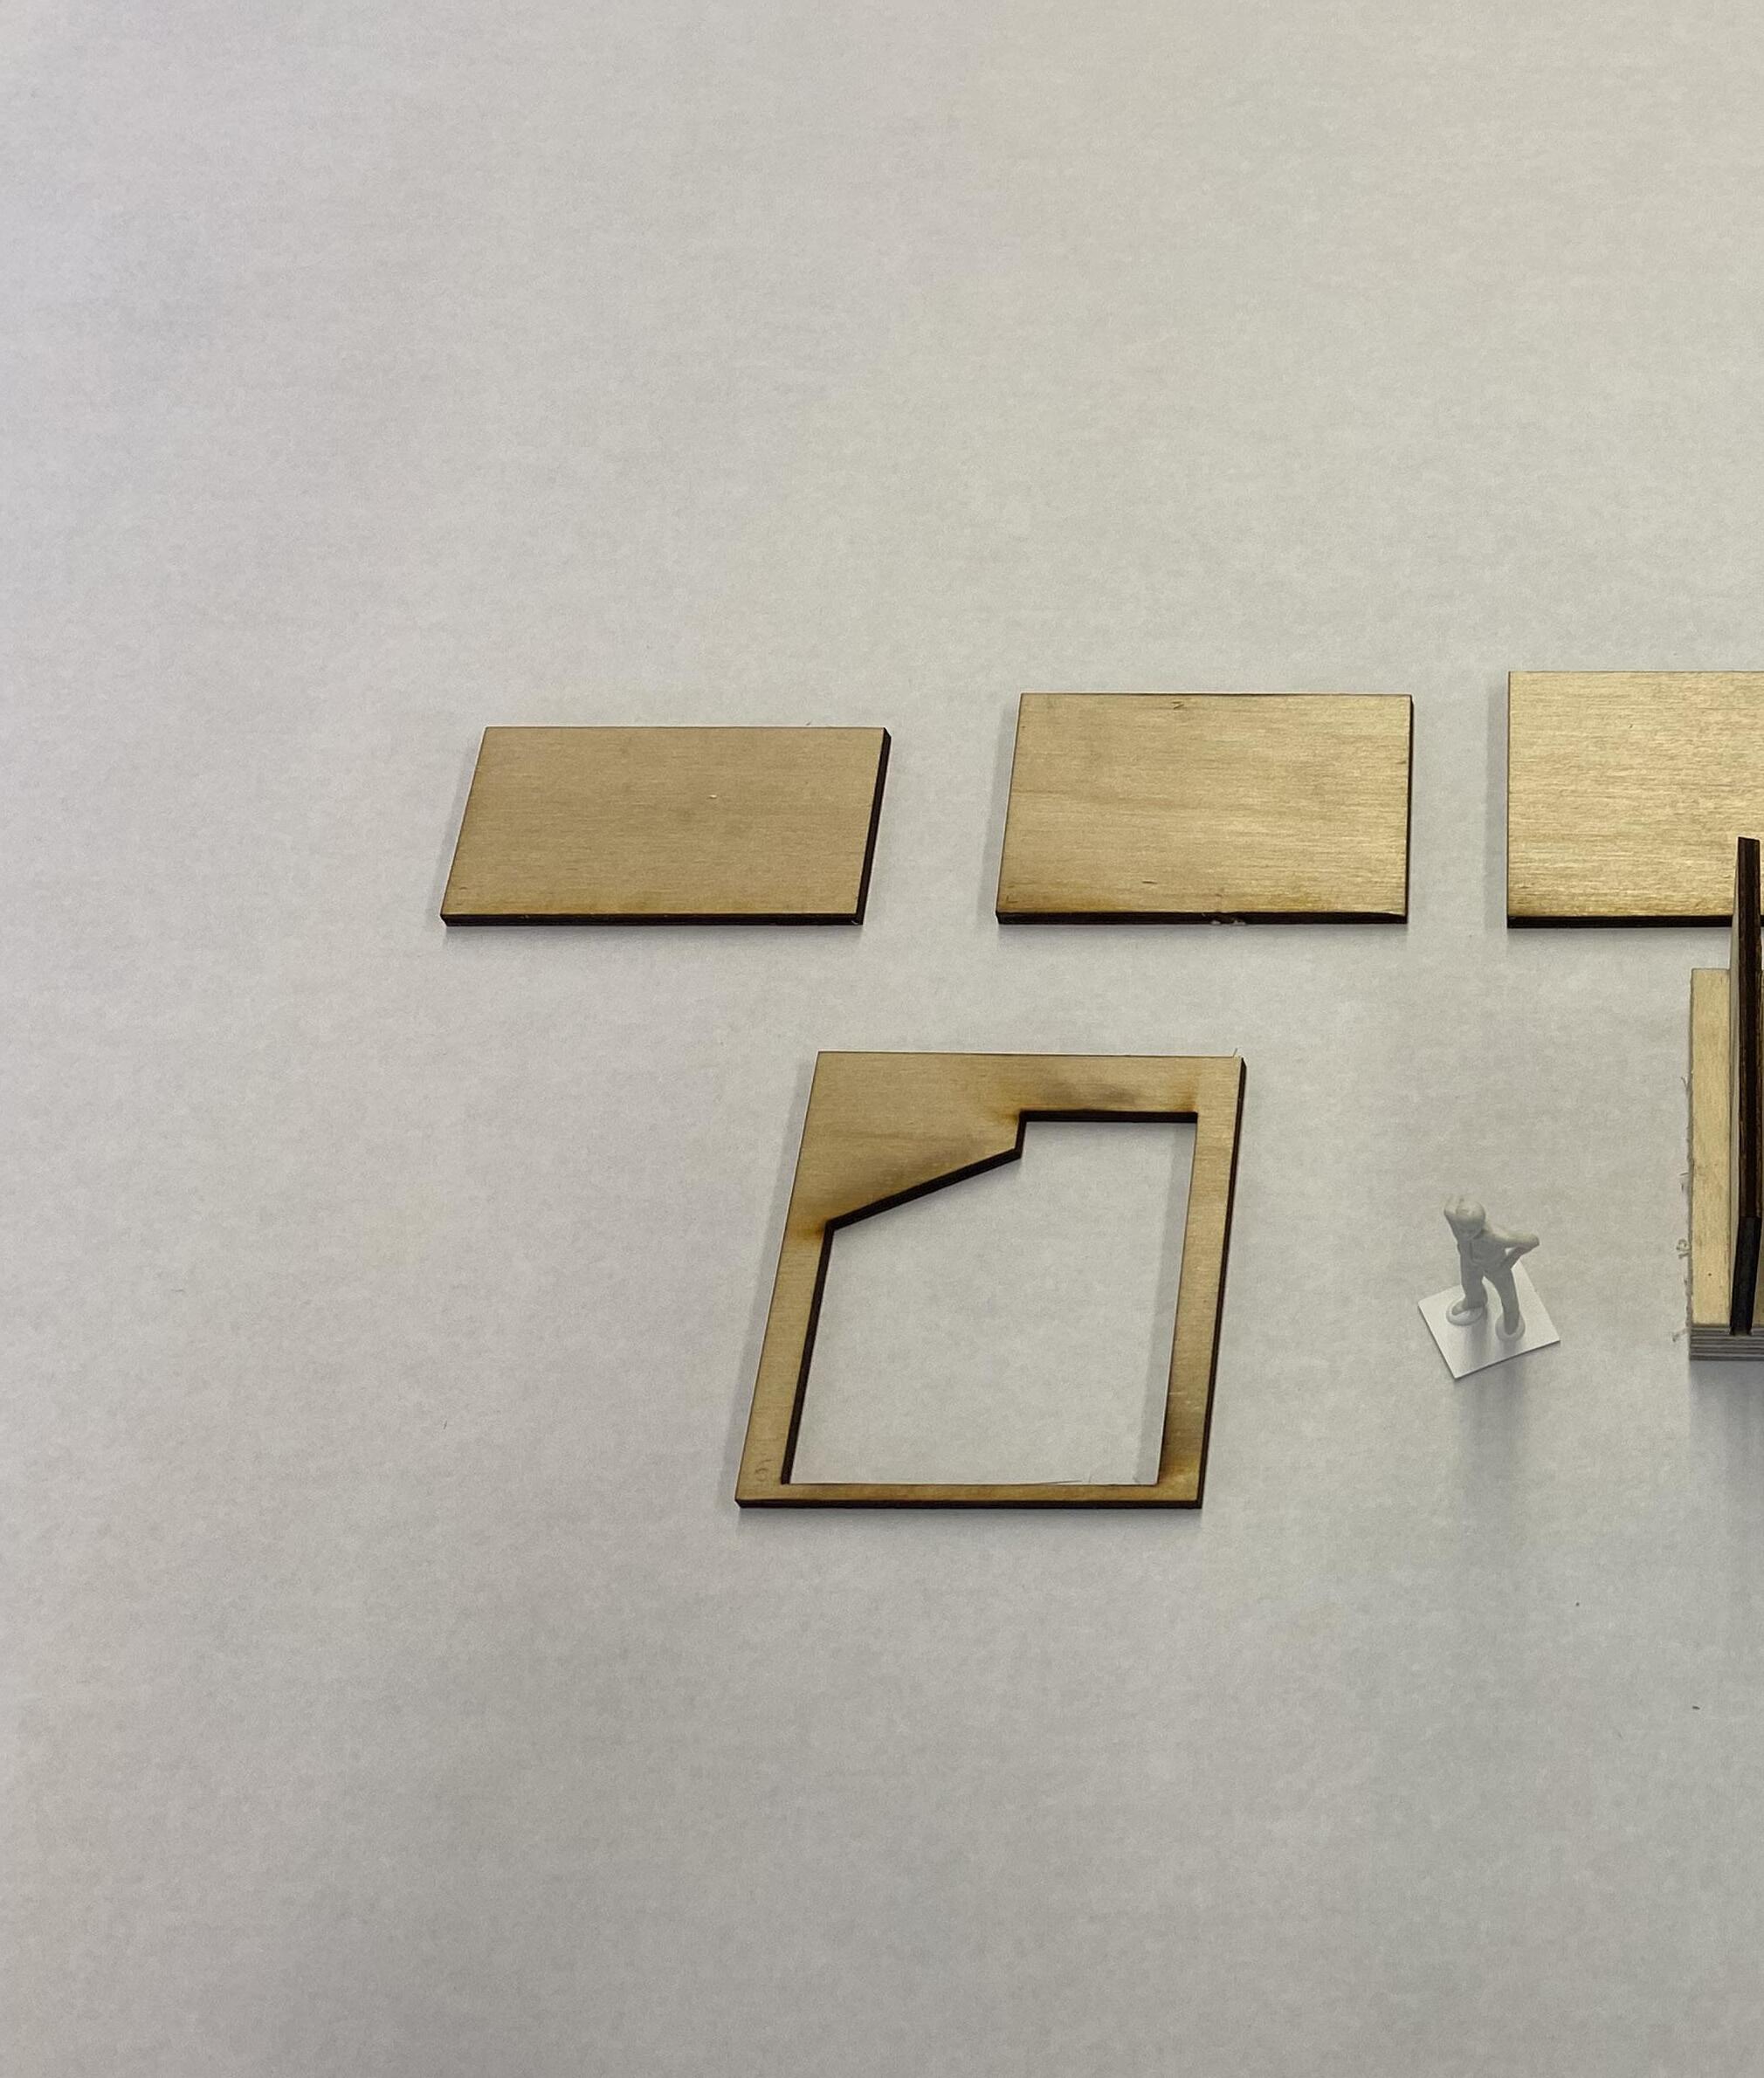
The Boolean Frames Model started by creating a massing in a housing like shape. Afterwards we put in our knowledge from the topography and contour lines but then to create this house framing. This was then molded and formed by extrusion that were taken away. This intended to make a unique space with experiences. I did this in my model by focusing on small skylights and then having the wall behind the skylight larger, so that the light bounces off of that area. I did have some challenges though. An hour before laser cutting I realized my Rhino model did not have 18 frames, it had 16. I realized that this was due to somehow having
a smaller base size then I should have. I attended office hours, and was able to figure out a quick fix before printing. Later I corrected my Rhino file to match the additions I have made. The Display mode settings have also been difficult this project, as you never quite know if they look right, so I have been going back to my TA to double check my settings, and displays.
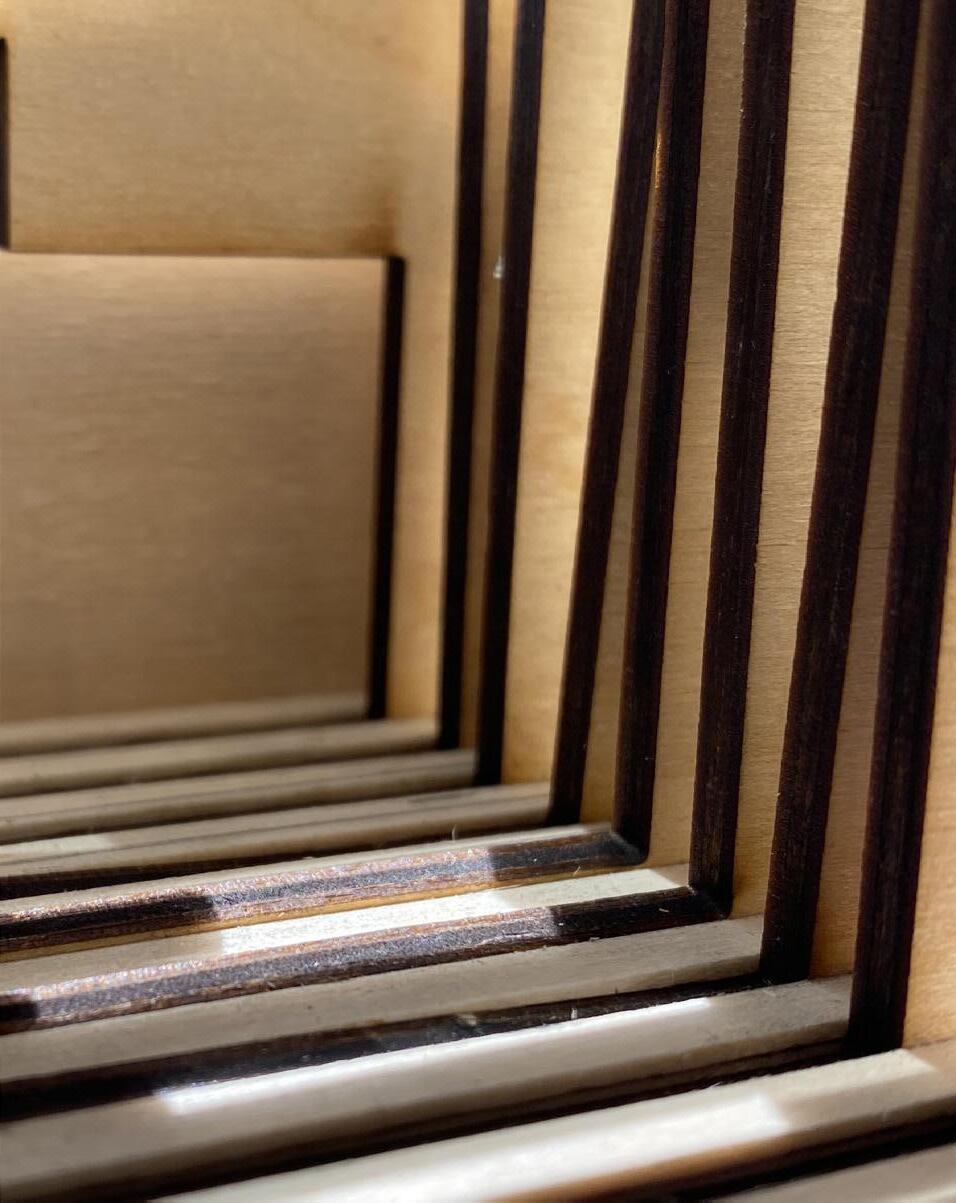

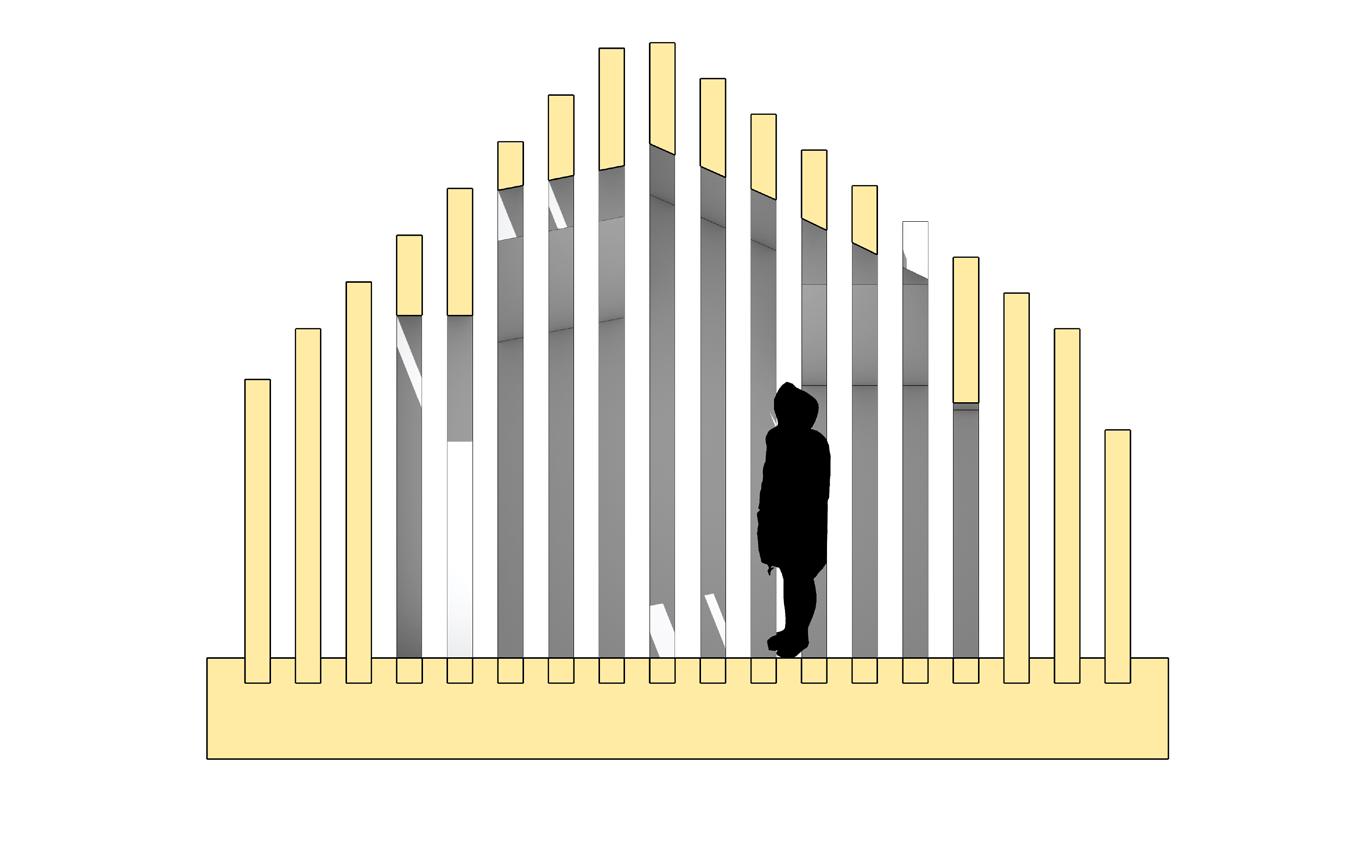
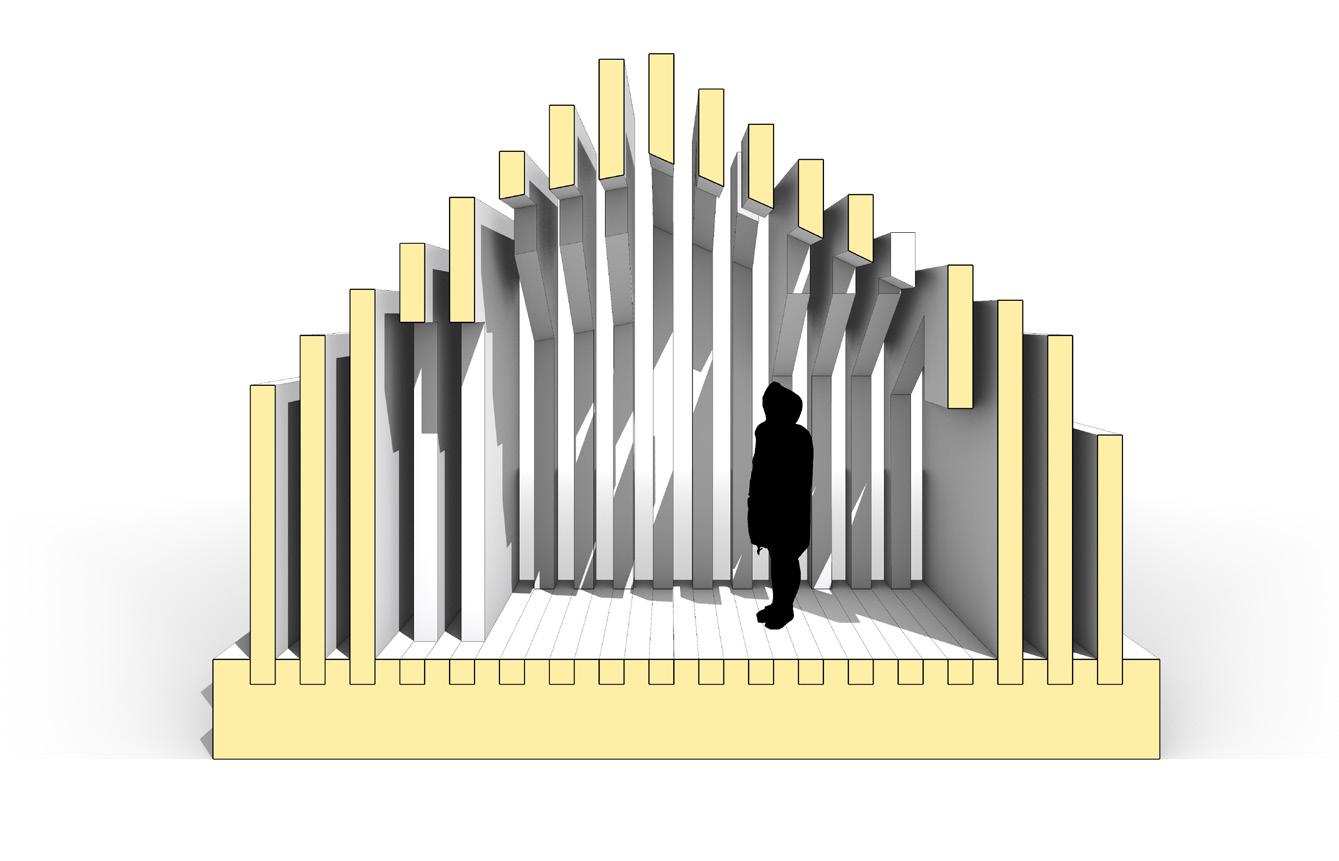

I have enjoyed reviewing the rendering settings in Rhino. It is a quick way to make your modeling look professional and work well with lighting. I am even planning on using these new techniques in my upcoming studio final. I especially liked reviewing textures and how to make your Rhino model more dynamic. When it comes to the display modes I did have some challenges as one of my frames had an issue rendering correctly and would show the sides as a black box. I have been able to fix it as I found out that it is an overlapping issue of more then one surface that is interfering in the render process. With the physical modeling it felt sad to cover
up the pretty wood grain, but I did enjoy the white models. The hardest part was painting on top of the model. The lines did not appear clean, and it kind of ruined the original look. The red has a warming sense as it overtakes the side walls, and the blue represents this void in the waves, much more tranquil I feel then the heat from the fire.

Images
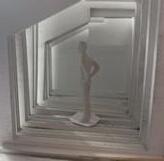
Top Left: Sun & Material Render
Top Right: Sun Render
Lower Right: Skylight Render
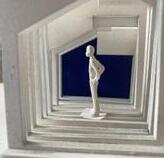
Images Opposite Page
Top: Spot Light Render
Middle: Point Light Render
Lower: Rectangular Light Render


Week 03 Cory Olsen
Week 04 Nancy Cheng
Week 05 Dylan Wood
Week 06 Ignacio Lopez Buson
Week 07 Philip Speranza
Week 08 Siobhan Rockcastle
The Guest lectures were very beneficial in showcasing all the different options available in the field of architecture. Whats maybe even more important is how digital fabrication was incorporated with physical model making and thinking.
This was very useful in considering what types of knowledge bases you should start building in College and how that may help you in the future.
Because of how often Mass Timber design came up in the Guest Lectures, I ultimately decided to write a research essay on Mass Timber and its sustainability for my WR 122 class. I think it is valuable to be able to connect different classes back towards each other, and that
every possible moment you have the chance to expand your knowledge. I think this class has especially accomplished that for me.
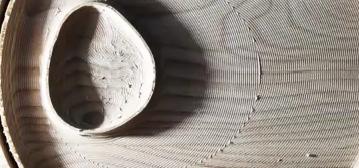
Cory talked to us about some of his classes and how different software are used and combined. He showed us many examples of personal and class projects. I was especially impressed with the rendering skills. As well as the bowl that was cut using technology and programming. It looks like a lathe project, which is something in the woodshop that I have challenged myself to use every week this term.
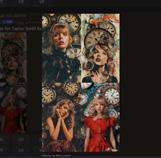
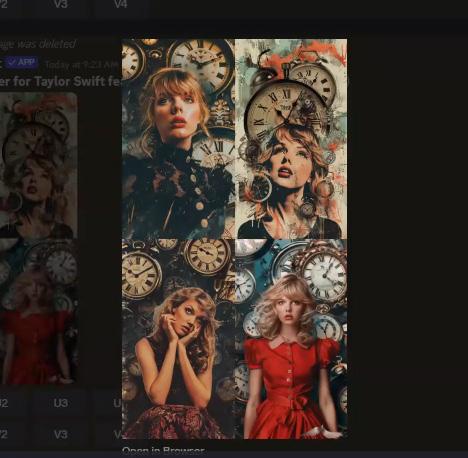
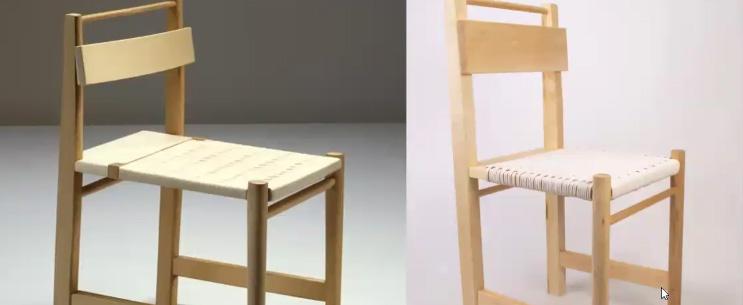
I was also inspired by the use of AI and how it can be a design aide. Especially in the furniture design. After class I started doing this as well, creating chairs using AI for artists like Vincent Van Gogh or Rembrandt. This was really fun, and I enjoyed
using and manipulating the tools we learned from this lecture.
Funnily enough for the class tutorial of AI, I yelled out Taylor Swift for one of my friends as “The Tortured Poets Department” was released later that day. I thought it interesting how AI has set limits to using a celebrity appearance and how it focuses on different words in a prompt. I have been messing with generative AI for a couple of months now and thought this was very insightful.
Yen-Wen Cheng
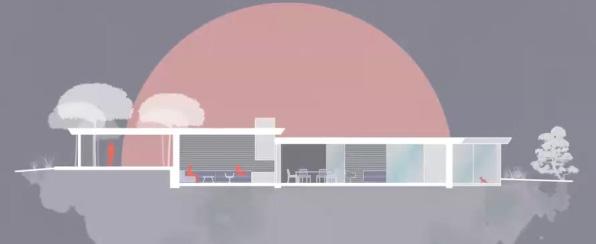
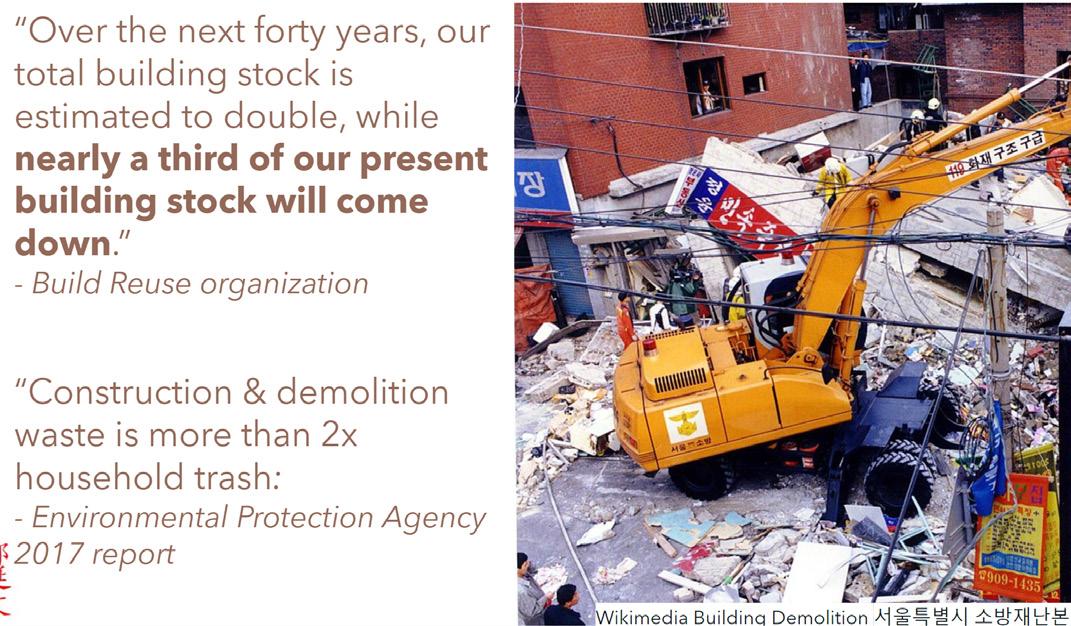
I left feeling enlightened by this lecture. I appreciated the focus on addressing construction waste (this is what I decided to write my research essay on for my writing class). I felt this was a great introduction to the possibility of reuse, and how architecture can be a way of doing so. Most of the lecture was great for forming and developing concepts and the processes behind them. This is helpful now going into our final studio project. The process that Nancy shared was Form, Light, Material and Structure. I think this is a great start and I feel like I have done something similar now for studio. Started with triangular forms and slopes, then to the feeling and
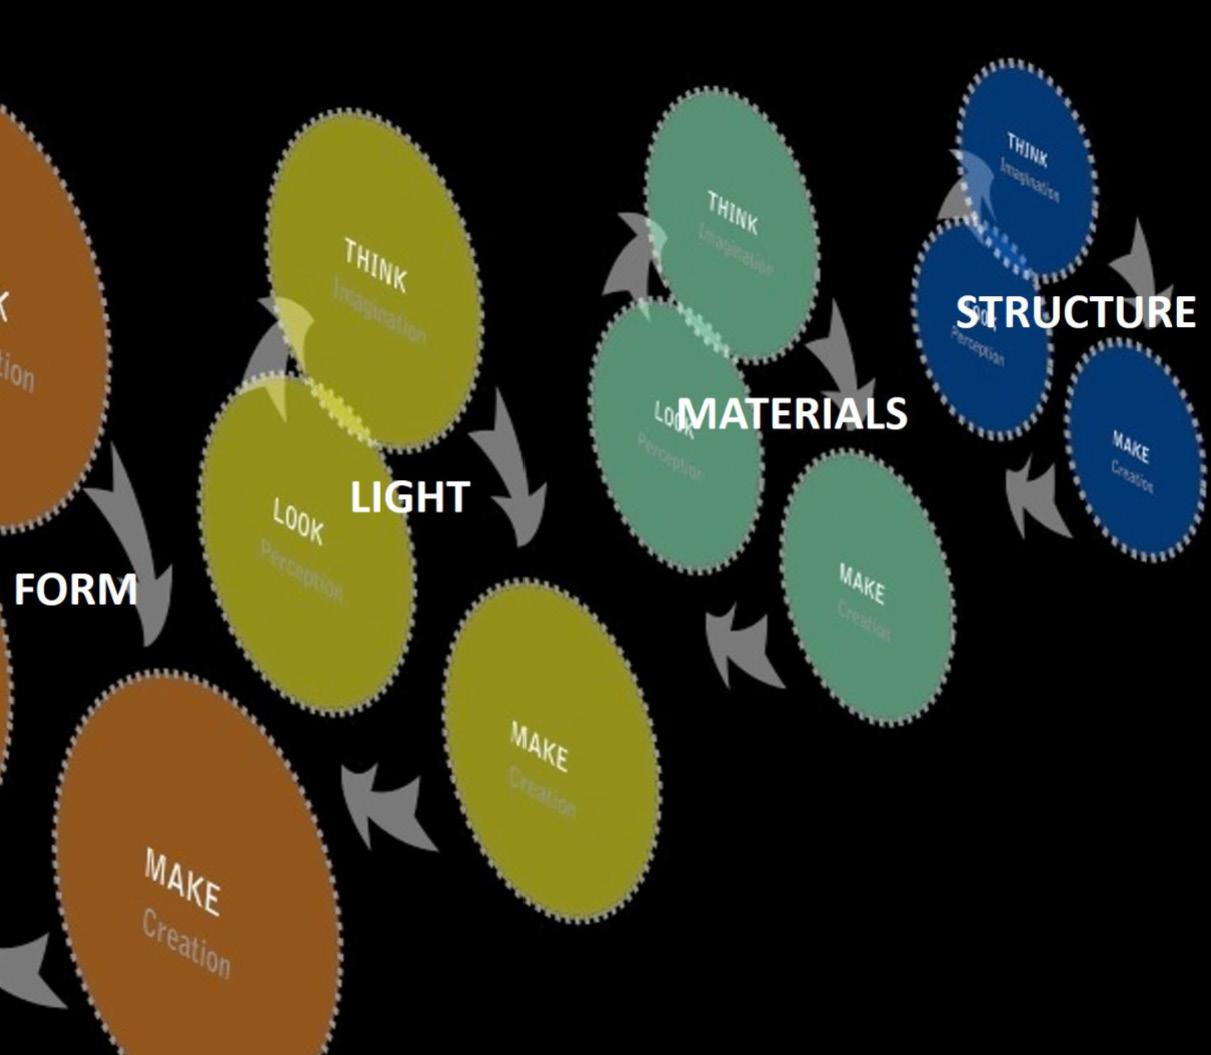
light of an alleyway or canyon, and then to material of brick and light white roof, and lastly how this forms a structure. I now feel like I can continue with a good starting point and ideals to follow.
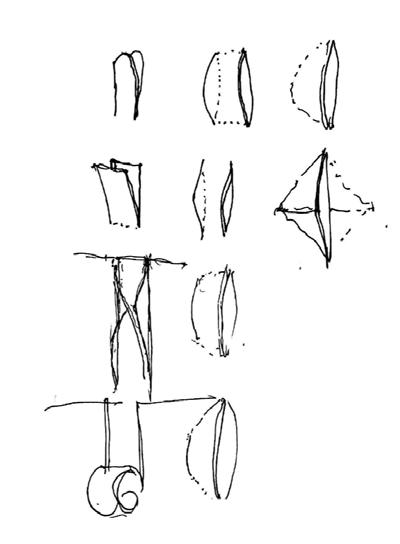
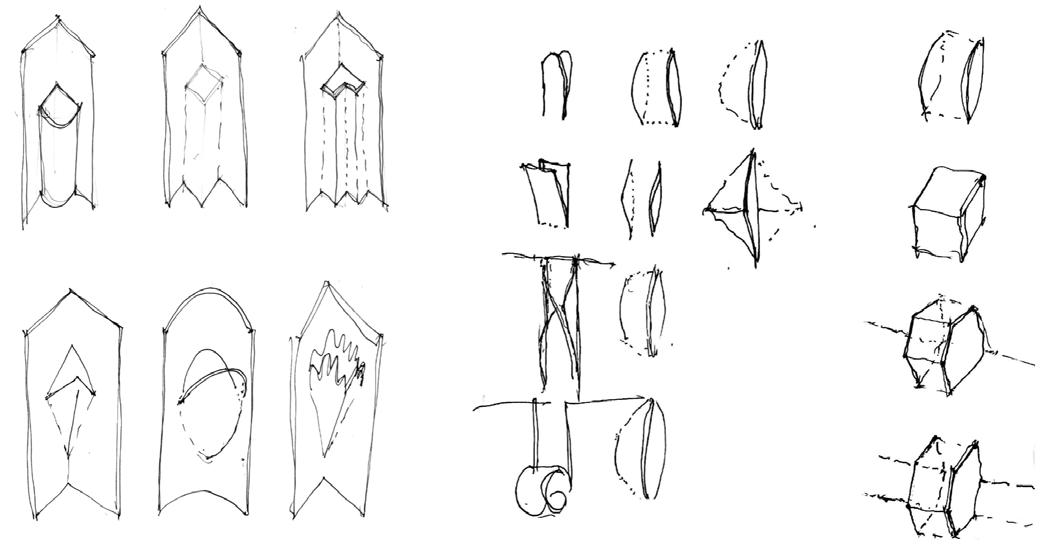
You can see a similar process in Nancy’s work, such as the diagramming to the side. It shows the idea of form and light and how that may start working in shapes. I appreciated her commitment to simplifying shapes and upscaling shapes.
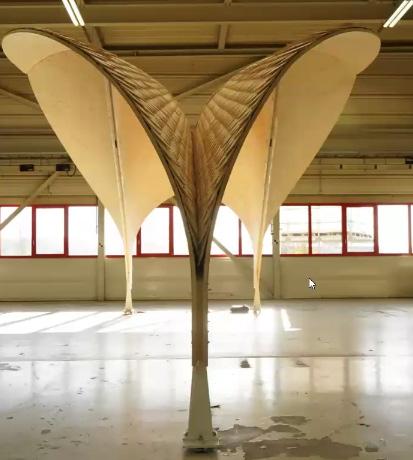
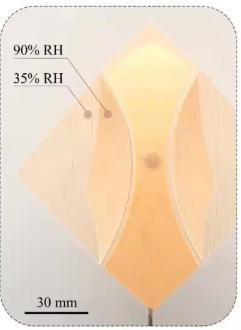
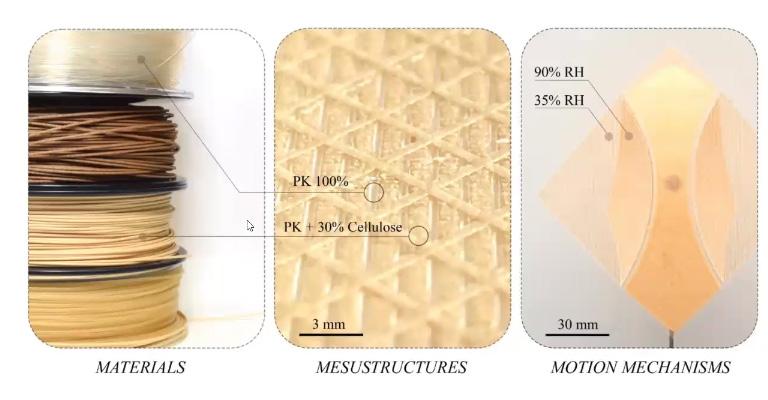
This was a great lecture. I loved learning about how bioengineering and computer engineering can make forms and shapes in architecture. It was really interesting to hear again how curved shapes, shaped by humidity use less timber than other methods. I liked how the built form also works well for the community it is in, and how it is standing as an architectural legacy. I also thought it was cool to see the many iterations that this structure went through, just like we have for module 2. Bioengineering and how wood responds to humidity like a pinecone was very intriguing. I feel like so much can be done and learned still about this process. It was
great to initially see a shade screen respond to daylight and temperatures, and then afterwards see how this works with a roof. That opened a lot of possibilities in my mind with how wood can shape and be used in architecture. This felt like true study of a material. I also like the other side of the use of wood, it is the material in combination with robotics. This was very interesting to view, and I would have liked to learn more about this as well if we had more time in the lecture.
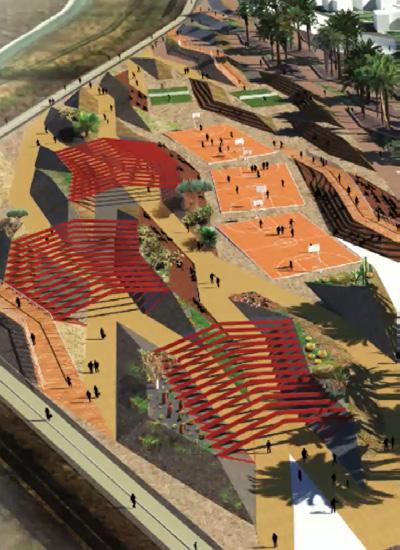
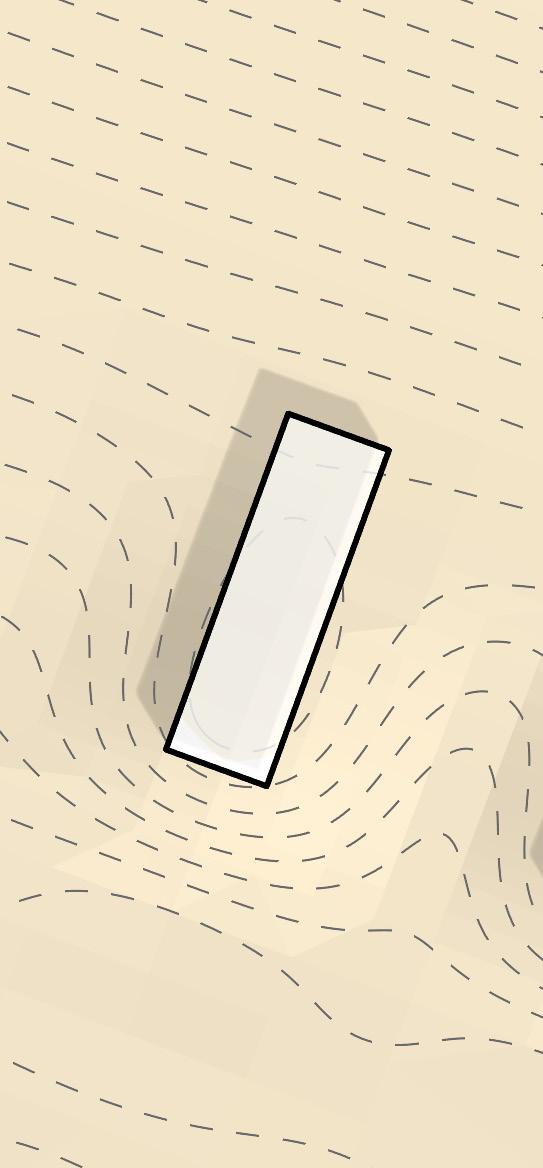
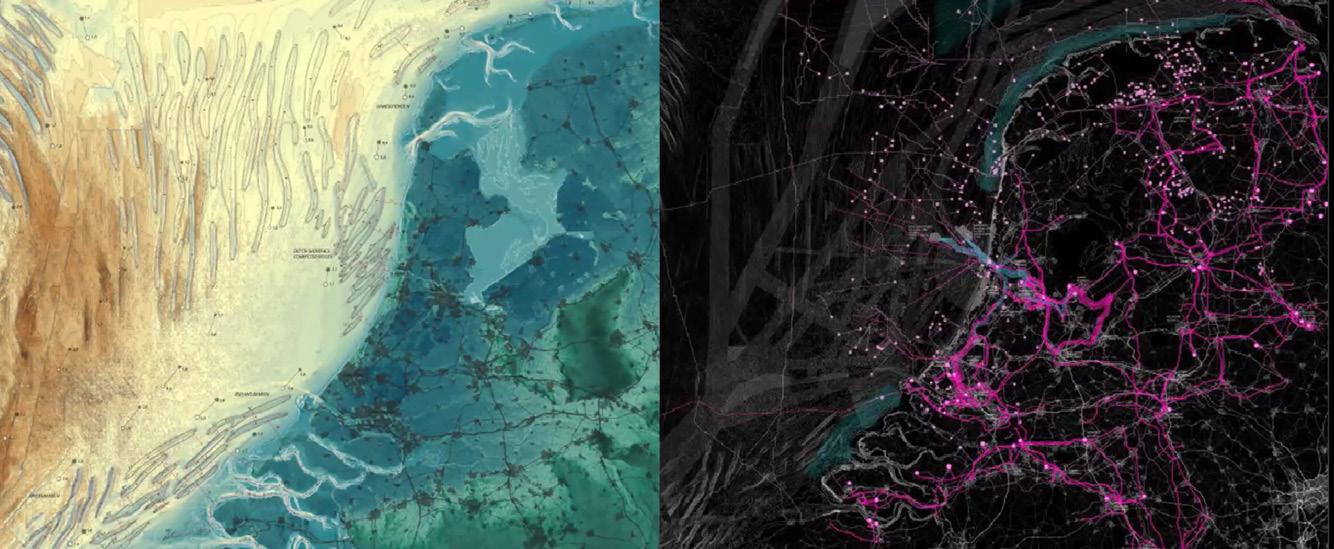
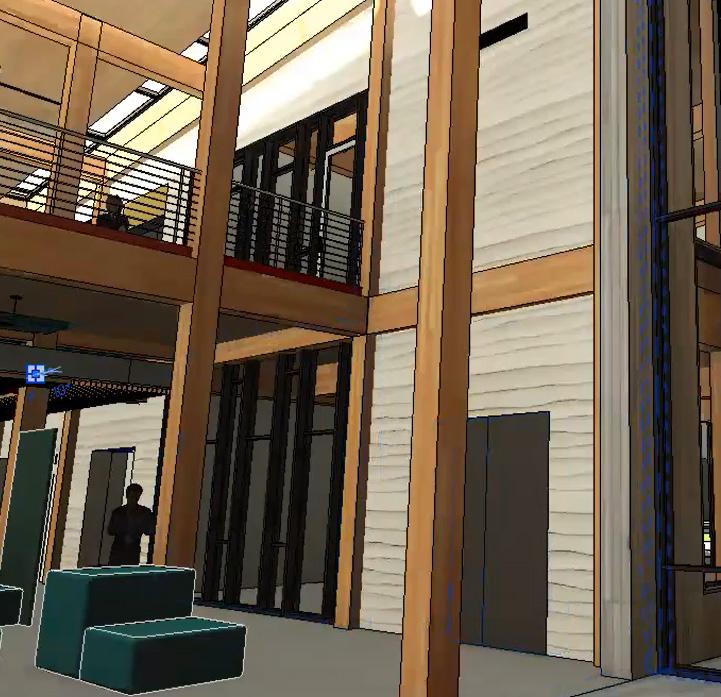
Ignacio Lopez has both interests LARCH and ARCH, and focuses his lecture on the power of digital tools and how we can use them, as well as the ideas of Green Infrastructure, and photogrammetry and drones. He focuses the lecture on what type of information we can get from using technology and digital fabrication. What I found most interesting was the use of technology and the idea of world building. At the beginning of the lecture he mentions this top right image of the Netherlands and the water streams, and how technology as the power to capture this of a whole country. Afterwards he moves on to drones and photogrammetry and how this ever improving technology is very important to gain informa-
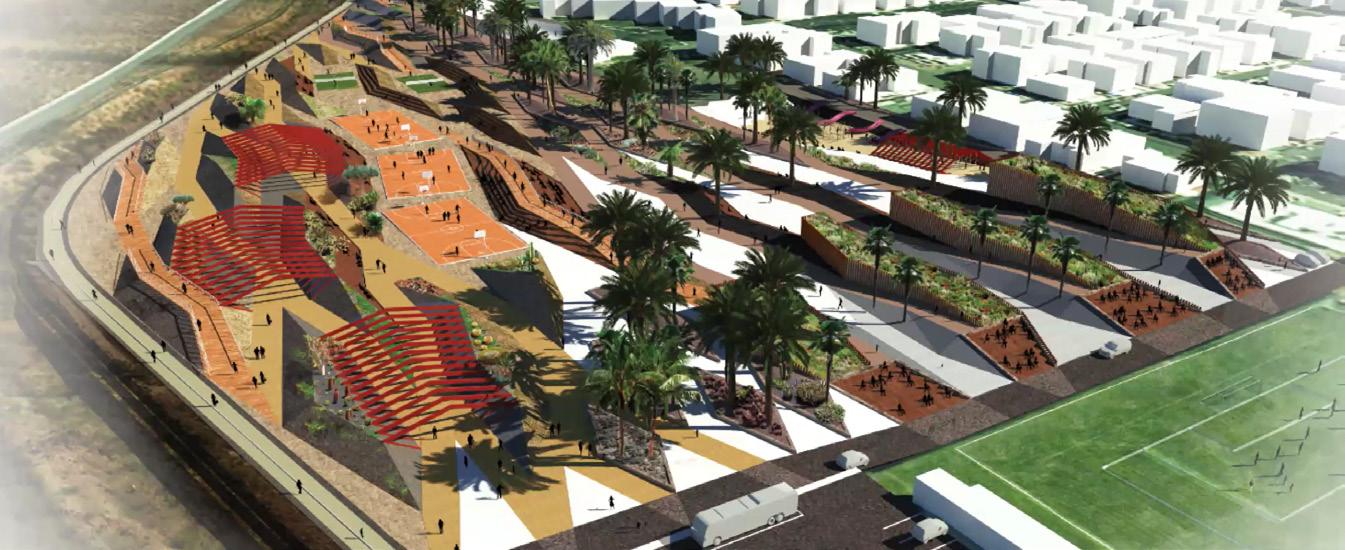
tion from, including radiation. He then stresses the importance of process in the top image, showing how it is important to constantly move between physical an digital modeling. Lastly I was very impressed by the park by the airport project depicted in bottom right. This project acts as dunes to block the noise from the airport, while also providing places for water to go. This lecture felt like a summary of the very objectives we have been covering during ARCH 222.
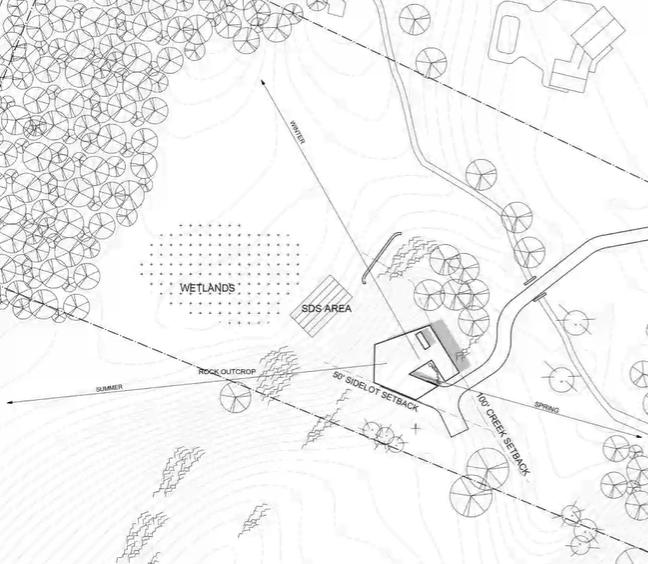
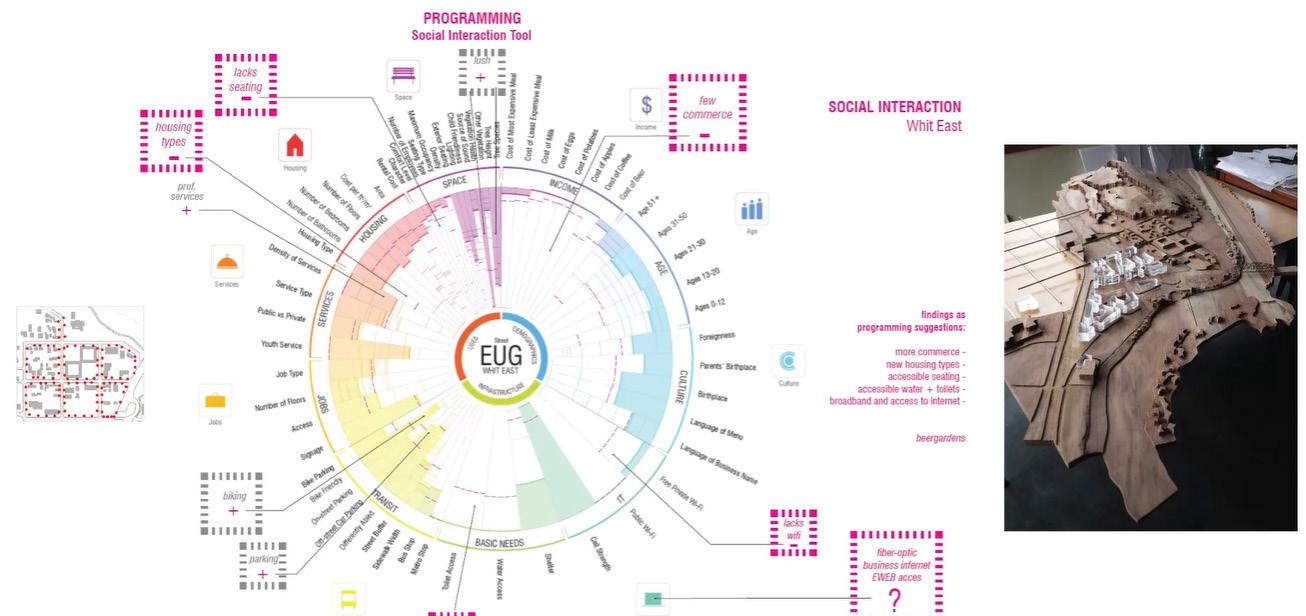
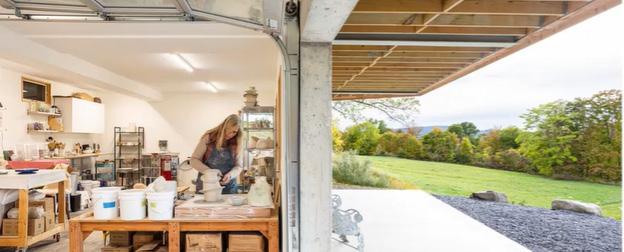
Philip Speranza walked us through different projects and processes including air quality testing he is currently doing in Barcelona. What interested me a lot was his thought process on programming for buildings, his inspiration for different moves and forms, and how you can highlight different views in a building. He showed us in the top right image how he programs buildings based on community need and what is not being filled. Like public transportation, Wifi access, housing, dining, grocery stores. This helps give an accurate idea of what the building should be supporting. The middle right image was a source of inspiration while building the Speranza Residence. This type of angle of building that he
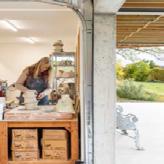
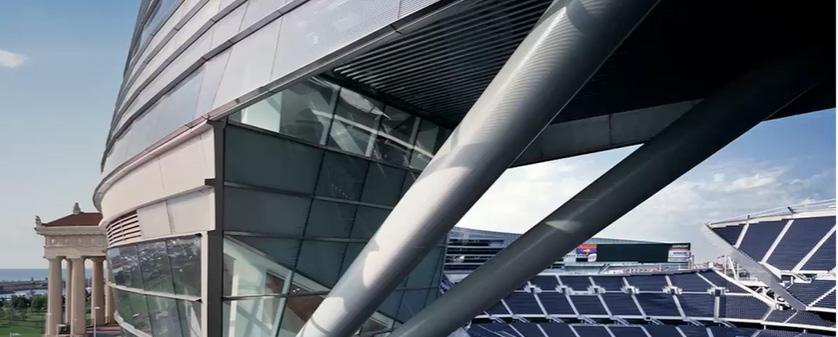
has worked on before gave him the knowledge to do something similar in his residence. It is great to see the inspiration of other architects and what they draw from. One of my favorite homes he showed was the Hudson house. This was a home overlooking the Hudson river, and Philip noted how they focused on the views around this meadow and frozen waterfall. I also appreciated the ceramics studio placement as it reminded me ARCH 283 where I built a home with such a studio.
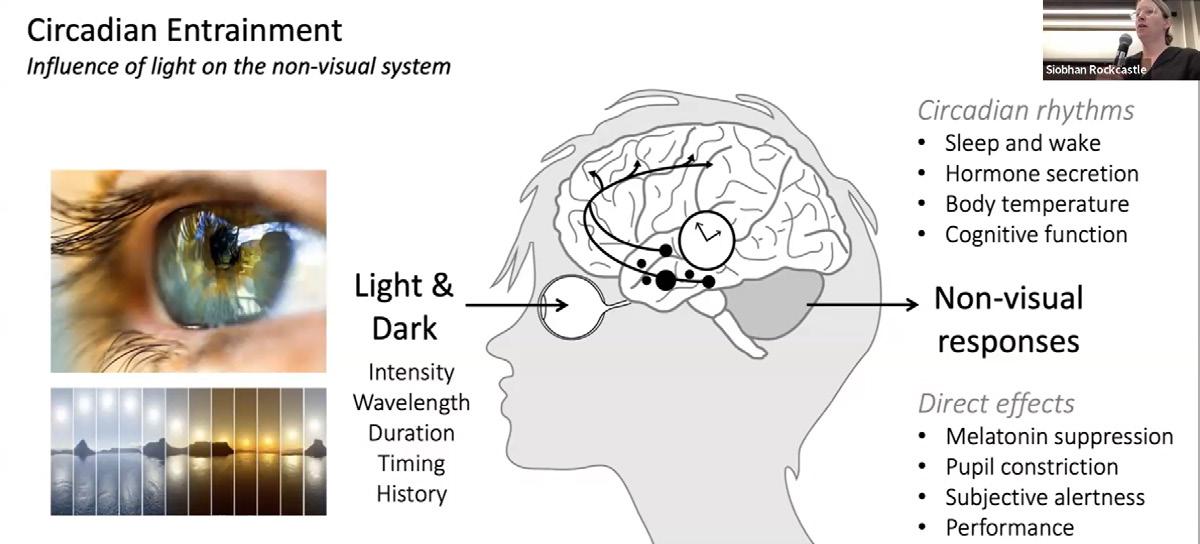
Siobhan Rockcastle reviewed a lot of different principles regarding light and color and our eyesight too. As well as touching on rendering and what types of rendering would represent light the best.
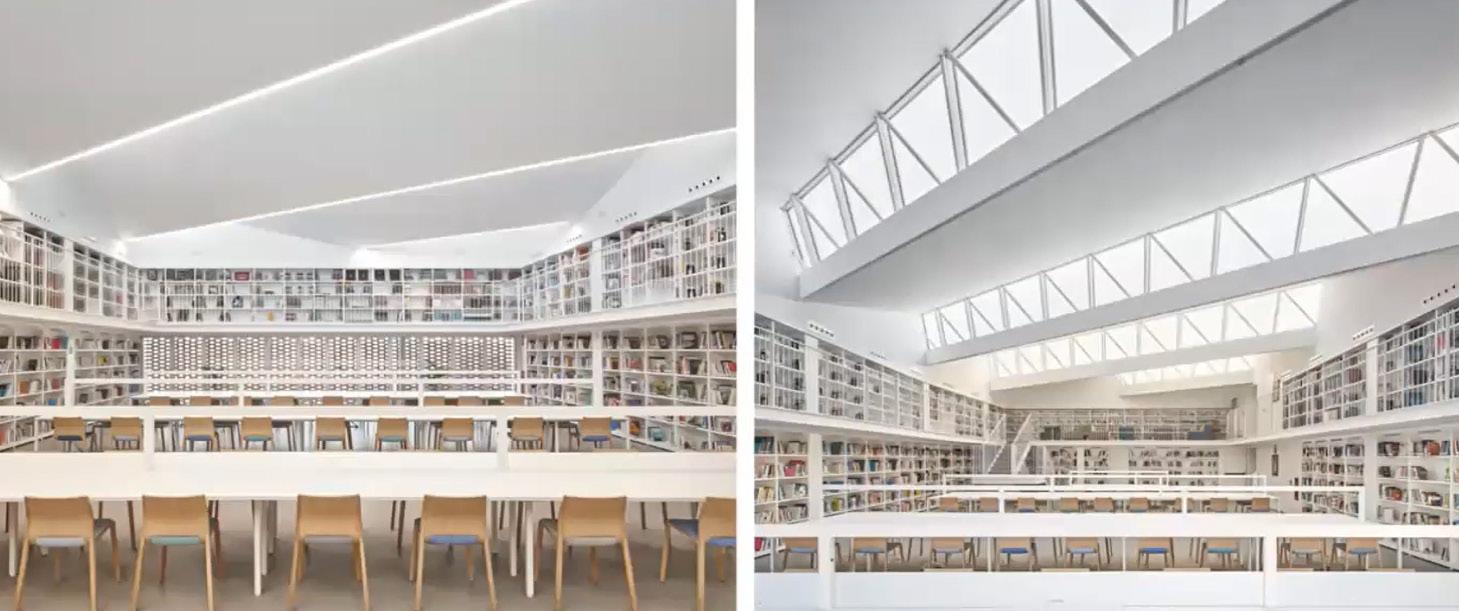
What I found was interesting was the Circadian Entrainment and how light impacts nearsightedness. This had to do with the amount of light in buildings not accurately showing outside light making us feel sleepier. She also covered indirect vs. direct light in different buildings, in the middle right is an image of that. As well as a workshop with 360 cameras to show the experience of a space in different lighting conditions. This is very helpful thinking, because we are in our last leg of
our studio project and I think modeling and seeing this would be very great. Lastly Ryan, one of her vertical studio students, showed us work from Revit with the top image showing an image of standard default lighting, while bottom right shows the lighting in a different display that more accurately shows how the light would hit the space and gradient out. She also advised trying out Climate Studio. Which i think I will also be using to look at different perspective angles.
Time Management Schedule
This was a very useful extra credit assignment. It helped me overview my week and see where I can put my time, and when I needed breaks. Ultimately I do think this shifted as the term progressed as I was able to better divide my time and see where I wanted to put more effort into.
I also always want to try to provide time to do the fun things in life, and with Architecture that can be difficult when it comes to time management. Ultimately though I was still able to do the clubs that I like, such as Ballroom Dance, or Board Game Club, and find time to hangout with friends.
I decided to do this extra credit because of the tool it can be to help with time management,
as well as creating a boost to my overall grade in case I got sick, or ran into an emergency over the term. You never know whats going to happen, and yes I did end up getting sick during this term. So, well thought out past me.