
AIR PRUNING
HYDROPONIC STRUCTURES
GROWING FROM A NEW ANGLE
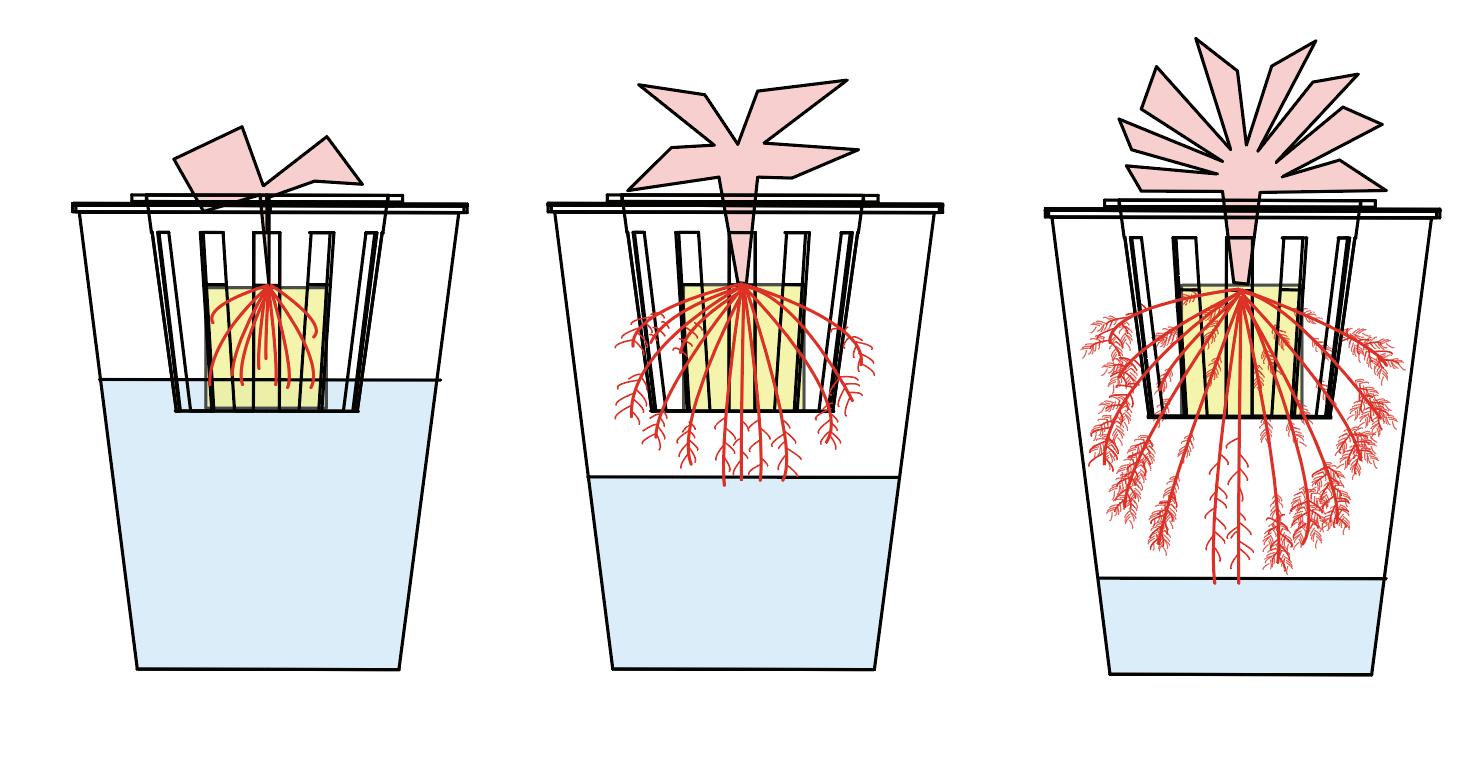
In 2009, University of Hawaii researcher Bernard Kratky introduced a simpler way of growing plants in a hydroponics system without the use of active elements. His method places the plant in a net cup containing a growth medium, which hangs above the water reservoir, only allowing the root tips to touch the reservoir. As the plant grows and absorbs the water, it
creates an increasingly large air gap between the net cup and the nutrient rich water below, allowing for air pruning of the roots to naturally occur where they don’t touch the water below.
This system allows for a low cost barrier of entry compared to other hydroponic systems, as the removal of active systems allows for less monitoring and reduces the cost of the system. The reliance of the system on the plants to provide a wicking effect along with lowering the water level can restrict the type of plants that can be grown within this system.
The lack of active systems in a larger version of the method would lead to the system having less points of control which could make scaling up of this method or application to green wall projects more difficult.
1- Diagram: Plant starts growth in medium
2- Diagram: Plant grows, absorbs water and introducing more air to roots
3- Diagram: Plant Fully Matured
Timeline Diagram of Standard Krakty Hydroponic System
Plant Roots absorb water leading to water level dropping
Drop in water level introduces air pockets between water and growth medium
Water absorption and air pruning process continues until the water source is mostly exhausted
After absorbing the majority of the water containing nutrients, the plant is ready for harvest
Roots in air gap begin air pruning process
Project
Review
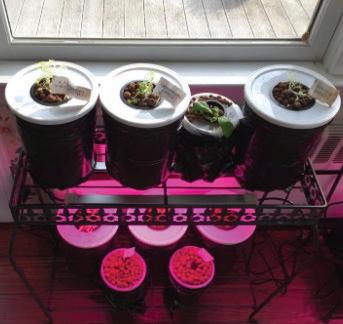
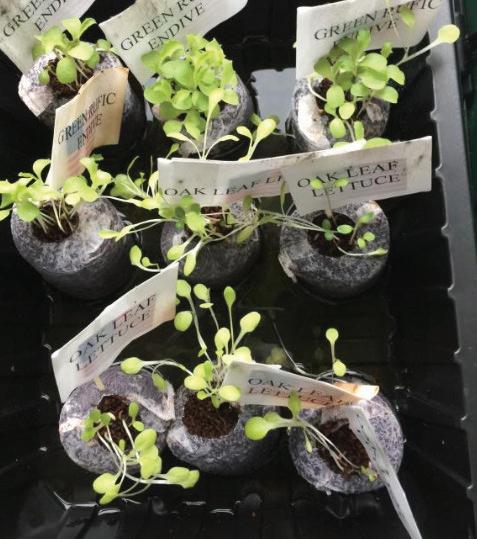
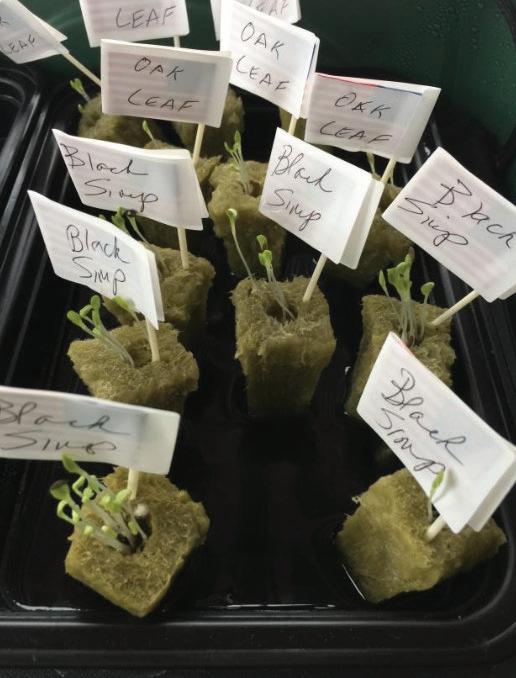
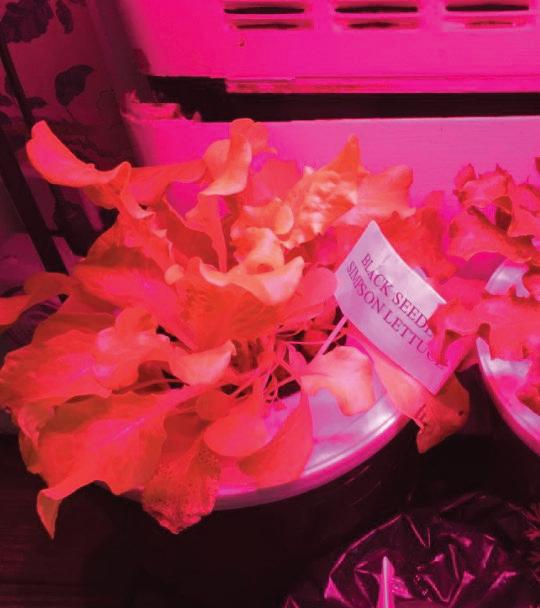
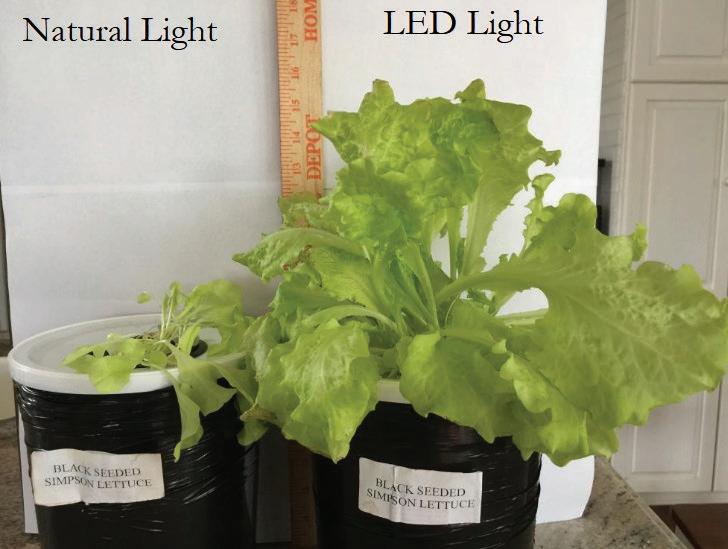
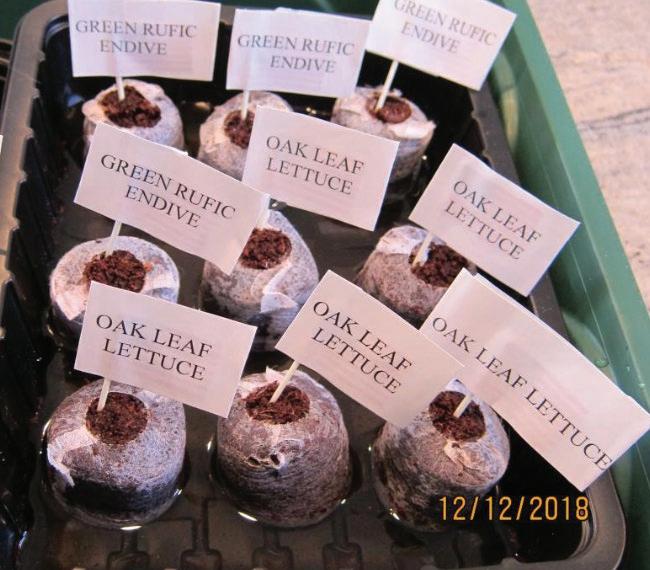
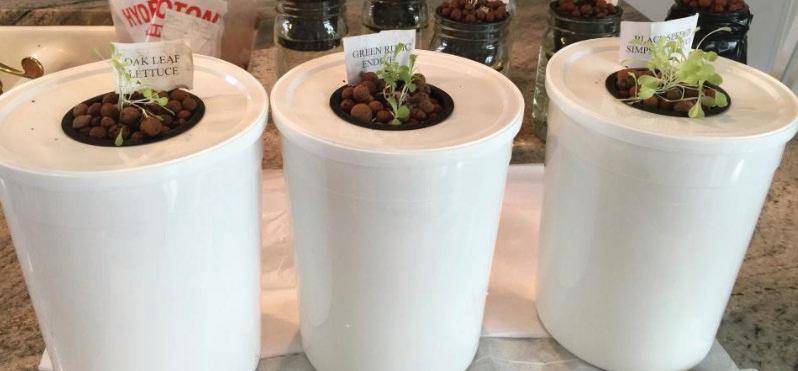
This project explores the use of the Kratky hydroponic method to grow indoor winter plants, lettuce and herbs. Mainly, the project studies the impact of light type and growth media, and choice of plant affects the success of the overall hydroponics system.
The project prepared 26 plants all varying in species, growth medium, lighting conditions and documented the growth of the plants for the report on each of the variables. The project drew some interesting conclusion, including that plants grew best in 1 gal plastic countainers and Grow LEDs allow the hydroponics system to have the same yield as soil
The project also found that herb plant growth happened regardless of the container use, with root growth being significant, but top growth being not as robust. Mint, Chives and Dill failed to grow regardless of other variables, while Rosemary, Sage and Basil herb grew in both natural and LED light settings.
The Cornell University project inspires this project to explore how changes in the growing system can impact the size to which the plant grows. The different tests from the Cornell project shows the ideal growing medium to be rockwool as it is less messy and just as effective as the other growth mediums
Kratky Hydroponic GardeningCornell University
Pictures showing the different growth tests of the project
Project Review
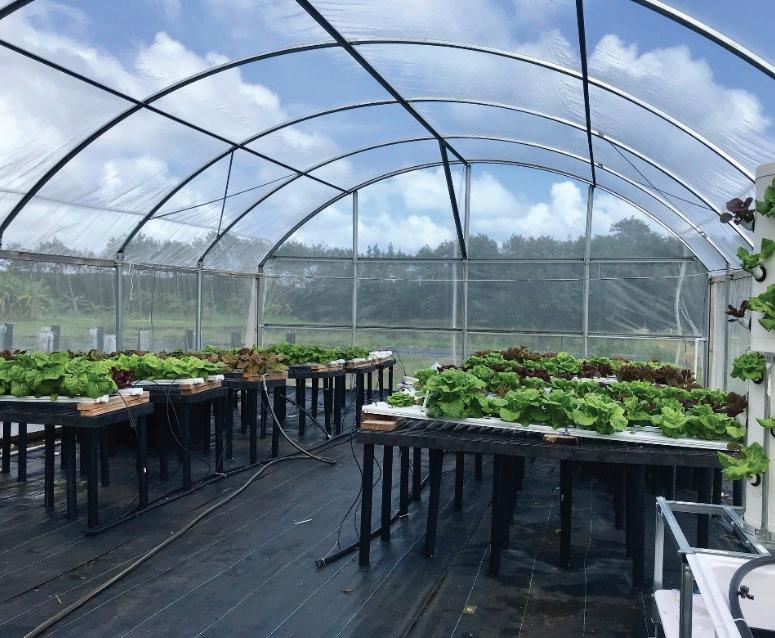
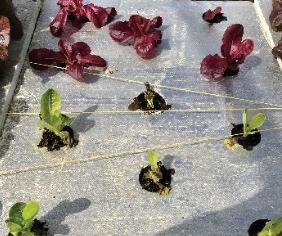
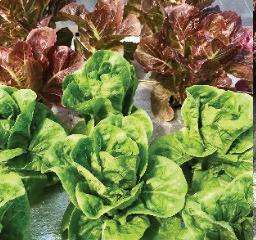
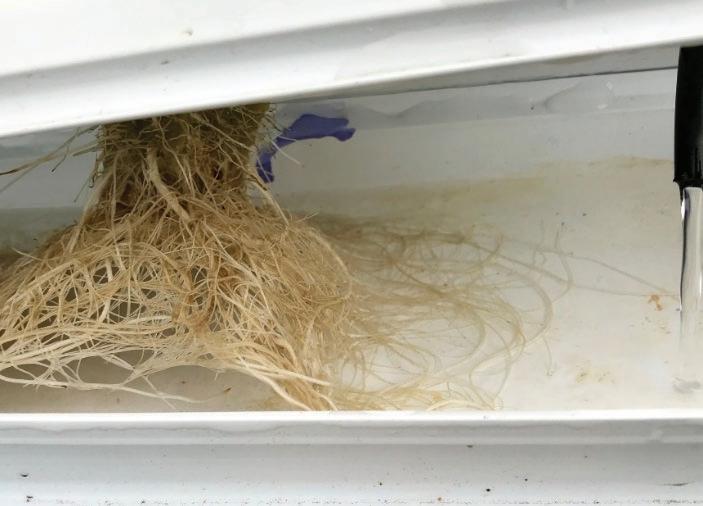
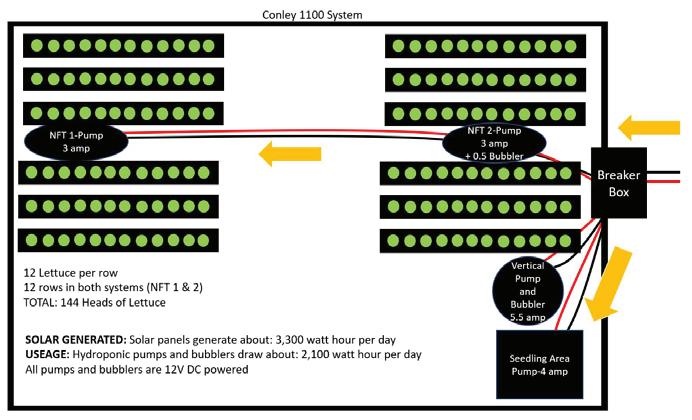
This project explores, explains and tests different types of hydroponic systems including Nutrient Film Technique and the Kratky method. The project looks into specifically how this systems can grow market viable plants while avoiding some of the common problems associated with standard plant growth such as rodents or plants
This project also explores vertical system of Kratky method allowing for spacial efficiency in plant growth. The project explores the two methods can be used under a singular overall solar powered and greenhouse system. The project found that it was possible for this system to yield marketable yields while reducing costs and increasing yield quality from avoiding possible rodents and pests.
Future work of the project group will be testing and evaluating organic fertilizers within the system to lower costs and increases effectiveness.
The Small Scale Hydroponics System project inspires this project as this paper’s project looks to explore how the Kratky system can be combind with a more active hydroponics systems. The Small Scale Hydroponics System project also reflects the setting of this paper’s projects, being located within a greenhouse.
Design of a Small-Scale Hydroponic System for Screenhouse
Energy and Pump System Diagram
Project Review
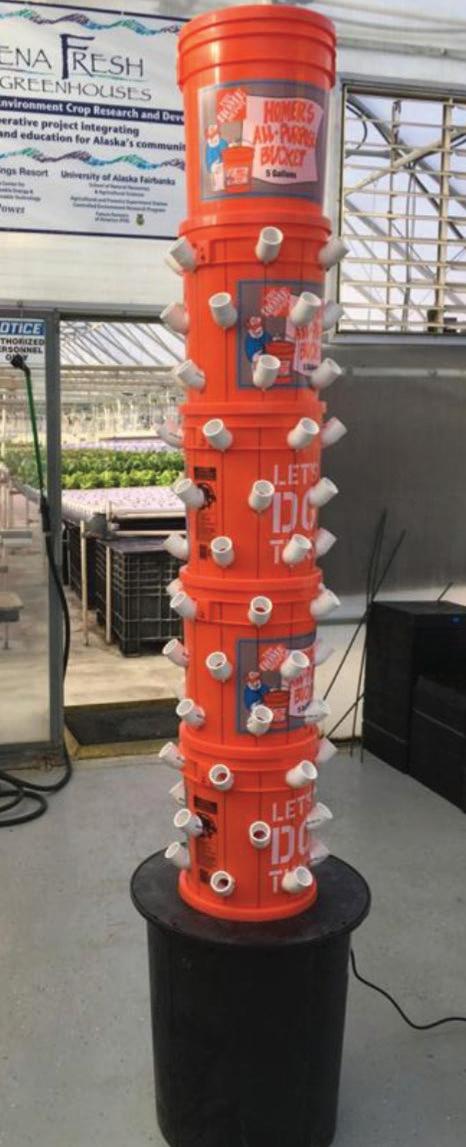
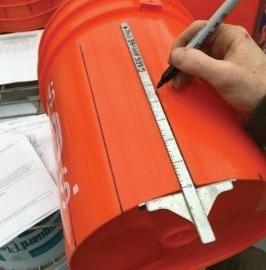
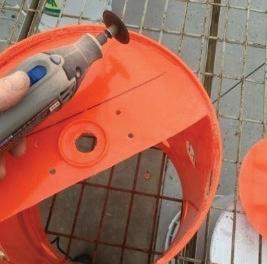
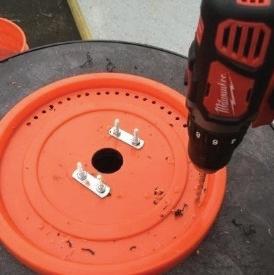
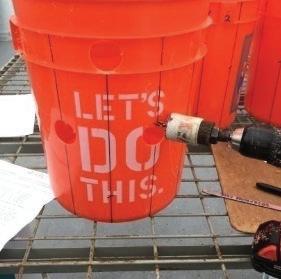

The concept of this project was to create an easy to build, to inspire youth to get involved in construction and the use of a hydroponics system. The project can be reproduced with supplies from a standard hardware store. The project also goes over some of the constraints of a hydroponics production structure.
The project goes over how the first choice of a hydroponics system is the crop, as it impacts the lighting and type of fertilizer needed. Some tougher plants including flowers and fruiting plants may require a more extensive grow light for the system to function.
The project’s main asset is how well documented the building process is through the numerous steps and clear images on how each step is accomplished. The Chena Grow Tower project inspires this project’s goal of creating a new, easy to grow and interchangable green wall system.
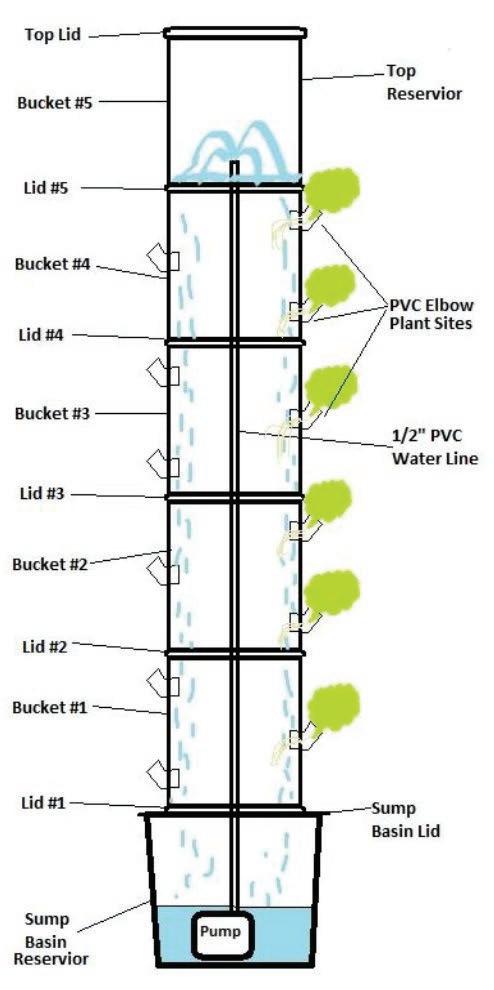
Chena Grow Tower Project
Diagram of the Tower’s Inner Workings
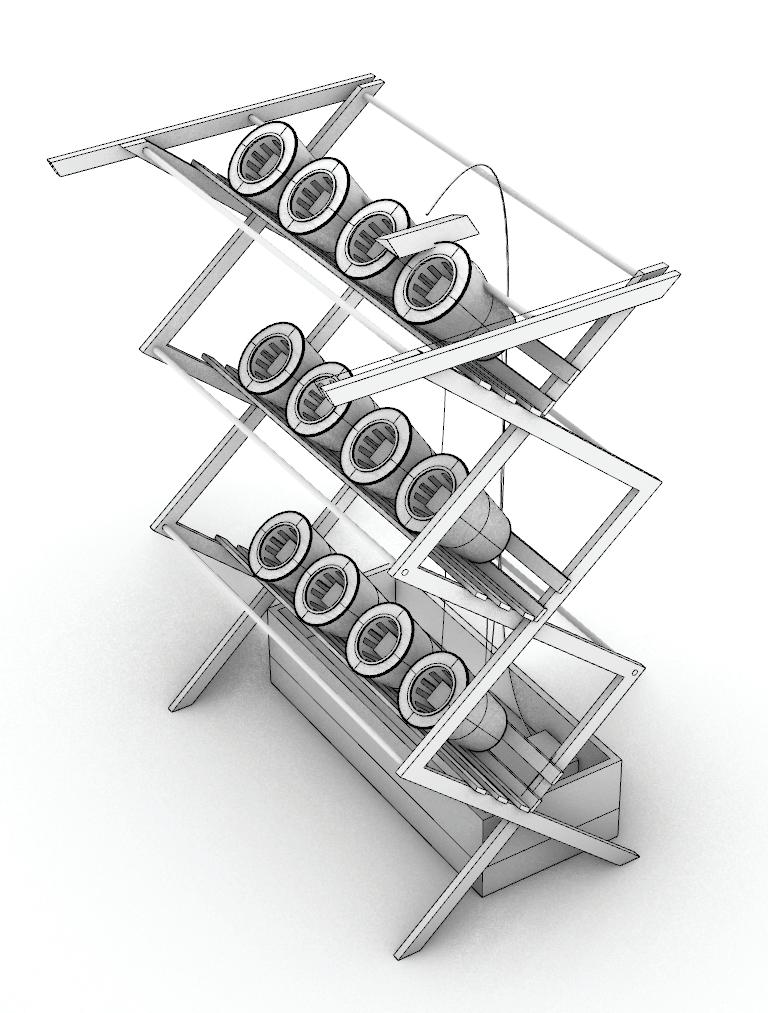
Methodology Aim
This project seeks to test the limits of the Kratsky method by changing two key elements of the system, the initial water level (consequently impacting other variables for the plant) and the flow rate of the water. The project will expand the possible uses for the method in other hydroponic/ soilless systems to explore air pruning, such as in ebb and flow or greenwall systems, which can struggle with root
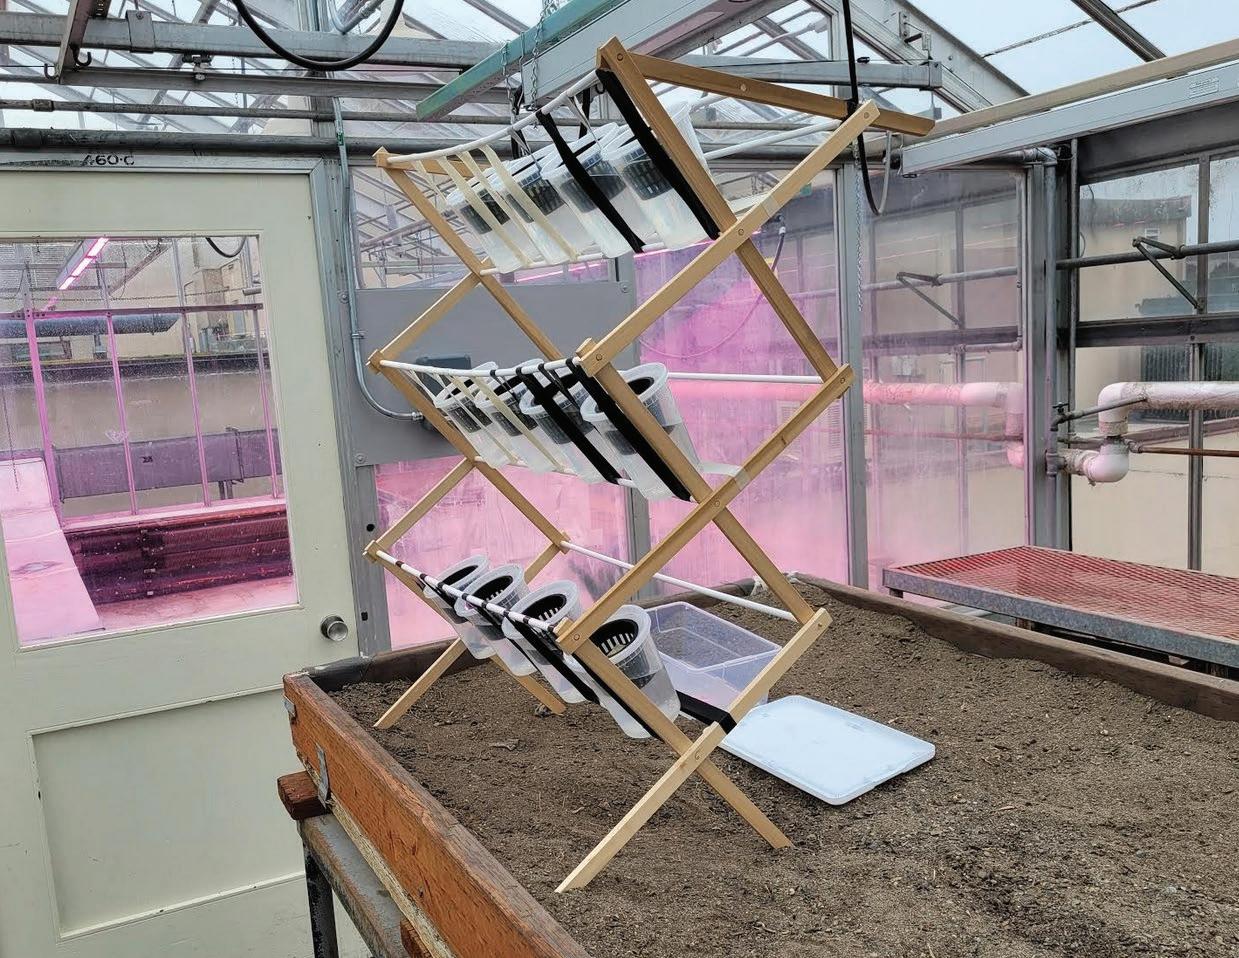
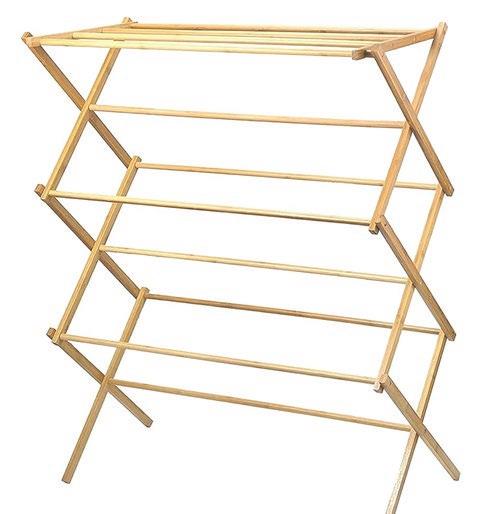
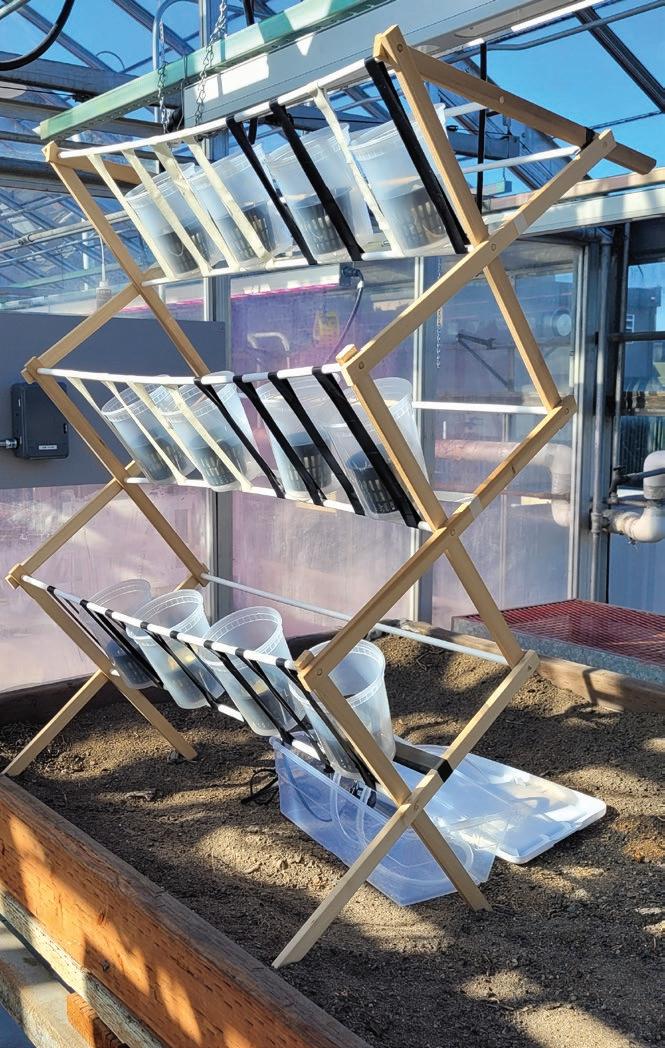
overgrowth in the nutrient rich water. The project will look into how standard household items, such as a drying rack, can be repurposed to make an autonomous, modular hydroponic system. It will also explore how the use of parametric modeling can provide a stable base for the hydroponic system to thrive within the rack frame
Initial Questions
This project also seeks to create a new system allowing for Kratky method hydroponics to be integrated into green wall systems. This system allows the quick removal and reintegration of water reservoir cups to allow for each part of the system to be easily interchanged and adapted.
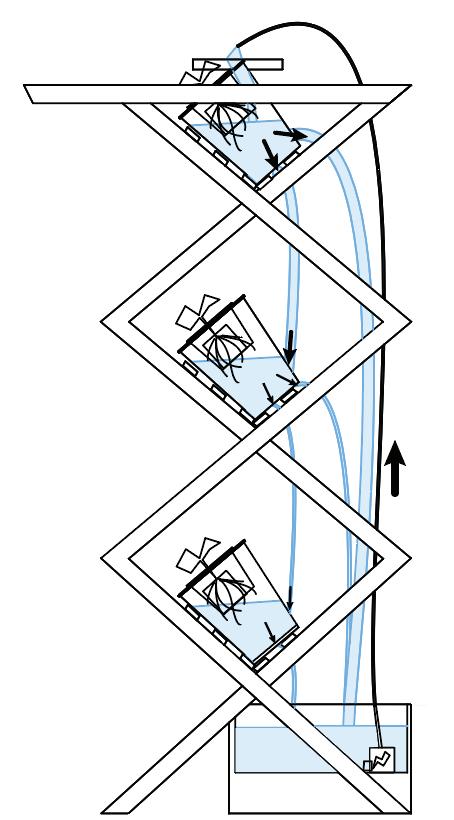
If we want water to flow to between each container, but stay at a consistent water level, how can the water flow be regulated? How can this method be applied to a larger green wall system?
Initial 3D Model of System
Initial Side View of Flow Testing
Right two rows focus on flow (kratky, hydroponic tower hybird)
Flow seperator splits flow from pump in half between the two rows
Wood or other rigid material creating the rack frame to hold cups
Water basin catches water going down through the system, redistributing it back up through the water pump
Water pump brings water up the system
Water flow in each upper is seperated 50/50 between the next cup and water basin
Left two rows focus on starting water level (pure kratky method)

Materials Used
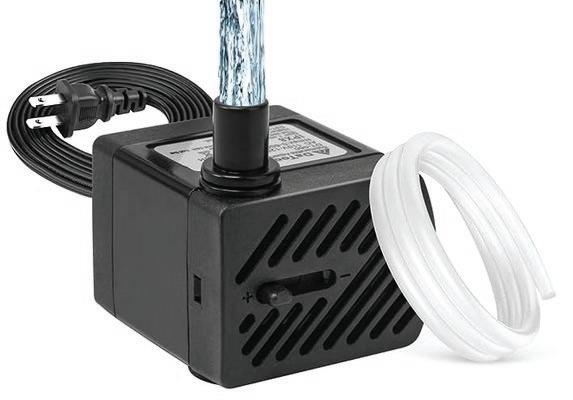
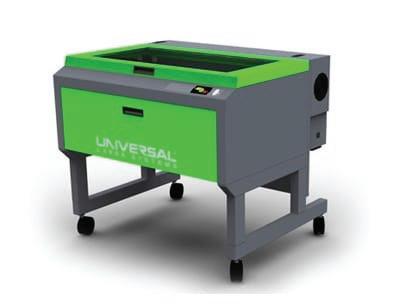
Other Materials and Tech Used
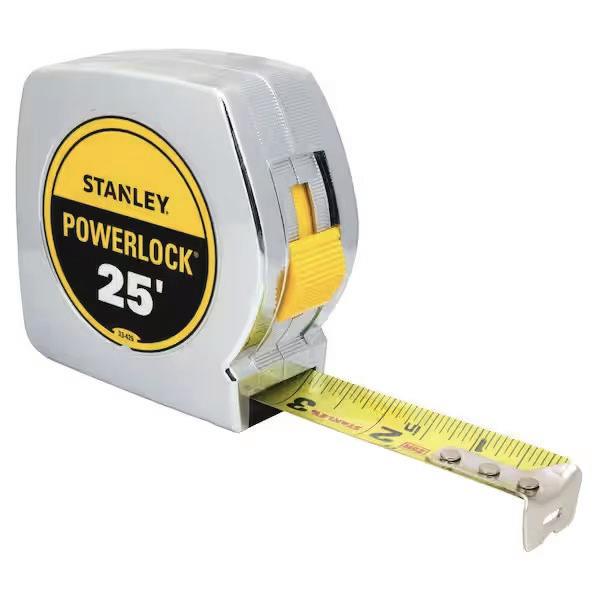
Measuring and Labeling Tools
Water
Laser Cutter
Water pump wih 3’ 3’’ hose
Lettuce Seeds (2$)
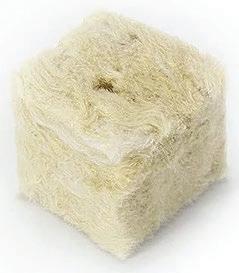
1.5’’ Rockwool Cubes (9$)
Drying Rack (34$)
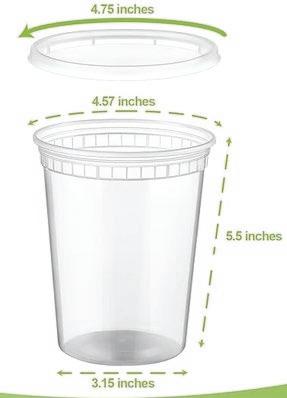
Deli Countainer Cups (13$)
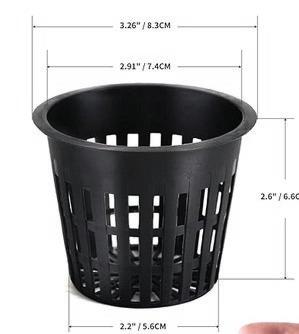
Plastic Net Cups (7$)
Water Pump wih 3’ 3’’ hose (8$)
Drying Rack (34$)
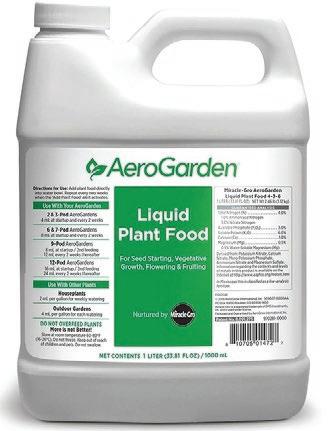
Liquid plant food (35$)
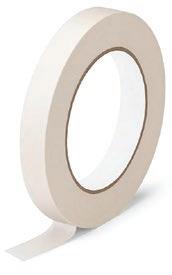
Masking Tape (5$)
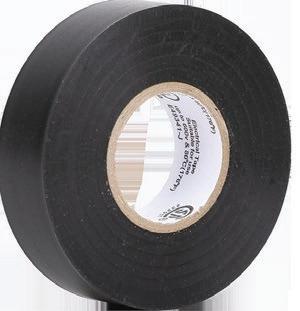
Vinyl Electrical Tape (1$)
(8$)
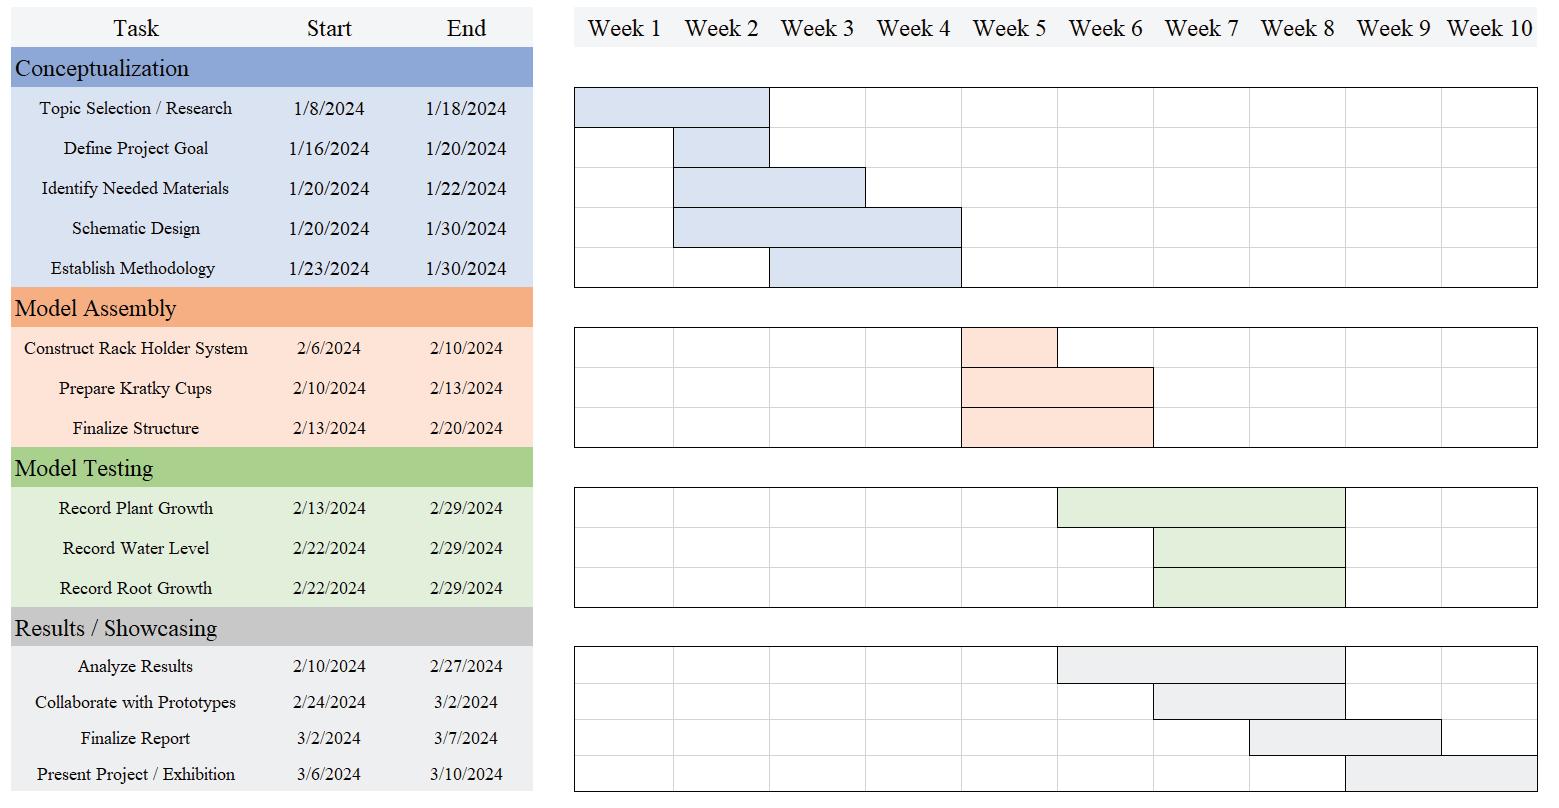
Timeline details the expected completion of all the different tasks needed to complete the project. The tasks have been broken down to 4 major categories for the 9 weeks of the project.
Timeline shifted in week 2 due to shake up from a severe ice storm in which shut down university operations for the week.
Conceptualization took up the first 3 weeks of the class as we looked into the type of plant system we wanted to research and/or develop a new growth prototype.
Model assembly took 2 weeks due to the limited access to the greenhouse and transportation/delivery of materials.
Model testing expected to be around 3-4 weeks, measuring primarily the height and width growth of the plants and the water level of the cups on each week.
Analysis of results will take place once the measurements of the plants begins. Plant growth overtime will be shown as a bar graph with each cup labeled with their identified sticker and represented through a box
showing the width and height of the pant on each day. The water level will be shown as a bar graph for each cup labeled with date. The Root growth of the plant will be shown as an upsidedown graph underneath the plant growth graph.
Prototype Timeline
Fabrication Process and Model Changes
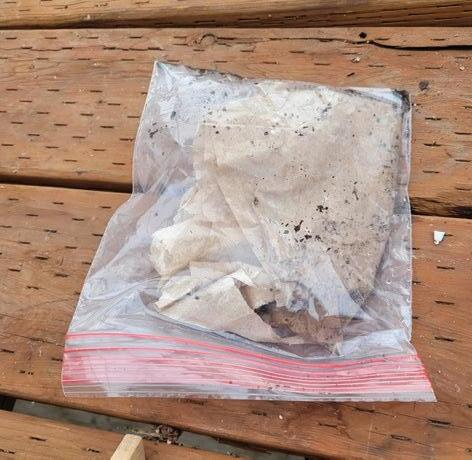
1- Establish warm, bright environment for system to grow
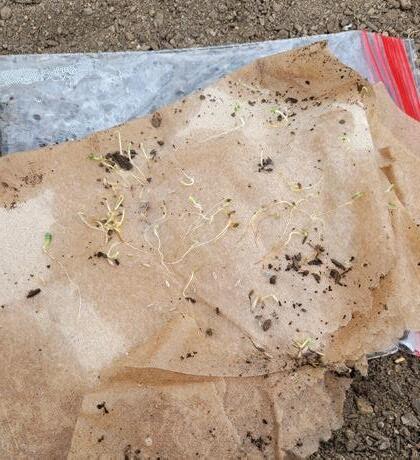
2- Sprout seeds using wet medium in plastic bag
3- Laser cut 3’’ diameter hole in deli container lid
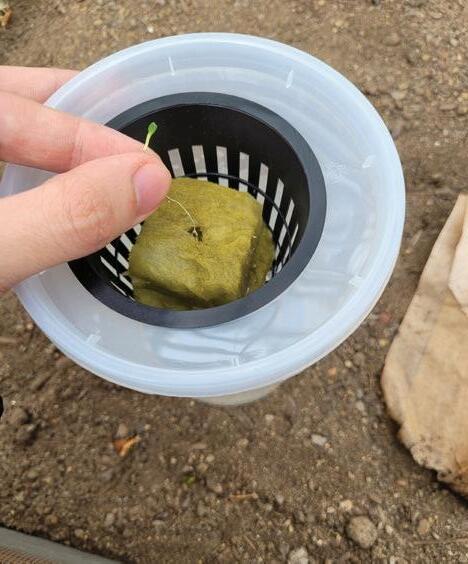
4- Place the plastic net cup within the deli countainer lid hole
5- Place sprouts in wetted rock wool cube
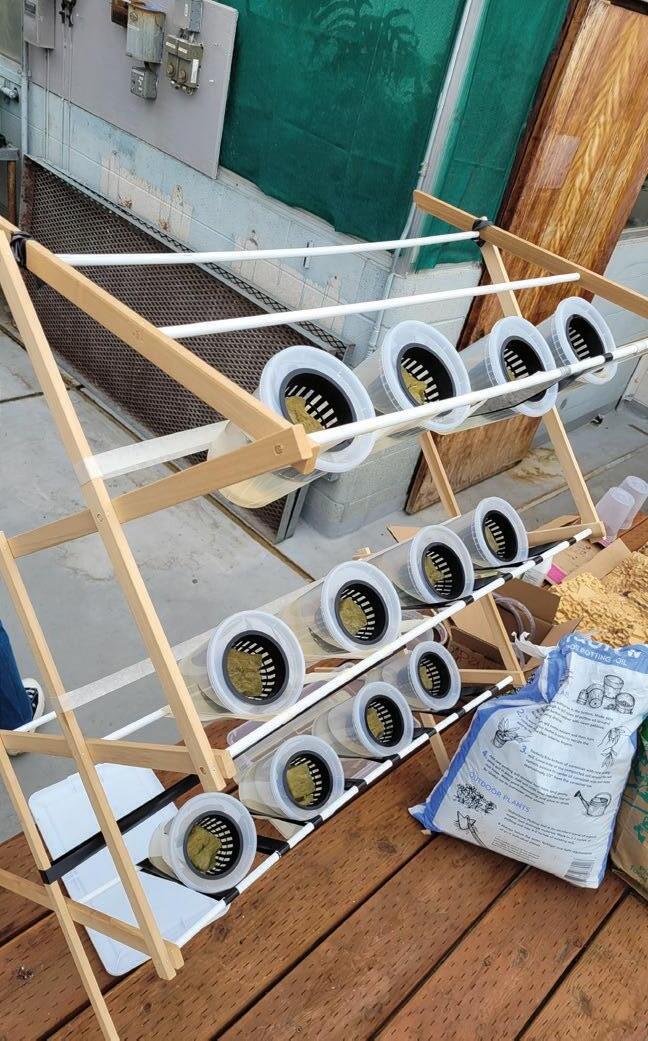
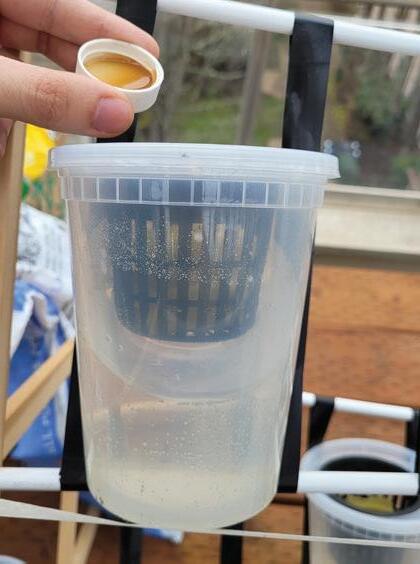
6- Add appropriate level of nutrient mix to the water reservoir cup
7- Make sure the water level of the reservoir cup partially submerges the rockwool to keep the medium moist
8- Label each cups water level and name to keep track of data
1- Unfold and stand up the frame; secure the standing frame
2- Double wrap tape around the middle rung and the diagonally spaced front rung, to support the cup between the tape increments
3- Place tape behind the base of the cup to provide additional safety if a cup loses balance
4-Place the cup with water on its own to test if the system can hold
5- Place the krakty systems within the designated spaces
6- Drill pvc pipe with holes and connect to hose end
7- Adhere pvc pipe to frame above 1st row of cups to start water flow
8- Use pin to create small holes in lower cups for water to escape back into the basin
Kratky Cup Fabrication
Frame Holder Fabrication
Design Development through Fabrication
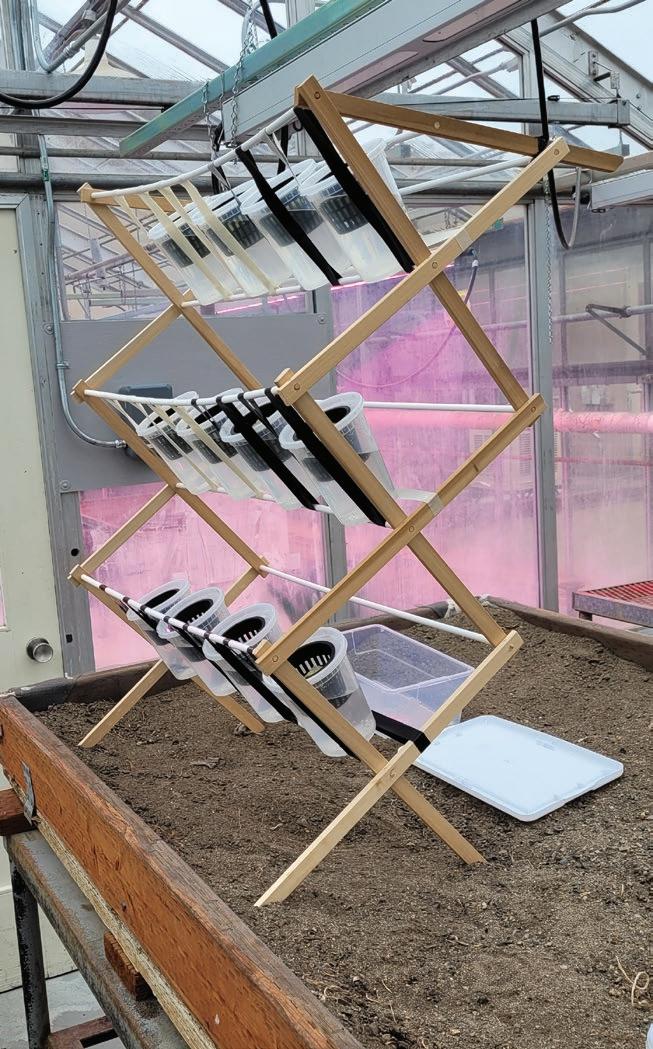
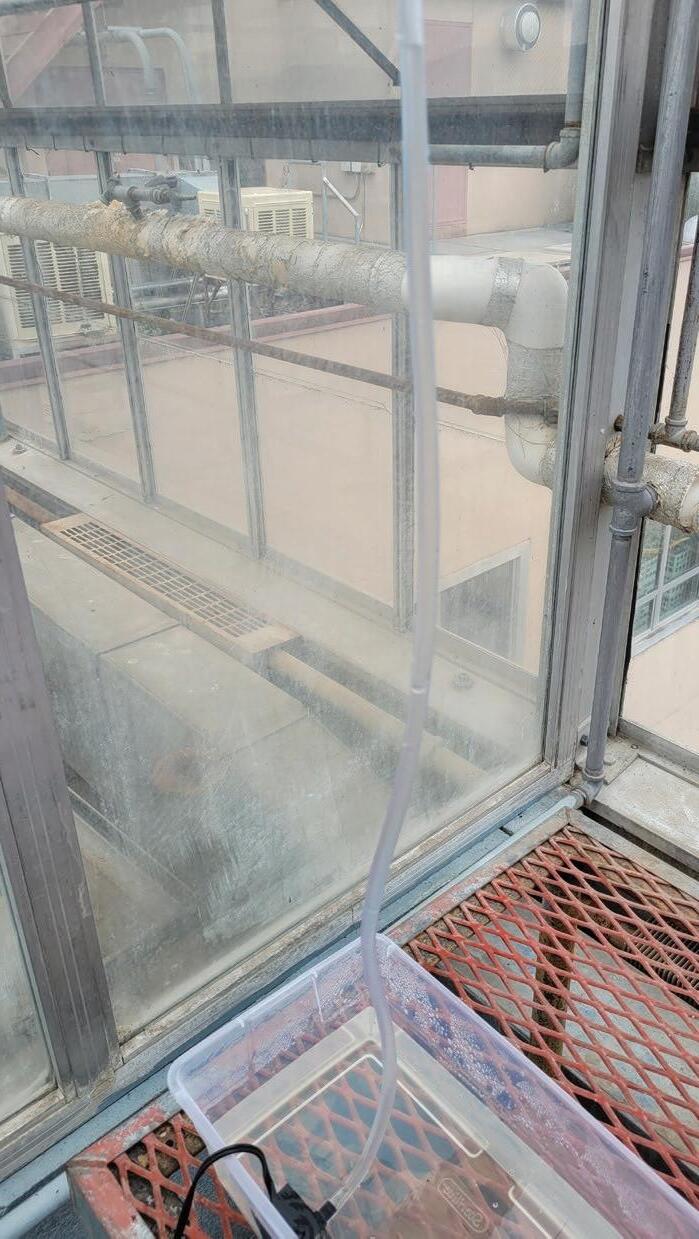
The initial concept of having the water pumped to the top row was hindered by the pump’s limited power, which stopped the water from progressing to the top of the system. In response to this development, a new flow rate system was devised. The water pump will connect to a pvc pipe above the 1st row of plants allowing water to flow directly to the cups instead of cup to cup, reducing
potential points of failure. The hole size will be regulated to where each plant gets a different of water flow. This leaves rows 2 and 3 to be tested uniquely for initial water level with one cup on each level starting at a specific measured water level.
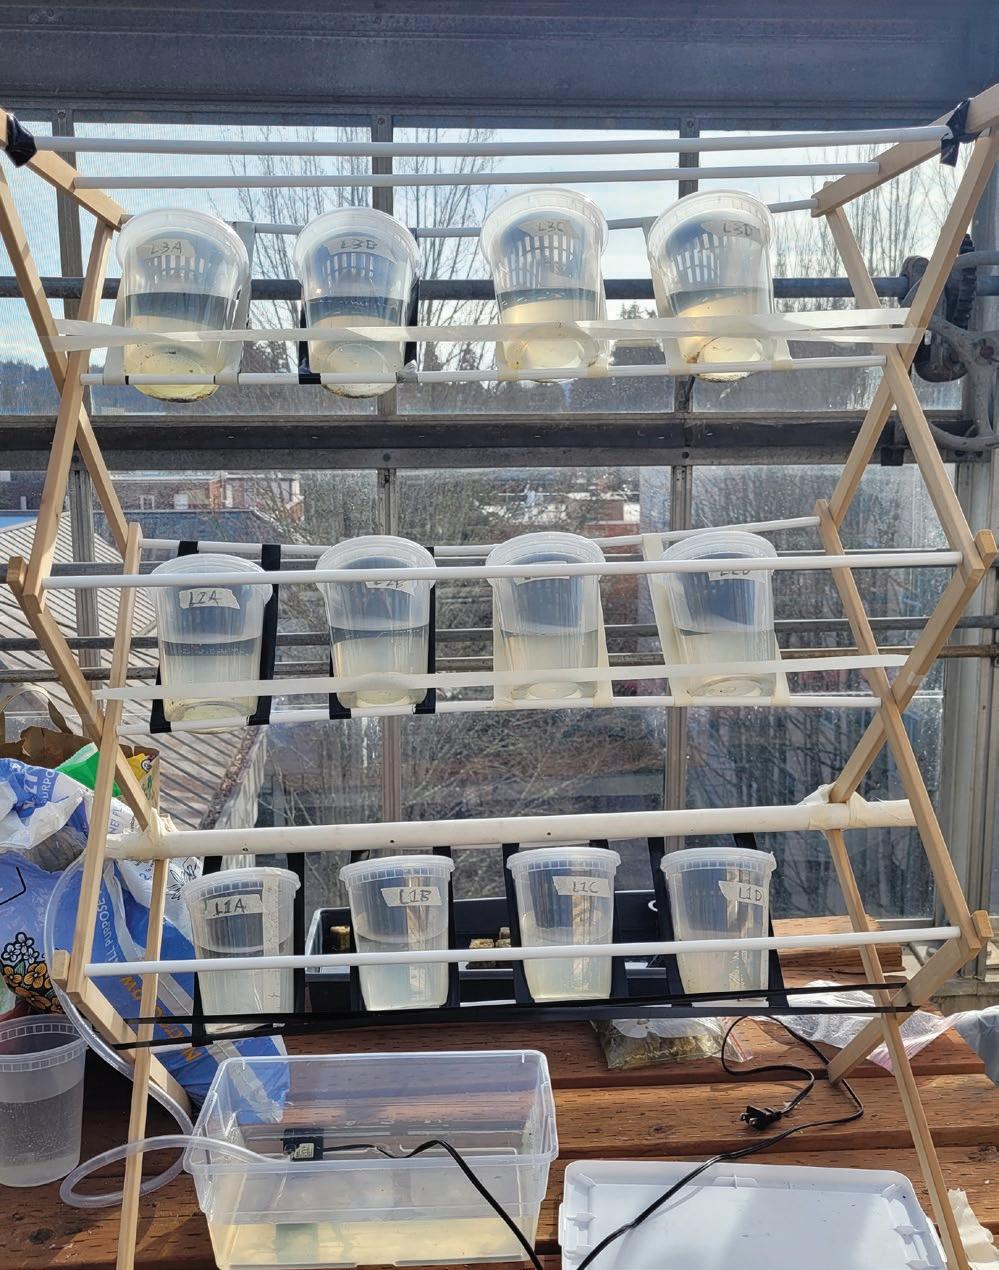
The use of tape to hold up the cups compared to the original solid blocking material was changed to accomodate the unique shape of the cups and spread the load within the system more evenly. The tape uses tension to create strenght for the cups to sit on and this tension also reinforces the structure of the rack as a whole compared to its wobbly start.
The addition of recording plant width as well as height would improve the visual clarity of the data gathered on each plant and how it relates to the prototype created for it.
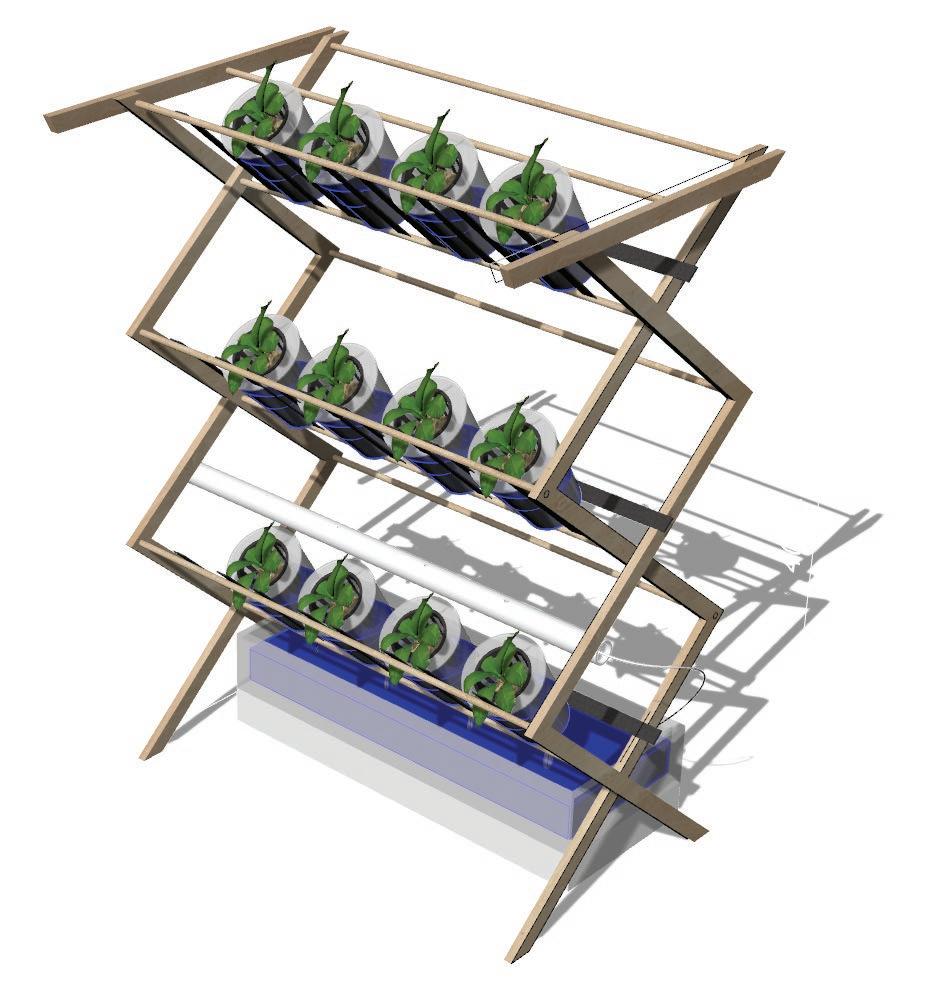
New 3D Model of Frame System
Hydroponics Model Editted to Match New Developments
Water Pumping Height Limitation of Around 2ft
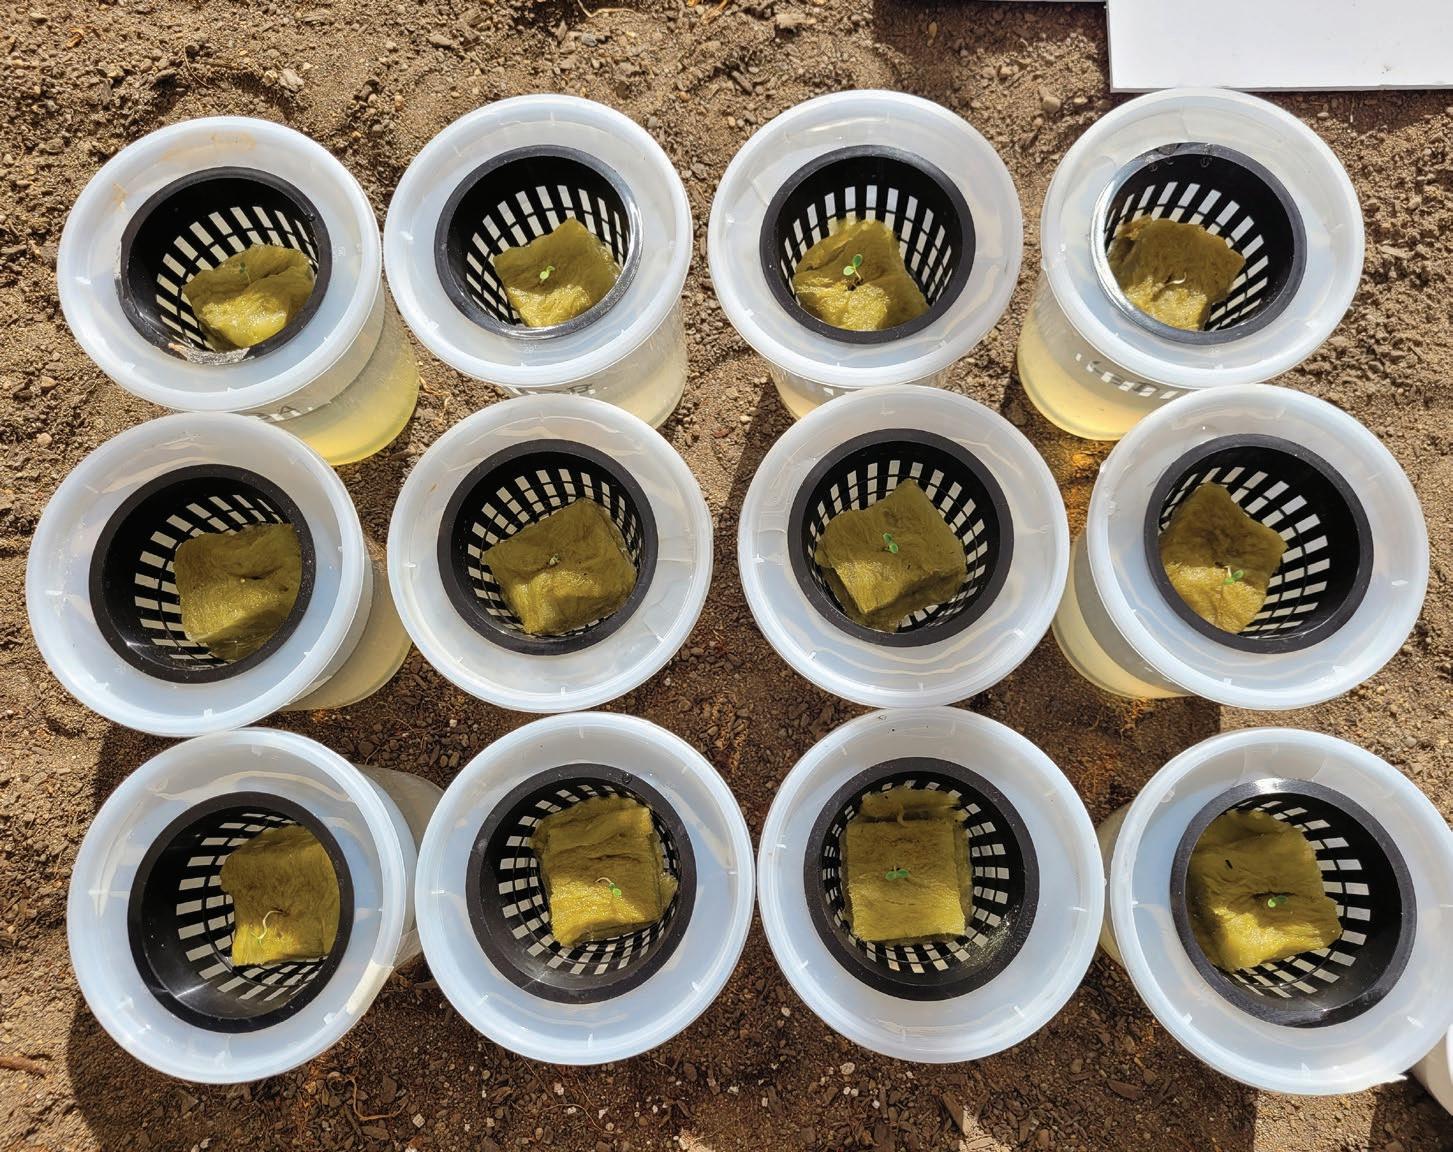
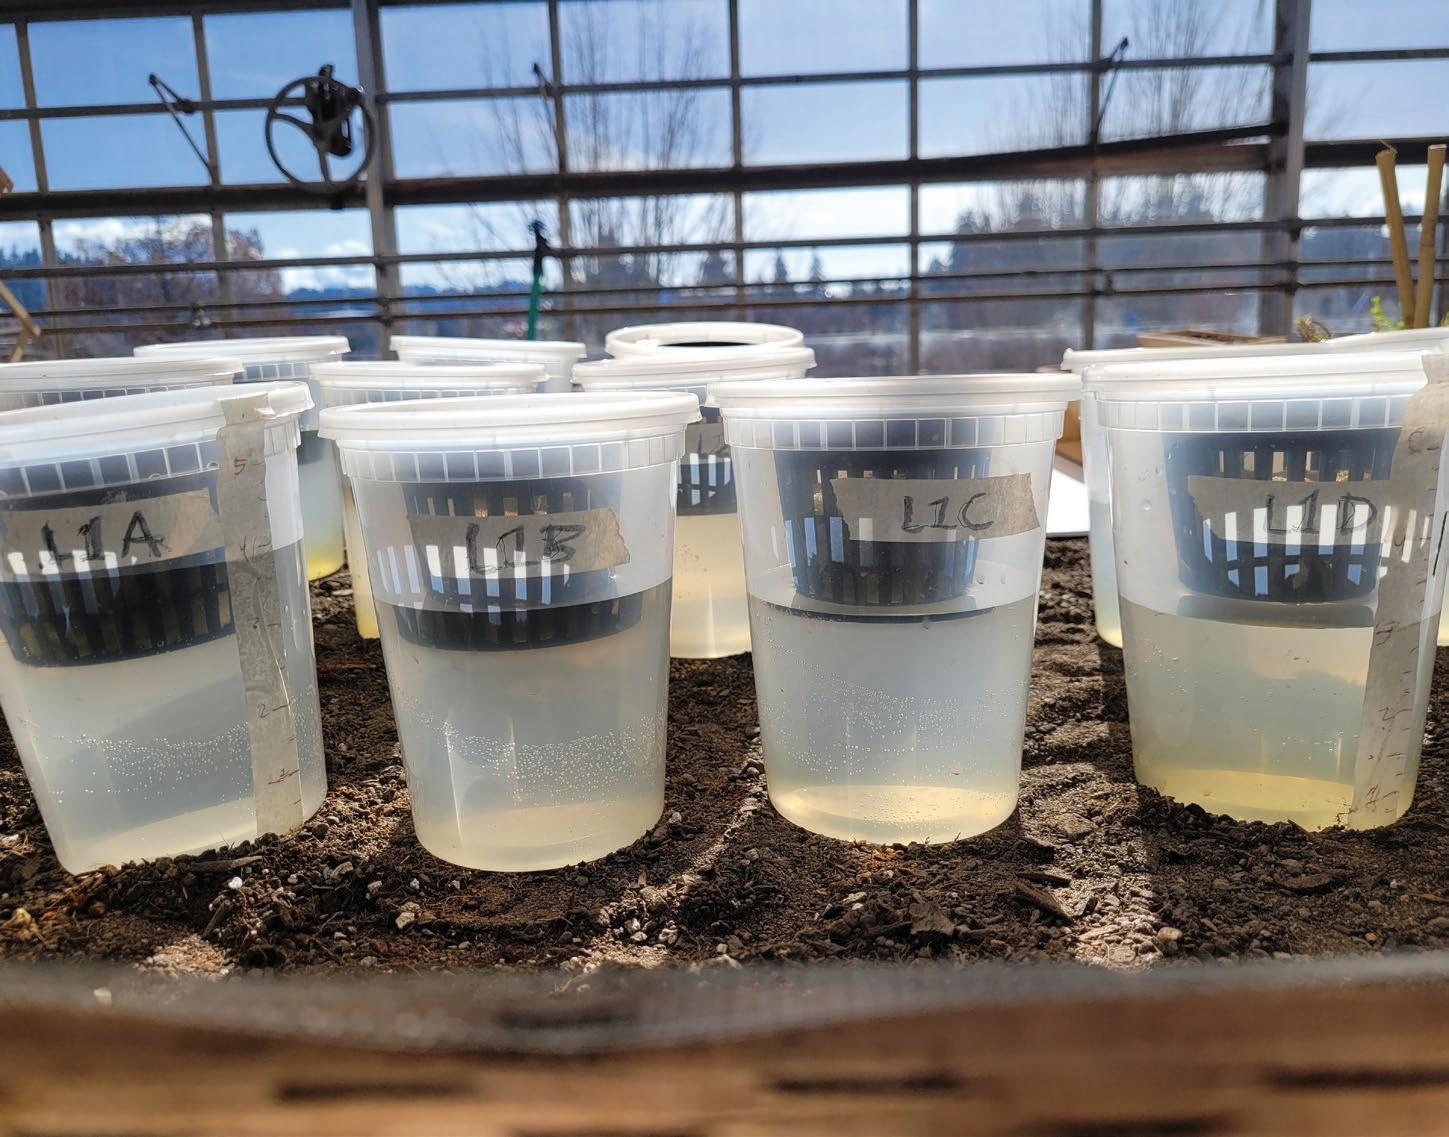
Data Recording Day 1 and Early Observations
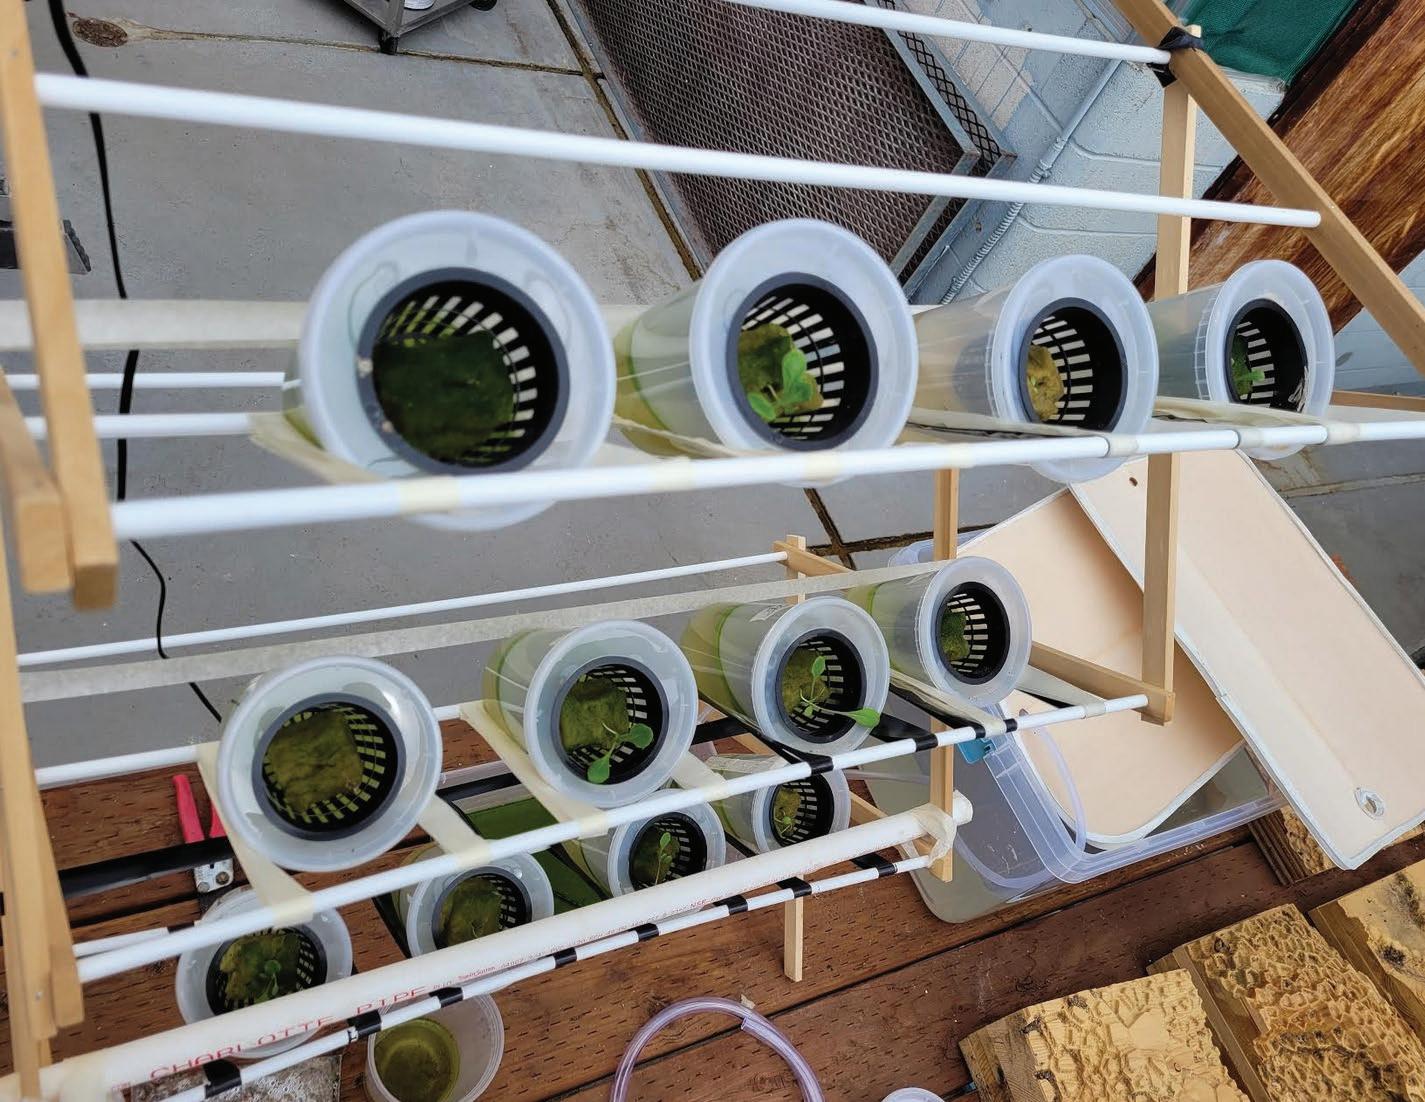
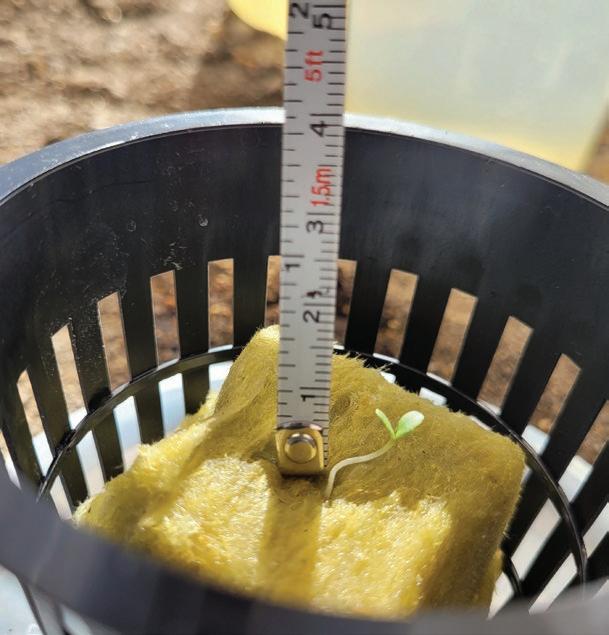
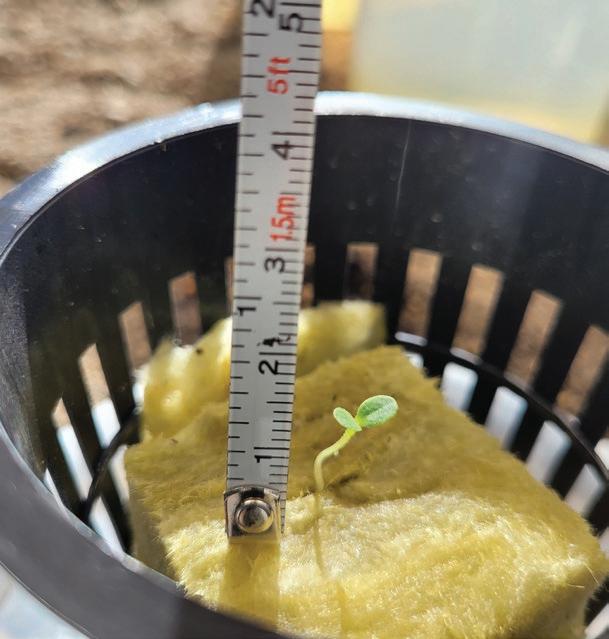
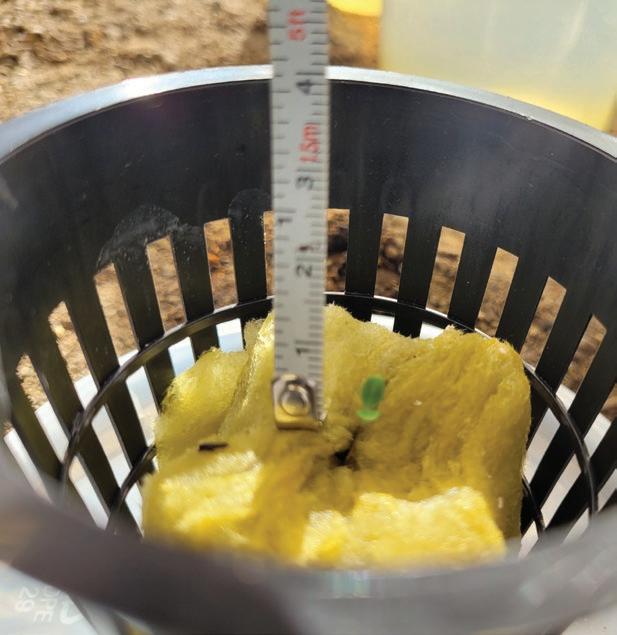
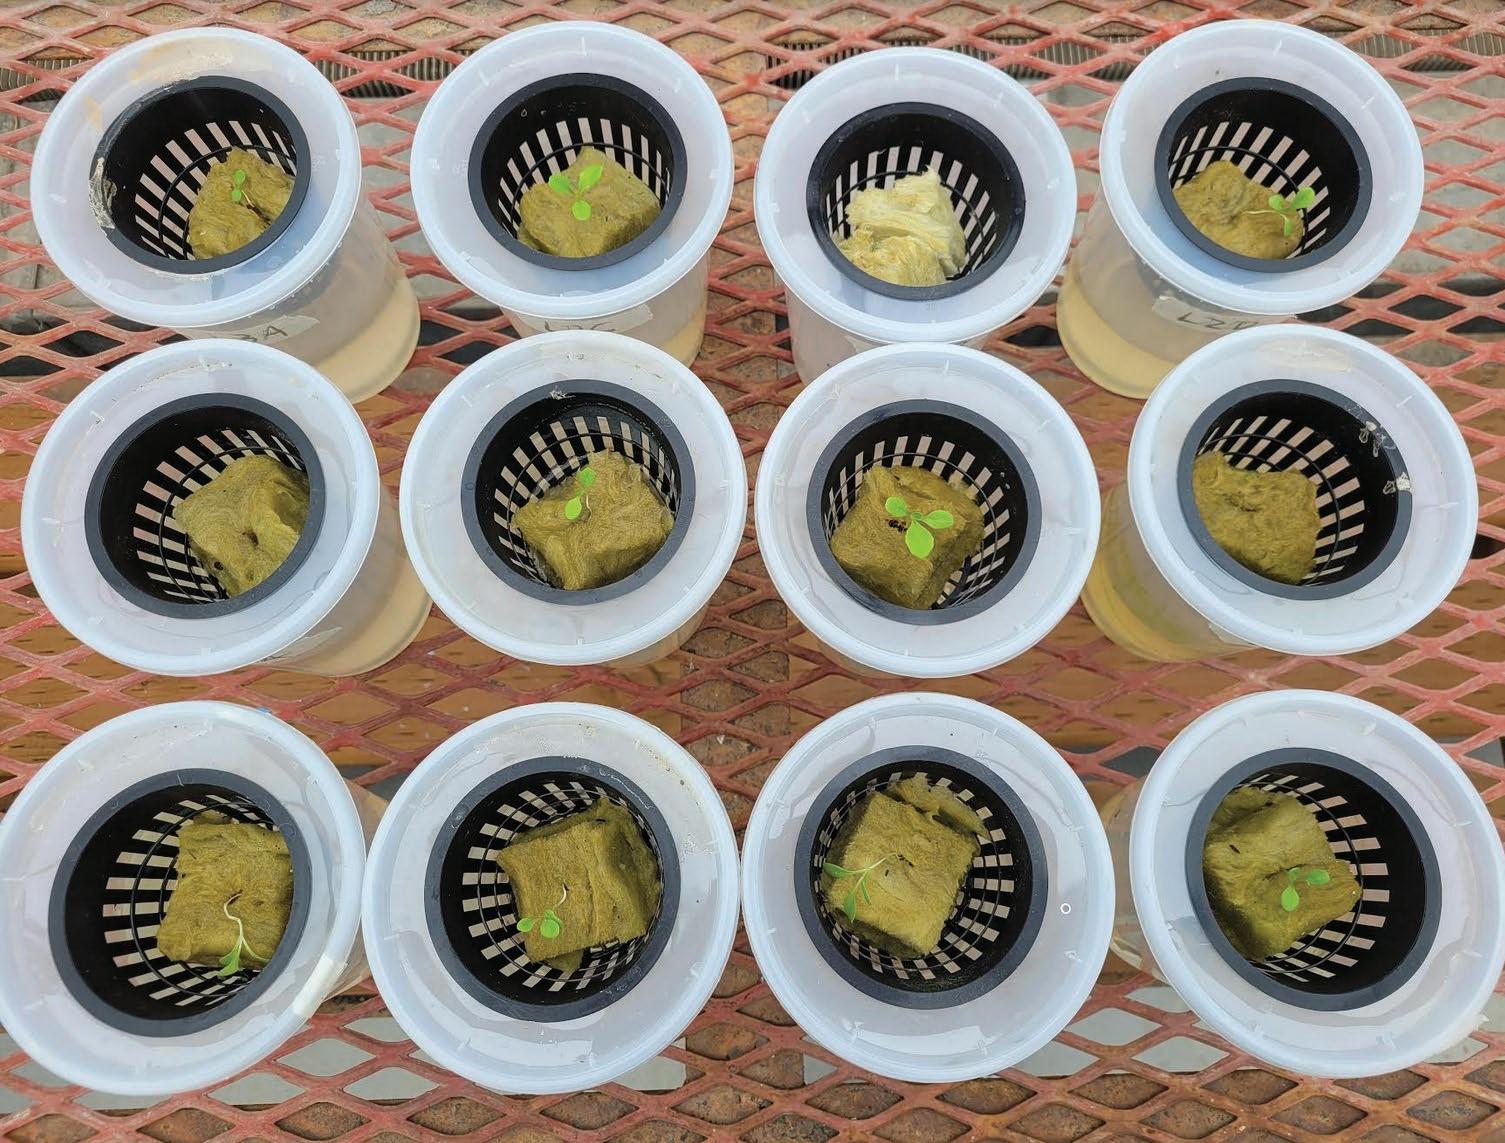
The first day of recording the plant growth happened two days after planting germinated plants. The germinated plants were chosen for being generally at the same level of development and planted to have the same starting height. After two days, we can see the early progression of the fledling lettuce plants, with 10/12 plants successfully growing into the growth medium.
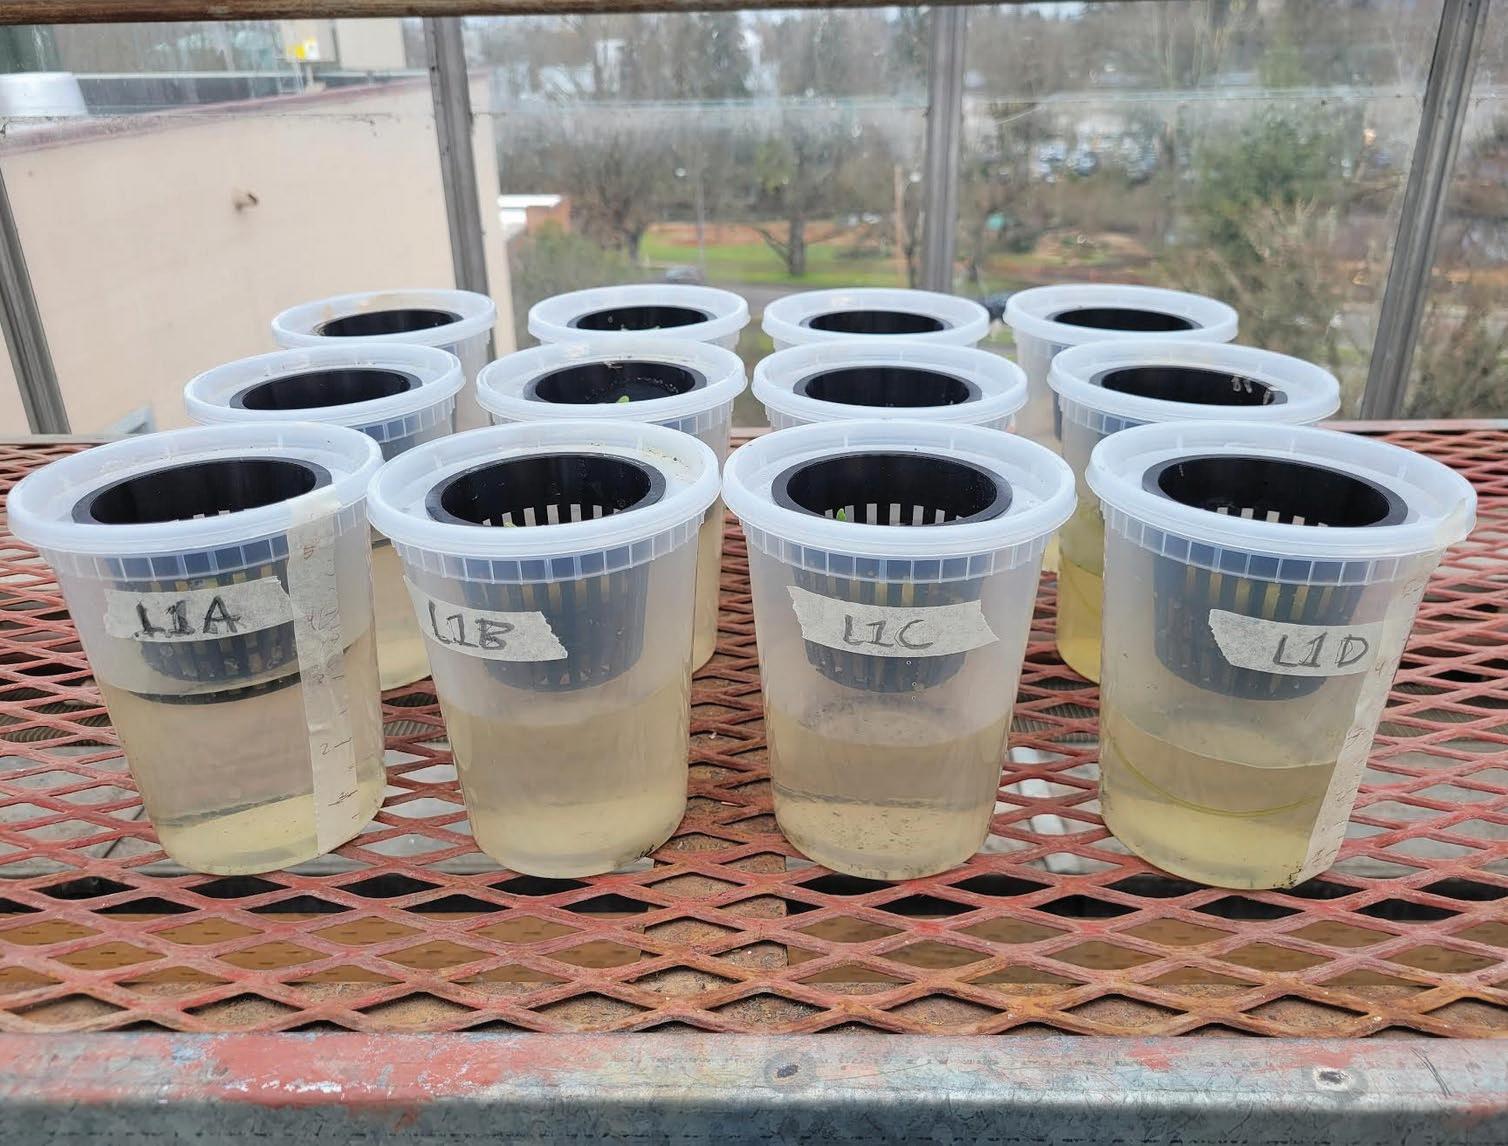
After two days of being on the tilted rack within the greenhouse, the row 3 plants placed on the upper level of the rack seem to be growing quicker. This could be due to the higher placement of the plants giving them more consistent access to daylight. Each cup was labeled based on column and row placement for consistent data collection
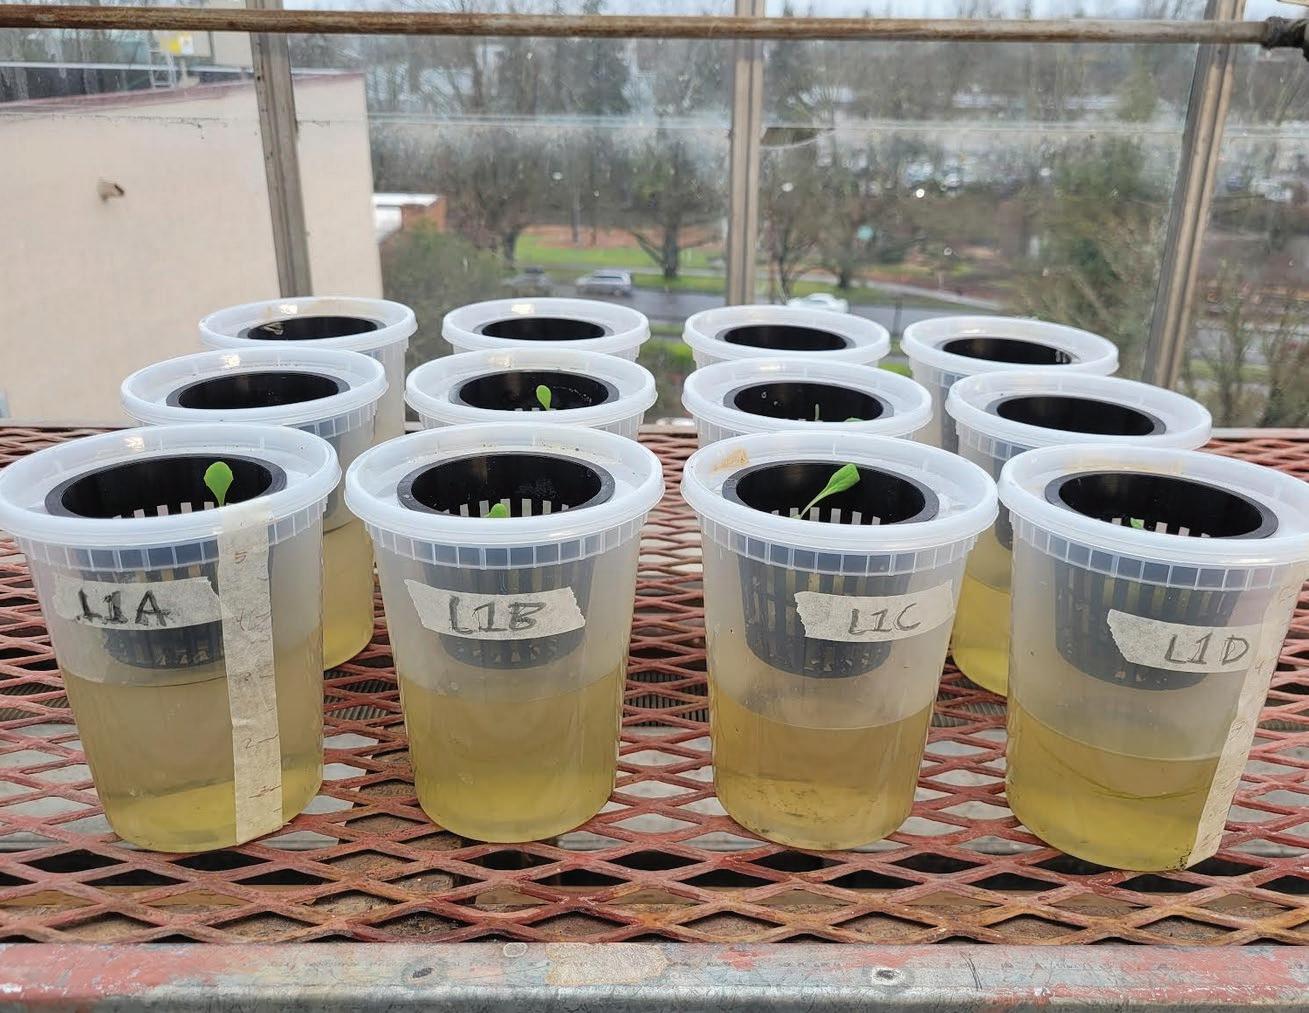
On Recording Day 1, the cups of each column were adjusted to a specific starting water reservoir level (A - 4.0 in, B - 3.75 in, C - 3.5 in, D-3.25 in). We should begin to see the impacts of of this change around the end of week 8. Each of the netted cups were taken out of the countainer to better measure the height of the plant.
During each recording day, the data will be recorded into an excel sheet, which will then be reinterpreted and displayed through a graphic bar graph showcasing the lowering water level, roots growing downwards and plant growing up and outwards. Changes in the flow rate will be integrated to the system on research day 2 to avoid completely destablizing the plants too early.
Day 1 Growth Sprout Top View
Adjusted Starting Water Level of Each Column
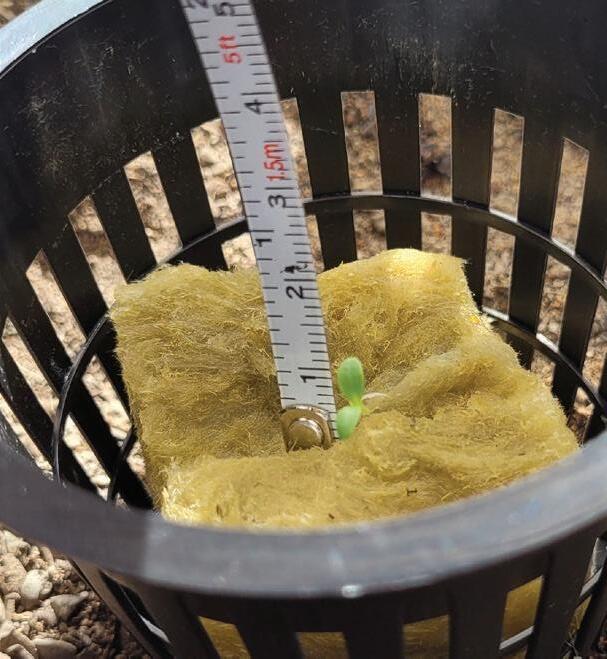
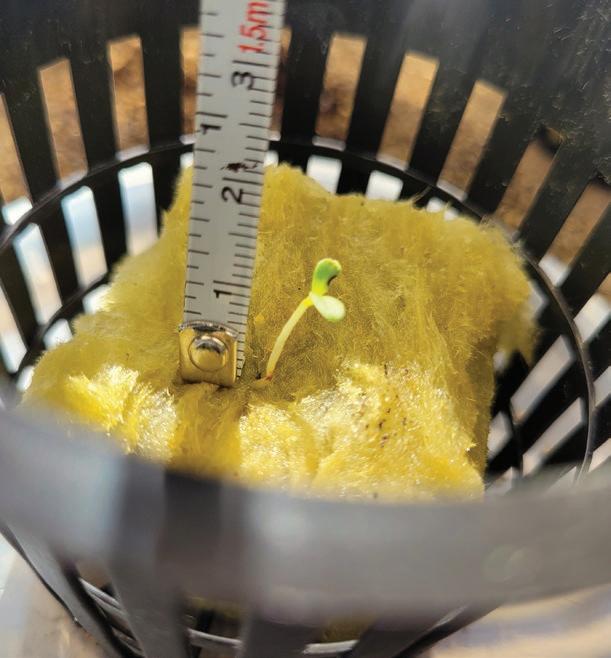
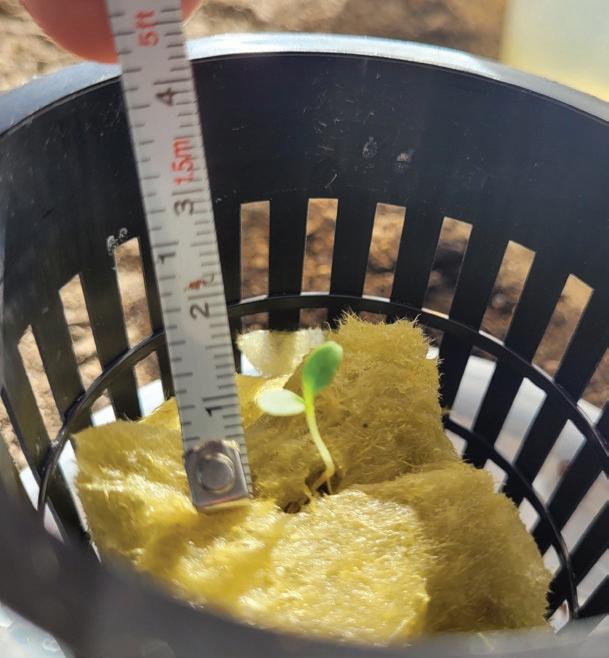
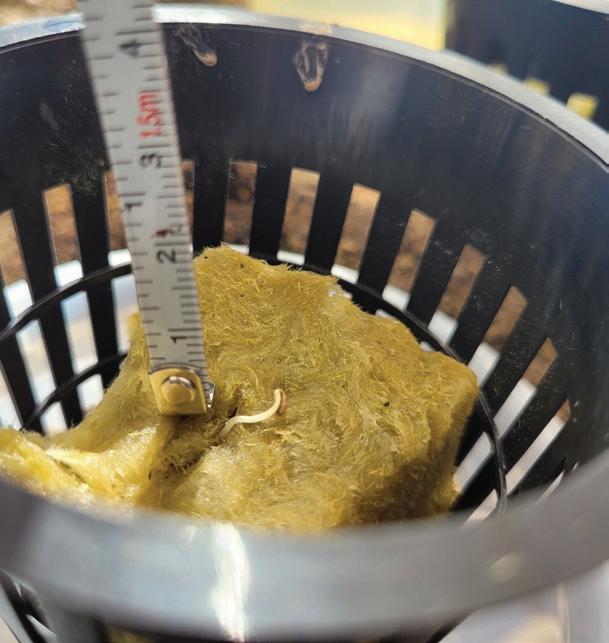
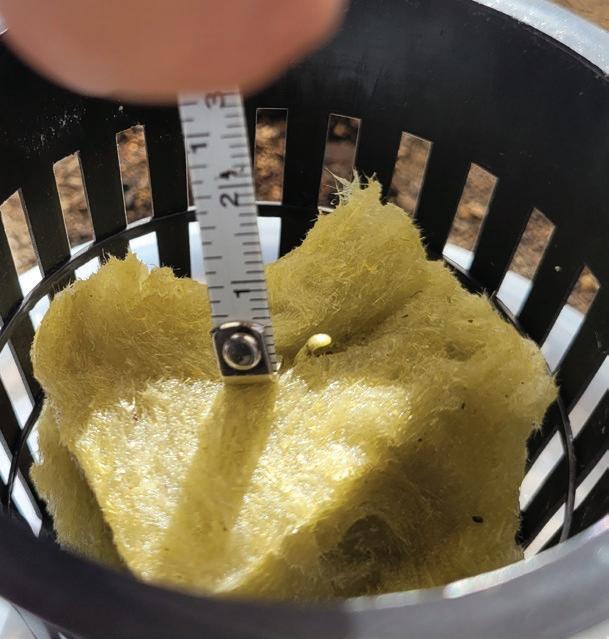
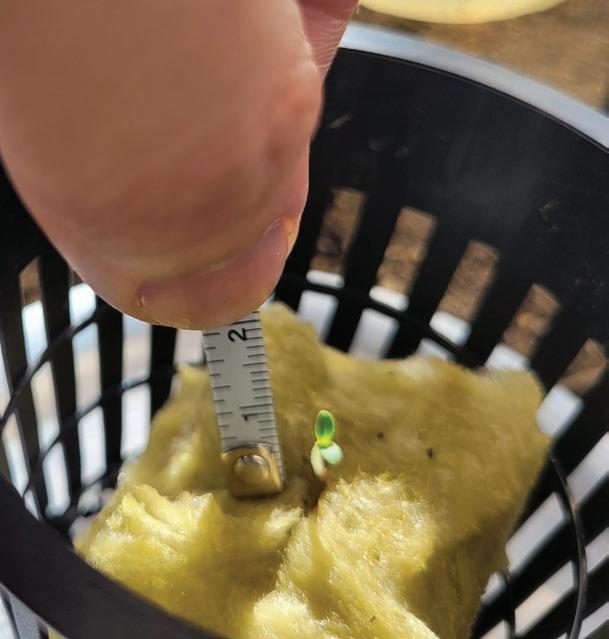
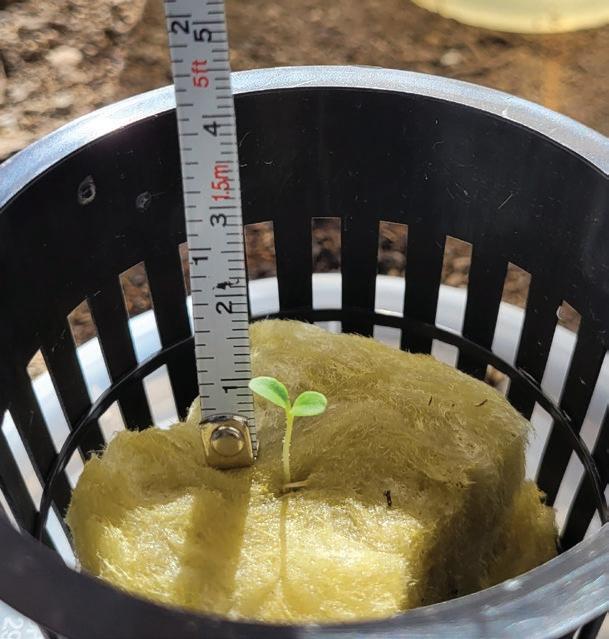
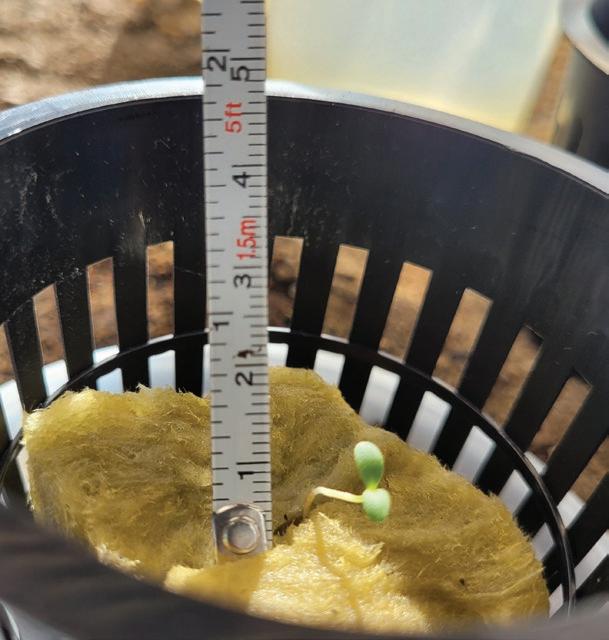
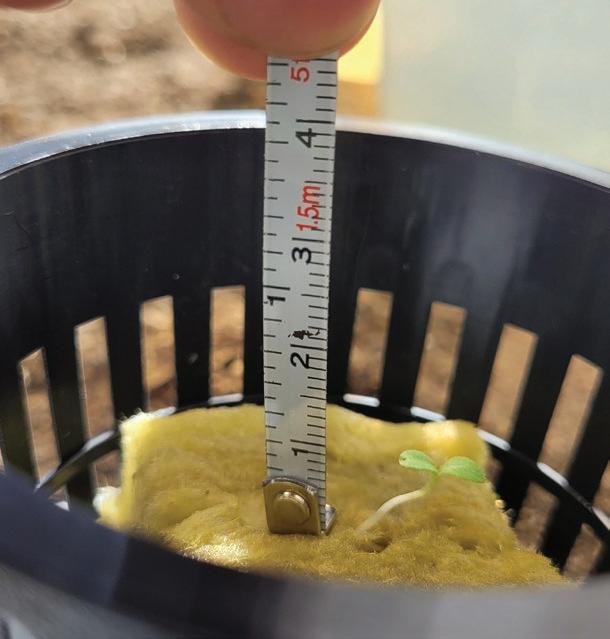
L1A
L1B
L1C
L1D
L2D
L2C
L3C
L2D
Initial Data Recording Issues and Adaptations
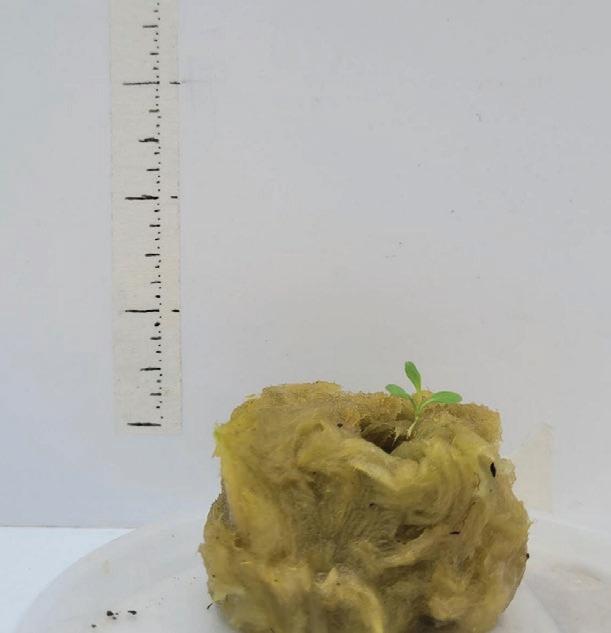
The first day of recording plant height for each of the pots was somewhat problematic due to the inconsistancy of the recording method in several areas including camera placement, angle, tape measure placement, and inconsistent lighting. I sought to improve my data collection method on that day initially by placing tape labeled with inch measurements on the cups themselves.
This method of measurement proved to be not as consistent as I would have liked as the water reservoir cup would tilt the tape with measurements on it. The nontransparent cup also meant that I could not record the plant’s height from inside the kratky method container.
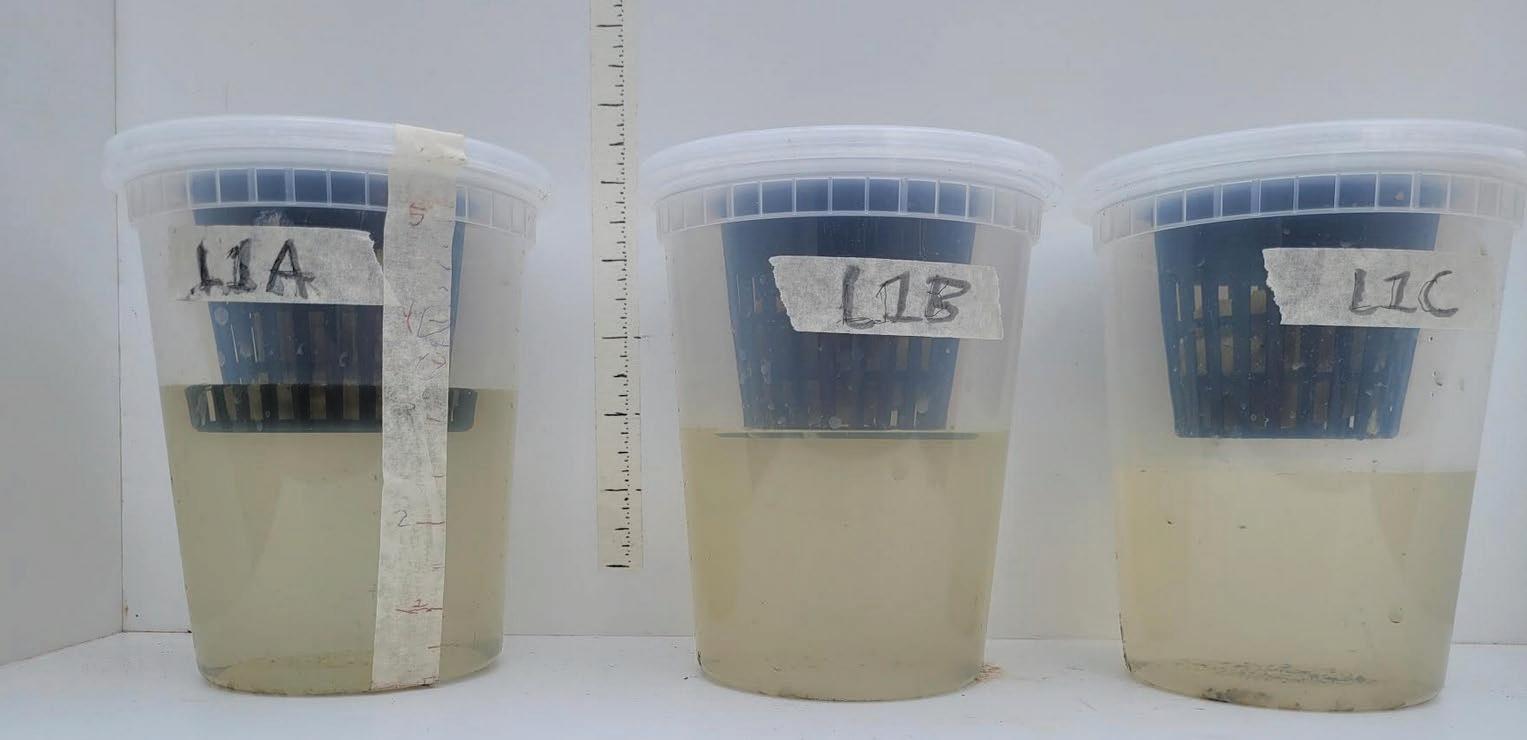
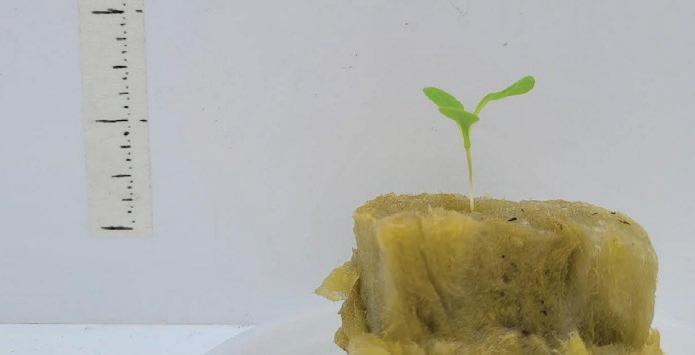
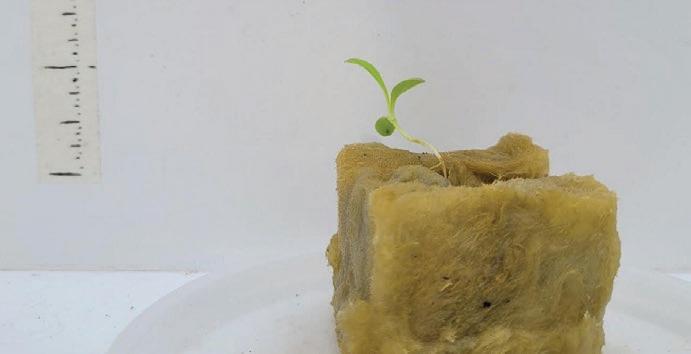
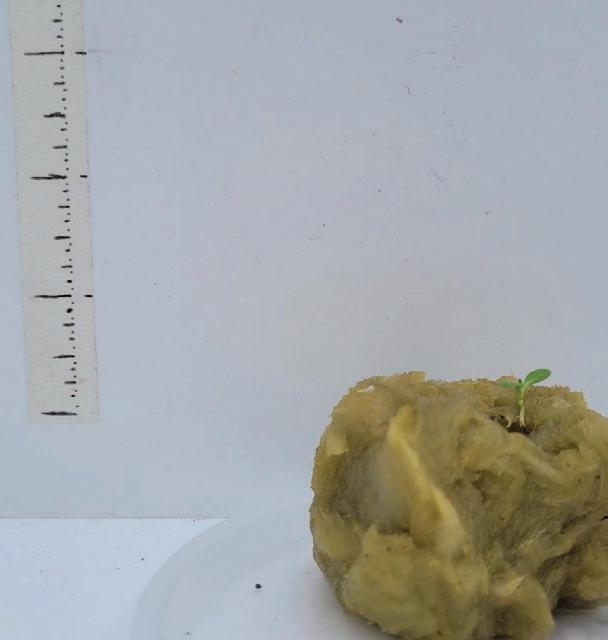
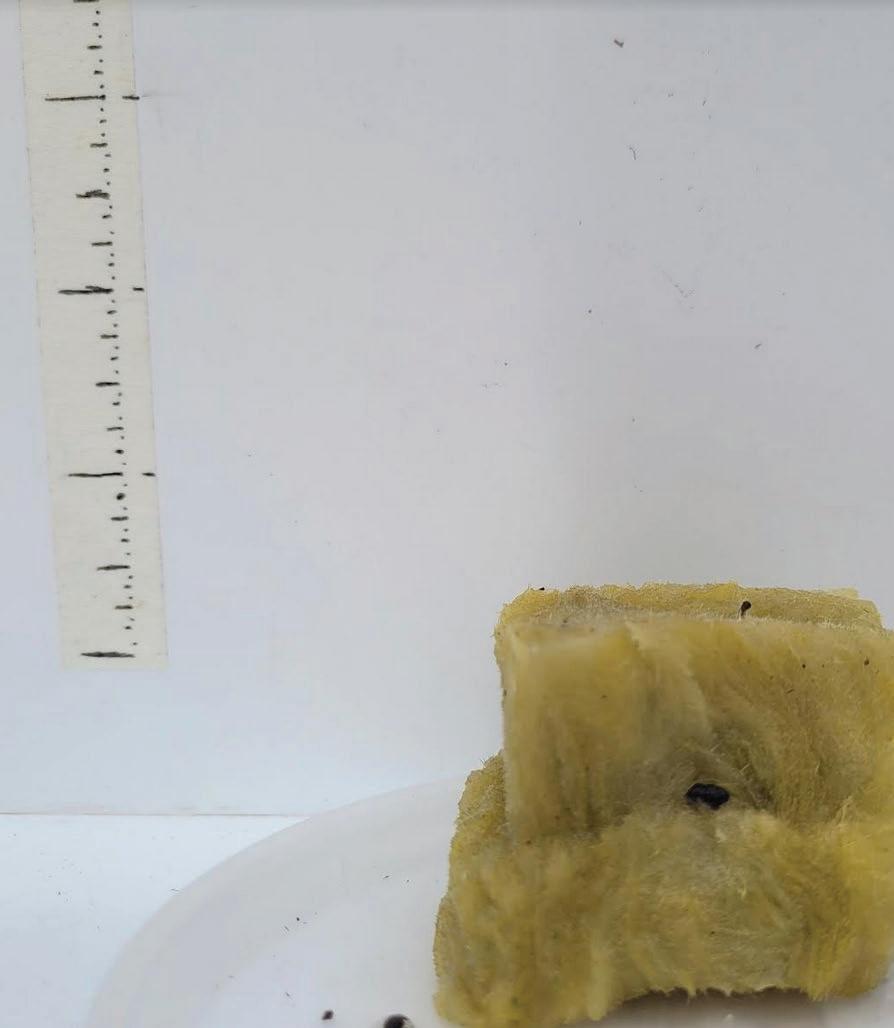
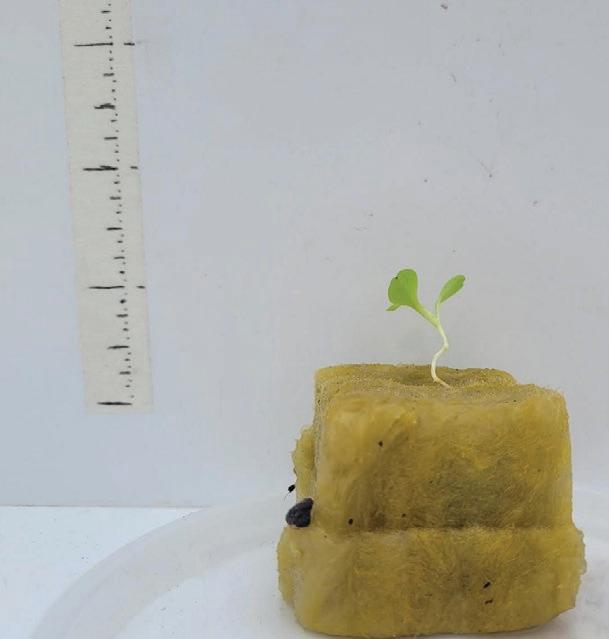
From Day 2 and onwards, I changed my height measurement method to a white background frame, developed and generiously shared by Melanie Guyer, which allowed the plants and cups to be recorded at a consistent angle. For the following measurements of the plant within the netted cup, I removed the rockwool and plant from the netted cup to better measure its height.
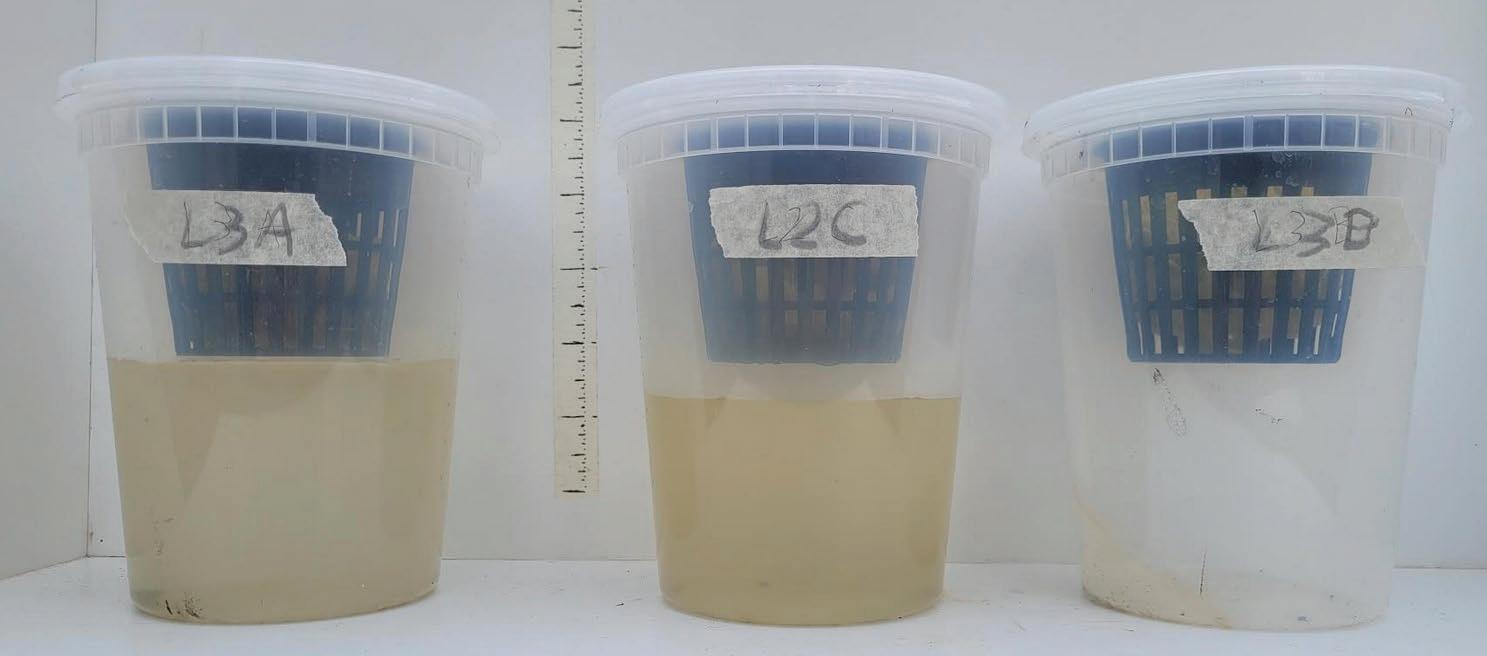
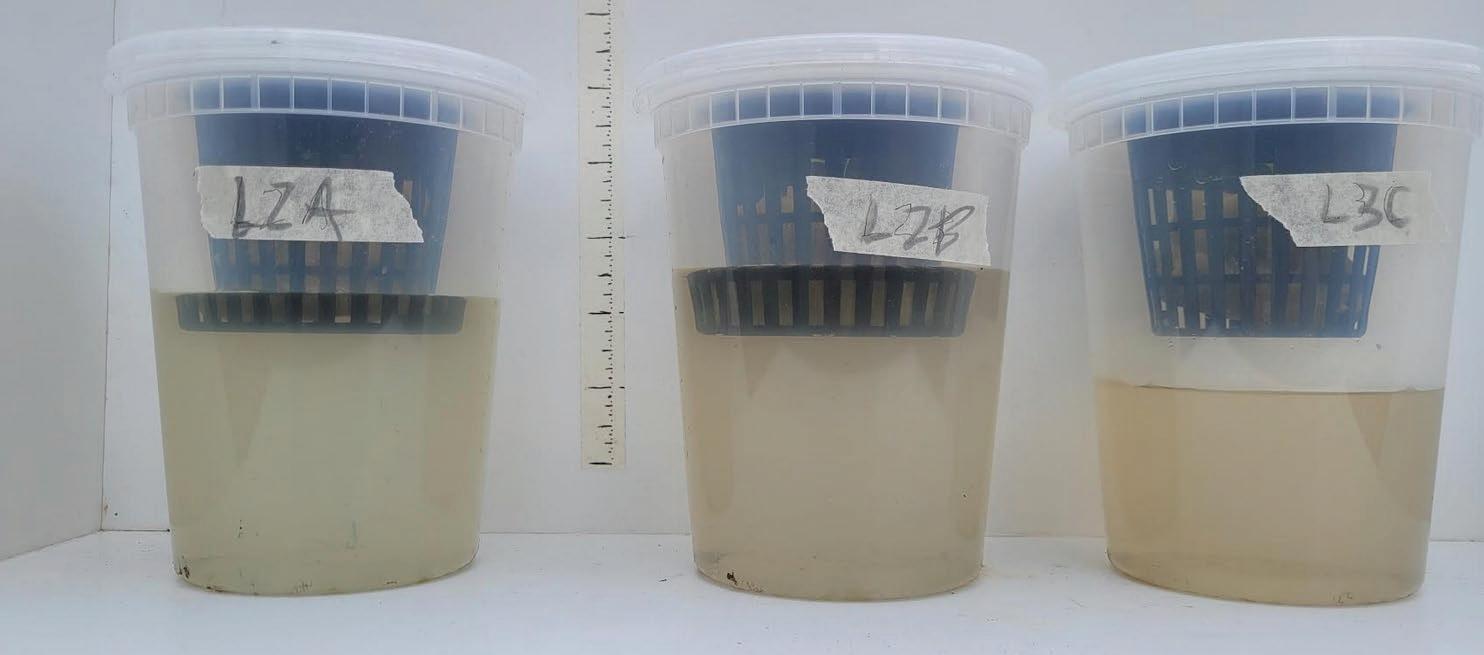
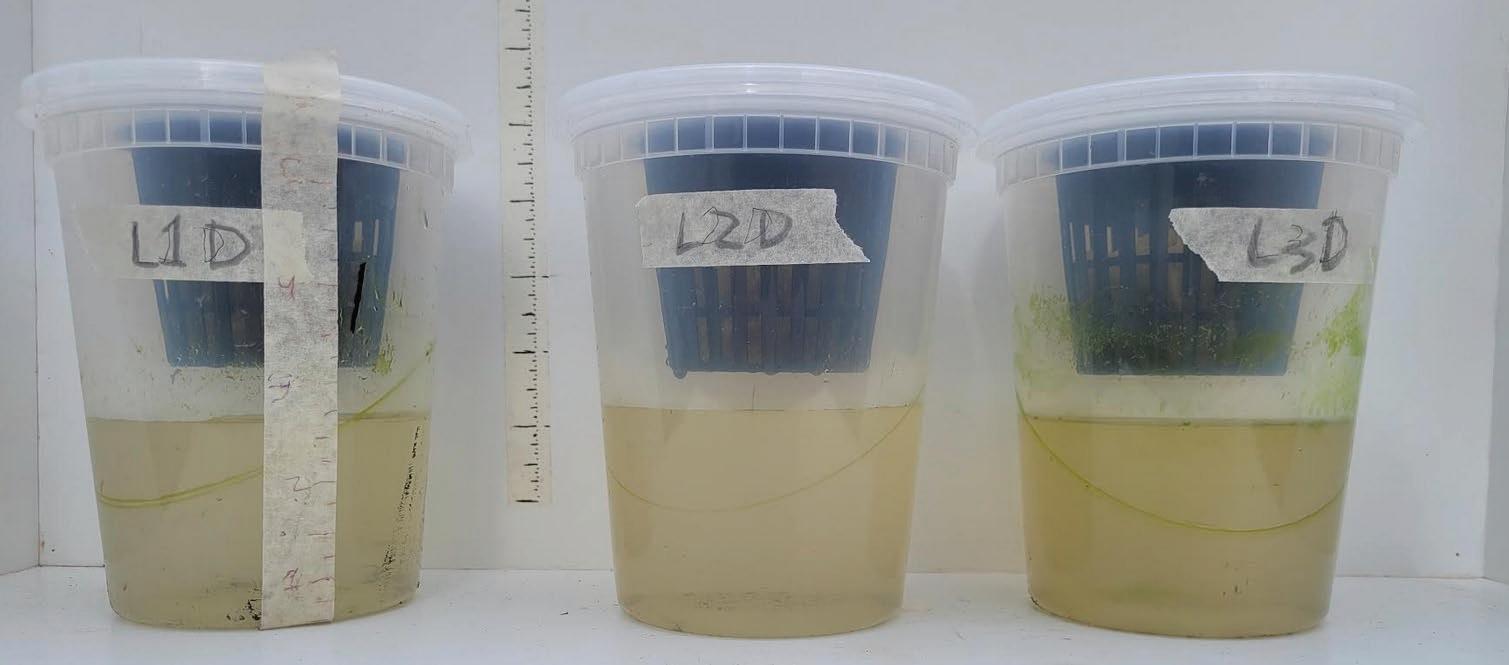
The water level of the cups was also measured using the frame, being placed in groups of 3 (L1:A-C, L2:A-C, L3:A-C, L1-L3:D) to better compare the different water levels of the cups.
Data Recording Day 2 and Observations
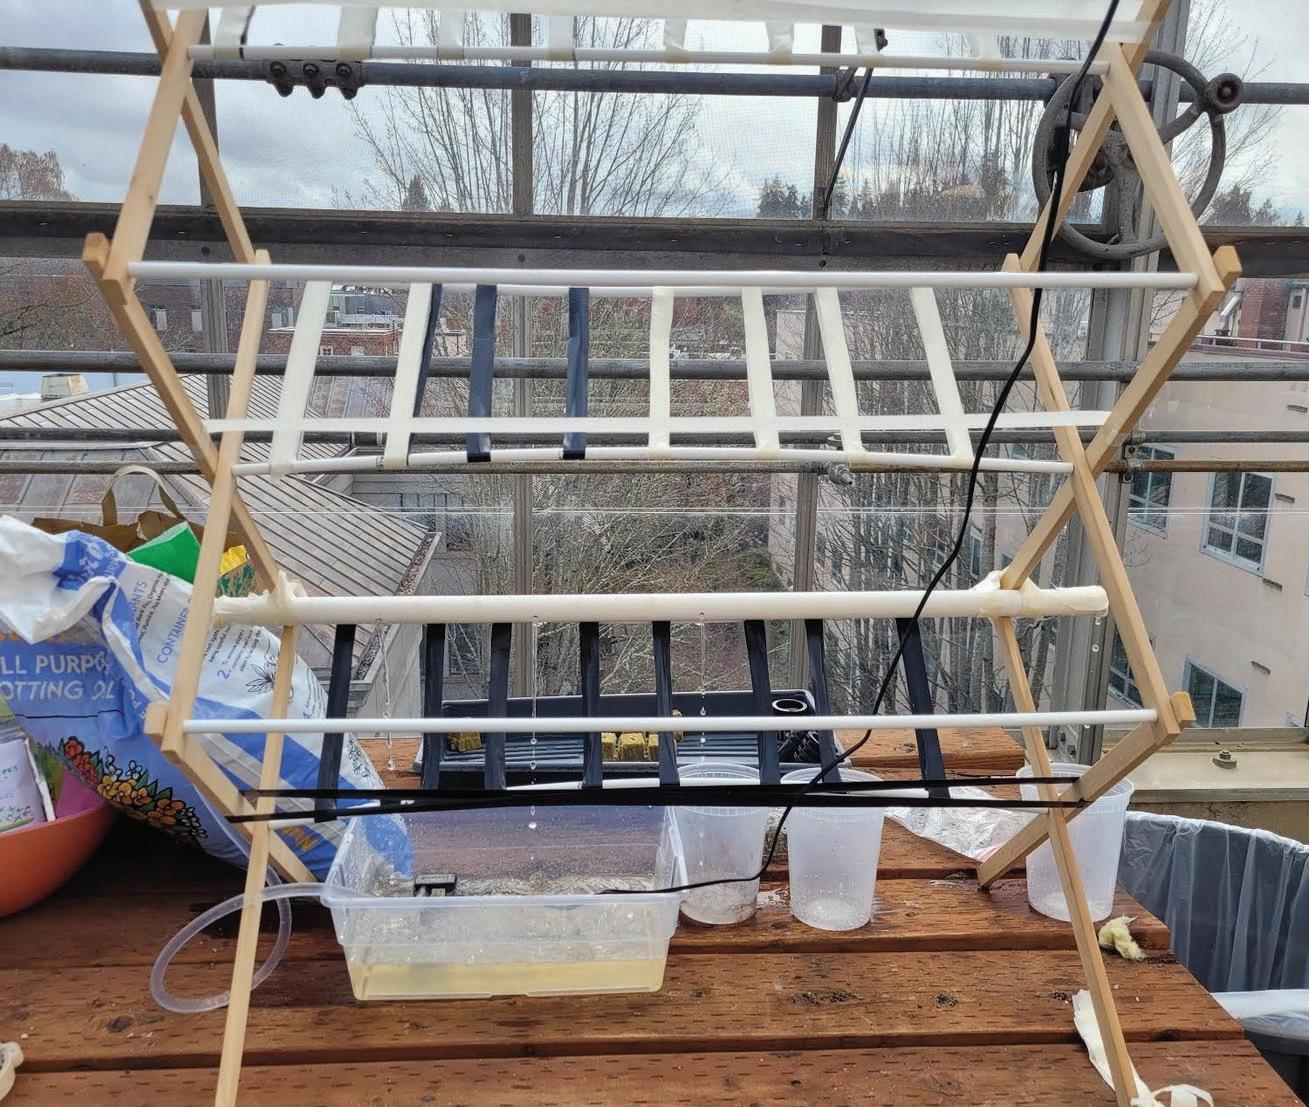
Between the 1st and 2nd day, the plants were given 5 days to grow without interferance. The 2nd testing day, I planned to start the water distribution system to the different cups within the system. The water distribution was successful as each cup of the lower row recieved a differing, yet constant flow of water based on the size of the holes drilled above each.
However, I decided against keeping the watering system in operation during testing. The water system leaked water on both of the tube ends, which could lead to the system failing as it would run out of water to pump. Integrating the water system would also require poking holes into the water reservoir, which I was uncertain on how to do at a precision while keeping a stable water level.
On the 2nd day of data collection, it became relatively clear which plants were growing and which hadn’t manage to survive in the conditions. On that day, I also found that one of the pots had fallen through the structure, leading to the rockwool and plant drying up. Despite this setback, 9/12 of the sprouts were growing well within the medium.
2nd Day Sprout Growth Top View
Tested Water Distribution System
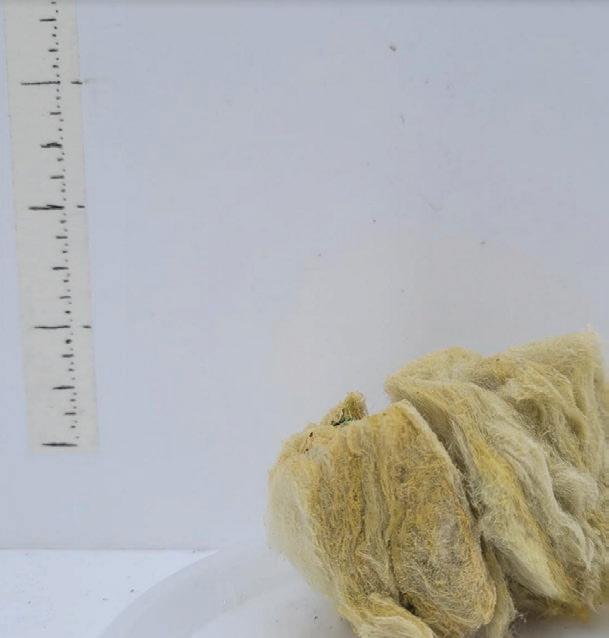
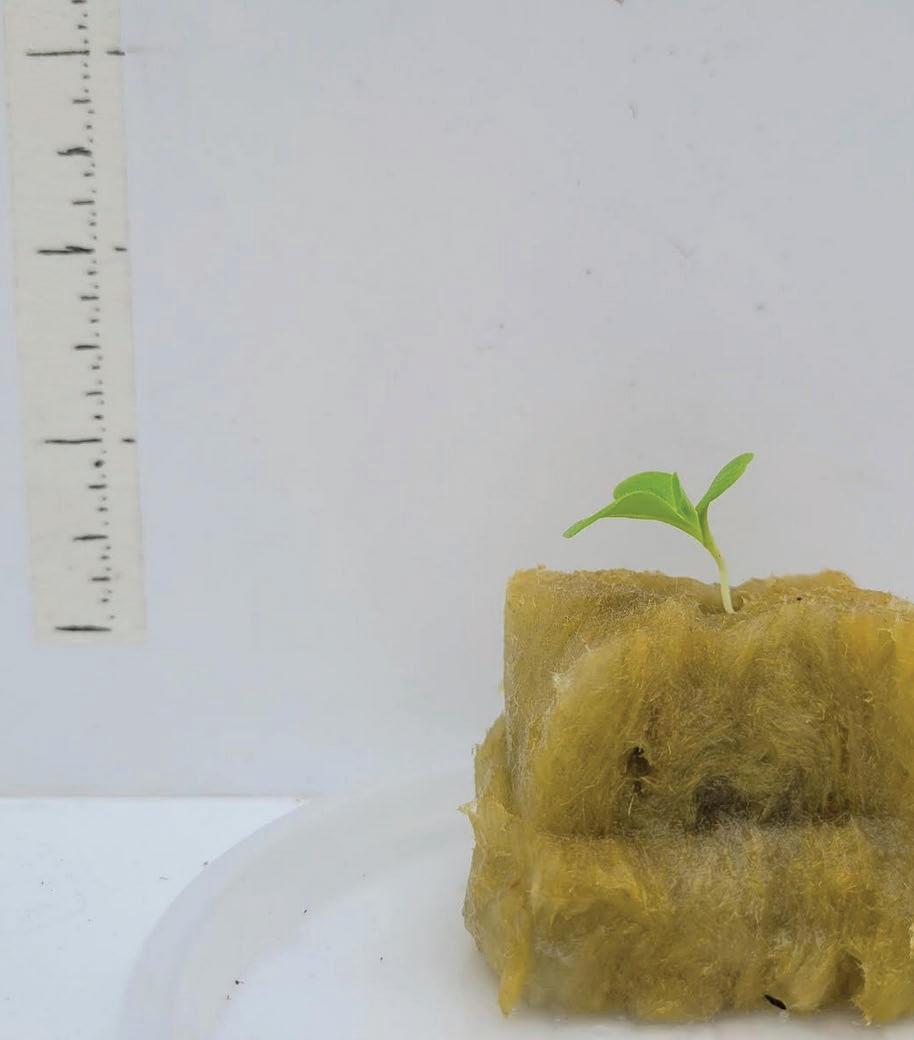
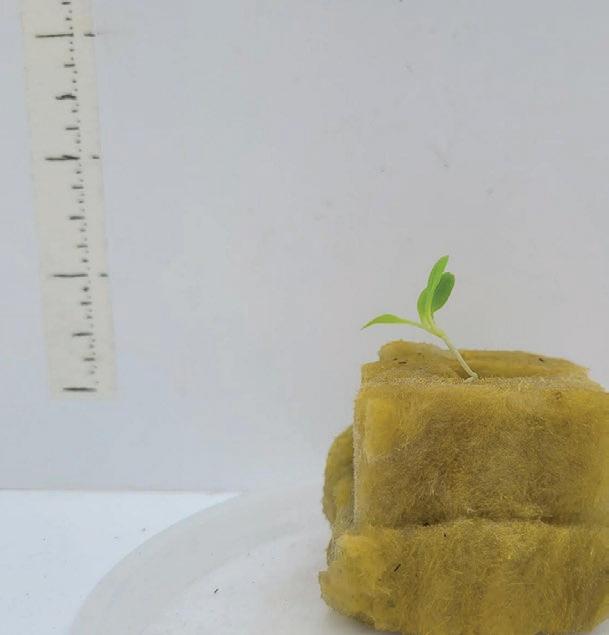
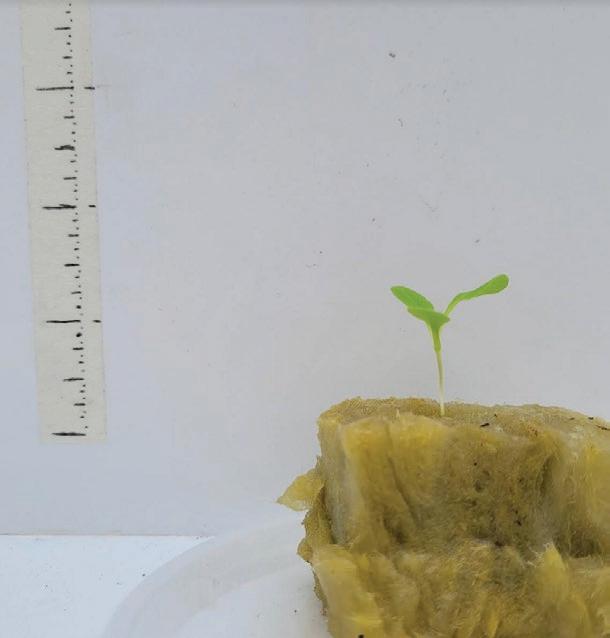
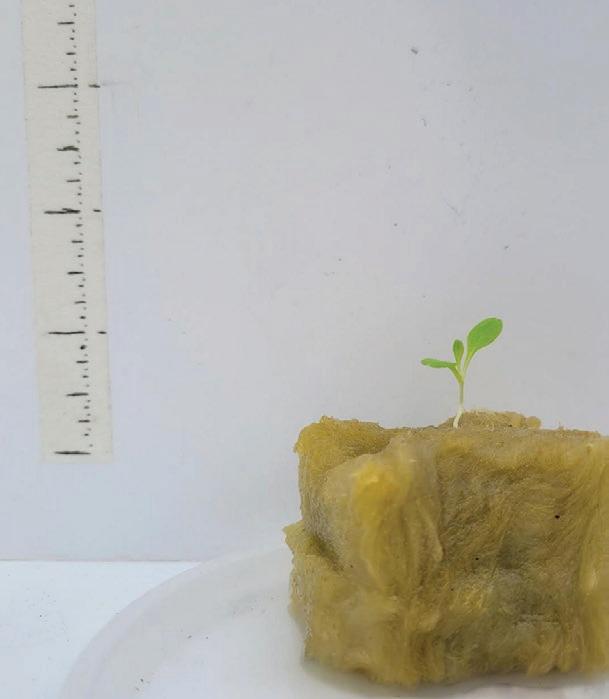
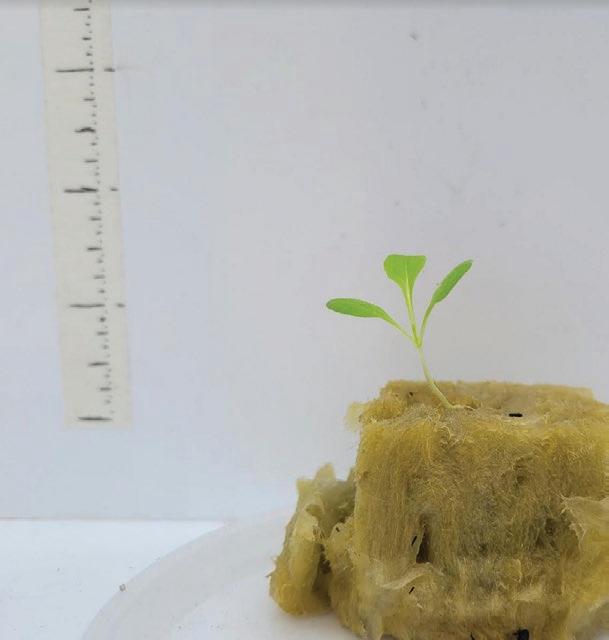
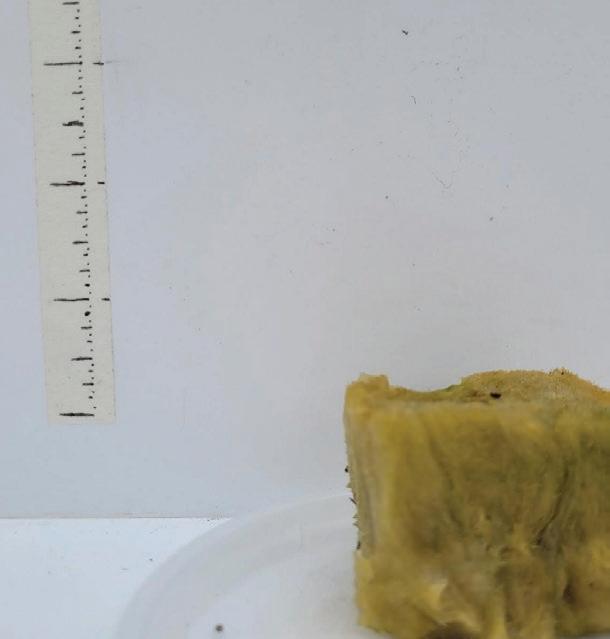
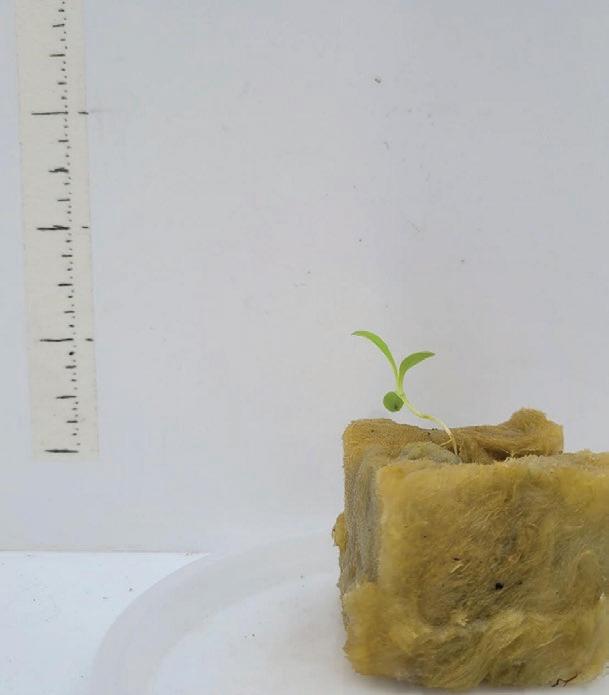
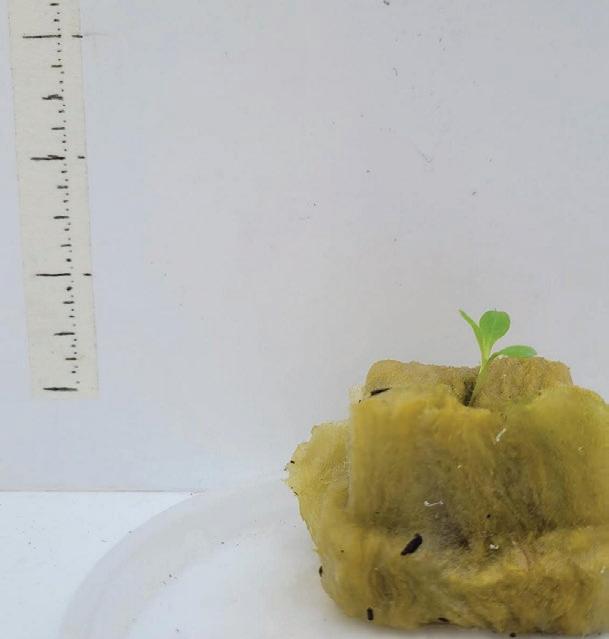
L1A
L1B
L1C
L1D
L2D
L2C
L3C
L3B
L2B
L2A
L3A
L2D
Day 2 Reservoir Container Water Level Measurements
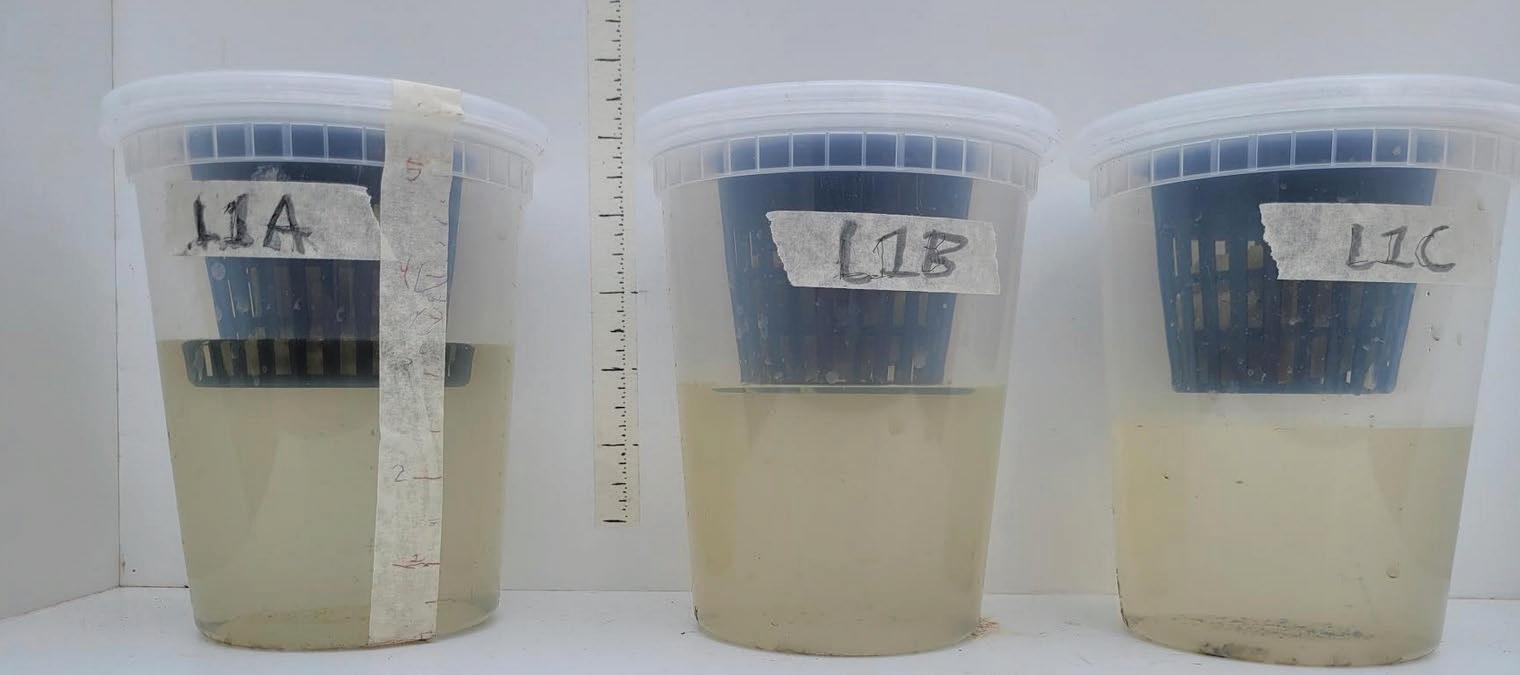
Cups L1A, L1B, L1C
Cups L3A, L3B, L2C
Cups L2A, L2B, L3C
Cups L1D, L2D, L3D
Data Recording Day 3 and Observations
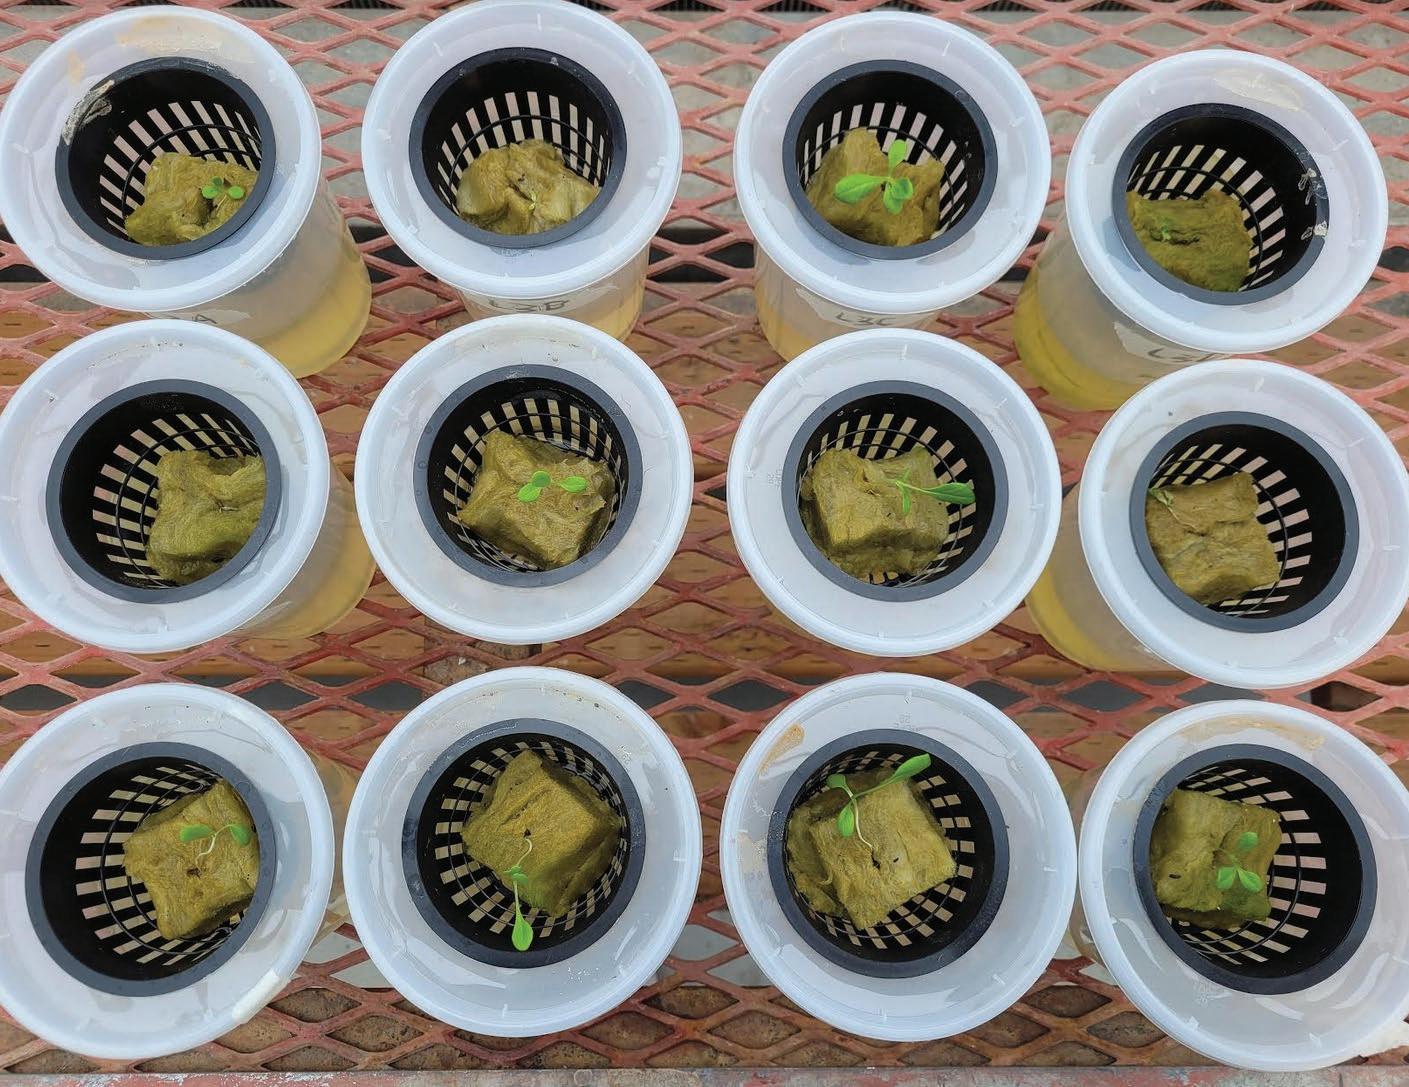
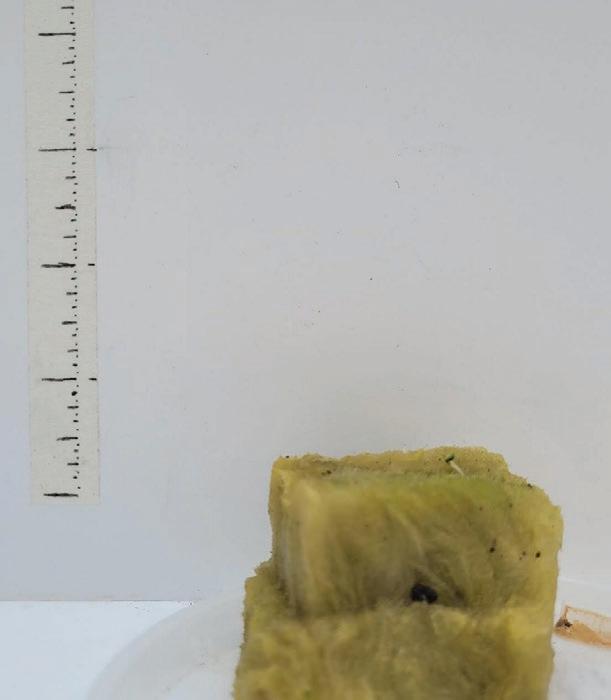
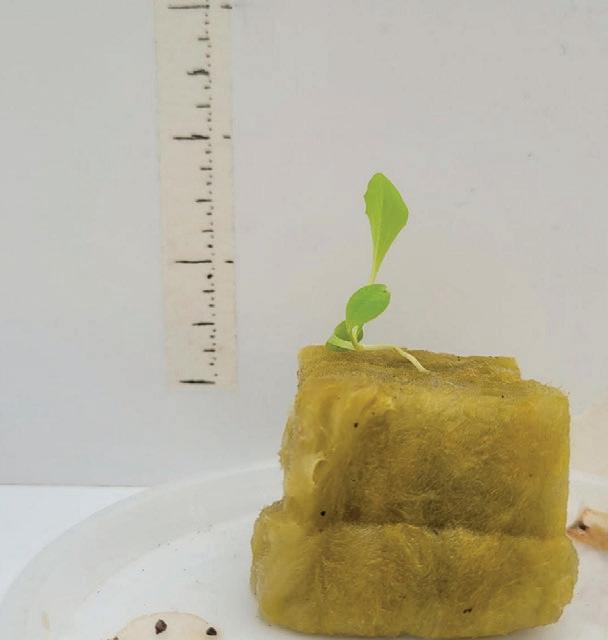
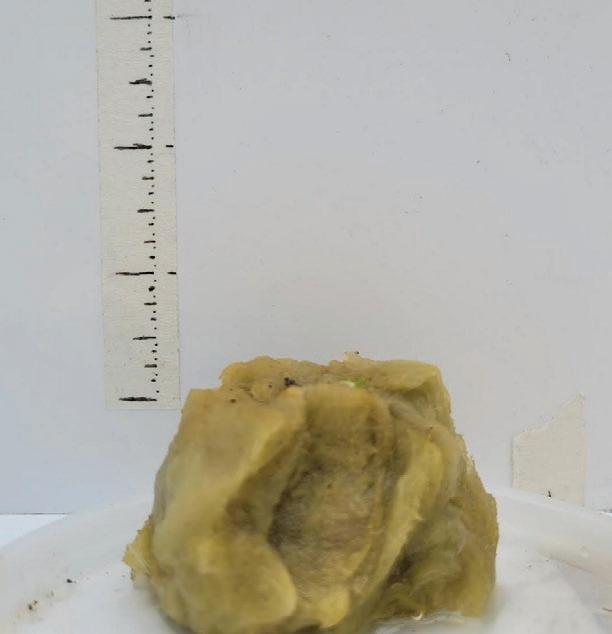
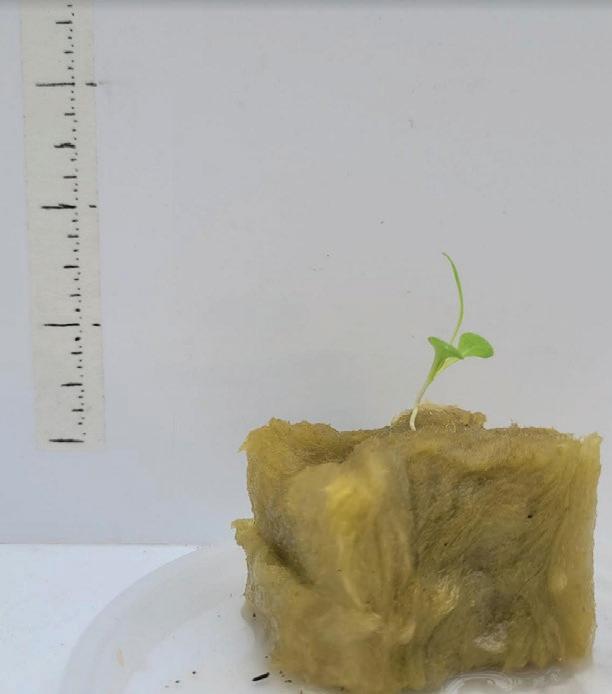
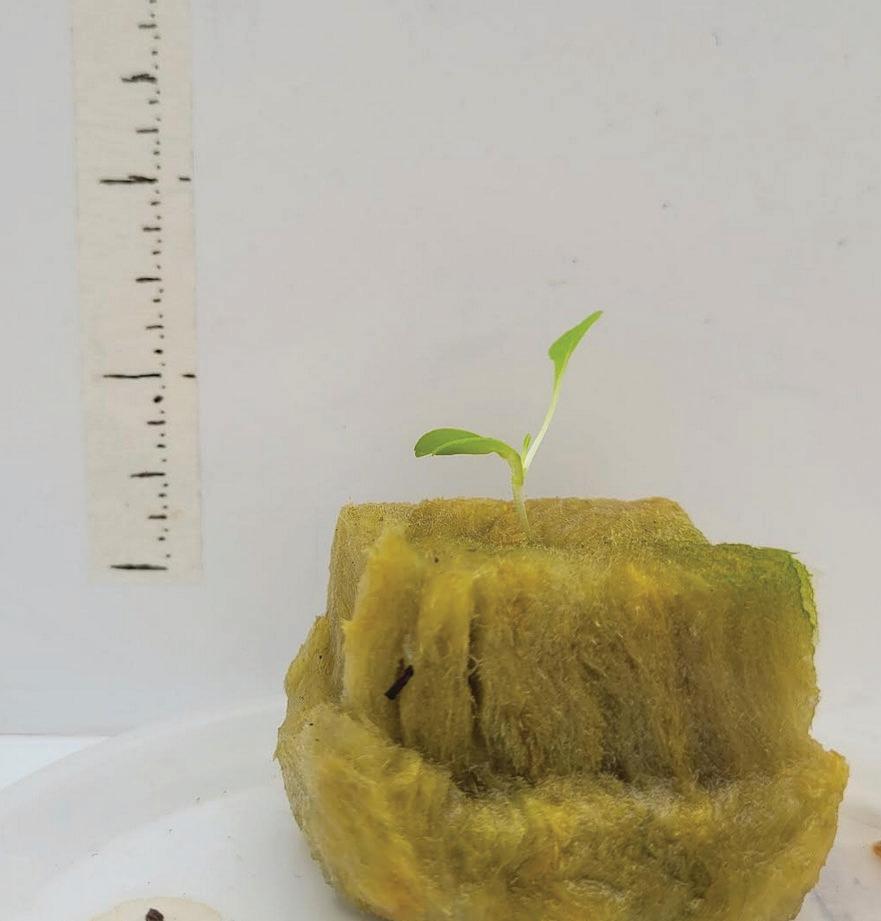
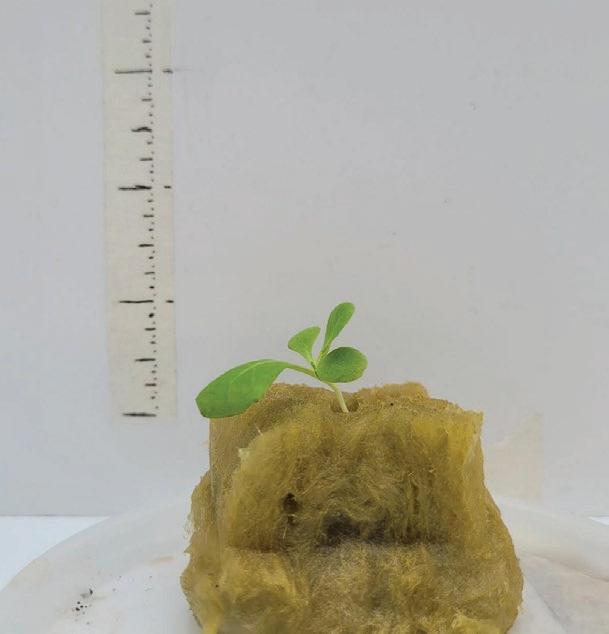
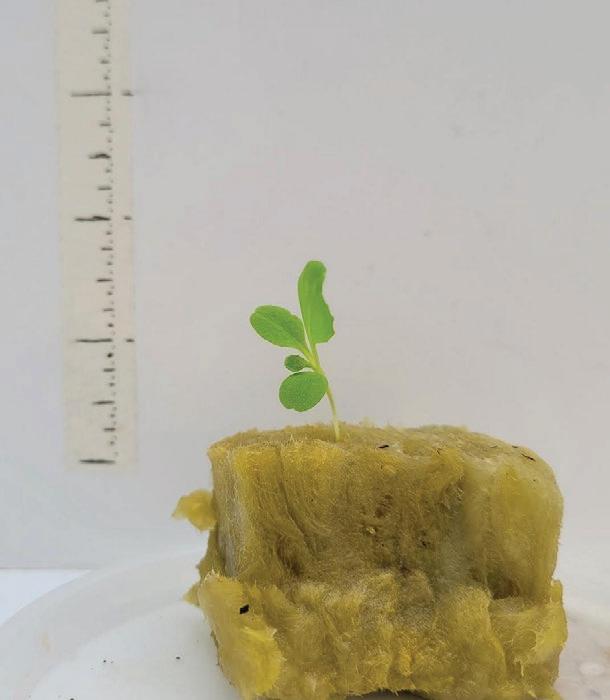
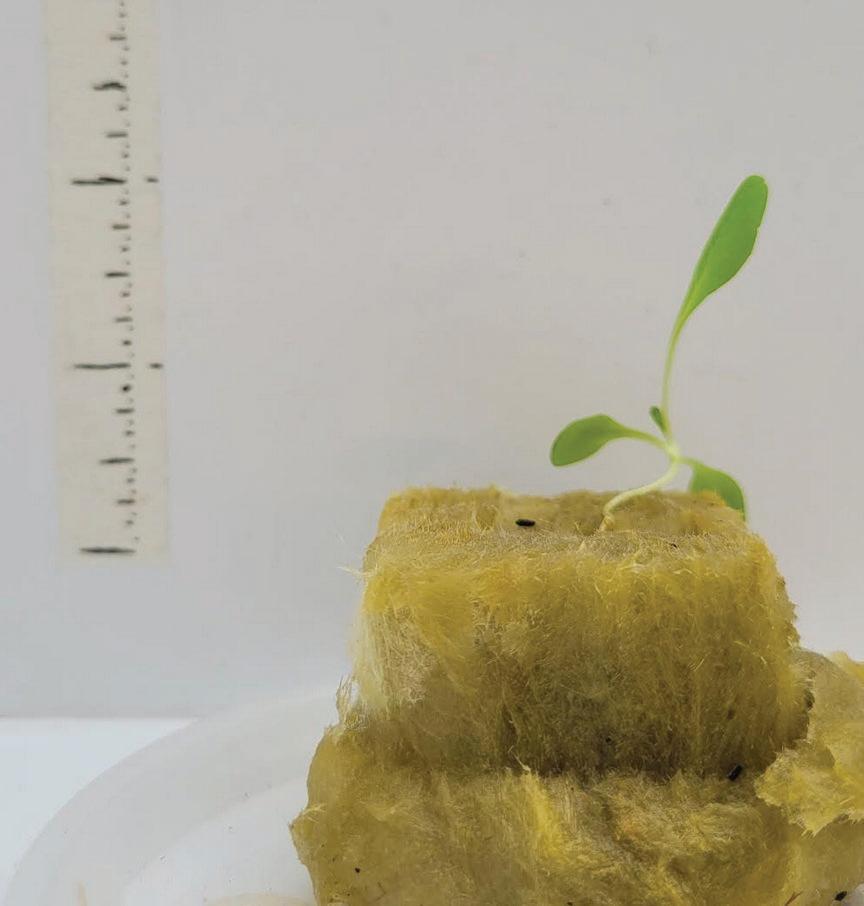
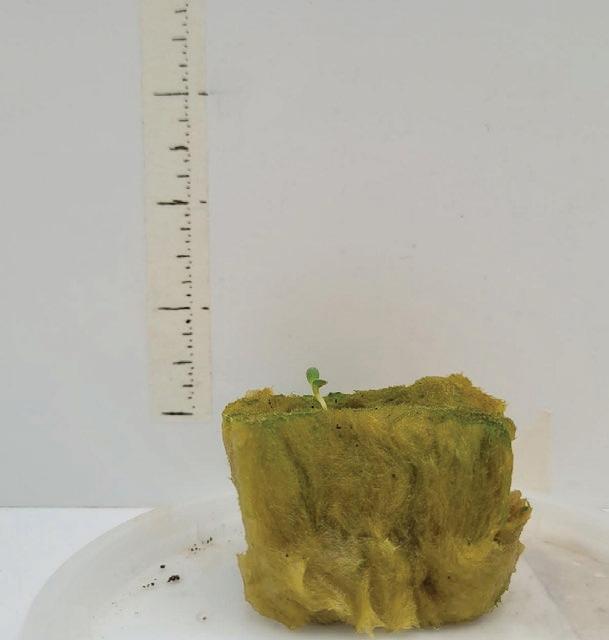
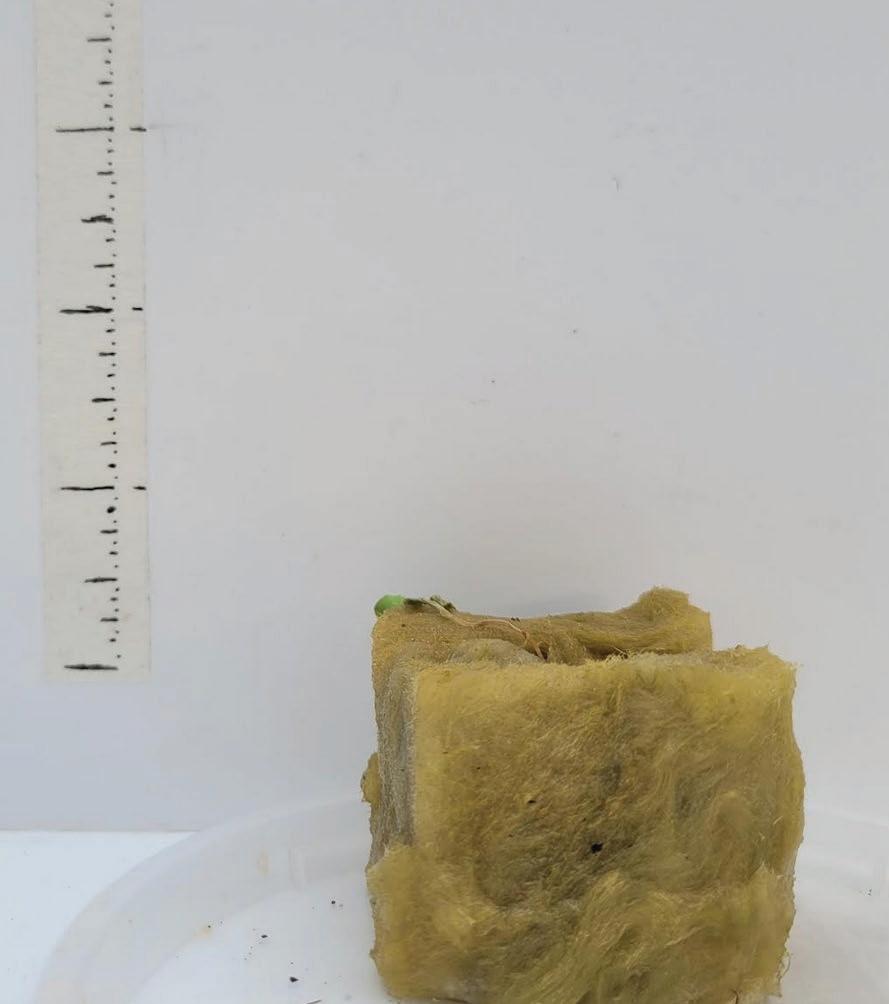
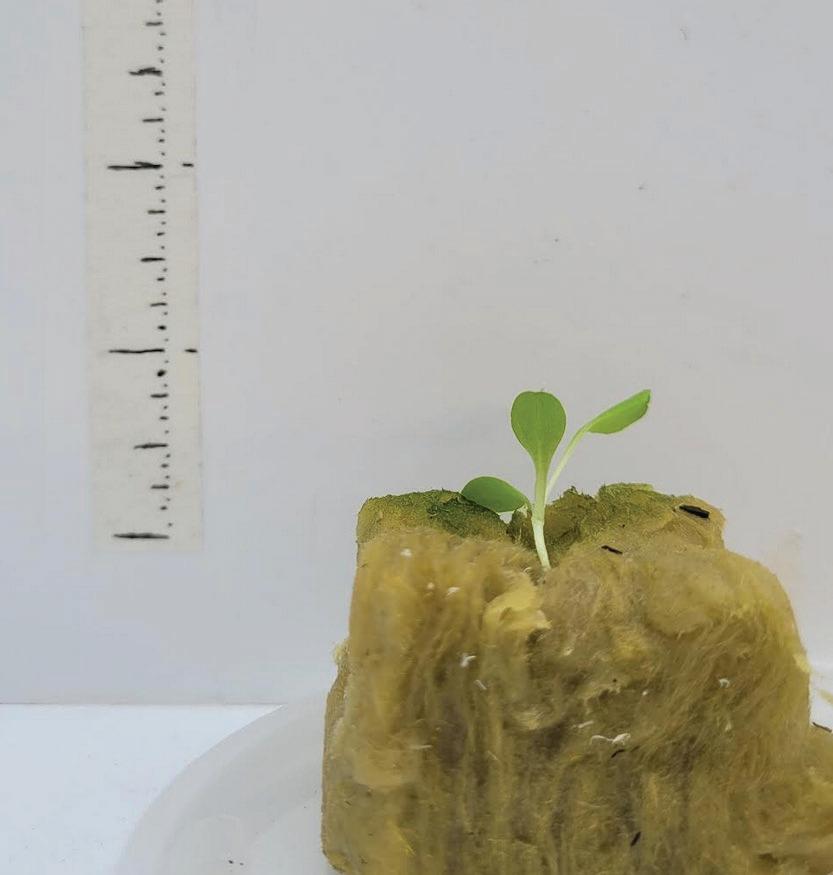
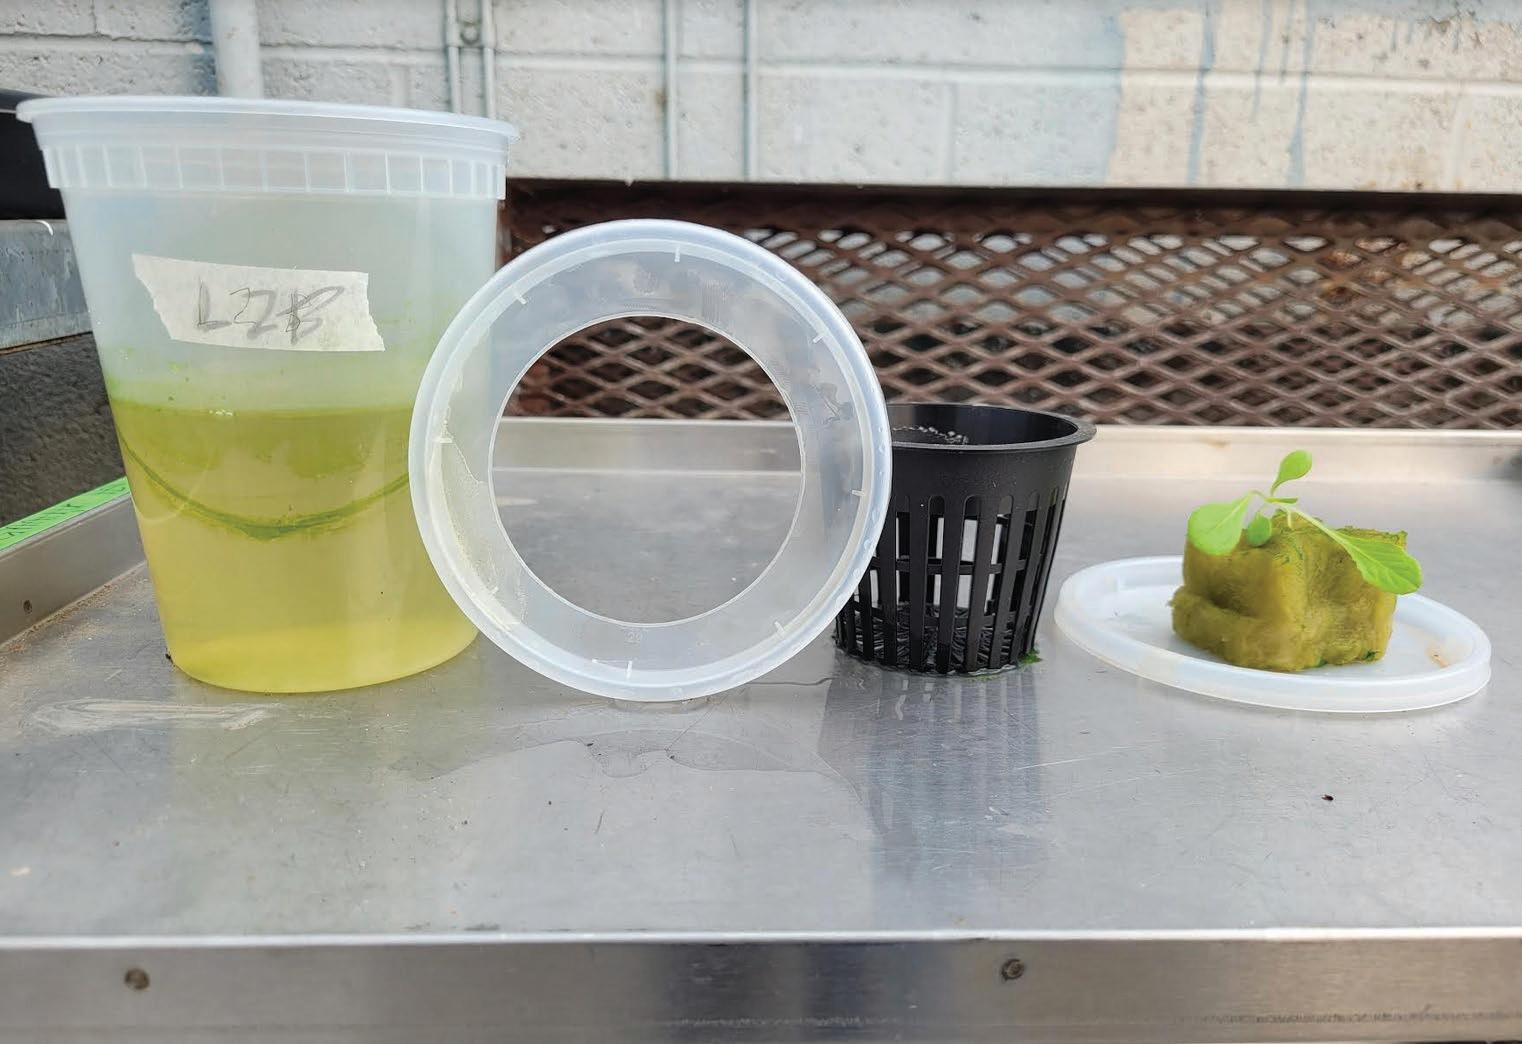
The 3rd day of testing happened two days apart from the 2nd test. As such, not as much growth happened between the 2nd and 3rd test. The 3rd day saw a significant increase in the algea growth within the reservoirs, making the water turn yellow within the cups. On this day, some of the new sprouts added to replace the dead plants on day 2 were beginning to see some growth.
The water levels between day 2 and 3 seemed to remain rather consistent, which may be because the weather in that time became more cold and cloudy, resulting in less evaporation. From the pictures taken that day, we can begin to see the algea spreading onto the rockwool. By this point, the plants were starting to grow more leaves and were growing longer. Many of the plants lacked the root
support to hold themselves upright leading to them tipping over.
Almost all of the plants which were growing well during day 2 were in a similar condition on day 3. The only exception is plant L2A, which seems to have dried out despite the rockwool the plant is within remaining moist.
New 3D Model of Frame System
3rd Day Sprout Growth Top View Water pumping height limitation of around 2ft
L1A
L1B
L1C
L1D
L2D
L2C
L3C
L3B
L2D
Day 2 Reservoir Container Water Level Measurements
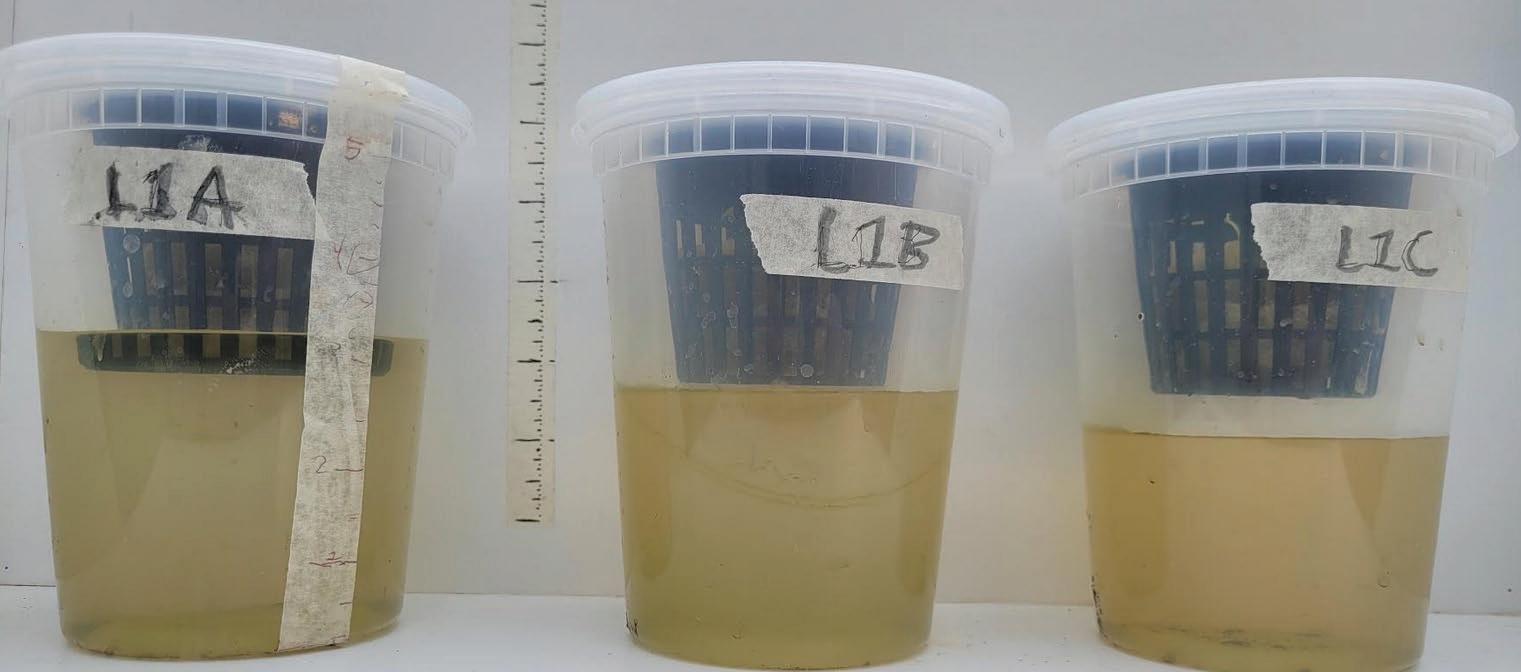
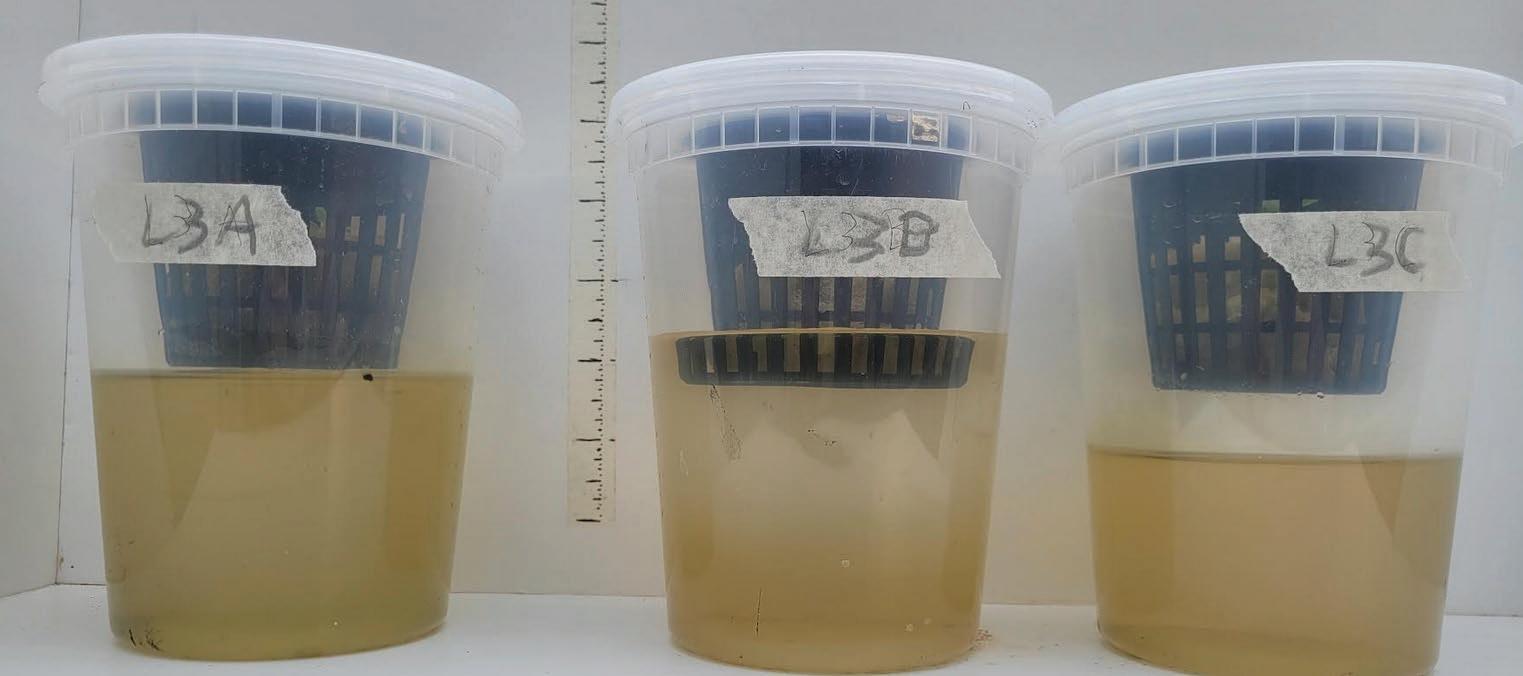
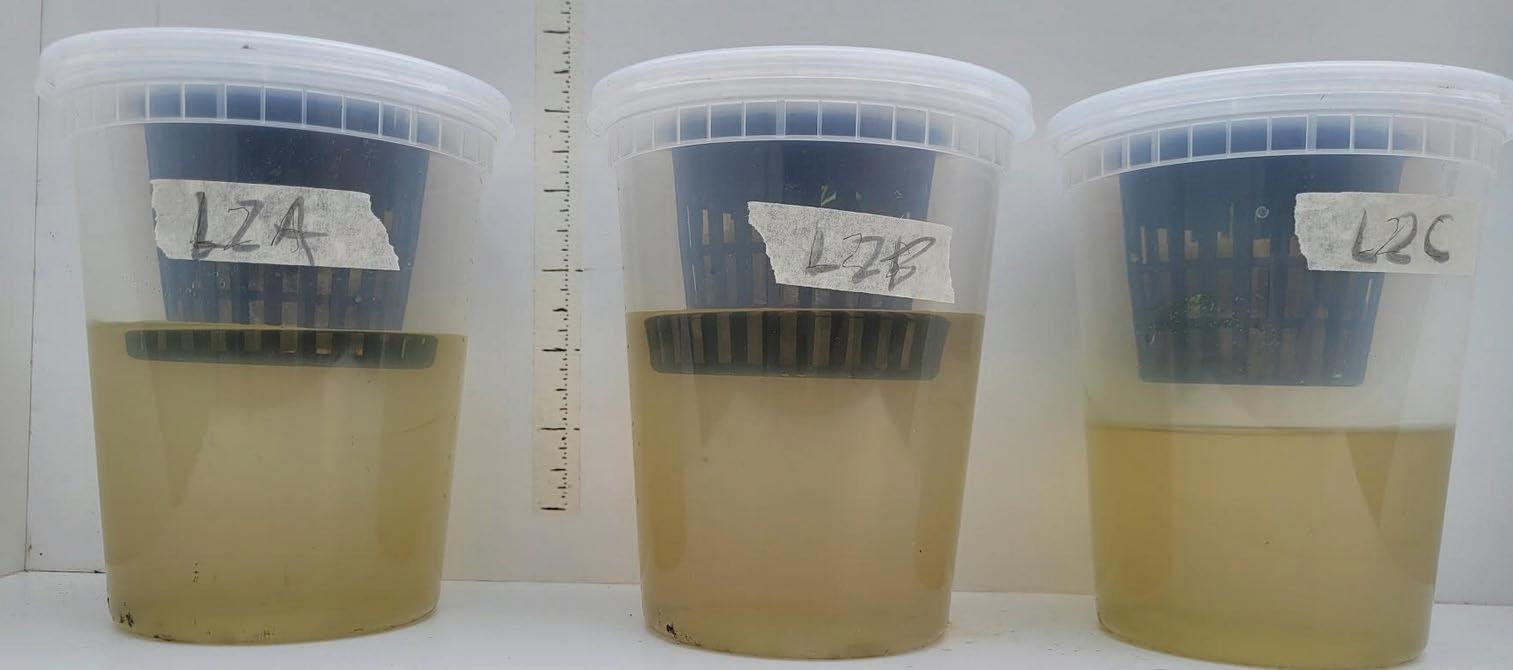
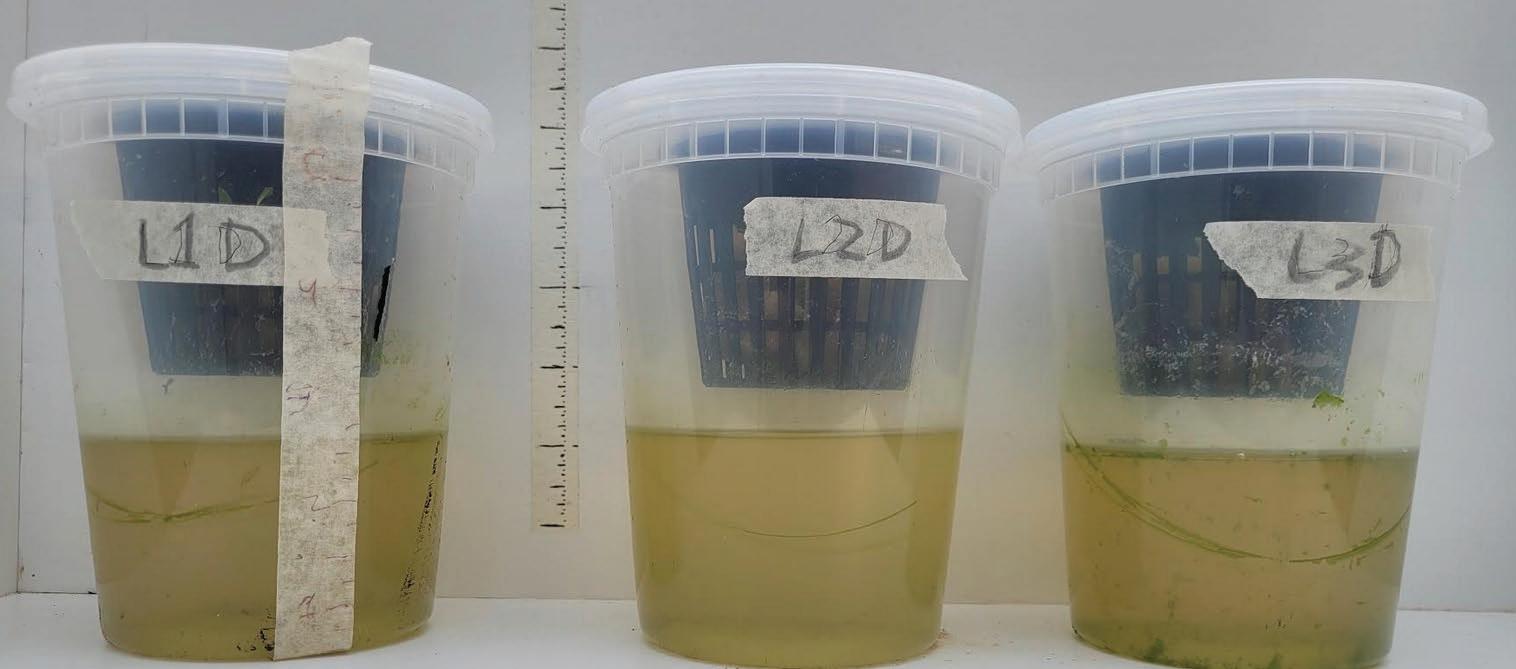
Cups L1A, L1B, L1C
Cups L3A, L3B, L3C
Cups L2A, L2B, L2C
Cups L1D, L2D, L3D
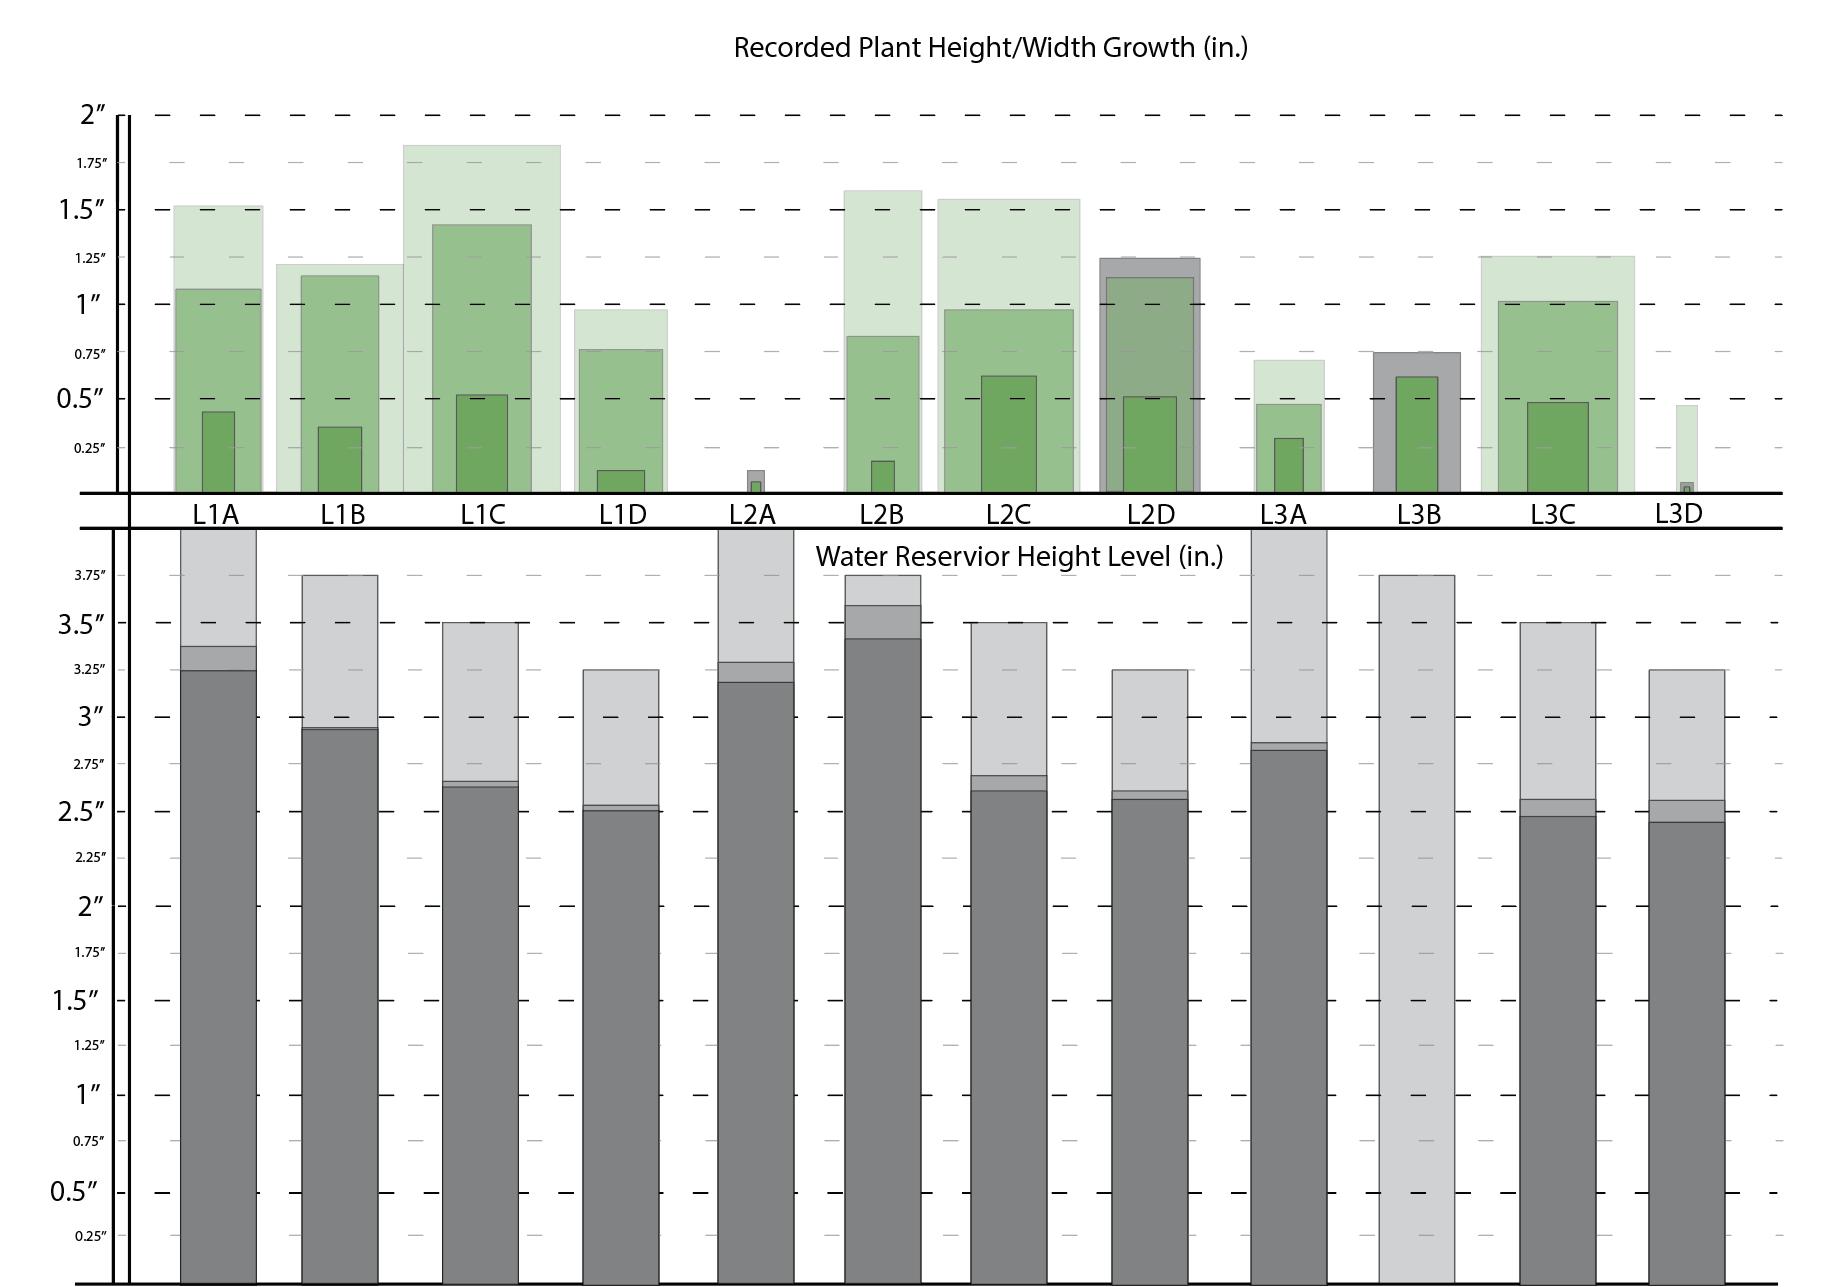
From the data compiled and illustrated in the chart, there are few observations as to potential impacts of the different factors on the sprouts growth. The biggest factor which affected the plant’s growth potential seems to be at what state the plant was intergated into the hydroponic system. The plants which died early on were planted when the leaf was still emerging from the seed.
Despite the rockwool losing contact with most water reservoirs, the rockwool remained moist, allowing the plants to continue to grow well within the medium. The water reservoirs levels gradually decreased mostly due to evaporation from direct sun exposure. The small sample size makes other conclusions on what affected plant growth hard to strictly determine based on the expirement.
This project sought to test the limits of the Kratky method, both in creating a new hydroponic frame and in testing how changing the conditions would affect plant growth within it. In terms of creating a new hydroponic frame system, the project succeeds in modularity, interchangability, cost accessibility, and creating a suitable environment for plant growth.
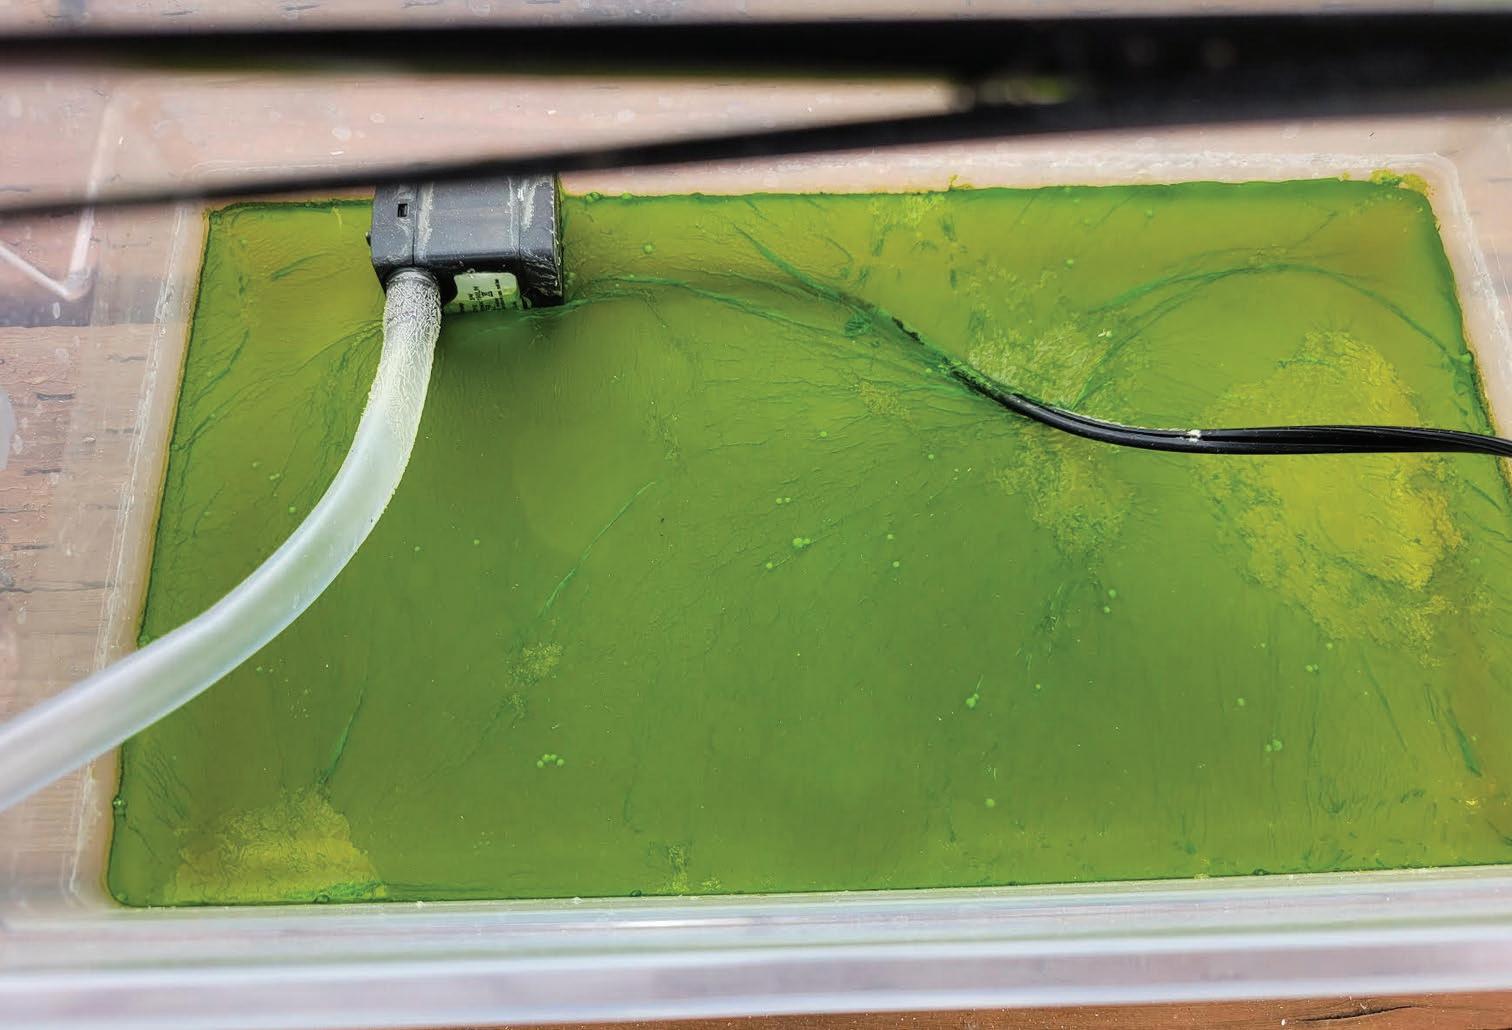
The new hydroponic frame system fell short of integrating and testing how flow would impact the growth of the plants within the tubes. The plant growth testing pointed towards the starting water level in the Kratky system to not be a massive influence in a plant’s early stages of growth. The study also shows tendancy of hydroponic systems to develop algae growth when left to its own devices.
Data Analysis
Moss Growth with Water Pump Reservoir
Individual Kratky Unit Divided into Parts
Final Production and Conclusions
Future Avenues to Explore
Working through this hydroponics project has informed me about just how many factors can affect how a plant growths, compared to soil plant growth. The plant growth in a hydroponic system could be influencd by the reservior the water is within and whether the reservoir controlls moss growth or not. The plant growing outside of soil also means water soluble nutrients must
be added for the plant to grow. Water soluble nutrient can be much more concentrated compared to nutrients for the soil which can lead to over or under feeding the plants in a hydroponics setting. Future projects can potentially explore how different plants grow within a Kratky hydroponic system to find which species are most adept at such environments. Plants adapted to
wetland settings such as rice plants can be compared to plants adapted to soil based growth. If i were to reproduce this project and study, I would have change some aspects to its design. I would change some aspects to improve data collection earlier on such as transparent netted cups and more frequent data collection. I would use smaller reservoir cups and netted cups to
have more samples to test and collect data. I would also use a rigid system to support the cups as tape has shown to be a somewhat unreliable method of keeping the pots within the frame. I’d also grow the plants under a grow light to have more consistent growth without the added uncertainty of weather and sunlight affect it. I would also record the depth at which the sprouts are planted.
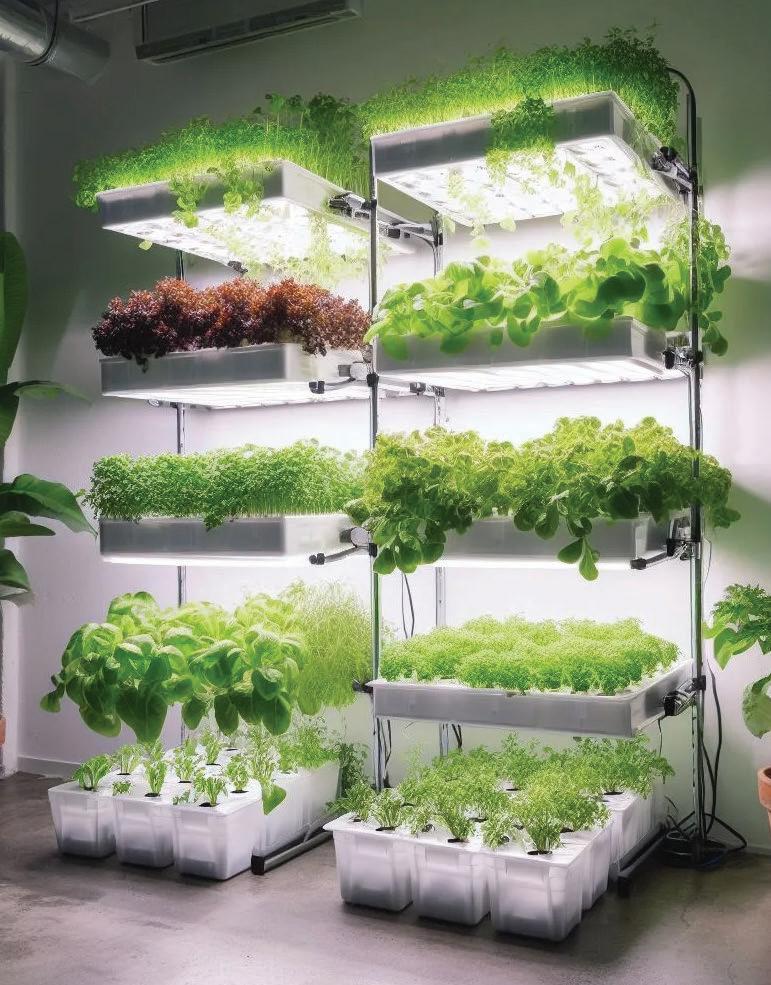
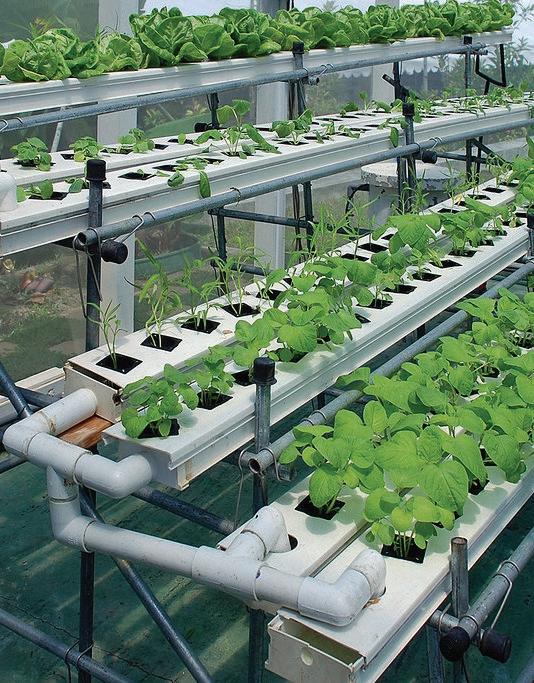
Ebb and Flow System
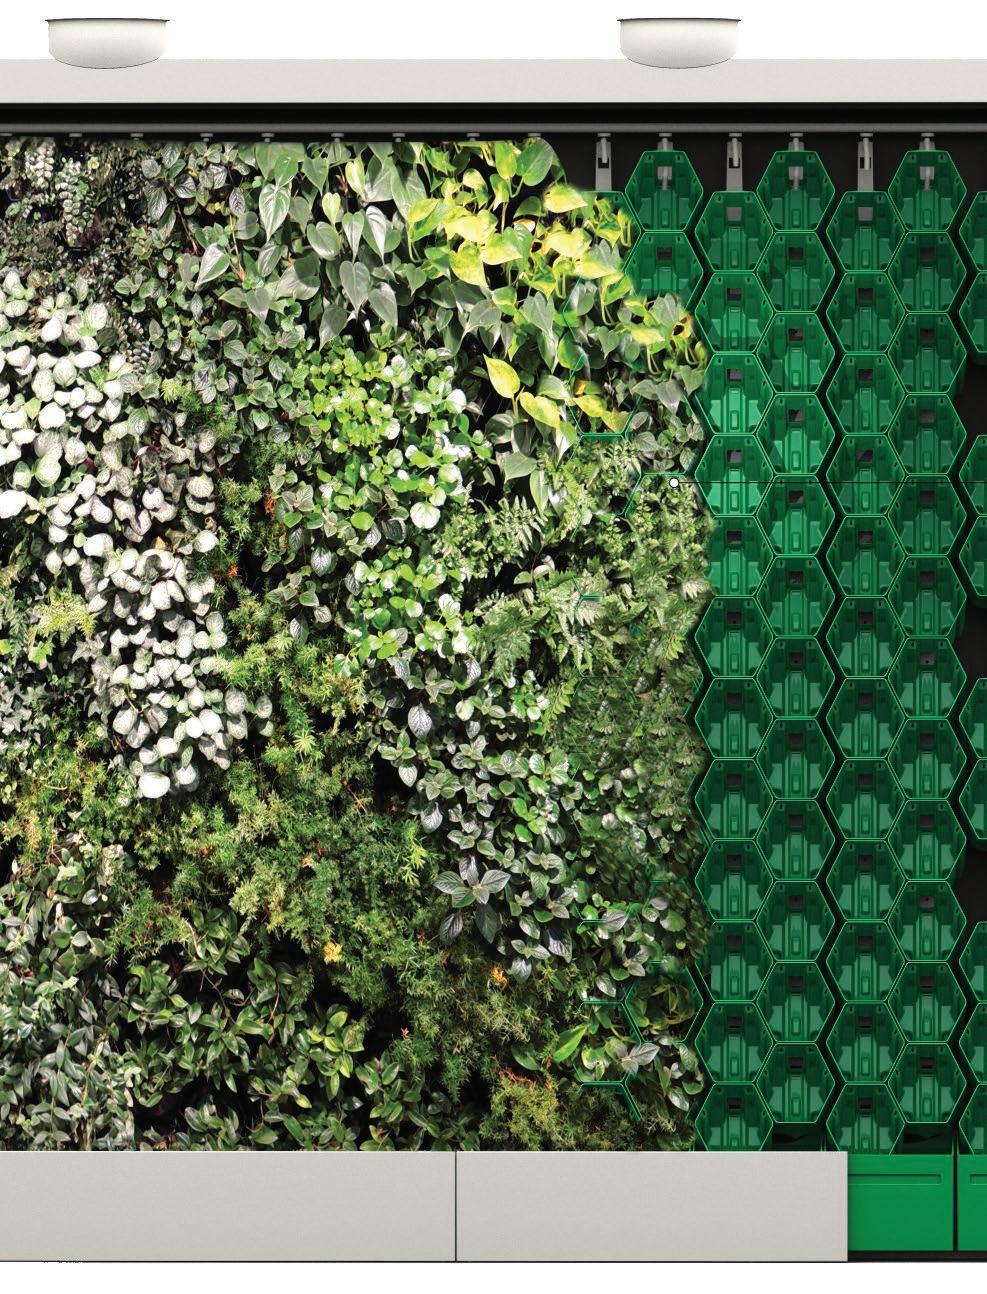
Pot System Green Wall
Kratky System Integrating Grow Lights
Sources:
Karl, Bernie. The Chena Grow Tower Project, s3.amazonaws.com/arc-wordpress-client-uploads/adn/wp-content/uploads/2017/07/07070654/The-Chena-GrowTower-Project1.pdf. Accessed 22 Feb. 2024.
Neumann, Sally S. “Kratky Hydroponic Gardening: Effects of Natural vs. LED Plant Light, Container Type & Seed Propagation/ Plant Support Media on Plant Growth.” Cornell University, 4 Feb. 2019, moodle.cce.cornell.edu/pluginfile.php/56449/mod_page/content/4/Neumann - Master Project - Kratky Hydroponic Gardening.pdf. Accessed 22 Feb. 2024.
Spinelli, G., et al. “Design of a Small-Scale Off-Grid Hydroponic System for Screenhouse Leafy Vegetable Production.” University of Hawaii at Manoa, Mar. 2019, gms. ctahr.hawaii.edu/gs/handler/getmedia.ashx?moid=65857&dt=3&g=12. Accessed 22 Feb. 2024.
Other Sources:
Gumisiriza, Margaret S., et al. “A Simplified Non-Greenhouse Hydroponic System for Small-Scale Soilless Urban Vegetable Farming.” National Library of Medicine, 9 Oct. 2022, www.ncbi.nlm.nih.gov/pmc/articles/PMC9596717/. Accessed 22 Feb. 2024.
Kratky, B. A. “A Suspended Pot, Non-Circulating Hydroponic Method.” University of Hawaii, 2004, www.ctahr.hawaii.edu/hawaii/downloads/A_Suspended_Pot_ Non-circulating_Hydroponic_method.pdf. Accessed 22 Feb. 2024.
Other Image Sources:
Insight, S. (2023, October 22). Hydroponics: The KRATKY method: The cheapest and easiest hydroponic system for beginners who want... Medium. https://medium. com/@silberinsight/hydroponics-the-kratky-method-the-cheapest-and-easiest-hydroponic-system-for-beginners-who-want-97615a548bdf
Modular living wall, green wall system. Modular Living Wall, Green Wall System. (n.d.). https://www.upscapers.com/living-wall-green-wall-system
This is why ebb and flow system works perfectly. Humboldts Secret Supplies. (n.d.). https://humboldtssecretsupplies.com/blogs/articles/this-is-why-ebb-and-flowsystem-works-perfectly
Materials bought list:
Cubes of RockWoolhttps://www.amazon.com/VIVOSUN-Rockwool-Stonewool-Propagation-Hydroponic/dp/B0B8HW3N9G/ref=sr_1_12?crid=3KXPUO9OOGVLA&keywords=rockwool%2Bcubes&qid=1706159938&refinements=p_36%3A-1000&rnid=2661611011&sprefix=rockwool%2Caps%2C159&sr=8-12&th=1 (28 pack 1.5’’ cubes 9$) Plastic Net Podshttps://www.amazon.com/Hydroponic-Watering-Aquaponics-Vegetable-Gardening/dp/B0946Q87XK/ref=ci_mcx_psdc_11117584011_t1_B091BS62FV?th=1 (12 pack 3 inch pods 7.29$) 32 oz Food safe containerhttps://www.amazon.com/AOZITA-Containers-Airtight-Dishwasher-Microwave/dp/B0CBMWLTKQ/ref=sr_1_3?keywords=Food%2Bstorage%2Bplastic%2Bdeli%2Bcontainers&qid=1706156507&refinements=p_36%3A-1300&rnid=386465011&sr=8-3&th=1
Plant Nutirentshttps://www.amazon.com/Plant-Food-Hydroponic-Nutrients-Supplies/dp/B0BBFBFKJB/ref=sr_1_7?crid=2X0I5P8UH4AJ7&keywords=hydroponic+nutrients&qid=1706159475&refinements=p_36%3A-1200&rnid=2661611011&sprefix=hydroponic+nutrient%2Caps%2C161&sr=8-7 (liquid
Lettuce seedshttps://www.amazon.com/Black-Seeded-Simpson-Lettuce-Seeds/dp/B013MBMYG6/ref=sr_1_6?crid=1NG2WEEFRYZYL&keywords=black+simpson+lettuce+seeds&qid=1706158845&sprefix=black+simpson+lettuce+seeds%2Caps%2C138&sr=8-6 (Black Seeded Lettuce - 2$) Water pumphttps://www.amazon.com/DaToo-Submersible-Fountain-Aquarium-Hydroponics/dp/B0B6PQG9HV/ref=sr_1_44?crid=11DR4U0ANJD5A&keywords=water%2Bpu (8$)
