2 minute read
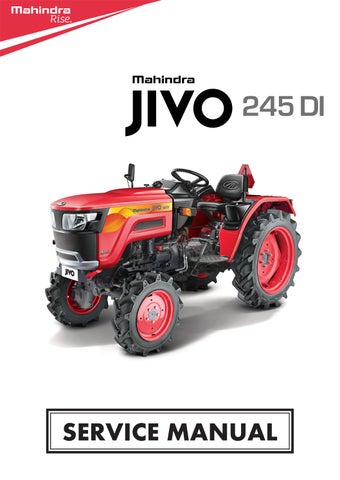
BLEEDING FUEL SYSTEM


Air must be removed :
1) When the fuel filter or lines are removed.
2) When water is drained from fuel filter.
3) When tank is completely empty.
4) When tractor is not used for a long period of time
Procedure Of Bleeding Air From Fuel System
CAUTION :-
Make sure that fuel Pipe clips are tighten.
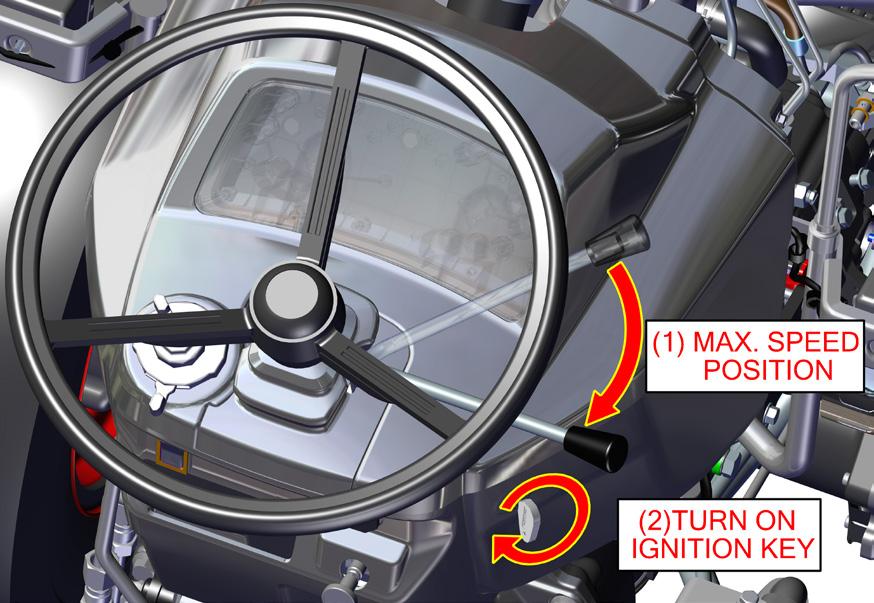
Open the air vent on the fuel injection Pump.
Pump the fuel pump knob located on the top of the fuel filter. The fuel pump knob will pump easily at first and with added resistance as air is purged from the system.
To make sure air is completely purged, pinch the fuel over flow hose with fingers if a pulsation is left when the knob is pumped then, no air remain
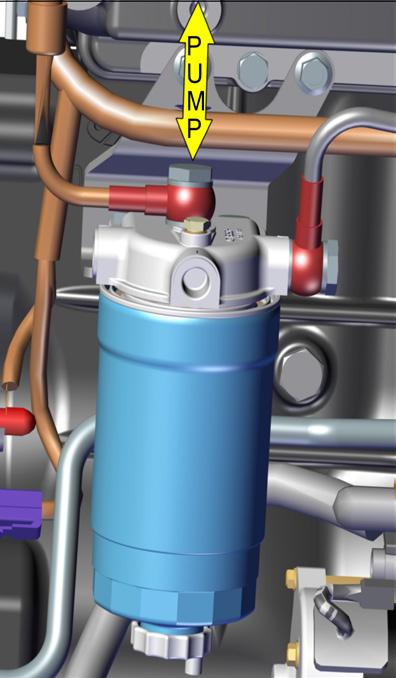
(1) Set the hand throttle lever / accelerator at maximum speed position.
(2) Turn on the key switch to start the engine and then reset the throttle at the mid speed position.
If engine doesn’t start try it several times with 30 seconds Intervals
Accelerate the engine to remove the small position of air in the fuel system.
If the air still remains and the engine stops, repeat the above steps. Close the air vent.
Do not hold key at engine start position for more than 10 seconds continuously. If more engine cranking is needed try again after 30 seconds.
Always close the air vent screw except for bleeding fuel lines other wise, engine will run irregularly or stall frequently.
Checking tyre pressure
For normal load and operation of the tractor the following tyre pressure is recommended
Note :
1. Keep the tube valve always closed with the dust cap, to protect the valve from mud/dust/slush.
2. To achieve best performance and maximum tyre life, maintain air pressure as per tyre size and load carrying capacity as recommendation.
Addition of Wheel Weights At Rear – To increase drawbar pull of the tractor & reduce wheel slip (Increase tyre life)
Cast Iron weights can be attached to the rear driving wheels. In case the slip continues, it may be necessary to liquid ballast the tyre.
Adding Water :
Tractor tyre can be 80% filled with water as follows, Remove excess air from Tyre.
1. Remove all air from tyre.
2. Raise the wheel. Rotate the tyre until the valve, stem is at 1’O Clock position.
3. Remove the valve core housing and screw on the adapter.
4. Force water into the tyre from a tank placed at least five feet higher than the tractor tyre, or by using a compressor and pressure tank filled with water.
5. When the liquid has reached the required level, remove the adapter, screw in the valve core and inflate to the recommended pressure.
6. Maintain air pressure as per recommendation
The instructions and recommendation shown below should be followed in order to secure maximum life and efficient service from pneumatic tyres.
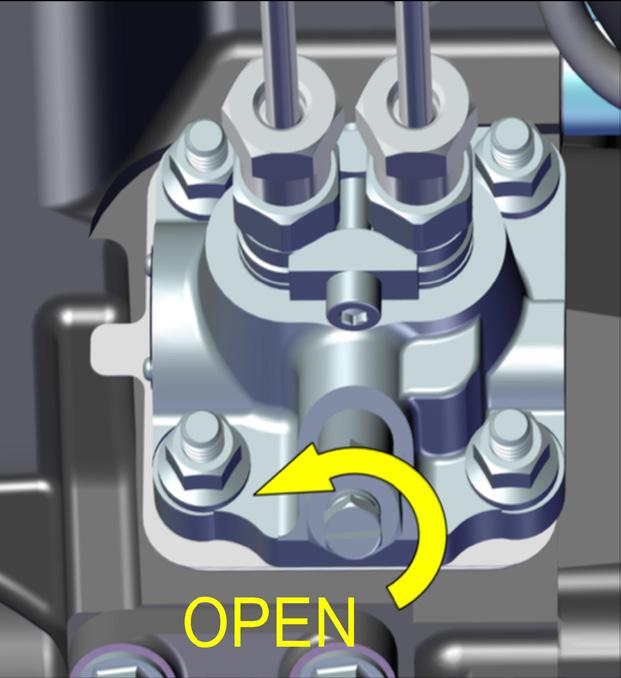
FRONT WHEEL “ TOE IN ”
In the event of the tie rod setting being interfered with, then it is necessary to adjust the TOE-IN. Before measuring and adjusting the TOE-IN, ensure the front wheels are in the straight ahead position and the front axle is not tilted.
Calculation of Toe In-:
(Refer image TOE-IN ADJUSTMENT)
Measure distance between centers of both front wheels from front of tractor.
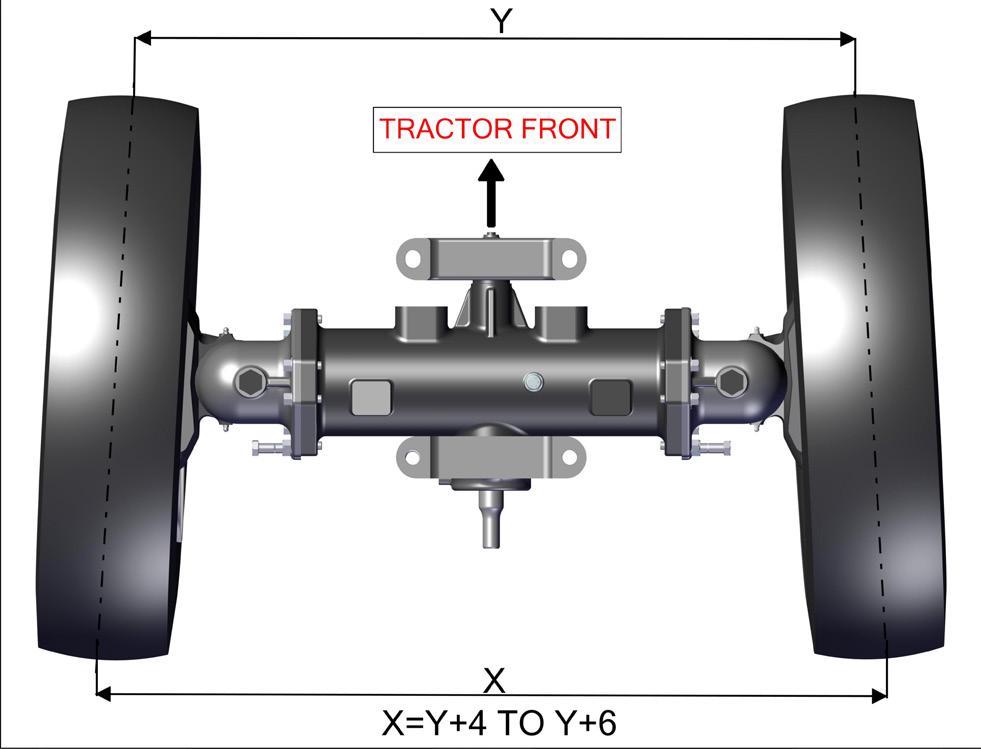
Let that distance be “Y”.
Now adjust track rod ball joints such that distance“Y” will remain same in front side of front wheels and at rear side of front wheel distance will increase in 4 to 6 mm.
TOE-IN ADJUSTMENT
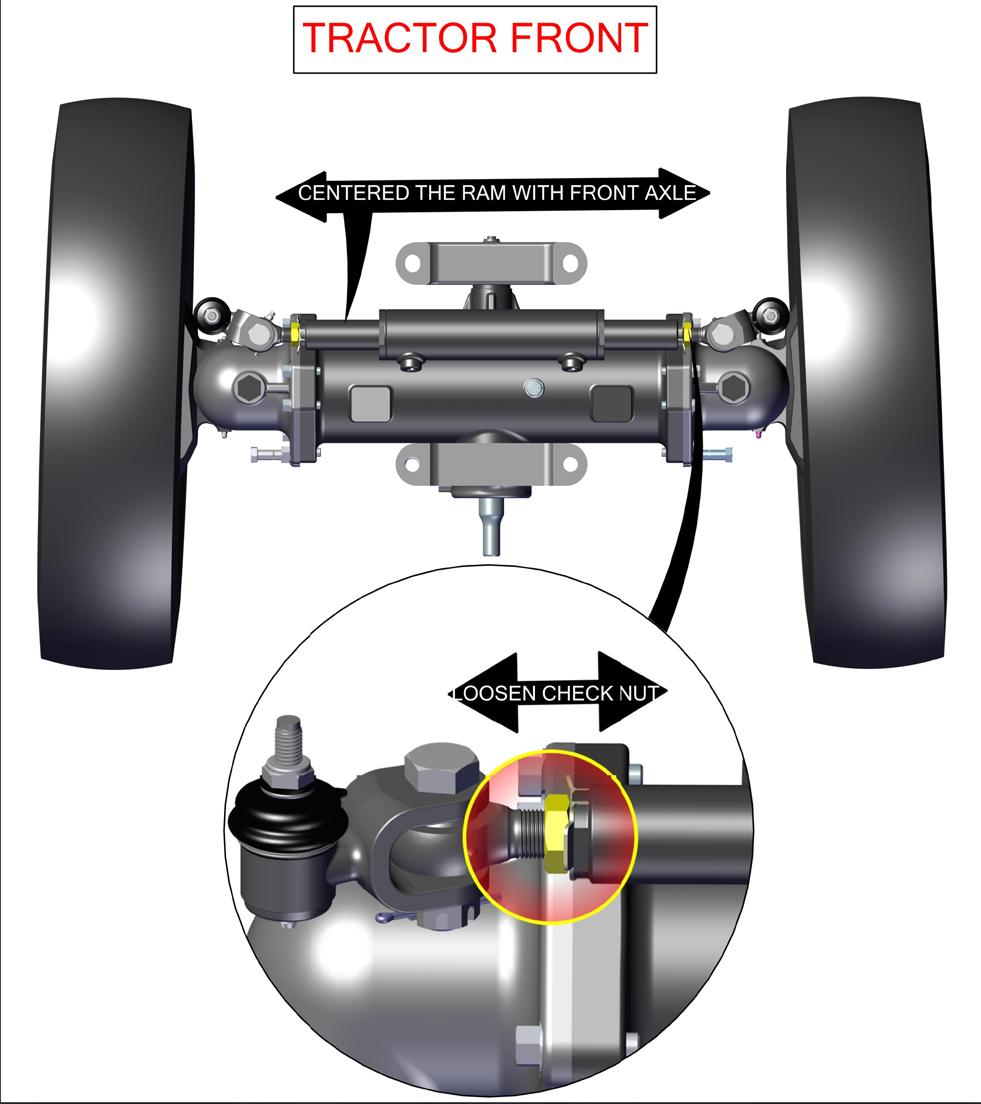
Procedure To Adjust Toe In-:
Loosen check nut of wheel cylinder from both sides andadjust Toe in position of front wheel. While adjusting position maintain center of ram inwheel cylinder with exact center of Front axle position.(Refer image MECHANICAL ADJUSTMENT)
After adjusting the front wheel tread and with allconnections secured, the front wheel Toe-in shall be as follows.
FRONT WHEEL TOE-IN let distance in rear of Front wheel be “X”. Therefore
X= (Y+4) To (Y+6) in mm