2 minute read
G -PERIODIC MAINTENANCE

from Gehl CT6-18 Low Profile CT6-18 Turbo Telescopic Handler Operator's Manual 913223 - PDF DOWNLOAD

G1 -BLEEDING THE FUELSYSTEM
These operations are necessary only in the following cases:
•Acomponent of the fuel system is replaced
•Adrained fuel tank
•Running out of fuel
Ensure that the fuel level in the tank is sufficient and bleed in the following order:
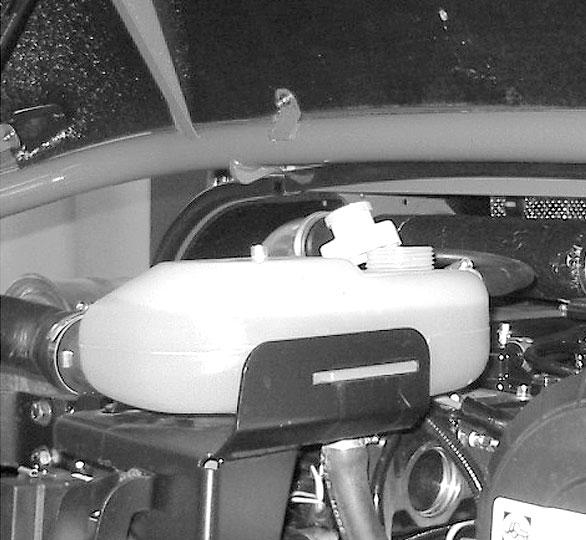
1.Open the engine cover.
2.Turn on the ignition for three minutes, to give the lift pump time to release air from the filter.
3.Switch off the ignition key.
IMPORTANT: Do not engage the starter motor for more than 30 seconds. Let it cool between unsuccessful starting attempts.
Bleeding The Injectors
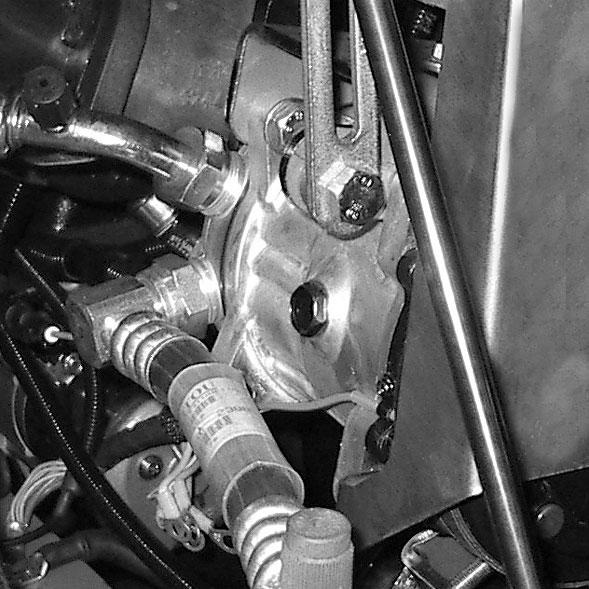
•Remove the injectors cover (1) (fig. G6/1).
•Loosen the high pressure connectors (2) (fig. G6/2) of all the injectors.
•Activate the starter until the diesel fuel flows out free of air at the high pressure connectors (2) (fig. G6/2).
G2 -WHEEL CHANGE
Warning
In the event of a wheel being changed on a public highway, follow this procedure:
For this operation, use a hydraulic jack and a safety support.
•Stop the telescopic handler, if possible on even and hard ground. Apply the parking brake.
•To stop the telescopic handler (see chapter: 4OPERATING AND SAFETYINSTRUCTIONS: G - STOPPING THE TELESCOPIC HANDLER).
•Switch on the hazard warning lights.
•Block the telescopic handler in both directions on the wheel opposite to the wheel to be changed.
•Break loose the nuts of the wheel to be changed.
•Place the jack under the flared axle tube, as near as possible to the wheel and adjust the jack (fig. G1/1).
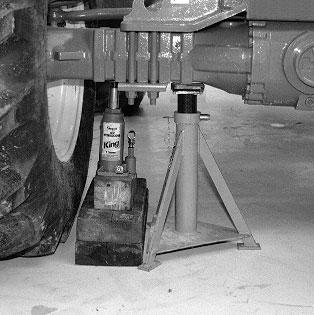

•Lift until the tire comes off the ground, and put the safety support in place under the axle (fig. G1/2).
•Tighten the connections while the diesel fuel is flowing out [tightening torque: 22 ft.-lbs. (30 Nm)].
•The engine is then ready to be started.
•Run the engine slowly for five minutes immediately after bleeding the fuel system, to ensure that the injection pump has been bled thoroughly.
NOTE: If the engine runs properly for a short time and then stops or runs irregularly, check for possible leaks in the low pressure circuit. If in doubt, contact your dealer.

•Completely loosen and remove the wheel nuts.
•Remove the wheel and roll it to the side.
•Install the new wheel on the wheel hub.
•Replace the nuts by hand. If necessary, grease them.
•Remove the safety support and lower the telescopic handler with the jack.
•Tighten the wheel nuts with a torque wrench (see chapter: 6 - MAINTENANCE: A- DAILYOR EVERY10 HOURS SERVICE for tightening torque).
G3 -ADJUSTING FRONT HEADLAMPS
Adjust
RECOMMENDED SETTING
Set the dipped beam to -2% in relation to the horizontal line of the headlamp.
ADJUSTING PROCEDURE
•Park the telescopic handler unloaded and in the transport position and facing to a white wall on flat, level ground (fig. G3).
•Check the tire pressures (see chapter: 1 - SPECIFICATIONS: SPECIFICATIONS).
•Place the shift lever in neutral and apply the parking brake.
CALCULATING THE HEIGHTOF THE DIPPED BEAM (H2):
•h1 = Height of the headlamp in relation to the ground
•h2 = Height of the dipped beam
•l = Distance between the headlamp and the wall
•h2 = h1 - (l x 2/100)