4 minute read
E -EVERY1000 HOURS OF SERVICE

from Gehl CT6-18 Low Profile CT6-18 Turbo Telescopic Handler Operator's Manual 913223 - PDF DOWNLOAD

Perform the operations described previously as well as the following operations:
E1 -FUELTANK CLEAN
Warning
While carrying out these operations, do not smoke or work near an open flame.
Park the telescopic handler on level ground with the engine stopped.
-Inspect the fuel system and tank for leaks.
-In the event of a leak, contact your dealer.
Warning
Never weld while alone, because welding can cause an explosion or a fire.
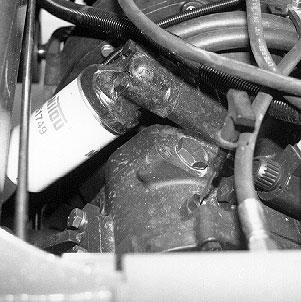
-Place a container under drain plug (1) (fig. E1/1) and unscrew the plug.
-Open the right side cover.
-Remove cap (2) (fig. E1/2).
-When fuel tank is drained, rinse with 2-1/2 gallons (10 litres) of clean fuel at filler port (3) (fig. E1/2).
-Replace and tighten drain plug 1 (fig. E1/1) [tightening torque: 21 to 29 ft.-lbs. (29 to 39 Nm)].
-Fill the fuel tank with clean fuel (see chapter: 6MAINTENANCE: LUBRICANTS AND FUEL) filtered through a strainer or a clean, lint-free cloth and replace the filler plug (2) (fig. E1/2).
E2 -SAFETYDRYAIR FILTER CARTRIDGE CHANGE
-For the disassembly and reassembly of the cartridge, see chapter: 6 - MAINTENANCE: D3 - AIR FILTER CARTRIDGE.
•Gently remove the air filter safety cartridge (1) (fig. E2), taking care to avoid spilling the dust.
•Clean the gasket surface on the filter with a damp, clean lint-free cloth.
•Before mounting, check the condition of the new safety cartridge (see chapter: 6 - MAIN TENANCE: FILTERS CARTRIDGES AND BELTS).
•Install the cartridge onto the filter axis and push it in, pressing the edges and not the mid dle.
NOTE: The period for changing the safety cartridge is given for information only. The safety cartridge must be changed after every two changes of the air filter cartridge
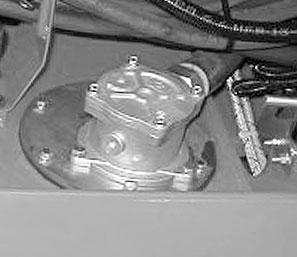
E3 -TRANSMISSION OIL DRAIN
Park the telescopic handler on level ground with the engine stopped and the transmission oil still warm.
Draining The Oil
-Place a container under drain plug (1) (fig. E3/1) and under cover (2) (fig. E3/2) and unscrew the drain plug.
-Open the right side cover.
-Take drain hose (3) (fig. E3/3) and screw to the union on drain port (4) (fig. E3/4).
-Remove cover plate (5) (fig. E3/5).

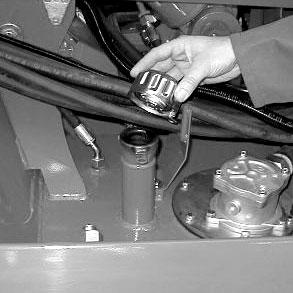
-Remove dipstick (6) (fig. E3/6) and unscrew filling plug (7) (fig. E3/6) to ensure that the oil is drains properly.
IMPORTANT: Dispose of the drain oil in an ecological manner.
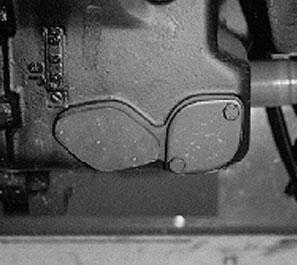
E4 -TRANSMISSION HOUSING STRAINER
CLEAN
CLEANING THE STRAINER
-Remove, clean and put back in place the drain hose (4) (fig. E3/4).
-Remove cover (2) (fig. E2/2) and set aside the o-ring joint and sealing washer.
-Allow the rest of the oil to drain.
-Remove and clean the strainer using a compressed air jet.
-Clean the magnetic section on the plate.
-Replace the assembly and tighten plate (2) (fig. E3/2) [tightening torque: 13 to 23 ft.-lbs. (18 to 31 Nm)].
REFILLING THE OIL
-Replace and tighten drain plug (1) (fig. E3/1) [tightening torque: 25 to 40 ft.-lbs. (34 to 54 Nm)].
-Fill with oil (see chapter: 6 - MAINTENANCE: LUBRICANTS AND FUEL) at filler port (7) (fig. E3/4) and replace the plug.

-Start the engine and let it run for a few minutes.
-Check for leaks from the drain plug and cover.
-Stop the engine, and within five minutes of the engine being stopped, check on the dipstick (6) (fig. E3/4) for the correct level between the MIN and MAX marks.
-Top up if necessary.
-Replace the cover plate (5) (fig. E3/5).
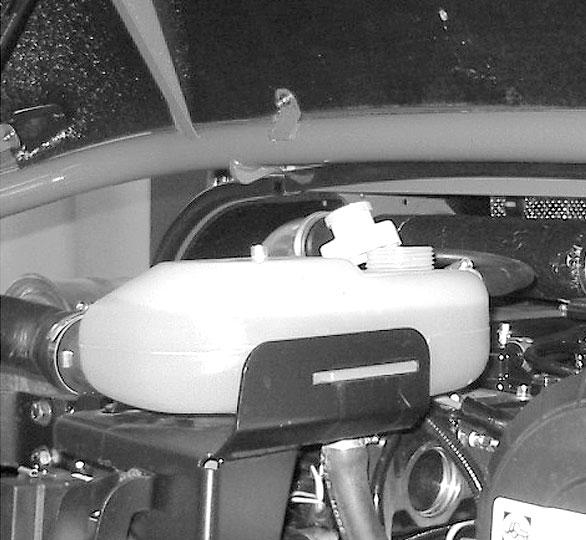
E5 -HYDRAULIC OIL
DRAIN
Park the telescopic handler on level ground with the engine stopped and telescopic boom retracted and lowered as far as possible.
IMPORTANT: Before servicing, thoroughly clean the area surrounding the drain plugs and the suction cover on the hydraulic tank.
DRAINING THE OIL
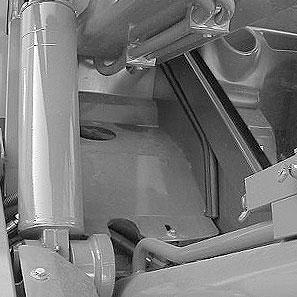
-Place a container under drain plug (1) (fig. E5/1) and unscrew the plug.

-Open the right side cover.
-Remove filler cap (2) (fig. E5/2) to ensure that the oil drains properly.
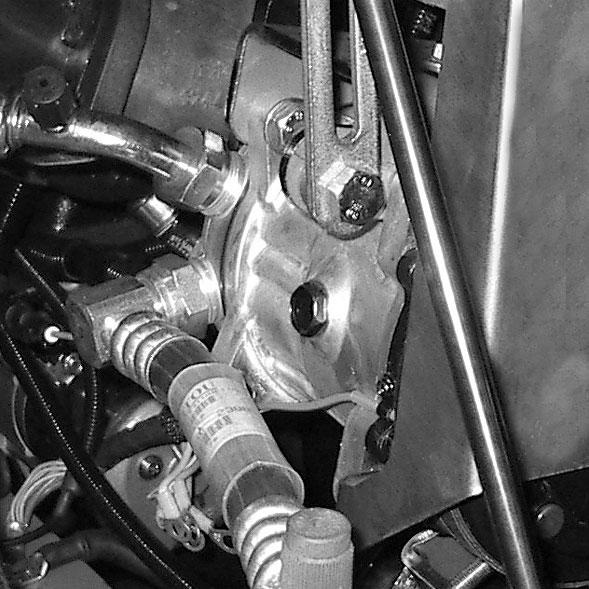
E6 -SUCTION STRAINER FOR HYDRAULIC OILTANK CLEAN
CLEANING THE STRAINER
-Remove the inspection panel (3) (fig. E5/3).
-Remove and clean the strainer using a compressed air jet. Check its condition and replace if necessary (see chapter: 6 - MAINTENANCE: FILTER CARTRIDGES AND BELTS).
- Replace the strainer and tighten the suction strainer cover (3) (fig. E5/3) [tightening torque: 60 ft.-lbs. (81 Nm)] making sure the seal is in the correct position.
E7 -FILTER CAPFOR HYDRAULIC OIL RESERVOIR CHANGE
FILLING THE OILRESERVOIR
-Clean and reinstall the drain plug (1) (fig. E5/1) [tightening torque: 21 to 29 ft.-lbs. (29 to 39 Nm)].
-Fill with oil (see chapter: 6 - MAINTENANCE: LUBRICANTS AND FUEL) at filler port 4 (fig. E5/2).
-Observe the oil level on the site gauge (5) (fig. E5/4); the oil level should be at the level of the center point of the site gauge.
-Check for any possible leaks at the drain plug.
-Replace filler plug (2) (fig. E5/2) with a new filler plug (see chapter: 6 - MAINTENANCE: FILTER CARTRIDGES AND BELTS).
-Close the right side cover.
FILTERING OF THE HYDRAULIC CIRCUIT
-Let the engine run (accelerator pedal at half throttle) for five minutes without using any hydraulic functions on the telescopic handler. Then run the engine for five more minutes while using all hydraulic functions (except the steering system).
-Accelerate the engine at full speed for one minute, then operate the steering system.
-This operation makes filtering of the hydraulic circuit possible through the hydraulic return oil filter.
E8 -SEAT BELT CHECK
SEATBELTWITH TWO ANCHORING POINTS
-Check the following points:
•Tightness of the anchor points on the seat
•Cleanliness of the belt and the locking mechanism
•Actuation of the locking mechanism
•Condition of the belt (cuts, curled edges)
RETRACTABLE SEATBELTWITH TWO ANCHOR POINTS
•The correct retracting of the belt
•Condition of the reel guards
•Roller locking mechanism when the belt is given a sharp pull
IMPORTANT: After an accident that involved stressing the seat belt, replace the seat belt.
Warning
Under no circumstances should the telescopic handler be used if the seat belt is faulty (not latching, has cuts or tears, etc.). Repair or replace the seat belt immediately.
E9 -FRONT AND REAR AXLE PLANETARIES OIL
DRAIN
Park the telescopic handler on level ground with the engine stopped and the planetaries still warm.
IMPORTANT: Dispose of the drain oil in an ecological manner.
-Drain and change both front axle plantaries:
•Place drain plug (1) (fig. E9) in position A.
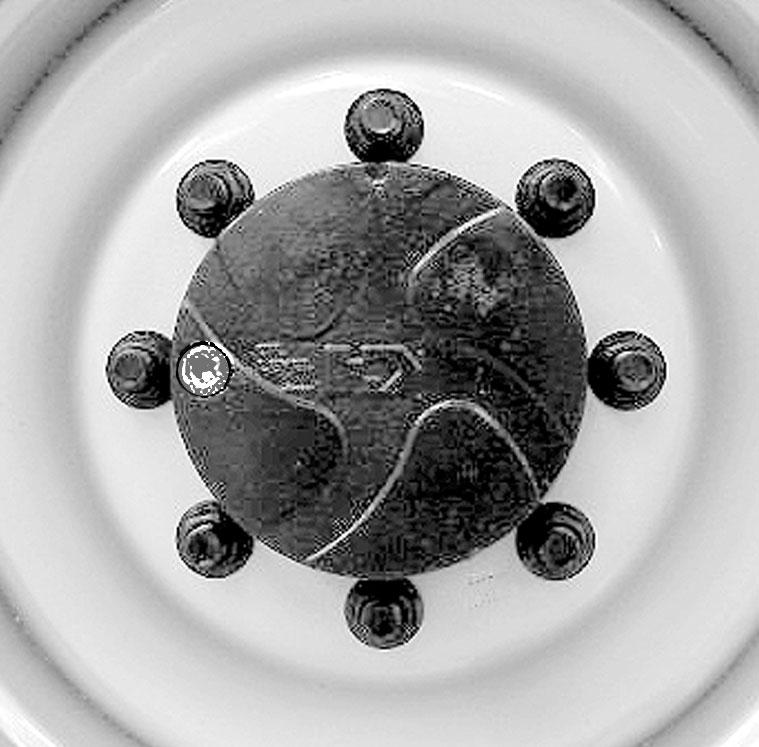
•Place a container under the drain plug and unscrew the plug.
•Let the oil drain fully.
•Place the drain port in position B, i.e., in a level position.
•Fill with oil (see chapter: 6 - MAINTENANCE: LUBRICANTS AND FUEL) by level port 1 (fig. E9).
•The level is correct when the oil level is flush with the edge of the hole.
•Reinstall and tighten the drain plug (1) (fig. E9) [tightening torque: 25 to 36 ft.-lbs. (34 to 49 Nm)].
•Repeat this operation on both rear axle planetaries.