20 minute read
3Controls

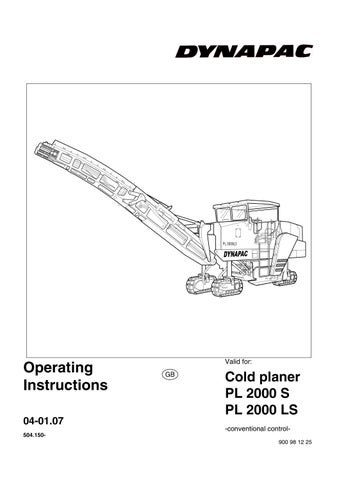
from Dynapac Cold Planer PL 2000 S PL 2000 LS Operating Instructions Manual 900981225 - PDF DOWNLOAD

3.1Control panel
The two control levers and their corresponding function switches are positioned the other way round on the second operating panel!
If overlaps arise during operation, functions such as travel drive, steering and feed are deactivated for safety. (error message). The commands of the operating panel which first addresses the control unit are always those which are undertaken.
ItemDesignationBrief description
1 Control lever upper conveyor
Controls the functions of the upper conveyor: „swivel“, „raise“, „lower“.
Is used after system is unlocked for the purposes of driving, steering and braking.
2 Control lever for travel drive
In conjunction with the appropriate activated automatic function, when the lever is swivelled out, the levelling equipment, water spray and cooling system and the appropriate loading belt is activated or deactivated in neutral position.
3Lighting
For illuminating the operating area when the parking light is switched on
4 Locking mechanism
For releasing and securing the operating panel when raising or lowering for the „standing“ or „sitting“ operating positions.
-To adjust position of detent pin (A), pull to release. The operating panel can only be adjusted if the machine is stationary.
5Securing handle
To release and secure the operating panel when moving the operating panel beyond the outer edge of the machine.
The operating panel can only be adjusted if the machine is stationary.
6Handle
Left and right on the operating panel for support during the positioning process. The operating panel can only be adjusted if the machine is stationary.
7 Anti-vandalism covers
Lockable cover to protect the operating panel. Anti-vandalism covers are fitted on both main control panels and the control and monitoring unit. Always keep all control panels and operating units locked to ensure machine safety while parked.
3.2Operating panels, operator’s control station
ItemDesignationBrief description
Press in an emergency (people in danger, threat of collision etc.)!
1 EMERGENCY STOP button
-When the EMERGENCY STOP key is pressed, the engine, traction units and steering are all switched off (i.e. disabled). It will then be impossible to perform a procedure, such as one on the loading conveyor! Risk of accident!
-To restart the engine, all EMERGENCY STOP buttons must be in the upright position. The traction unit brakes are applied whenever an emergency stop button is pressed!
2 Preselection controller Travel drive
This is used to set the speed which is to be attained when the drive lever is fully extended.
To activate and deactivate the differential lock. Apply when the machine encounters traction problems.
3 Electric differential lock ON/OFF + telltale LED
-Top shift position: Differential lock ON
-Bottom shift position: Differential lock OFF
The differential lock works in transport and working gear.
Note the „differential lock“ indicator lamp
Two switch positions can be selected:
-Hare: Transport speed
-Tortoise: Working speed
4 Travel drive fast / slow + telltale LED
The operating mode can only be changed when the machine is stationary and the drive lever is in its centre position!
When changing from working to transportation speed, the milling drum transmission and raise / lower function are automatically deactivated.
ItemDesignationBrief description
Dual-axis control lever for controlling the traction units. Steering is transmitted electrohydraulically.
-Swivel direction left: the machine is steered to the left via the front axle when steering mode is deactivated and by both axles when cornering mode, crab steering and straight ahead travel are defined.
-Swivel direction right: Turns the vehicle to the right
-Swivel direction forwards: Drives the vehicle forwards direction.
5 Control lever Travel drive
-Swivel direction backwards: Drives the vehicle in reverse direction. During this steering movement, the milling drum drive is disengaged. Travel drive steering movements can be performed in all control lever positions even in zero position.
Forwards and reverse travel is only possible when swivelling the control lever if the slide switch was previously moved out of its neutral position (sensing signal).
The driving speed depends on the displacement time of the control lever Long displacement time = greater speed.
When reversing, an acoustic signal sounds.
Ensure that no-one is standing in the danger area.
6Not in use
ItemDesignationBrief description
Used for electrical locking / unlocking of the travel drives.
To unlock, the switch must be slid forwards or backwards.
When unlocking, the switch slips back into its neutral position once released.
7Slide switch
Each time the control lever is pulled over the zero position, the travel drives are locked again. If the machine’s direction of travel is to be changed, the slide switch must be pressed again.
When pressed, the drive is unlocked for 5 seconds. The slide switch must be pressed a good few moments before the drive lever is moved.
8Horn
Use when danger threatens and as an acoustic signal when setting off!
Makes co-ordinated cornering possible.
9
Co-ordinated front and rear steering+ telltale LED
Front and rear machine steering systems are activated when pressed.
Pushbutton: the activated mode is deactivated when the button is pressed again.
All drive units are swivelled from their present steering position into the straightahead position. The machine is then only steered by the front axle.
10
Straight ahead travel on front and rear drive units+ telltale LED
If a steering movement is undertaken on the front drive units when this function is activated, the system automatically changes over to „Straight ahead travel for rear drive units“ steering mode.
Steering mode is deactivated during a steering movement on the rear drive units.
The function can only be activated with a delay (approx. 1 minute after the machine is started).
Pushbutton: the activated mode is deactivated when the button is pressed again.
ItemDesignationBrief description
The drive units are swivelled to the left while the switch is being pressed and remain in the position reached when the switch is released.
If this function is engaged, steering mode is deactivated.
11 Steering system, rear drive units+ telltale LED
The drive units are swivelled to the right while the switch is being pressed and remain in the position reached when the switch is released.
If this function is engaged, steering mode is deactivated.
Pushbutton: the activated mode is deactivated when the button is pressed again.
If overlaps arise when operating with both operating panels, the commands of the operating panel which first addressed the control unit are always those which are undertaken!
Setting for drive mode of track drives. Front and rear traction units are powered simultaneously.
12 „Crab steering“+ telltale LED
The function can only be activated with a delay (approx. 1 minute after the machine is started).
Pushbutton: the activated mode is deactivated when the button is pressed again.
Both drive units are swivelled out of their present steering positions into the straightahead position. The machine is then only steered by the front axle.
13
Straight ahead travel of rear drive units+ telltale LED
If a steering movement is undertaken by the rear drive units when the function is activated, steering mode is deactivated.
The function can only be activated with a delay (approx. 1 minute after the machine is started).
Pushbutton: the activated mode is deactivated when the button is pressed again.
ItemDesignationBrief description
Dual-axis control lever for moving the lower conveyor:
-Swivel direction left: swivels the upper conveyor to the left
-Swivel direction right: swivels the upper conveyor to the right
-Swivel direction forwards: lowers the upper conveyor
14 Control lever upper conveyor
-Swivel direction backwards: raises the upper conveyor
The upper conveyor is moved continuously while the control lever is swivelled in the appropriate direction.
Ensure that no-one is standing in the danger area beside the upper conveyor.
15Horn
Use when danger threatens and as an acoustic signal when setting off!
16 Speed governor for upper conveyor
To adapt the removal of milled material to the current circumstances (volume of material accumulating, feed speed).
The setting can also be undertaken during milling. Ensure that removed material does not „skid“ off the upper conveyor in an uncontrolled manner!
There is a choice of three switch positions:
-0: upper conveyor transport function OFF
-AUTO: transport function is linked to the control lever. The upper conveyor only starts when the milling operation begins.
17 Function of the upper conveyor+ telltale LED
The upper conveyor stops or overruns when the milling operation is interrupted or ended.
-1: transport function of upper conveyor in forwards direction ON
Moving the switch into the top position switches between the AUTO and 1 functions. If the switch is pressed for longer, the system switches straight to function 1.
There is a choice of three switch positions:
-0: Transport function for lower conveyor OFF
-AUTO: transport function is linked to the control lever. The lower conveyor only starts when the milling operation begins. The lower conveyor stops or overruns when the milling operation is interrupted or ended.
-1: Transport function of the lower conveyor in forwards direction ON
Moving the switch into the top position switches between the AUTO and 1 functions. If the switch is pressed for longer, the system switches straight to function 1.
ItemDesignationBrief description
There is a choice of three switch positions:
-0: Levelling OFF
-AUTO: Levelling equipment engages automatically when the control lever for the travel drive is fully extended (milling mode)
The controller must also be switched to „AUTO“ in order to activate the levelling equipment!
19 Levelling function on left + telltale LED
-1: Levelling equipment ON, Levelling equipment active, responds independently of the control lever
Moving the switch into the top position switches between the AUTO and 1 functions. If the switch is pressed for longer, the system switches straight to function 1.
Only adjustments into the AUTO and 1 switch positions can be made using the connected levelling equipment.
Three switch positions can be selected:
-0: Levelling equipment OFF
-AUTO: Levelling equipment engages automatically when the control lever for the travel drive is fully extended (milling mode)
The controller must also be switched to „AUTO“ in order to activate the levelling equipment!
20 Levelling function on right + telltale LED
-1: Levelling equipment ON, Levelling equipment active, responds independently of the control lever
Moving the switch into the top position switches between the AUTO and 1 functions. If the switch is pressed for longer, the system switches straight to function 1.
Only adjustments into the AUTO and 1 switch positions can be made using the connected levelling equipment.
ItemDesignationBrief description
-All traction units are extended as far as their limit positions for as long as the switch is pressed. The levelling equipment is automatically switched off during this function.
21
Raise/lower machine
-All traction units are retracted as far as their limit positions for as long as the switch is pressed. The levelling equipment is automatically switched off during this function.
The rear traction units are extended / retracted as far as their limit positions for as long as the switch is pressed.
22
Raise/lower rear of machine
The strut towers can be moved separately for maintenance and repair work. The valve for changing over the hydraulic circuits is located under the engine hood in front of the right support strut.
23
Raise / lower machine at front left
The front left traction unit is extended / retracted as far as its limit position for as long as the switch is pressed. When this function is active, levelling equipment is disengaged automatically on the left side.
24
Raise / lower machine at front right
The front right traction unit is extended / retracted as far as its limit position while the switch is being pressed.
When this function is active, levelling equipment is disengaged automatically on the right side.
ItemDesignationBrief description
25
Dust suction system ( ) ON / OFF+ telltale LED
This engages the dust suction system beside the milling section, the material transfer point between lower and upper conveyors and the discharge area on the upper conveyor.
This is used to switch the milling drum transmission on and off.
-Top shift position: milling drum transmission activated
-Bottom shift position: milling drum transmission deactivated
Before the milling drum transmission is activated, check that the machine is not lowered so far that the milling drum is touching the ground!
26
Milling drum drive ON / OFF+ telltale LED
The milling drum transmission can only be activated when the machine is set up as described below:
-Working gear selected
-Drive lever in centre position
-Engine at idle speed
-Milling flap closed
The engine cannot be started if the milling drum transmission is activated!
Three switch positions can be selected:
-0: Water pump OFF
-AUTO: Water spraying system is linked to the control lever. The water pump only pumps once the milling process starts (extend drive lever).
27
Water pump ON / OFF / AUTO+ telltale LED
-1: Continuous water spraying
Moving the switch into the top position switches between the AUTO and 1 functions. If the switch is pressed for longer, the system switches straight to function 1.
This water is definitely not drinking quality!
ItemDesignationBrief description
„Simulates“ the machine's milling while stationary. The engine speed is increased, the AUTO functions
-water pump
28 Set-up mode ( )+ telltale LED
-lower conveyor+upper conveyor
-Levelling equipment can be activated.
The function is deactivated as soon as the machine starts to move.
29
Raise / lower sliding shoe
30 Function Sliding shoe + telltale LED
The sliding shoe is raised or lowered until the upper or lower limit position is reached for as long as the switch is pressed into the corresponding position. Danger resulting from raised loads. Do not enter the danger area.
Two switch positions can be selected:
-0: sliding shoe blocked - remains in the position desired
- ~: sliding shoe in floating position
During milling operations, the sliding shoe should always be in floating position. Under certain working conditions, it may however be possible for the sliding shoe to dig into the substrate. This can be prevented through the use of the blocking or relief function.
The left side board is raised as far as the upper limit position for as long as the switch is pressed.
31
Raise side board on left
If the switch is released or the engine is switched off, the side board automatically lowers again to the lower limit position.
Danger resulting from raised loads. Do not enter the danger area.
32
Raising right side board
The right side board is raised as far as the upper limit position for as long as the switch is pressed. If the switch is released or the engine is switched off, the side board automatically lowers again to the lower limit position.
Danger resulting from raised loads. Do not enter the danger area.
ItemDesignationBrief description
Two switch positions can be selected:
-0: moldboard blocked - remains in desired position
- ~: moldboard in floating position
33
Function Scraper (moldboard)+ telltale LED
During milling operations, the moldboard should always be in float position. Under certain working conditions, it is however possible for the scraper to dig into the substrate. This can be prevented through the use of the blocking or relief function.
34
Raise / lower scraper (moldboard)
The moldboard is raised or lowered until the upper or lower limit position is reached for as long as the switch is pressed into the corresponding position. Danger resulting from raised loads. Do not enter the danger area.
3.3Front operating units
PL2000LS_SBT_conv_front_top.wmf/PL2000LS_SBT_conv_front_ISO.wmf
ItemDesignationBrief description
Press in an emergency (people in danger, threat of collision etc.)!
1 EMERGENCY STOP button
-When the EMERGENCY STOP key is pressed, the engine, traction units and steering are all switched off (i.e. disabled). It will then be impossible to perform a procedure, such as one on the loading conveyor! Risk of accident!
-To restart the engine, all EMERGENCY STOP buttons must be in the upright position. The traction unit brakes are applied whenever an emergency stop button is pressed!
2Horn
Use when danger threatens and as an acoustic signal when setting off!
There is a choice of three switch positions:
-0: upper conveyor transport function OFF
-AUTO: transport function is linked to the control lever. The upper conveyor only starts when the milling operation begins. The upper conveyor stops or overruns when the milling operation is interrupted or ended.
3 Mode of upper conveyor+ telltale LED
-1: transport function of upper conveyor in forwards direction ON
Moving the switch into the top position switches between the AUTO and 1 functions. If the switch is pressed for longer, the system switches straight to function 1.
The upper conveyor only runs in conjunction with an activated milling drum.
4 Reversing mode, upper conveyor
The direction of travel of the upper conveyor is changed over to reversing mode when the switch is pressed.
Once pressed, upper conveyor mode is switched to „0“.
PL2000LS_SBT_conv_front_top.wmf/PL2000LS_SBT_conv_front_ISO.wmf
ItemDesignationBrief description
There is a choice of three switch positions:
-0: Transport function for lower conveyor OFF
5 Mode of the lower conveyor+ telltale LED
-AUTO: Function of the lower conveyor is engaged by moving the travel drive control lever forwards to obtain forwards motion.
-1: Transport function of the lower conveyor in forwards direction ON
Moving the switch into the top position switches between the AUTO and 1 functions. If the switch is pressed for longer, the system switches straight to function 1.
6 Reversing mode lower conveyor
The direction of travel of the lower conveyor is changed over to reversing mode when the switch is pressed.
Once pressed, lower conveyor mode is switched to „0“.
Three switch positions can be selected:
-0: Water pump OFF
-AUTO: Water spraying system is linked to the control lever. The water pump only pumps once the milling process starts (drive lever is extended).
7 Water pump ON / OFF / AUTO+ telltale LED
1: Continuous water spraying
Moving the switch into the top position switches between the AUTO and 1 functions. If the switch is pressed for longer, the system switches straight to function 1.
This water is definitely not drinking quality!
8Not in use
Two switch positions can be selected:
9
10
Selector switch for sliding shoe+ telltale LED
-0: sliding shoe blocked - remains in the position desired
- ~ : sliding shoe in float setting (applied load function or relief)
Raise / lower sliding shoe
The sliding shoe is raised or lowered until the upper or lower limit position is reached for as long as the switch is pressed into the corresponding position. Danger resulting from raised loads. Do not enter the danger area.
ItemDesignationBrief description
Press in an emergency (people in danger, threat of collision etc.)!
1 EMERGENCY STOP button
-When the EMERGENCY STOP key is pressed, the engine, traction units and steering are all switched off (i.e. disabled). It will then be impossible to perform a procedure, such as one on the loading conveyor! Risk of accident!
-To restart the engine, all EMERGENCY STOP buttons must be in the upright position. The traction unit brakes are applied whenever an emergency stop button is pressed!
2Horn
Use when danger threatens and as an acoustic signal when setting off!
There is a choice of three switch positions:
-0: Levelling equipment OFF
-AUTO: Levelling equipment engages automatically when the control lever for the travel drive is fully extended (milling mode)
The controller must also be switched to „AUTO“ in order to activate the levelling equipment!
3 Levelling function on left+ telltale LED
-1: Levelling equipment ON, Levelling equipment active, responds independently of the control lever
Moving the switch into the top position switches between the AUTO and 1 functions. If the switch is pressed for longer, the system switches straight to function 1.
Only adjustments into the AUTO and 1 switch positions can be made using the connected levelling equipment.
ItemDesignationBrief description
Three switch positions can be selected:
-0: Levelling equipment OFF
-AUTO: Levelling equipment engages automatically when the control lever for the travel drive is fully extended (milling mode)
The controller must also be switched to „AUTO“ in order to activate the levelling equipment!
4 Levelling function on right + telltale LED
-1: Levelling equipment ON, Levelling equipment active, responds independently of the control lever
Moving the switch into the top position switches between the AUTO and 1 functions. If the switch is pressed for longer, the system switches straight to function 1.
Only adjustments into the AUTO and 1 switch positions can be made using the connected levelling equipment.
5 Raise / lower machine at front left
The front left traction unit is extended / retracted as far as its limit position for as long as the switch is pressed. When this function is active, Levelling equipment is disengaged automatically on the left side.
6 Raise / lower machine at front right
The front right traction unit is extended / retracted as far as its limit position while the switch is being pressed.
When this function is active, Levelling equipment is disengaged automatically on the right side.
The rear traction units are extended / retracted as far as their limit positions for as long as the switch is pressed.
7 Raise/lower rear of machine
The strut towers can be moved separately for maintenance and repair work. The valve for changing over the hydraulic circuits is located under the engine hood in front of the right support strut.
ItemDesignationBrief description
The side board (on the side on which the operating unit is positioned) is raised as far as the upper limit position while the switch is being pressed. If the switch is released or the engine is switched off, the side board automatically lowers again to the lower limit position.
8Raise side board
The automatic levelling equipment is set to „standby“ while the switch is pressed!
Danger resulting from raised loads. Do not enter the danger area.
Two switch positions can be selected:
-0: moldboard blocked - remains in desired position
9 Selector switch Scraper (moldboard)+ telltale LED
10 Raise / lower scraper (moldboard)
- ~: moldboard in floating position
During milling operations, the moldboard should always be in float position. Under certain working conditions, it is however possible for the scraper to dig into the substrate. This can be prevented through the use of the blocking or relief function.
The moldboard is raised or lowered until the upper or lower limit position is reached for as long as the switch is pressed into the corresponding position. Danger resulting from raised loads. Do not enter the danger area.
ItemDesignationBrief description
Key positions:
-P: Lighting active + warning light can be activated
-0: Ignition OFF
-1: Ignition ON
-2: Start function
1Ignition lock
The engine can only be started when the drive lever is in its centre position, the milling drum is not activated and the switch for raising and lowering the machine is in its neutral position.
Engine starts are permitted once indicator lamps 11, 12, 13, 14 have gone out.
The key can only be removed when in positions P and 0.
There is a choice of three switch positions:
-0: Light OFF
2Light switch
-1: Travel lighting ON (headlights, operating panel lighting)
-2: Work lighting ON (working lights, headlights, operating panel lighting)
Two switch positions can be selected:
-0: Warning lights OFF
3Warning lights
-1: Warning lights (rotary beacon) ON Switch on for safety on roads
Continuously variable engine speed setting (if drive lever is extended).
Min. setting: idle speed
Max. setting: nominal speed
4 Engine speed setting device
The nominal speed is normally set during milling operations, while the speed is reduced during transport operations.
Automatic speed control keeps the set speed constant, even when under load.
ItemDesignationBrief description
5 Error / malfunction retrieval
If an error detected on the engine has been indicated by one of the warning lamps, a code can be retrieved to which a defined error is assigned. Press the switch until the three-digit code has been issued by the warning lamp.
For error code retrieval, see Section on „Malfunctions“!
Error memory:
If several errors have occurred, these are saved for retrieval.
6
Error memory for engine + „Tipptronic“ for engine speed
7 Operating hours counter
-To call up the next or previous error message from the memory, move the switch to the required position.
Display using switch for error / malfunction retrieval.
Tipptronic:
For progressive increase or reduction of engine speed while milling, up/down to max/min speed.
-Actuate switch (5) and set speed using switch (6).
The operating hours are only counted when the engine is running.
Observe maintenance interval. (see chapter F)
8rpm meter
Engine speed display in revolutions per minute (rpm). The speed can be changed using the engine speed adjuster.
The coolant temperature should be between 60°C and 100°C.
9 Coolant temperature
10Fuel gauge
The engine may be damaged if it is continuously operated at too low or too high a coolant temperature. Check coolant temperature gauge frequently.
Shut down engine if the temperature does not match the specified values. Check coolant level.
Always keep an eye on the tank display. Never run the diesel tank empty! Otherwise the complete fuel system will have to be vented.
ItemDesignationBrief description
11
Error message with engine stop (red)
Lights up when a serious error has occurred on the engine. The engine is automatically shut down for safety. As a check, lights up for a few seconds after the ignition is switched on.
Only start the engine once the indicator lamp has gone out.
Indicates that there is an engine error. The machine can continue to be operated on a temporary basis. The error should however be remedied quickly to prevent further damage.
12
Error message (yellow)
13 Maintenance (yellow)
As a check, lights up for a few seconds after the ignition is switched on.
Only start the engine once the indicator lamp has gone out.
Indicates too low a coolant water level in the engine. To prevent damage to the engine, top up the coolant water level straight away as specified.
As a check, lights up for a few seconds after the ignition is switched on.
Only start the engine once the indicator lamp has gone out.
When the ignition has been switched on, lights up until the combustion air in the engine is preheated to the correct temperature.
14
Preheat indicator lamp (yellow)
Only start the engine once the indicator lamp has gone out. This will reduce wear and ensure better starting properties.
Only start the engine once the indicator lamp has gone out.
ItemDesignationBrief description
15Not in use
Indicates that one of the following operating modes prevents the machine from being started up:
-EMERGENCY STOP button actuated
-Lower/raise scraper actuated
16Start inhibit
-Lower/raise sliding shoe actuated
-Raise side boards actuated
-Control lever on upper conveyor actuated
-Raise/lower chassis legs actuated
17
Telltale for scraper (green)
Lights up whenever the moldboard is closed. Travel drive and milling drum transmission cannot be engaged while moldboard is open!
Indicates that the level in the water tank is too low. The water system is shut down!
18
Water system level check (yellow)
Interrupt milling operation and top up water level!
19
Hydraulic tank level check (yellow)
Lights up when the hydraulic oil level in the tank is too low.
Top up hydraulic oil, visual inspection for signs of leakage if needed!
20
Battery charge status check (red)
Must go out after starting at increased speed.
-Shut down the engine if the light does not go out.
-Displays a flashing code if an error has occurred on the travel drive computer. For details of the error message of the travel drive computer, see the „Malfunctions“ section.
21
Fault message „Travel drive“, „Collision message“
22Speed display
-If this lights up continuously, functions such as travel drive, steering and feed have been shut down for safety as a result of overlaps in operations.
To be able to restart, all the relevant operating and control elements must be returned to their zero position.
Indicates the current travel or milling speed in m/min or ft/min.
ItemDesignationBrief description
Lights up whenever the machine exceeds a lateral inclined angle of > 5.5°.
23Tilt alarm
Whenever the tilt alarm is enabled, the levelling function is switched into semi-automatic mode.
26Socket
24Lighting
25Socket
24 volt socket for external consumers such as additional working lights or diagnosis units.
For illuminating the operating area when the parking light is switched on
24 volt socket for external consumers such as additional working lights or diagnosis units.
ItemDesignationBrief description
1 Control unit Moldboard
To set the pressure at which the moldboard slides over the milling lane. The pressure setting determines the extent to which the milling lane is cleared of milling debris.
2 Pressure controller Controls pressure on the scraper (relief or load settings)
3 Preselector switch
-Top shift position: Scraper relief setting
-Bottom shift position: Scraper load setting
-Neutral switch setting: no load/relief applied
4 Control unit Sliding shoe
Used to set the pressure at which the sliding shoe slides over the substrate being planed. The pressure setting determines the response characteristics of the planing surface, e.g. breaking out of segments and plate sections.
5 Pressure controller Controls pressure on the sliding shoe (relief or load settings)
6 Preselector switch
7 Control unit „Rear steering“
-Top shift position: Sliding shoe relief setting
-Bottom shift position: Sliding shoe load setting
-Neutral switch setting: no load/relief applied
To enable external operators to steer the rear drive units.
The drive units are swivelled to the left/right while the switch is being pressed and remain in the position reached when the switch is released.
8 Steering rear drive units
If this function is engaged, steering mode is deactivated.
This function is cancelled if opposing operator instructions occur, i.e. if there is a contrasting overlap with one of the upper control panels.
Press in an emergency (people in danger, threat of collision etc.)!
9 EMERGENCY STOP button
-When the EMERGENCY STOP key is pressed, the engine, traction units and steering are all switched off (i.e. disabled). It will then be impossible to perform a procedure, such as one on the loading conveyor! Risk of accident!
-To restart the engine, all EMERGENCY STOP buttons must be in the upright position. The traction unit brakes are applied whenever an emergency stop button is pressed!