3 minute read
8.Setting

from CLAAS COMBINE VARIANT 260 VARIANT280 ADJUSTING THE ENDLESS BELTS Assembly instructions Manual_DE_EN_

A
B
C 40
41 8.SETTING
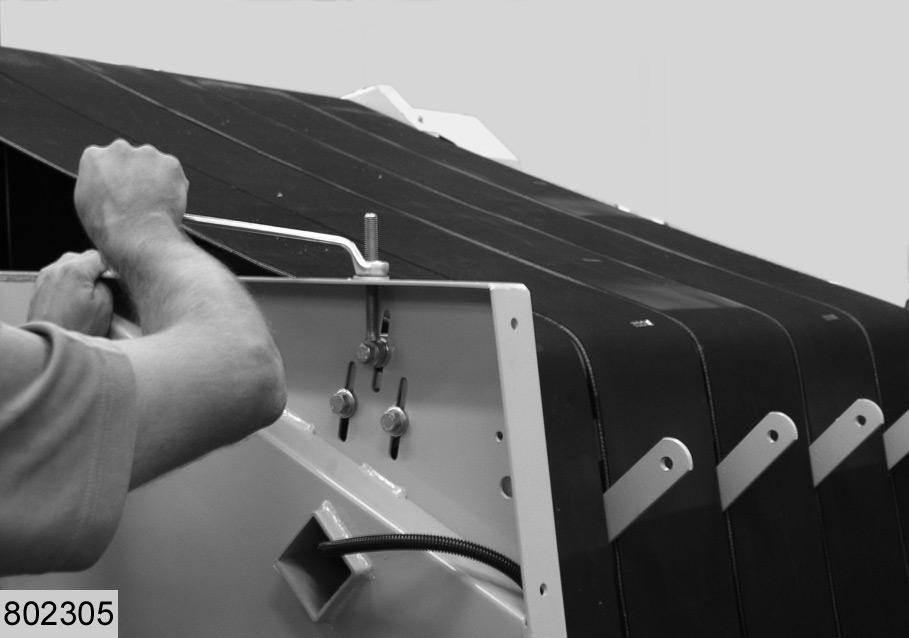
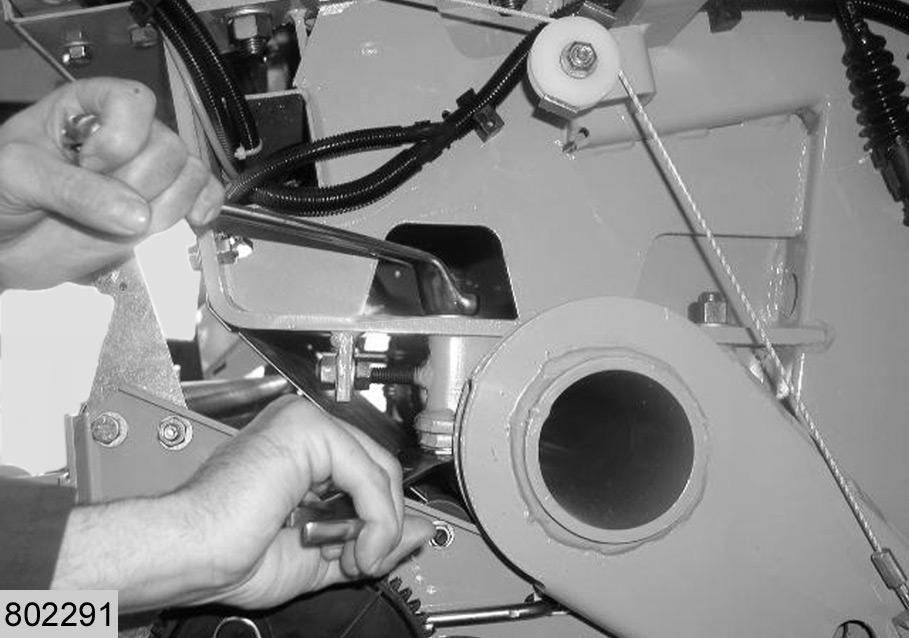
8.1 Adjusting roller 7 – closed tailgate
Slacken the bolts M10 (A) on either side of the machine. Adjust roller 7 by means of the threaded pins on left (B) and right (C) hand side.
Adjustment direction
If the belts drift to the left in the guides of roller 7, raise the roller on the left hand side or lower it on the right hand side, so that the belts run in the middle between the guides.
Note!
r The differences in length between the pins on right and left hand side must not exceed 15 mm.
–Retighten the bolts M10 (A) on either side of the machine. (Fig.40,41,42)
8.2 Checking the adjustments – step 5
Repeat all tests conducted in the step "5. Checking the belt guides". Shut down the machine.
42 8.3 Relieving the belts
Relieve the belts hydraulically (see operating instructions, chapter on maintenance).
H
D
K
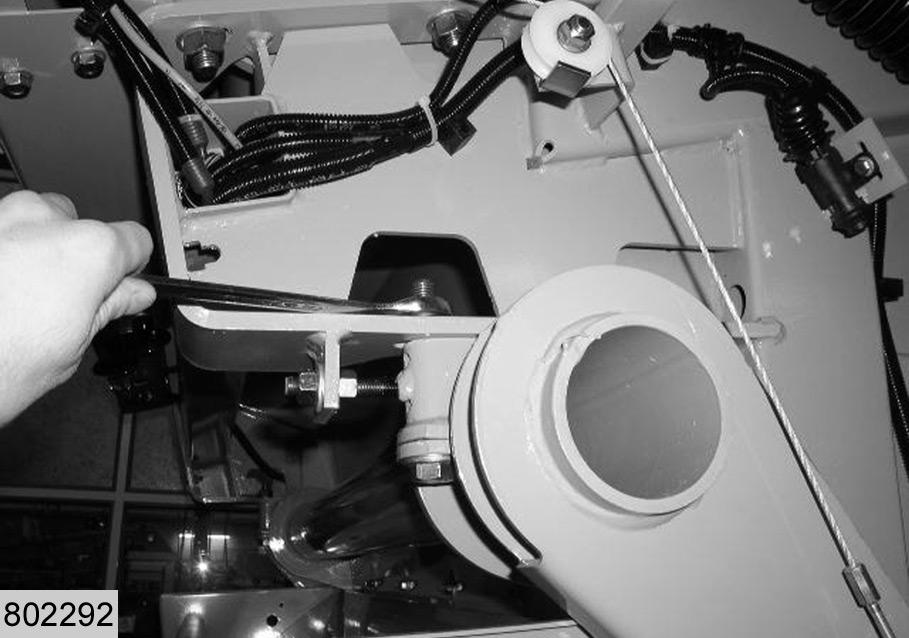
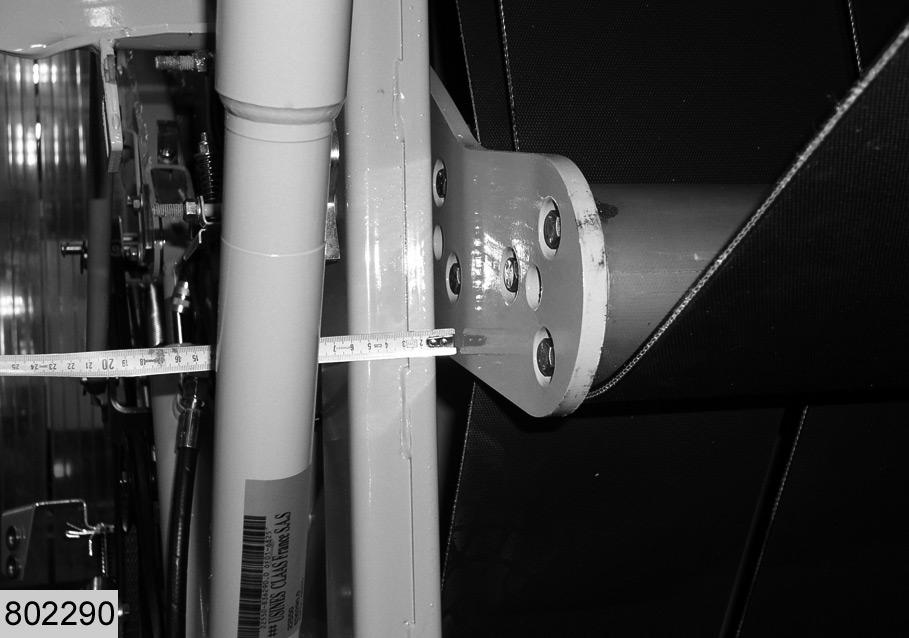
Q D 8.4 Longitudinal adjustment of lower arm – tailgate open (left)
Loosen 4 fastening screws M16 (H) on right and left hand side of machine.
Adjustment direction
If the belts drift to the left in the guides of roller 6 move the lower tensioning arm back.
43
Adjust the lower arm on the front left hand side of the machine with threaded pin (K). (Fig.43,44)
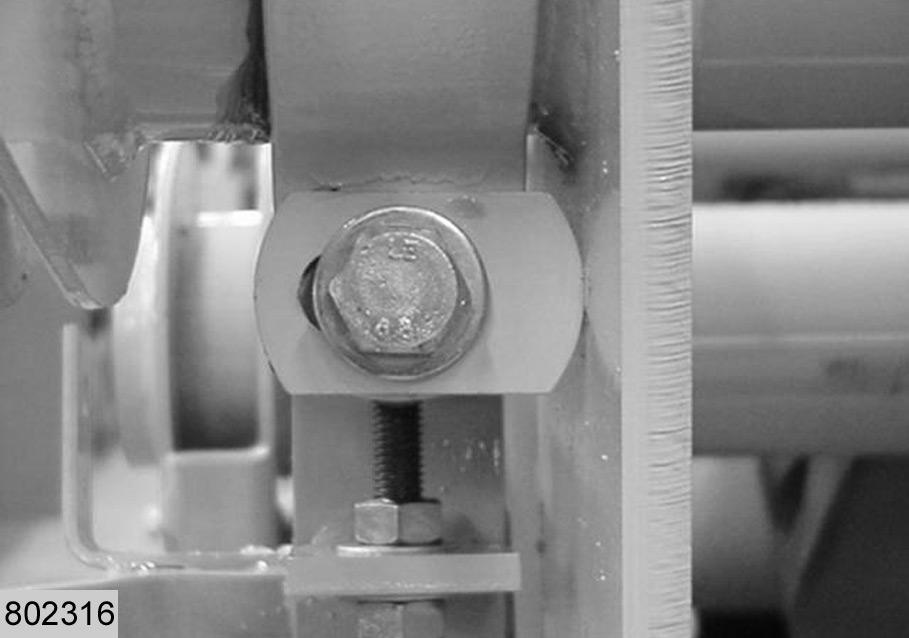
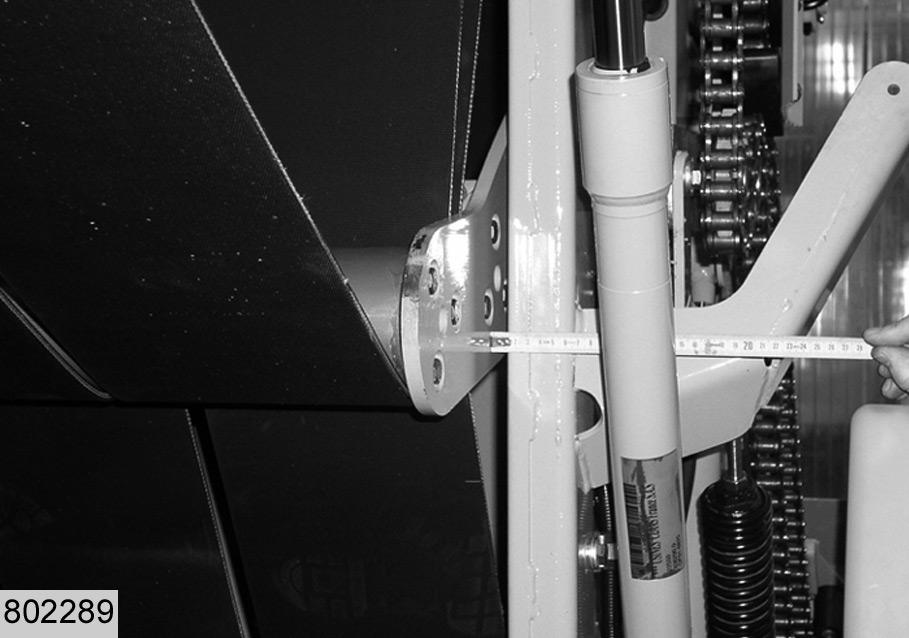
Tighten 4 bolts M16 and check the position of the adjustable stops (Q) during this procedure: –There must be a minimal clearance between the adjustable stops and arm (D): arm and stop must not touch. (Fig.45)
44
45
8.5 Checking the guide – tailgate closed
Repeat all tests conducted in the step "6. Adjustment - closed tailgate".
46
47
Q D
48 8.6 Checking the guide – tailgate open
Repeat all tests conducted in the step "7. Adjustment - open tailgate".
–If the guide is in good condition and all points 7 are correct, continue with step "9. Aligning upper and lower arms". –If the guide is in no good condition and one points 7 is incorrect, continue with step "8.7 Axial adjustment of lower arm".
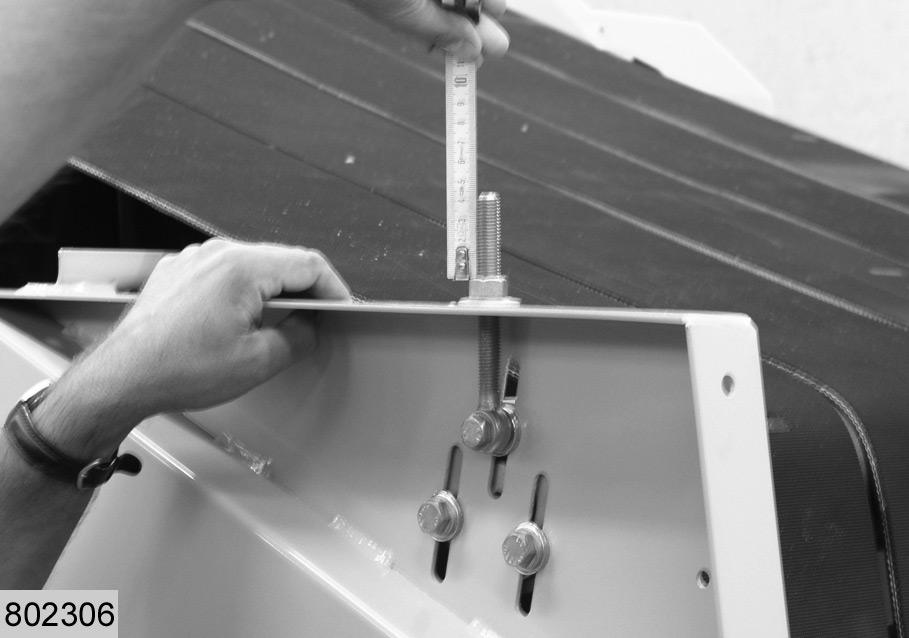
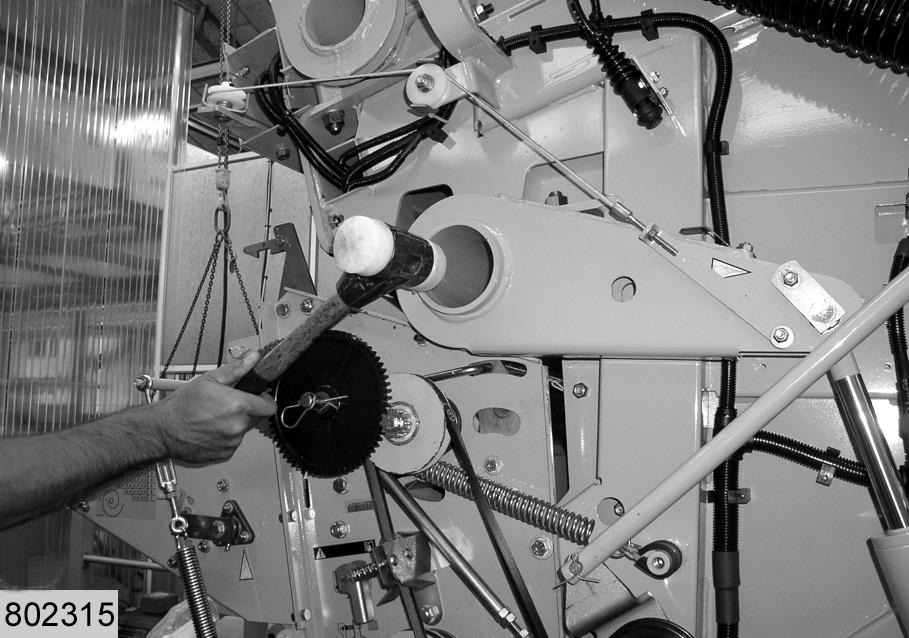
8.7 Axial adjustment of lower arm
Slacken the belts. Loosen 4 fastening screws M16 of the lower arm. (Fig.46)
Adjust the lower arm by using a hammer: –If the belts contact on the left hand side, knock on the lower arm on the right hand side. –If the belts contact on the right hand side, knock on the lower arm on the left hand side.
Tighten the belt. (Fig.47)
Tighten 4 bolts M16 and check the position of the adjustable stops (Q) during this procedure: –There must be a minimal clearance between the adjustable stops and arm (D): arm and stop must not touch. (Fig.48)
A
D
D B
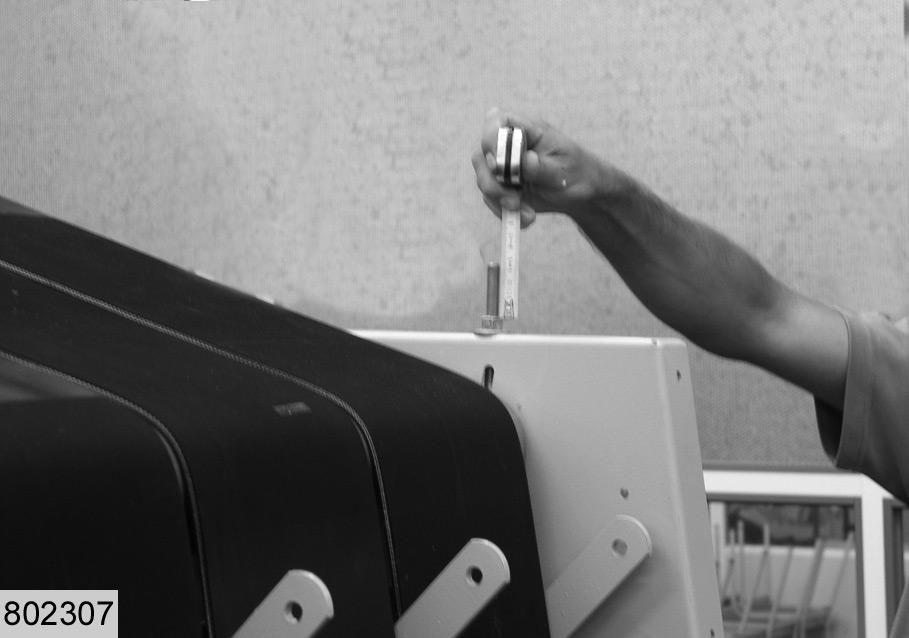
Measure the clearance between left (A) and right (B) hand wall and lower arm (D). The clearance between arm and walls must be at least 3 mm. (Fig.49,50)
49
50
8.8 Checking the guide – tailgate closed
Repeat all tests conducted in step 5.
8.9 Checking the guide – tailgate open
Repeat all tests conducted in the step "7. Adjustment - open tailgate".