2 minute read
t1.3 Muffler, Removing and Installing
Golf 2015 ➤ , Golf Variant 2015 ➤ Engine Mechanical, Fuel Injection and Ignition - Edition 04.2015

d by copyright . Copying fo pivate or commerci al pur po s e s , i Protect
Removing – Disconnect the Oxygen Sensor 1 after Catalytic Converter p a r t o r in w ho le, is not permitted unless authorised by Volkswagen AG. Volkswagen AG does notguarantee or accept any liabilit y wi th res pect t o t h e c o r r e c t n e ss o f GX7- connector -1-. n – Remove the Heated Oxygen Sensor -1- using a tool from the Ring Spanner 7-Piece Set - 3337- . Installing Note the following when installing: Note r in format ion in this document. Copyright by Volkswagen AG. r ♦ Coat new oxygen sensors with an assembly paste. This paste must not come into contact with oxygen sensor slots. ♦ For a used oxygen sensor, only coat threads with hot bolt paste. This paste must not come into contact with oxygen sensor slots. Hot bolt paste. Refer to the Parts Catalog. ♦ The oxygen sensor wire must always be attached at the same location when installing. Do not the electrical wire connection come in contact with the exhaust pipe. eTightening Specifications ♦ Refer to ⇒ “8.1 Overview - Heated Oxygen Sensor”, page 333 .
Golf 2015 ➤ , Golf Variant 2015 ➤ Engine Mechanical, Fuel Injection and Ignition - Edition 04.2015
9 Special Tools


Protected by copyright . Copying for pivate or commerci al pur po s s , i n p a r t r o r in w ho le, is not permitted unless authorised by Volkswagen AG. Volkswagen AG does notguarantee or accept any liabilit y wi th res pect t o t h e c o r r e c t n e ss o f in format ion in this document. Copyright by Volkswagen AG. Special tools and workshop equipment required ♦ Elbow Assembly Tool - T10118e♦ Injector/Combustion Chamber Seal Tool Set - T10133C♦ Torx Socket - T30 - T10347-
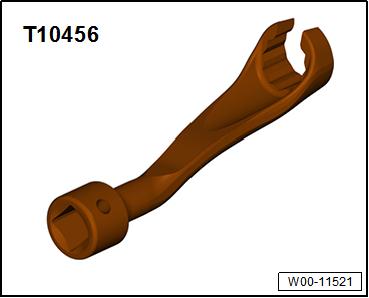
♦ Flare Nut Attachment - 17mm - T10456-


