1 minute read
Replacing the fuel level sensor


Withdrawal
Open the hood. Disconnect the battery. Remove the clamp from the output of the mass of the mass. Place the bottom of the container for drainage. Reset the fuel pressure using a special device KM-J-34730-91 through the test channel.
NOTE Collect leaking fuel into a suitable container - observe safety regulations and national legislation.
Open both rear doors Remove the bench.
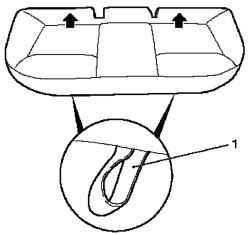
Fig. 2.282. Staples issuance rear
seat: 1 - Staples
2 Pull the clips release (Fig. 2.282). Remove the bracket in the direction of the arrows in 2 places. Remove the bench seat of the car. Remove the cover. Bend the noise isolation and open the lid. Disconnect the wiring harness connector.
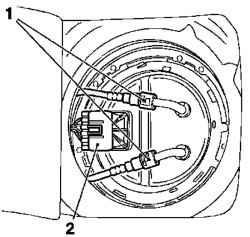
Fig. 2.283. Fuel lines: 1 - fuel, 2 -
Connector
Mark and remove the fuel lines using a special tool KM-796-A (Fig. 2.283). Close the fuel plugs special tool KM 807 and KM 6015.
NOTE Make sure that the special tool KM-797 properly and safely installed.
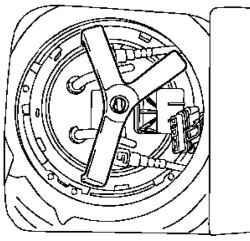
Loosen the locking ring lid using a special tool KM 797 (Fig. 2.284).
NOTE Rotate counter-clockwise.
Carefully remove the module cover up.
NOTE Be careful not to damage the wires and hoses.
Fig. 2.285. Disconnect the wiring
harness connector from the cover: 1 - Connectors
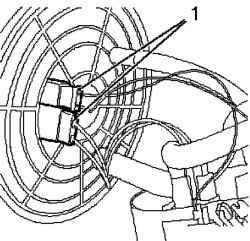
Disconnect the 2 connectors from the wiring harness cover (Fig. 2.285).
NOTE Special Tools KM-6391-1 must be installed so that the sensor in the tank was moved vertically. Install special tool 4 KM-6391-1 and remove the module.
Remove the module using a special tool KM 6391 (Fig. 2.286). Install special tool 4 km 6391 on the module, as shown in Figure 2.286. Release the module by clicking on the special tool and remove it. Remove the module from the fuel tank.
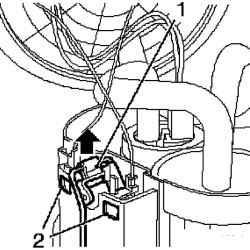
Fig. 2.287. Removing the fuel level
sensor: 1 - fuel level sensor, 2 Holders
Remove the fuel level sensor (Fig. 2.287) and release the holder.


