FERRATE in the BADIA , FASSA and GARDENA Valleys
30 vie ferrate, 11 equipped trails and 2 Alte vie
First edition June 2025
ISBN 978 88 55472 35 7
Copyright © 2025 VERSANTE SUD – Milano (I), via Rosso di San Secondo, 1. Ph. +39 02 7490163 www.versantesud.it
All translation, reproduction, adaptation and electronic registration, either totally or partially, by any methods, are rights reserved for all countries.
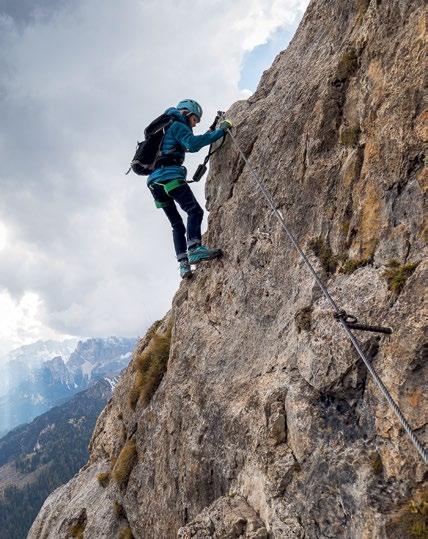
Cover image Via Ferrata Piccolo Cir © Marco Corriero
Text Marco Corriero
Drawings and topos Eugenio Pinotti
English translation Melanie Roberts
Maps Tommaso Bacciocchi © Mapbox, © Open Street Map
Symbols Tommaso Bacciocchi
Layout Francesco Rioda
Printing Tipolitografia Pagani – Passirano (BS), Italien
ZERO miles
This guidebook is homegrown and locally produced
ZERO miles!
This is a “zero-miles” guidebook. It’s locally produced!
It has been compiled by local authors, who live and promote climbing in the area reviewed.
Climbers benefit from local authors: – locals know the latest news and updates – locals don’t promote only the most “commercial” spots – locals invest the revenues from the guidebook in equipping new crags
Local authors promote and respect their area: – they review only the spots where climbing is allowed – they pay attention in the same way to any different spot
– they meaningfully interact with local actors
Note
Climbing is a potentially dangerous sport in which participation is entirely at your own risk. All the information in this guide has been updated based upon information at the time of publication, however it is vital to evaluate every situation yourself before placing yourself in a life threatening situation or to seek the advice of experienced and qualified individuals.
30 vie ferrate, 11 equipped trails and 2 Alte vie ZERO miles
FERRATE in the BADIA , FASSA and GARDENA Valleys
Introduction
I would like to begin the introduction of this guide with the words that one of the greatest mountaineers of all time, Reinhold Messner, used in reference to via ferratas: “I have met so many people enthusiastic about them, that I can therefore only defend them. Within certain limits, of course, and on condition that they are not underestimated”.
Since they became a tourist attraction, via ferratas have polarised opinions between staunch defenders and die-hard detractors. The latter,
including a good number of mountaineers, claim a sort of “paternity” towards the peaks that can be conquered only by those who possess strictly mountaineering skills and competence. They complain that instead routes specially equipped with cables, brackets and ladders, also grant simple hikers the privilege of ascending to certain peaks and being able to enjoy unique views; a sort of “easy way” to reach the summit.
On the other hand, the via ferrata is seen as an opportunity to confront oneself, one’s limits,
savour the thrill of exposure, feel the adrenaline that pervades the whole body, enjoy with the gaze glimpses and horizons of rare beauty, touch the rock and breathe in its characteristic smell, experience verticality. The metal fixtures greatly help progression, this is unquestionable and the presence of the cable allows us, especially in the event of an accident, not to fall into the void but to remain attached with our carabiners. But, as the famous mountaineer said, the enthusiasm that you see on people’s faces is such that you can’t help but be in favour Messner then adds two distinctions: “within certain limits” and “provided they are not underestimated” and these are two very important considerations. As for the limits, my opinion is that it refers to the number of via ferratas and
how they are set up. It is in fact necessary to distinguish between historic via ferratas, dating back to the First World War, and via ferratas built later, specifically for tourist purposes. Indeed, in recent years we have been experiencing a sort of “boom” of new routes. Municipalities and tourist promotion consortia have probably noticed how there is an ever-increasing number of enthusiasts from all over the world and therefore wanted to expand the tourist offer in this way too. New routes have also been created in areas outside the circuit of greatest influx of the Dolomites, in order to attract a growing number of “ferrata climbers” (see for example the new via ferratas in Val di Vizze, Val Venosta and Valle Aurina in Alto Adige or in Val D’Astico in Veneto).
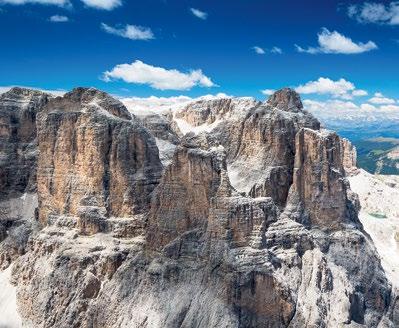
For the Dolomites, being a UNESCO heritage site,
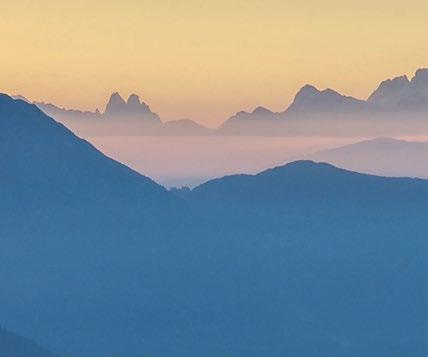
The characteristic skyline of the Dolomites (© M. Corriero)
the situation is a little different as they are more protected; in any case, even here new routes have sprung up in recent years, albeit in smaller numbers, such as the Magnifici 4 in Val di Fassa or the Forcella via ferrata on the Sassolungo group. The second distinction Messner refers to concerns safety, an aspect that is unfortunately often underestimated by hikers. When planning a via ferrata outing, we must always consider four variables: a) our psychophysical conditions at that moment; b) our athletic ability and our experience; c) the weather conditions; d) the correct use of safety devices. Unfortunately, every year we read about interventions by mountain rescuers who recover people who no longer know how to continue, or who are exhausted by fatigue, or who have been “surprised” by the darkness, sometimes putting the safety of the rescuers themselves at risk.
SAFETY AND CHOICE OF ROUTE
Let’s look at these aspects more closely: Psychophysical conditions: via ferratas, especially the difficult ones, require a good level of concentration, even for a long time, and an optimal physical condition. Therefore, if on the day of the via ferrata you do not feel well for any reason or are not in shape, it is better to give up altogether or choose an easier itinerary that requires less effort.
Our technical skills and experience: via ferratas are not for everyone and not everyone can complete a difficult or extremely difficult route. Maybe it’s just a matter of experience, and my advice is to proceed step by step to acquire competence and skill, or a route is objectively too difficult for our level. In this case, always be cautious and never commit to something that is beyond our capabilities. If anything, you can always turn to a certified mountain guide to be accompanied. When I speak of experience, however, I am referring to the ability to know how to move on rough and steep terrain of any nature, whether grassy, rocky or snowy; a via ferrata is in fact often included within a wider itinerary, with several hours of approach or a return that involves climbing narrow passes, crossing ridges and climbing or descending demanding sections that are not equipped. Experience means knowing how to plan your times to avoid finding yourself “out of time” with the risk of darkness, knowing how to give up or go back even halfway, perhaps due to the imminent risk of adverse weather conditions.
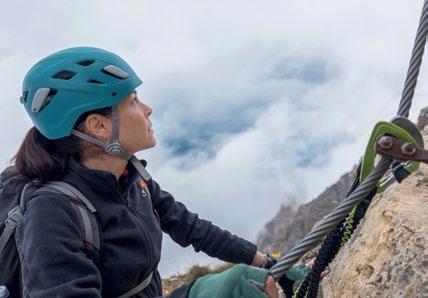
Weather conditions: a rule to follow to safely go on a via ferrata is to leave early in the morning, especially for long and challenging routes. In fact, the probability of local thunderstorms (even very strong ones) is greater in the afternoon, hours in which we should already be on our way back. Never ever find yourself on a via ferrata during a
Via Ferrata Piccolo Cir, with the Sella in the background (© M. Corriero)
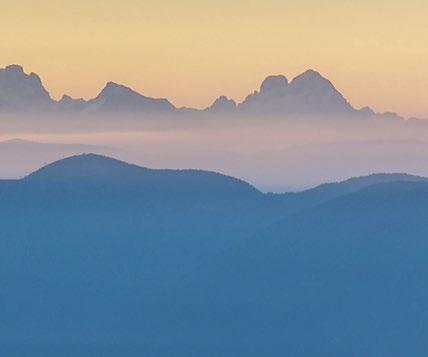
A view of the Isarco Dolomites (© M. Corriero)
thunderstorm! Especially if you are on the summit, on a ridge or in a large open space. Metal is an excellent conductor of electricity and we ourselves become lightning rods in those situations. But even walking on a via ferrata during a downpour is not a pleasant experience: the rock immediately becomes unsafe on the holds, the cable slippery as a bar of soap and the temperatures drop suddenly putting us at risk of hypothermia. So always check the weather forecast and plan the outing based on it. If the weather is uncertain, focus on shorter itineraries, perhaps half a day in order to limit as much as possible the risk of finding yourself on a via ferrata during a storm.
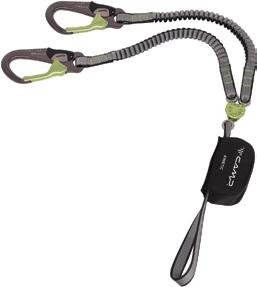
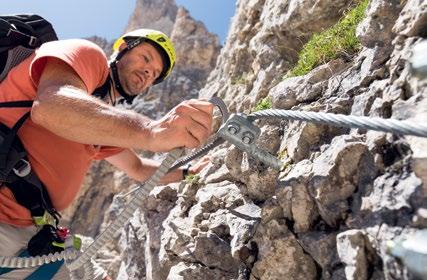
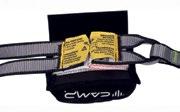
Safety devices: CE UIAA approved helmet, Y-shaped via ferrata set also approved including two elastic lanyards that end with a carabiner, and a dissipator, harness and via ferrata gloves are among the safety devices that we must use to avoid injuries, in the most minor cases, or remaining attached to the cable when falling, thanks to the correct functioning of the carabiners and the dissipator, if something were to go wrong. The gloves offer us a better grip on the cable and prevent abrasions to the hands or the onset of blisters. Finally, the helmet protects the head if you hit the rock and from stones that fall from above, either due to natural causes or the carelessness of via ferrata climbers who precede you and who accidentally move loose rocks (it happens more often than you think).
Clothing is also important: as for a normal mountain hike, it is useful to dress in layers with breathable materials, to have a change of clothes in your backpack, a rain jacket, a sun hat, sun cream, a portable first aid kit, energy food and enough liquids to avoid dehydration. It is preferable to wear comfortable boots, which perform well on different types of terrain and are suitable for progression on via ferratas, i.e. equipped with a “climbing zone” at the tip for greater grip on the rock and if possible a sole with a good grip. A water-repellent coating on the upper is also recommended. For long and complex itineraries, a high boot is better, while for more technical routes, so-called “approach” shoes are also excellent, which leave the ankle free and have a sole with a tread ideal for climbing.
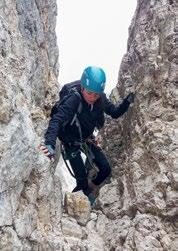
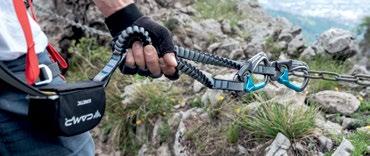
Once you have put on the via ferrata kit correctly, progression should be done by always keeping one hand on the cable and the 2 carabiners attached, while with the other hand you look for holds on the rock. When you come across a bolt between one section of cable and another, you detach the first carabiner and attach it to the next section. Only then can you detach the second carabiner and secure it to the other section. In this way we are always safely attached to the cable. I recommend avoiding proceeding by applying too much leverage on the cable with both hands to avoid “burning them”, as they say in jargon, given that the resistance of the muscles of the upper limbs is much lower than that of the legs. Only in those cases in which there is no other way to proceed, if you do not have
excellent mountaineering knowledge, can you overcome certain particularly difficult passages by applying force with both hands on the cable.
BEHAVIOR ON VIA FERRATA
I would therefore like to summarise some rules of conduct to ensure that the amazing experience of a via ferrata is as safe as possible, for oneself and for others:
1. Never start a via ferrata when the weather is unstable or rain or storms are imminent.
2. Always choose the itinerary according to your strength or ability.
3. Evaluate the travel time of the entire itinerary including the approach and return times, so as not to find yourself still on the road in the late afternoon or evening or, worse, on a via ferrata.
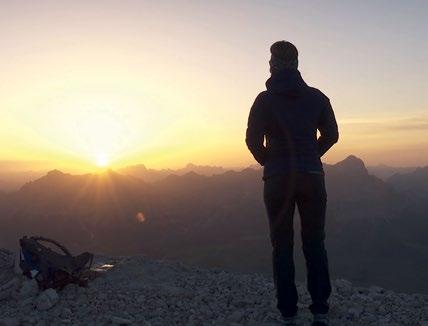
A cold sunrise on the summit of Piz Boe (© M. Corriero)
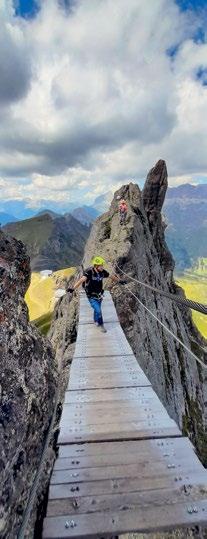
The scenic bridge along the Trincee ferrata (© M. Corriero)
4. Never unhook yourself from the cable to overtake one or more people and then proceed to free climb. (Unfortunately, there are reports cases of in which this procedure has been fatal for some people.) Instead, wait until you reach a point where this is possible with greater safety.
5. Pay maximum attention and concentration even in those sections that are not secured and perhaps exposed: it can happen that, once the cables have finished, you mentally relax, but it is enough to put a foot wrong to slip or fall.
6. Avoid accidentally dropping rocks that could then fall on via ferrata climbers who are below. There are via ferratas where this risk is higher than in others (e.g. the Finanzieri and Kaiserjäger via ferratas).
7. Always use safety and self-belay devices when on a via ferrata: it is not uncommon to see tourists ascending or descending even challenging equipped routes without helmets, ropes and carabiners, putting their own and others’ safety at risk. I happened to witness a situation like this last season on the Finanzieri: two tourists who were walking the route in the opposite direction of travel and without knowing its difficulty, and without any device, relying on “good luck” and an optimistic spirit of adventure.
As for point 1, it is worth stopping and looking more closely at the subject of thunderstorms; when the weather is unstable, lightning represents the greatest danger. Let’s see why: mountain areas are more likely to be struck by lightning, both because the rocks and slopes become the trigger point for convective air movements, thanks to the greater heating of the sun compared to the surrounding air, and because the peaks are located at a shorter distance from the base of the clouds and are therefore struck more often. It is however possible to predict the risk of lightning in the area where we are with a certain, albeit brief, advance notice: you may hear crackling sounds in the air or buzzing in metal equipment (such as summit crosses) and your hair becomes electrified. These are all signs of an imminent risk of lightning. You need to quickly lower your altitude, abandoning ridges, gullies, peaks and exposed slopes and avoid having your
body be the highest thing nearby. Avoid taking shelter under trees but seek shelter in depressions in the ground (holes, hollows), assuming a crouched position and with feet together. Caves are also fine, as long as they are deep enough and without leaning on the internal walls if damp, or any artificial shelter you come across (shelters, bivouacs, ruins). If we are in a group it is
necessary to separate and adopt the aforementioned individual measures (staying in a group increases the risk of being struck due to the “herd effect”). If we are unfortunately on a glacier or snowfield, move immediately to the outer edge of the expanse. Carabiners and cell phones do not attract lightning and therefore we can keep them with us, as long as they are not in contact with
the skin because, if they are crossed by electric currents, they overheat and risk burning us. Finally, the danger is over when you no longer hear thunder for about half an hour.
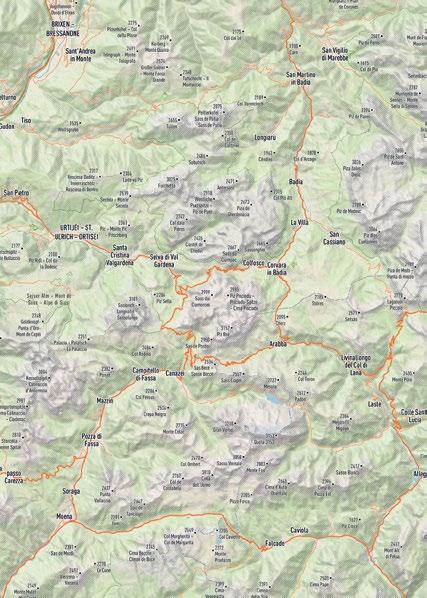
THE TERRITORY
This guide describes 43 itineraries, including via ferratas and simple equipped paths, present in
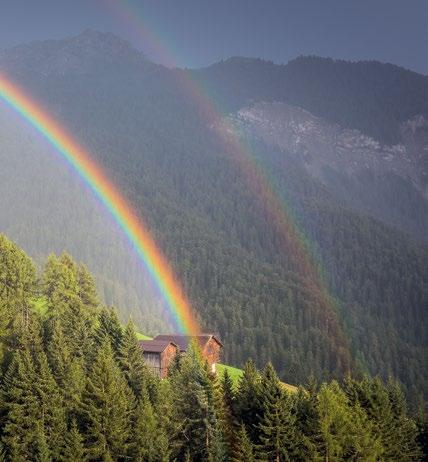
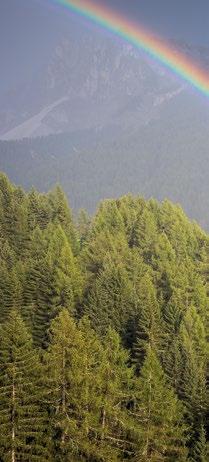
A beautiful rainbow in Val di Funes (© M. Corriero)
the mountain groups of the Val Gardena – Alpe di Siusi, Val Badia and Val di Fassa areas. Some routes, despite being just outside these geographical boundaries, have been included in the guide because they are of particular historical or panoramic interest, or because they are very famous among via ferrata enthusiasts. The three valleys are all native speakers of Ladin, although it must be said that each valley speaks a different Ladin: in fact, there is a Gardena language, a Badia language and a Fassa language. The inhabitants are all trilingual and also speak Italian and German correctly. The valleys have a strong association with international tourism, especially for winter sports, and are therefore equipped with a large network of cable car, which allow transport from the valley bottoms to the mountain pastures and connect the valleys to each other (see the Sellaronda circuit). In summer, in addition to the via ferratas, there is a vast choice of hiking trails for enthusiasts of all levels. A large number of huts and refuges are popular destinations for food and wine enthusiasts or simple support points for
long excursions and climbs. In recent years, the world of cycling tourism has had a huge boom and interesting trails have been set up for enthusiasts of this sport from all over the world. The three valleys are embellished by some of the most famous and renowned mountain massifs, such as the Marmolada, Catinaccio, the Odles, the Sassolungo and the Sella groups, which draw their territorial borders and it is on these mountains that some of the most beautiful via ferratas in the Dolomites have been equipped.
THE DIFFERENCE BETWEEN A VIA FERRATA AND AN EQUIPPED TRAIL
The CAI officially speaks of via ferrata in these terms: A set of structures and equipment fixed and/ or artificially created on a rock face to facilitate safe climbing. This action, without the presence and use of artificial structures, would require the knowledge and use of roped climbing techniques with personal individual mountaineering equipment (rock pitons, ropes and carabiners) or free. An equipped trail also includes metal equipment such as ropes, brackets and ladders but, and here is the difference, if they were not
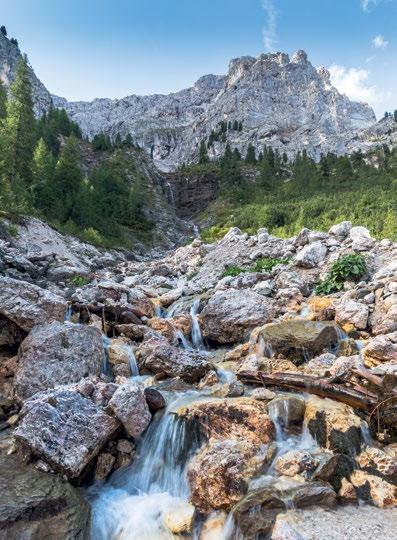
Equipped trail on the Scalette (© M. Corriero)
there, it would not require climbing techniques or mountaineering equipment to proceed. The equipment on this type of trail is intended to increase safety (for example in difficult weather conditions such as snow, ice, slippery rock, etc.) and to protect even in horizontal but exposed or dangerous sections. Finally, on an equipped trail, the secured sections are generally short and minor compared to the main trail.
In a via ferrata, on the other hand, the development is mainly vertical, except for the “ridge” ferratas, and can keep the hiker busy for several hours. It can have exposed and overhanging passages and requires good arm strength.
CAN VIA FERRATAS ALSO BE DONE DOWNHILL?
The answer is ambiguous, in fact the answer must be: “it depends”.
Generally speaking, the direction of travel is uphill, except for those cases in which access to the summit and the return must be done along the same route (see Sass Putia or Piz Conturines), or in the case of ridge via ferratas where it is possible to travel them in both directions (see Cresta del Masarè or Laurenzi). Nobody prevents you from tackling them downhill, but some routes explicitly place a sign at the end of the ropes that prohibits descending for safety reasons and to avoid overcrowding along the route (see Forcella del Sassolungo). Since from a technical point of view, tackling a via ferrata downhill is more difficult than uphill, for routes classified as “very difficult” or “extremely difficult” (D; E) it is absolutely not recommended to go in the opposite direction (see Magnifici 4, Piazzetta or Tomaselli).
Carefully evaluate your own abilities before descending those considered “difficult” (C). For all the others, it is possible to travel in the opposite direction, always paying attention to your own safety and that of others. The Alpine rescue team has had to intervene to recover some inexperienced people no longer able to proceed along the descent route taken by mistake, due to overestimation of their own abilities or lack of knowledge of the route (more than once for example on the Piazzetta via ferrata).
CLASSIFICATION OF VIA FERRATAS
There is no single classification scale for via ferratas and equipped paths, but there are sev-
eral: French, Italian, German and Austrian. In addition, sometimes in the descriptions other scales created by the authors which follow their personal classification criteria, are added. For example, the Alpine guides of Cortina d’Ampezzo provide for the division of the routes in their area into four levels: beginner, intermediate, advanced and expert. However, we all agree on one thing: the via ferratas can all be classified as EEA, i.e. paths for Expert Hikers with Equipment, as the CAI explains well. Those who frequent via ferratas (of any level) should therefore be expert hikers capable of moving easily on any type of terrain: steep and slippery slopes, scree and short snowfields. They should also be able to orient themselves on unmarked paths and on vague trails, with good physical preparation, no fear of heights and perhaps capable of climbing on easy rocks of grade I or II.
Returning to the classification of via ferratas, this guide follows the Austrian five-level scale from A to E, because it is particularly intuitive and because some of the latest new generation via ferratas have a useful descriptive table of the
A crack must be surmounted free climbing; equipped path at Passo Santner (© M. Corriero)
route at the start, the difficulty of which is expressed according to the Austrian scale (see for example the Forcella del Sassolungo via ferrata or the one at Piz da Peres).
Here is the description of the scale that I will adopt in this guide:
A = EASY equipped route with moderate exposure and long walking sections. Fixed protections are mainly metal cable and/or brackets used only to increase safety.
B = MODERATELY DIFFICULT short via ferrata with low exposure which develops between saddles, chimneys and short vertical sections where cables, brackets and ladders aid progression.
C = DIFFICULT via ferrata of medium or long duration that requires good physical condition and reasonable technique. The route is often vertical and sometimes with short overhangs.
D = VERY DIFFICULT exposed and vertical via ferrata, with several technical passages that require experience and any overhangs equipped to the minimum necessary. Sometimes the entire route is equipped with only a fixed cable. Excellent psychophysical condition is required.
E = EXTREMELY DIFFICULT very exposed via ferrata that requires excellent progression technique, sometimes with hard sections even on overhangs. The verticality is constant even for long stretches. Excellent psychophysical condition required. A short lanyard is recommended to be able to stop in the most difficult sections. For each itinerary in this guide, a general description of the via ferrata is included, the road access to the starting point, a description of the approach, a detailed description of the development of the route with intermediate times and altitudes and, finally, final notes commenting
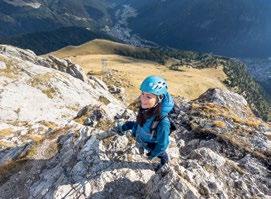
Amidst the clouds climbing Piccolo Cir (© M. Corriero)
on the route, with information on the state of the equipment, any dangers or difficulties that may be encountered. A summary table includes all the main data of the via ferrata such as: the technical difficulty (Austrian scale A to E), exposure, physical effort and environmental difficulties (all expressed on a scale of 1 to 5), the maximum altitude reached, the difference in altitude, walking times and the recommended period of the year.
As for environmental difficulties, it is worth spending a few words to understand what we are talking about. I have taken into consideration these very important factors that are added to the purely technical difficulty of a via ferrata:
- altitude at which the itinerary develops;
- isolation of the area where the via ferrata is located;
- difficulty in orientation (poor signing) or in weather conditions (fog, rain, snow);
- presence or absence of support points (refuges, bivouacs);
- presence or absence of particular objective dangers (falling rocks, loose or treacherous terrain, free climbing passages of grade I or II).
The spectacular Sella Towers (© M. Corriero)
Technical notes on via ferrata progression
Via ferratas are pre-equipped routes that wind vertically or almost vertically on rock faces with different types of progression, difficulty and levels of construction safety. With regard to these factors, via ferratas can be classified based on their difficulty in terms of physical effort and environmental exposure, but also based on their level of safety for the type of anchors present and their correct positioning.
If with respect to the first point, the one regarding physical difficulty, users of via ferratas are quite aware of the differences between one route and another, with respect to the safety and quality of the anchors, however, there is a lot of “non-awareness” and lack of technical knowledge of the elements inherent in a possible fall from a height.
ELEMENTS RELATING TO FALLS WHILE CLIMBING
To develop awareness of how to move on a via ferrata, it is good to remember one point. The moment a body falls in space, it incorporates energy and this inconvenient energy must be managed at the moment of impact. We will now look at some very important technical terms such as impact force and fall factor, typical of climbing, but also important on a via ferrata.
By impact force we mean the stress that a body undergoes after a fall as a result of the energy trapped during the fall. This force can be high or low, depending on whether it remains totally incorporated into the falling body or whether it is passed and dissipated partially or totally to other elements capable of absorbing it. It is quite intuitive to think about the differences that there can be between bungee jumping with an elastic cord, as is practice, or with a metal cable...
The fall factor, on the other hand, is an index used to quantify how impactful a fall is and its
severity; in climbing, in theory it is between 0 and 2. The higher the value, the more severe and dangerous the fall will be.
The fall factor is the ratio between the height of the fall and the length of the rope
This happens in climbing, where elastic ropes
of considerable length are used to progress. Here, in fact, the severity of the fall does not depend so much on the height of the fall itself, but on how much rope there is below the climber and how much the rope is able to absorb the energy that the climber acquires during the fall.
In the previous image we can see two examples of the same height of fall but different lengths of
rope and the effects with respect to the fall factor. In the second case, even though the height of the fall is the same as the first, that is 4 meters, the consequences in terms of fall factor are totally different and the climber’s body undergoes very high stress levels (almost certainly traumatic).
This is what happens when we climb with a rope, a case in which, in addition, the dynamic counterweight of the belaying partner significantly lowers the fall factor. But on a via ferrata we do not have a dynamic rope, a very useful tool capable of absorbing the impact force, but rather a steel cable.
l’unico elemento in grado di generata dalla caduta, è il DISSIPATORE funziona un dissipatore da ferrata ? funzione di assorbire energia in modo arrivare alla rottura delle sue componenti rimanere sempre ancorati alla linea
absorb this force, while we progress attached to a steel cable positioned on hard and compact rock?
When we are on a via ferrata, the only element capable of absorbing the energy generated by the fall is the via ferrata dissipator. But how does a via ferrata dissipator work?
The dissipator has the function of absorbing energy progressively, without breaking its components and therefore allowing you to always remain anchored to the safety line.

FALL FACTORS AND IMPACT FORCE IN FERRATA
dissipatore è composto da una fettuccia cucita, in grado se trazionata di essivo fino ad 1,5m e di assorbire
durante una caduta in ferrata. in considerazione nel momento in ferrata, che il allunga fino a 1,5m a seguito di altezze di caduta elevata e molta energia E’ quindi importante comprendere un ulteriore elemento teorico, ovvero TIRANTE D’ARIA. Per tirante d’aria si intende lo nché una
considerando gli allunghi di eventuali sistemi di comporti l’impatto contro ostacoli.

Let’s now see what happens when a fall occurs on a via ferrata. The physical principles of a fall are the same as those of climbing, that is, our body acquires inconvenient energy that it must then transfer and dissipate to something. The more elastic, and therefore able to absorb energy, the element to which our body transfers the blow, the less the consequences will be for us. Jumping and landing on a comfortable spring mattress is very different from landing on a hard slab of rock. But when we are on a via ferrata, what elements do we have to
dalla lunghezza dei singoli o dei punti in cui il cavo della ferrata è Maggiore sarà la distanza tra di essi e maggiore dalla caduta e la necessità del dissipatore di a Ipoteticamente i costruttori di ferrate di questi elementi, ma non sempre è avvenuto così in passato. citate all’interno di questa guida ed emanate dal Alpine Italiane nel 2016 hanno cercato di di ferrate di tener conto di questi elementi. ofondire l’argomento è possibile scaricare il testo indirizzo email: https:// www.guidealpine.it/assets/ - G u i d a - p e r- a t t re z z a t u r a - d e i - s i t i - n a t u r a l i - p e rcorsi-attrezzati-SIAE.pdf.
4 m


attualmente non tutte le ferrate sono concepite in ottica moderna tenendo elementi quali tiranti d’aria ecc, sia per anzianità di realizzazione o per mal frazionamenti. Da qui anche il motivo di aver a ffiancato alla scala di di fficoltà bontà di realizzazione. Scala che si spera non sia più necessaria tra qualche estyling che sta avvenendo.
To do this, the dissipator is made of a ribbon folded several times and sewn, which, if pulled, can progressively lengthen from 1.5m to 2.5m (depending on the model) and thus absorb the impact.
This is what happens during a fall.
We must therefore take into account, when a fall occurs on a via ferrata, that the dissipator
set lengthens up to 2.5m following a long fall and there is a lot of stored energy (extreme case). It is therefore important to understand a further theoretical element, namely the definition of clearance. By clearance we mean the space needed so that a fall from a height, considering the length of any dissipation systems,
does not result in an impact against obstacles. In a via ferrata, this depends on the length of the individual sections, or the points where the cable of the via ferrata is fixed to the rock. The greater the distance between them, the greater the force generated by the fall and the
To reiterate, currently not all via ferratas are designed with a modern perspective, taking into account elements such as clearance, etc., either due to the age of construction or poor positioning of the divisions between sections.
EQUIPMENT REQUIRED FOR VIA FERRATA
need for the dissipator to extend to absorb it. Hypothetically, via ferrata builders should take these elements into account, but this has not always been the case in the past. The guidelines cited several times in this guide and issued by the College of Italian Alpine Guides in 2016 have tried to raise awareness among via ferrata builders in taking these elements into account.
If you would like to delve deeper into the topic, you can download the full text at this address: https://www.guidealpine.it/assets/doc/professione/Linee-Guida-per-attrezza-dei-siti-naturali-per-arrampicata-e-dei-percorsi-attrezzati-SIAE.pdf.
To be able to move along a via ferrata, a few but important pieces of equipment are needed. Let’s look at them in detail: first of all, you will need a certified mountaineering harness, which can have a vertical safety ring, like those used for climbing, or a horizontal one like those used for via ferrata.
Warning: harnesses, like all textile or plastic components, in mountaineering normally have a maximum life of 10 years! Do not use textile material beyond this date, even if it is still packaged and has never used before! (Always follow the manufacturer’s instructions, which can lengthen or shorten this duration).
You will then need a helmet approved for mountaineering, which is also affected by the time limits of the harness.
The same considerations must be made for the dissipator kit, an element capable of absorbing the fall, as seen above.
The use of gloves on a via ferrata is very important, both for comfort when pulling metal cables, but also for safety in the event that parts of the cables are damaged and therefore capable of cutting your hands if pulled. It can be very useful to have an additional carabiner to place in the appropriate ring of the dissipator kit, for any rests during progression. Be careful, however, to always position the gear used for any rests upstream of the dissipator
and never downstream, towards you, because, if badly positioned, the dissipation effect of the kit itself is nullified! Additional gear and safety devices can be used by expert users in the management of particular cases, such as accompanying children on a via ferrata.
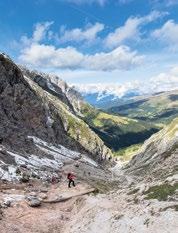
APPROACH
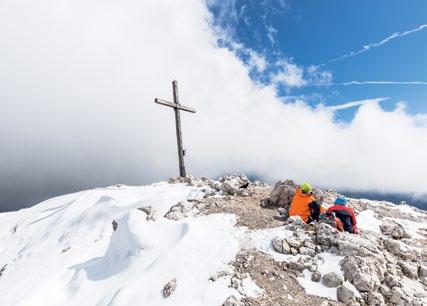
From the pass, follow the signs towards Munt de Fornela and Sass de Putia (signpost no. 8A) on a wide track with a moderate slope. Pass a series of huts until you emerge onto Pra de Putia, a large expanses of pastures beneath the slopes of the severe north-west faces of the massif where you can also find the Fornella hut (2065m), a popular destination for many tourist families. You continue to the right crossing the meadows until the path narrows, having to cut across the entire western side of the mountain along a series of scree slopes. A steep descent leads to the base of the col Forcella de Putia, joining path no. 4 (Altavia trail no. 2) that comes from the valley floor (2091m; 0h40'). You then climb the steep col until you emerge onto the south-east side of Sass de Putia (2358m; 0h40'). On the right, continuing on path no. 4, you quickly reach the Genova refuge (2300m) while turning your gaze to the left the slow and tiring approach to the top of the mountain along its entire southern side (signpost no. 4B) starts. The climb becomes increasingly tortuous along the steep grassy slope to give way to an increasingly rocky and detrital base until you reach a wide saddle at an altitude of 2760m where, with a short diversion, it is possible to reach the anti-summit called “Picia Putia” (Little Putia, 2813m; 1h) where a wooden cross is also fixed. From here you can perfectly see the entire rocky block of the main peak that rises above the saddle.
DESCRIPTION OF THE EQUIPPED TRAIL
The first cables start diagonally to the right to overcome an inclined ramp, that is at times polished, and a series of moderately exposed rocky sections. A single steep rock passage in a short chimney requires more effort, then the difficulty decreases as you climb up easy rocks. Once the cables are finished, continue on the path again on a scree slope until you reach the enormous summit cross (2875m; 0h30')
SASS DE PUTIA 2875m
DESCENT
To return to the car park, you need to go back the same way you came, so be careful of the people who are climbing in the short equipped section, avoiding dislodging rocks and in any case keeping maximum concentration as an equipped path downhill is more difficult than uphill (2h15').
NOTES
The short equipped trail to Sass de Putia is also suitable for beginners as the exposure is modest as is the technical ability required. The cables are in good condition. In season the trail is very busy so on the section with the cables you need to be aware of the comings and goings of people in both directions. Environmental difficulties: long approach; no nearby support points.
The Putia col (© M. Corriero)
The summit of Sass de Putia (© M. Corriero)

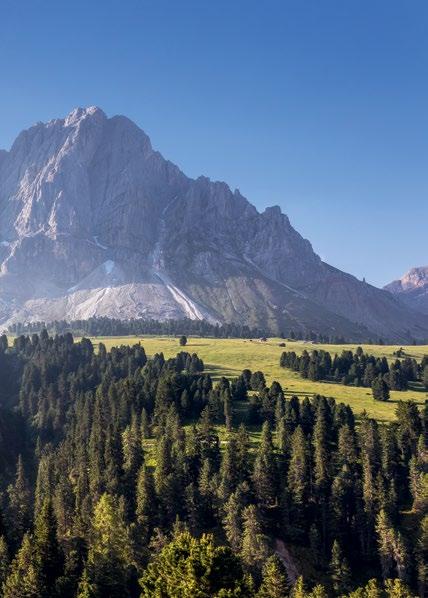
Sass de Putia seen from Passo delle Erbe (© M. Corriero)
scattered boulders and then diagonally cross a wide gully to the remains of the Austrian command sheltered by an enormous boulder. Afterwards, at about 2350m, a clear deviation to the left climbs with a steep zig-zag towards the base of the southern walls of Lagazuoi. A comfortable ledge introduces what we can define as the start of the equipped path.
DESCRIPTION OF THE EQUIPPED TRAIL
You enter a gully, overcoming a steep section with the help of some brackets and then you climb sharp bends reinforced with large wooden trunks. Once you exit the gully you reach a second equipped passage consisting of a ledge that leads to the characteristic suspended bridge about fifteen meters long and rebuilt exactly where the original one used by the Austrian troops in the war was located. Once you exit the bridge you climb up some rocks secured by the cable and an oblique ledge followed by a steep section but with plenty of holds. You then exit onto the so-called Austrian Ledge full of emplacements and tunnels that are worth visiting with a small detour from the path. You now proceed diagonally between easy rocks and short steep sections with steps that are partly equipped up to a saddle, beyond which in a few minutes you reach the top of Piccolo Lagazuoi (2778m; 2h15'), very crowded in season thanks to the presence, not far away, of the mountain station of the cable car and the refuge.
DESCENT
There are several options for the descent: the return can be along the outward route (1h30') or via the nearby cable car or (recommended) via the easy but very scenic equipped path of the Lagazuoi Tunnels (A) in the heart of the open-air museum of the First World War. In this case, however, it is better to bring a headlamp. The access is located immediately below the mountain station of the cable car. Once out of the tunnels, take path no. 402 and then take the deviation towards the northwest which, going up the gullies, takes you to rejoin the outward path (2h). Last possible alternative, from the Lagazuoi refuge, follow the signs for the Col Travenanzes (2507m; signpost 401) along the steep scree slope (ski slope in winter). From the col, take path no. 402 towards the Falzarego pass and from here with the path that runs alongside the road and passes under the north walls of Sass da Stria you return to the car park (1h45').
NOTES
The equipped trail of the Kaiserjäger is technically easy but tiring as the climb is quite steep. Combined with the Lagazuoi Tunnels equipped trail, it is a very rewarding itinerary for the hiker, also due to the numerous war relics along the way. Be careful at the beginning of the season because the climb to Piccolo Lagazuoi, although south facing, could still be obstructed by piles of compact snow and therefore crampons may be necessary.

A picturesque section along the Kaiserjaeger equipped path (© M. Corriero)
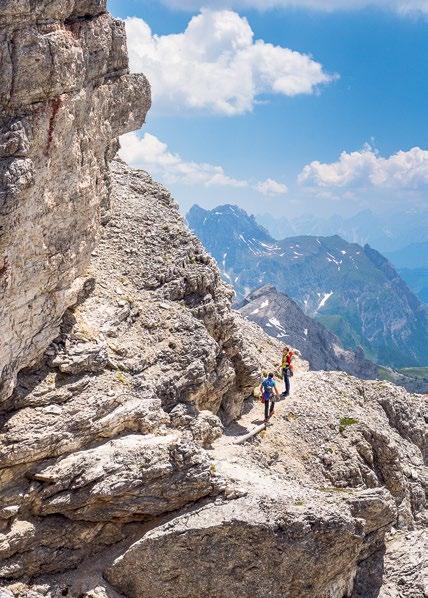

Along the Kaiserjaeger equipped path, the view of the Belluno Dolomites and the Civetta opens up magnificently (© M. Corriero)
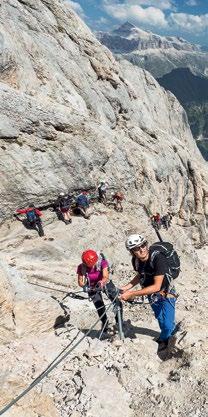
DESCENT
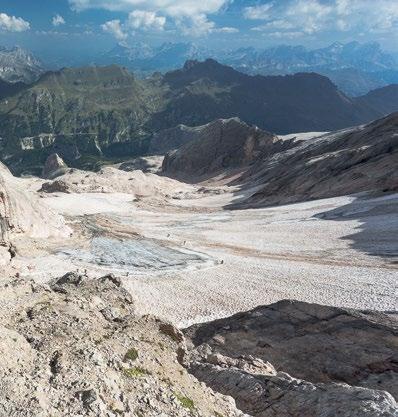
For the return there are two alternatives: the first is to go back down the via ferrata following exactly the outward route (4h) and the second is to cross the glacier on the north side, an option recommended only if you have experience with glaciers or are accompanied by an Alpine guide. You cross a snowfield on the ridge called Schena de Mul in a roped party equipped with ice axes and crampons until you reach the first rocks that, with a difference in altitude of about 150m, descend to the glacier. You down climb on easy 1st grade rocks and steep steps equipped with cables and rungs. Be careful because this section is also traveled in the opposite direction by those who did not go up the via ferrata but the normal route on the north side. The subsequent crossing of the glacier must be done with the utmost caution given the presence of crevasses and, considering the climatic conditions of recent years, it is particularly treacherous and dangerous especially on abnormally hot summer days. Unfortunately, the immense tragedy of July 3, 2022, which saw a gigantic serac break away and overwhelm a group of climbers, is a dire example of the consequences of global climate change.
After about 1.45 hours you reach Pian dei Fiacconi and from here, along the outward route, back to the car park and Lake Fedaia (1h15').
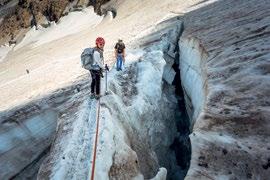
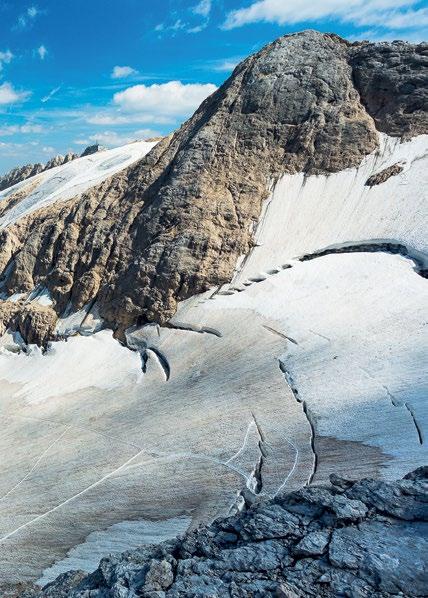
Crossing the crevasses requires a lot of attention and a steady step
The first equipped passages towards the Forcella Marmolada (© M. Corriero)
(© M. Corriero)
NOTES
Via ferrata not technically difficult but where the difficulties are mainly environmental having to cross snowfields and glaciers. Being a high altitude ridge route it must be tackled with stable weather because with bad weather the conditions change suddenly from summer to winter. After the dismantling of the ski lift the approach and return are very long and the conditions of the equipment show their age.
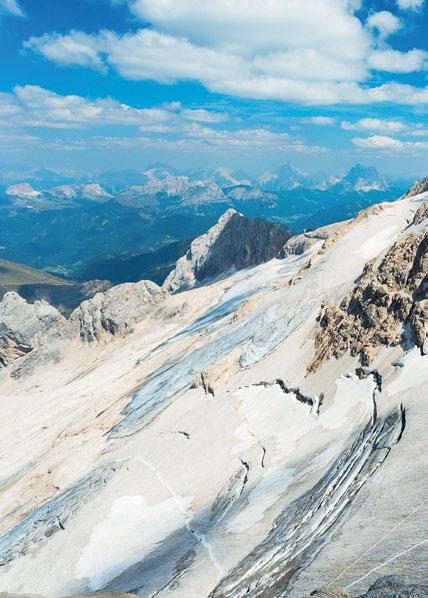
The return journey takes place across the treacherous Marmolada glacier (© M. Corriero)
DESCENT
To descend, follow the normal route which is nothing more than an easy and wide path along the grassy north slope that quickly takes you back to the stations at the top of the lifts. The return is along the same route as the outward journey (0h30').
NOTES
Short and technical via ferrata with various passages (chimneys, traverses, slabs, short rock faces, corners) that make the climb fun and never banal. The cable, in good condition, is always taut. Environmental difficulty: rock slippery in places after rainfall.
Completing a via ferrata is always a great satisfaction (© M. Corriero)
An adrenaline-filled aerial edge (© M. Corriero)