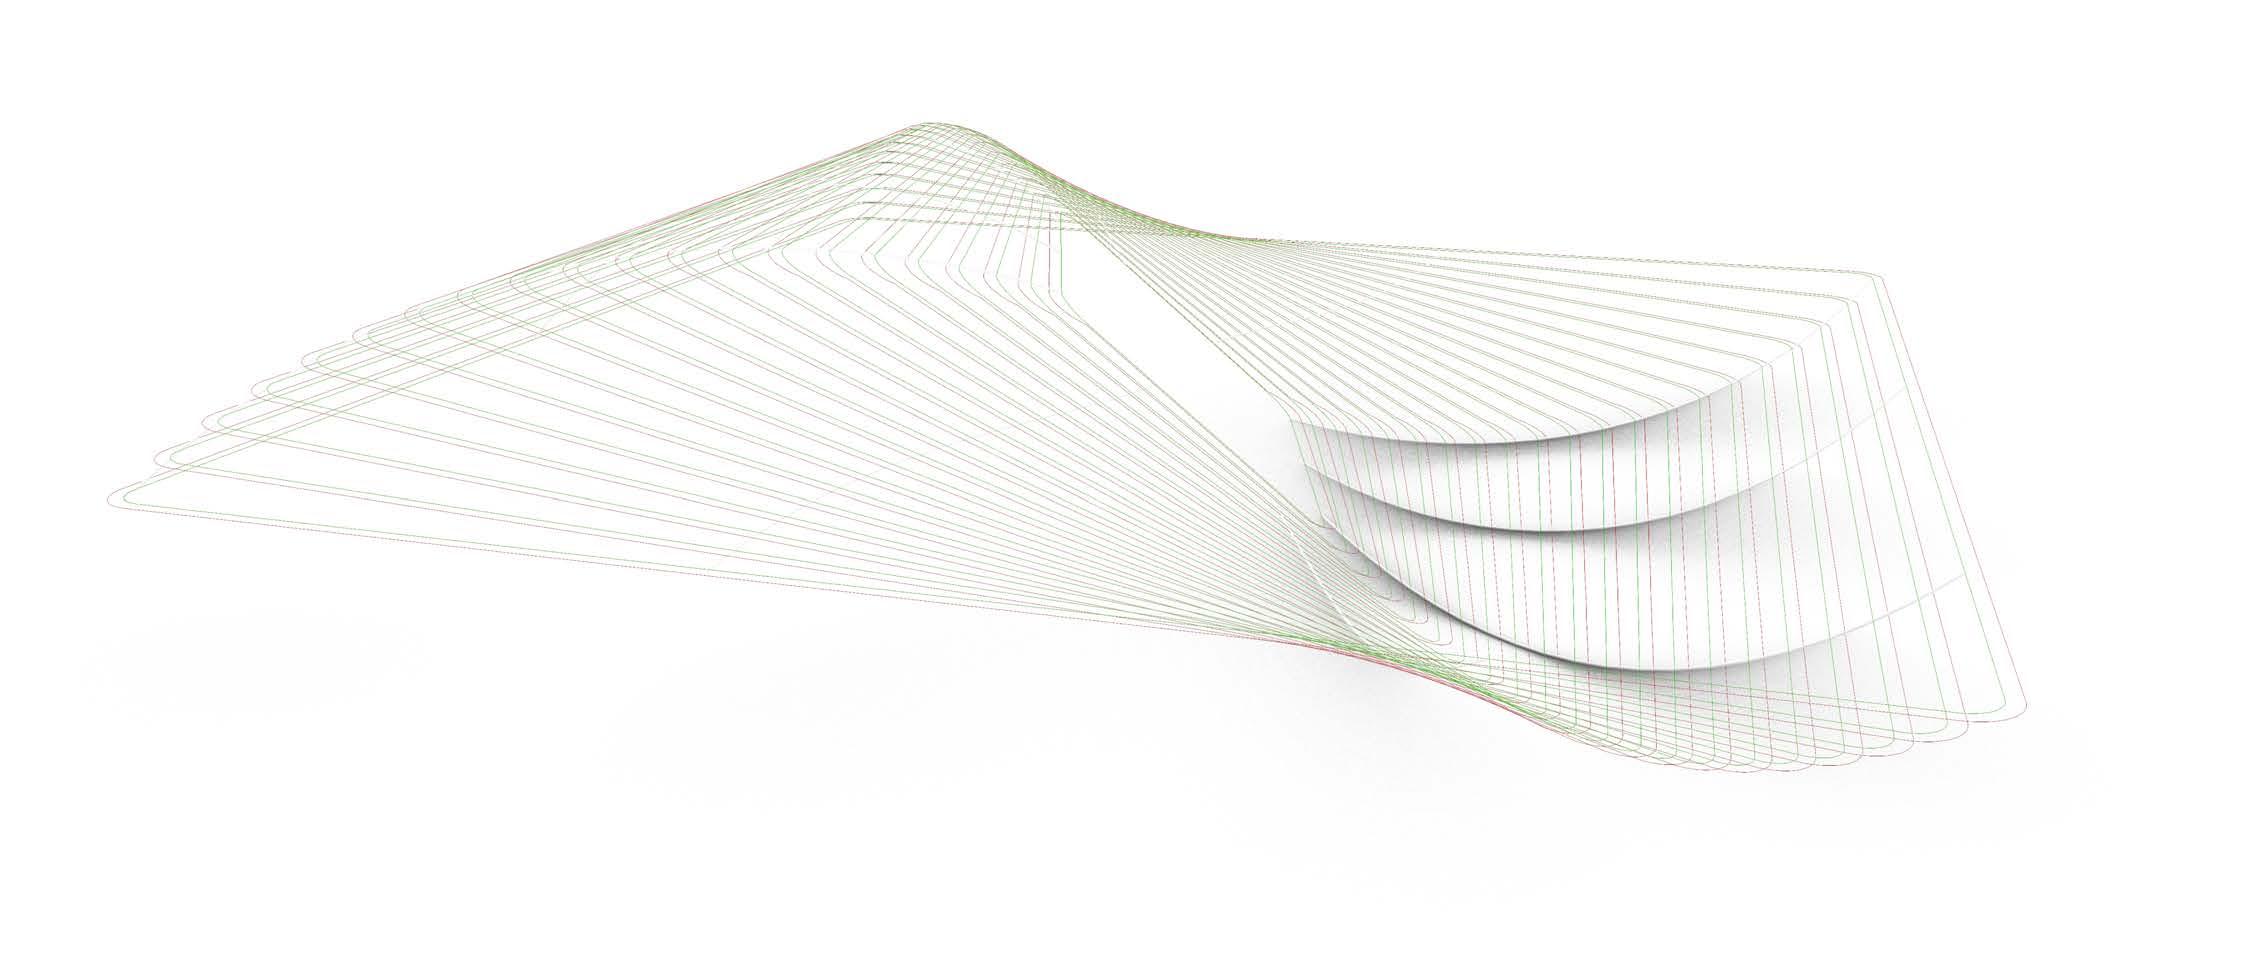
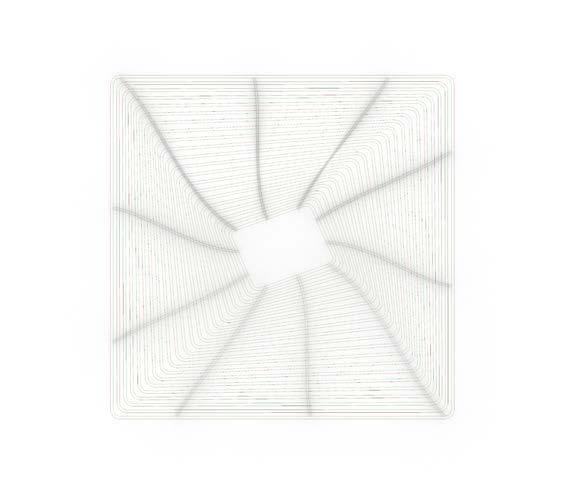
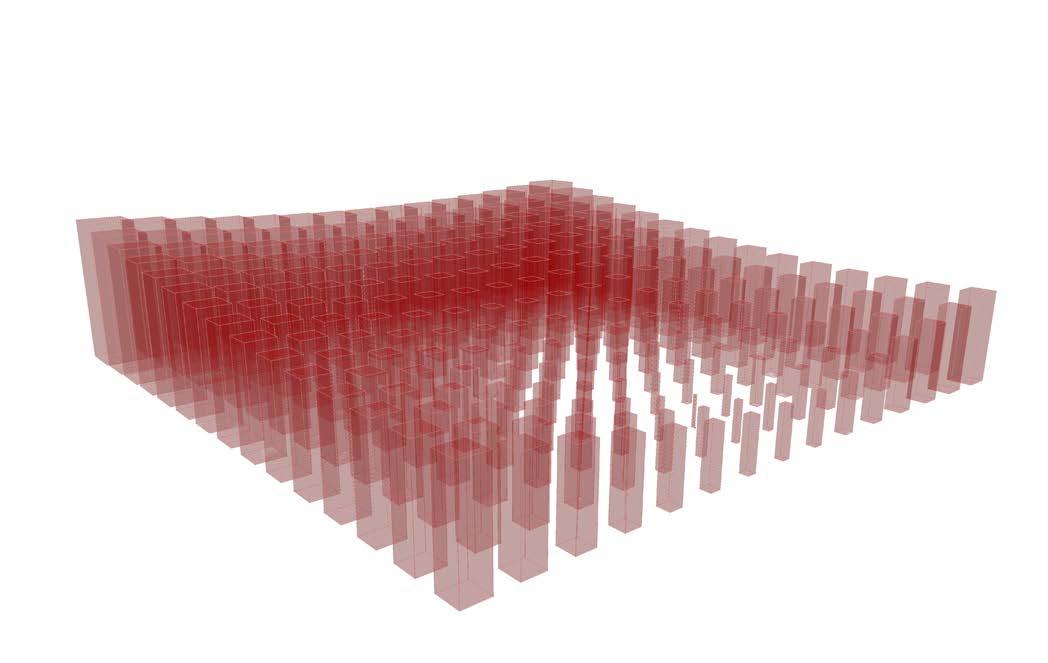
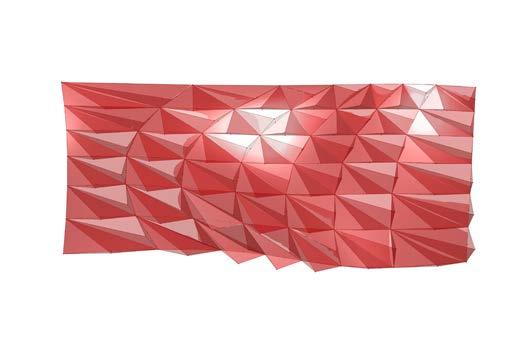
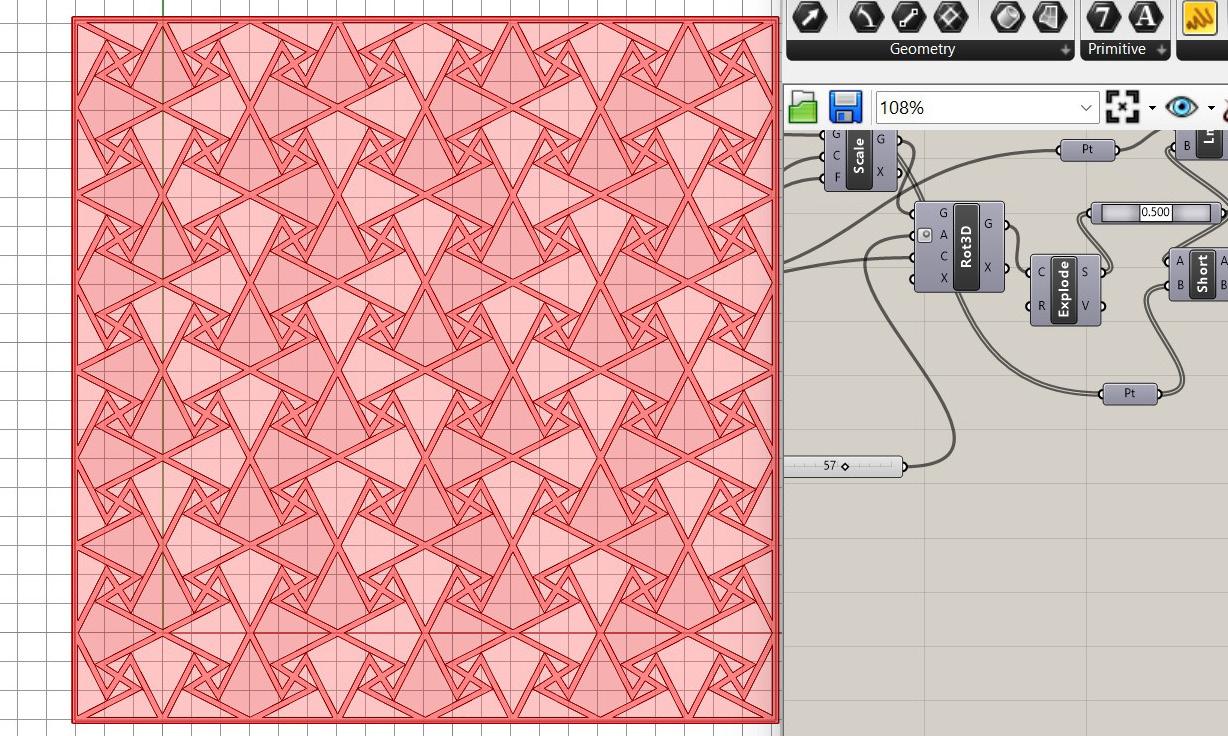
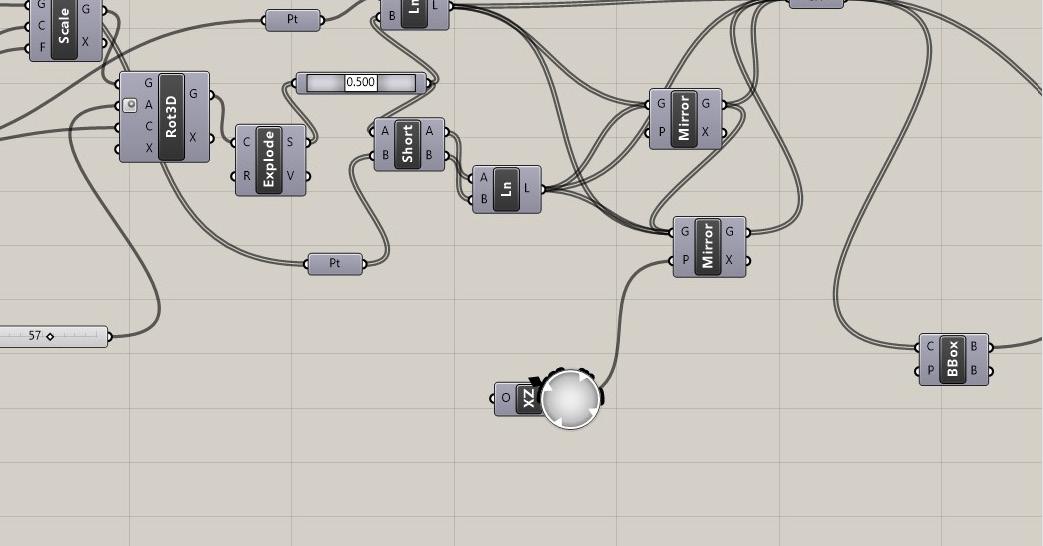
Brep> Bounding box> Area+ Scale> Points in box> Dispatch> Point>
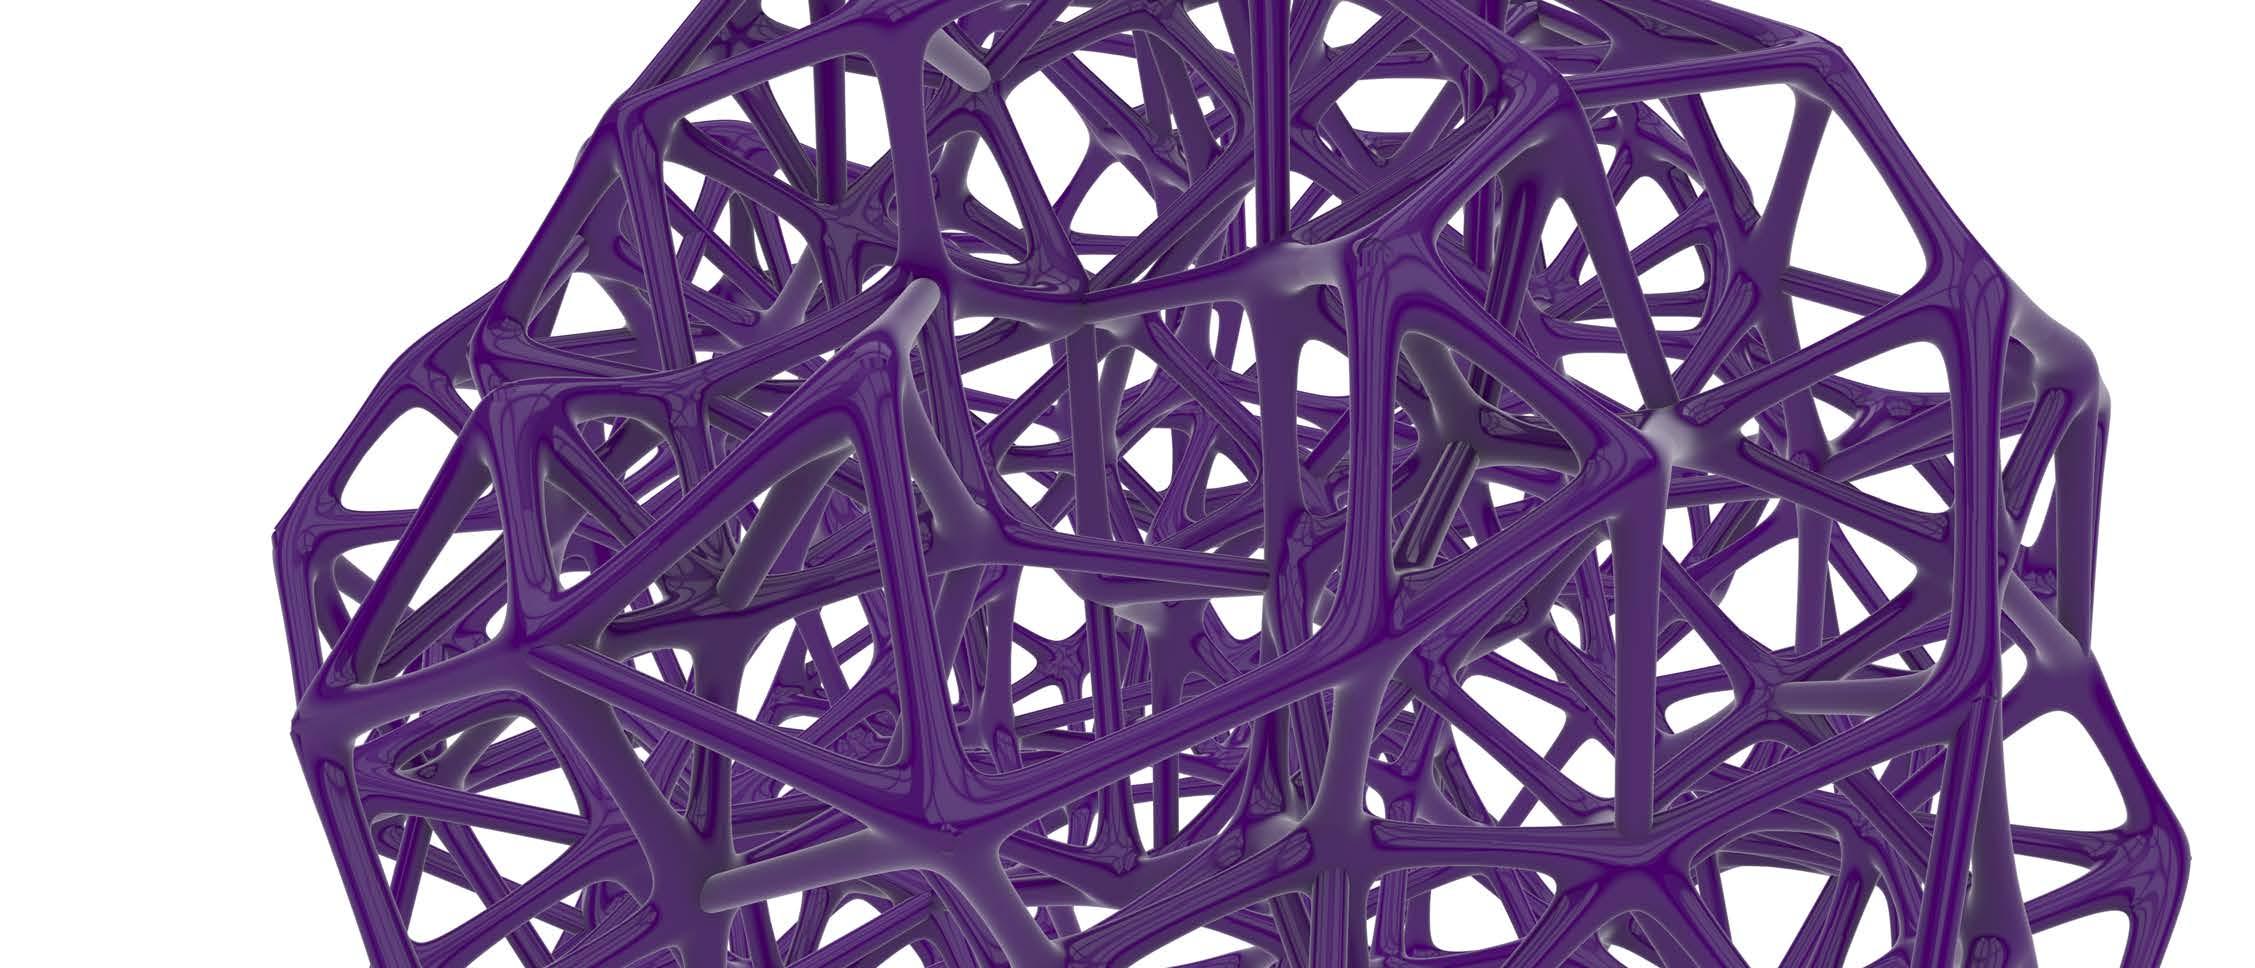
Proximity 3D> Multipipe
PART B: FROM DIGITAL TO PHYSICAL
W1_Learning grasshopper in class
W2_Learning grasshopper in class
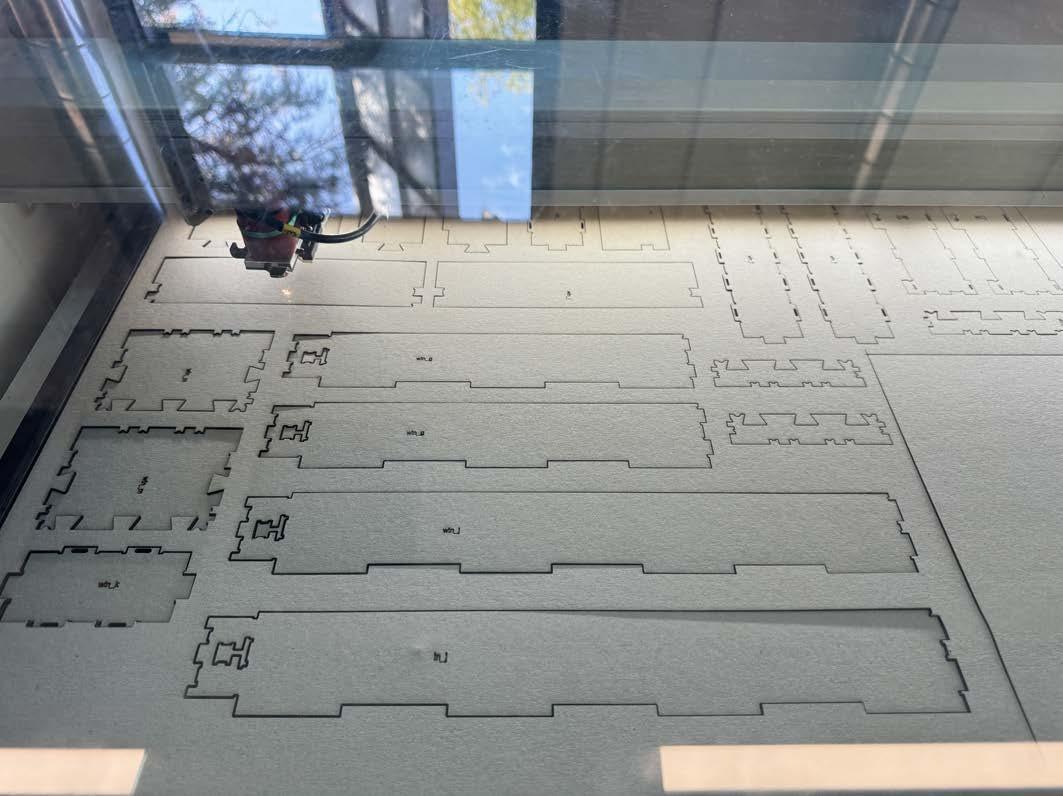
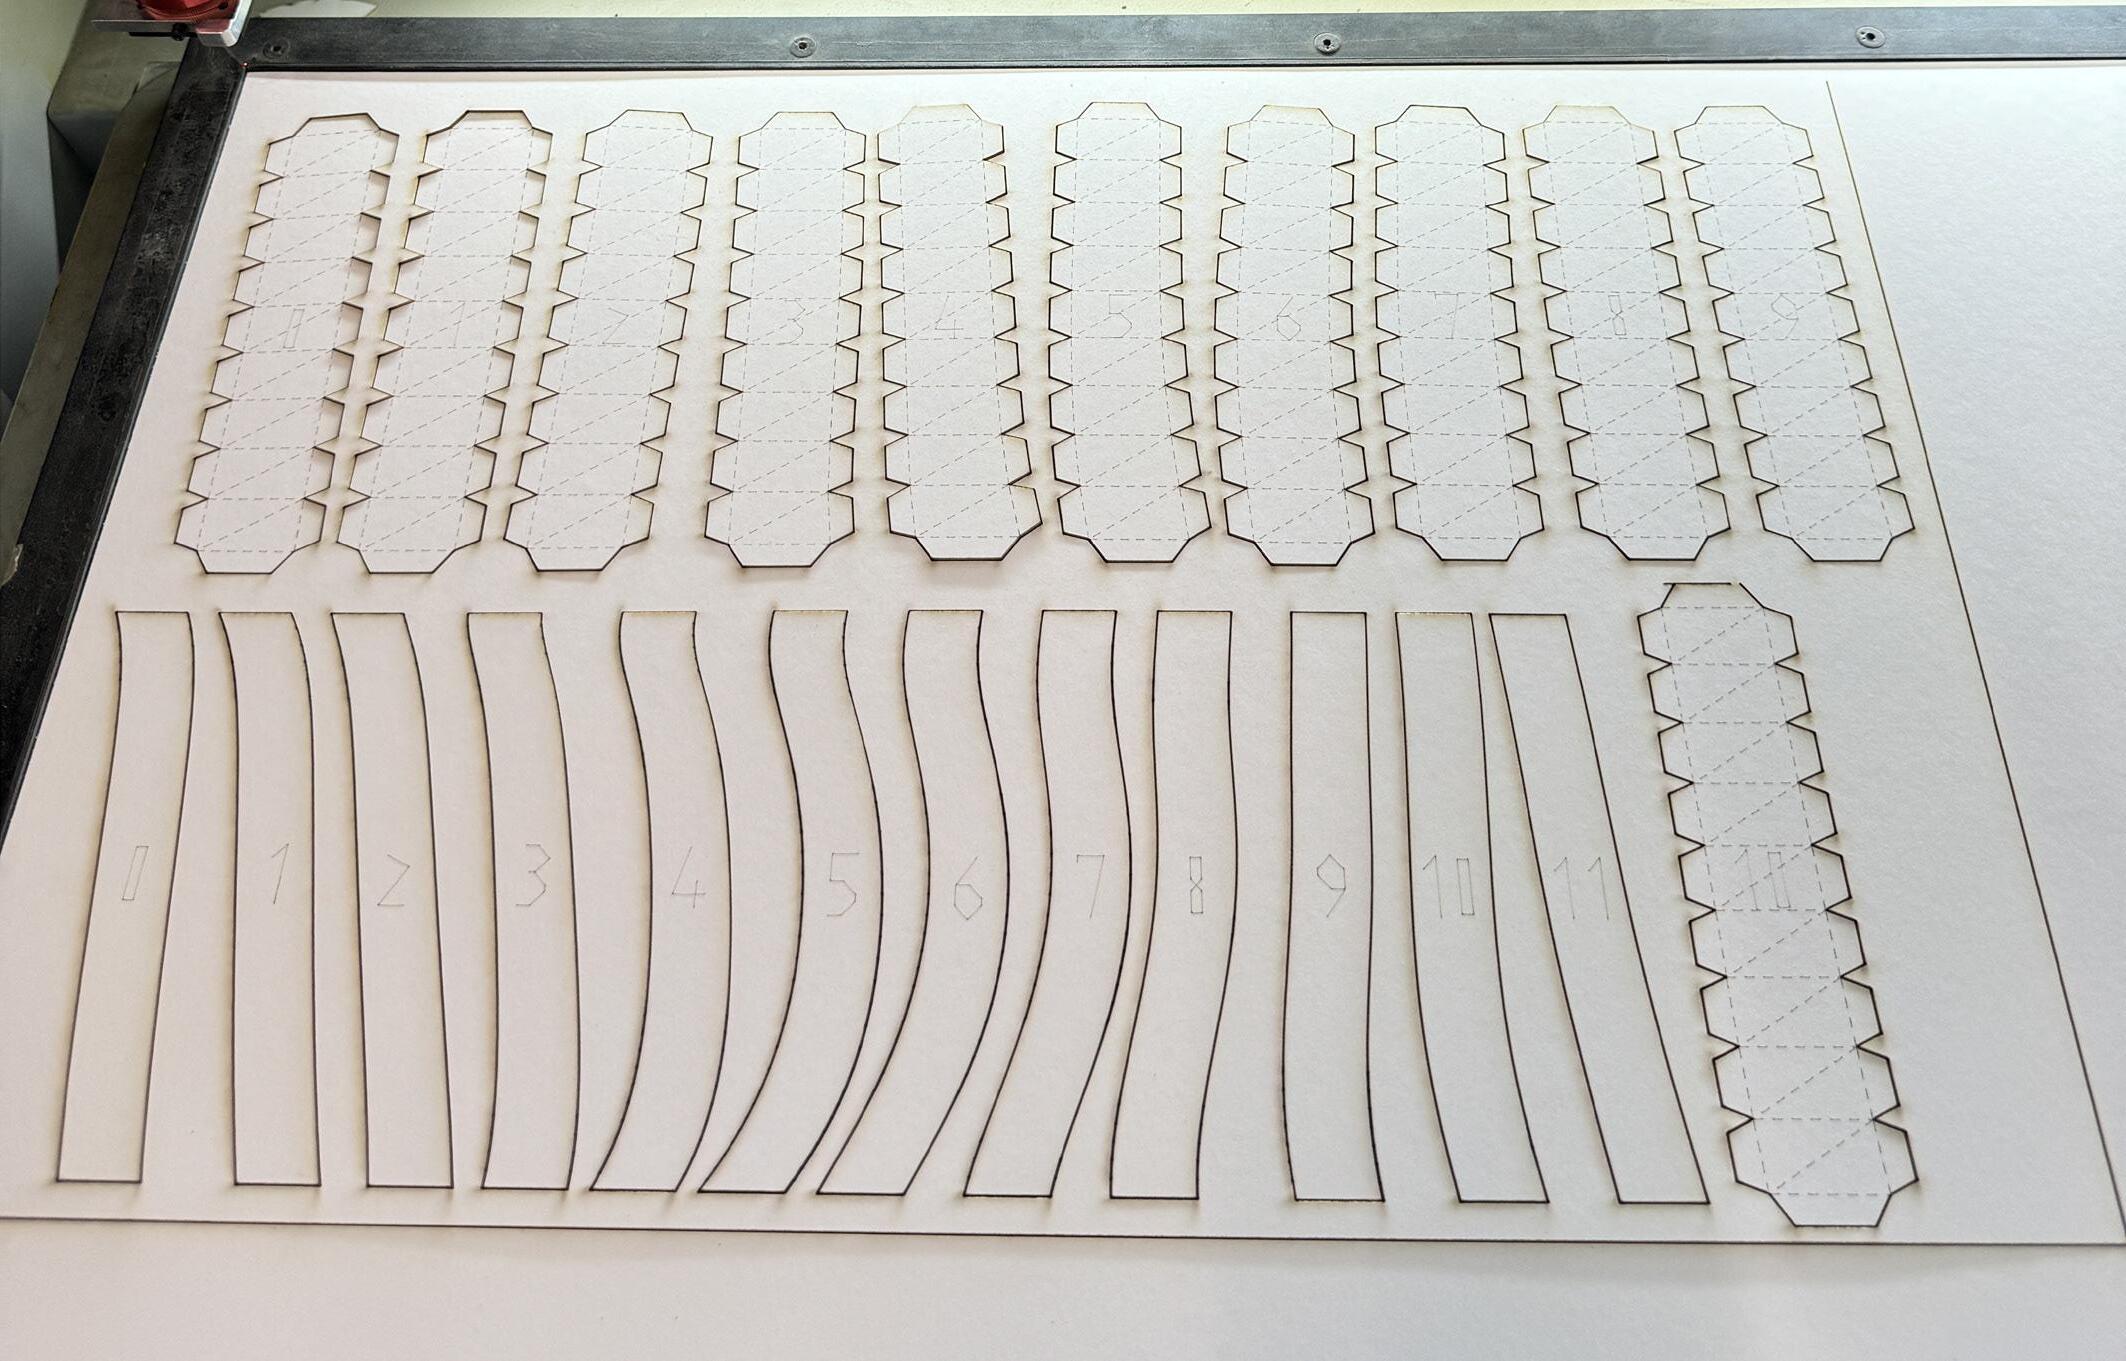
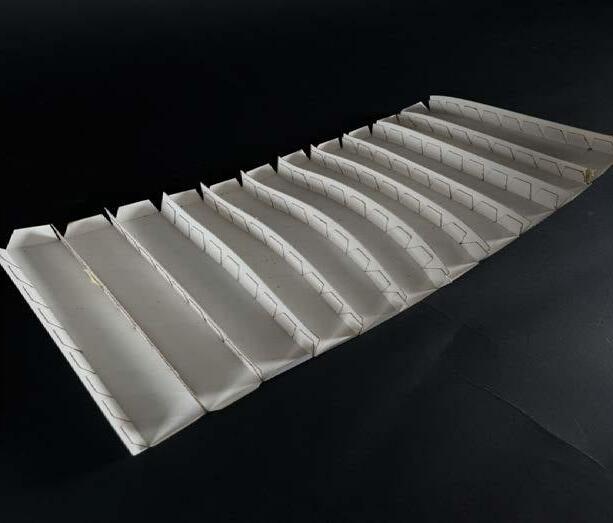
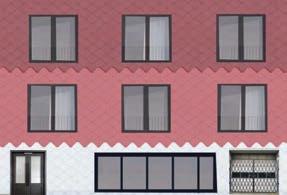
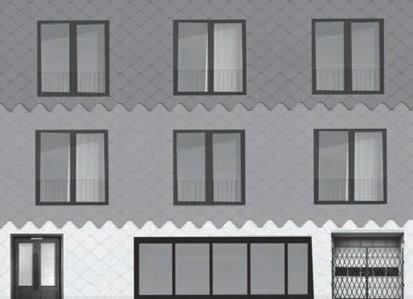
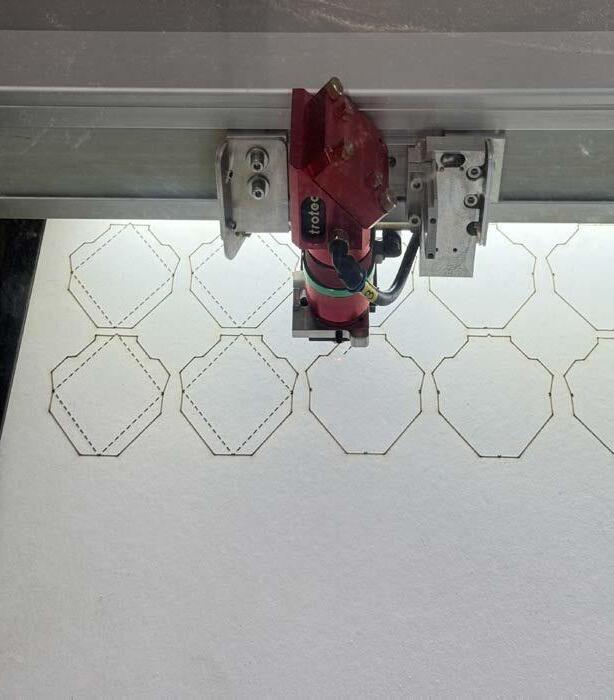
W2_Print WikiHouse components
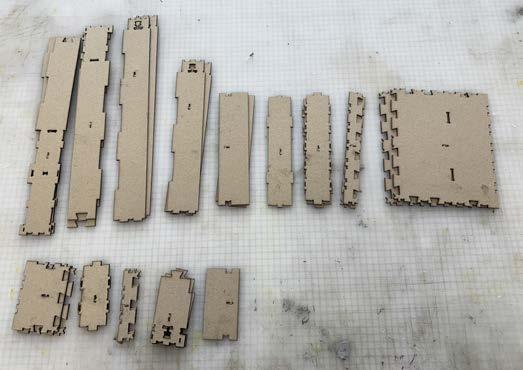
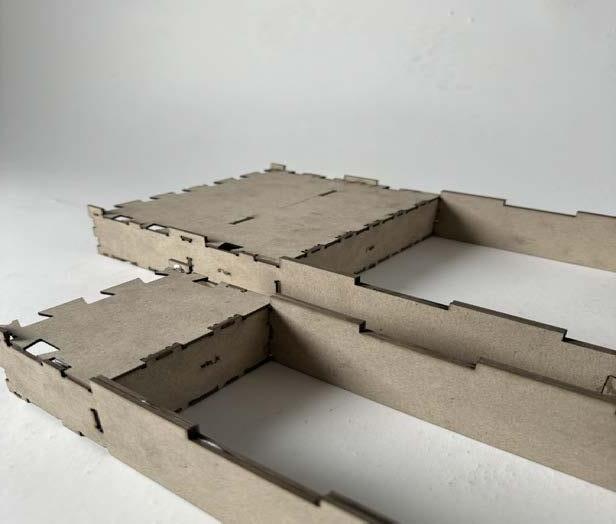
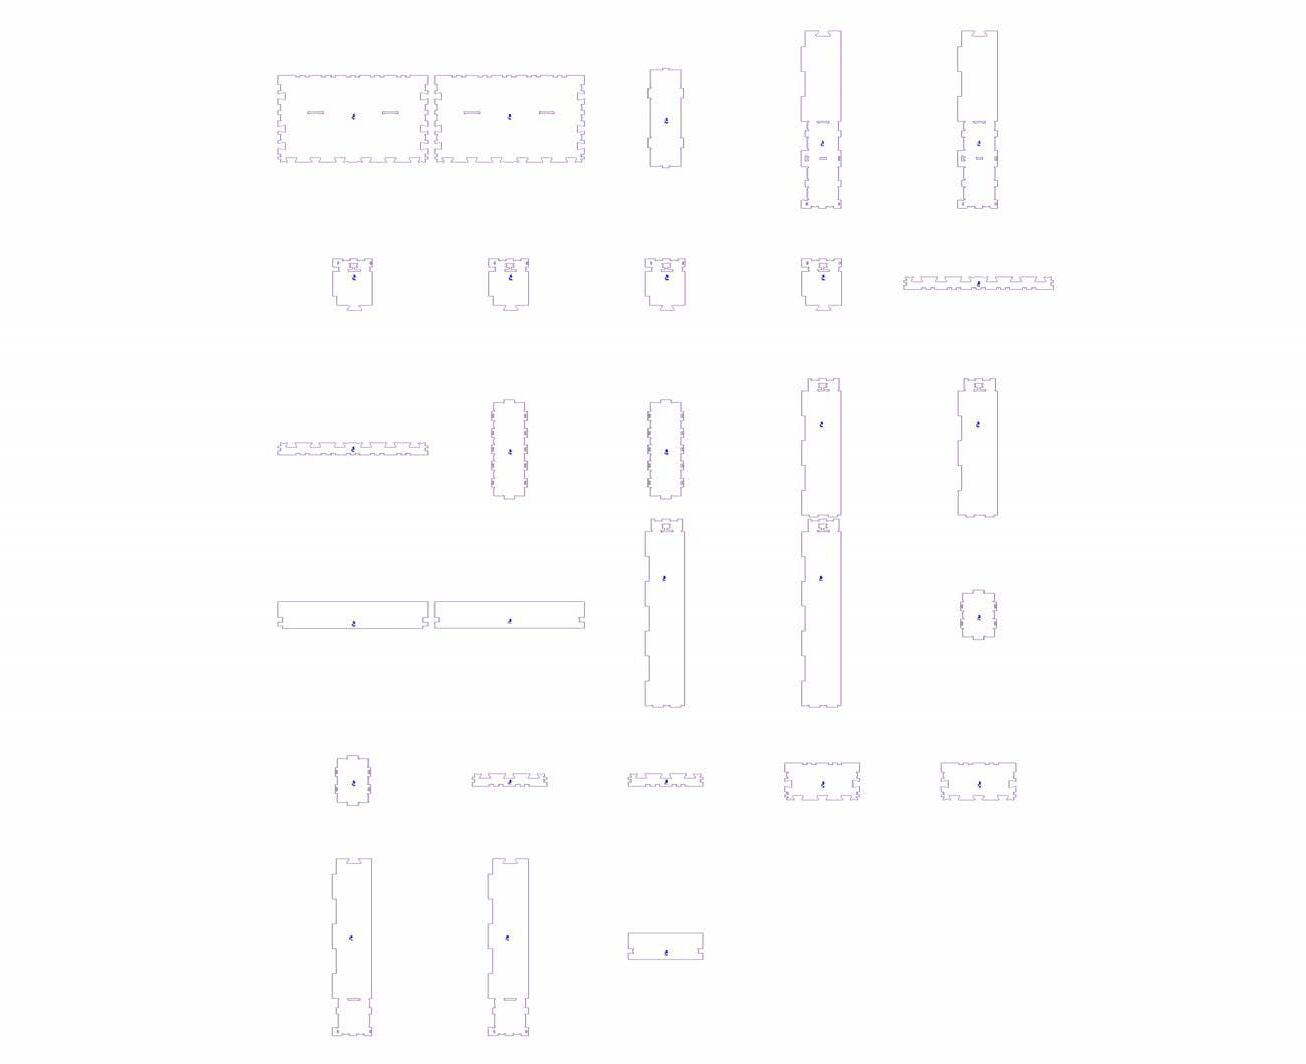
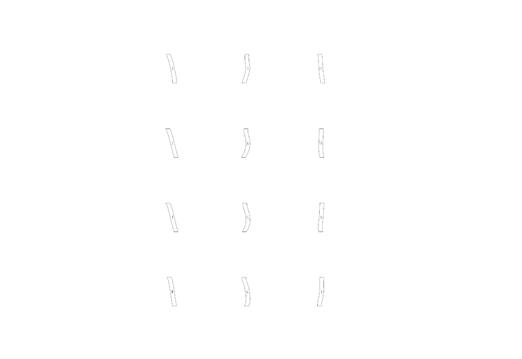
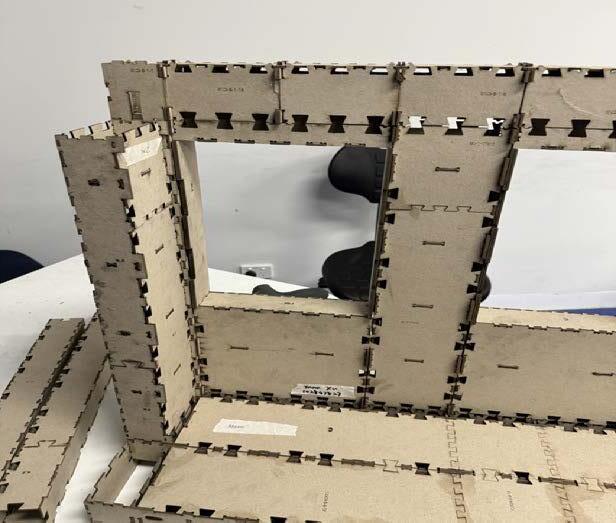
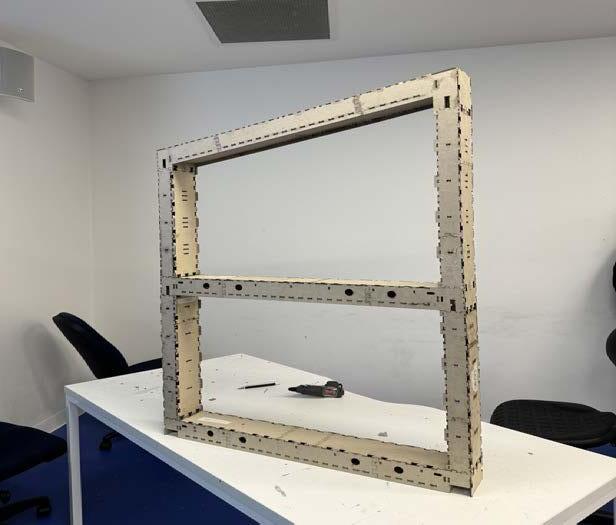
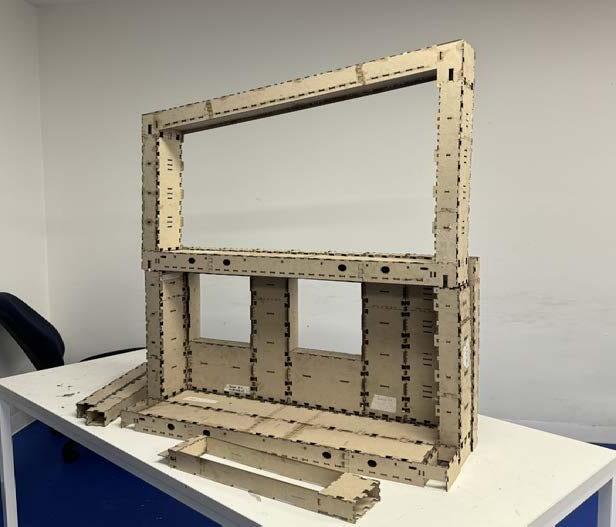
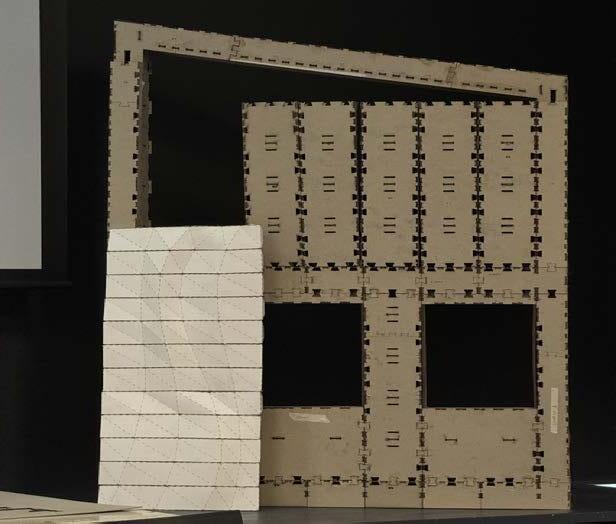
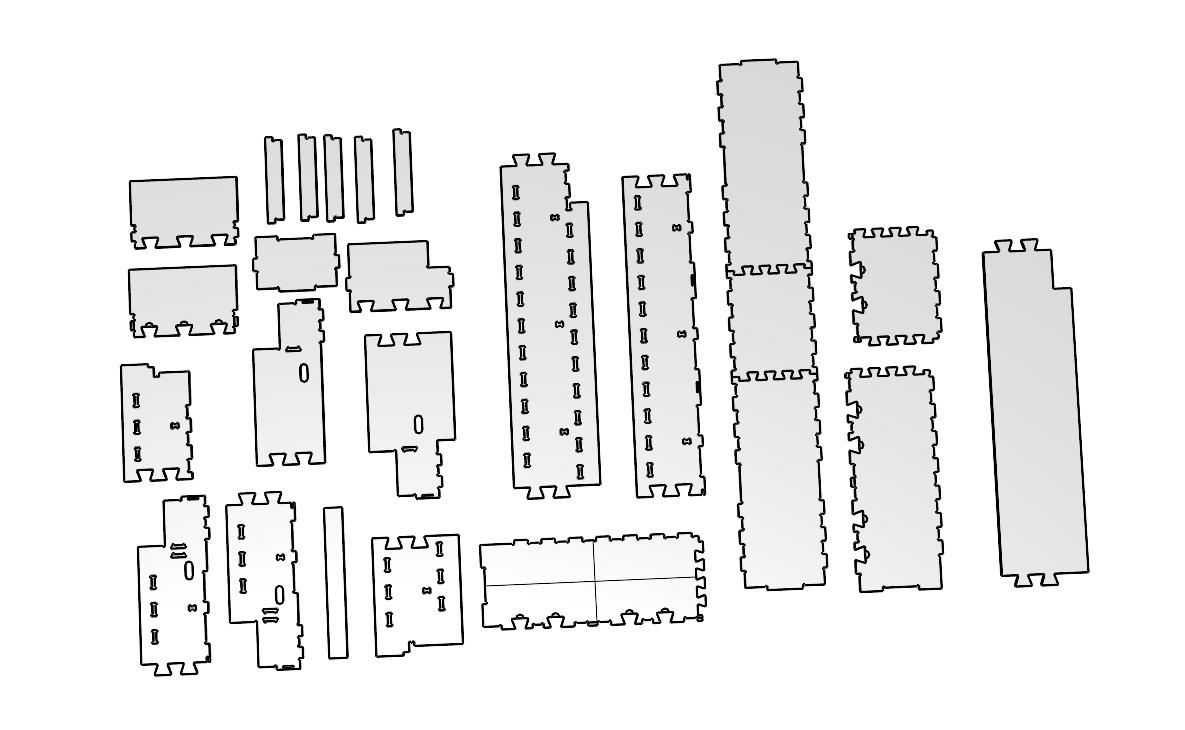
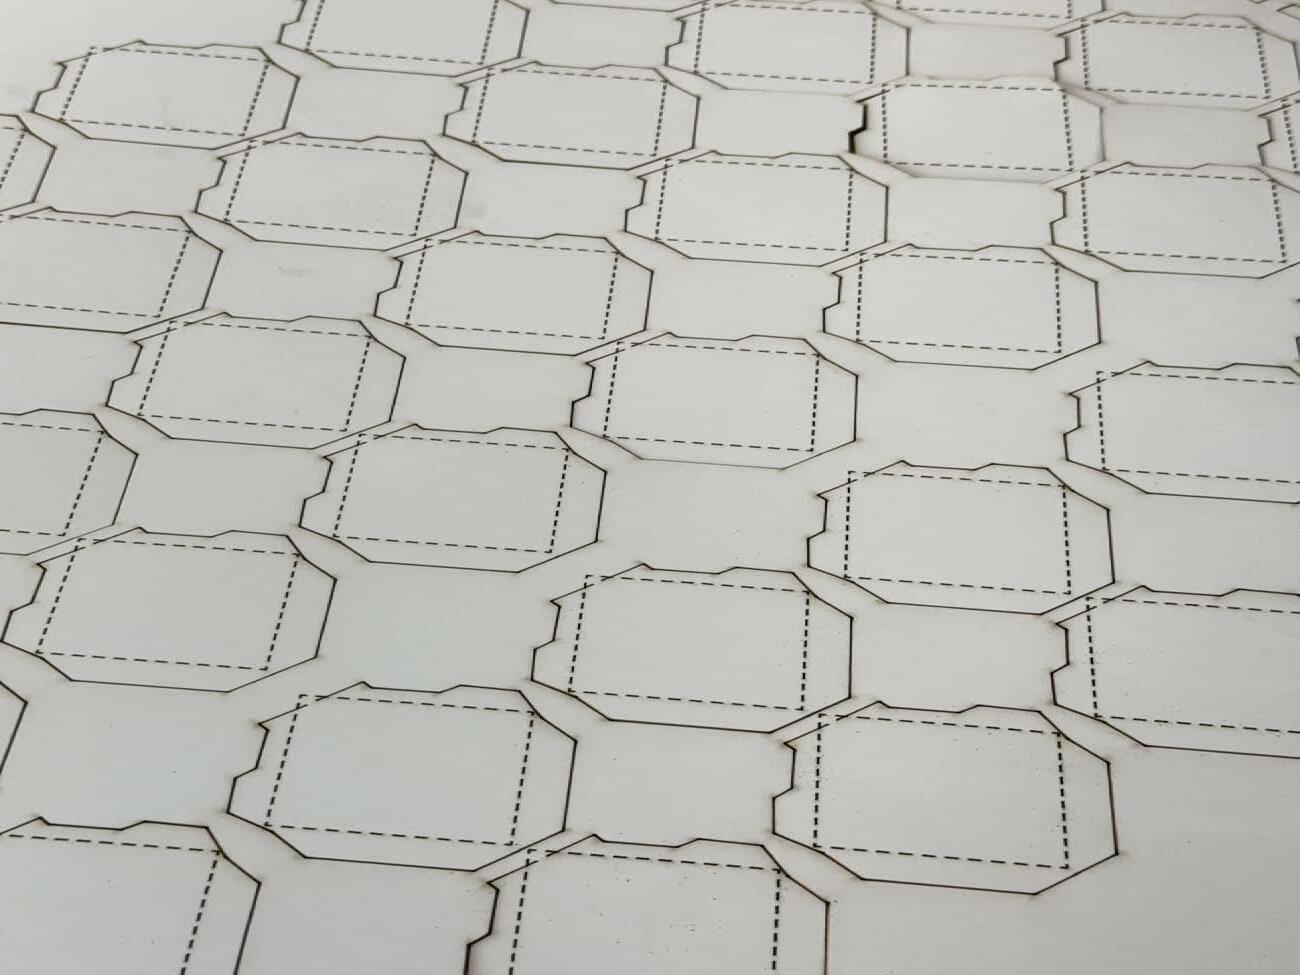
COMPONENTS AFTER LASER CUTTING
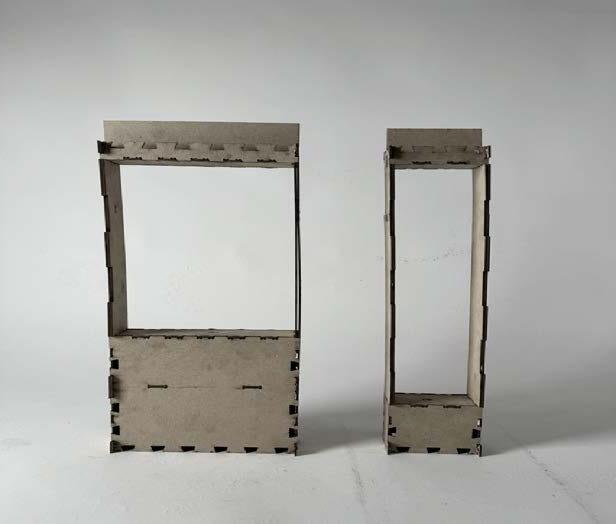
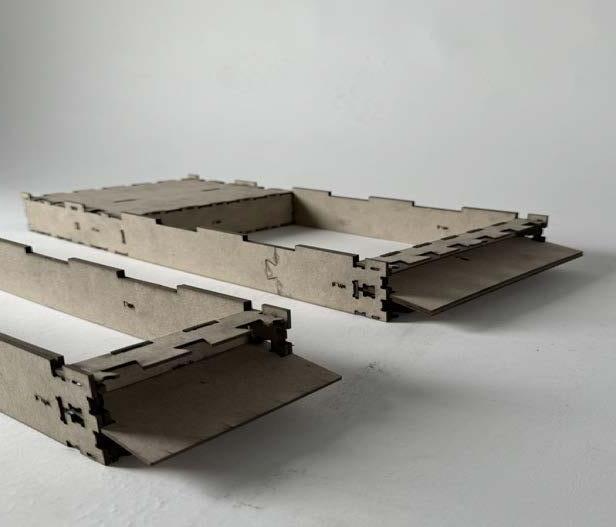
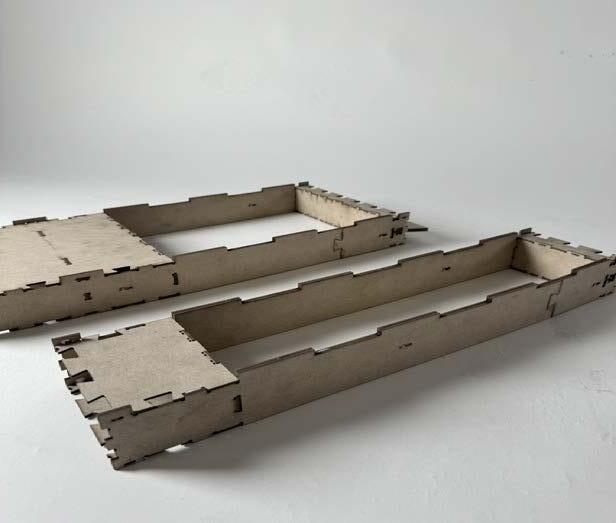
FROM ASSEMBLING MODELS TO UNDERSTAND WIKIHOUSE
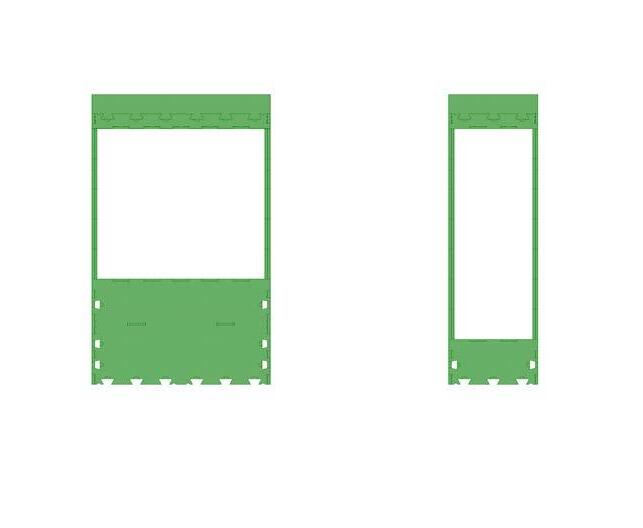
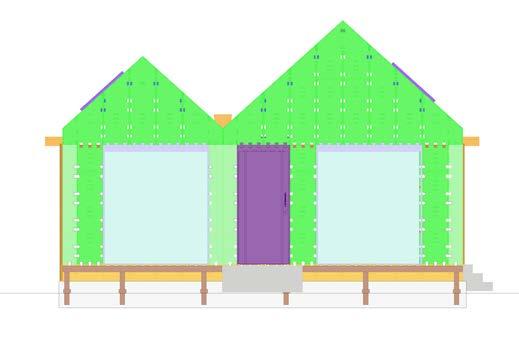
This week, I learned how to use Grasshopper components to quickly and accurately split model parts and generate wireframes from surfaces to create the model, assigning names to each part. The model I was assigned consisted of two types of windows. During the assembly process, I gradually gained an understanding of the Wikihouse assembly method by referencing the original digital model. I also identified an issue with the original component of the smaller window and fixed it in the model.
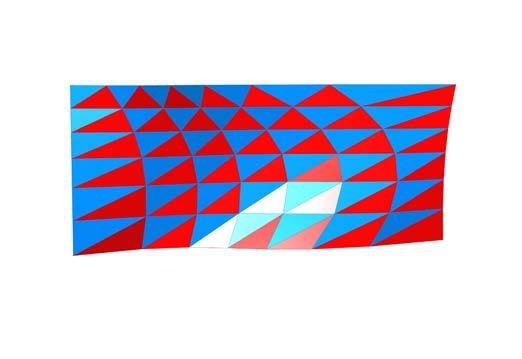
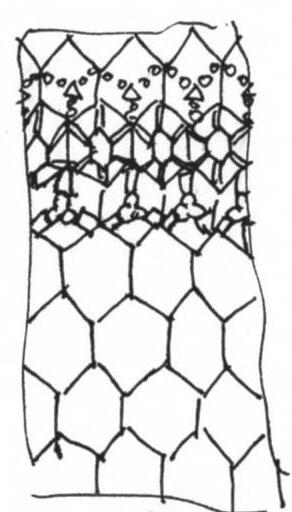
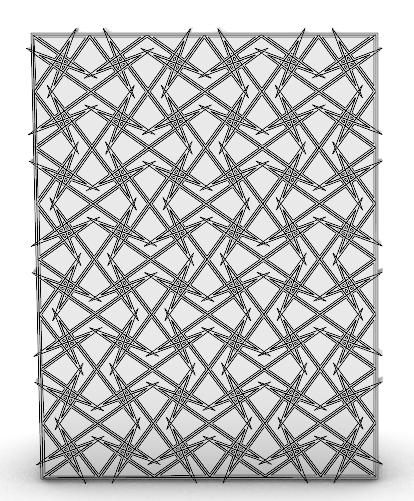
3. Use Brep edges and point on curves to find the middle point, then move surfeces.
2. Using Find neighbour and marge points, them make the triangular shapes
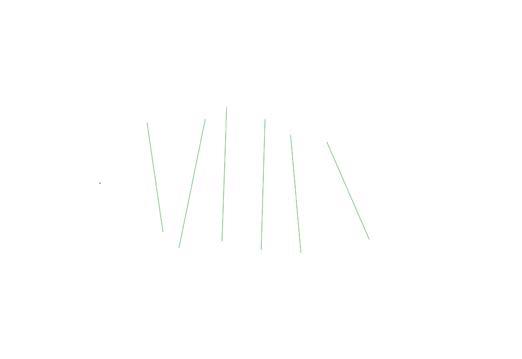
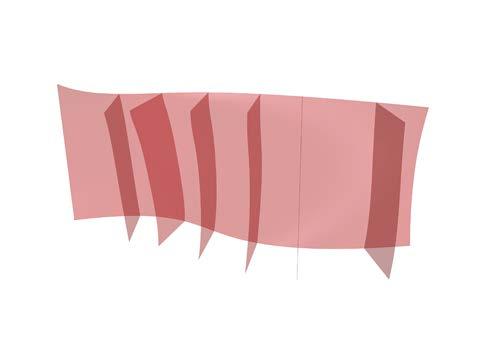
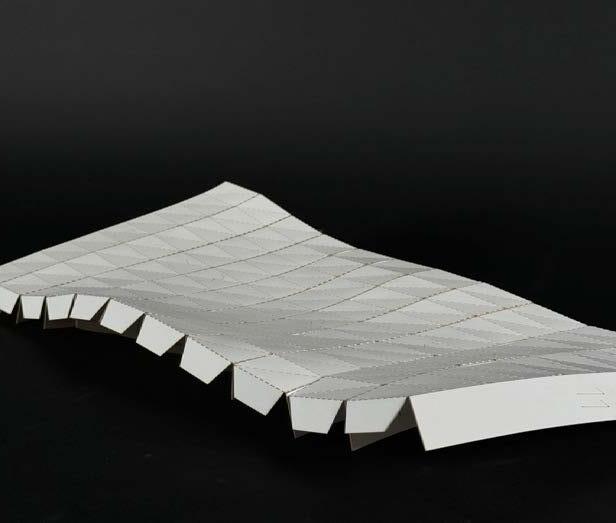
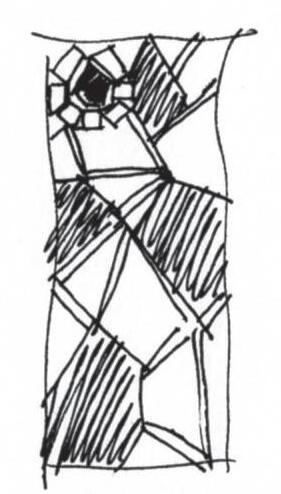
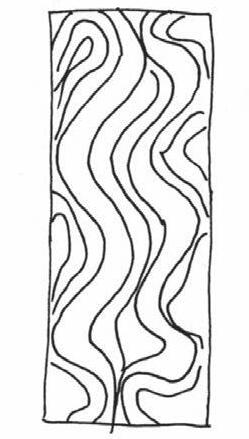
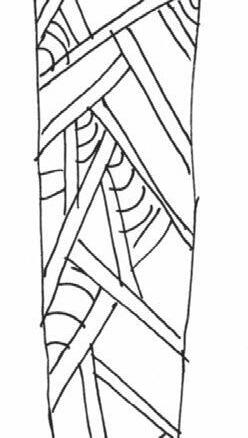
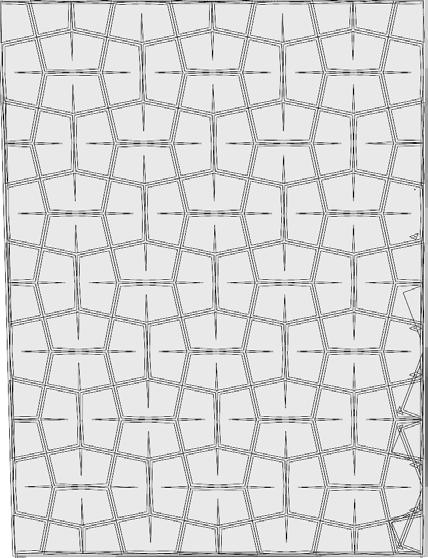
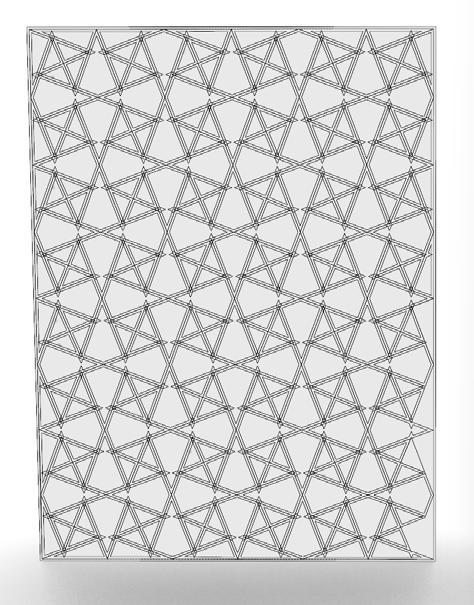
W3_Patterning for fabrication
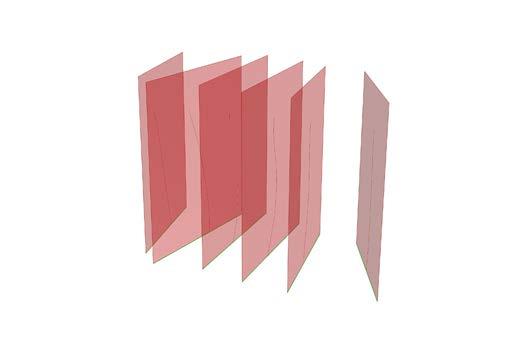
1. Prepare the surface
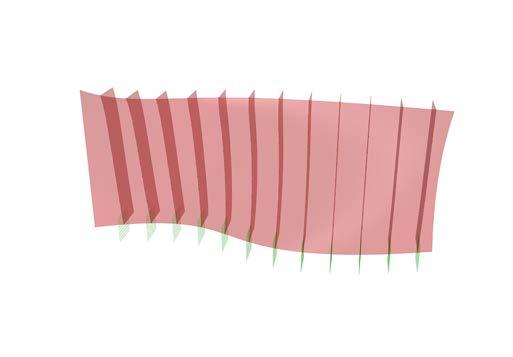
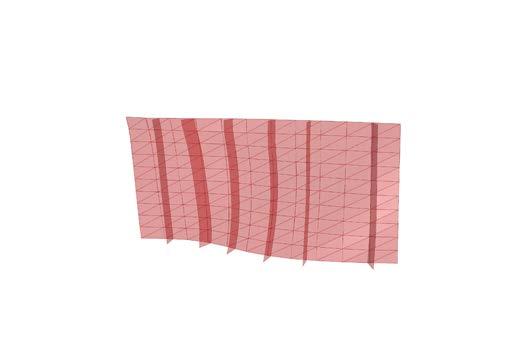
3. Extrude lines for cutting things later
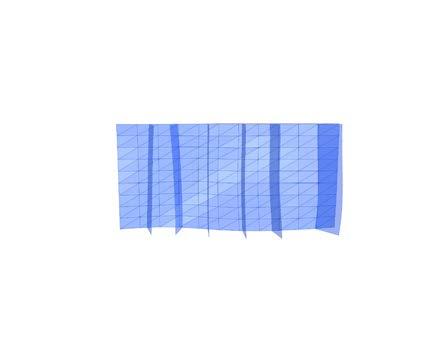
5. Making arc wall on the base
2. Draw several curves
Loft countour lines following "knrife curves"
6. Adjust numbers, get the final model
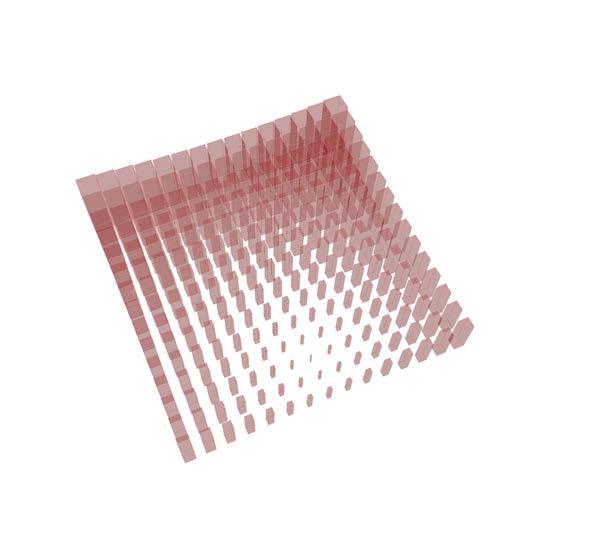
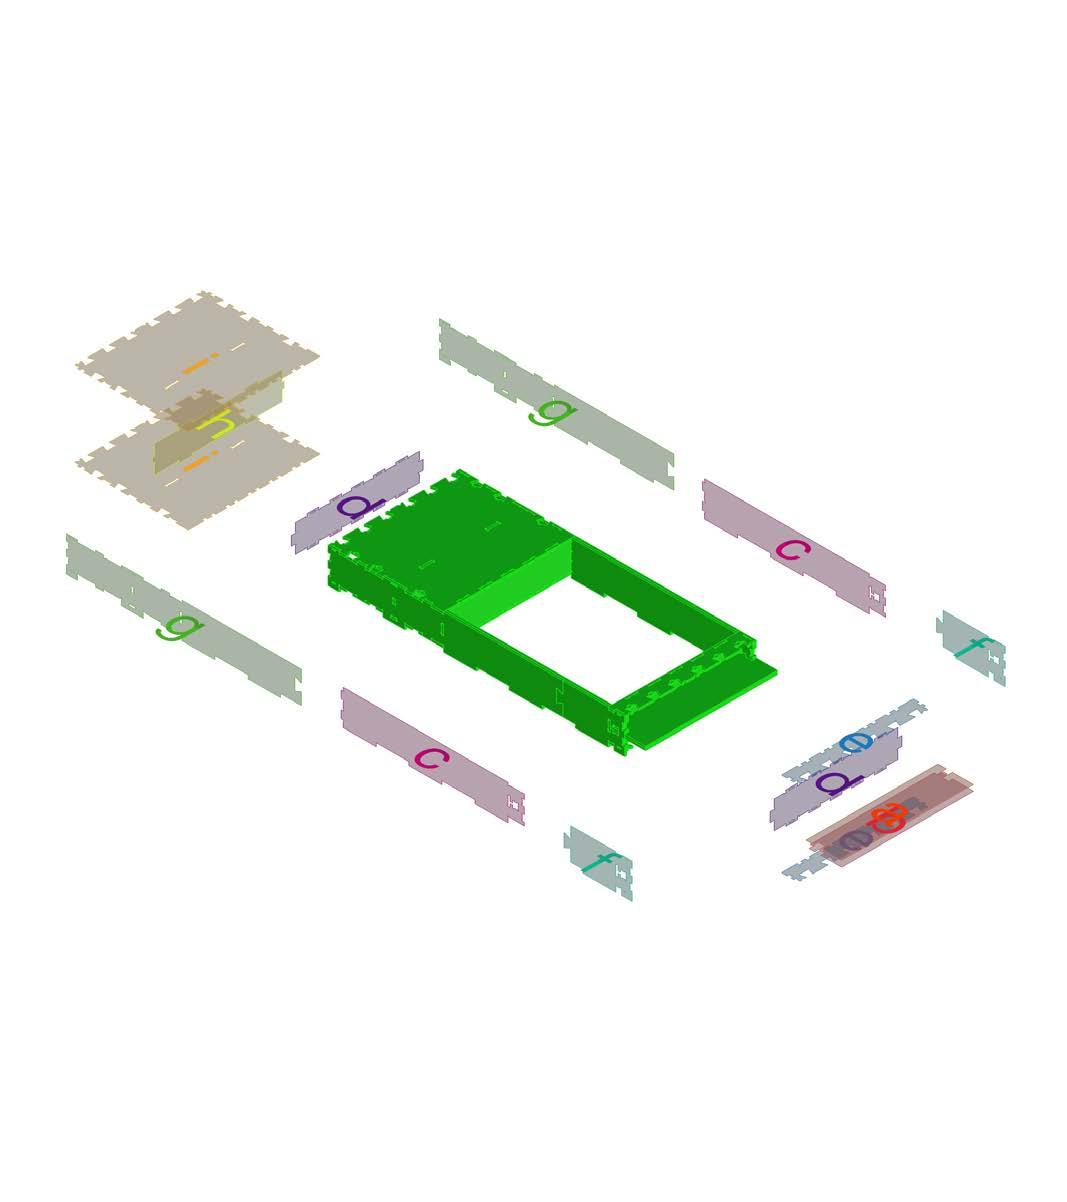
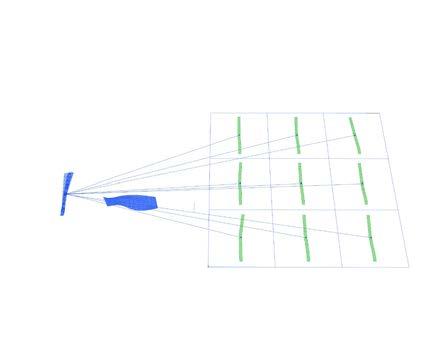
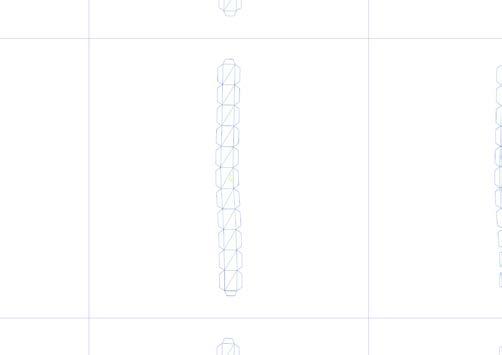
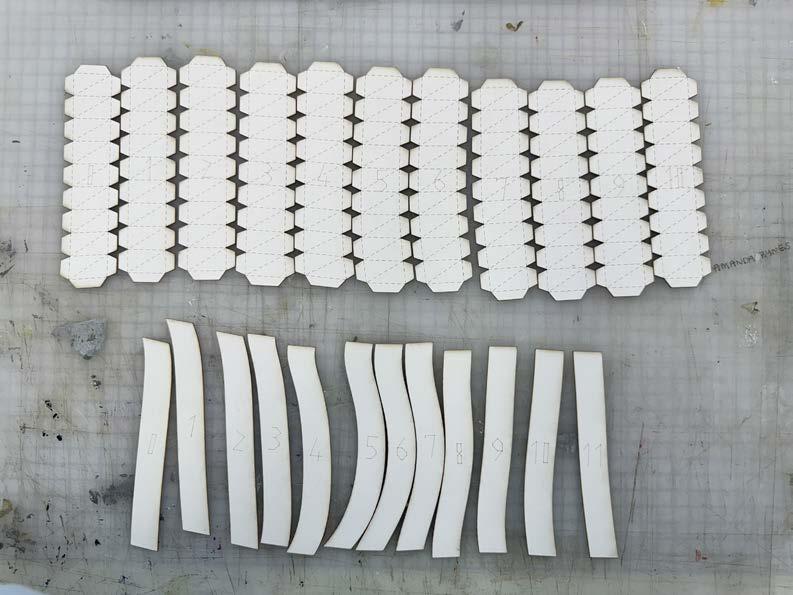
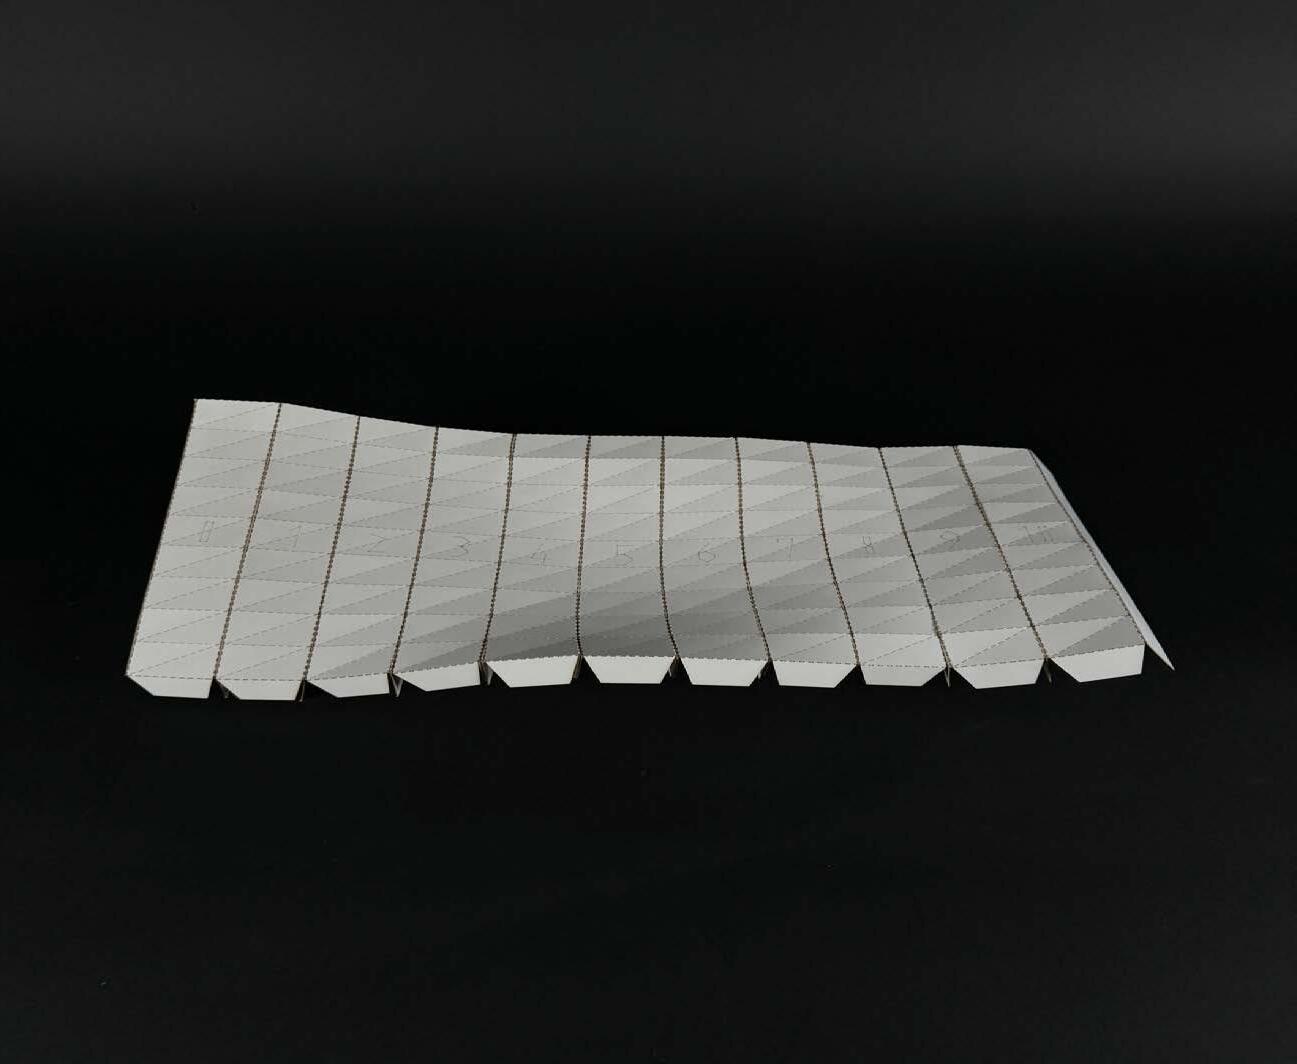
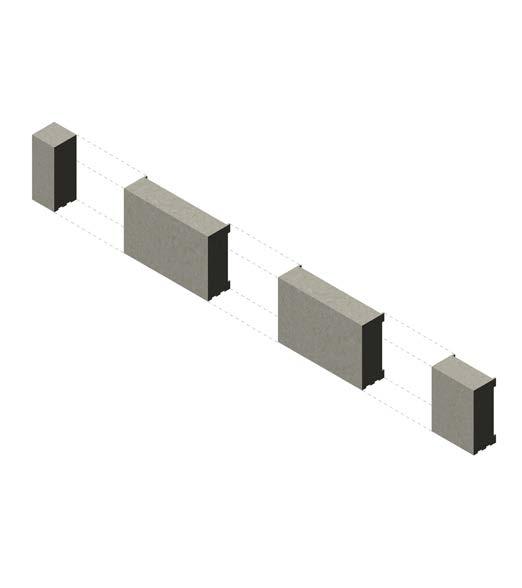
W4_From digital to physical
1. Prepare the original digital model
3. Create a grid and distribute the components into the grid squares
5. Break it down by each small node
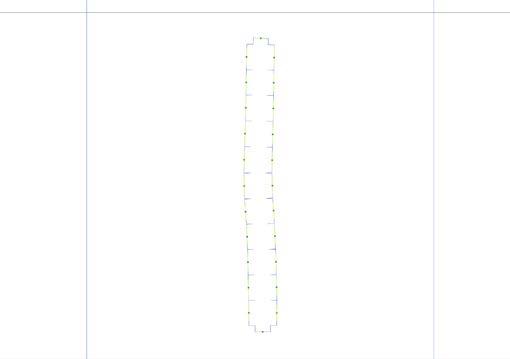
2. Divide them into component bars by column
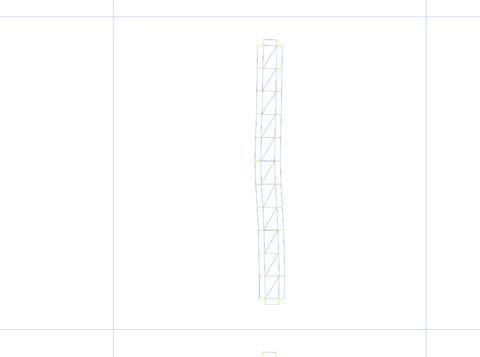
4. After extracting the lines, then start creating edge connection surfaces.
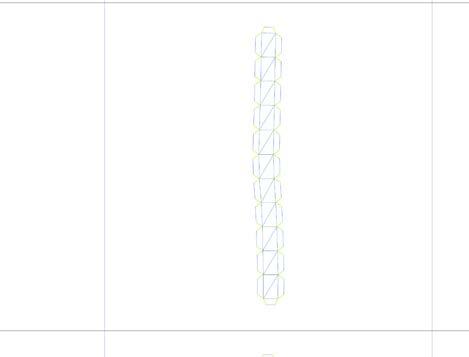
6. Complete the connection surfaces.
4.
W4_From digital to physical
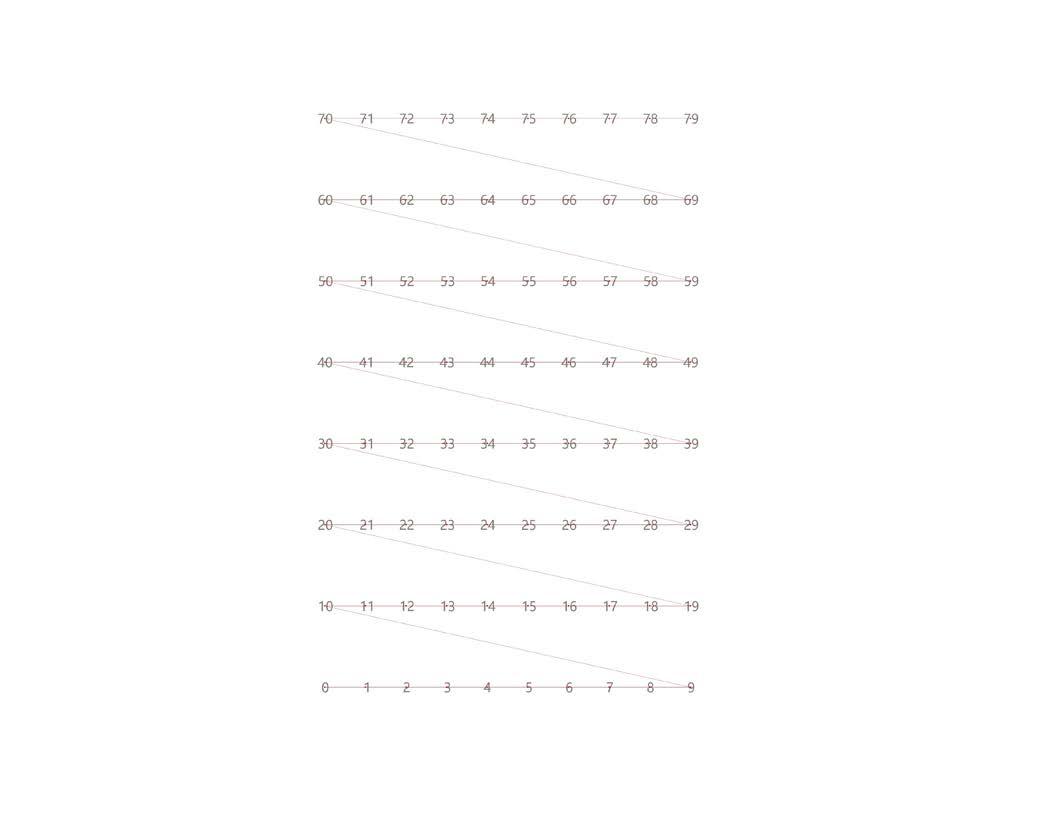
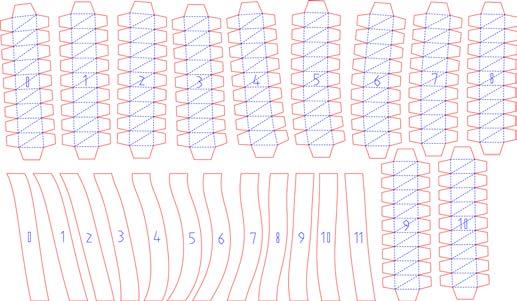
7. Assign the numerical sequence to each component in order.
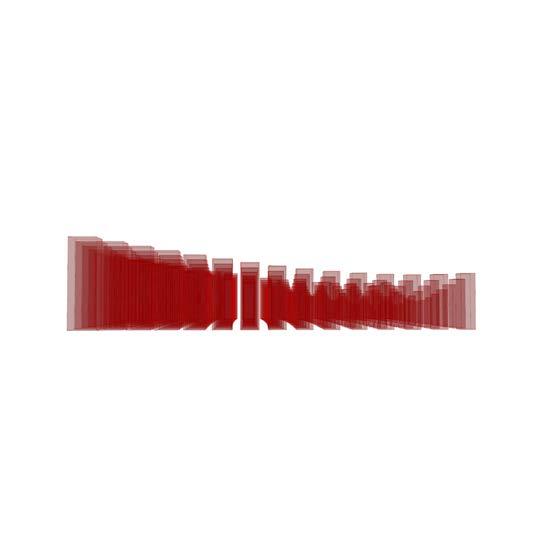
9. Challenge step: Create the dragon bones on the back of the model using the same system and arrange the numerical sequence in order.
8. Add text to the model to assist with referencing during assembly.
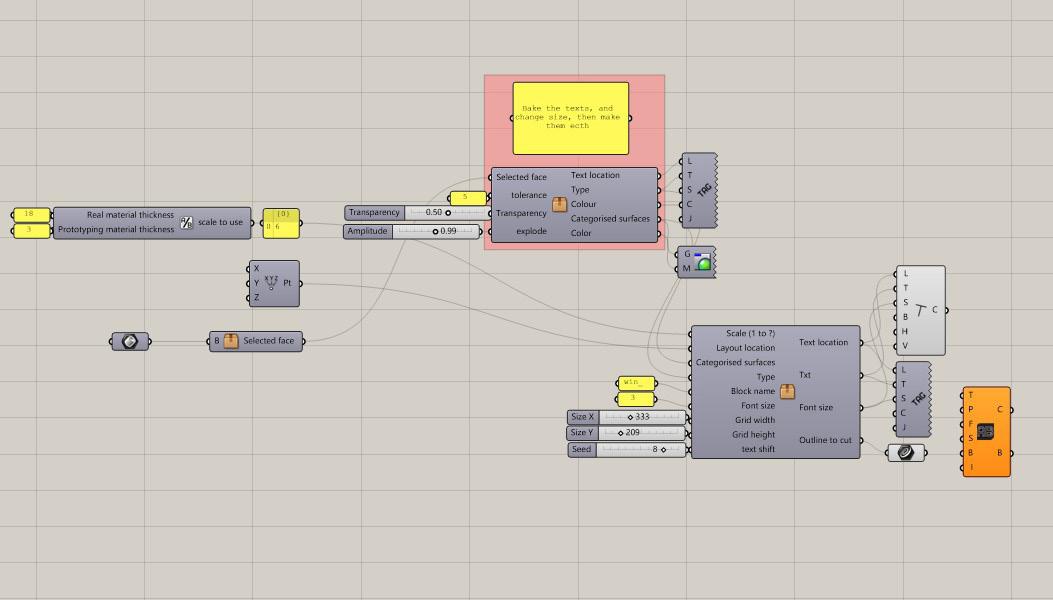
10. Scale components and texts to right scale, and preprae Luser cutting file. The image shows the final design of my Illustrator file.
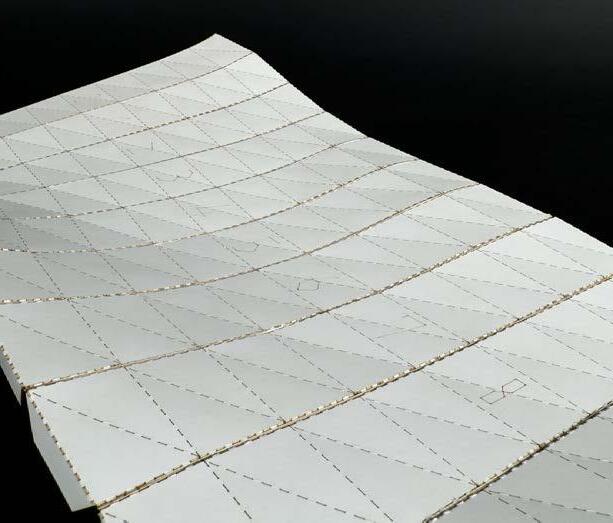
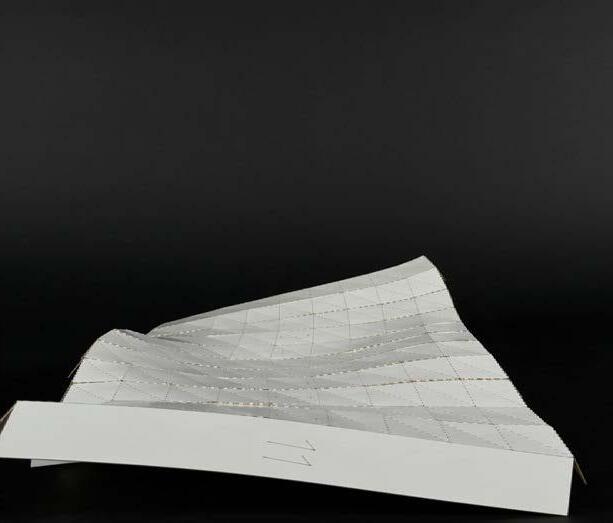
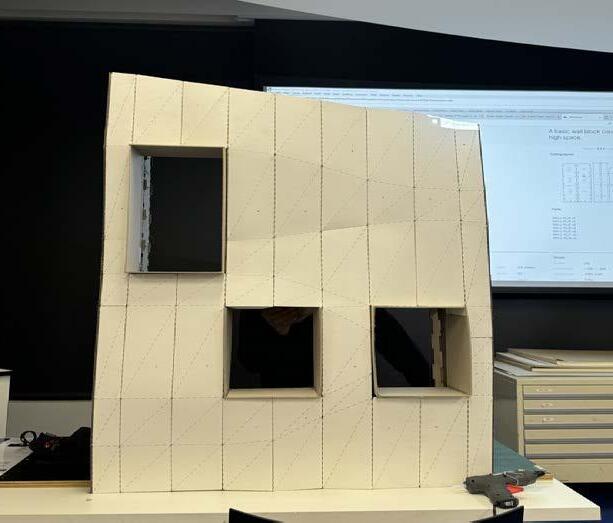
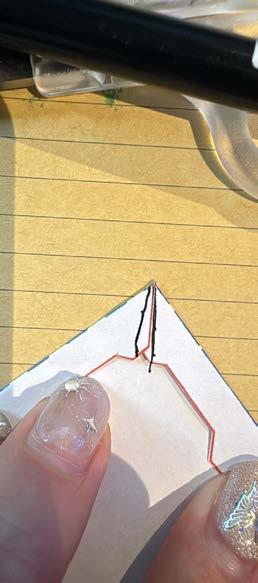
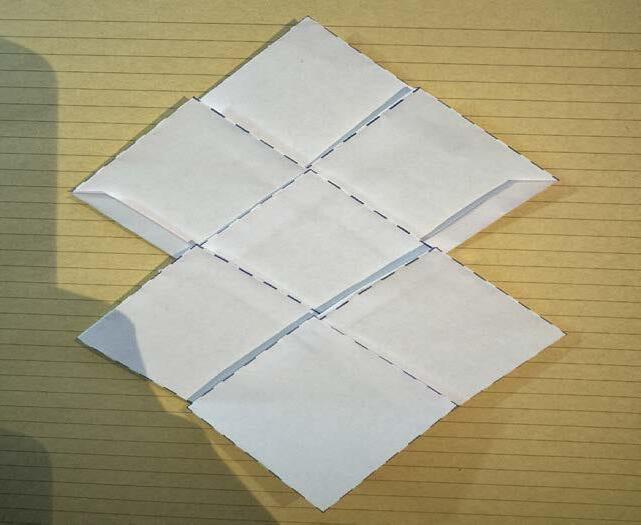
W5_Phisical model
<Summarize the cause of failure:
1. Wrong scale, it is too small.
2. The choice of model material is too thick, 0.5mm board is the best materil for folding.
3. Rhino counts from 0, the keel should be attached from the far left THE MODEL THAT FAILED THE FIRST TIME
PART C: PRECEDENT STUDY
Learn about WikiHouse
WHAT IS WIKIHOUSE?
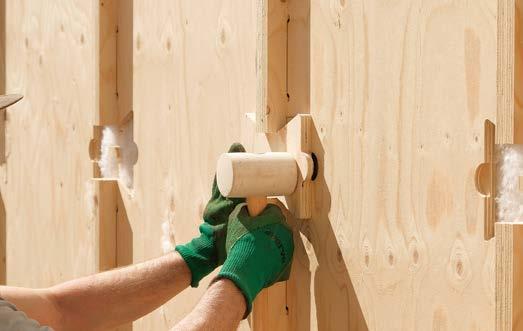
WikiHouse is a platform that offers users digital design files for modular building components, primarily made from sustainable materials like plywood. These files are then cut out using a CNC machine for precision and easy assembly. The pieces fit together like a 3D puzzle, requiring no heavy machinery or advanced construction skills. This process emphasizes sustainability and minimizes waste. WikiHouse structures can be easily adapted, expanded, or modified to meet different needs. The system also fosters collaboration by allowing anyone to contribute to the design library, improving and sharing new ideas openly within the community.
< The WikiHouse Skylark system's components are mainly connected using these small butterfly joints.
WikiHouse Partition vs. Structural Walls
In WikiHouse construction, partition walls and structural walls serve different purposes:
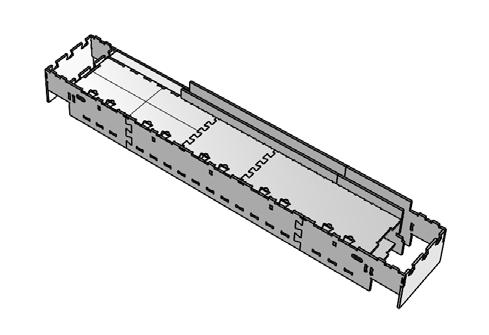
^ Structural Walls: These are load-bearing walls that serve as the primary support for the building's framework. The integrity and stability of the structure are dependent on structural walls, which cannot be removed or modified without jeopardizing the building's strength.
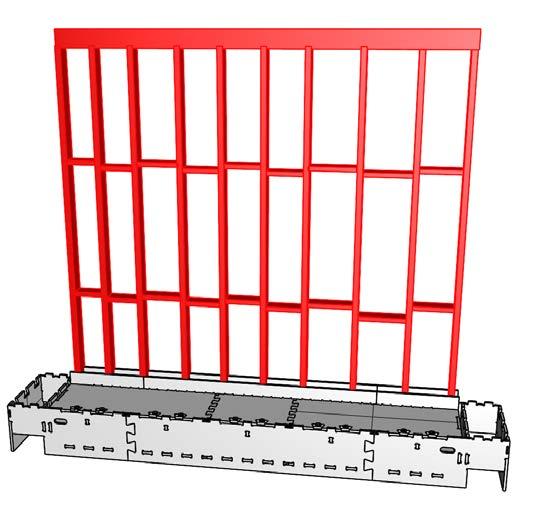
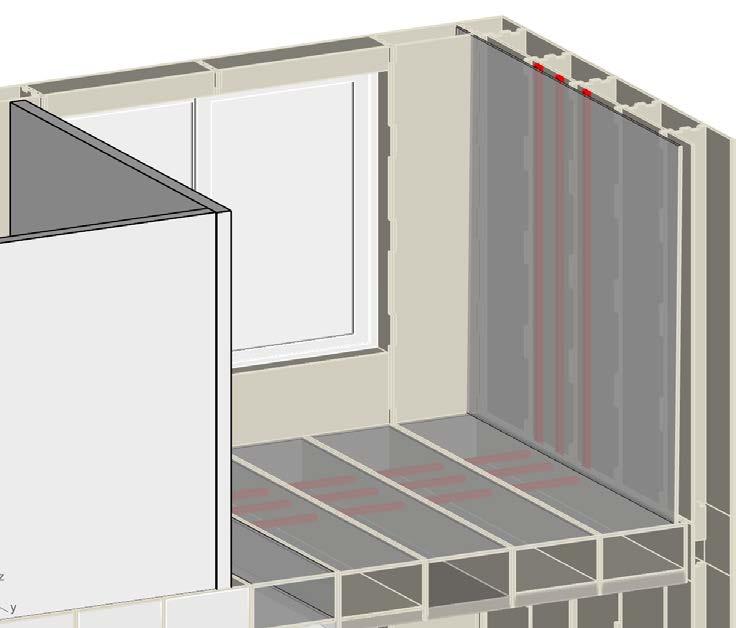
< Partition Walls: These are non-load-bearing walls that are employed to partition interior spaces. Shown in the figure is a component named XFFLOOR. They do not provide structural support for the building, which permits flexibility in layout design. If the interior space requires reconfiguration, partition walls can be effortlessly relocated or altered.
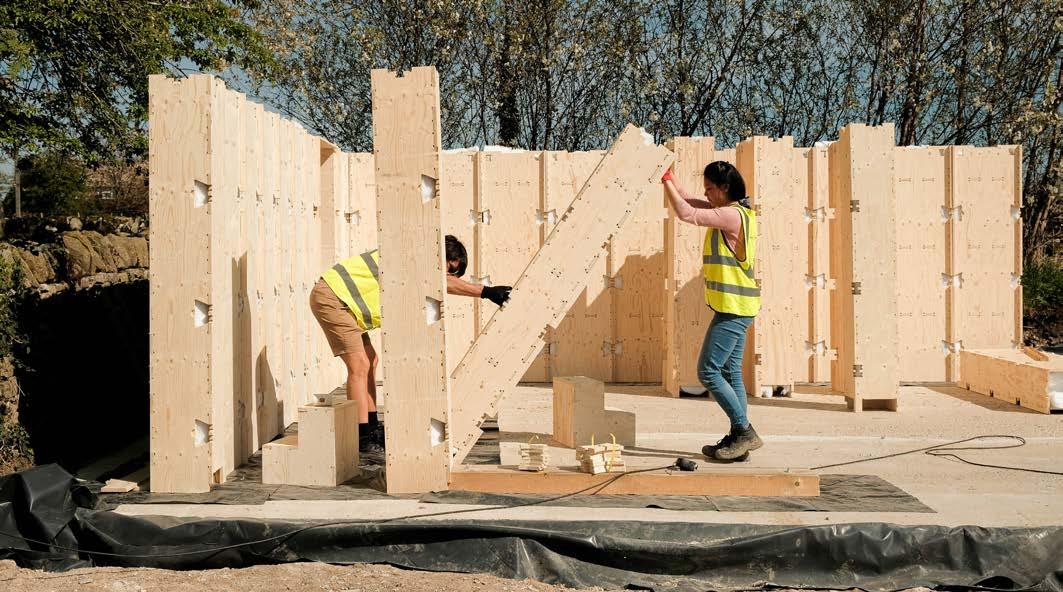
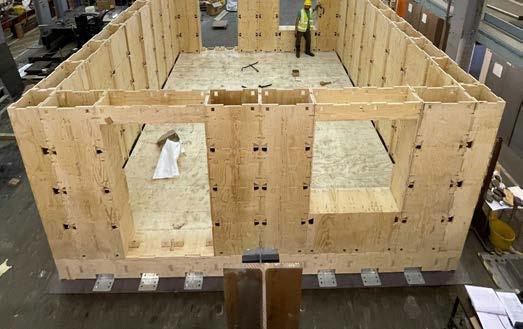
COLLECTIVE ACHIEVEMENT
All WikiHouse components were assembled from the entire class to form one wall of WIKIHOUSE, and the wall cladding was presented by tutor Canhui Chan.
PART D: WIKIHOUSE DESIGN
WikiHouse Project
Team: Yuan Xu, Traven Lam
INTRODUCTION
This project involved an in-depth study of the WikiHouse as a precedent, using an assigned Ground Floor Plan as the basis for designing our WikiHouse system house. The design was completed collaboratively by myself and my team member, Traven Lam. We selected the Skylark 250 series components for our construction.
In this collaborative design effort, I was primarily responsible for the design of the floor components, ground floor exterior walls, midsection load-bearing walls, and understanding the additional structural components of the WikiHouse. I proposed effective solutions for transforming the floor plan into the WikiHouse system.
My team member, Traven Lam, was responsible for the design of the roof, interior walls, gutters, and services. Together, we completed the group model and jointly contributed to the design of the attic floor and wall cladding.
Original Floor Plan
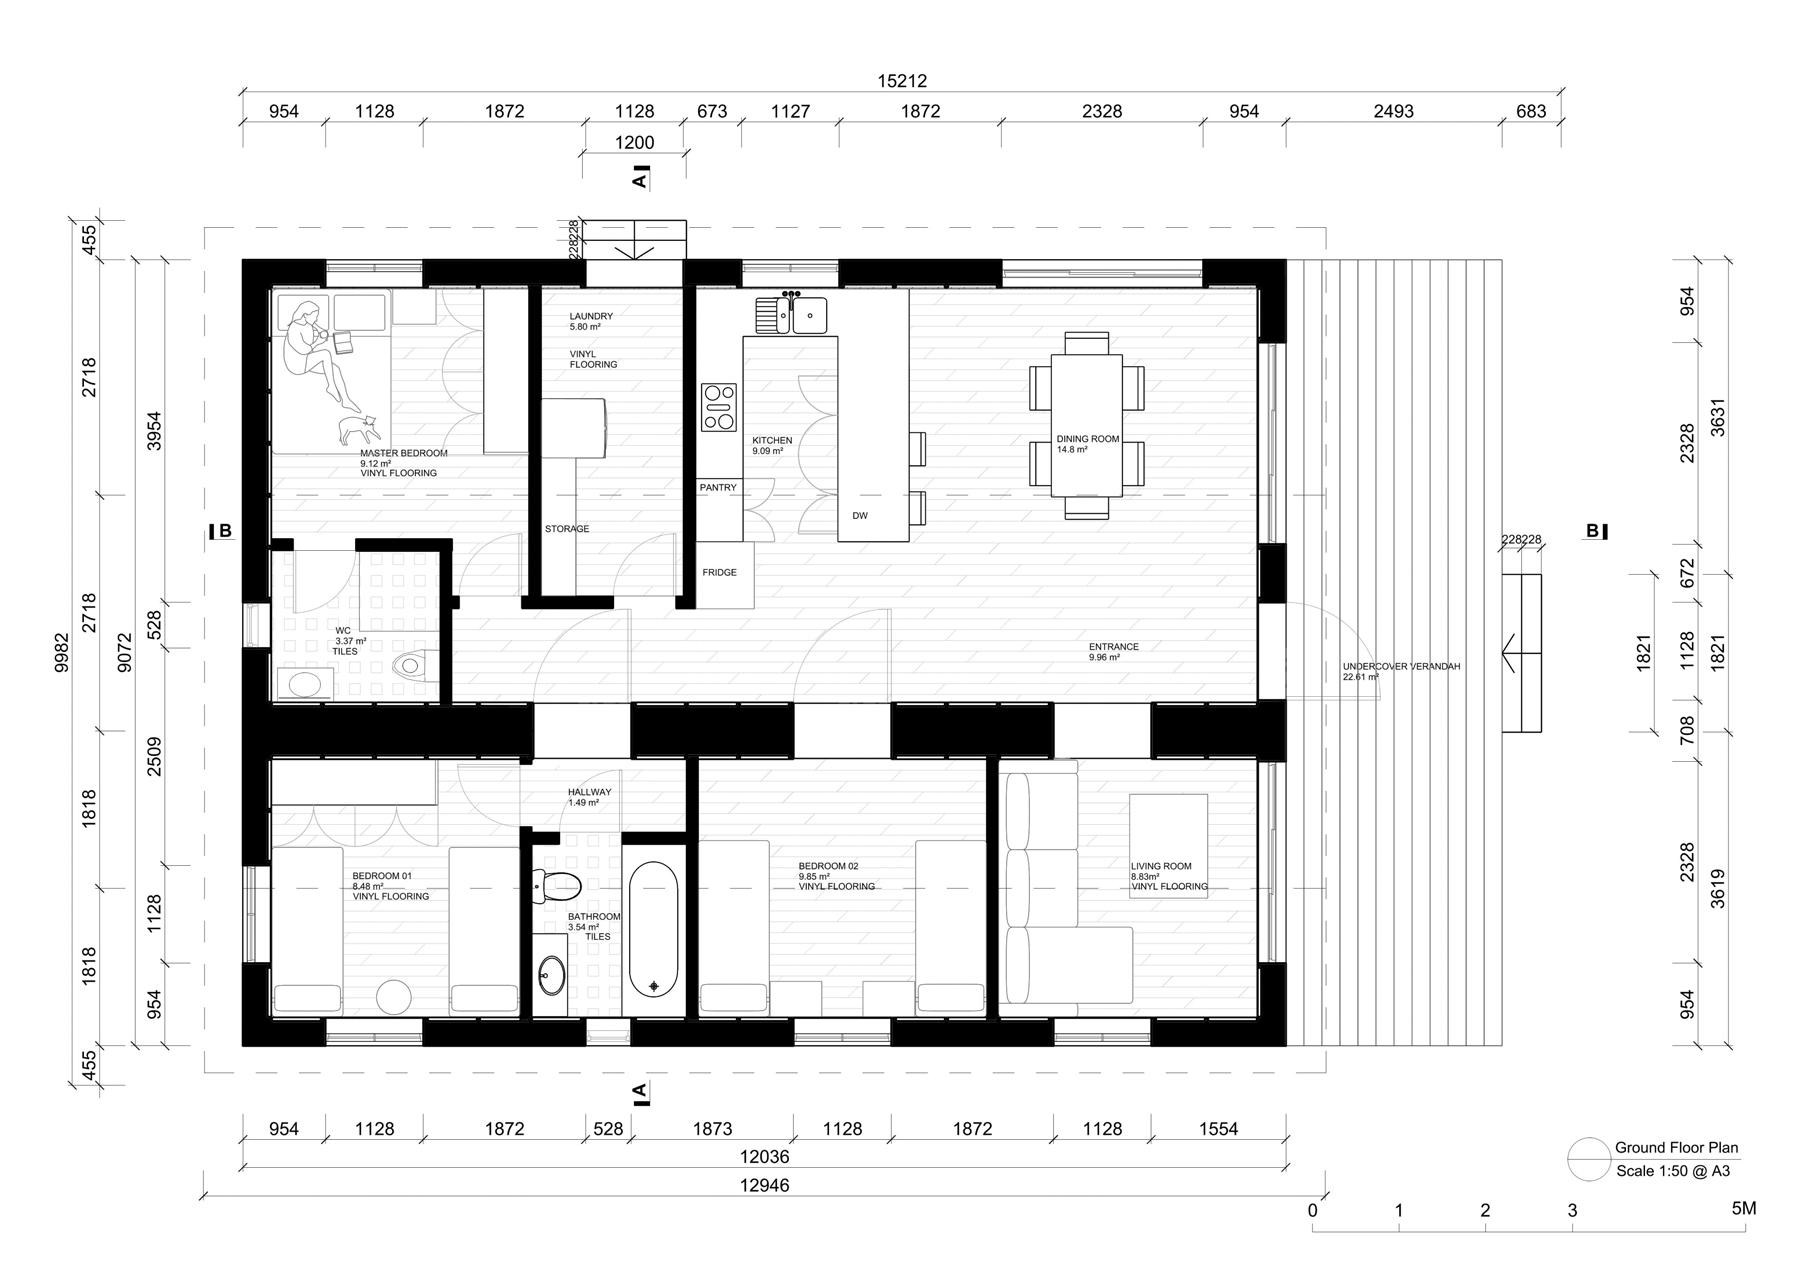
The initial floor plan specified a residential house measuring 9.661 by 14.858 meters. The design requirements included a central main entrance and a side entrance providing access to the laundry room. These elements were essential to the overall layout and functionality of the space.
Additionally, the layout needed to accommodate three bedrooms, two bathrooms, a living room, kitchen, dining area, and an external deck space.
- Drawing by Yuan Xu
Design Process Using WikiHouse Blocks
FIRST DESIGN GRID
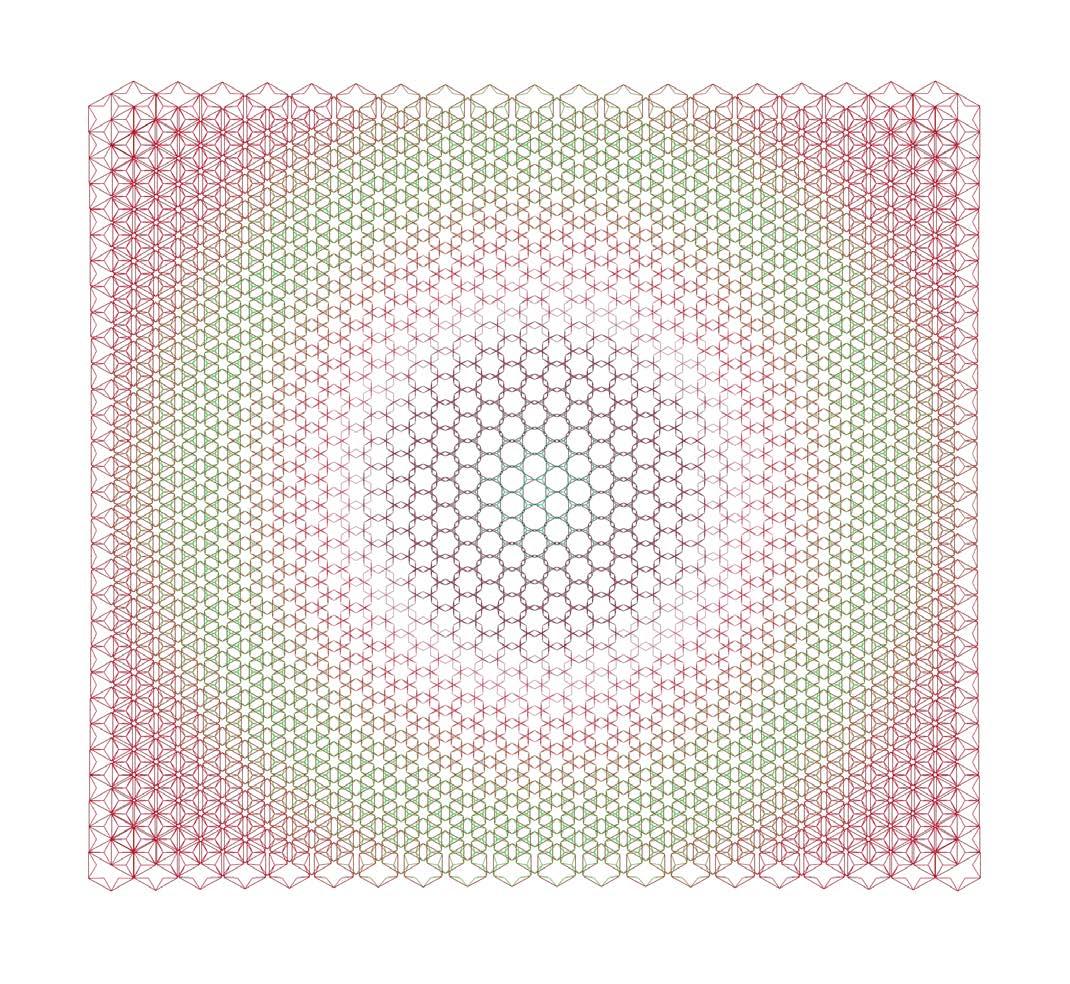
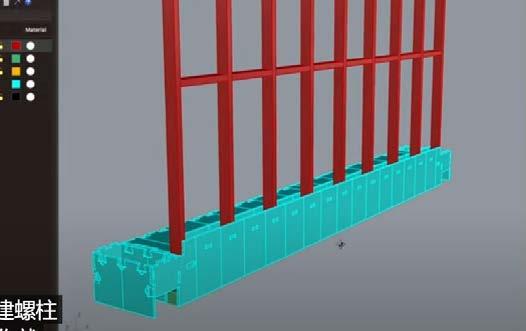
The accompanying illustration presents our initial design grid, where the grid represents the arrangement of WikiHouse elements. In this layout, red lines signify horizontal END and FLOOR components, while green lines denote corner columns and wall components.
Early in the process, we faced a significant challenge. The longest WikiHouse component measures only approximately 6 meters, which falls notably short of the dimensions in our original design. This limitation led to a substantial reduction in usable space,
making it challenging to meet the initial design specifications.
- Drawing by Yuan Xu
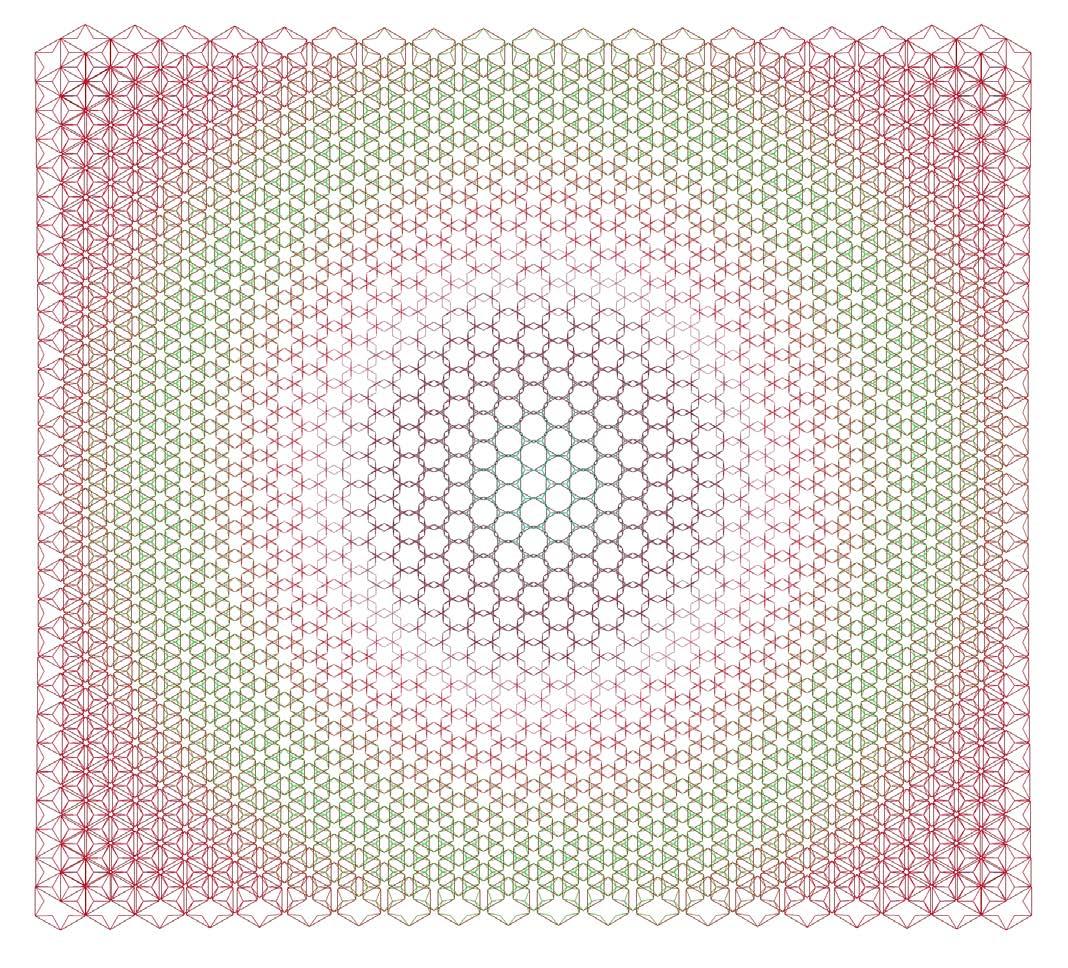
FINAL DESIGN GRID
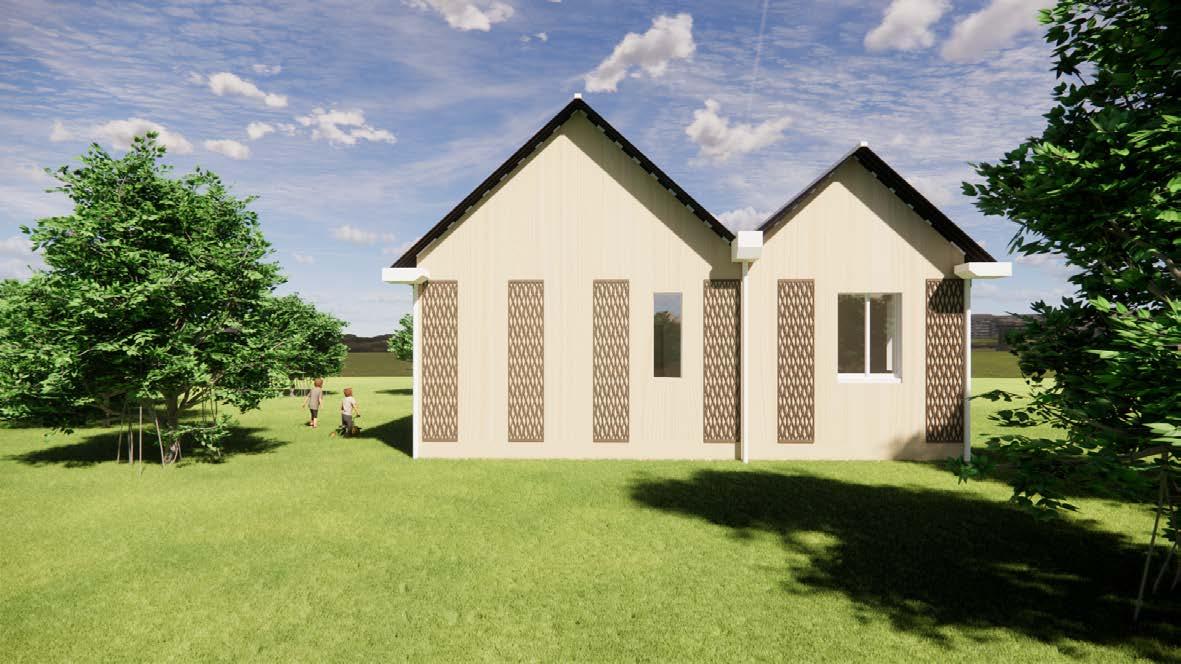
This is our solution, which also represents the final design grid. After extensive exploration, we resolved the issue by combining two END/ FLOOR components, as illustrated by the red and blue grids. This approach divided the house into two primary sections. Essentially, we merged two WikiHouse units, resulting in a dual-roof structure. To support the roofs, a structural wall was strategically placed at the center of the house.
- Drawing by Yuan Xu
Challenges & Solutions
CHALLENGES
1. The building size of the drawing is much larger than the End & Floor component's size.
2. Main entrance in the middle
3. Custom components
4. Understanding where to place structural walls and partition walls
5. How to set the roof and the size selection of roof
6.Gutter Settings
SOLUTIONS
1. (See Design process using Wikihouse Blocks - Final design grid)
2. The second challenge we encountered involved the central main entrance. When we combined the two WikiHouse units, it became apparent that the center contained two corner columns. Due to the dimensions of this component, the connection points differed from other areas, preventing us from placing elements such as doors, walls, or windows in the middle of this section. To address this, we utilized two ground components of varying lengths, which ultimately provided sufficient space for the main entrance and the central
corridor.
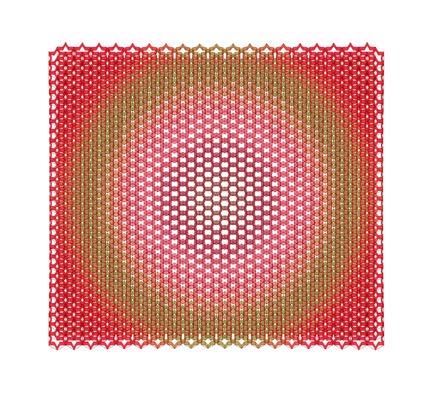
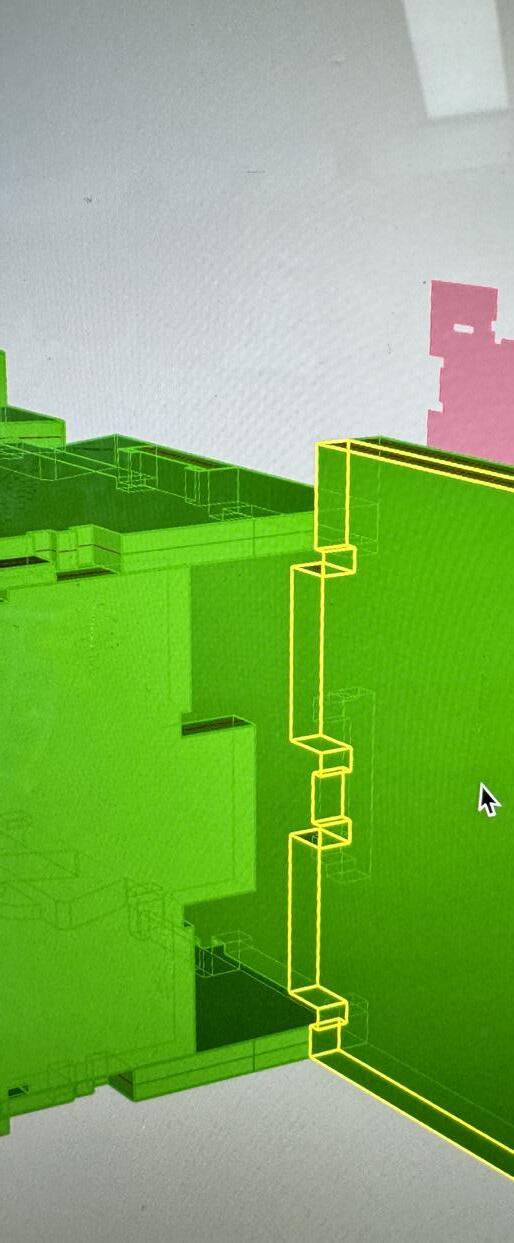
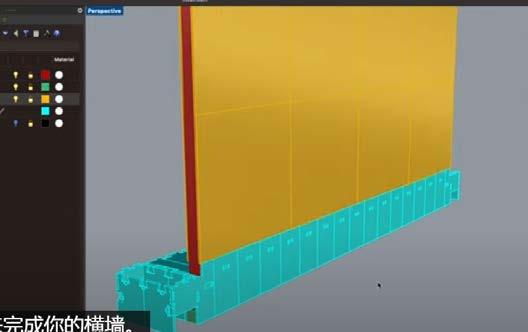
3. During the design process, I experimented with combining components, custom-making certain parts, and modifying others. Ultimately, the only modified component incorporated into the final design was the adjustable internal wall frame, known as the XFFLOOR. The areas where the XFFLOOR was implemented are highlighted in yellow in the accompanying diagram.
4. In the central section where the two WikiHouse units were combined, structural walls were employed to support the two roofs and the angled walls connecting them. In all other areas, partition walls were used.
5. After finalizing the design for the ground components, this issue was resolved by selecting roof components that matched the length of the END/FLOOR components used. In this instance, we employed two gable roof roofs to complete the design.
6.Given the presence of two roofs, we installed gutters on both sides and also incorporated a triangular-shaped gutter in the center to align with the roof's shape.
Custom-modified components - XFFLOOR
The structural wall connecting the roof and the choice of two roofs componets
Gutters
Challenges & Solutions
<< In the initial design, there was a very narrow bathroom at the end of the corridor, with only one shower serving the three rooms. We revised this by transforming it into a bathroom with a shower feature and connected it to the master bedroom.
- Design by Traven Lam
<< To connect the two WikiHouse units, we added door frame components between the structural walls. This modification served the dual purpose of supporting the roofs and facilitating connectivity between the units.
- Designed collaboratively by the team
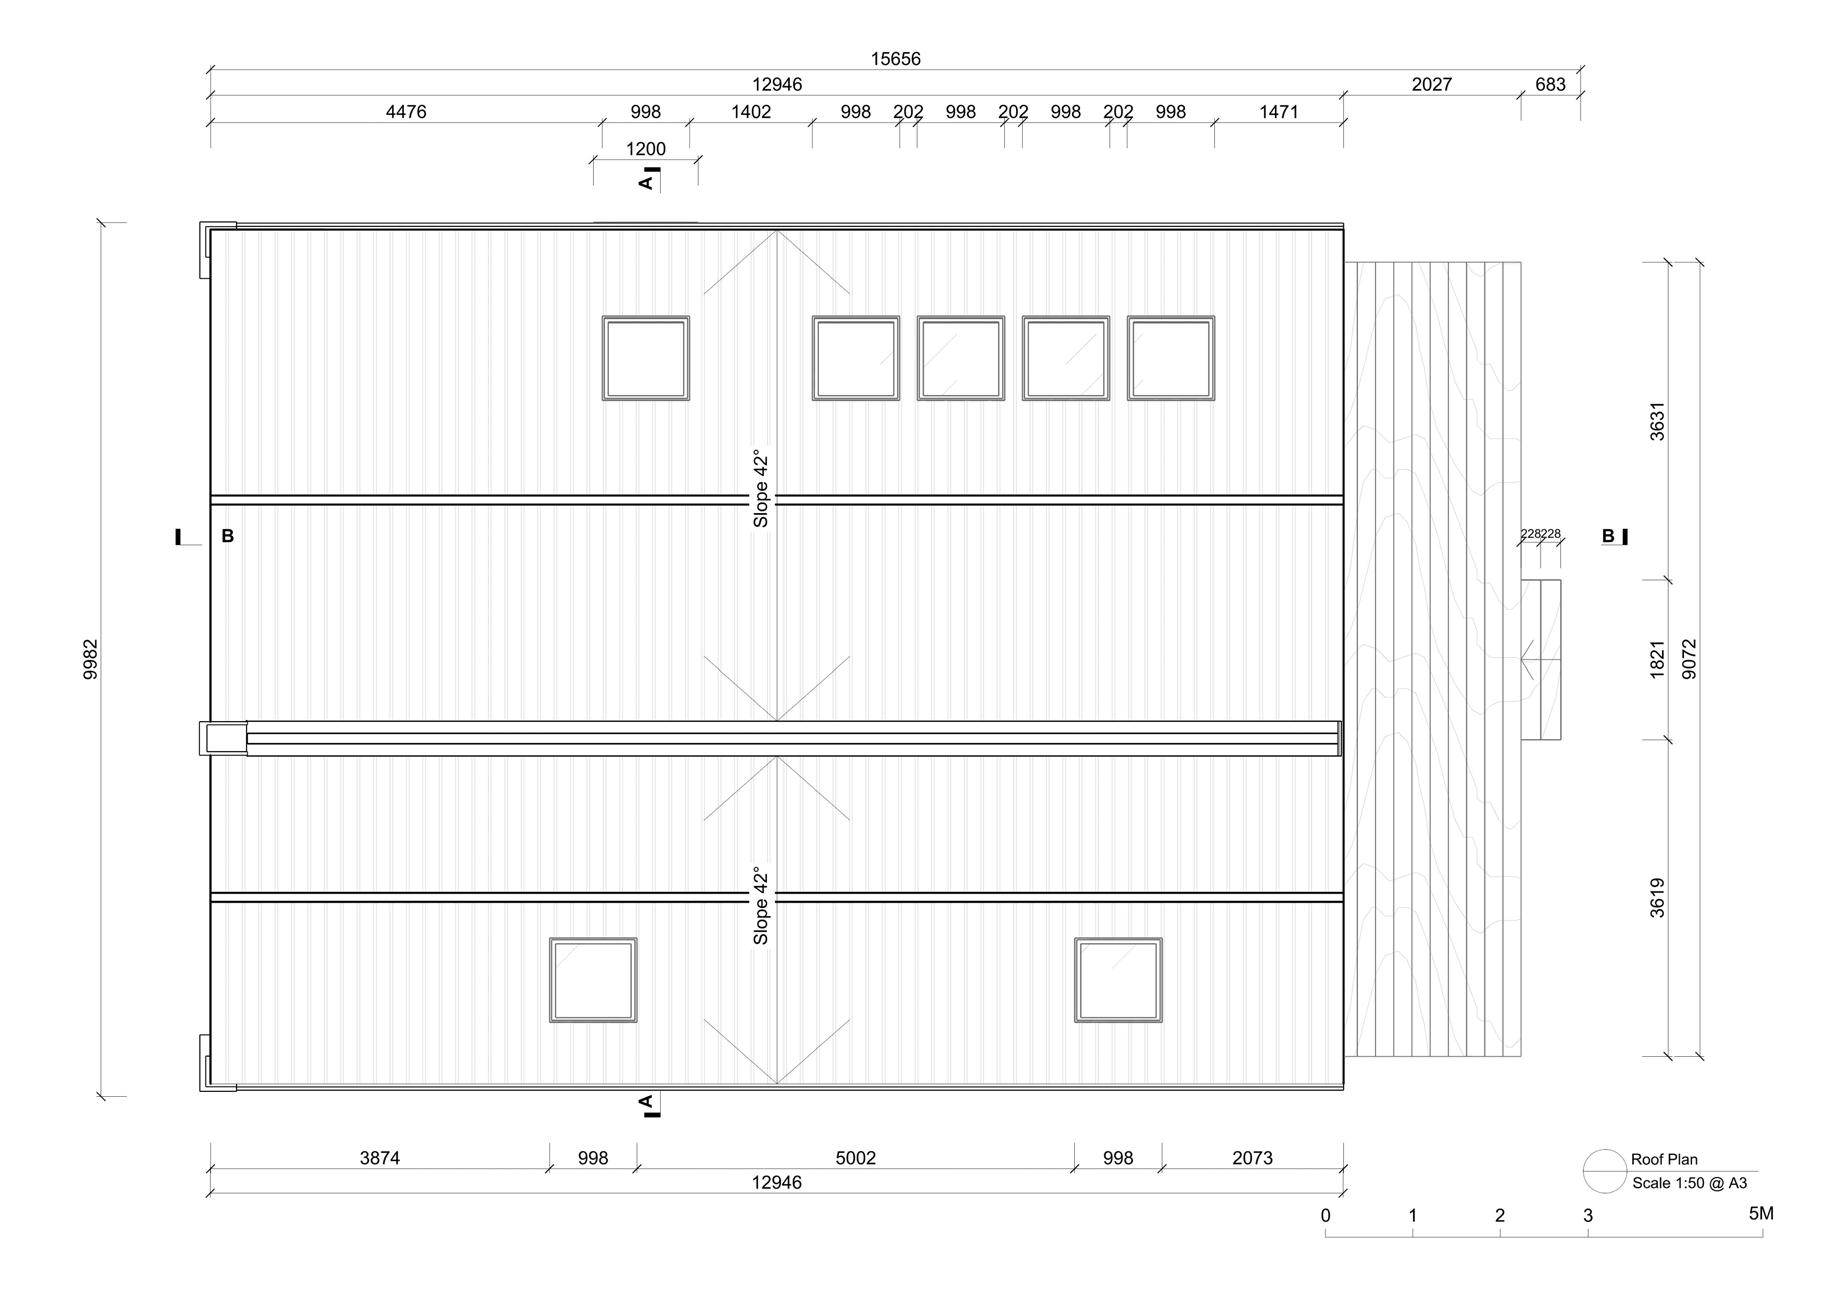
Roof Plan
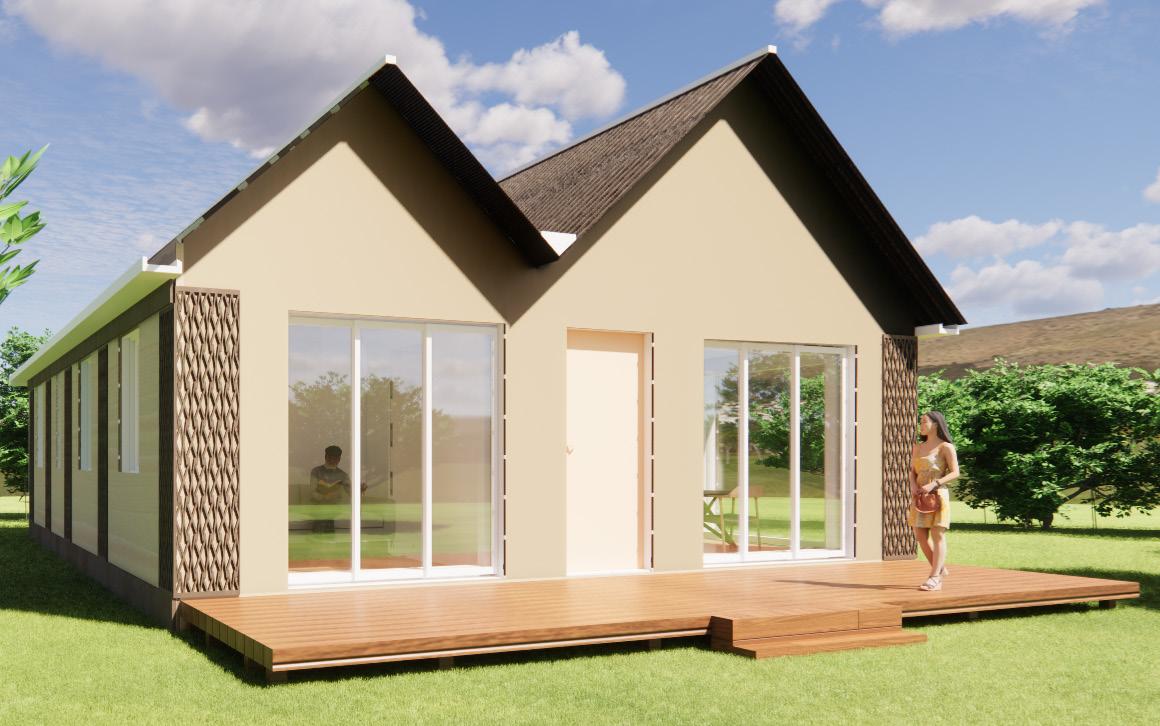
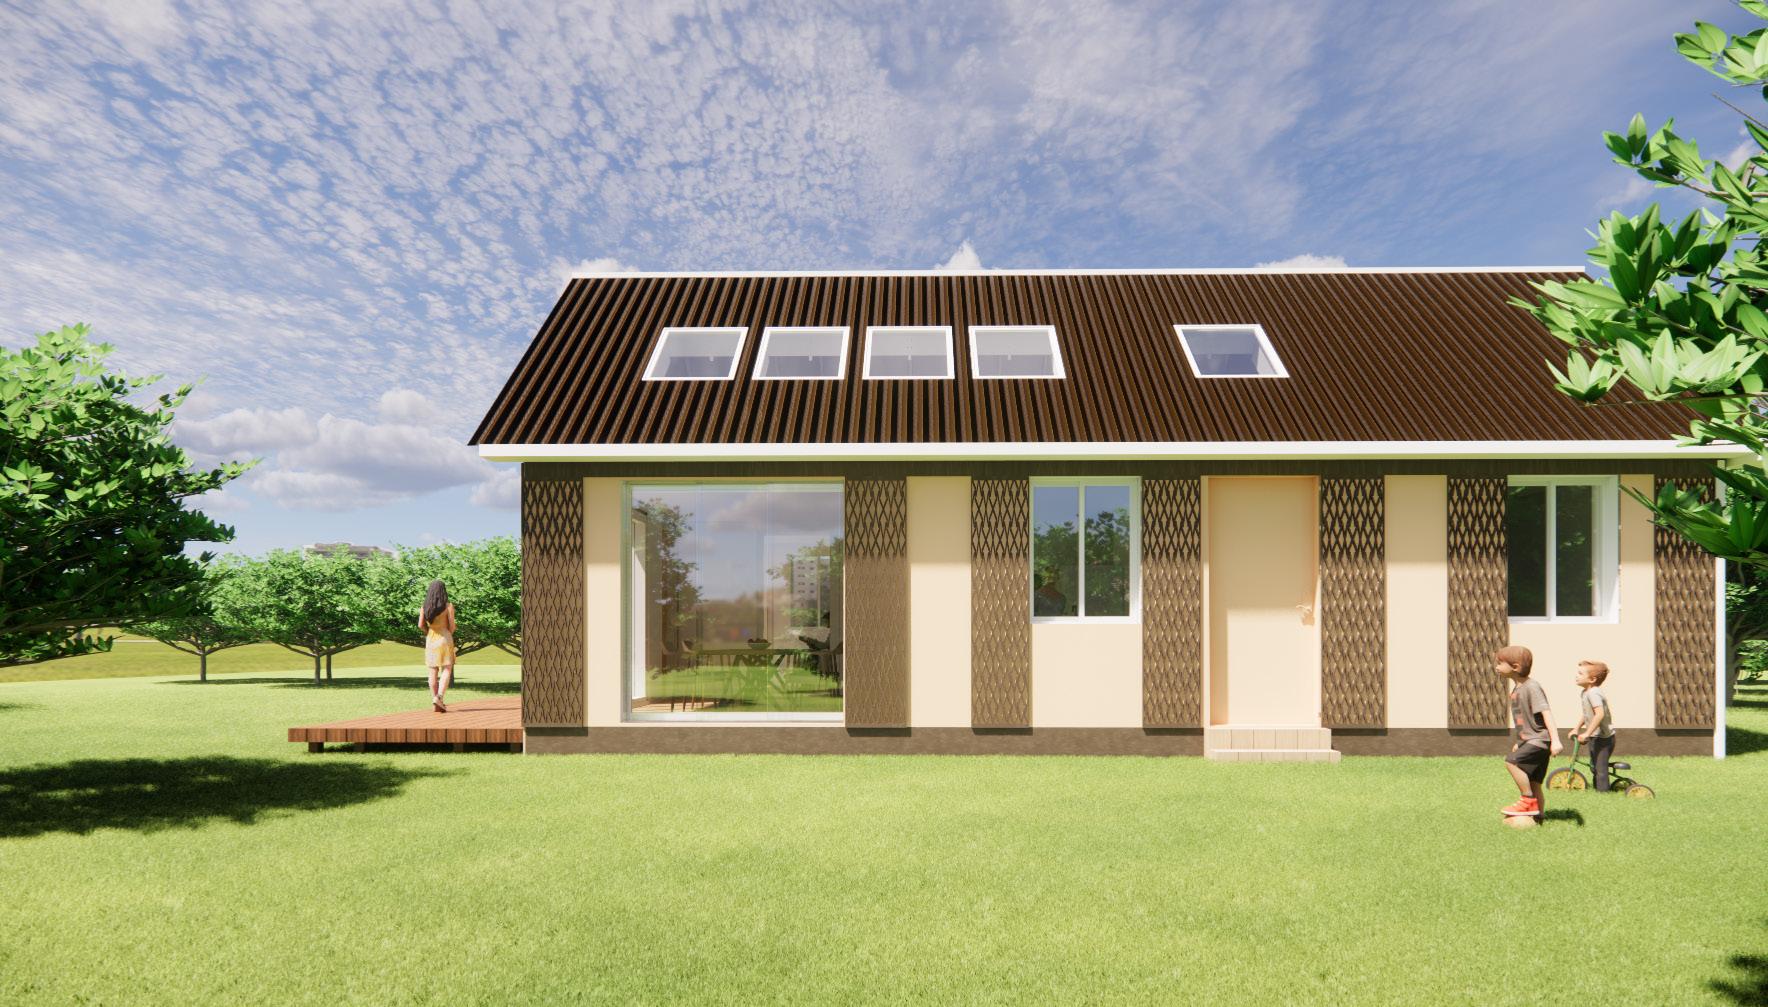
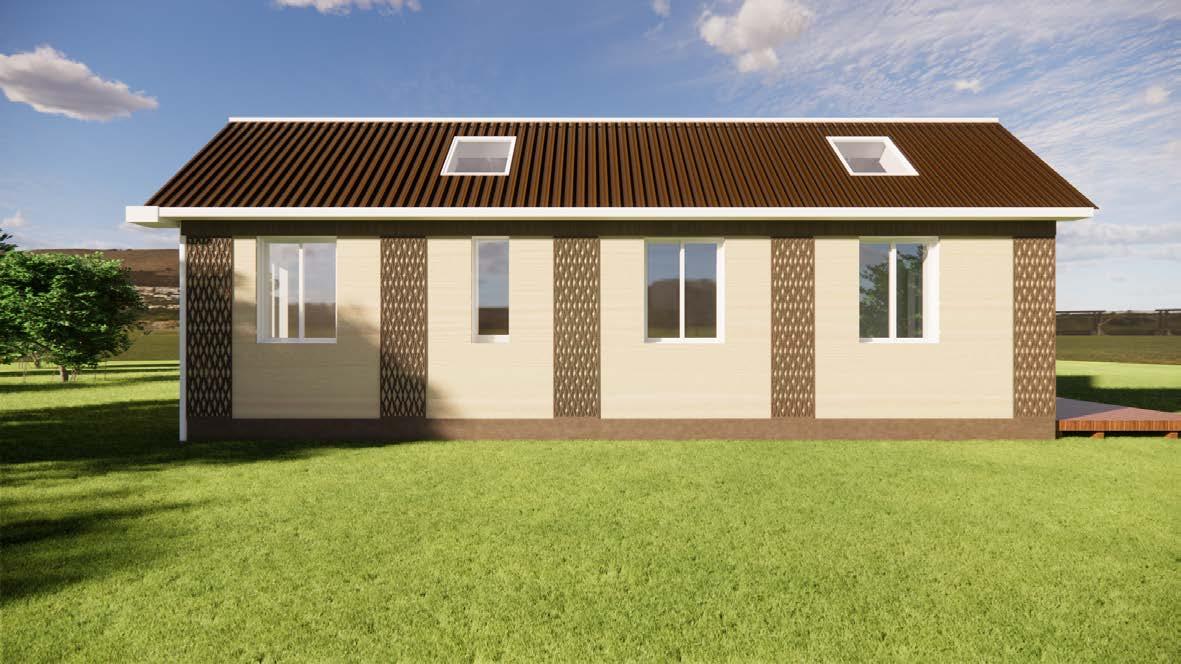
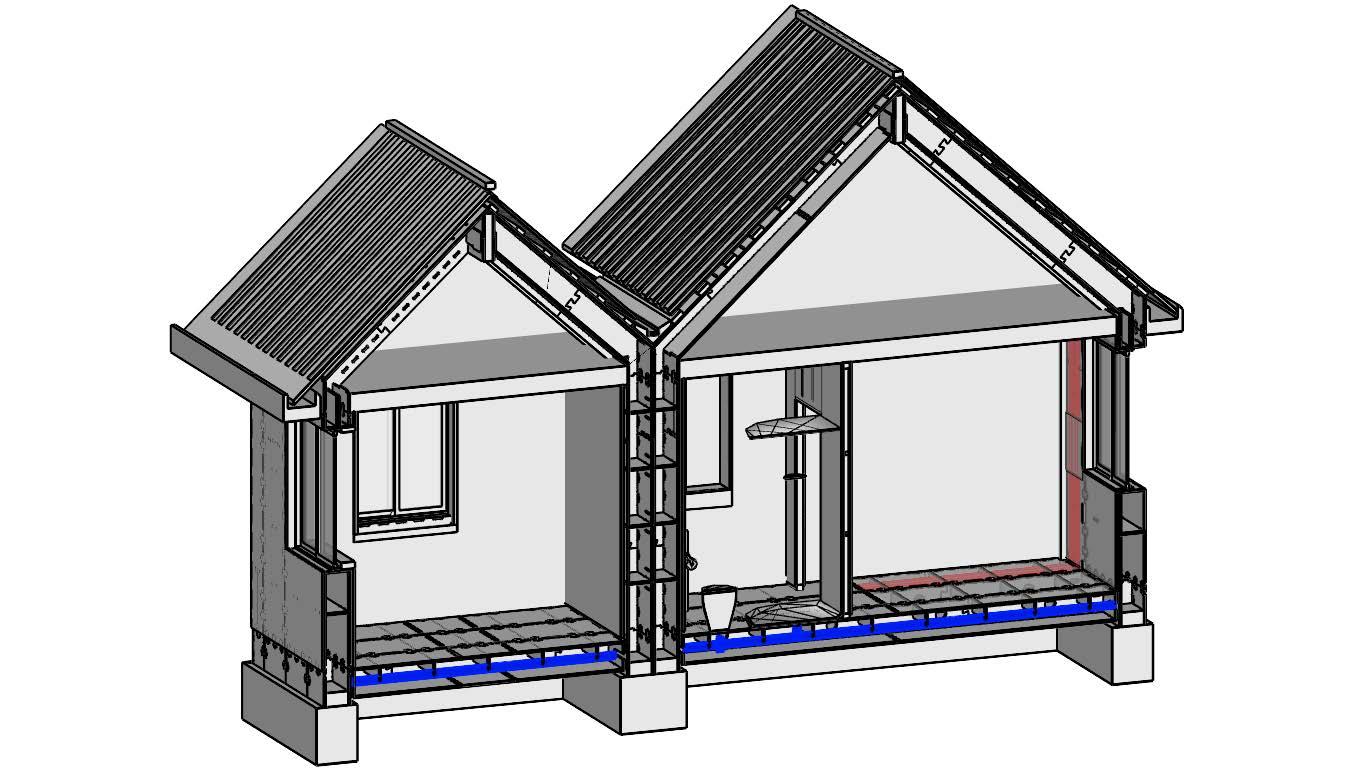
To enhance natural light in the design, we incorporated skylights into both roofs. Each roof is a 42° gable roof design, and we opted for a lightcolored metal roofing to complement the overall aesthetic.
- Drawing by Yuan Xu
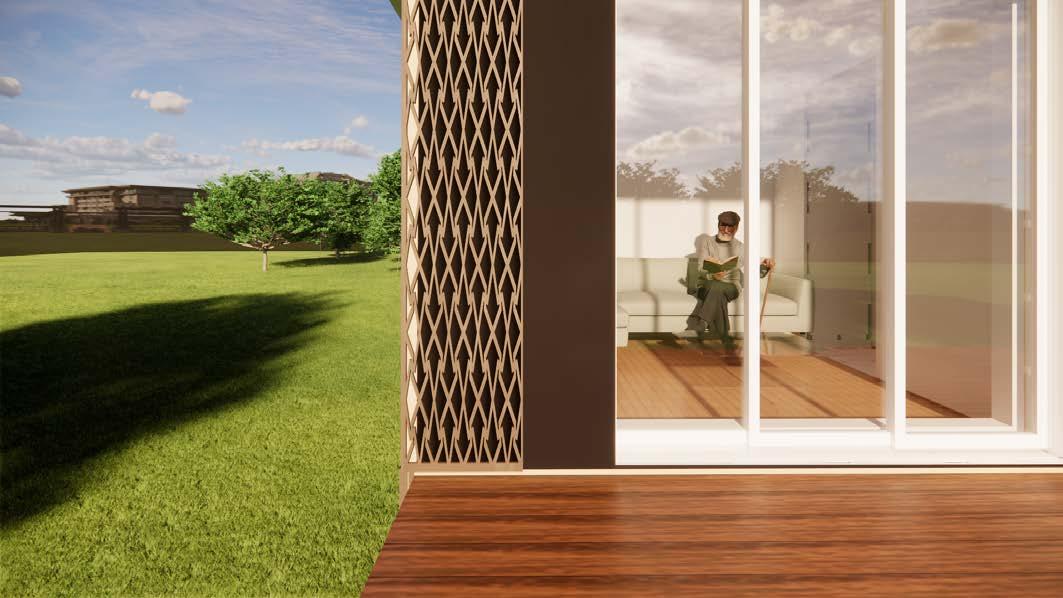
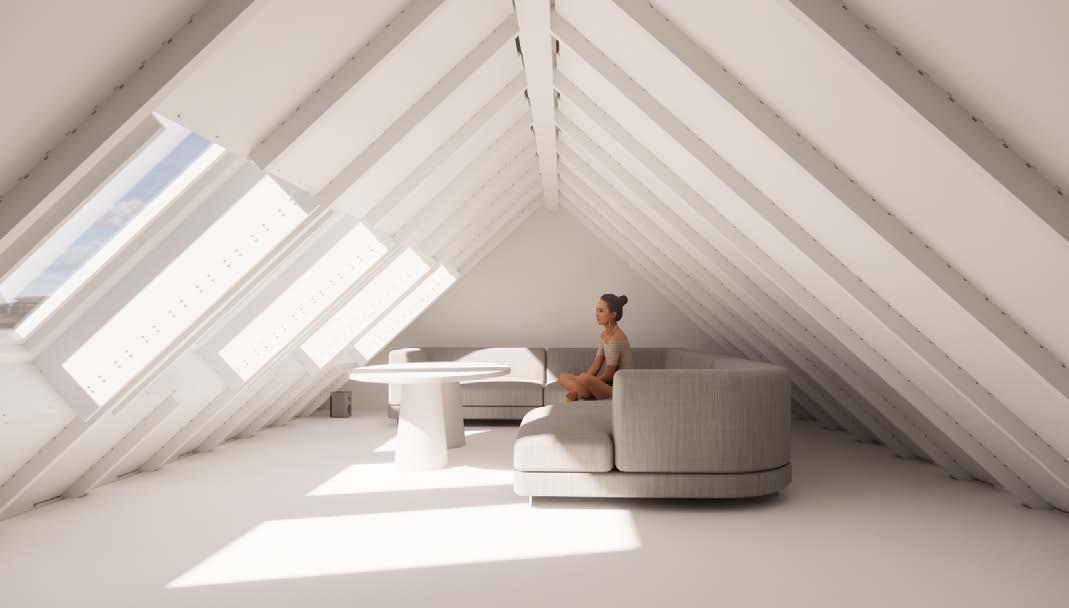
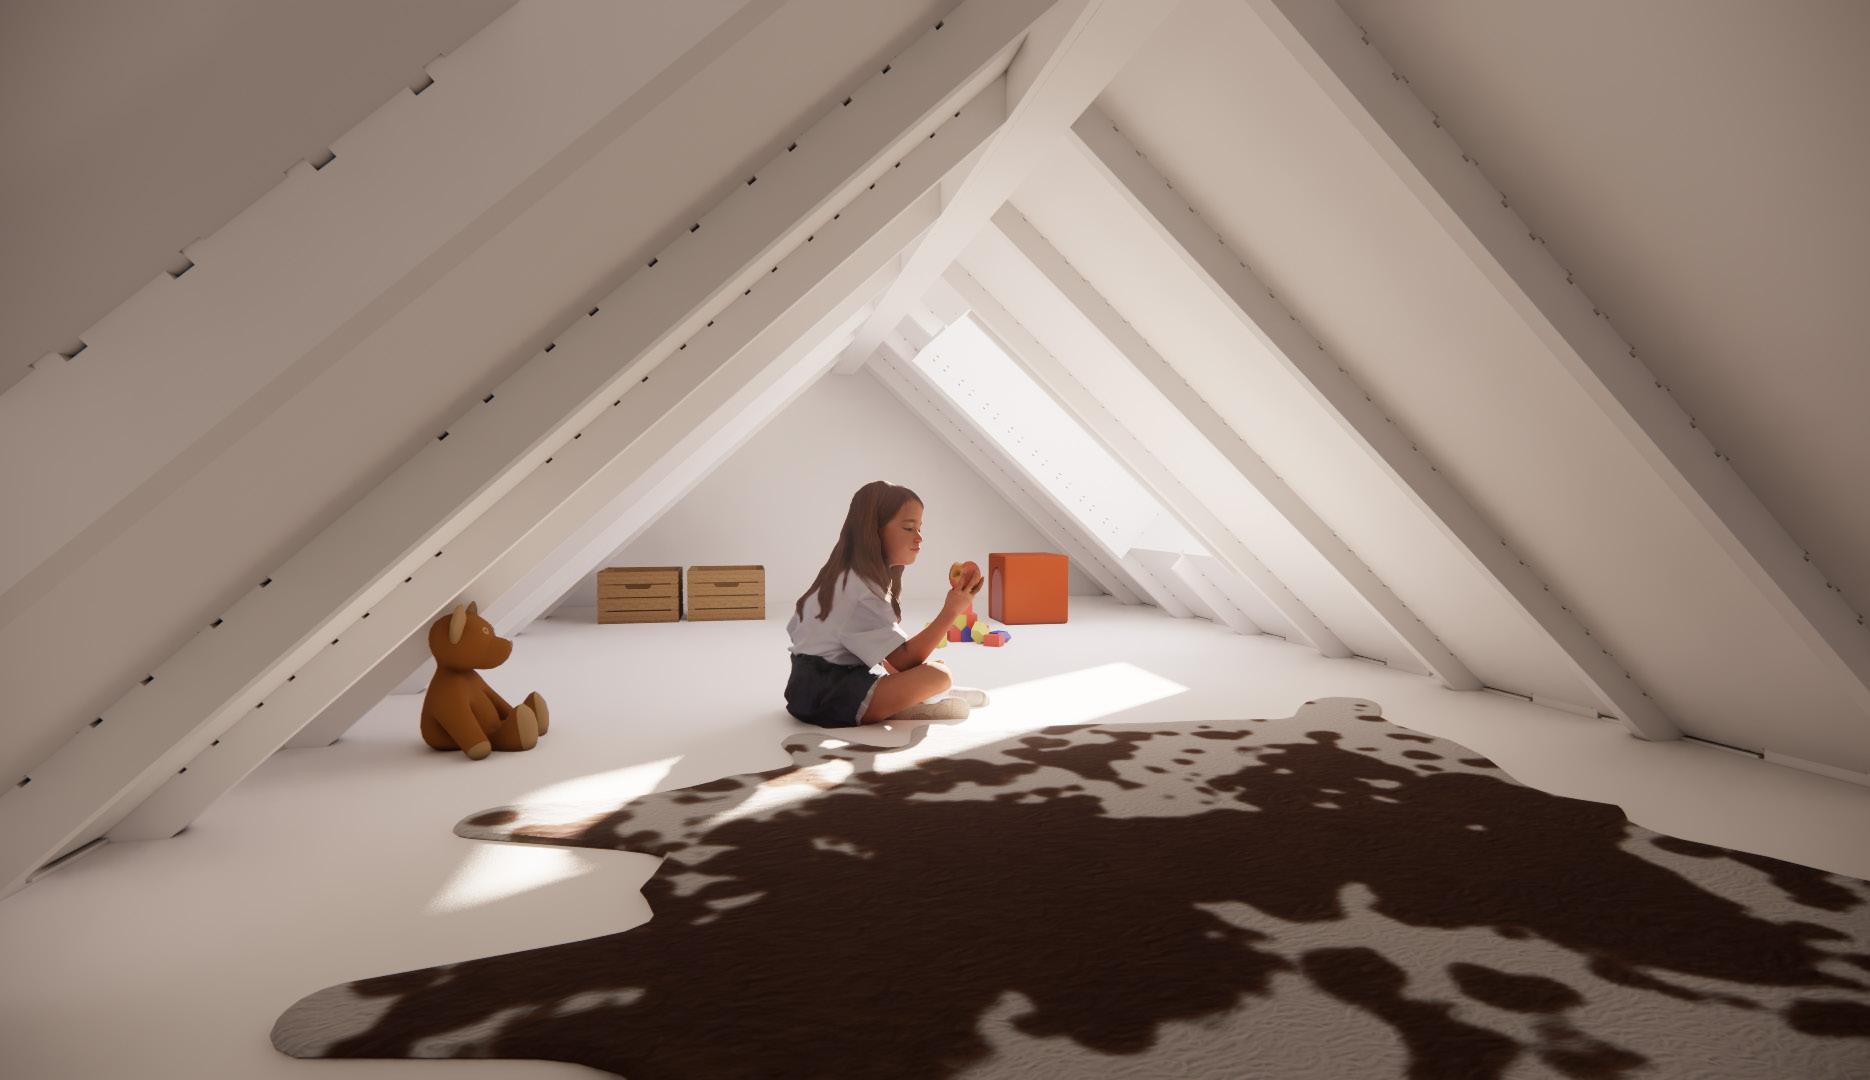
During the refinement phase of the design, we received valuable feedback from our mentor. To optimize space, we added an additional floor to each side of the house. On the left side, the lower attic space, accessible via an attic ladder, can serve as either a storage area or a playroom for children. We made every effort to integrate natural light into the design. The right-side attic, with enough room for large furniture, offers an ideal relaxation area bathed in sunlight, perfect for reading.
This was a completely new experience for me, as in my home country of China, most residential buildings are either high-rise apartments or flat-roofed houses. It was my first time working with an attic floor and attic ladder design.
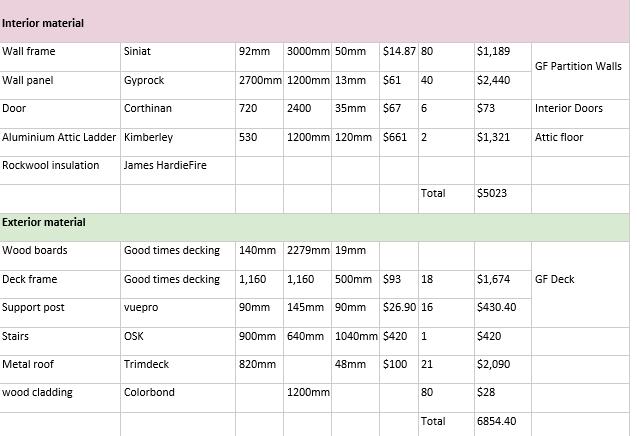
Additionally, WikiHouse walls are notably thicker than standard walls. For insulation, we used rock wool, with 250mm insulation in the walls and 350mm in the roof components, which we highly recommend for optimal thermal performance.
- Drawing by Yuan Xu
- Drawing by Yuan Xu
- Drawing by Traven Lam
- Drawing by Traven Lam
- Drawing by Traven Lam
- Drawing by Traven Lam
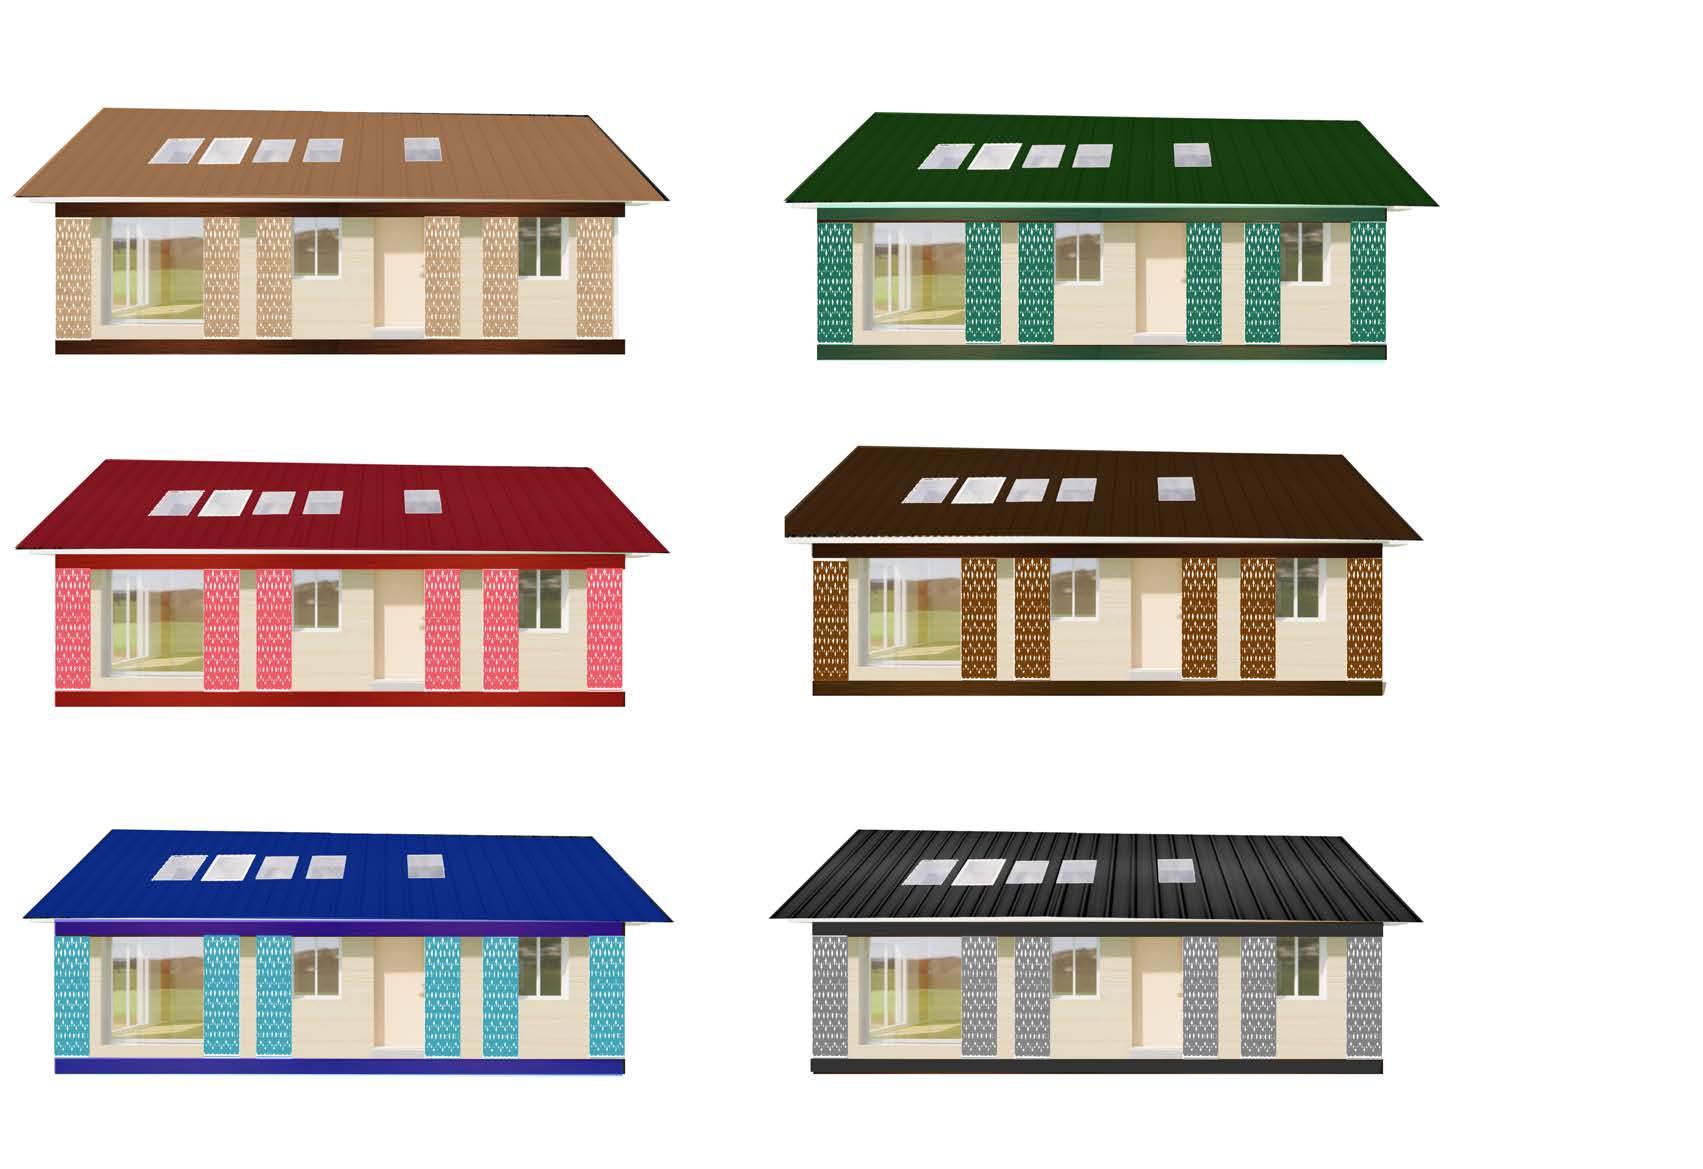
Color Exploration
Drawing by Traven Lam
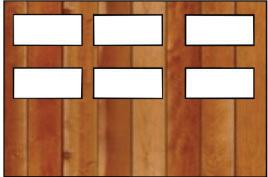
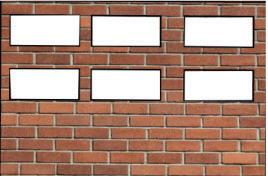
Among the various materials we considered, we ultimately chose wood. Its relatively light weight makes it more suitable for the wooden structure of the WikiHouse, particularly in comparison to materials like brick and natural stone that we brainstormed earlier. Additionally, it aligns with the initial impression the WikiHouse structure gave us, serving as a source of inspiration.
- Designed collaboratively by the team
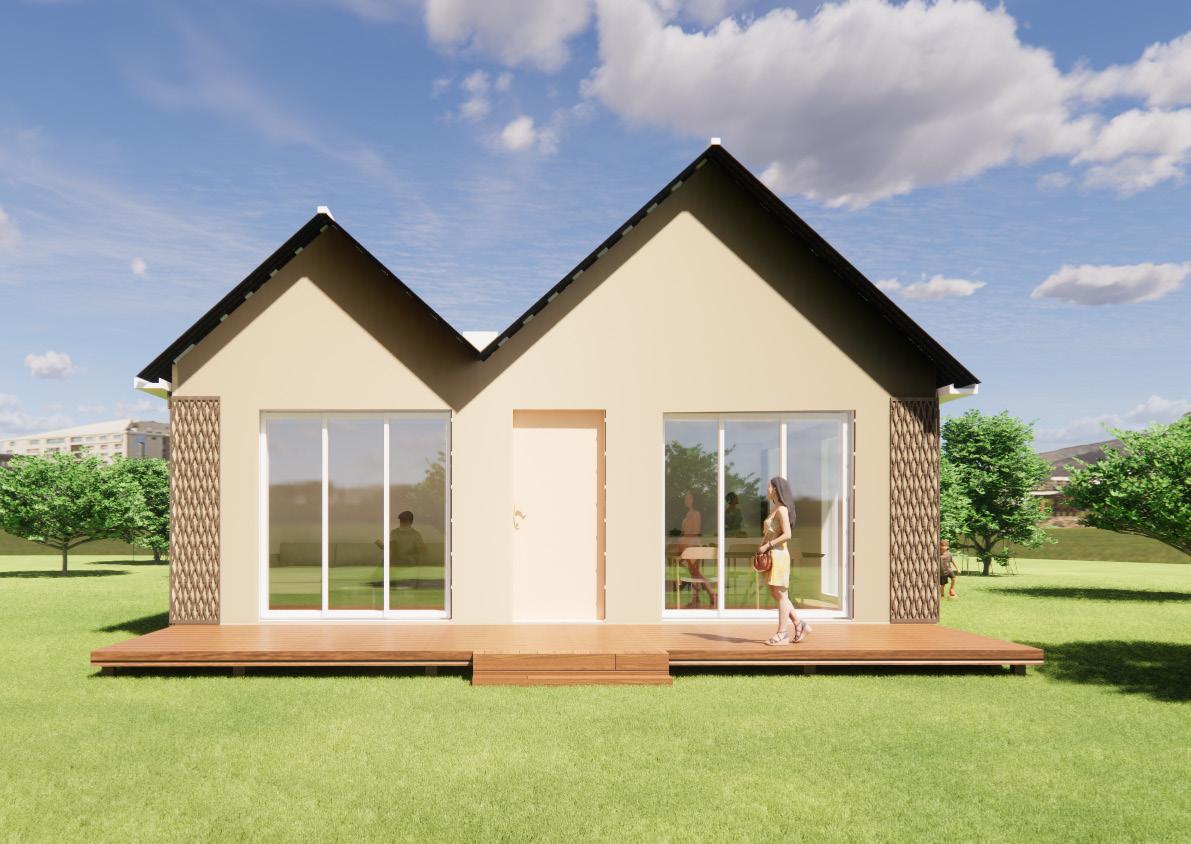
- Render by Yuan Xu
- Render by Yuan Xu
- Render by Yuan Xu
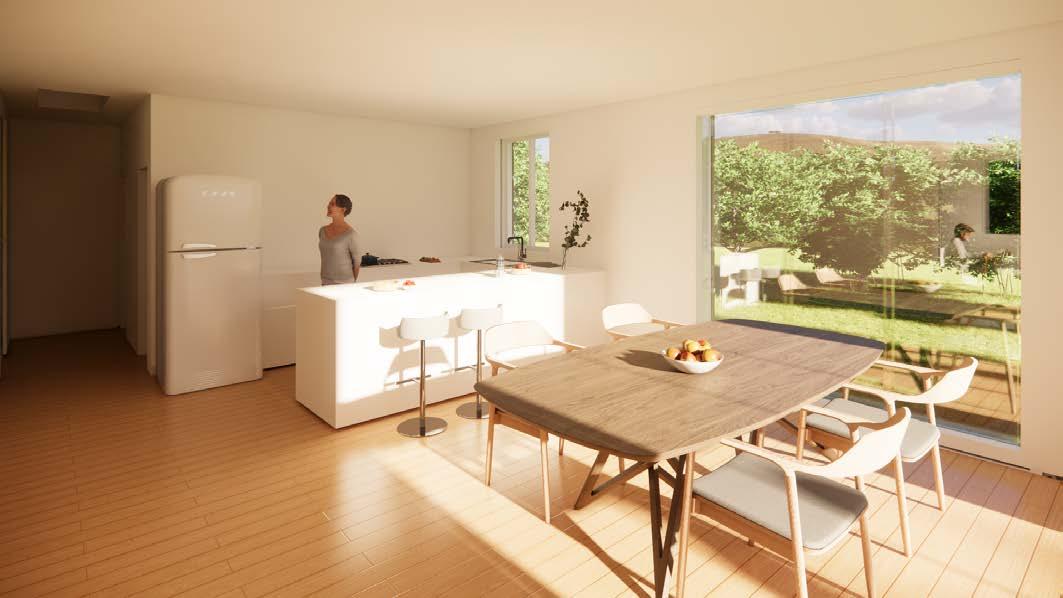
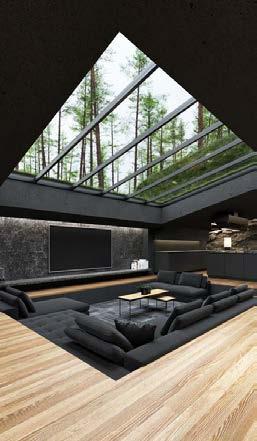
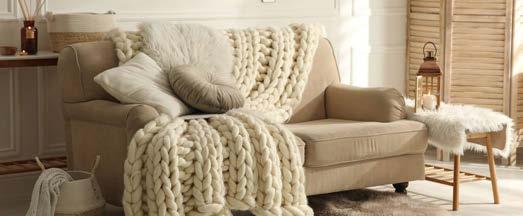
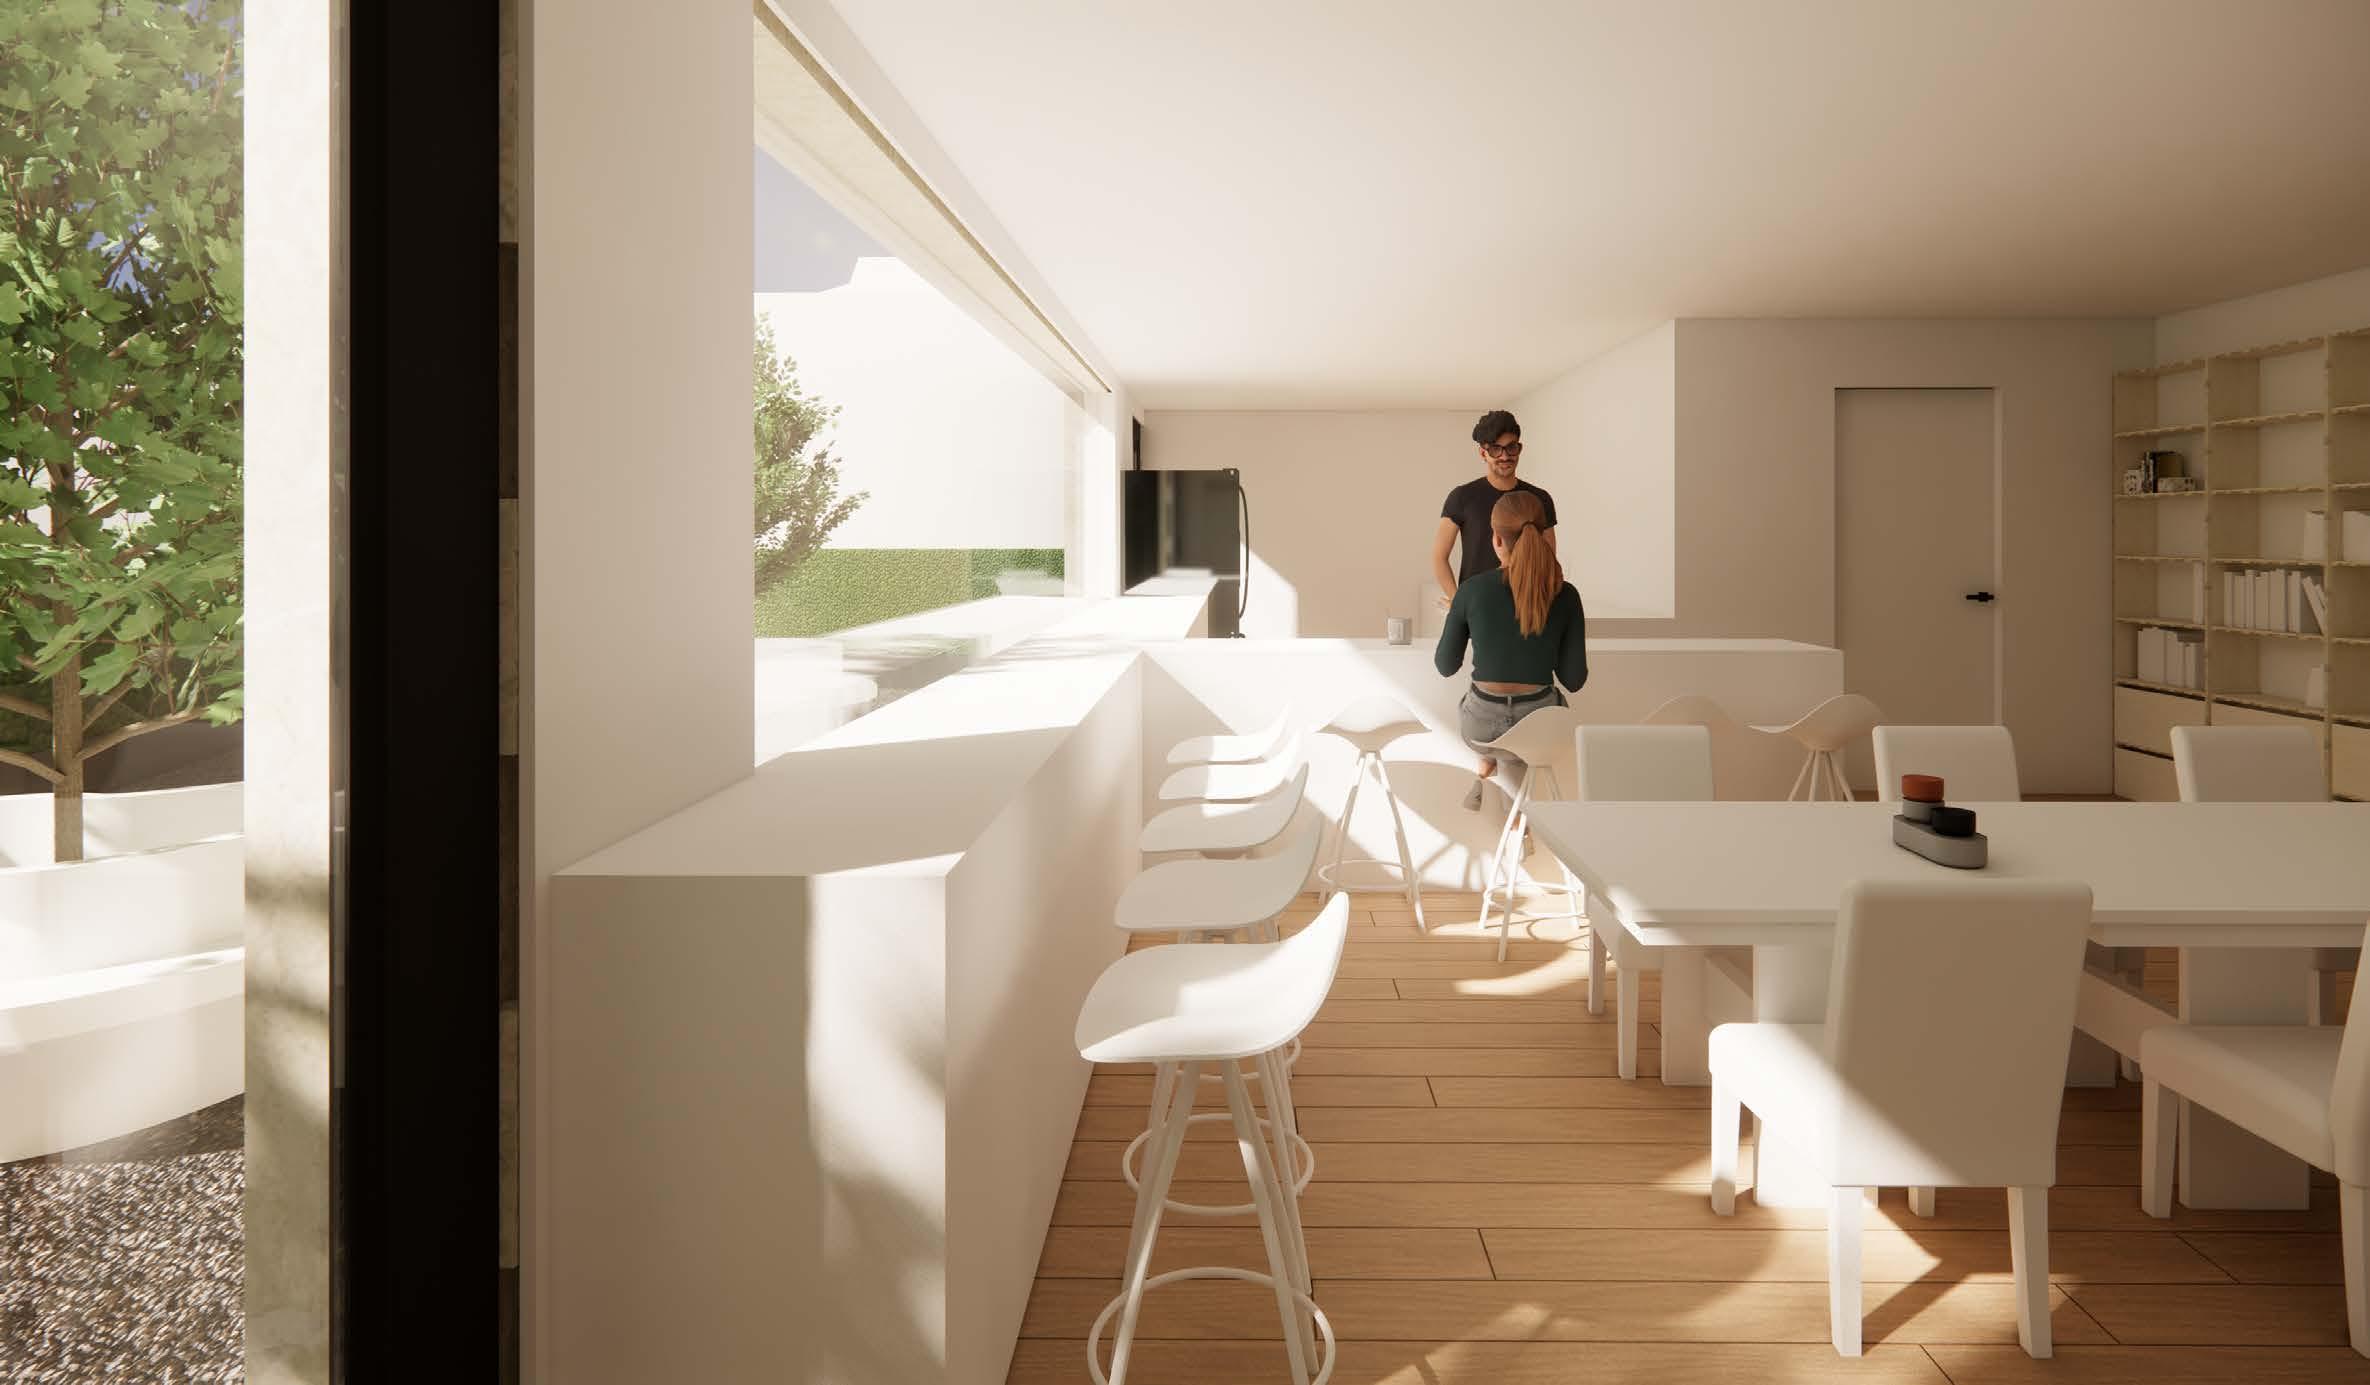
Through our mood board, we aimed to create a warm and cozy atmosphere for our design. As such, the interior furnishings prominently feature wood and fabric elements. In the dining room, we opted for light-colored interiors, using different wood textures to add depth and layering to the space.
The interior renderings include the living room, the reading room, and the attic floor on the right side. We gradually introduced light colors to the roof space to maintain a bright and airy feel. The attic floor on the left side, designed as a storage or children's gaming room, is made more lively with the addition of a carpet.
- Designed collaboratively by the team
- Render by Yuan Xu
Reading room/Attic floor on the right side
Living room
Kitchen & Dining room
- Render by Yuan Xu
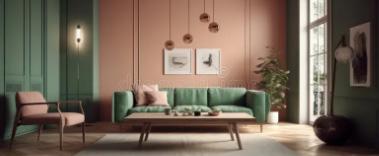
Moodboard
EXPLORE WITH CHATGPT
Please give me some warm, comfortable colors.
Text by Chatgpt: Colors that convey warmth and coziness include:
- **Warm Beige**
- **Soft Taupe**
- **Cream**
- **Muted Terracotta**
- **Warm Gray**
- **Dusty Rose**
- **Golden Yellow**
- **Sage Green**
- **Soft Brown**
- **Burnt Orange**
These colors create an inviting and comfortable atmosphere.
Develop Design In Grasshopper
- Designed collaboratively by the team
Develop Design In Grasshopper
GRASSHOPPER EXPLORE
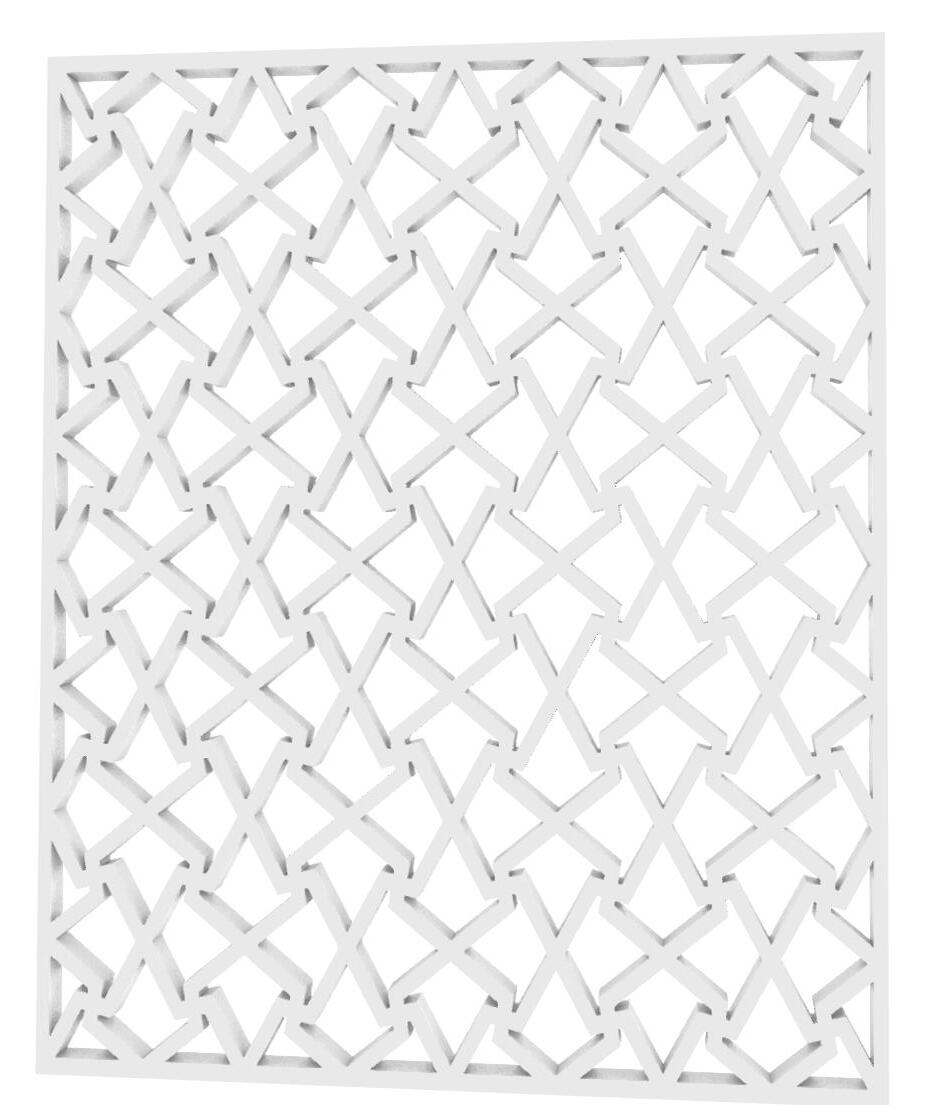
FINAL WALL CLADDING DESIGN - Model by Traven Lam
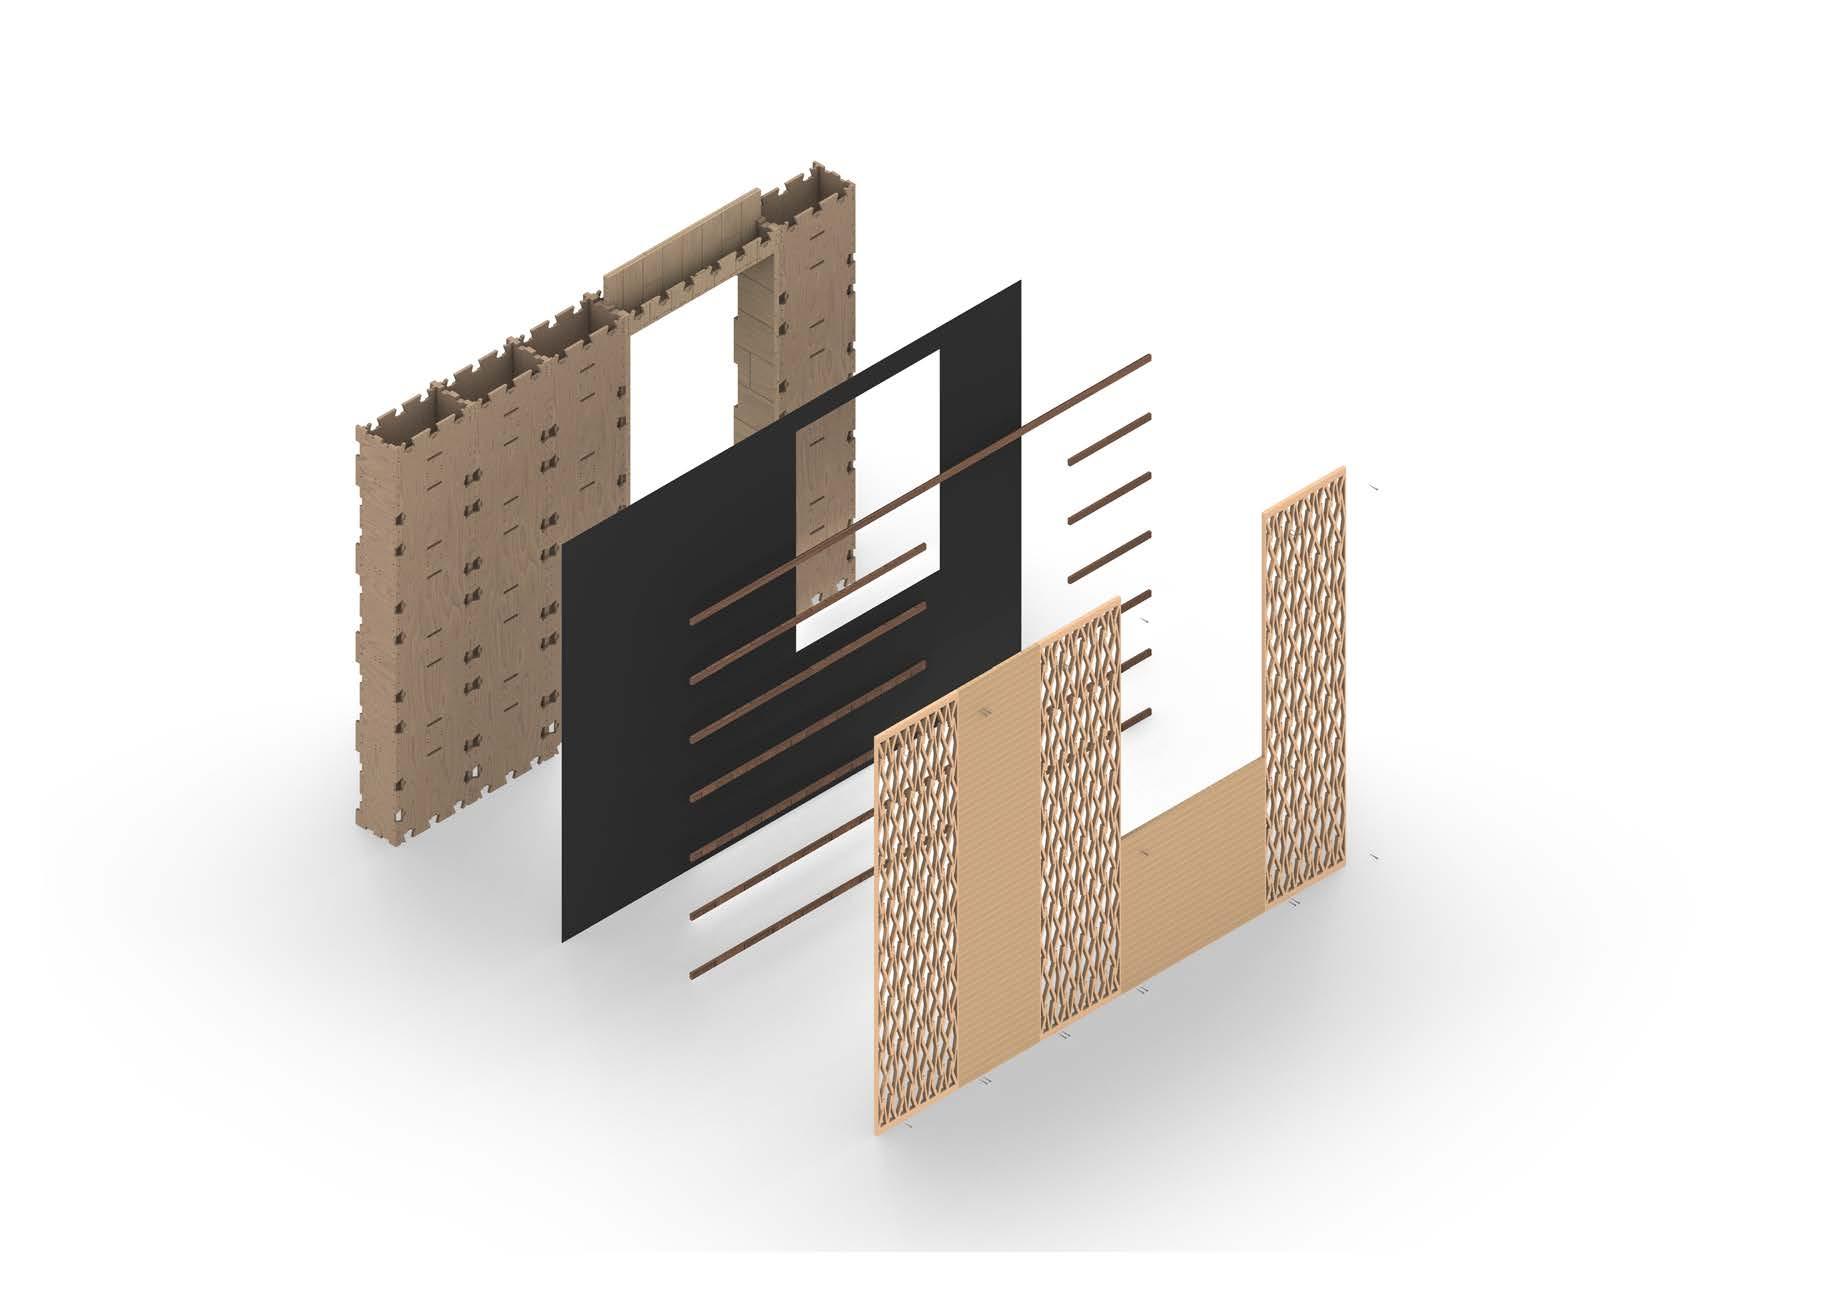
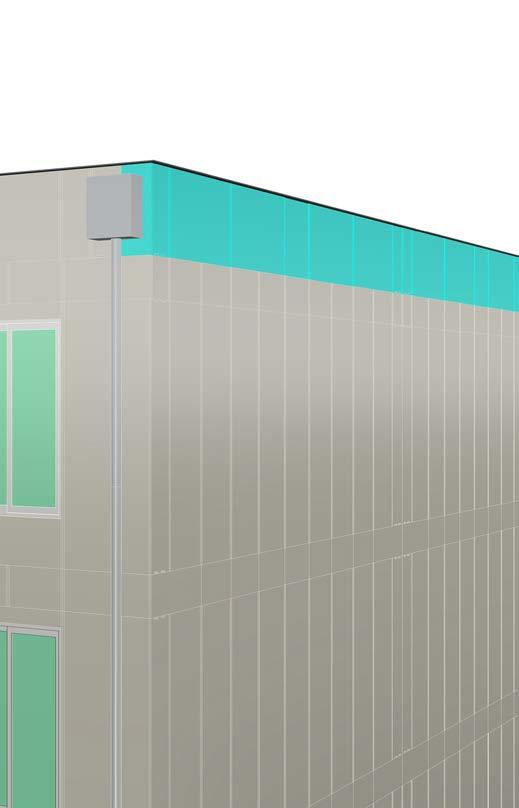
Exterior Finishes
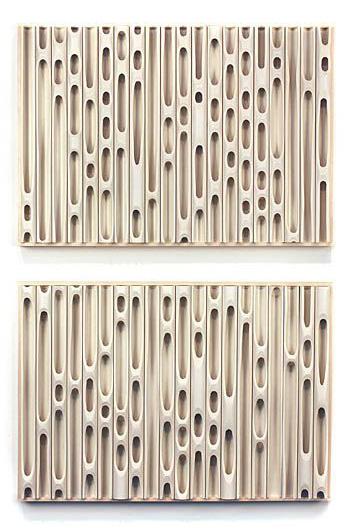
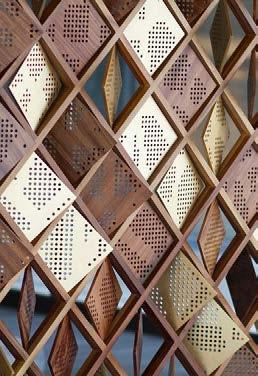
Our cladding system consists of two types of wooden wall panels: a custom-designed panel and a solid wood panel. The installation process begins with applying a waterproof layer over the wall components, followed by the installation of wall battens. The wall panels are then securely attached to the battens, completing the exterior cladding.
- Drawingr by Yuan Xu
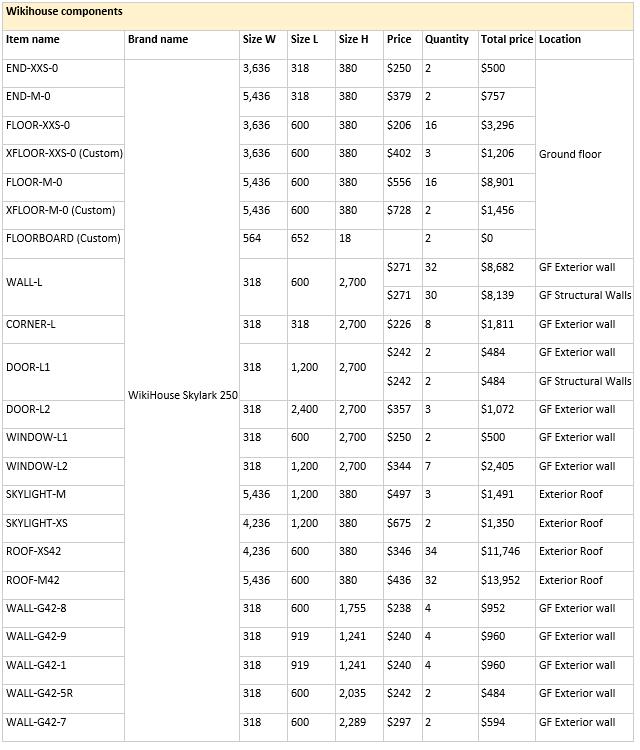
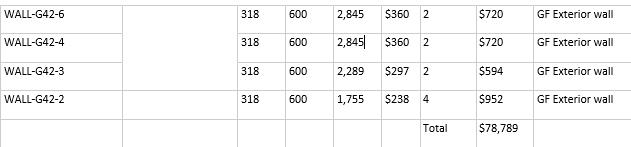
WikiHouse Components
Wall cladding
Wall battens Screws
Waterproof
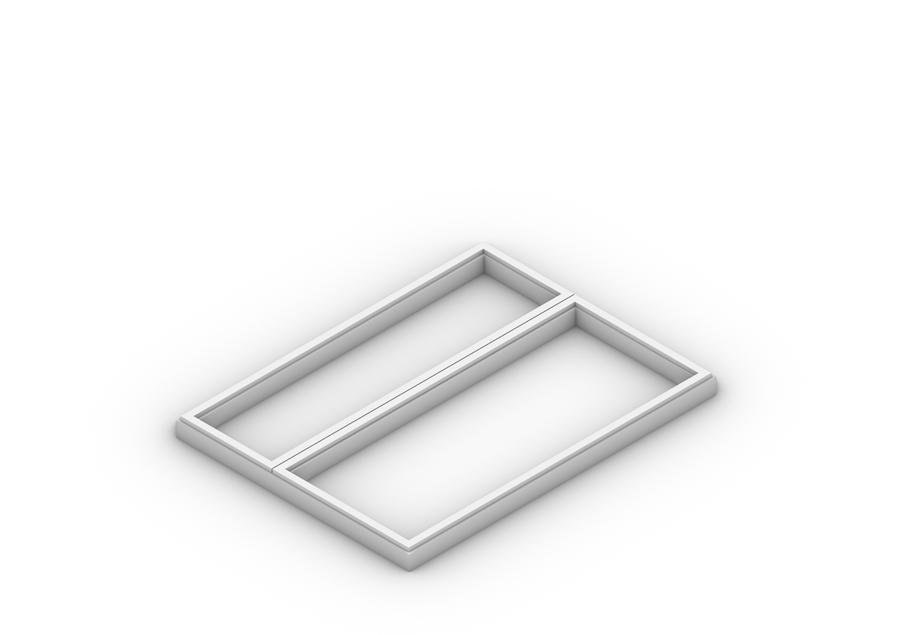
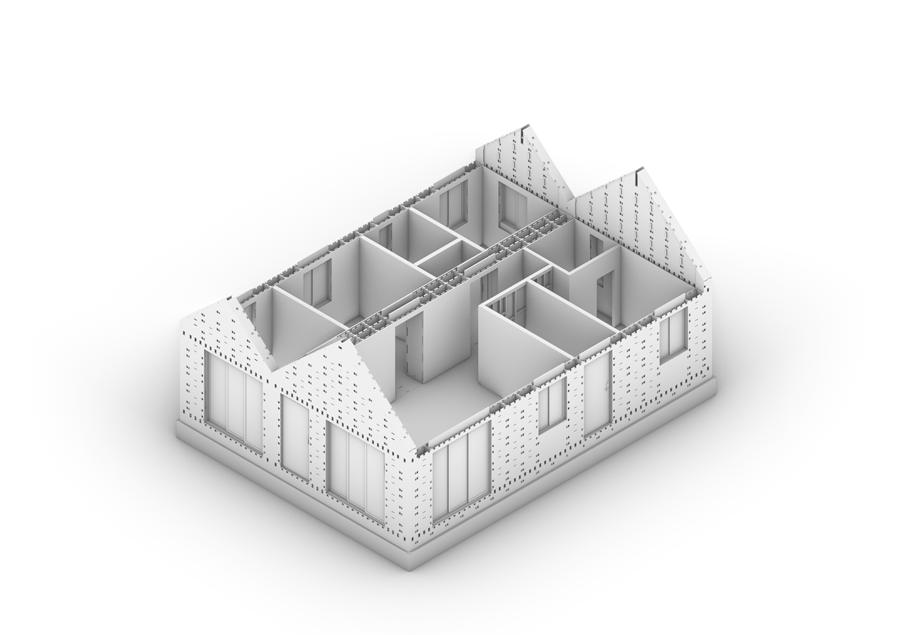
1. Concrete slab
2. Ground Floor - End & Floor components
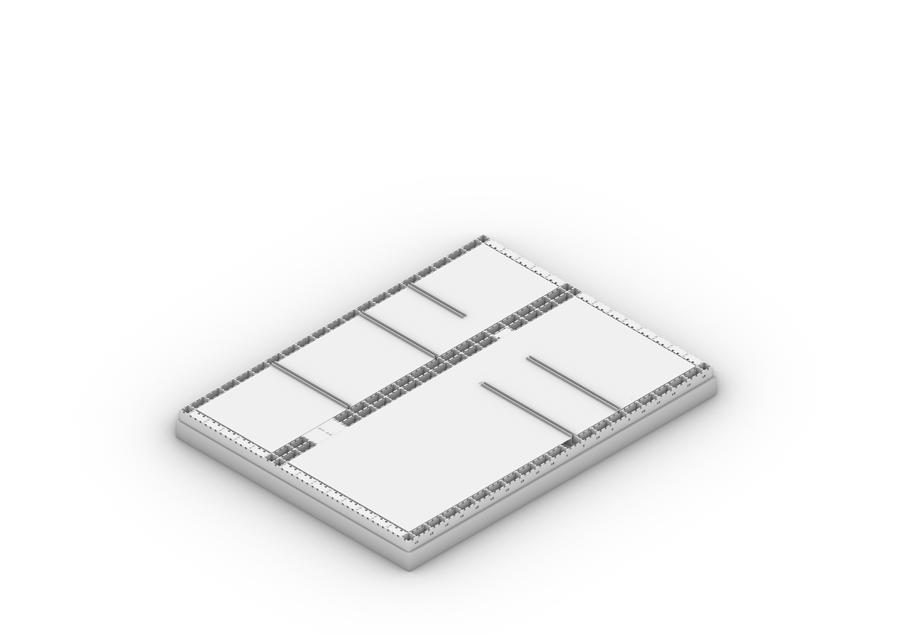
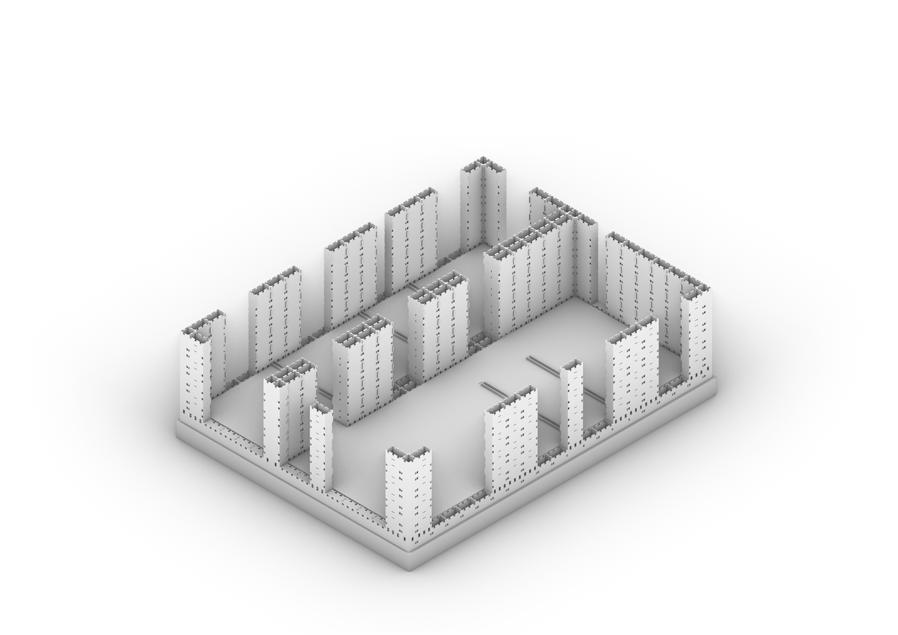
3. Ground Floor - Structural Walls
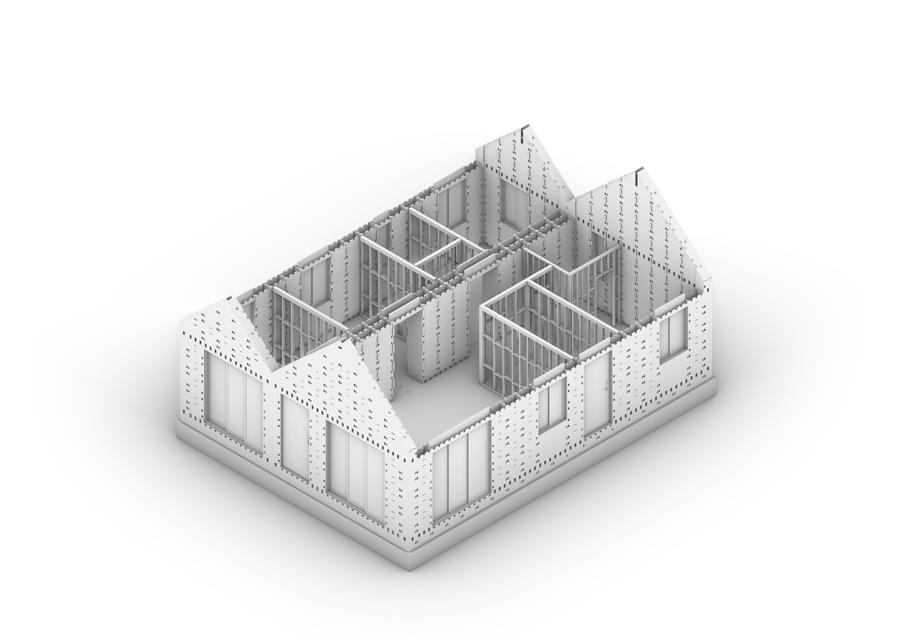
4. Ground Floor - Adding Edge wall and inner wall frame, adding Door & Windows
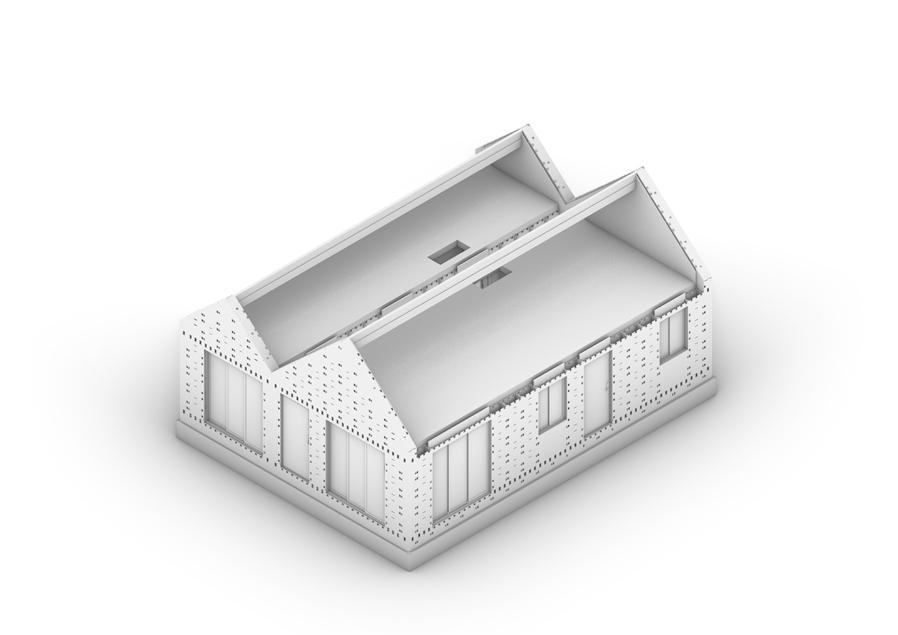
5. Adding Wall panel and flooring
6. Attic floor
7. Beam
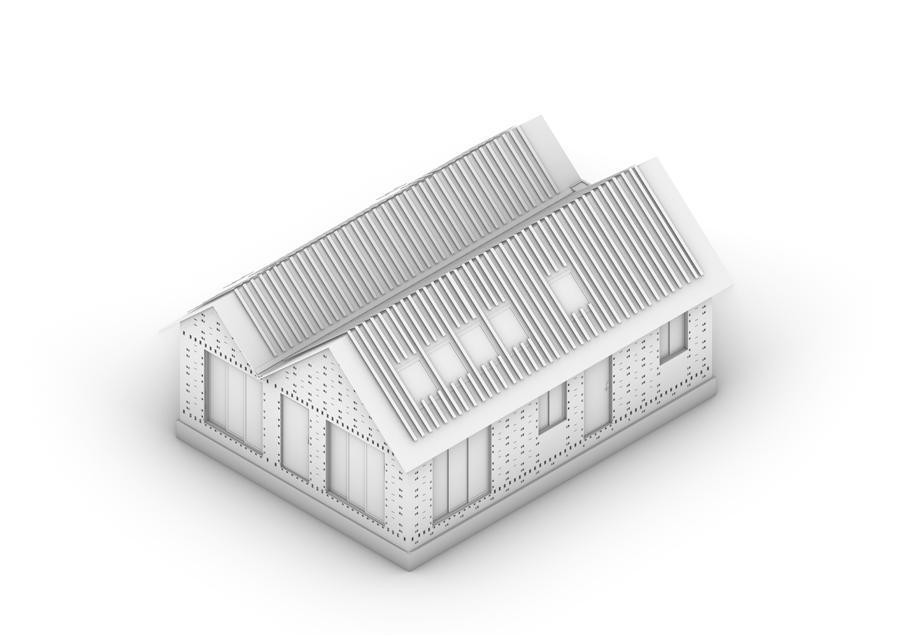
8. Steel roofing
Drawingr
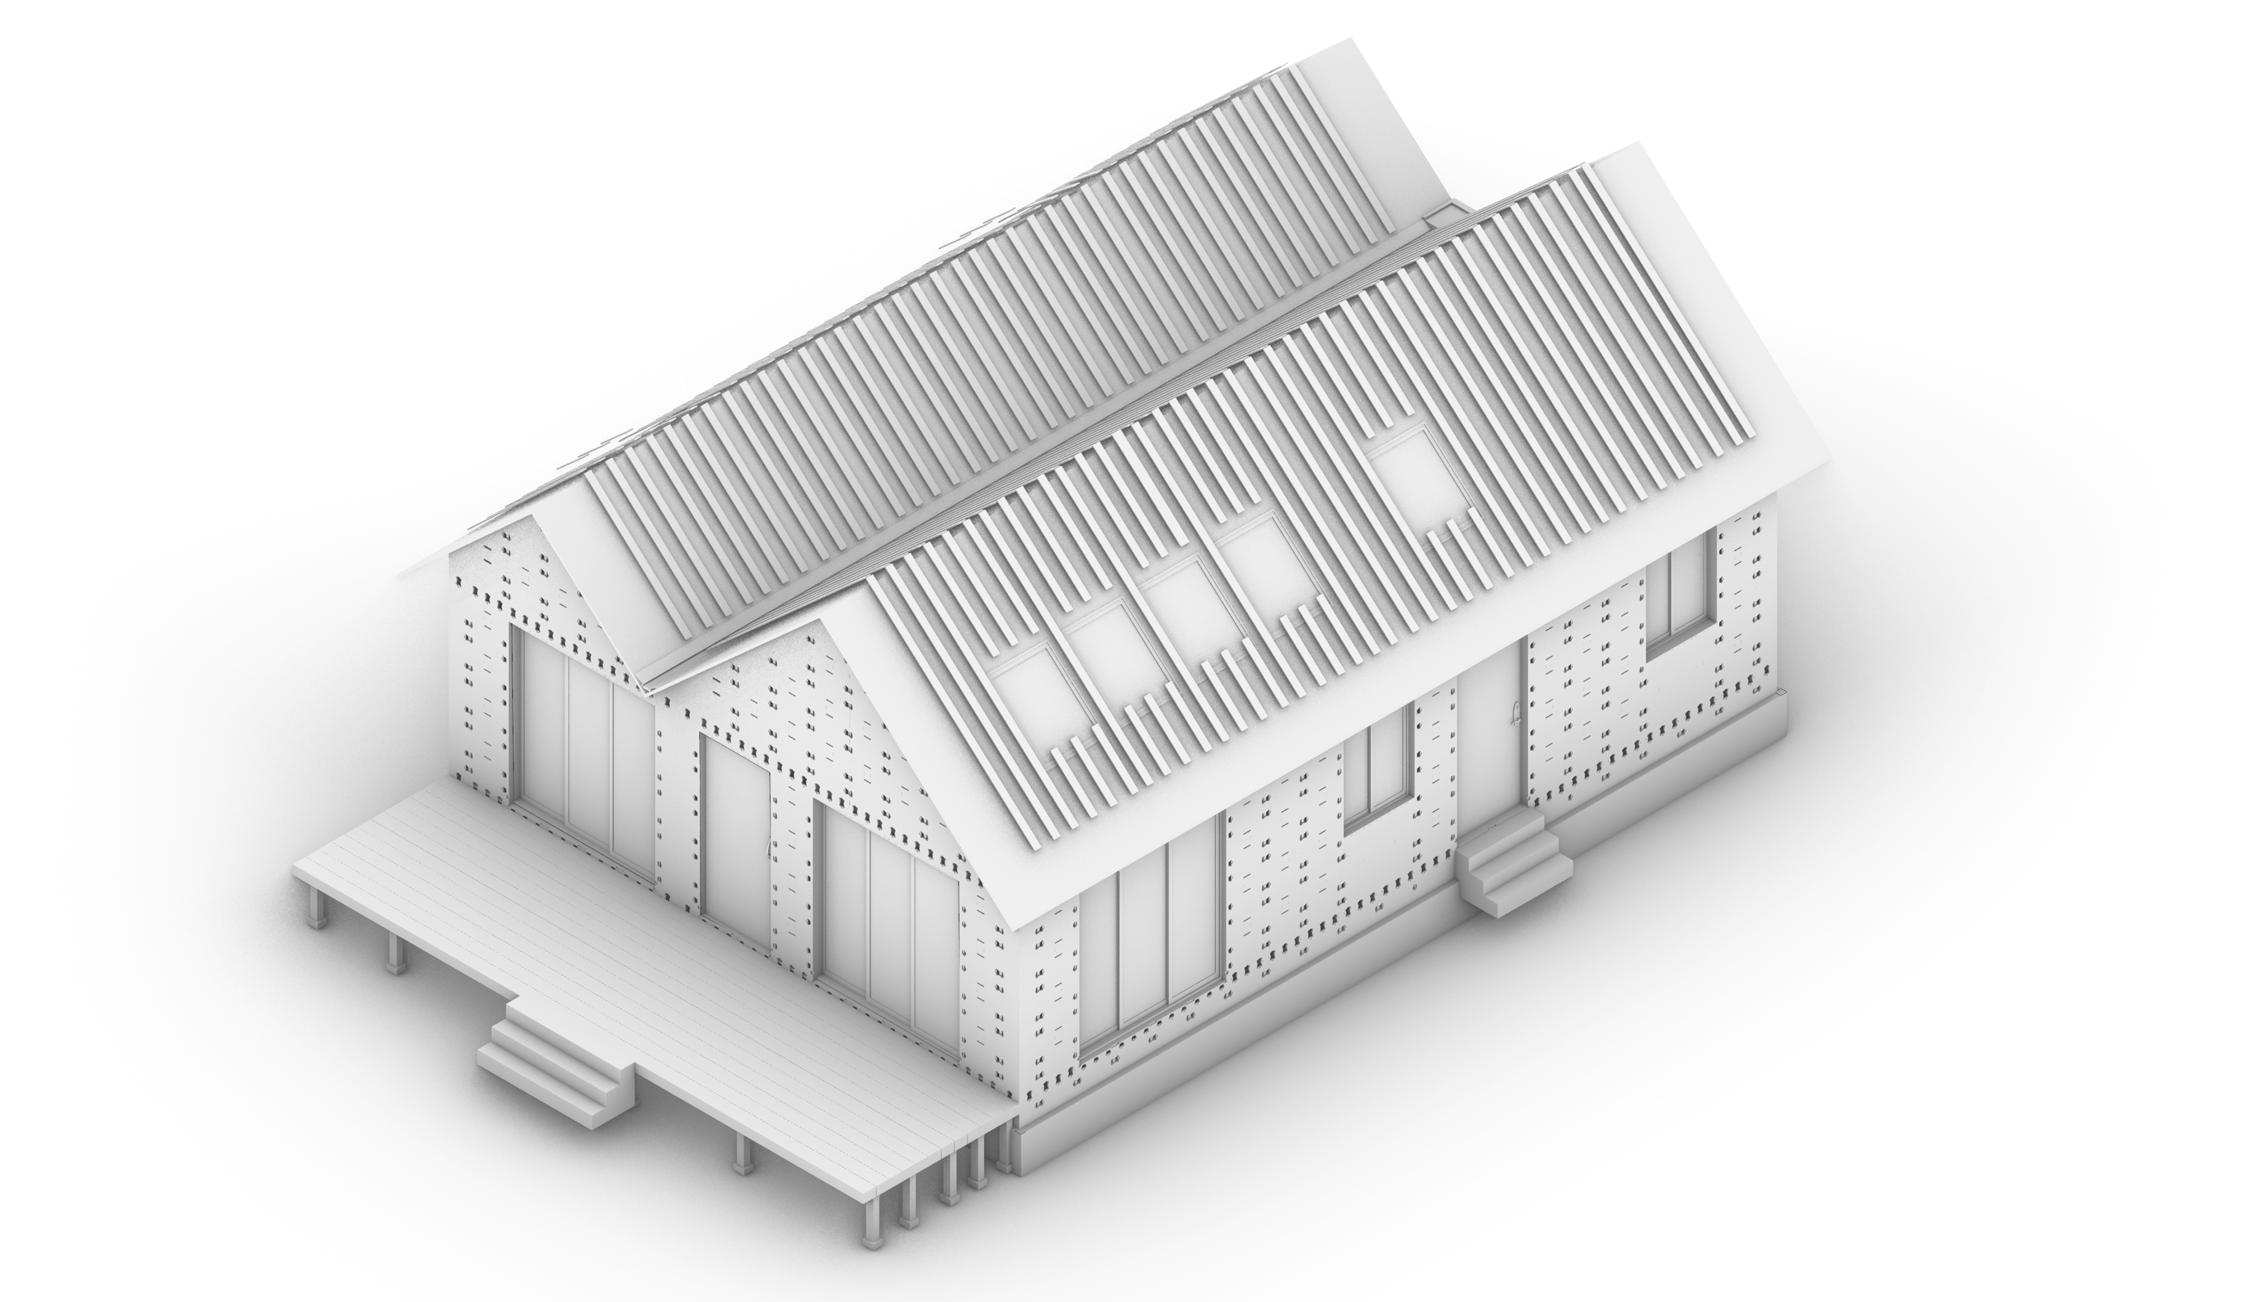
9. Add Deck & Exterior stairs
Key details: Gutters & Services
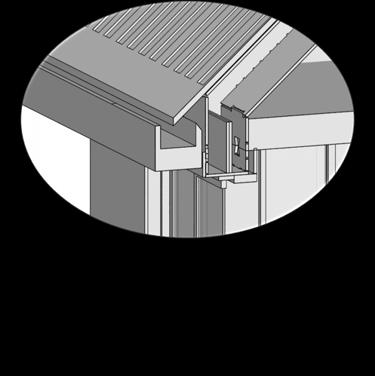
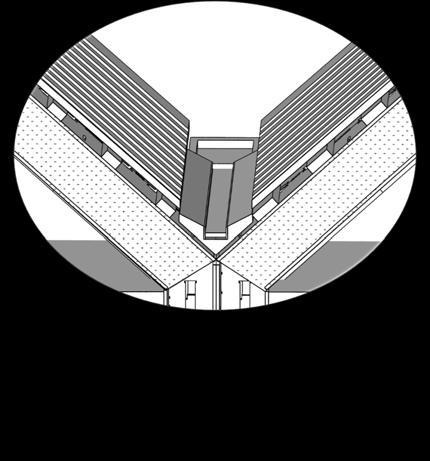
GUTTER DETAIL DRAWING
The gutter detail drawing illustrates the gutter system located at the center of our dual gable roofs. Given its position between the two roofs, we designed the gutter in a triangular shape. A gutter board is placed at the front to prevent water from spilling over, while a gutter box at the rear connects to a downspout that channels the water to the back of the house. Both sides also have gutter under the eaves
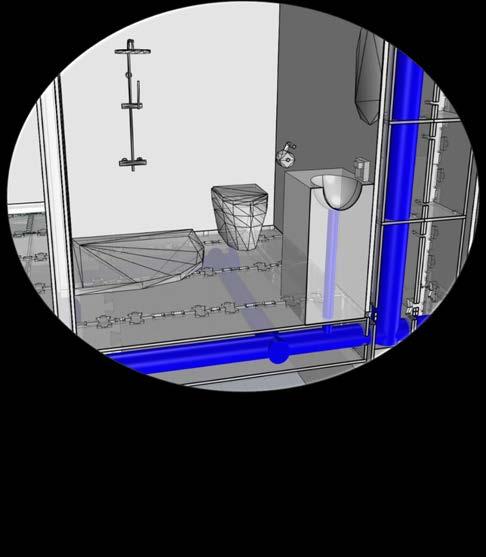
BATHROOM PIPE SERVICE
The WikiHouse system's plumbing layout is optimized for efficiency and practicality, with water pipes distributed throughout the building and integrated into the walls for a clean, minimalist appearance. Key components are strategically placed to minimize exposure and maximize space usage, ensuring functionality without compromising the overall design.
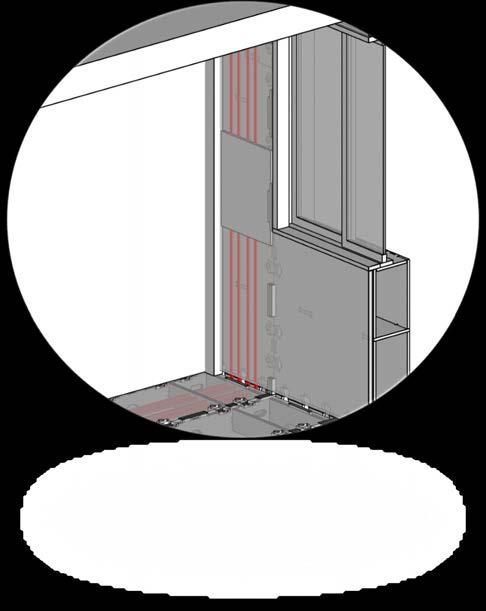
ELECTIVE SERVICE
Based on the WikiHouse component design, electrical wiring can be securely fixed onto the wall and floor components. Once the wiring is in place, the floor and wall panels are installed, effectively concealing the electrical lines within the structure for a clean, seamless finish.
- Drawingr by Traven Lam
The total cost $291,333 -collaboratively by the
PART E: WIKIHOUSE DESIGN 2
AUSTRALIA'S HOUSE CRISIS OVERVIEW
Australia is facing a severe housing crisis due to an imbalance between supply and demand, such as worker shortages, project delays, high costs, and rising interest rates.
The increase in urban population has led to a housing shortage in the CBD. With limited space, the surrounding surbubs are also becoming more densely populated. People working in the CBD struggle to find rental housing, and newcomers to Melbourne, such as international students, often wish to live near the CBD.
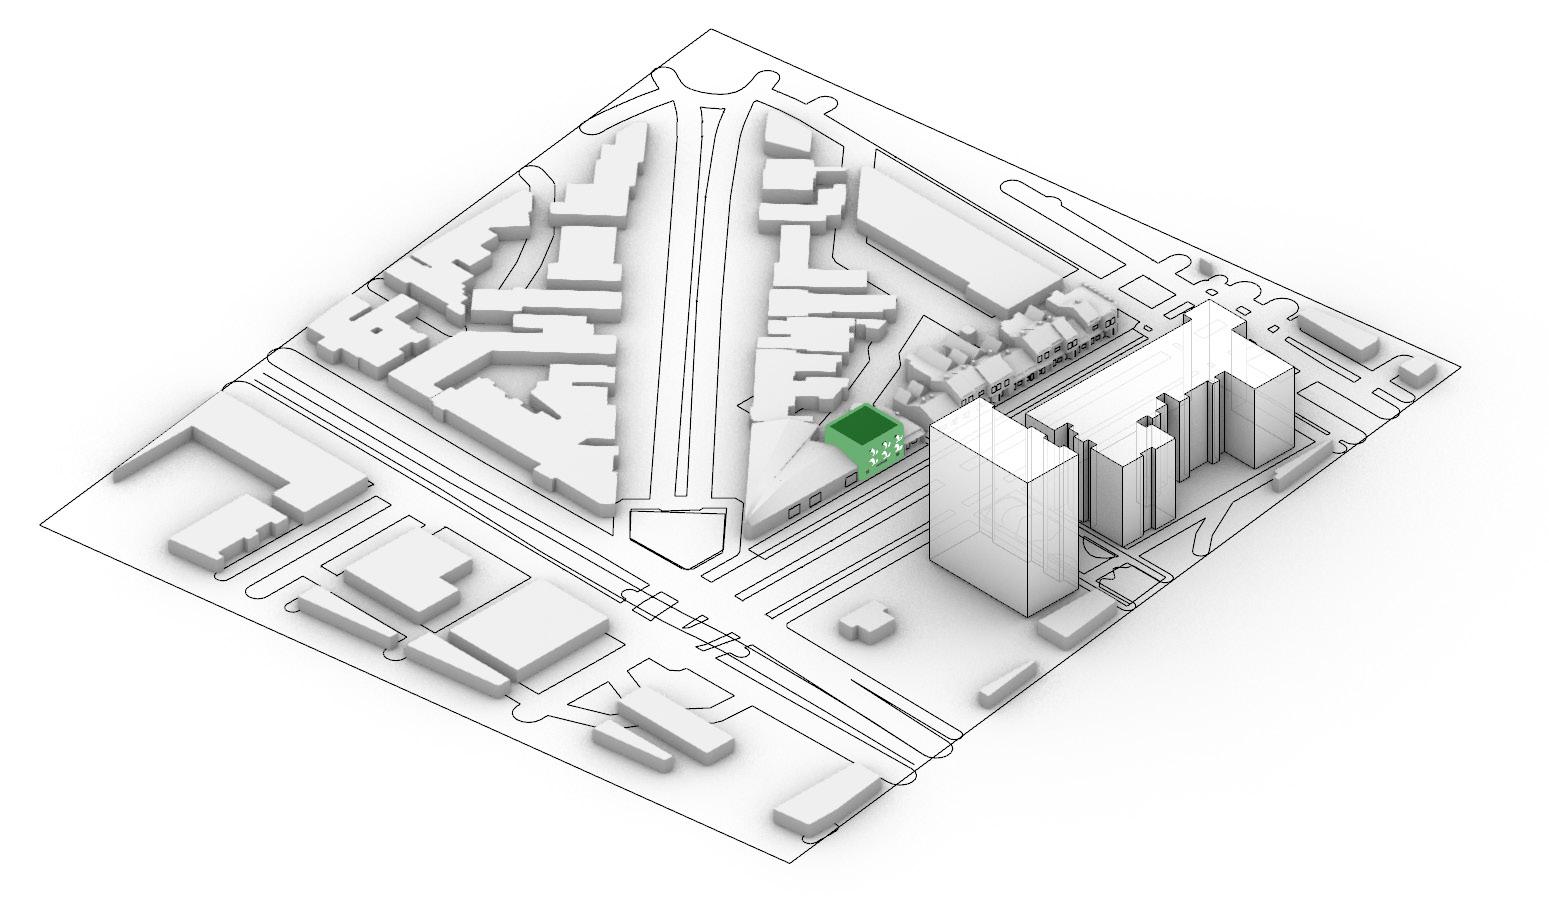
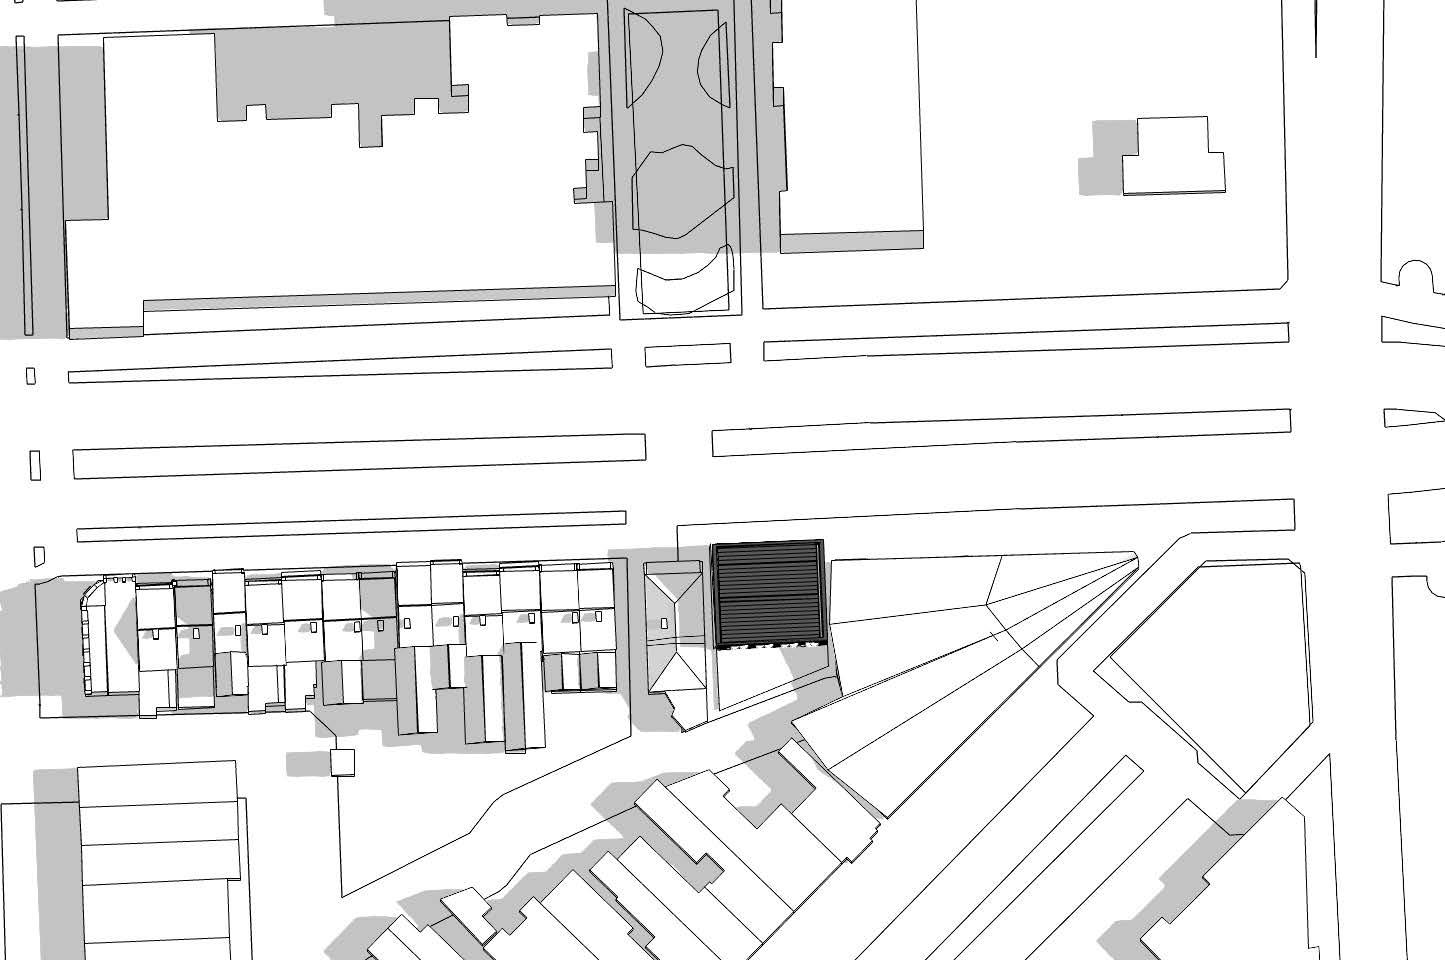
SITE CHOOSE BASED HOUSE CRISIS
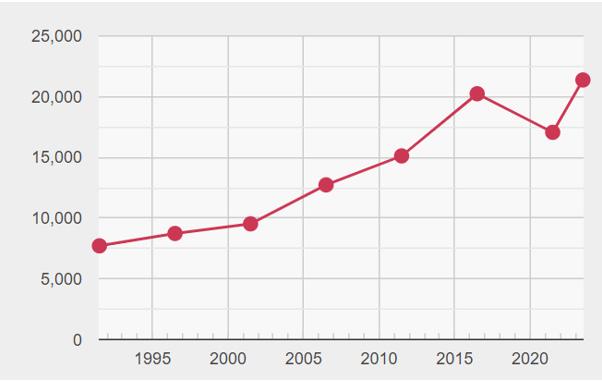
Based on the housing crisis, we chose Carlton as our site location. This area is close to the city, has convenient public transportation, and serves as an excellent option near the CBD. Carlton has a high-density population and recorded the largest net overseas migration gain, with 3,700 people (Australian Bureau of Statistics, 2024) last year.
The project will still be designed using Wikihouse
ADVANTAGES OF WIKIHOUSE IN ADDRESSING THE CRISIS
In light of the pressing housing crisis, WikiHouse offers a viable solution as an affordable and rapidly deployable housing option, particularly for the rental housing sector. Its cost-effectiveness and shorter construction timelines make it a potential strategy for providing affordable social housing in a challenging economic environment.
LIMITATIONS OF WIKIHOUSES
One limitation of WikiHouse is that it is primarily suited for low-rise buildings, with a maximum height of three stories, which restricts its application in high-density urban areas.
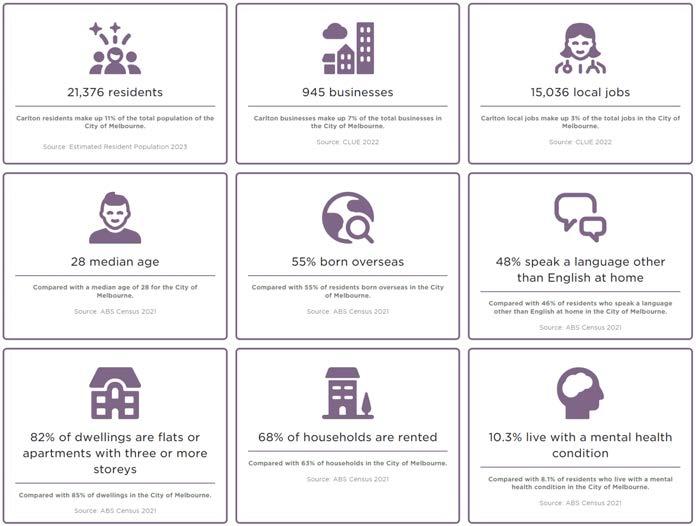
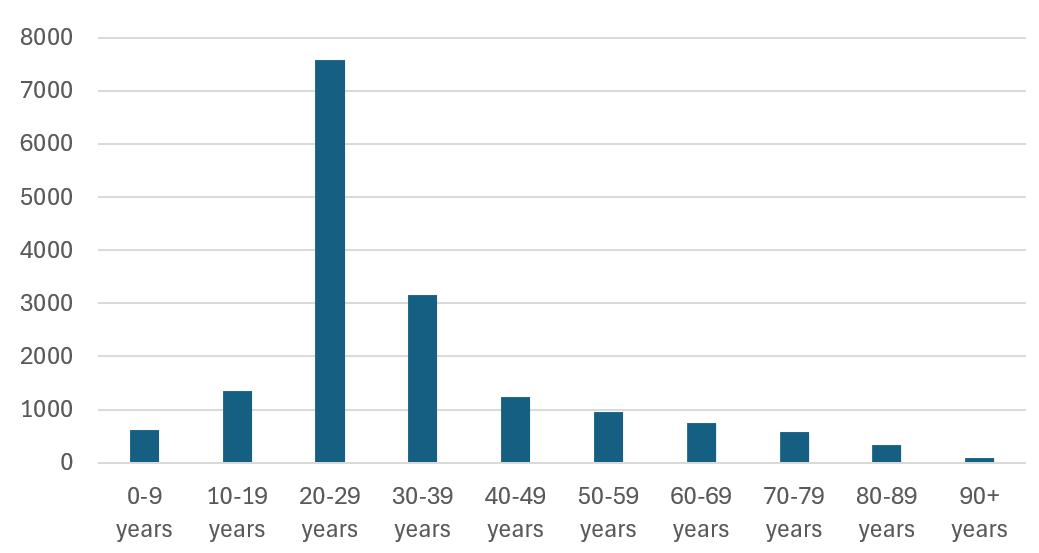
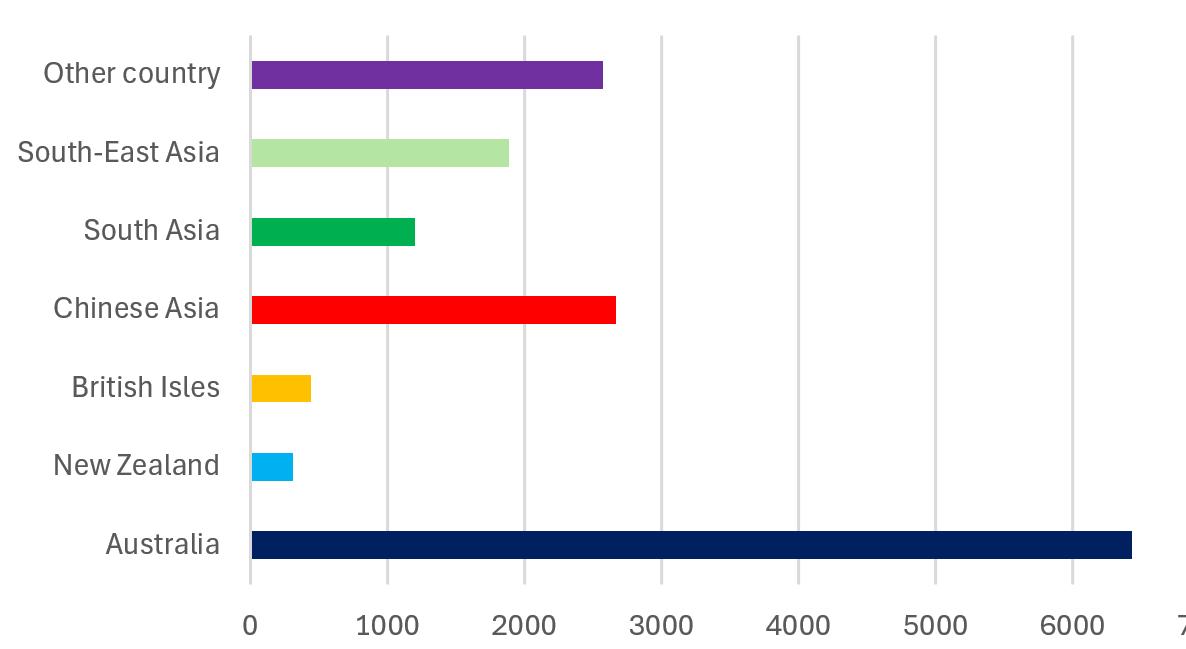
The Carlton area has experienced significant population growth, primarily due to overseas migration. Demographics reveal a predominantly young population, with the highest proportion of residents aged 20-29, followed by those aged 3039. This aligns with Carlton's proximity to universities and business districts, making it attractive for students and professionals. International migration data shows many newcomers are from Asia, particularly China and India. In addition, 82% of dwellings in Carlton are flats or apartments with three or more storeys, reflecting a strong preference for compact, singleperson or small household living arrangements due to both housing demand and lifestyle choices. This insight is crucial for our design approach, which aims to provide accessible housing that accommodates Carlton’s diverse and growing population.
Country of birth in Carlton
Age Distribution in Carlton
Population Density of Carlton
More Data about Carlton
TARGET 1
TARGET 2
TARGET 3
Single or double occupancy is supported for young workers working in or near the city
College students studying nearby
People who communte using bicycles or public transport
Zoning Analysis
BARKLYSTREET
Meaning of The Zoning Codes
General Residential Zone Schedule 2 –Incremental Change Areas with Access Public park and recreation area
General Residential Zone Schedule 1 –General Incremental Change Areas
Residential Zone Schedule 3
VICTORIA
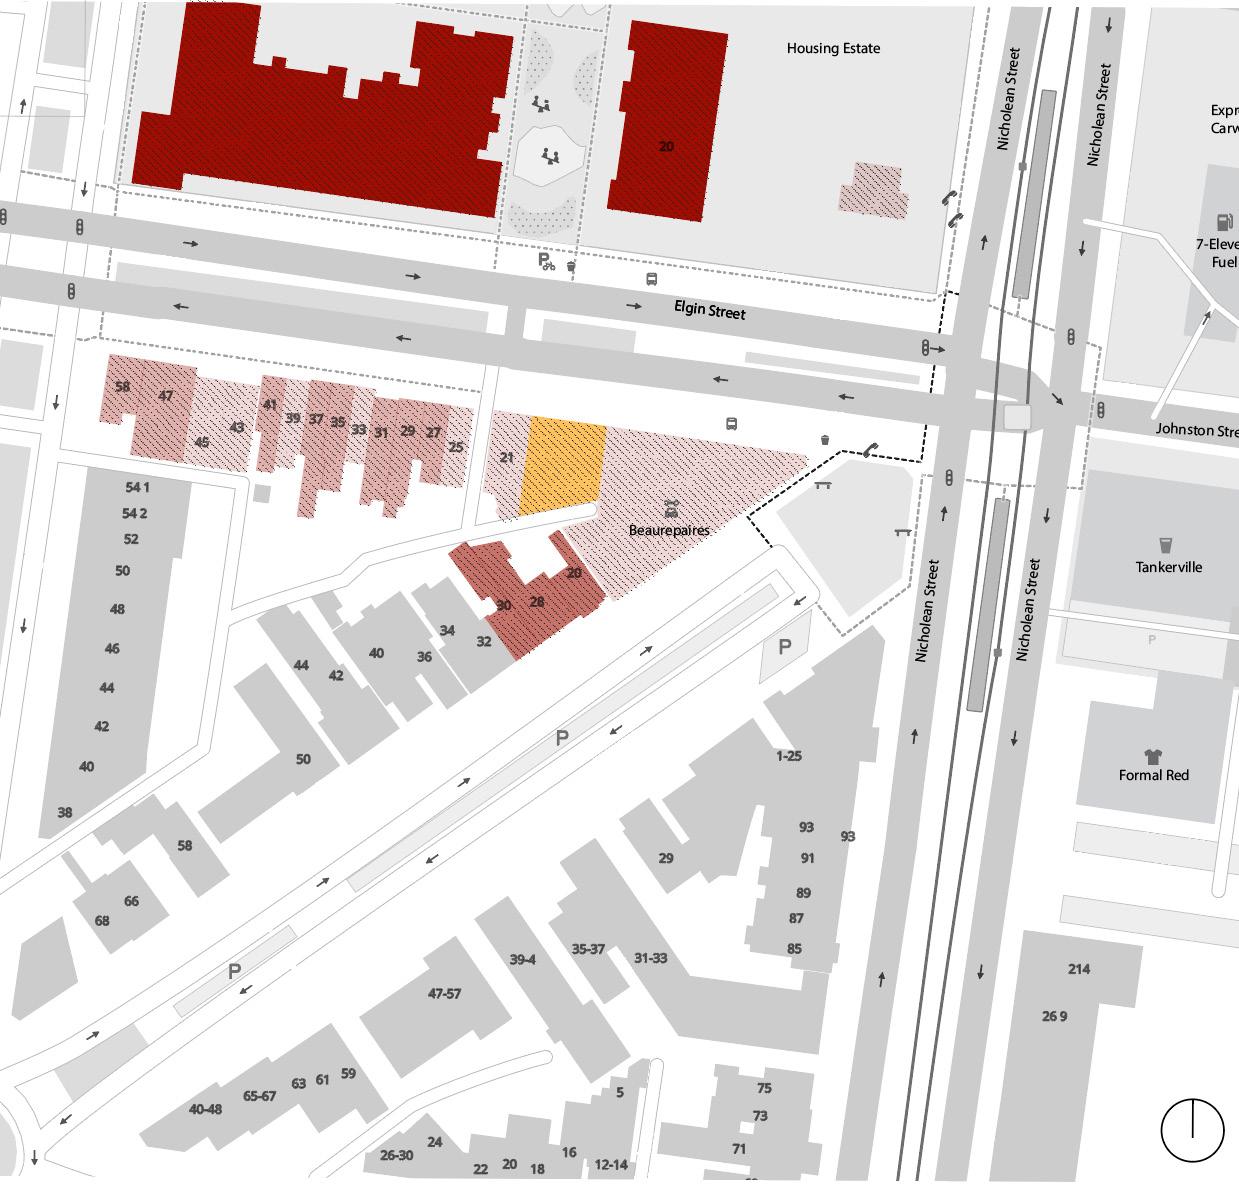
Beaurepaires
Formal
Nicholean
Surrounding Facility
ELGIN STREET
JOHNSTON STREET
VICTORIA STREET
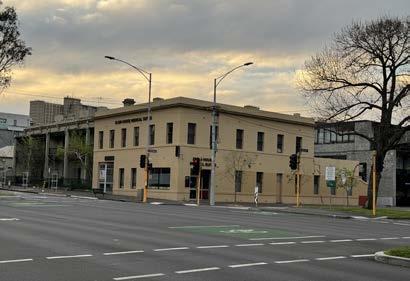
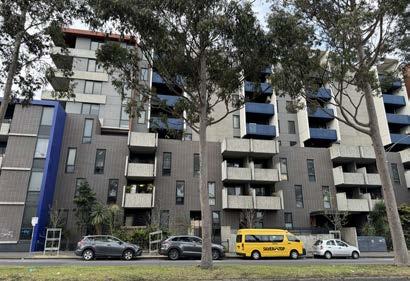
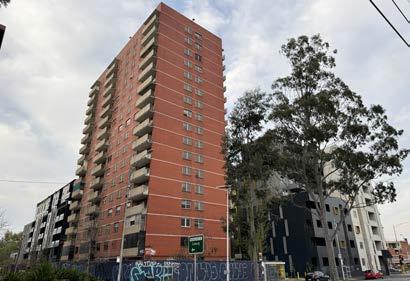
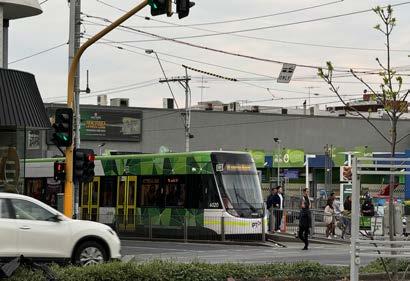
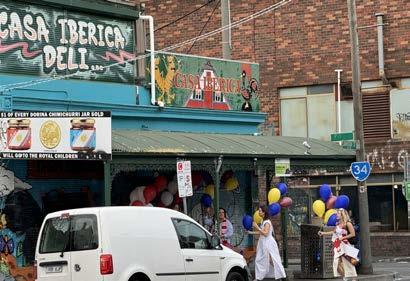
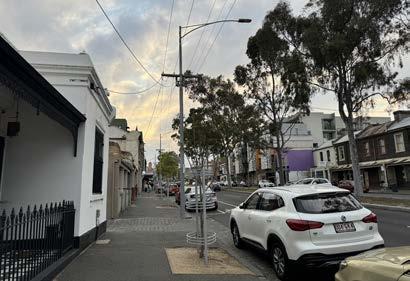
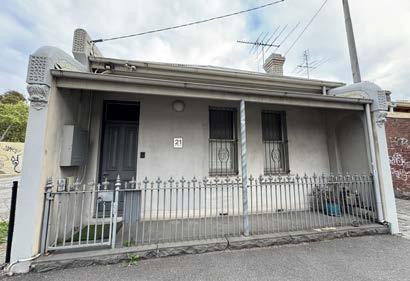
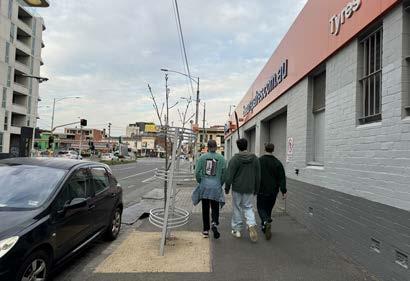
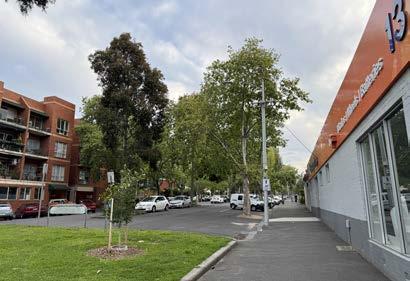
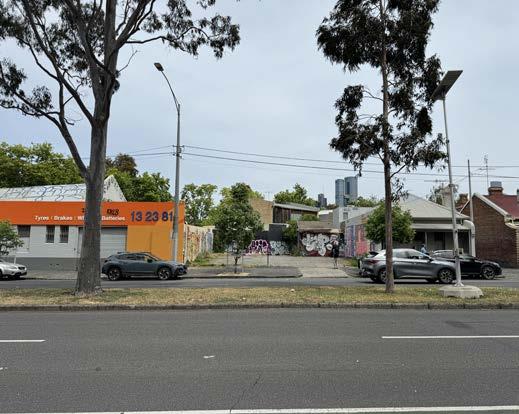
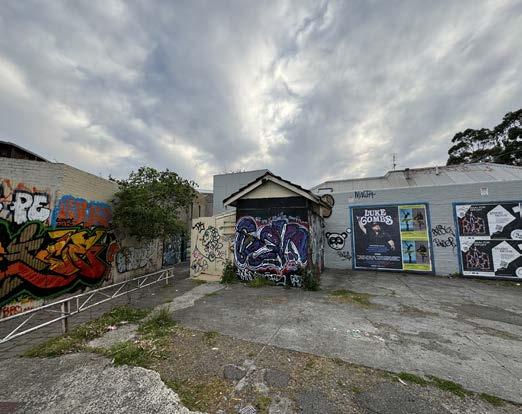
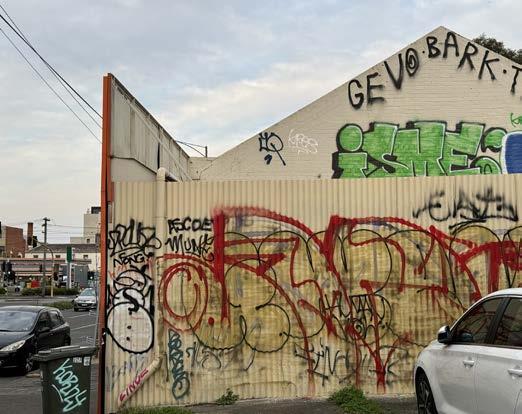
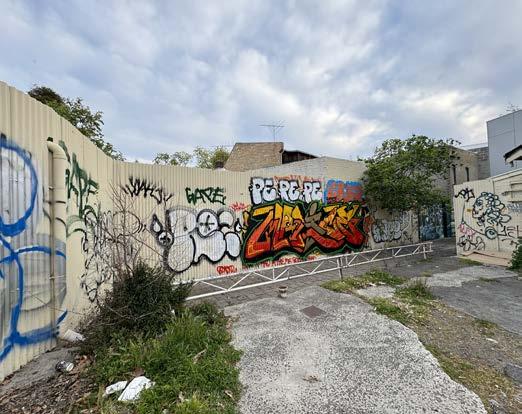
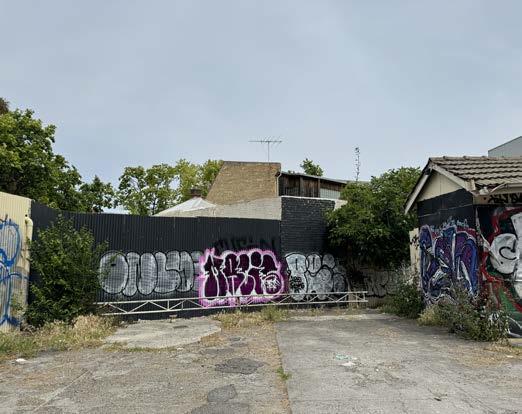
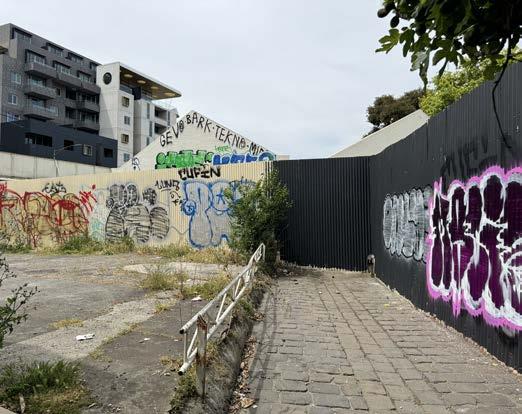
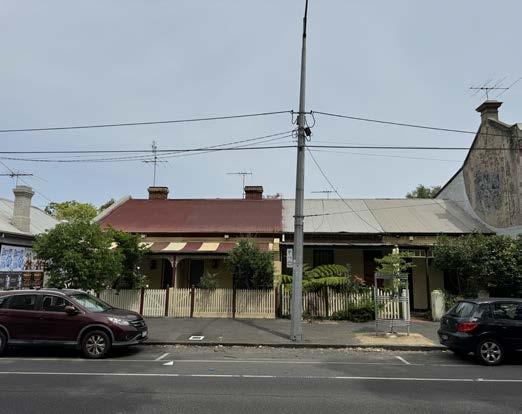
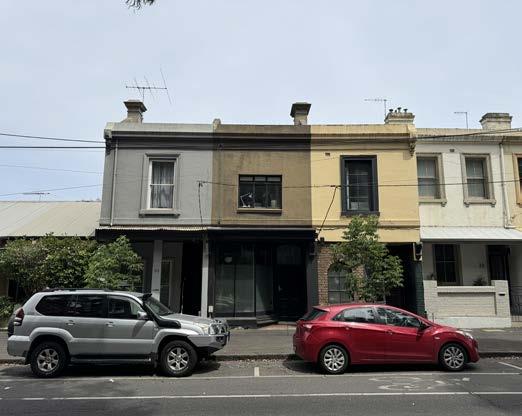
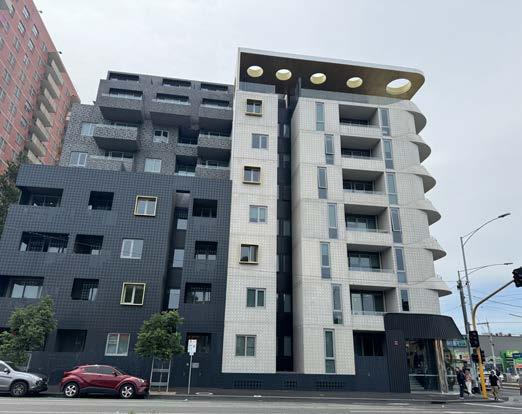
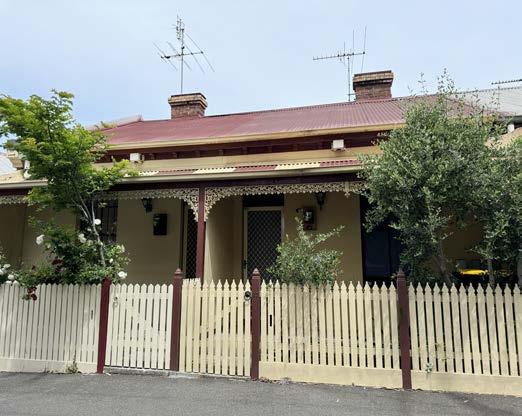
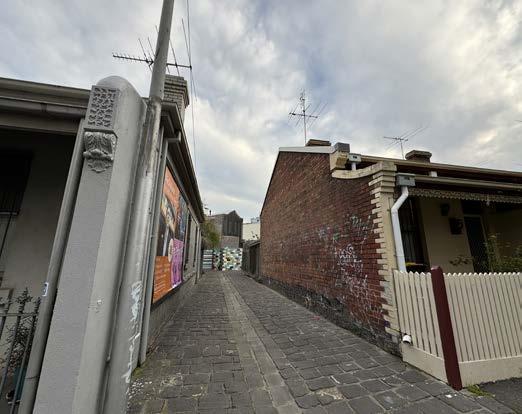
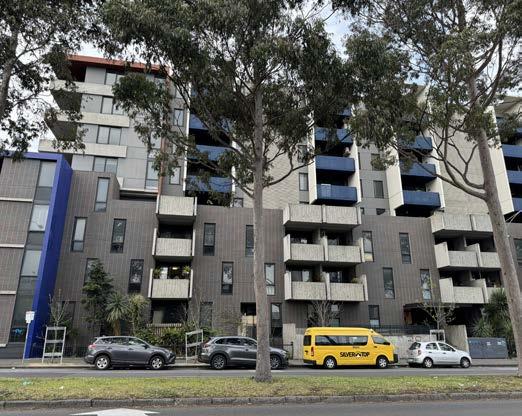
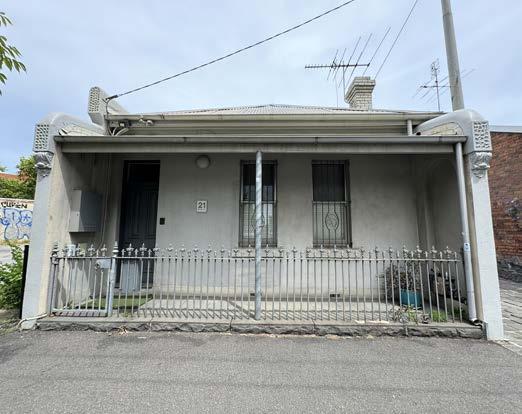
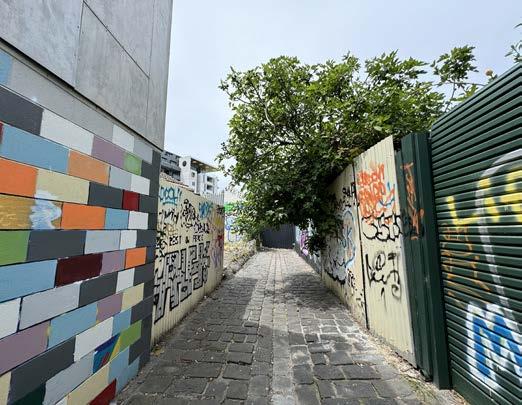
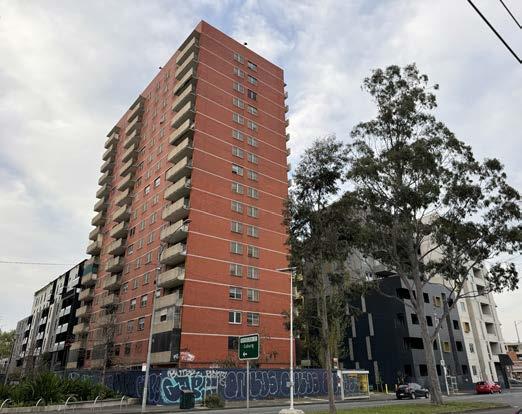
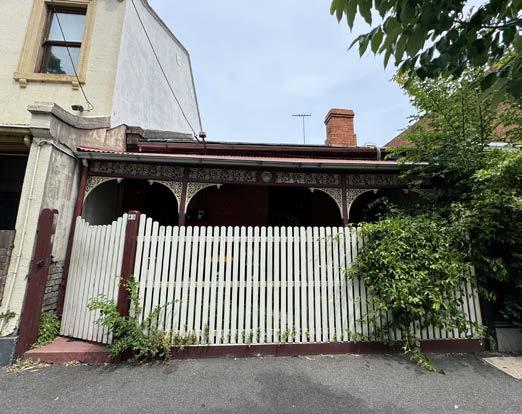
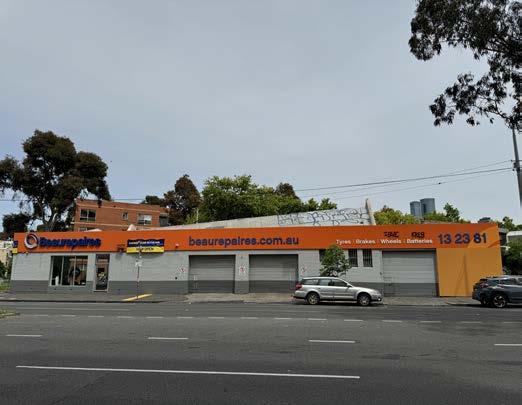
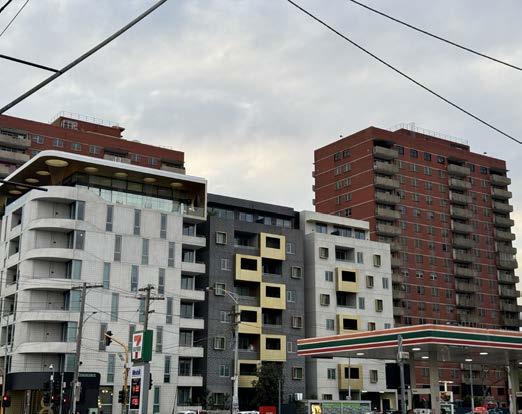
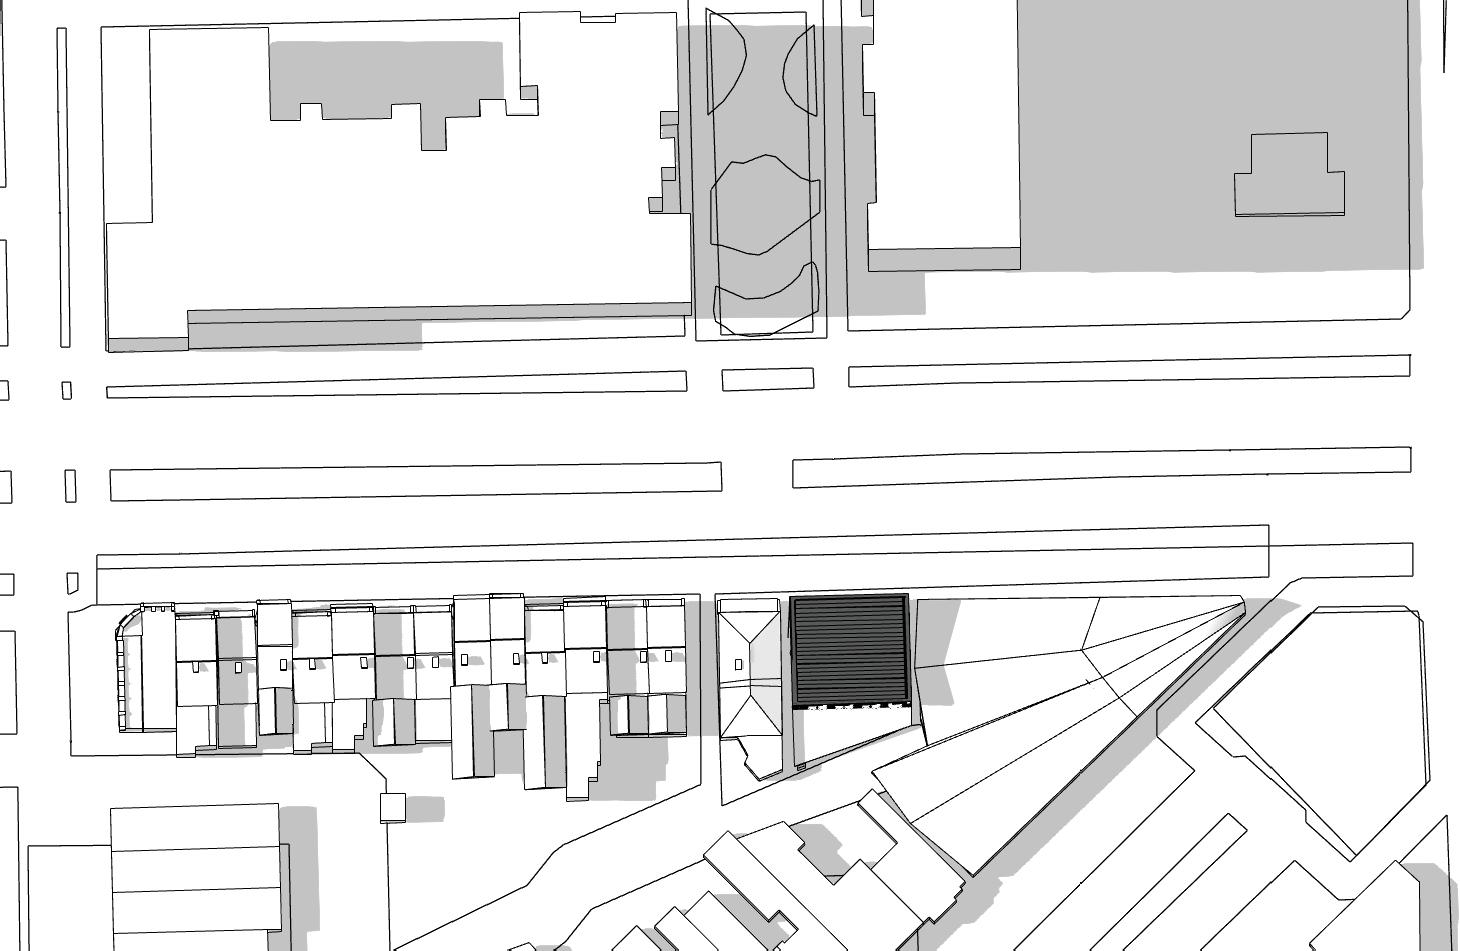
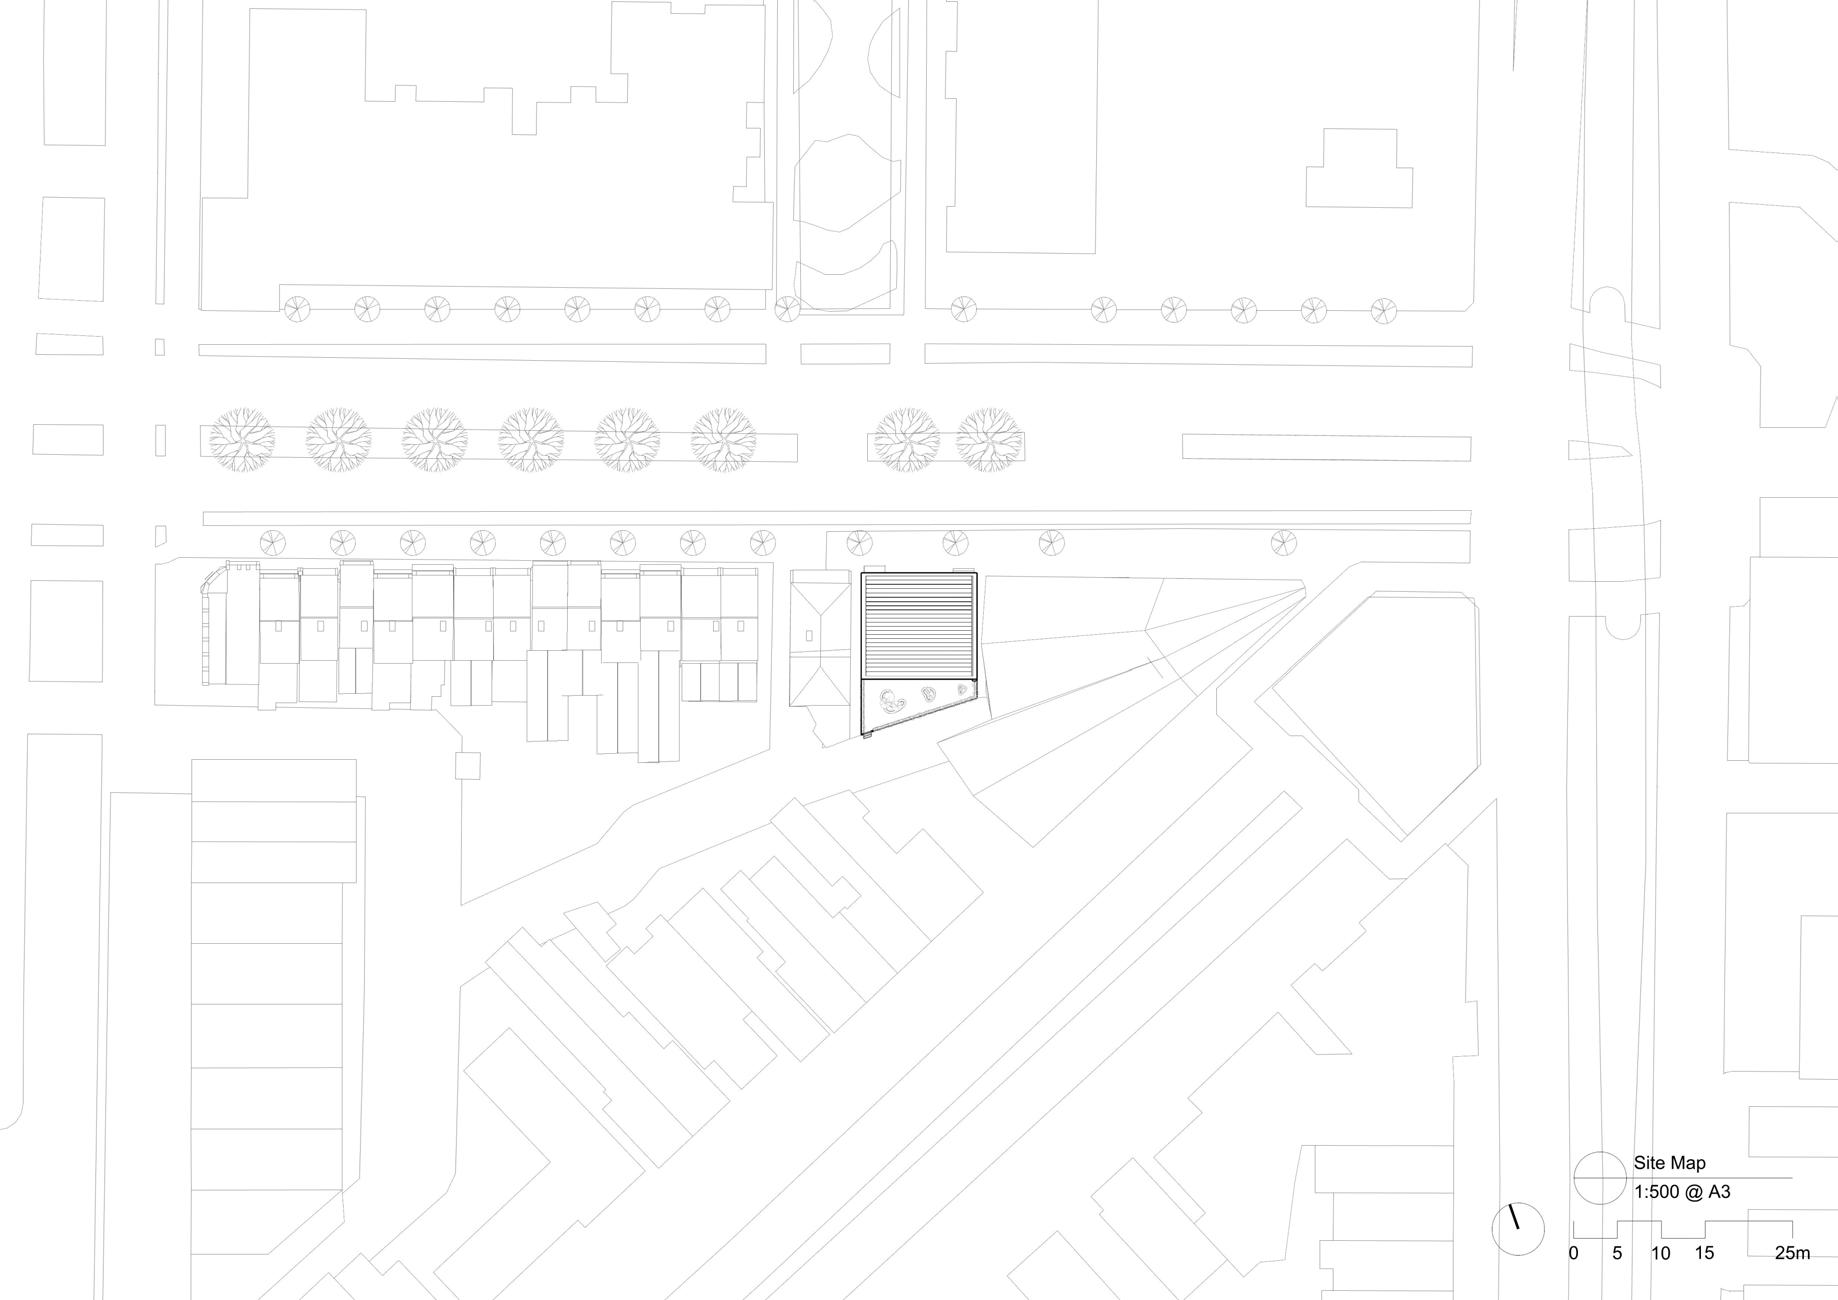
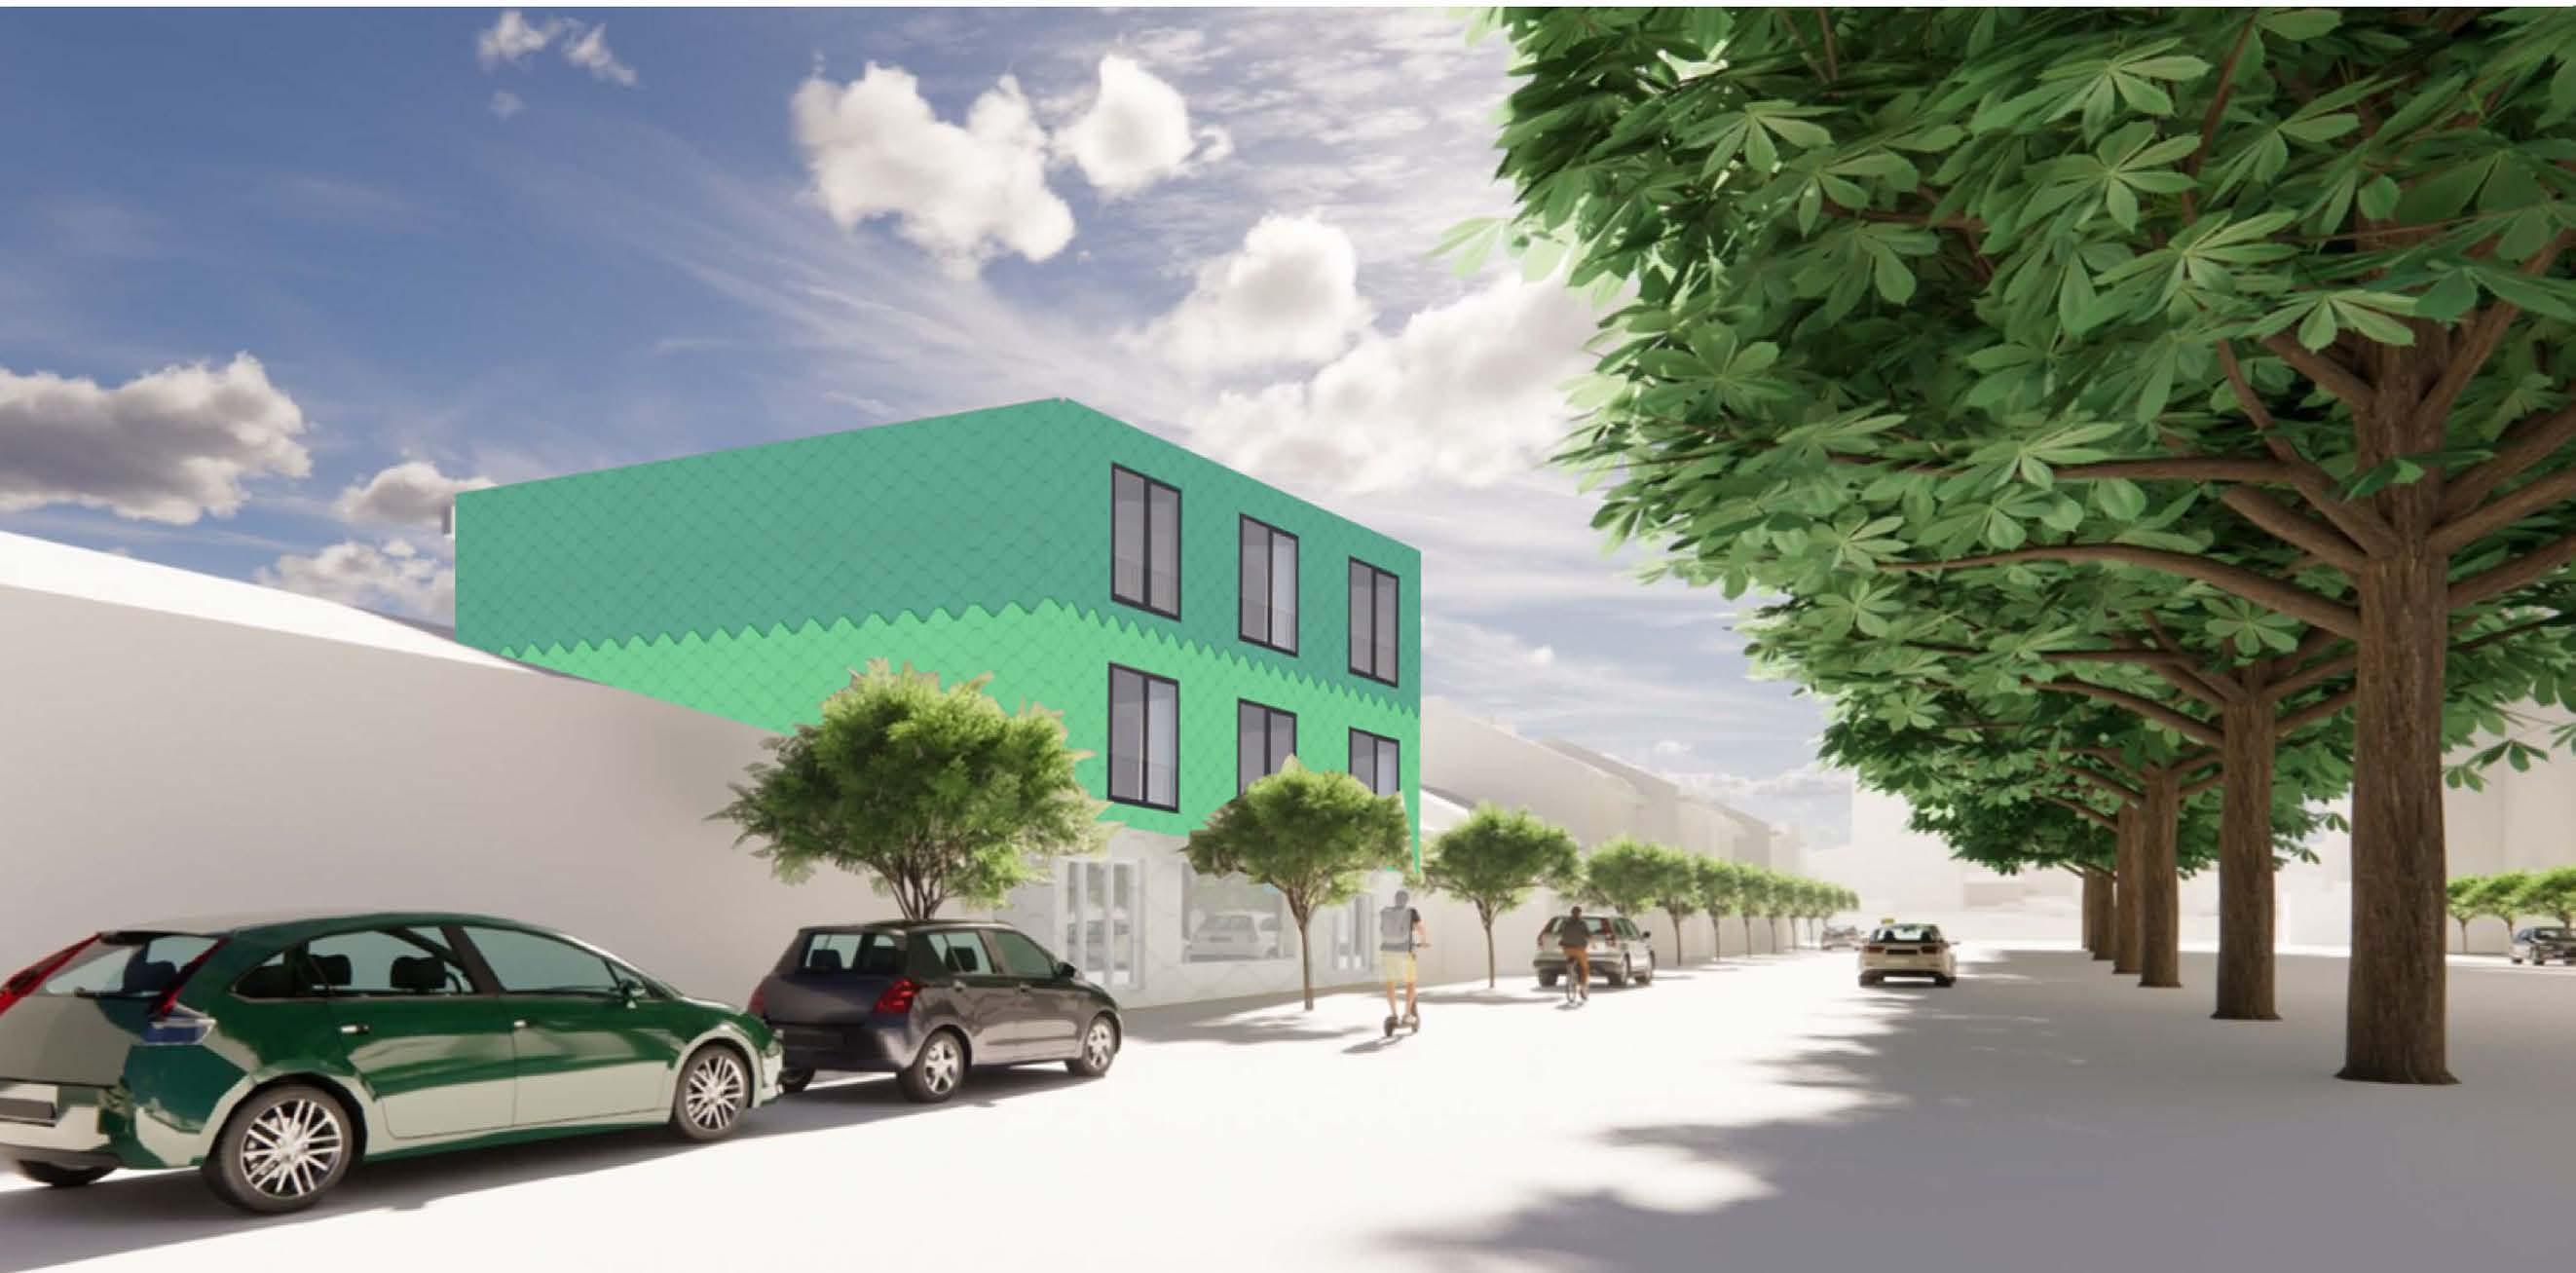
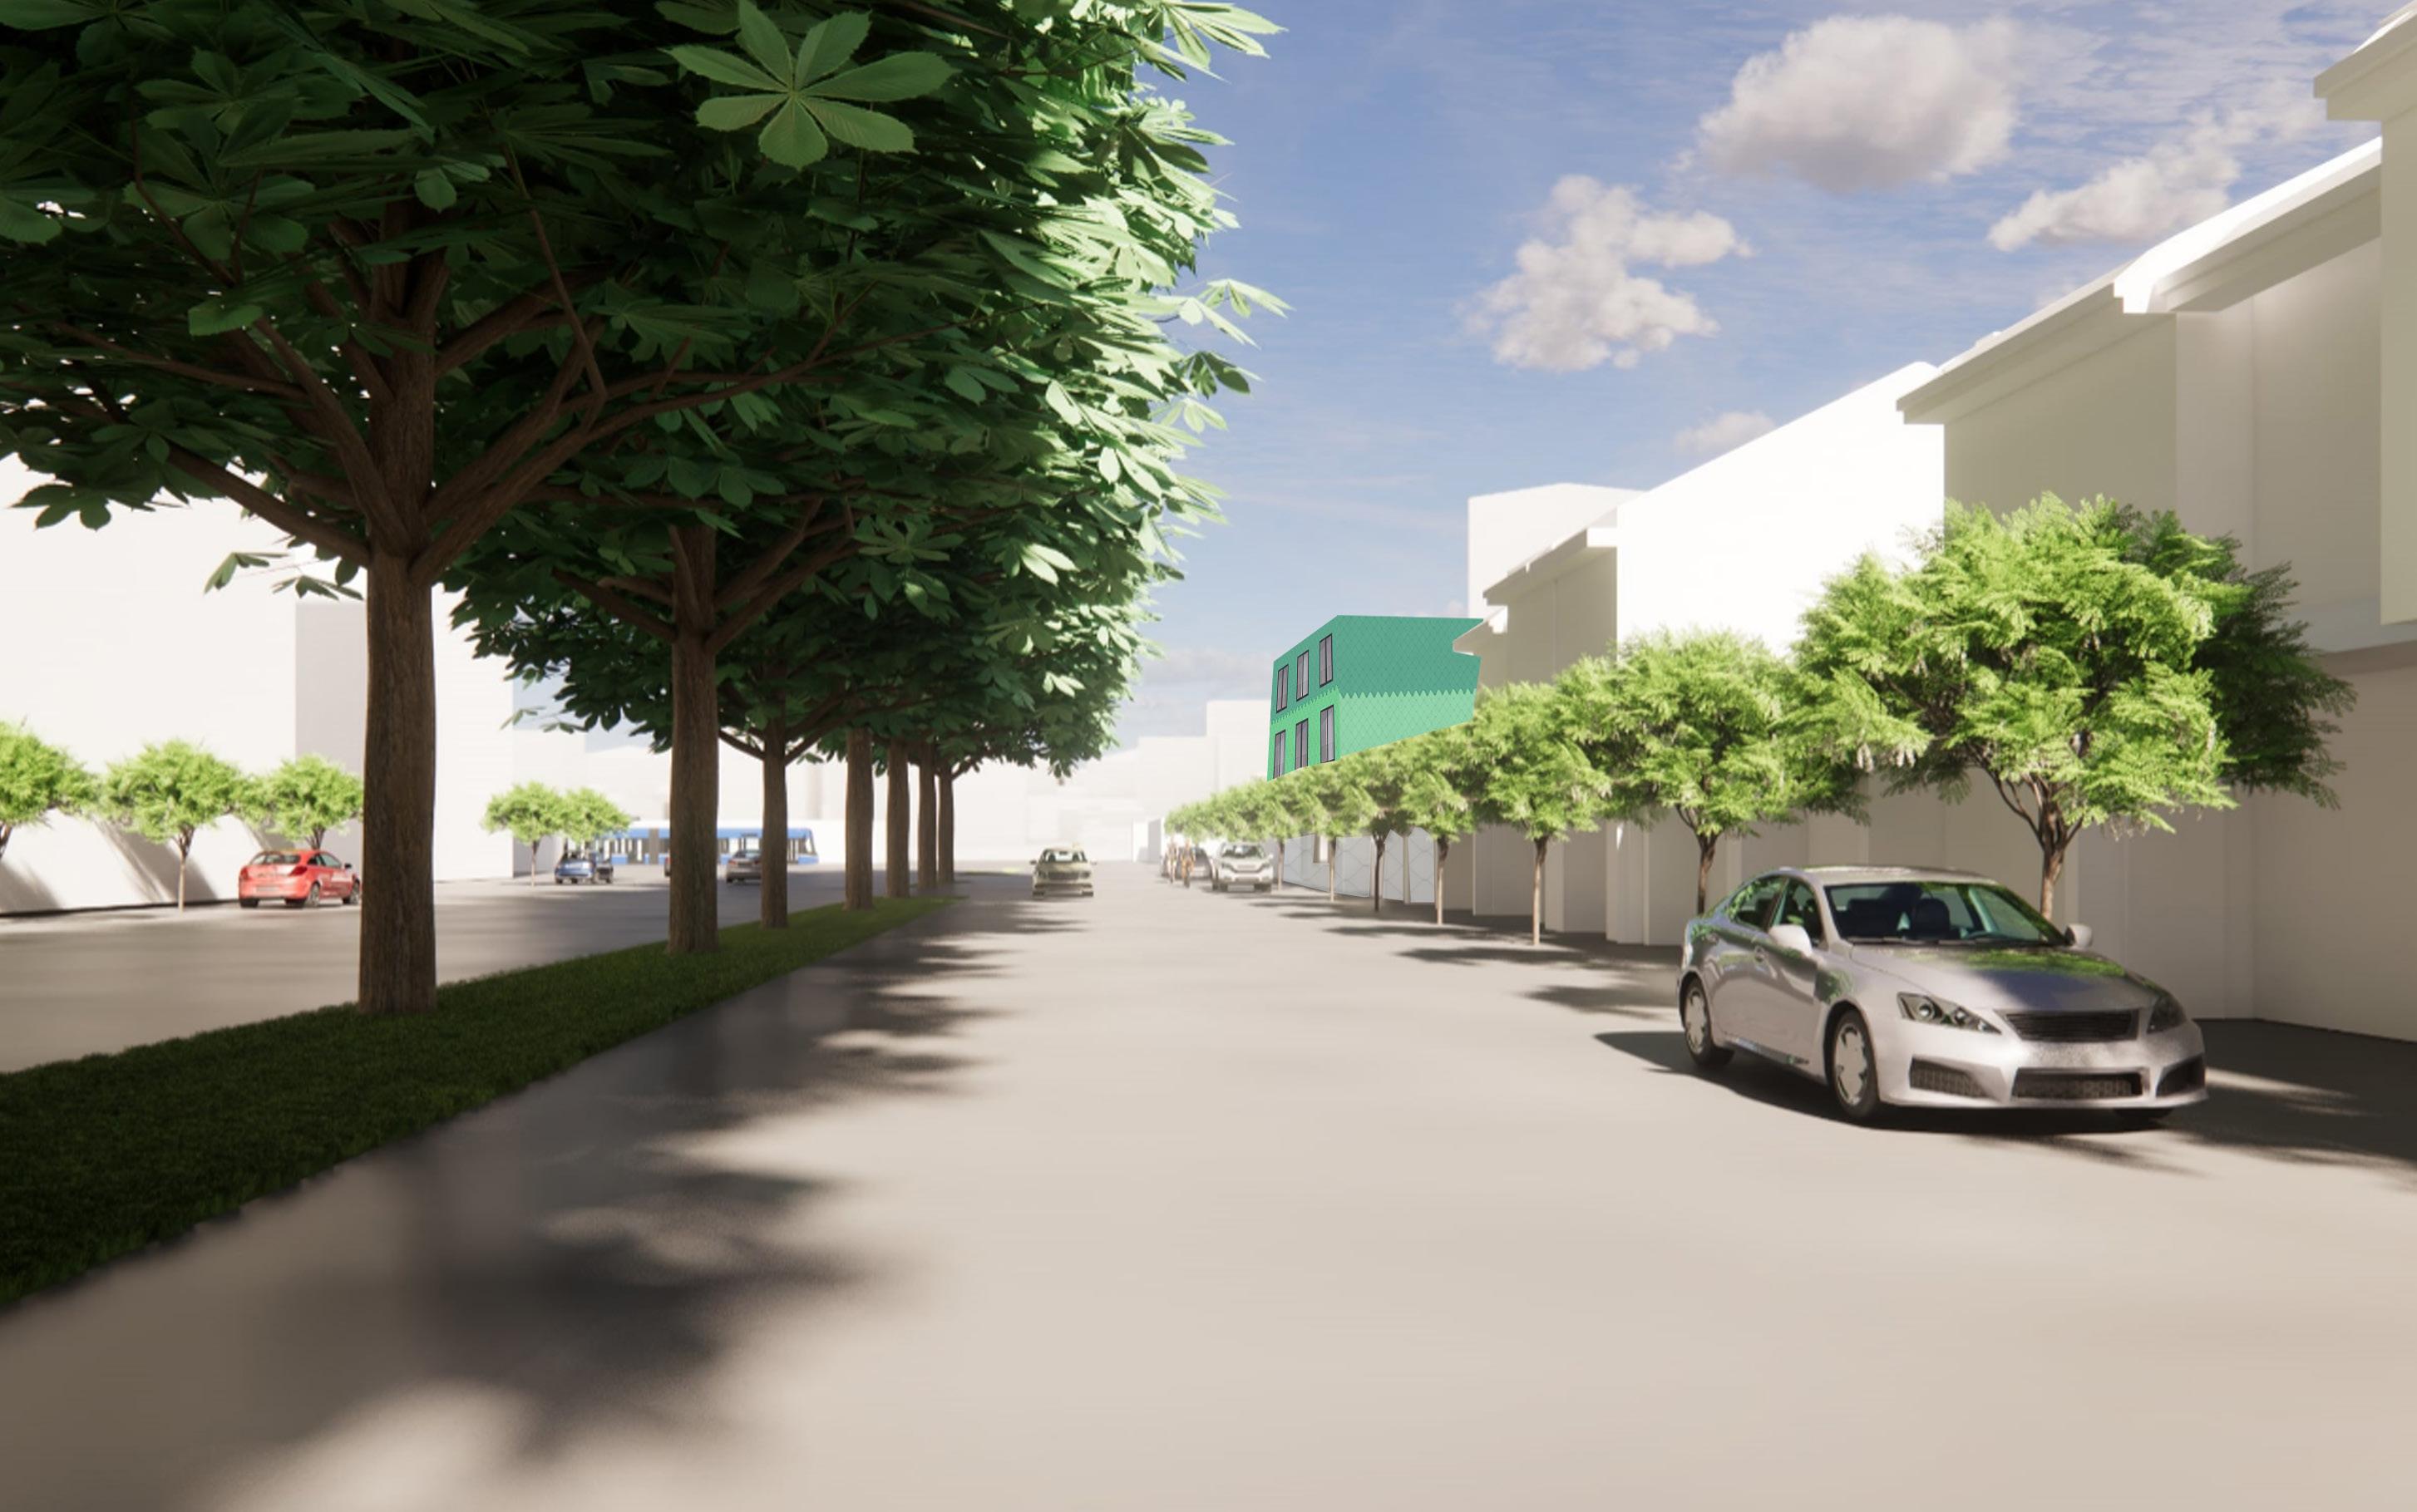
LOCATION: 15-19 Elgin St, Carlton VIC 3053
SITE ADVANTAGES:
• Close to city center and university
• The shops are varied and life is convenient
• Well-developed transportation
• Lots of parking nearby
• The height of the buildings on both sides is very low
SITE CONS:
• Noisy
• Poor air quality
- Photos taken by Yuan Xu
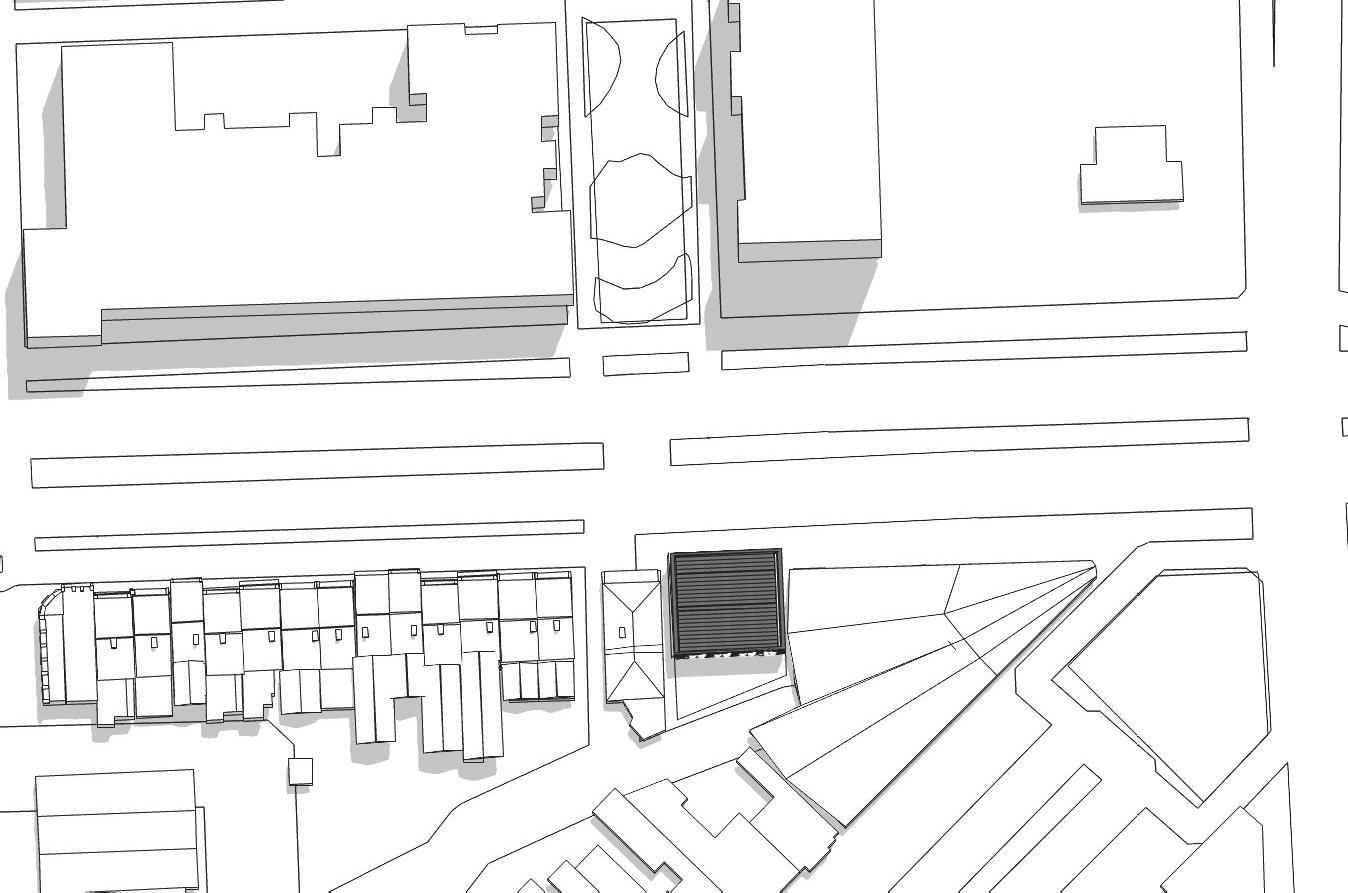
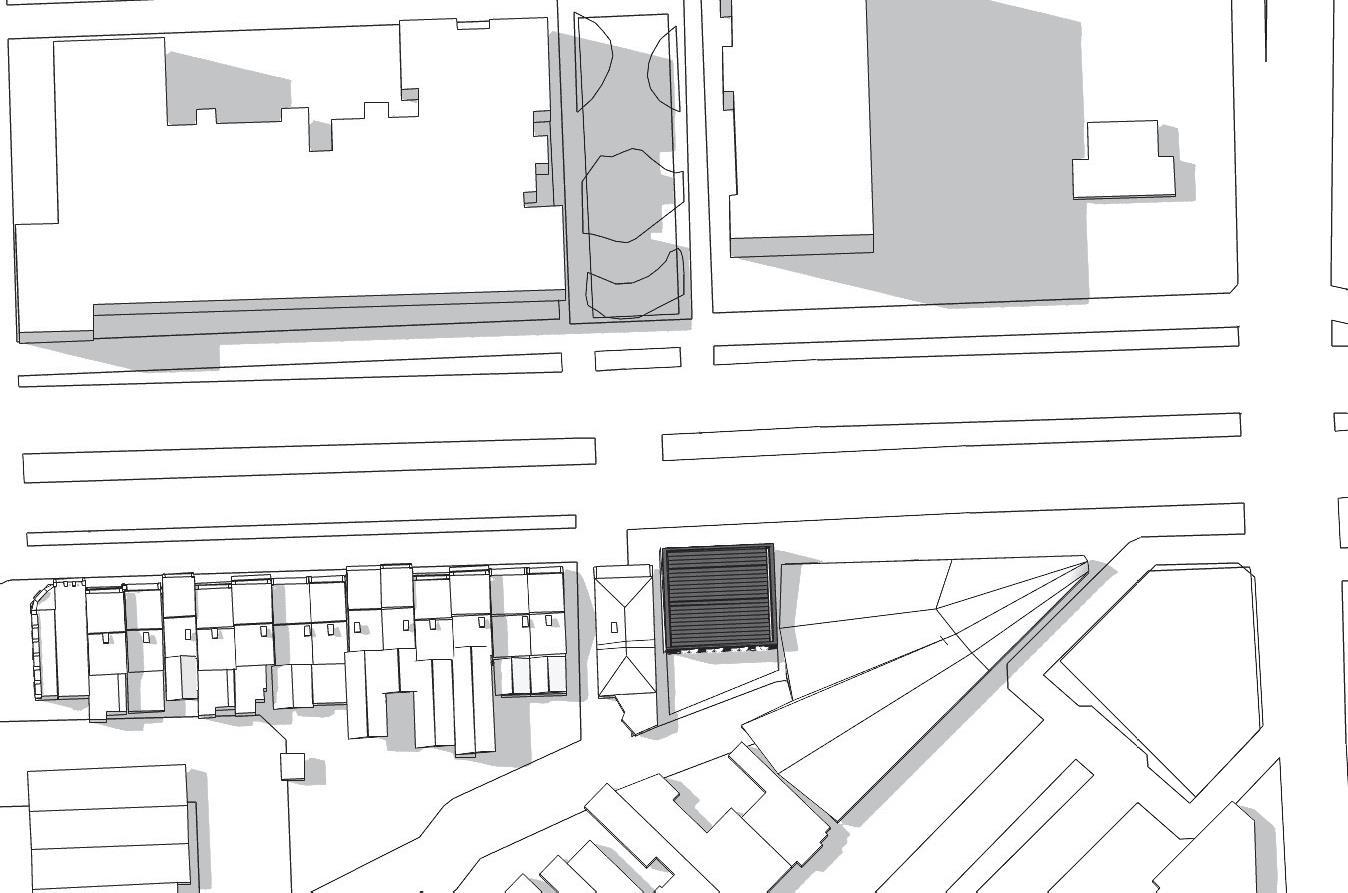
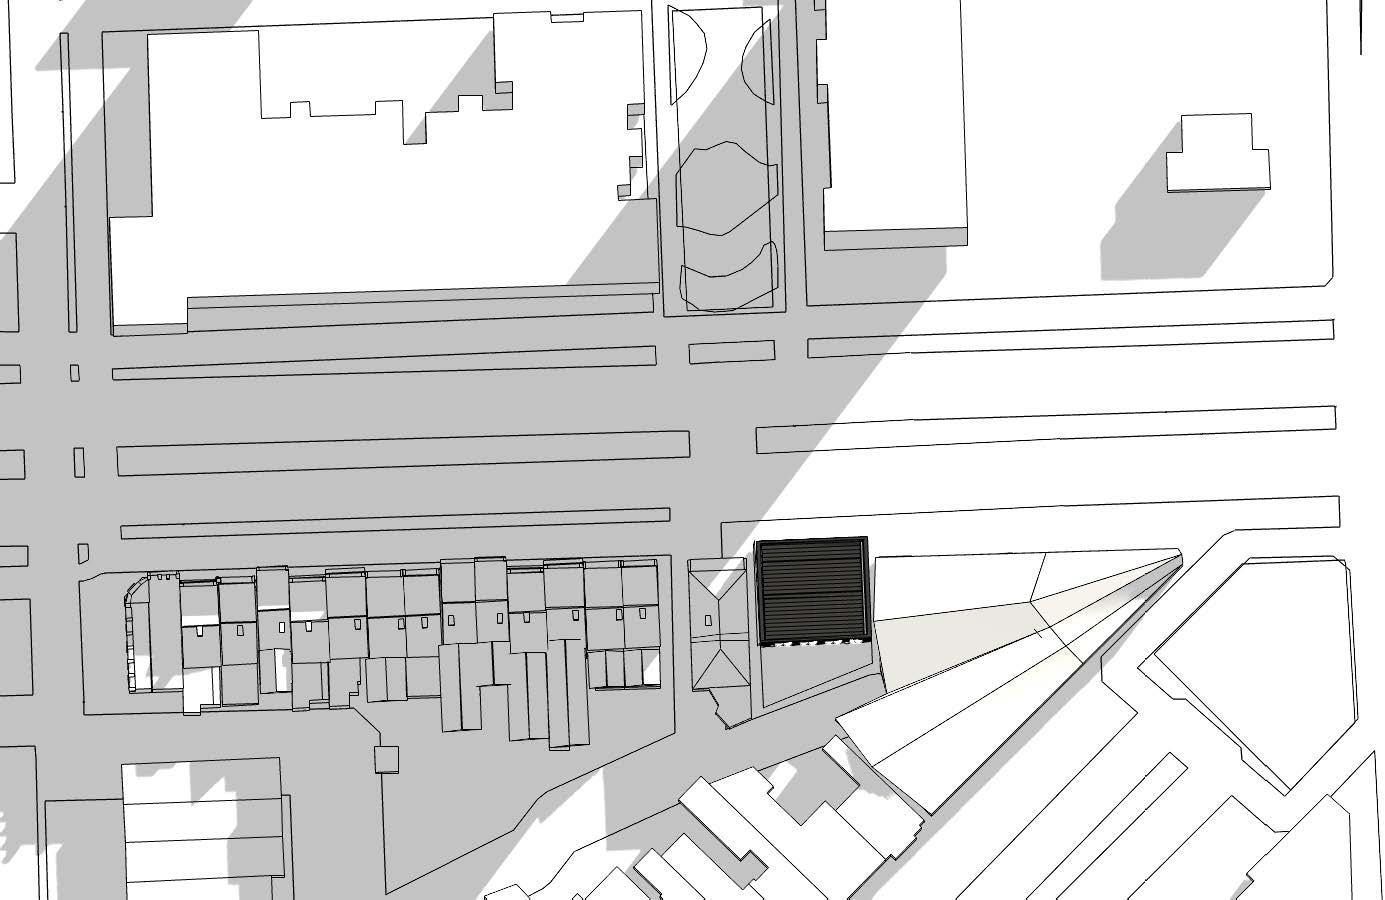
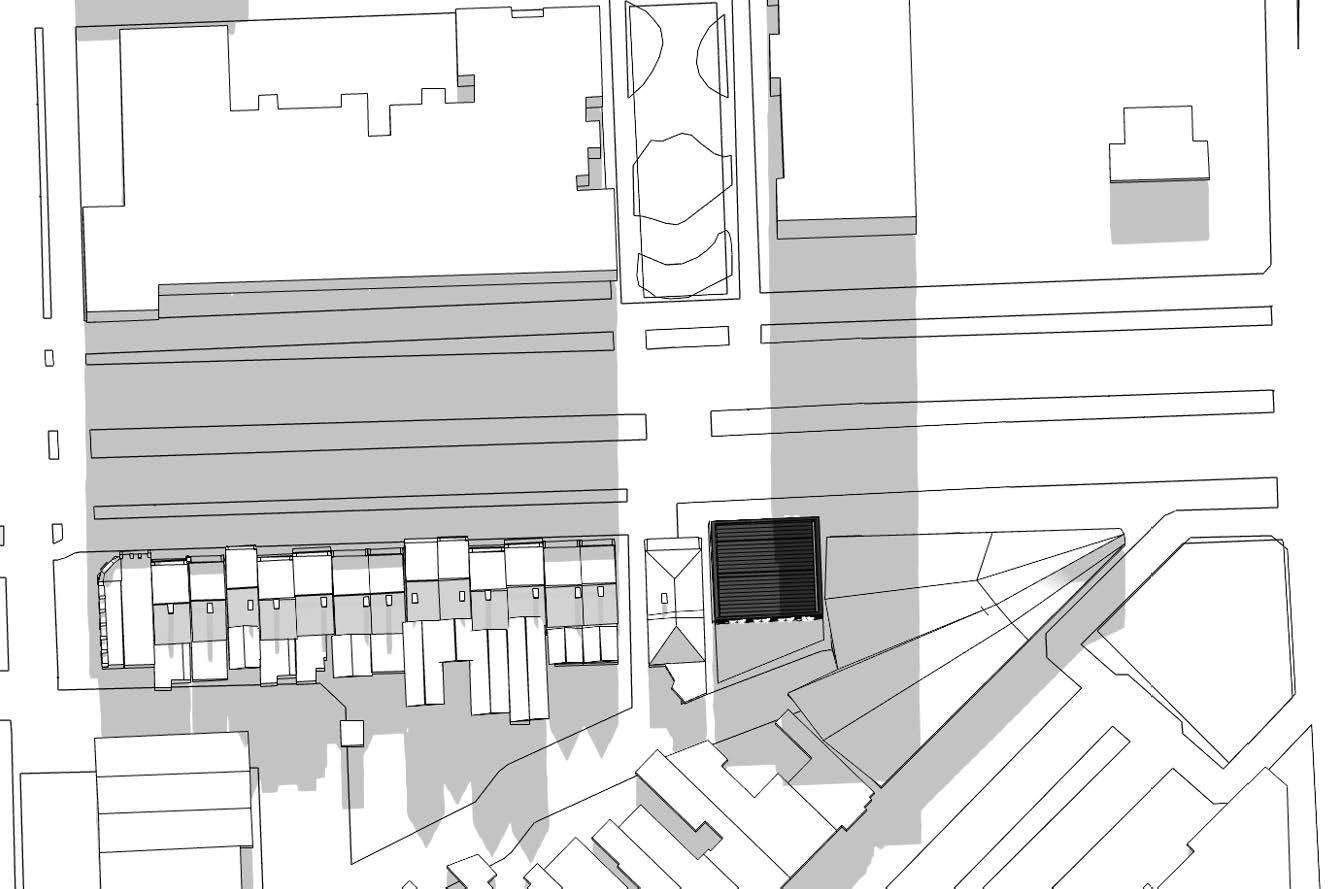
Summer Sunlight Analysis
Sunlight Exploration Studies
Estimated Sun Path at 12pm
Estimated Shadow in the winter
Estimated Shadow in the summer
Bedroom
Livingroom
Drawingr by Traven
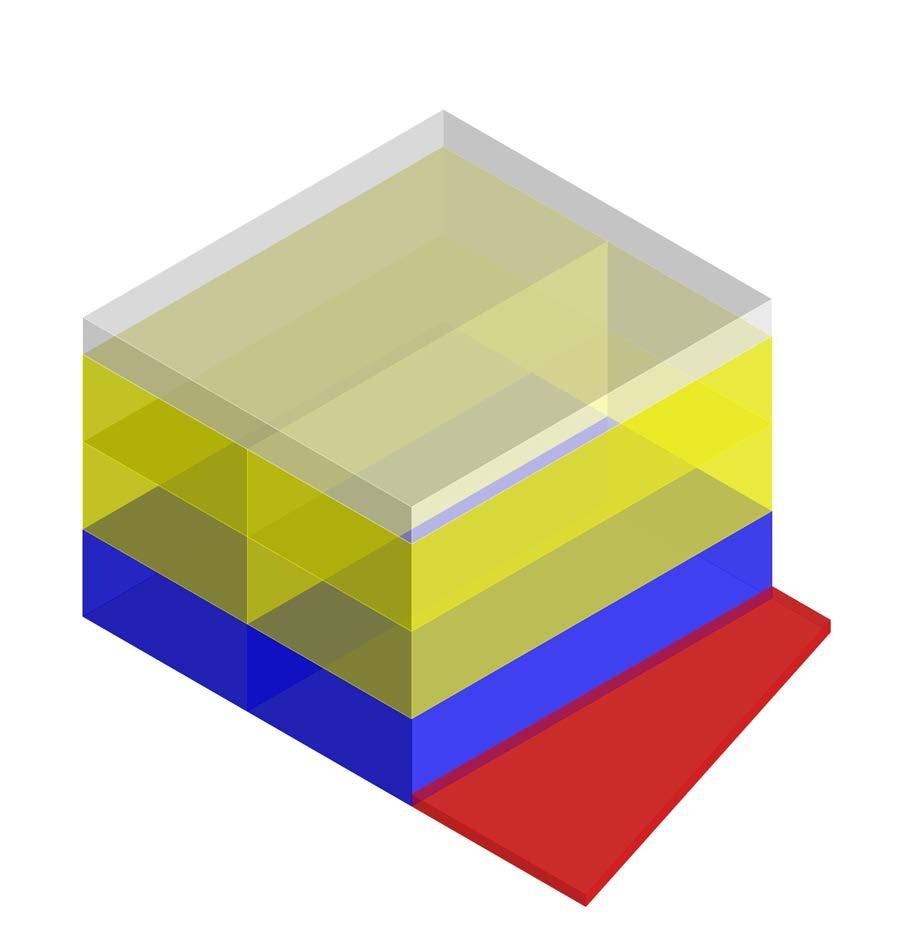
MAIN AREA DIVISIONN Massing and Spatial Planning
ROOM
SHARINGAREA LIVINGAREA LIVINGAREA
EXTERIORSHARINGAREA
Entertainment area/Kitchen
BATHROOM
STAIR
PARKING
LAUNDRY
Garden
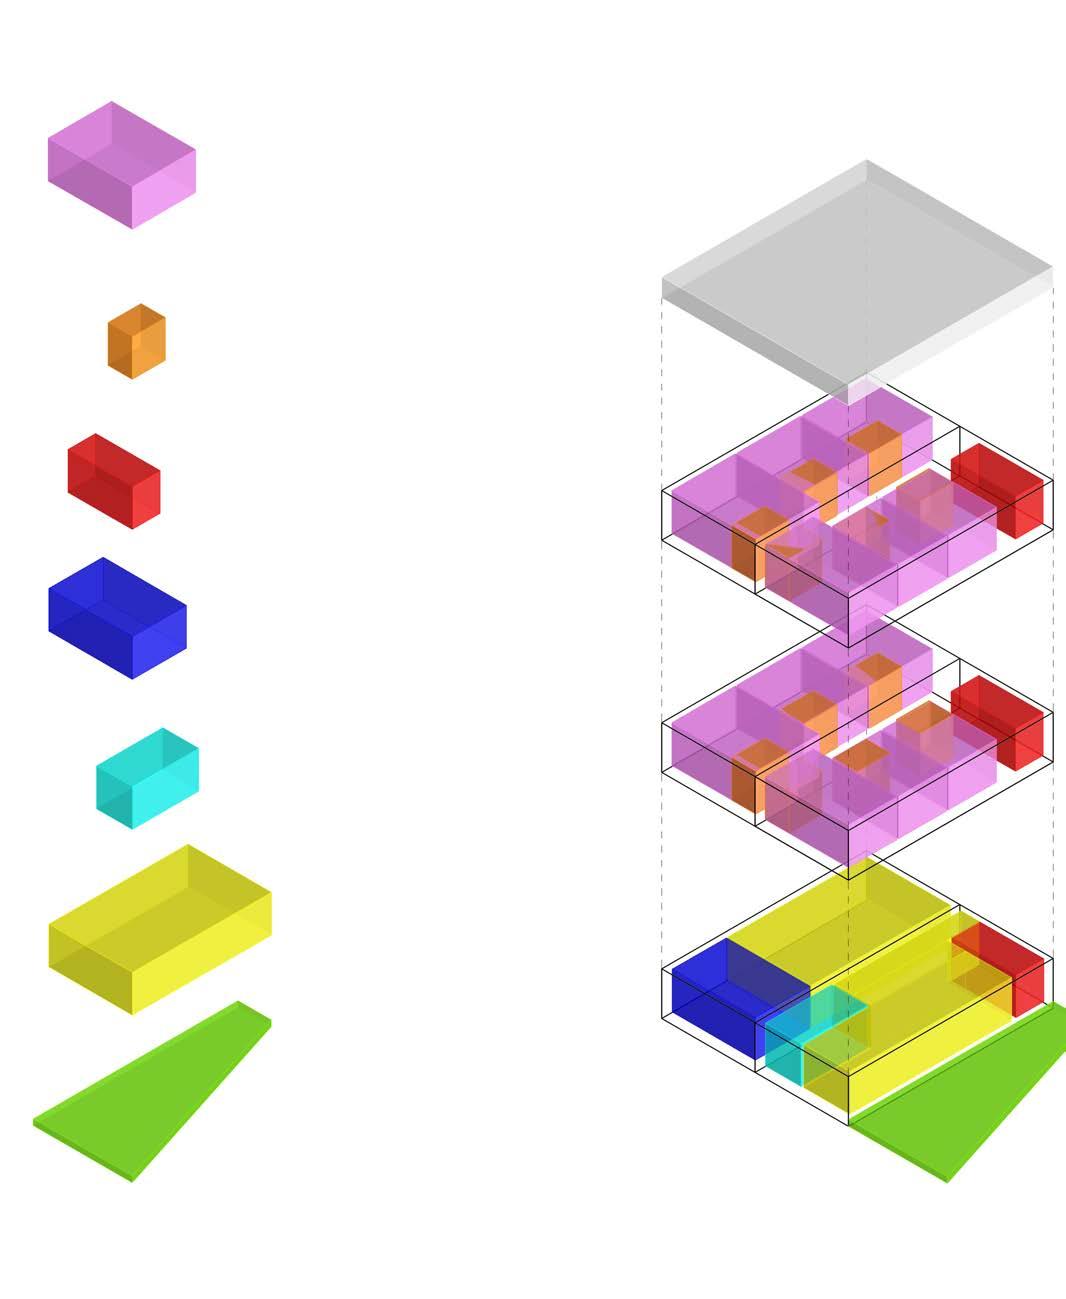
Spatial Relationship Diagram
ENTRANCE
BICYCLE PARKING
ENTERTAINMENT AREA/ LOBBY
Public sharing area
Entrance/Stair
Parking
Private area
Exterior
The building has entrances at both front and back, allowing residents to enter through the main entrance or bicycle parking. People will meet in the entertainment area. People also can through the small road to the back garden, Come up, there has two entrances, one leading to the public kitchen and the other near the stairs.
People reach the private areas on the second and third floors via the stairs, with access to individual rooms through a corridor.
- Drawingr by Yuan Xu
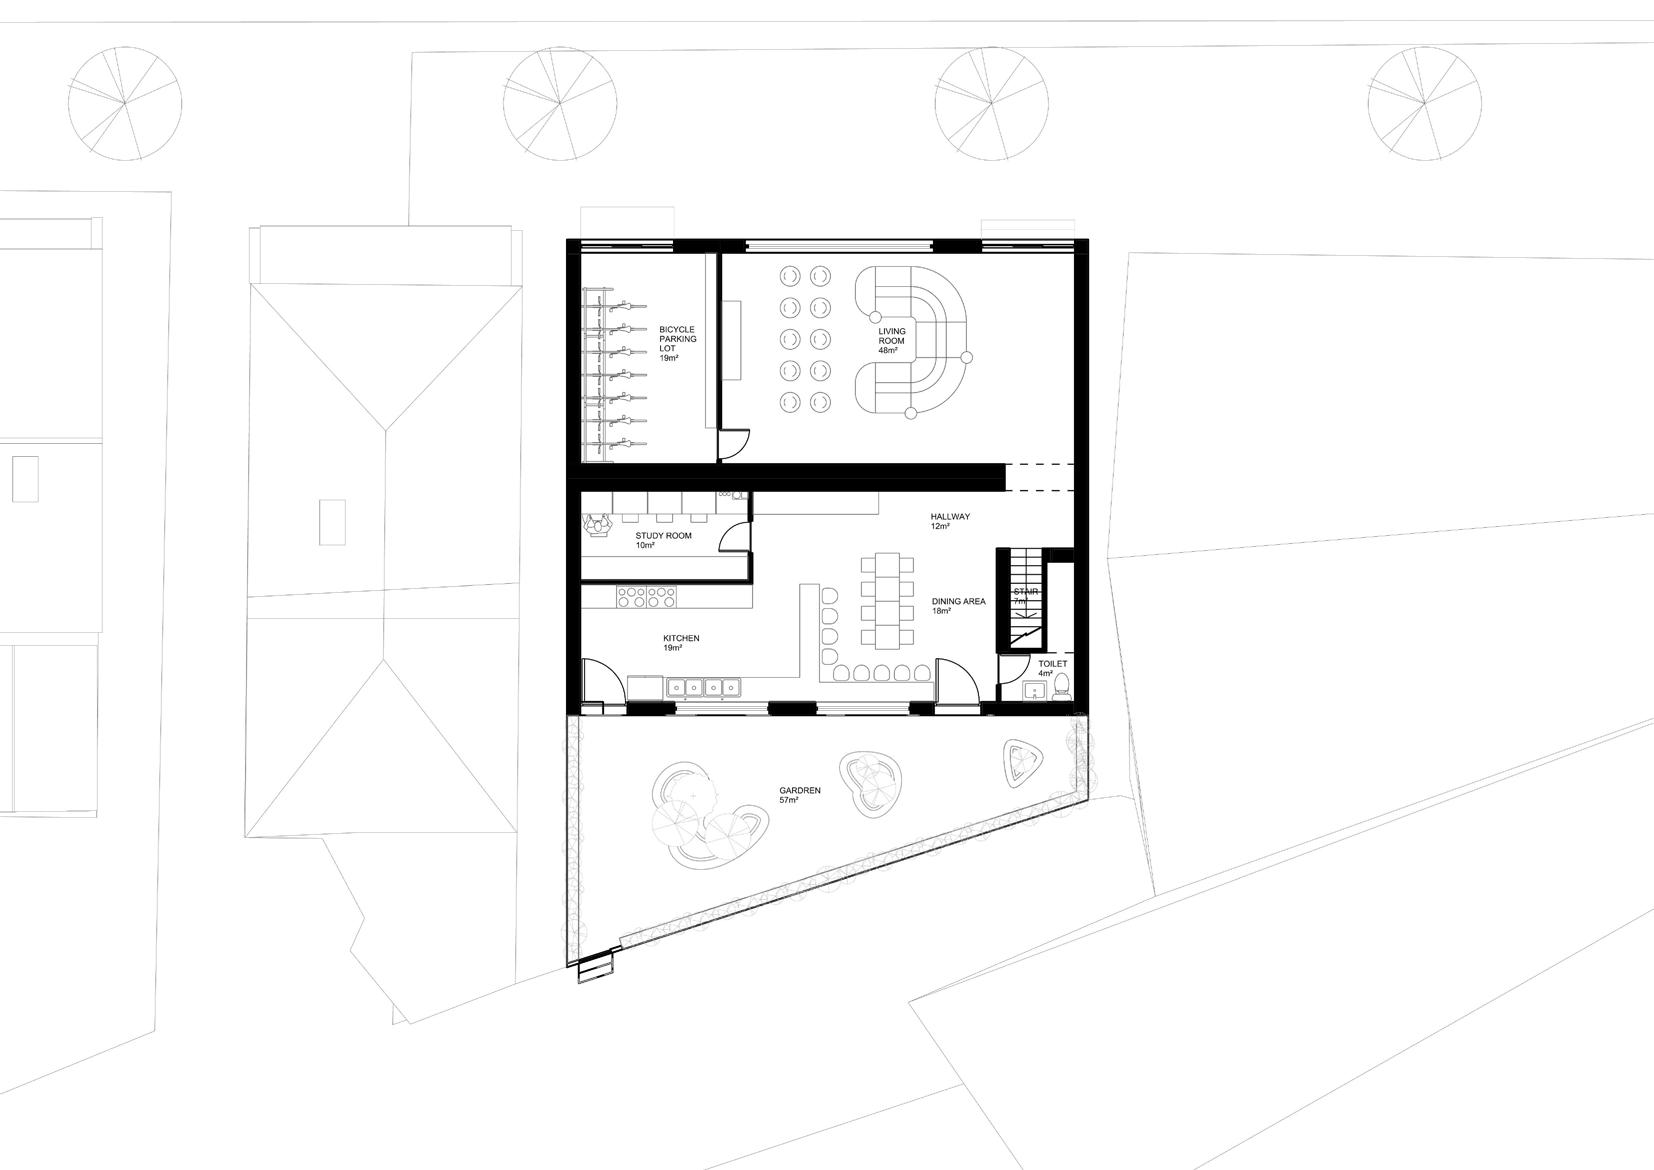
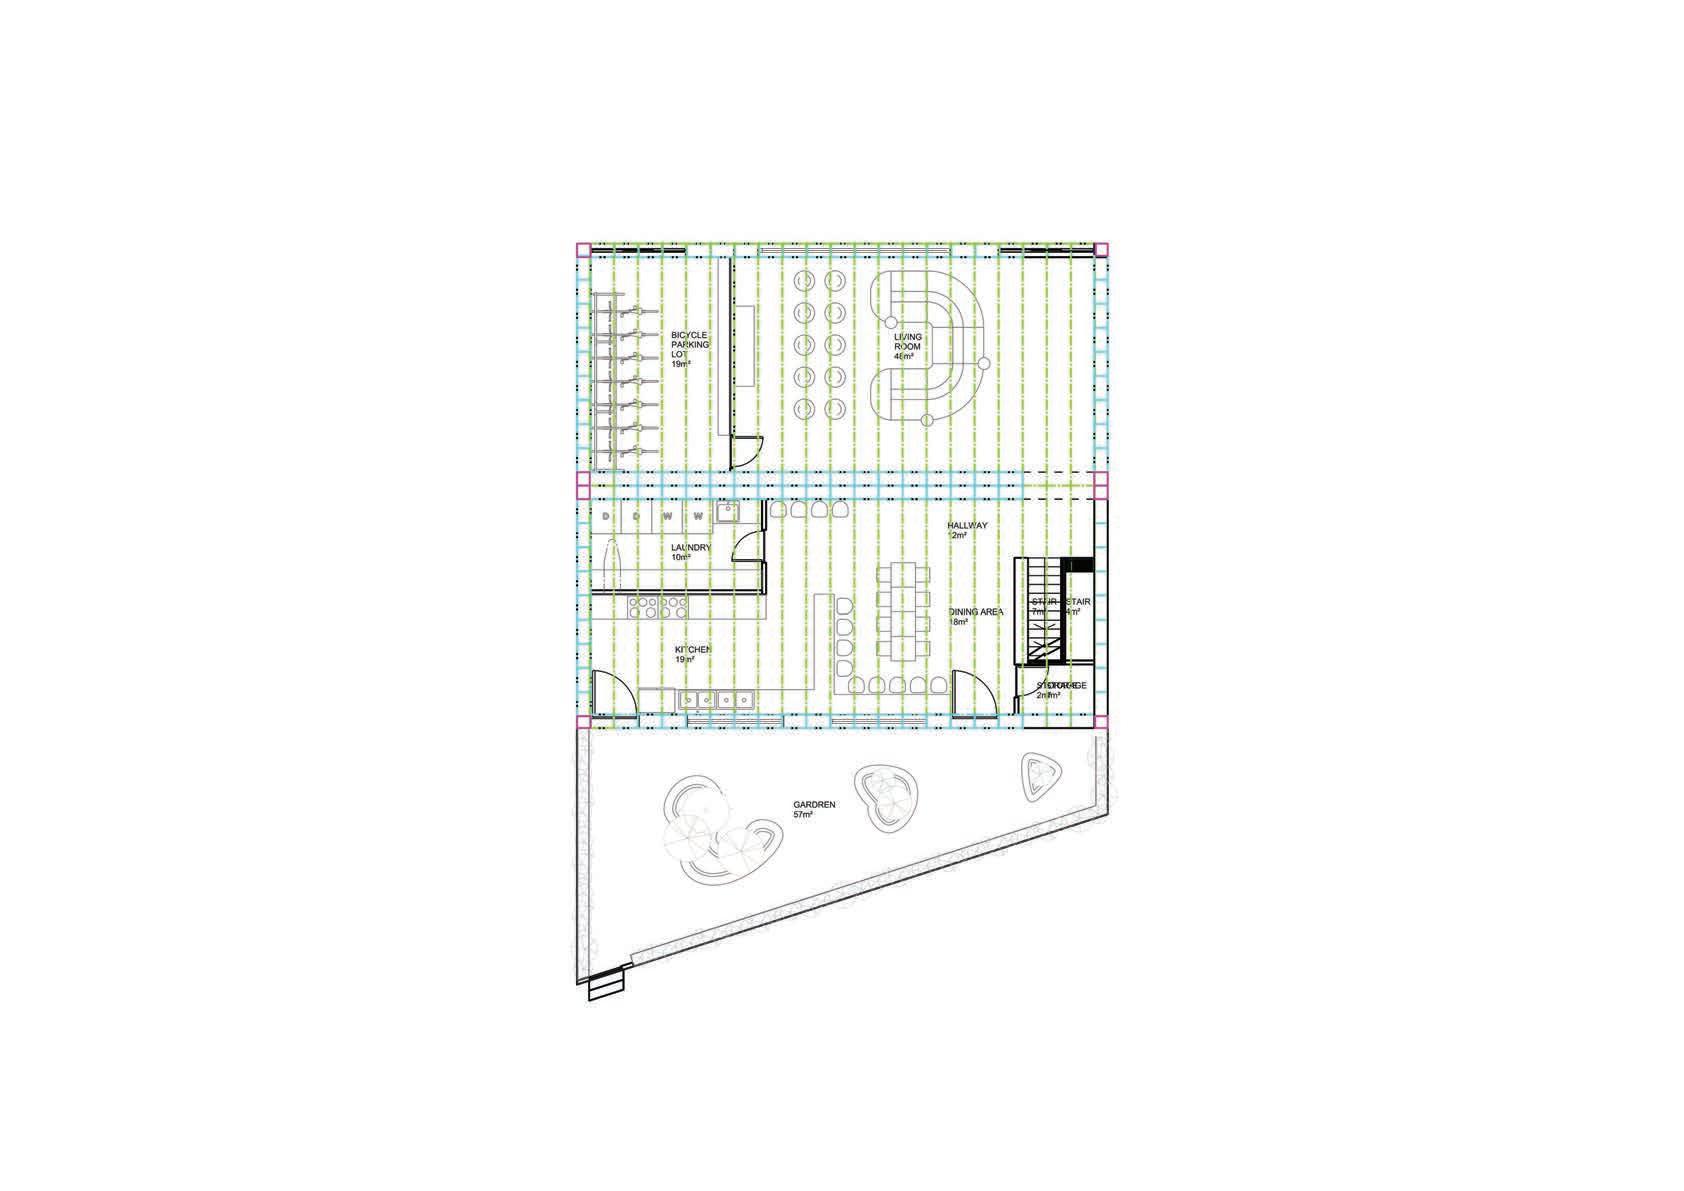
Ground Floor Plan
The ground floor is designed for shared use by all residents, with our design target being university students and young professionals. We have included common recreational spaces, a shared kitchen/dining area, and study areas. Due to the limitations of the buildings on both sides of the site, all windows face north and south. The backyard design creates a peaceful retreat amidst the hustle and bustle, adding greenery and vitality to the southfacing spaces.
- Drawing by Yuan Xu
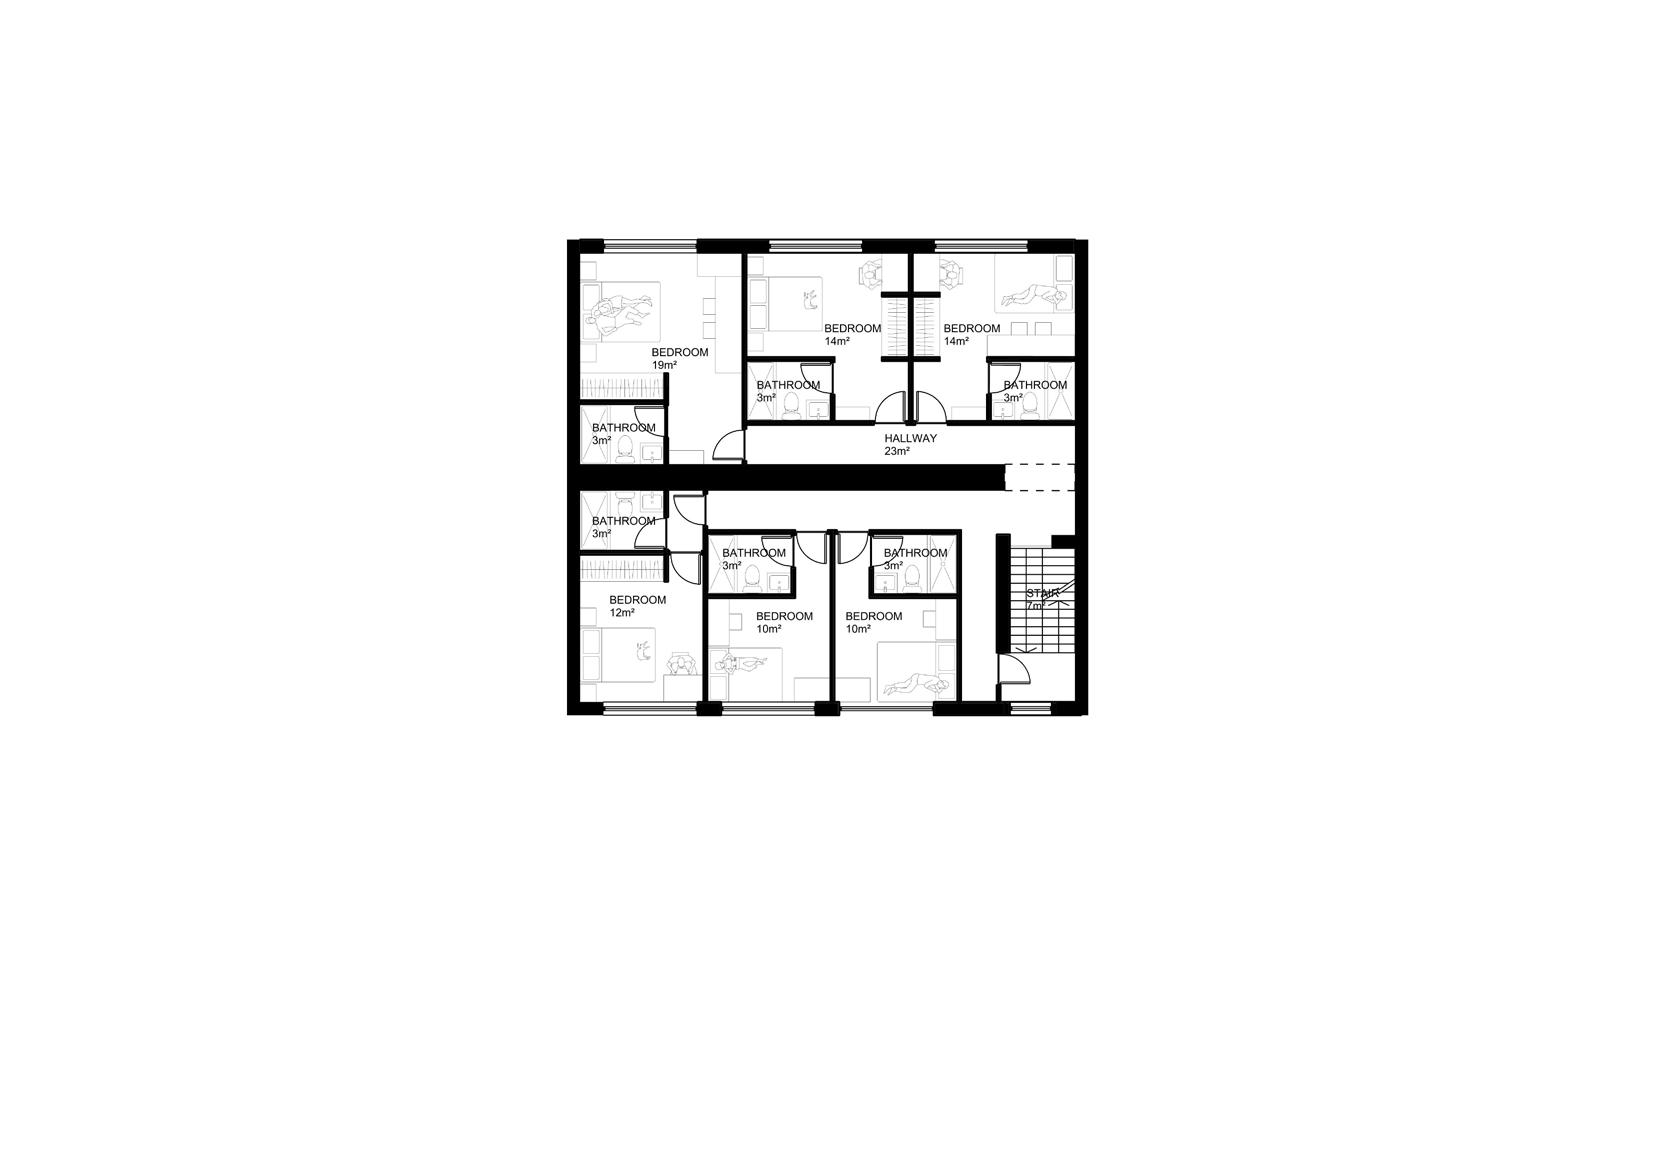
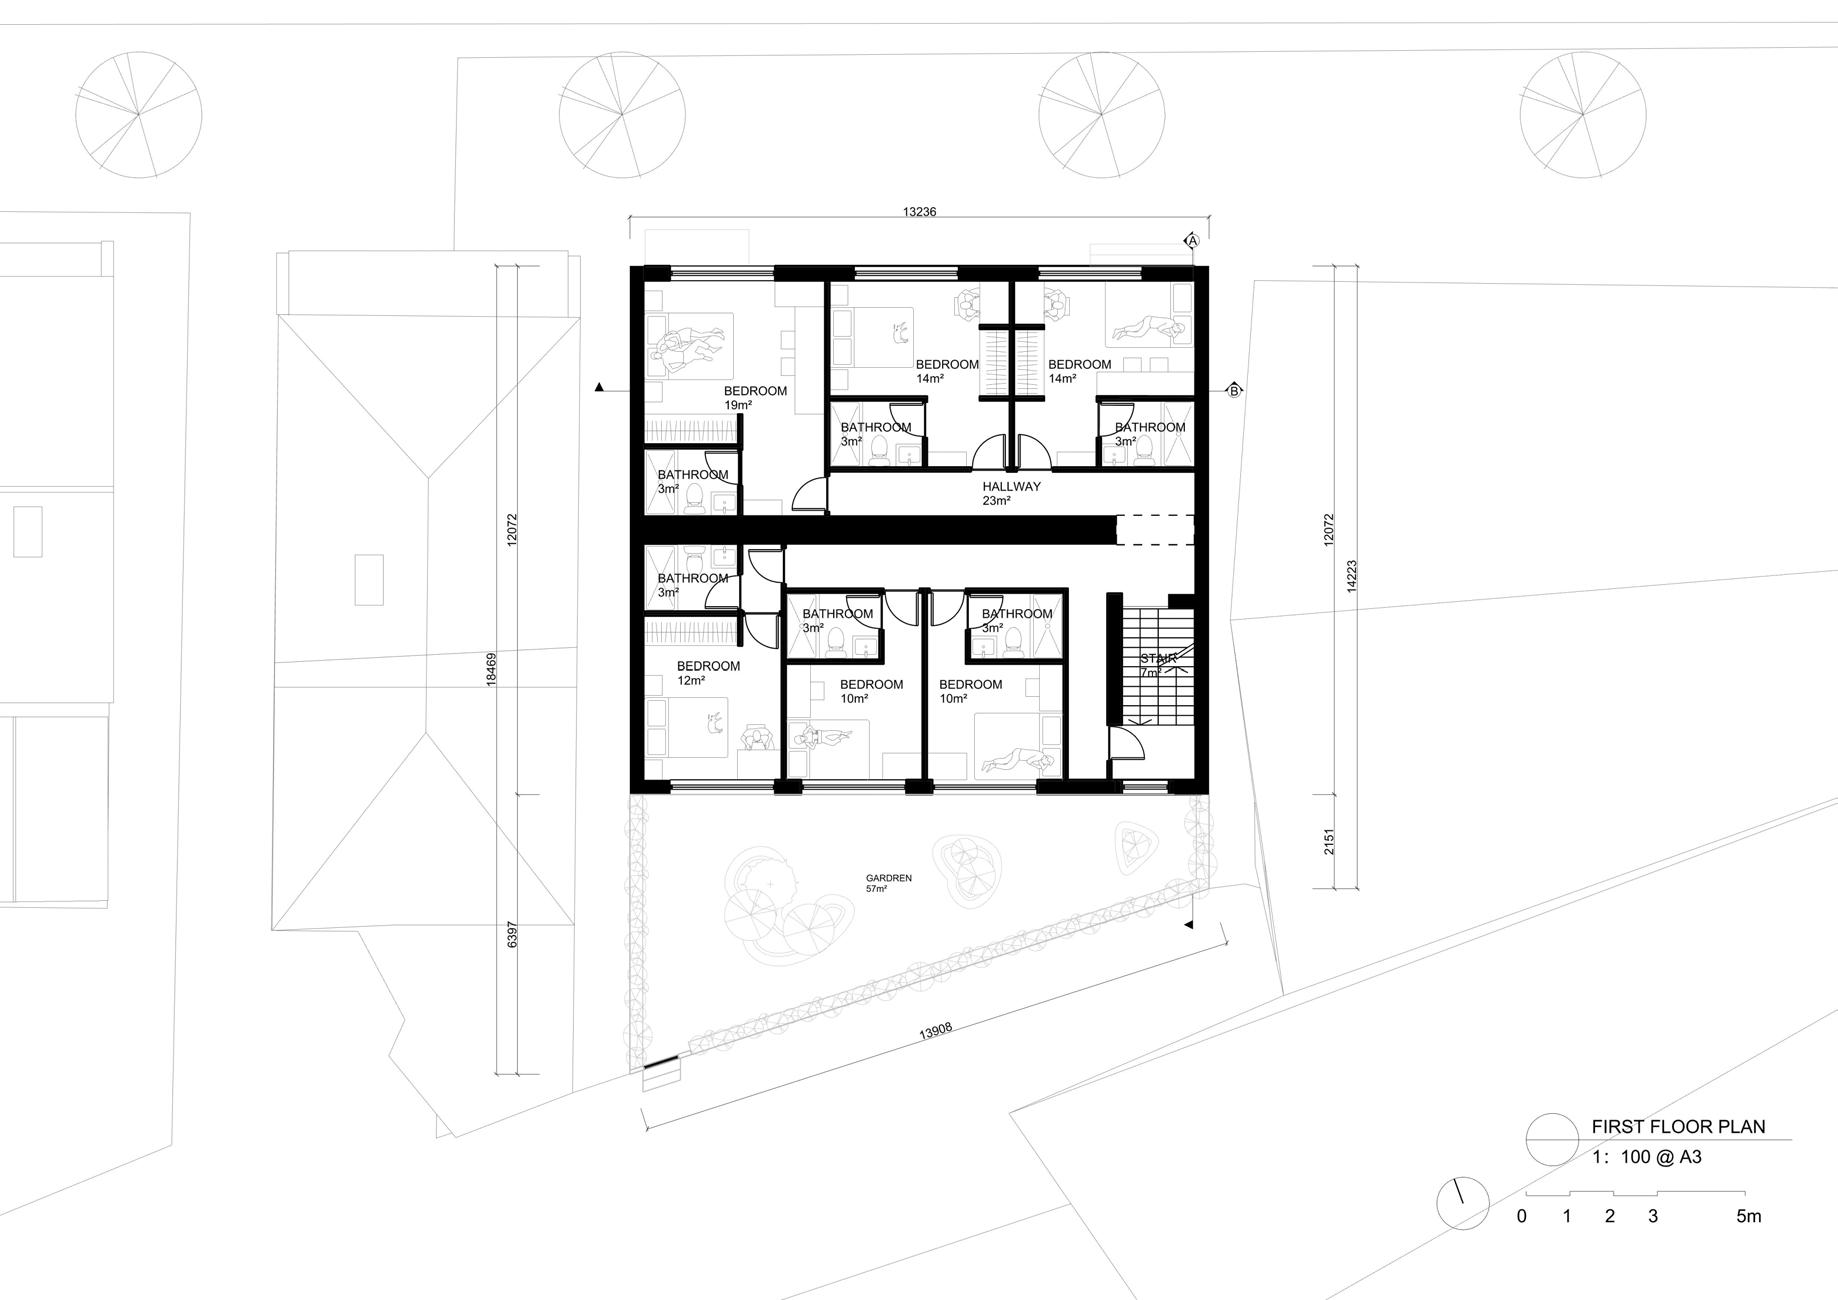
First Floor Plan
The first floor and second floor are designated as private space, continuing the north and south orientation. On each side, three rooms are arranged, with each room accommodating 1-2 people. Our design can house a total of 12-24 people.
- Drawing by Yuan Xu
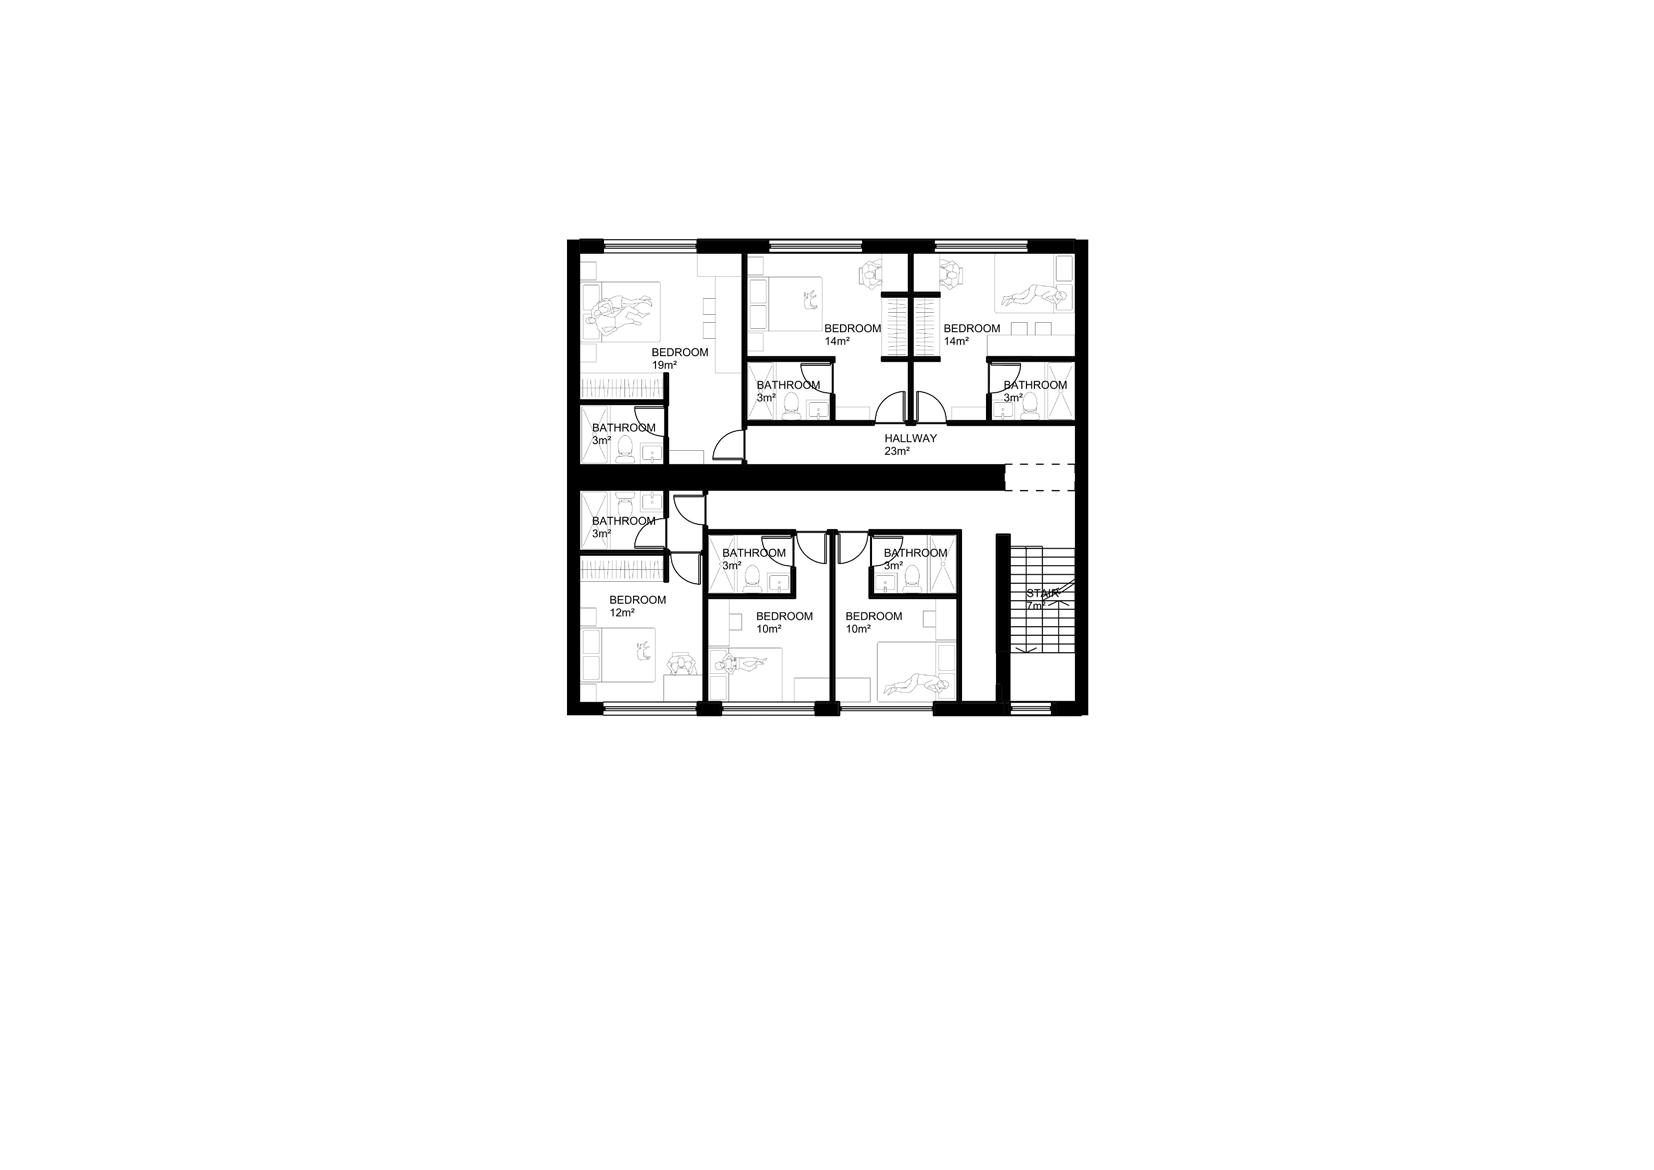
Second Floor Plan
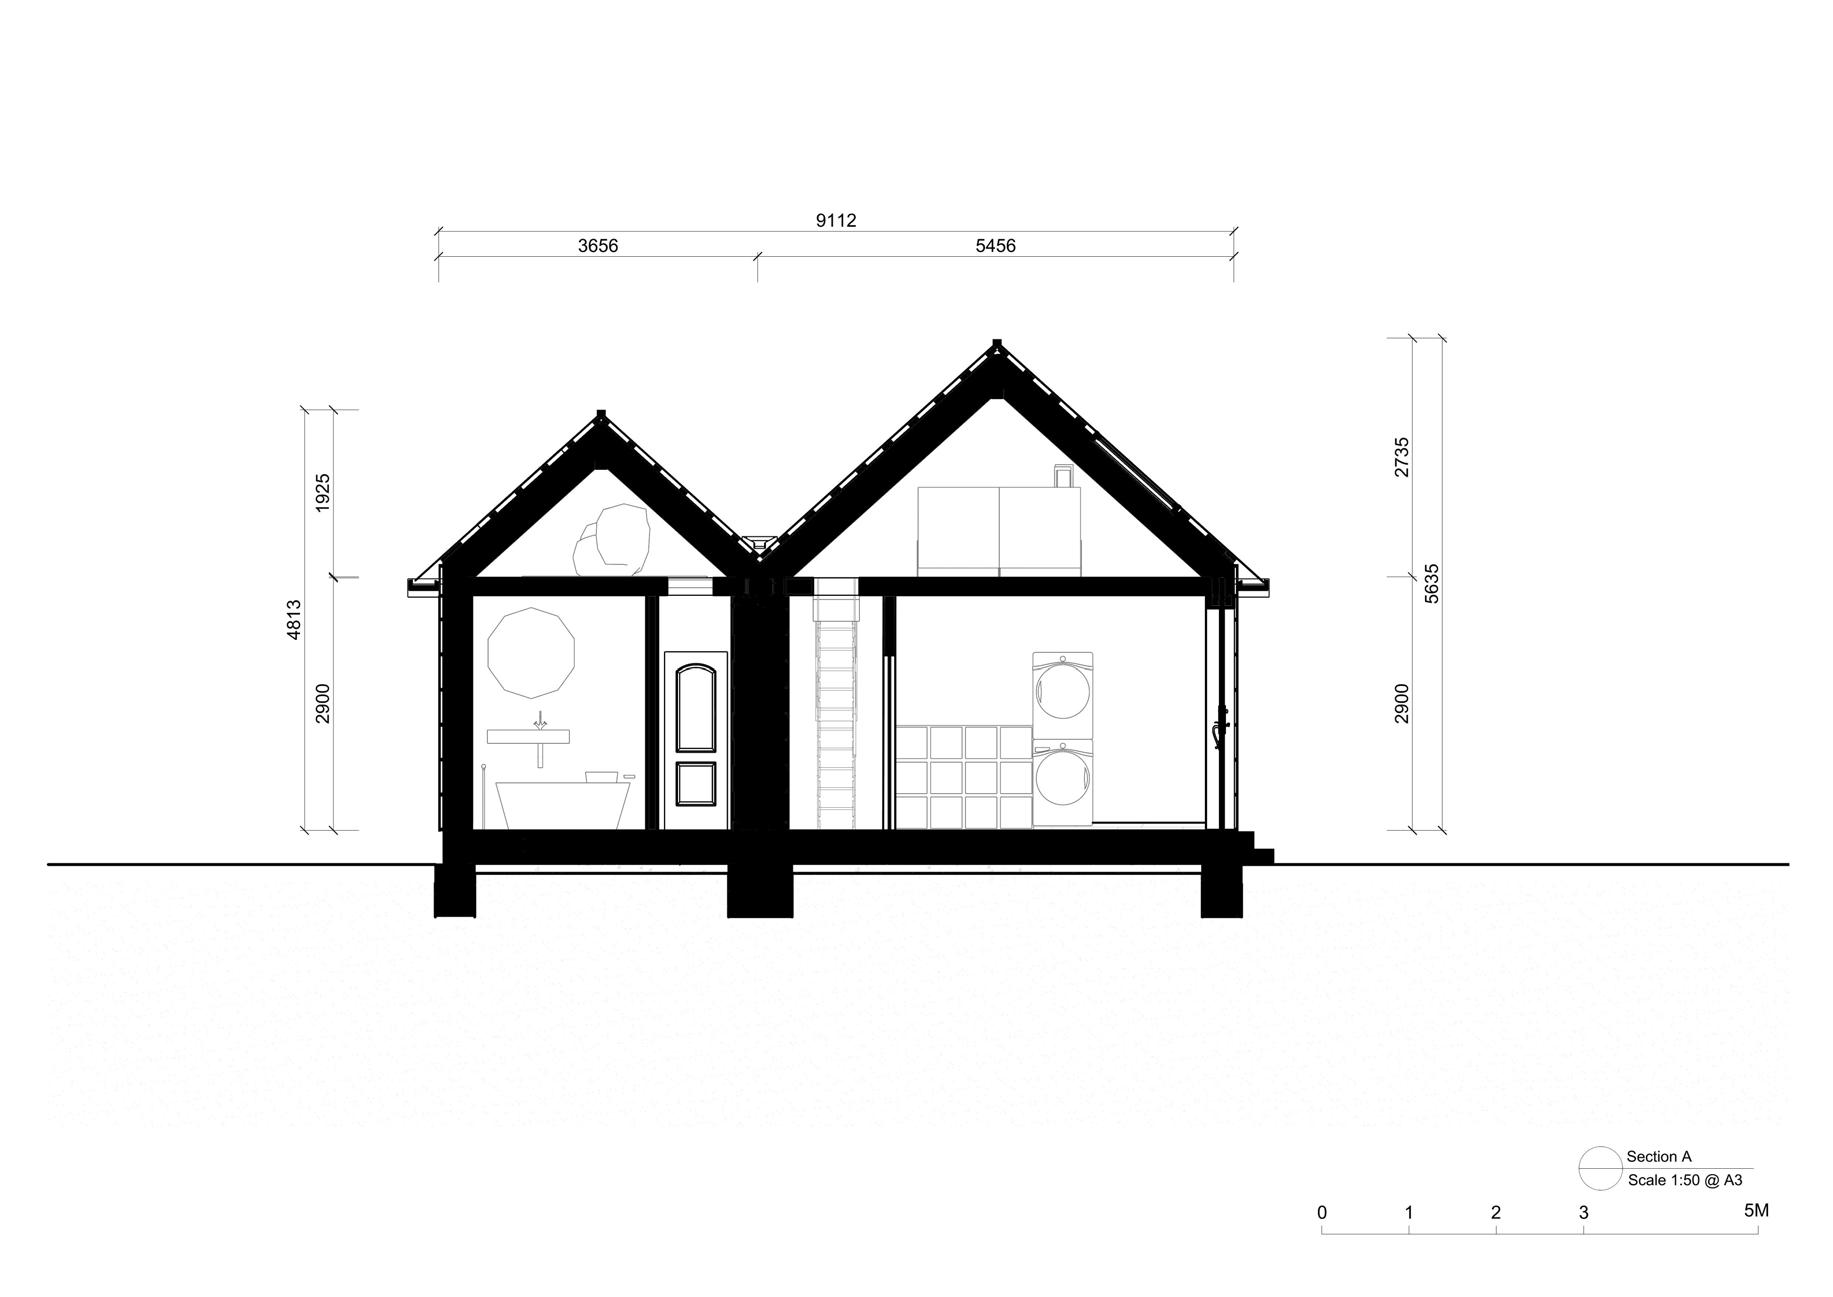
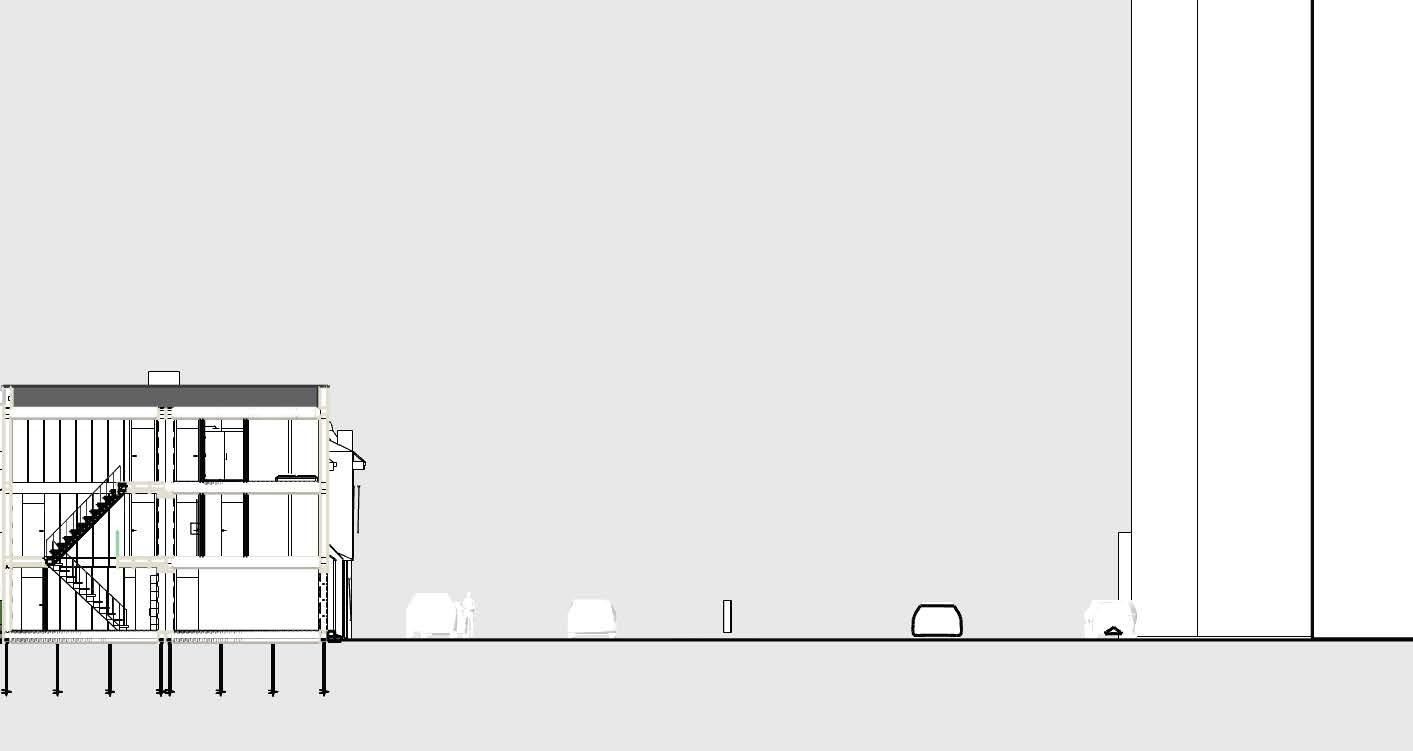
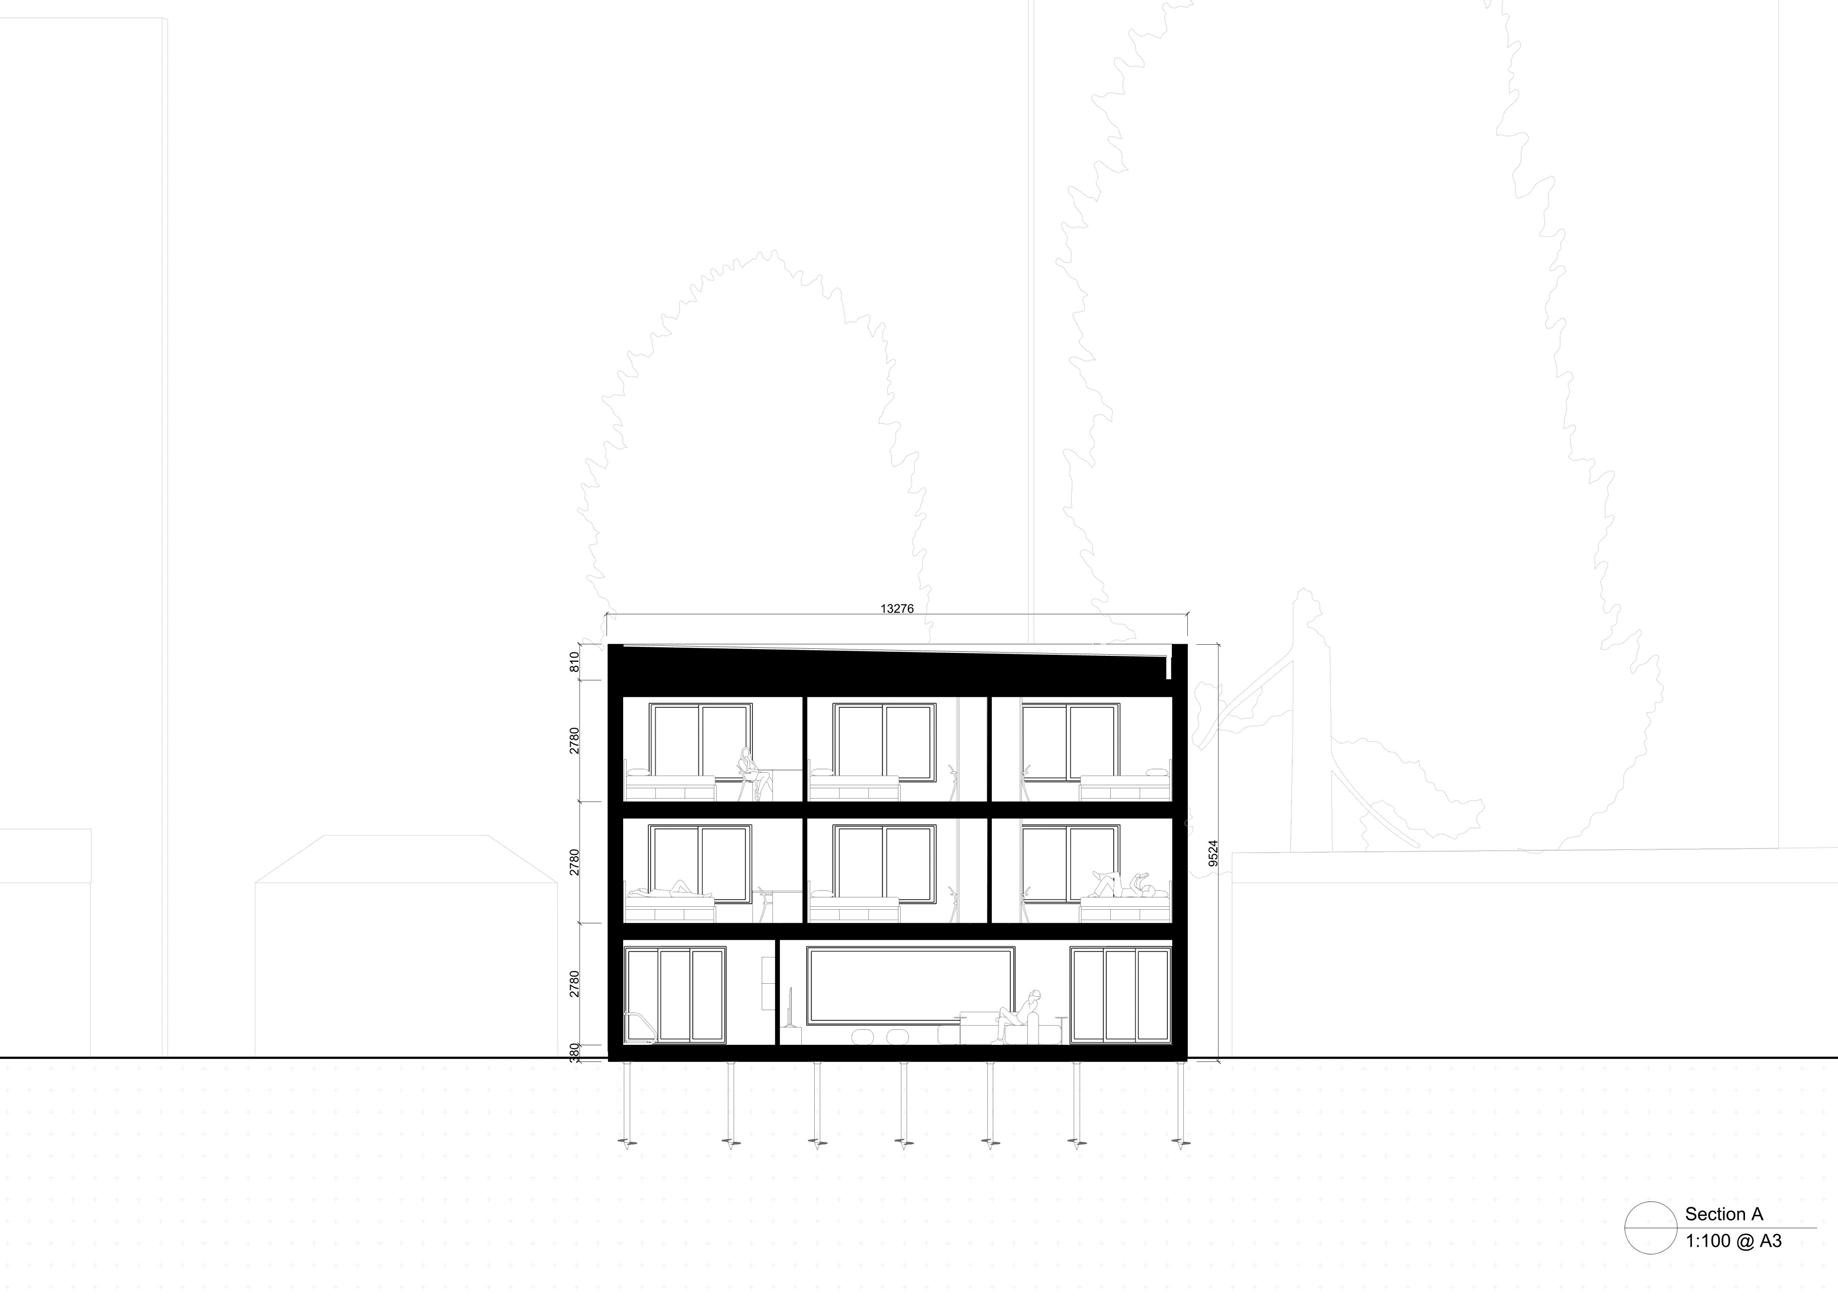
Section A
Drawingr by Yuan Xu
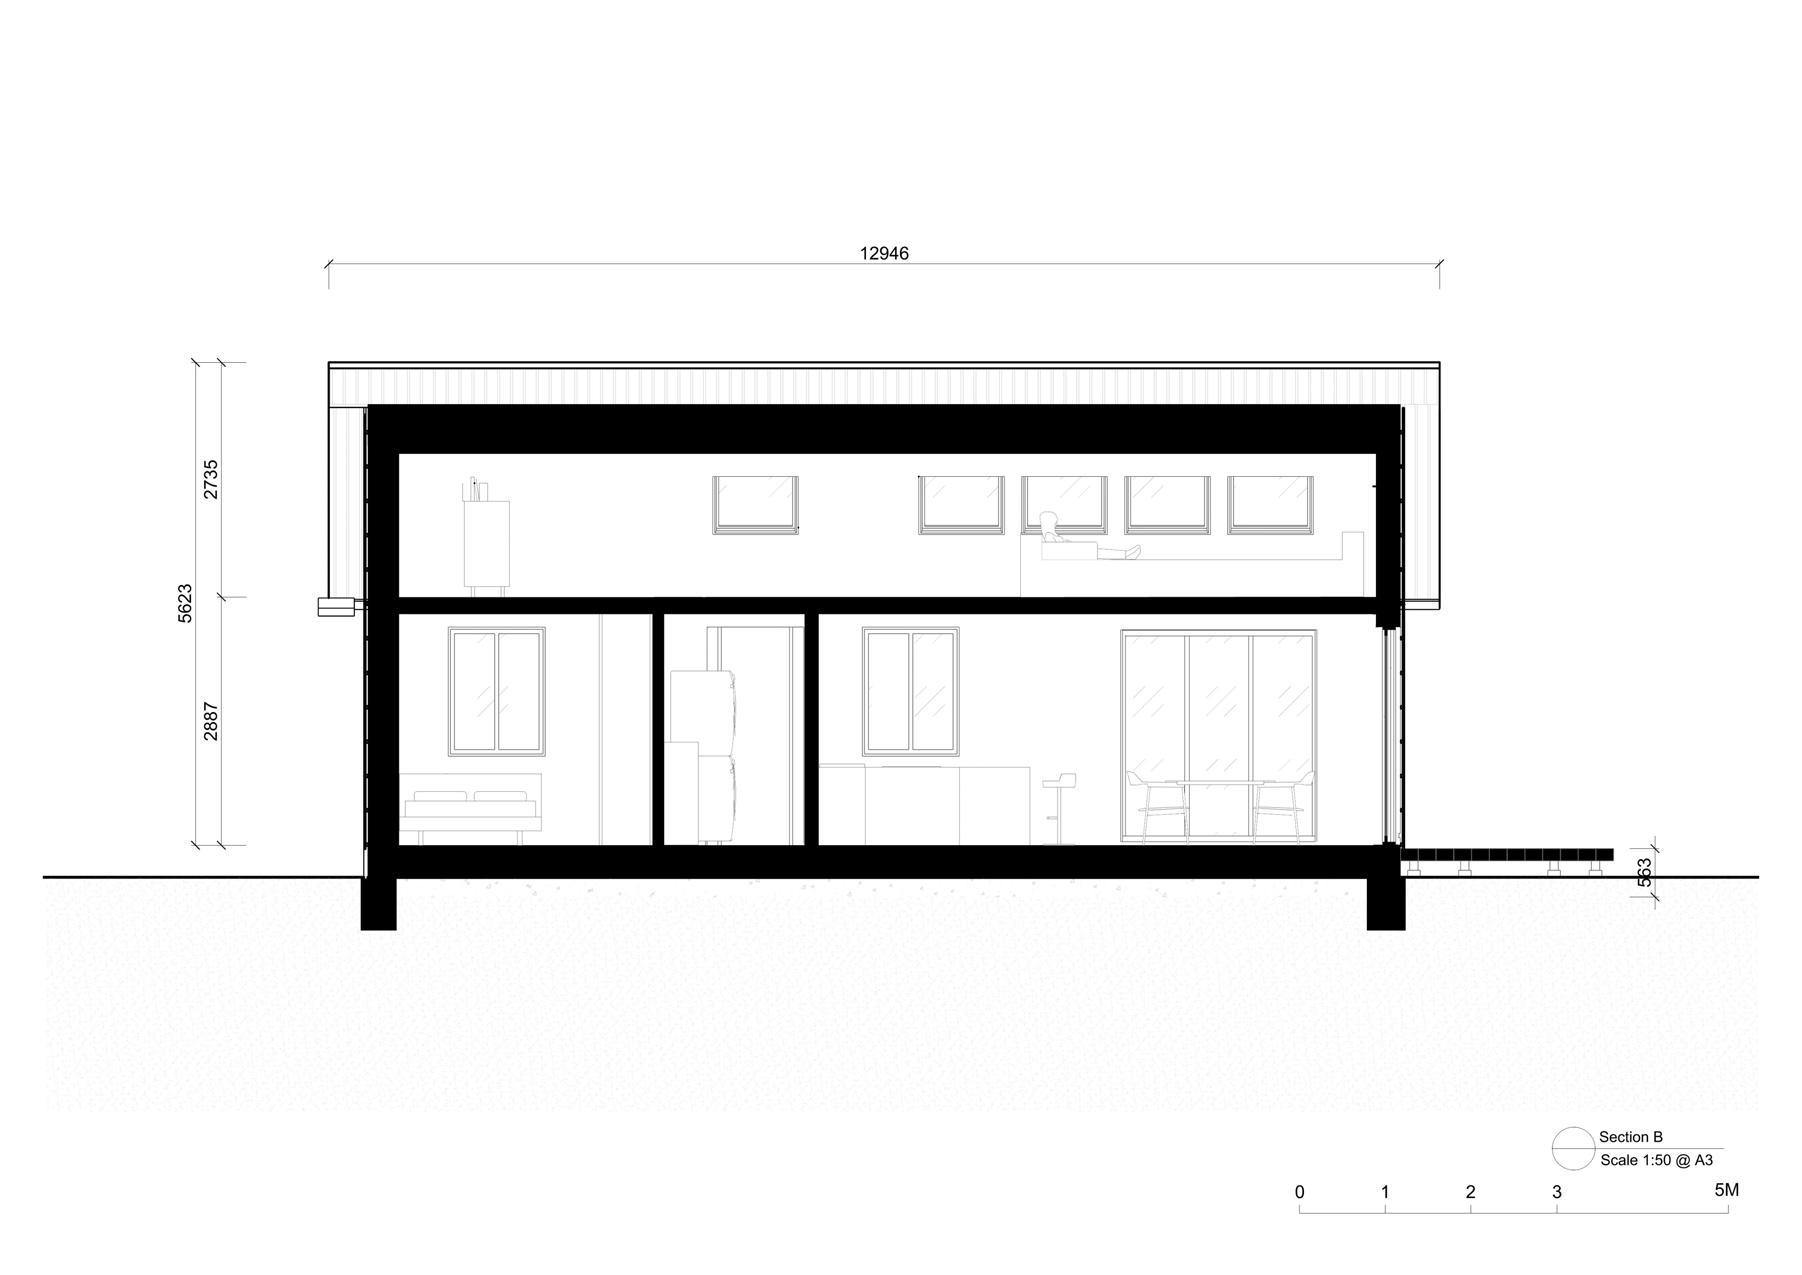
Section B
Drawingr
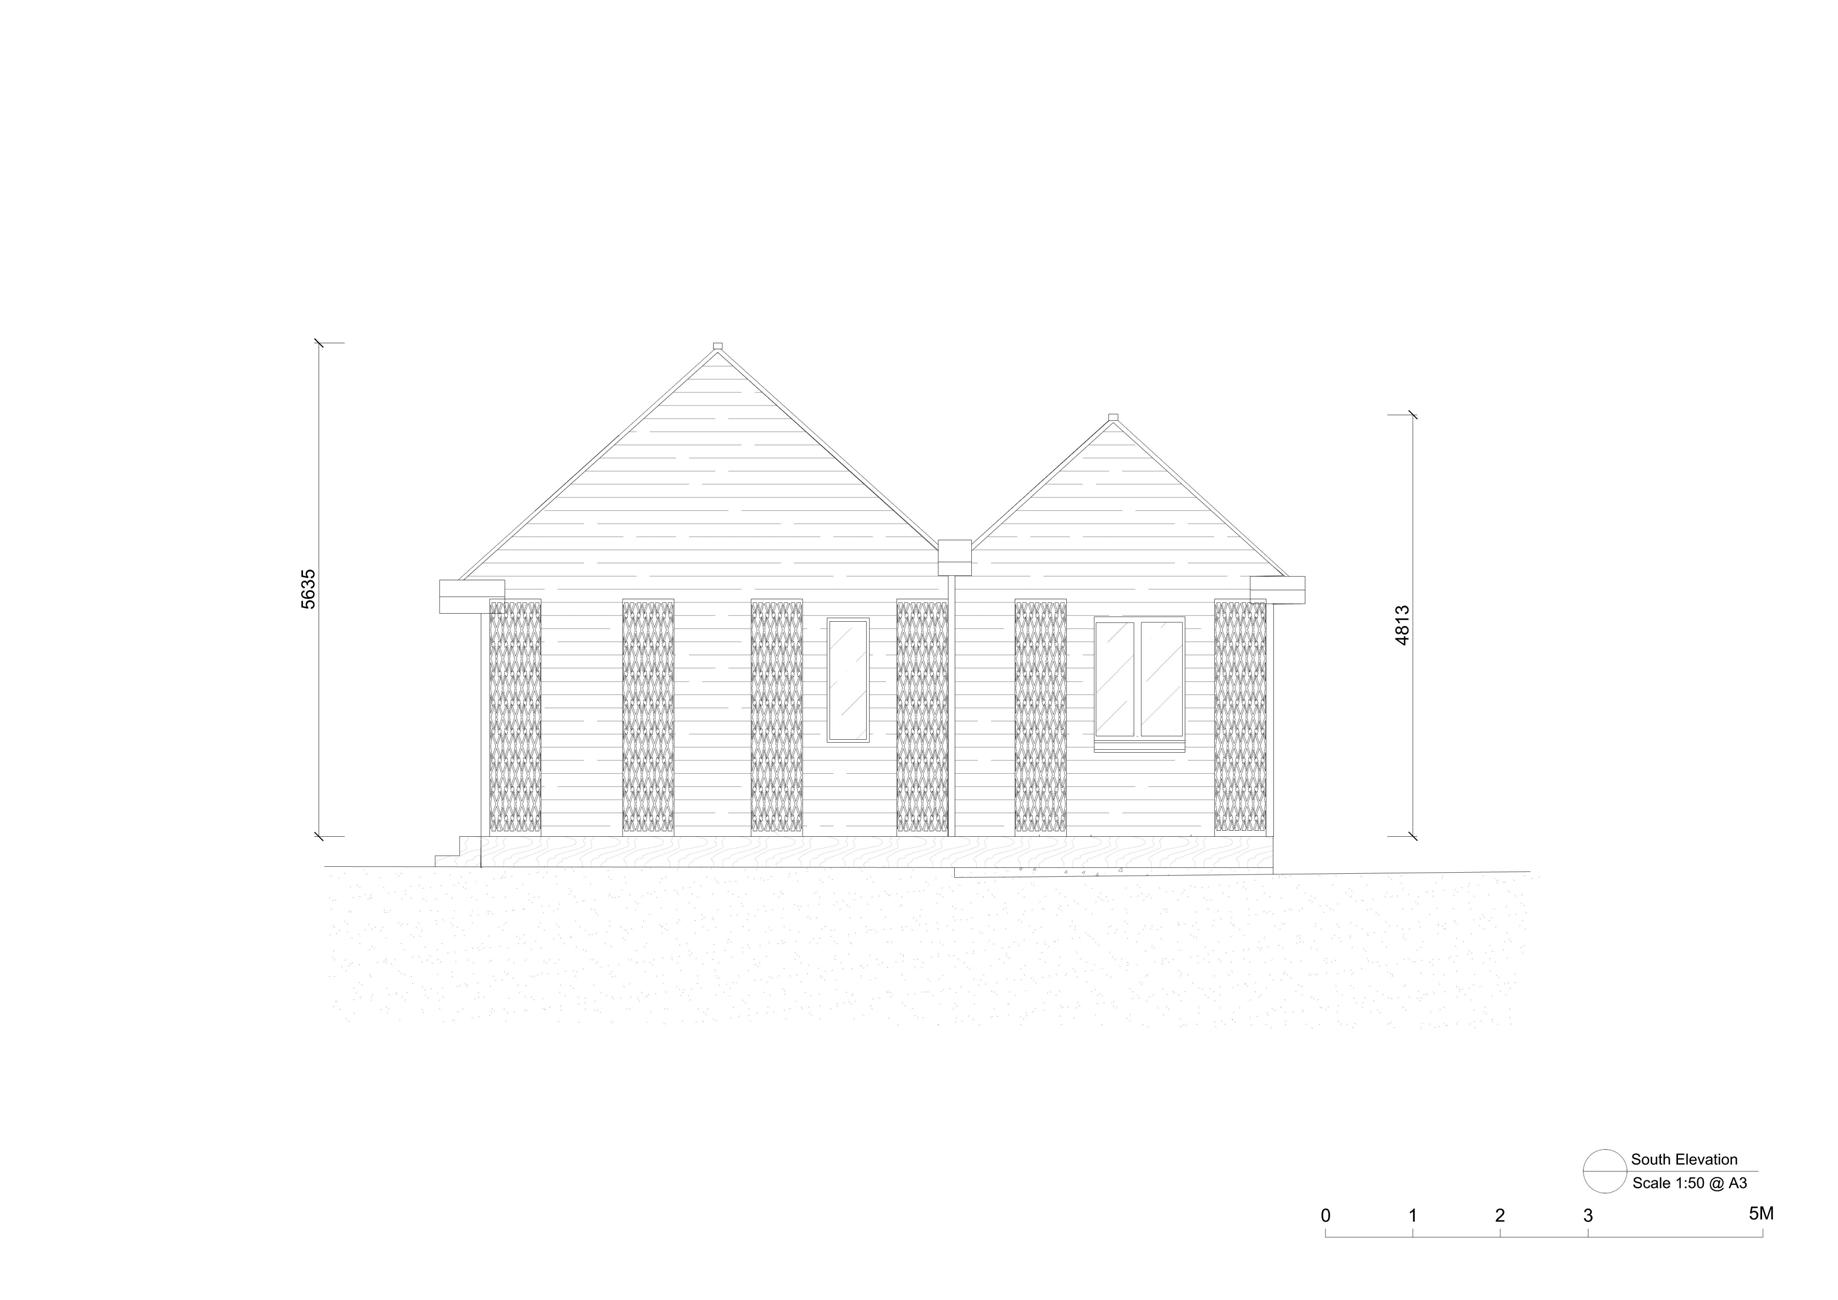
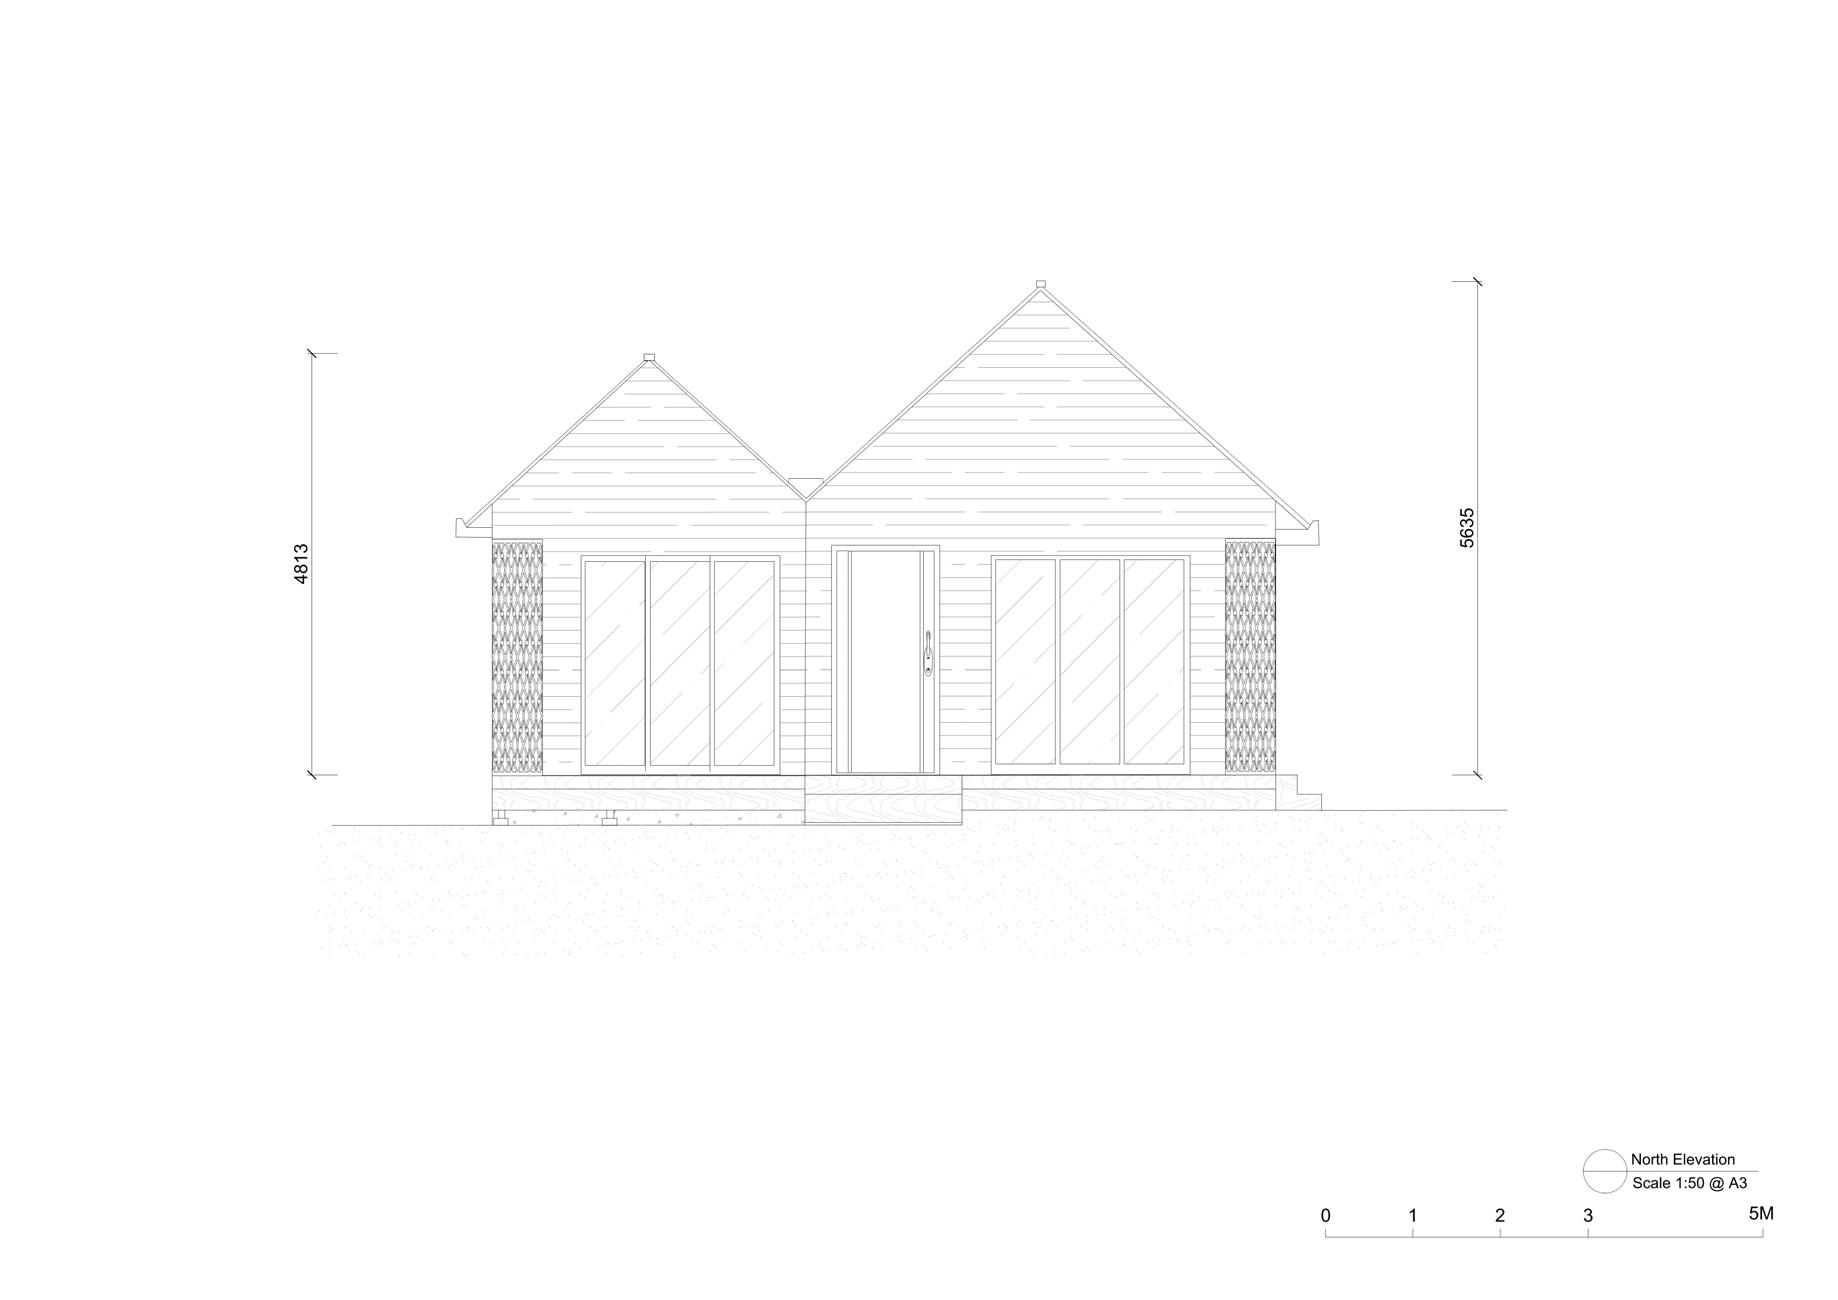
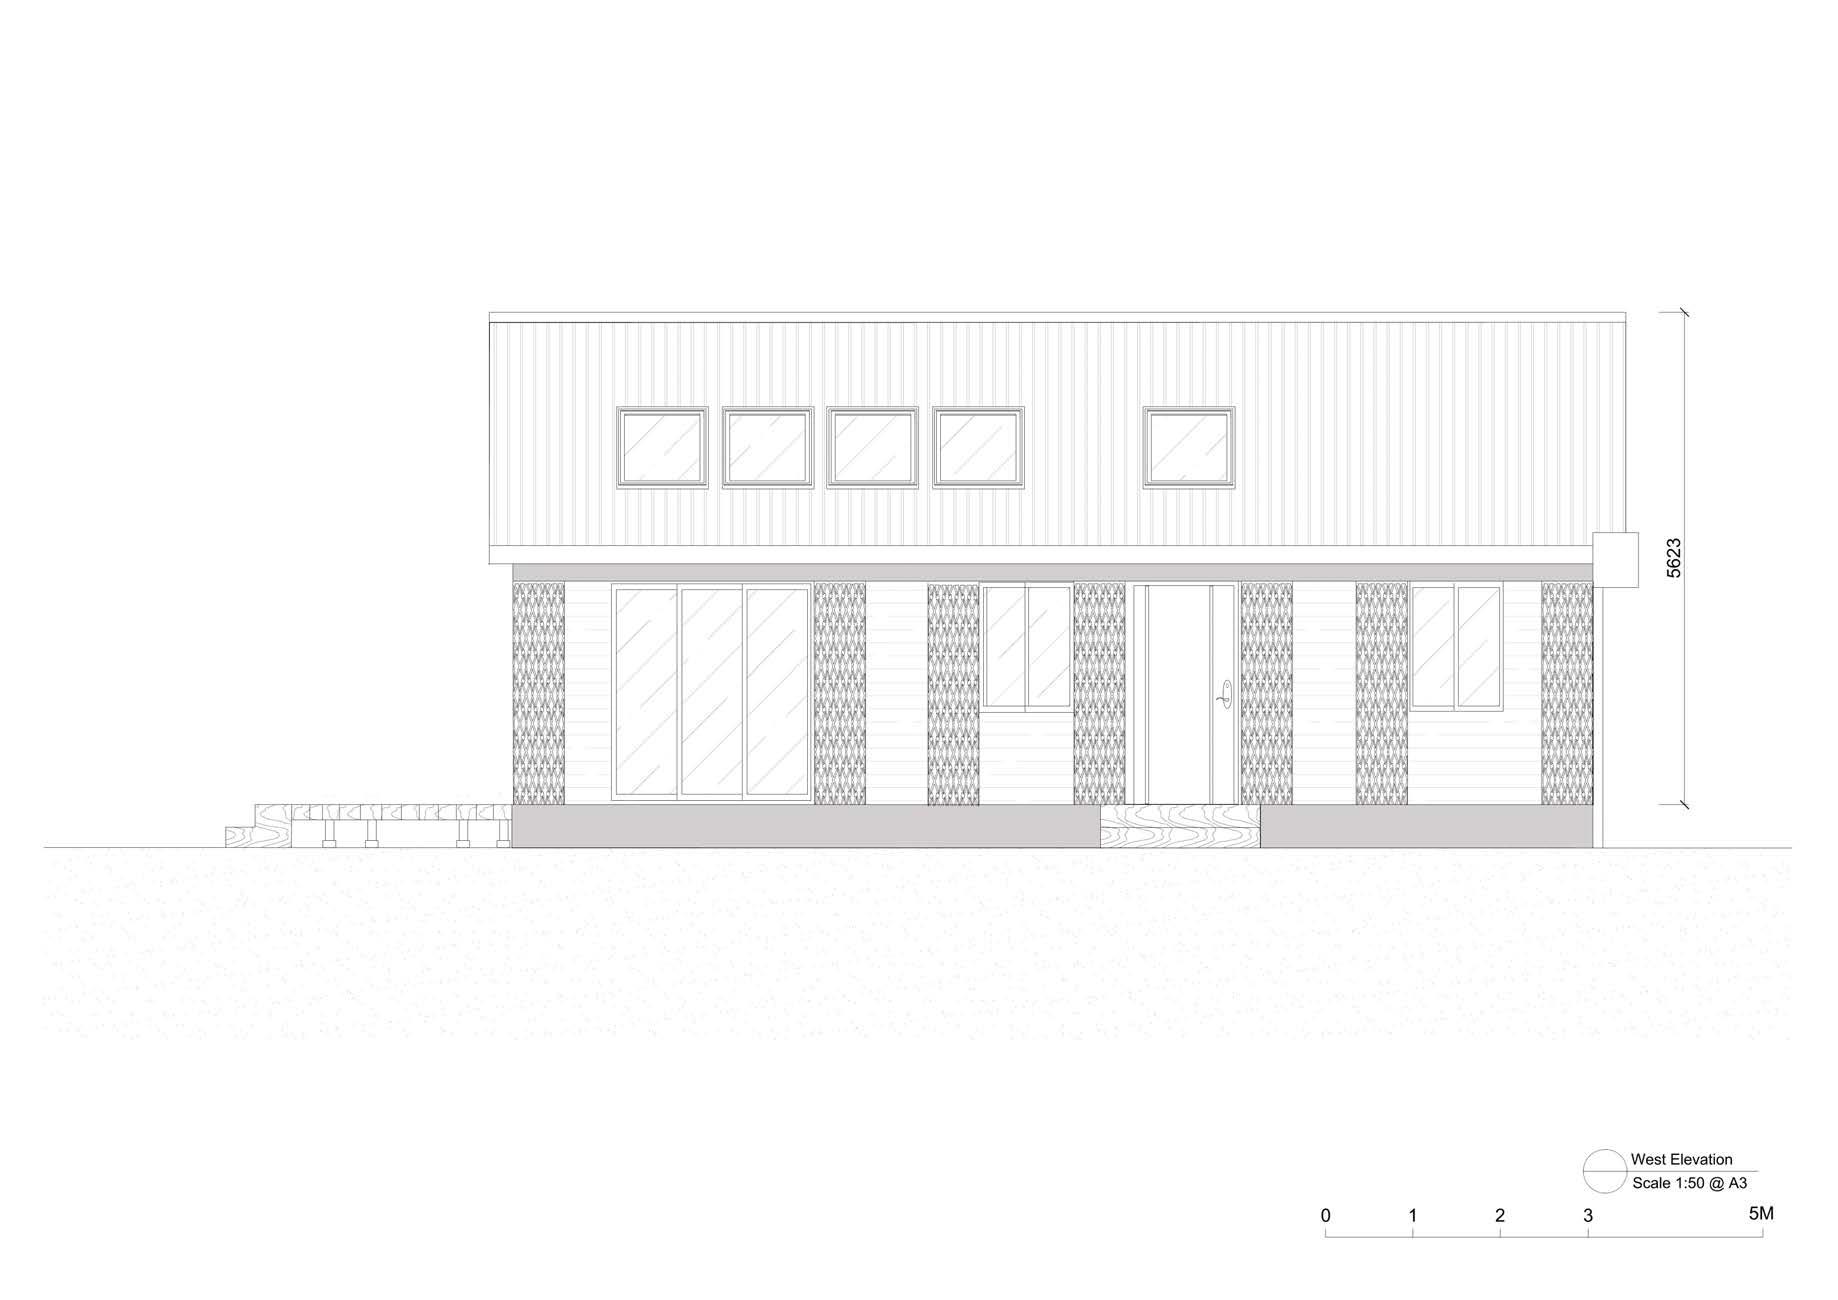
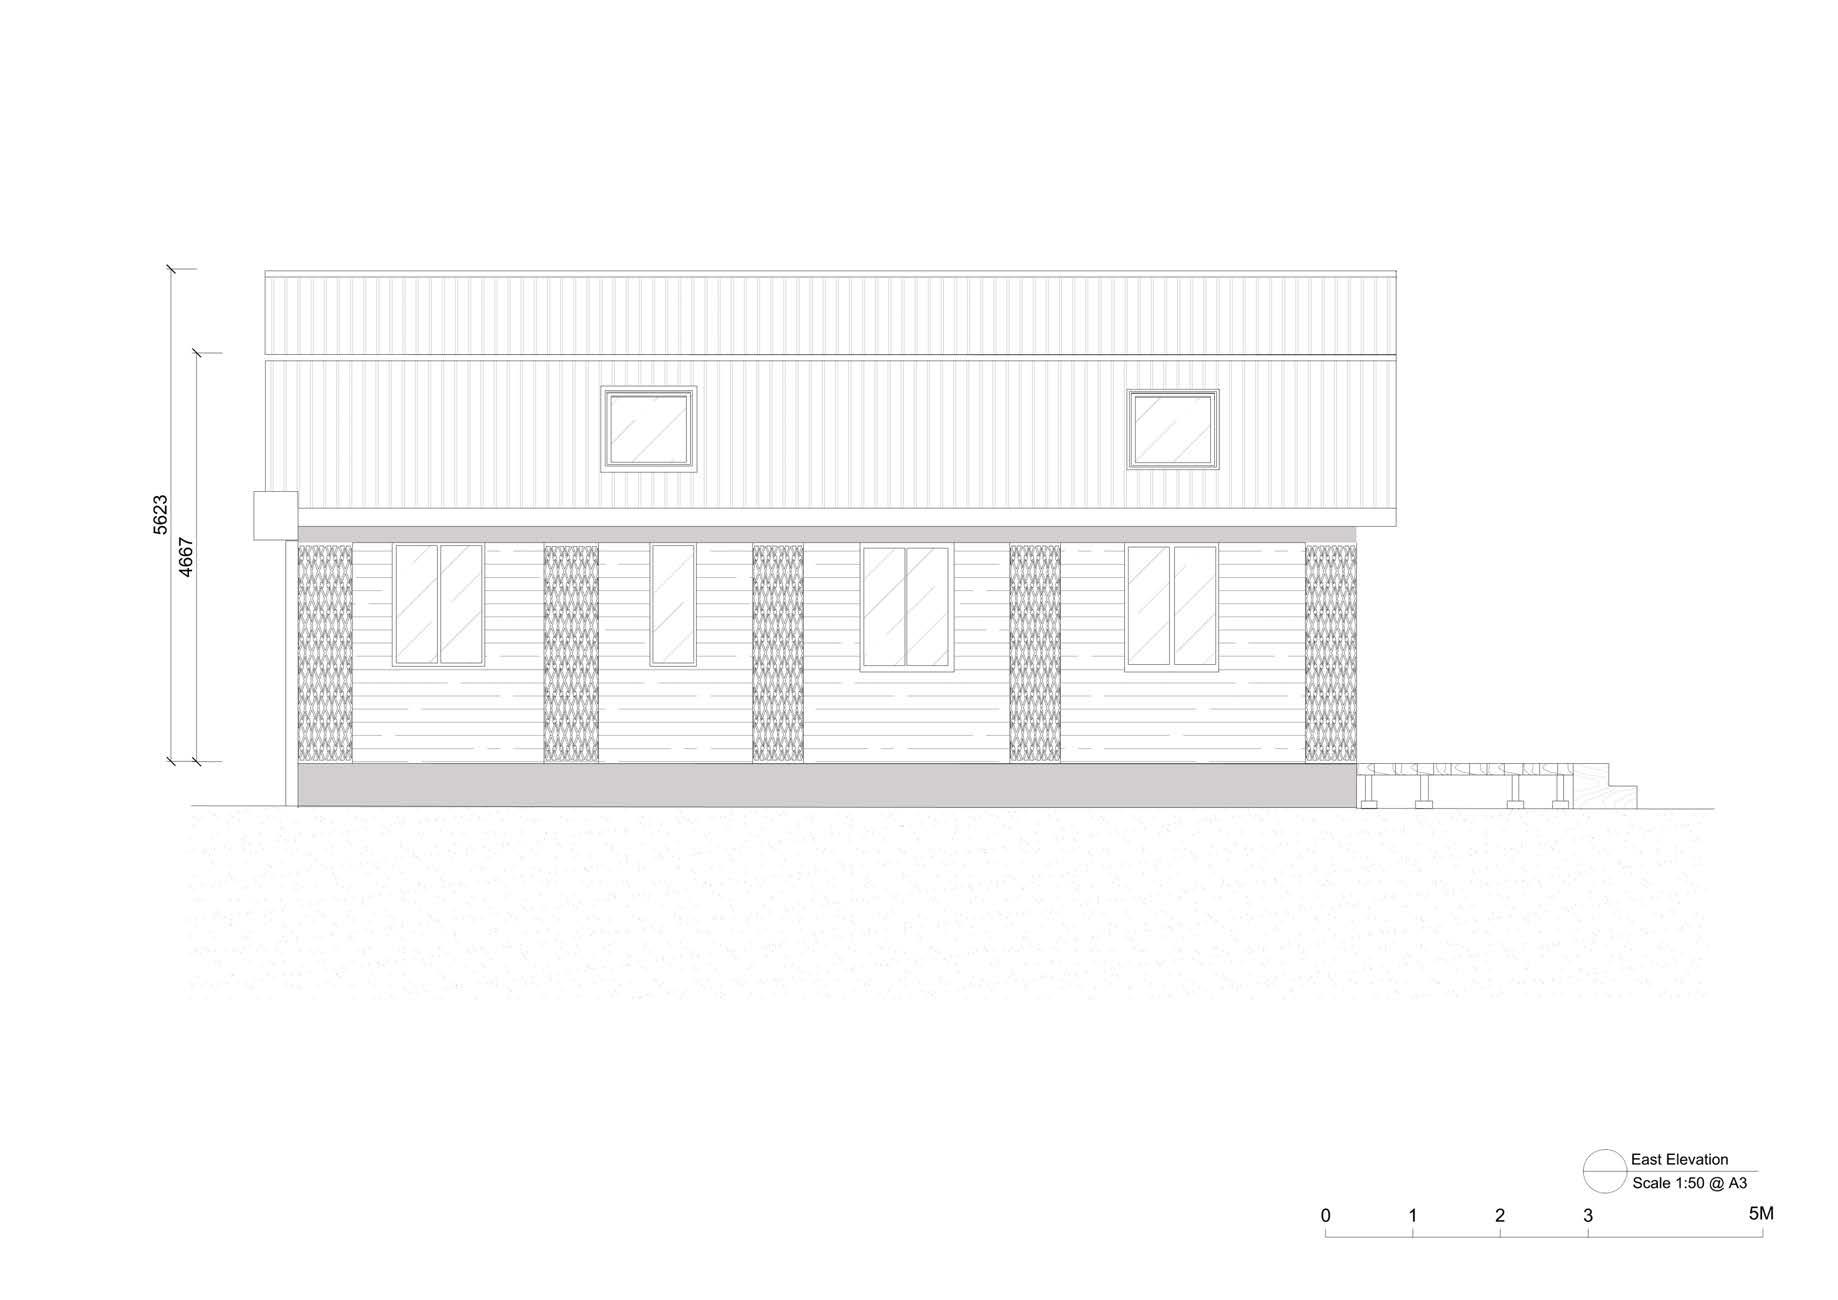
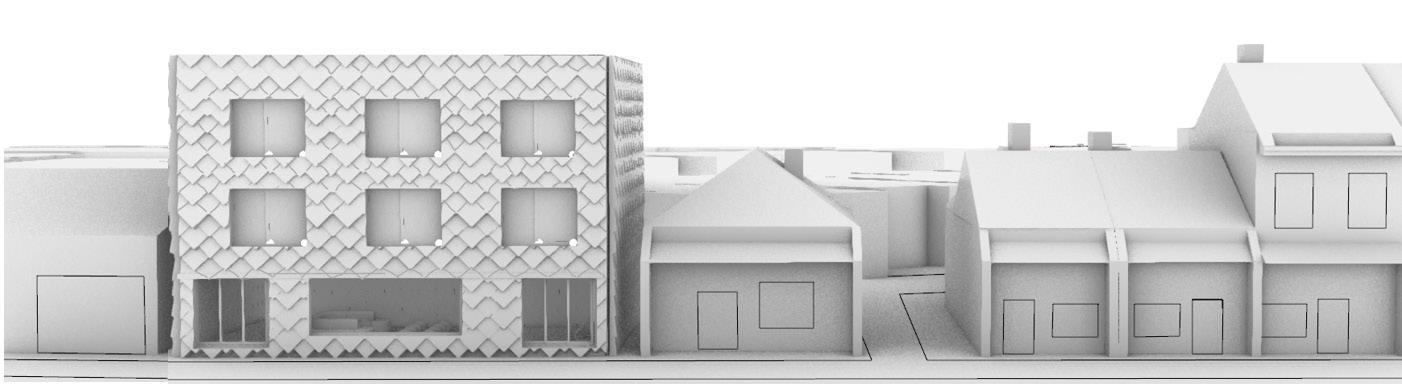
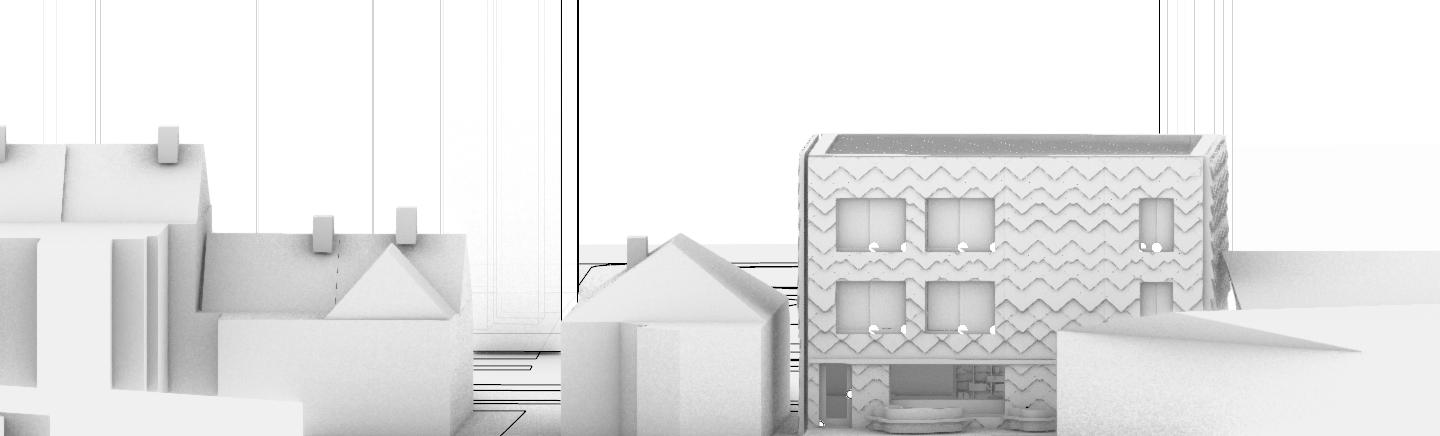
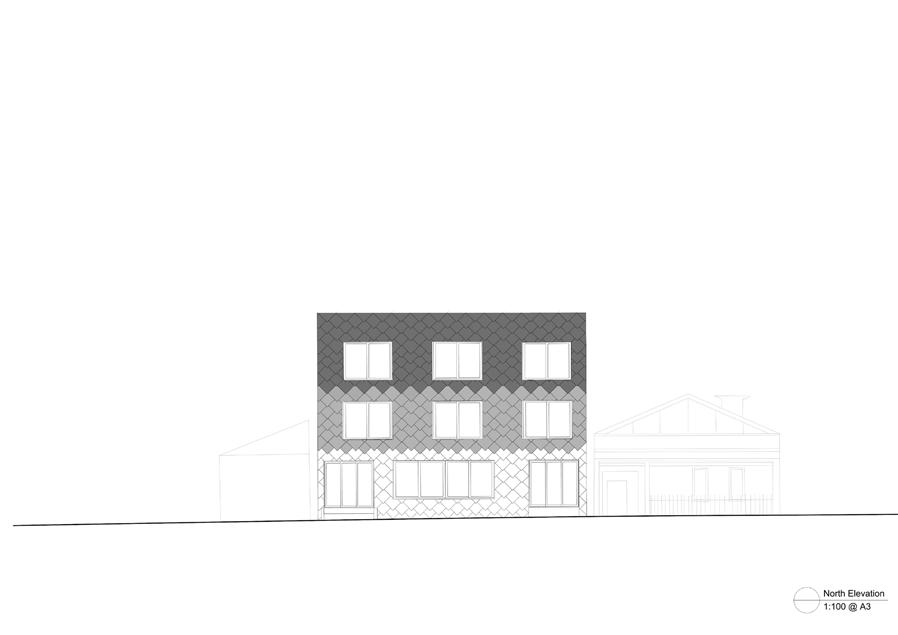
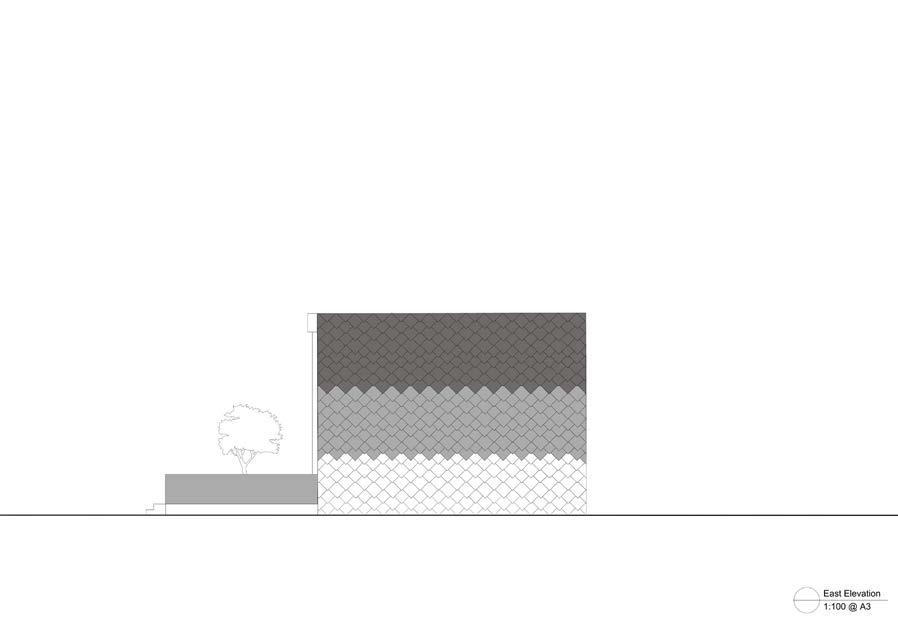
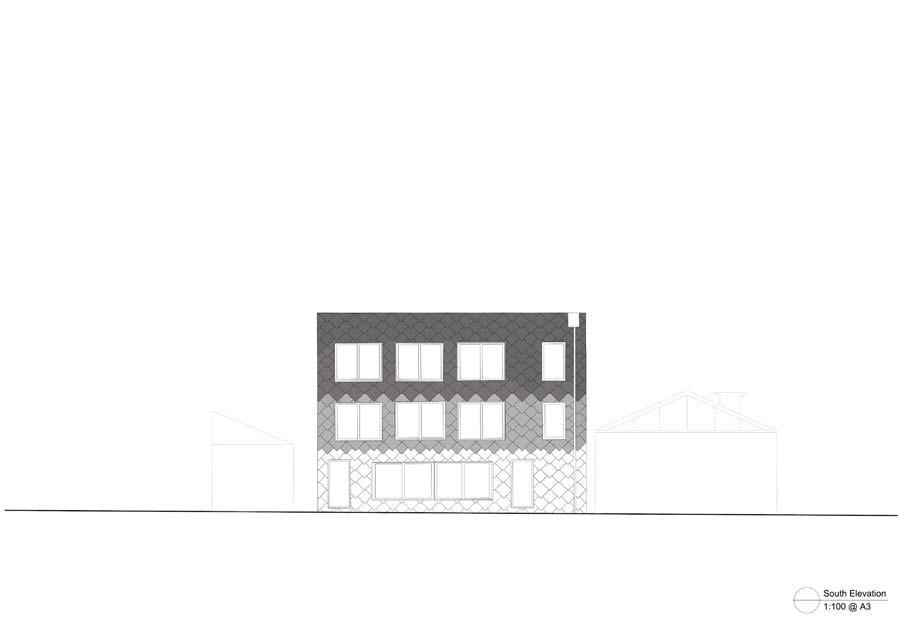
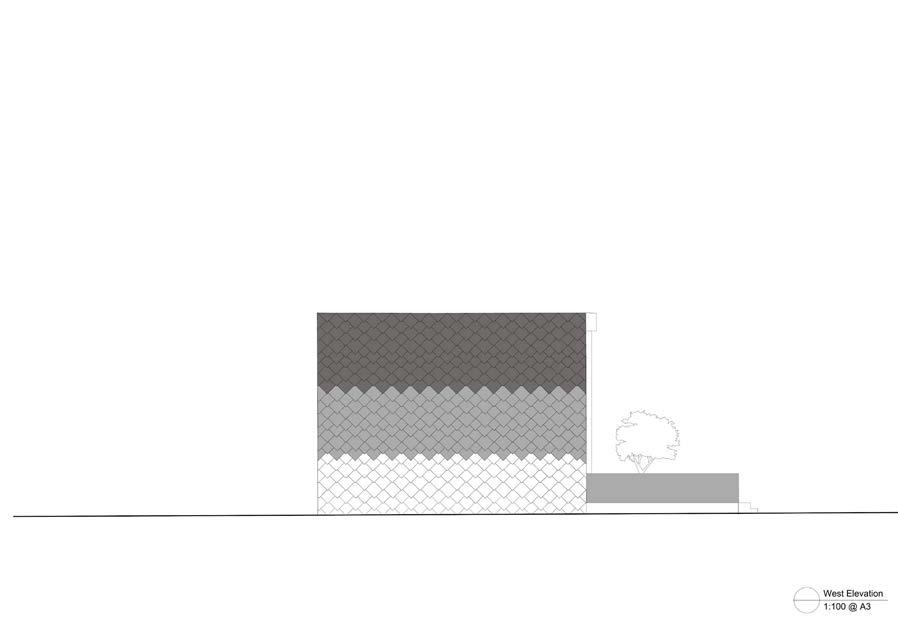
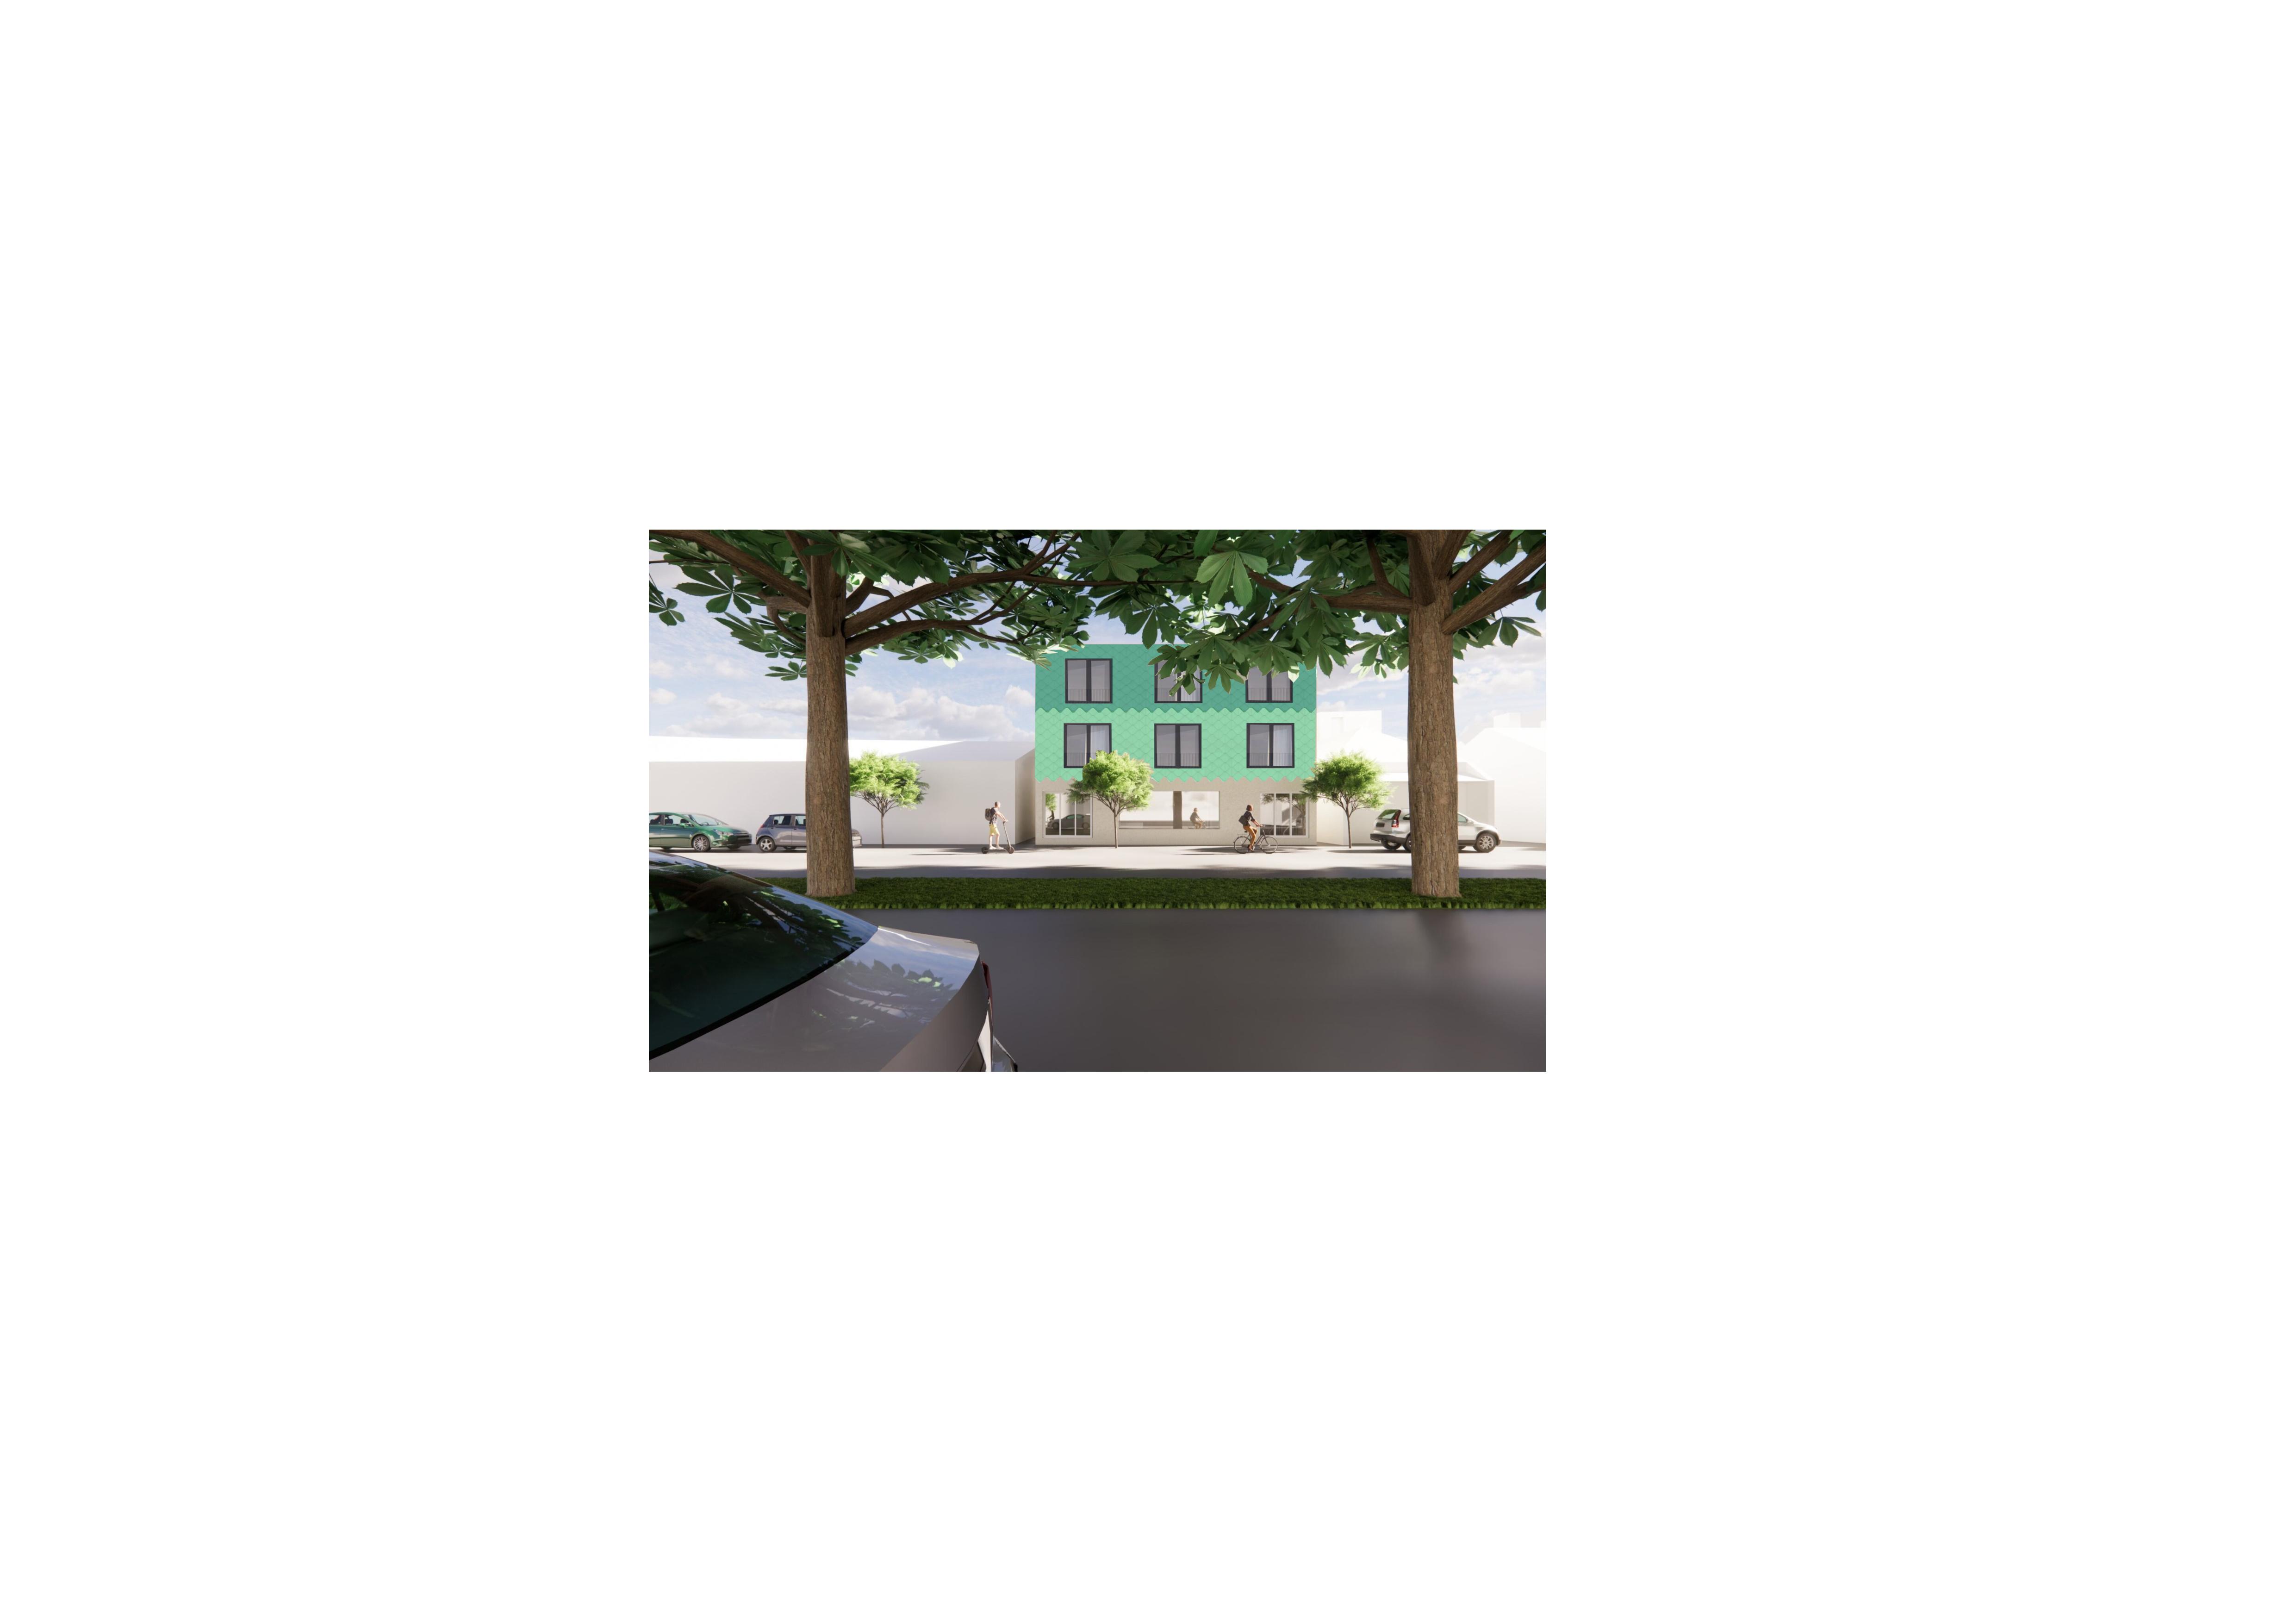
Elevations
- Drawingr by Traven Lam
The Base of the Wikihouse is built by four components: coner, floor, end and wall.
In the preliminary design, we encountered the first design challege, that is, the Wikihouse components are 6 meters in maximum size and our site design has at less 12 meters in length, to solved this problem, we build two wikihouses together, and we leaving a walkway gap on the right side.
- Drawing by Yuan Xu
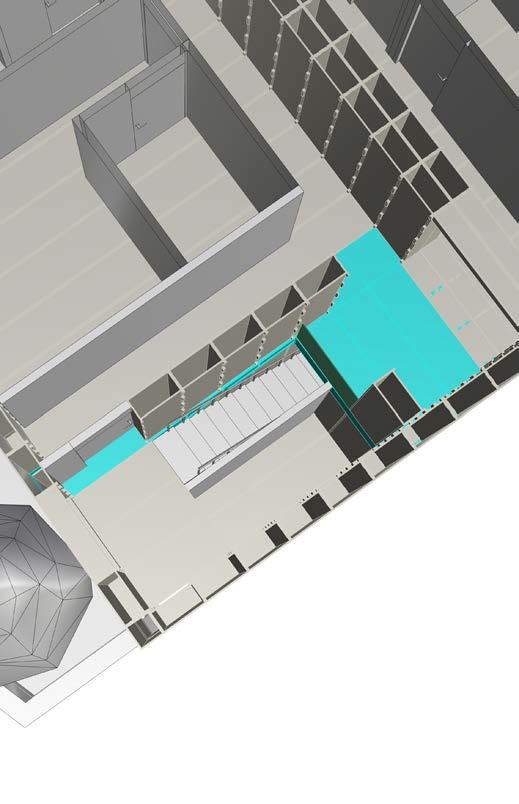
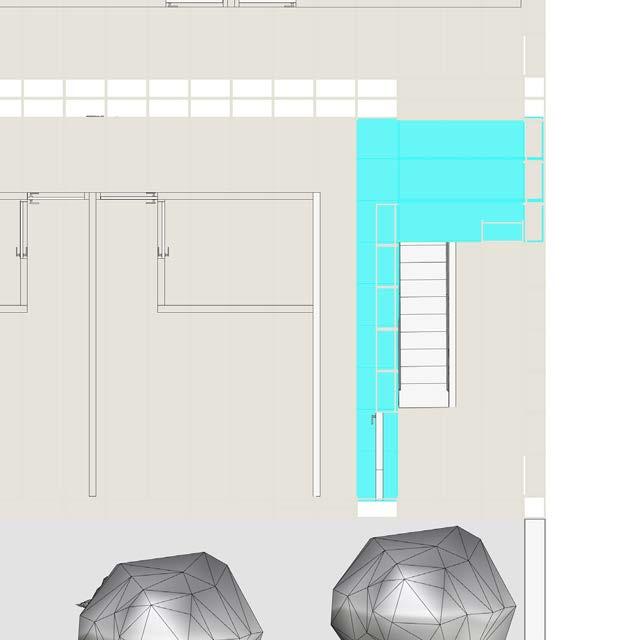
Another significant challenge we encountered was constructing the floor near the stairs and
To address this, we designed a custom block solution. (See Blue custom component in 'After' part) As a result, the area received adequate and stable support, with secure fixation achieved, and a load-bearing wall was incorporated to further reinforce the structure.
- Drawing by Yuan Xu
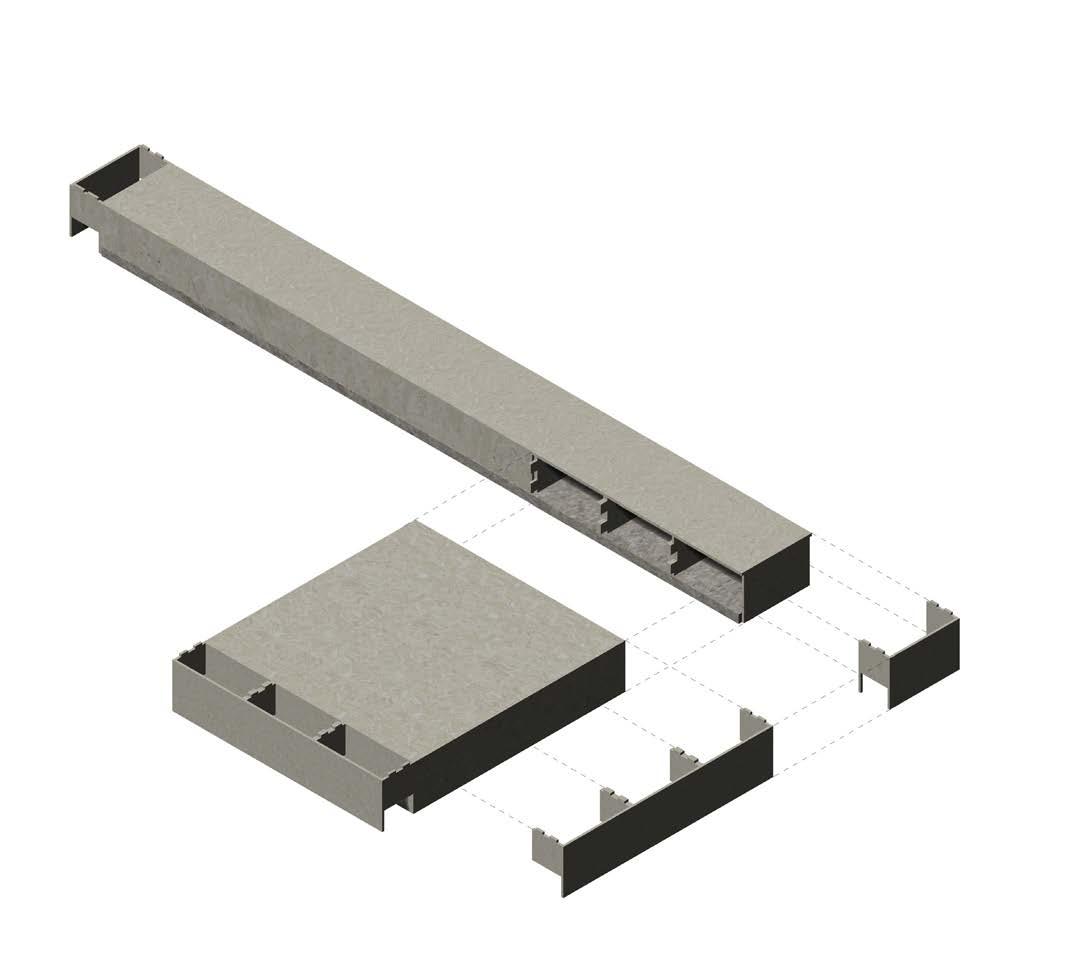
1. I cut the floor assembly to the required length
2. Created a specialized floor strip to allow for side connections between the two sections.
3. Necessary connecting elements were added to both sides of Section 1, allowing for the connection between the first and second-floor walls. This modification also replaces part of the 'END' section, providing sufficient peripheral fixation.
Drawing by Yuan Xu
-
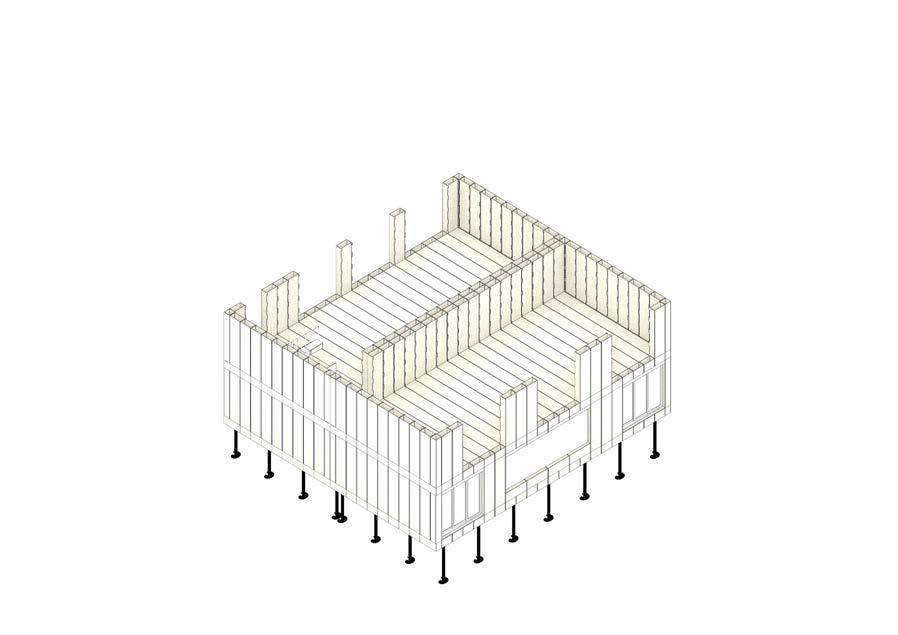
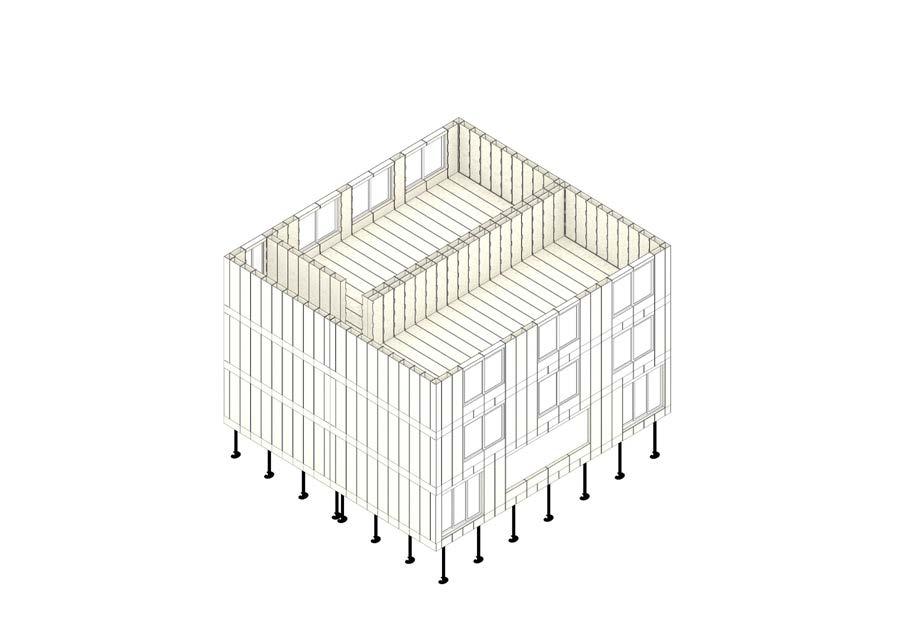
Construction Sequence
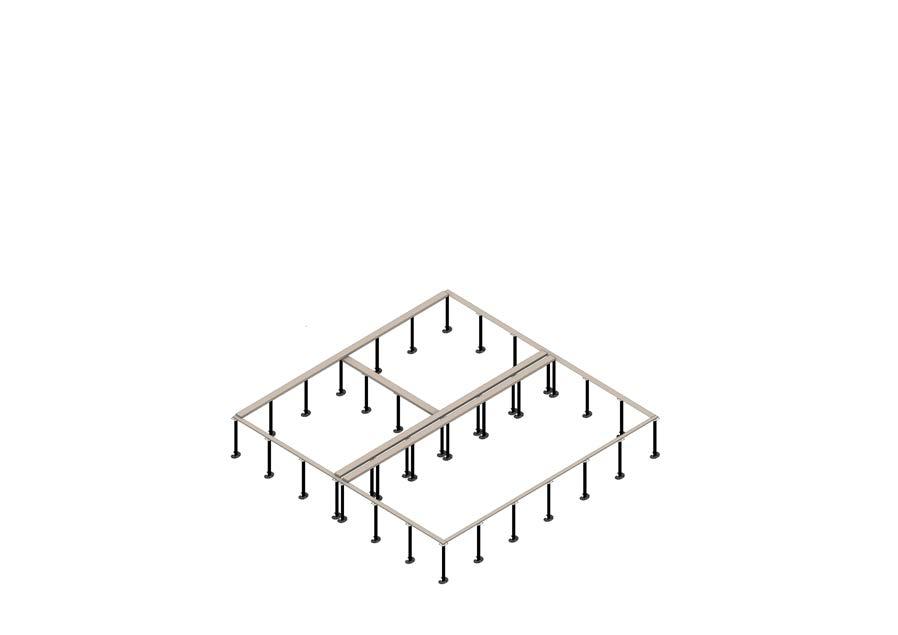
1. Screw piles and Beams
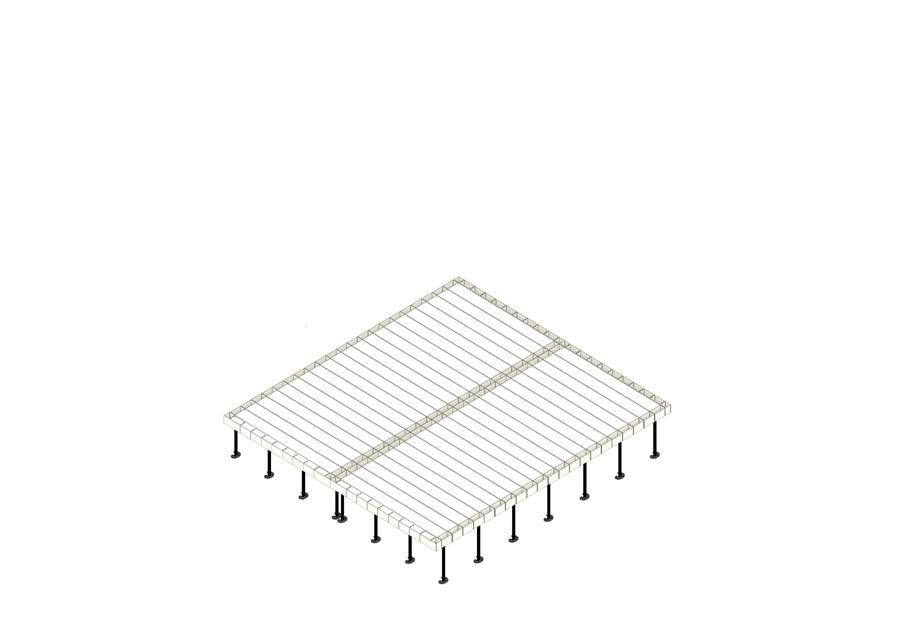
2.Ground Floor - End & Floor
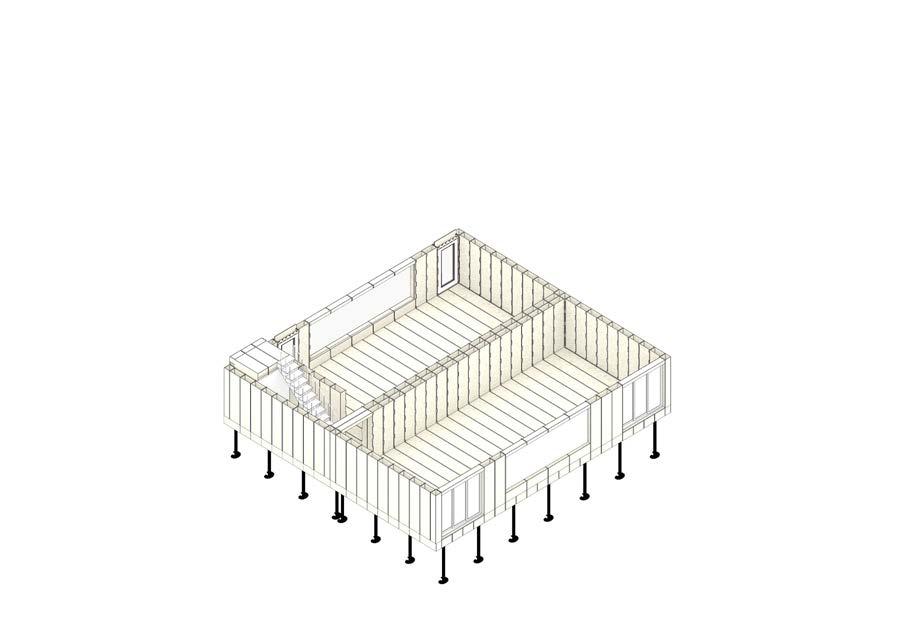
3.Ground Floor - Stair & Walls
4.Ground Floor - Door & Windows
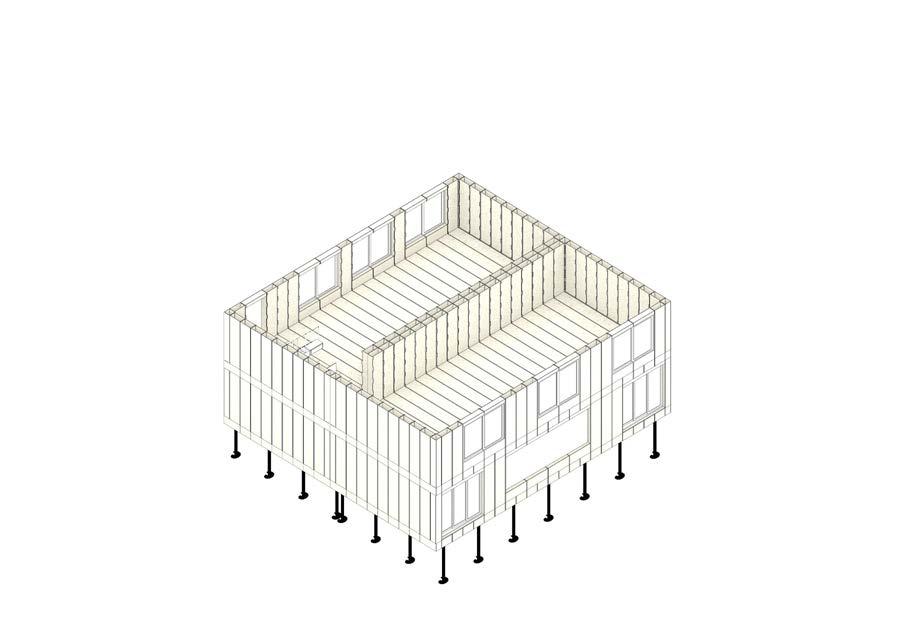
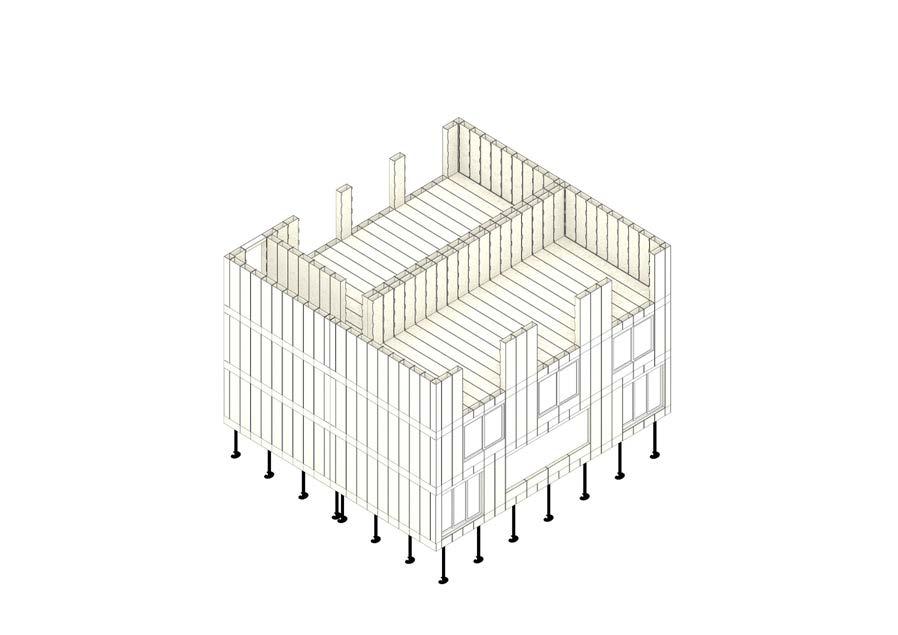
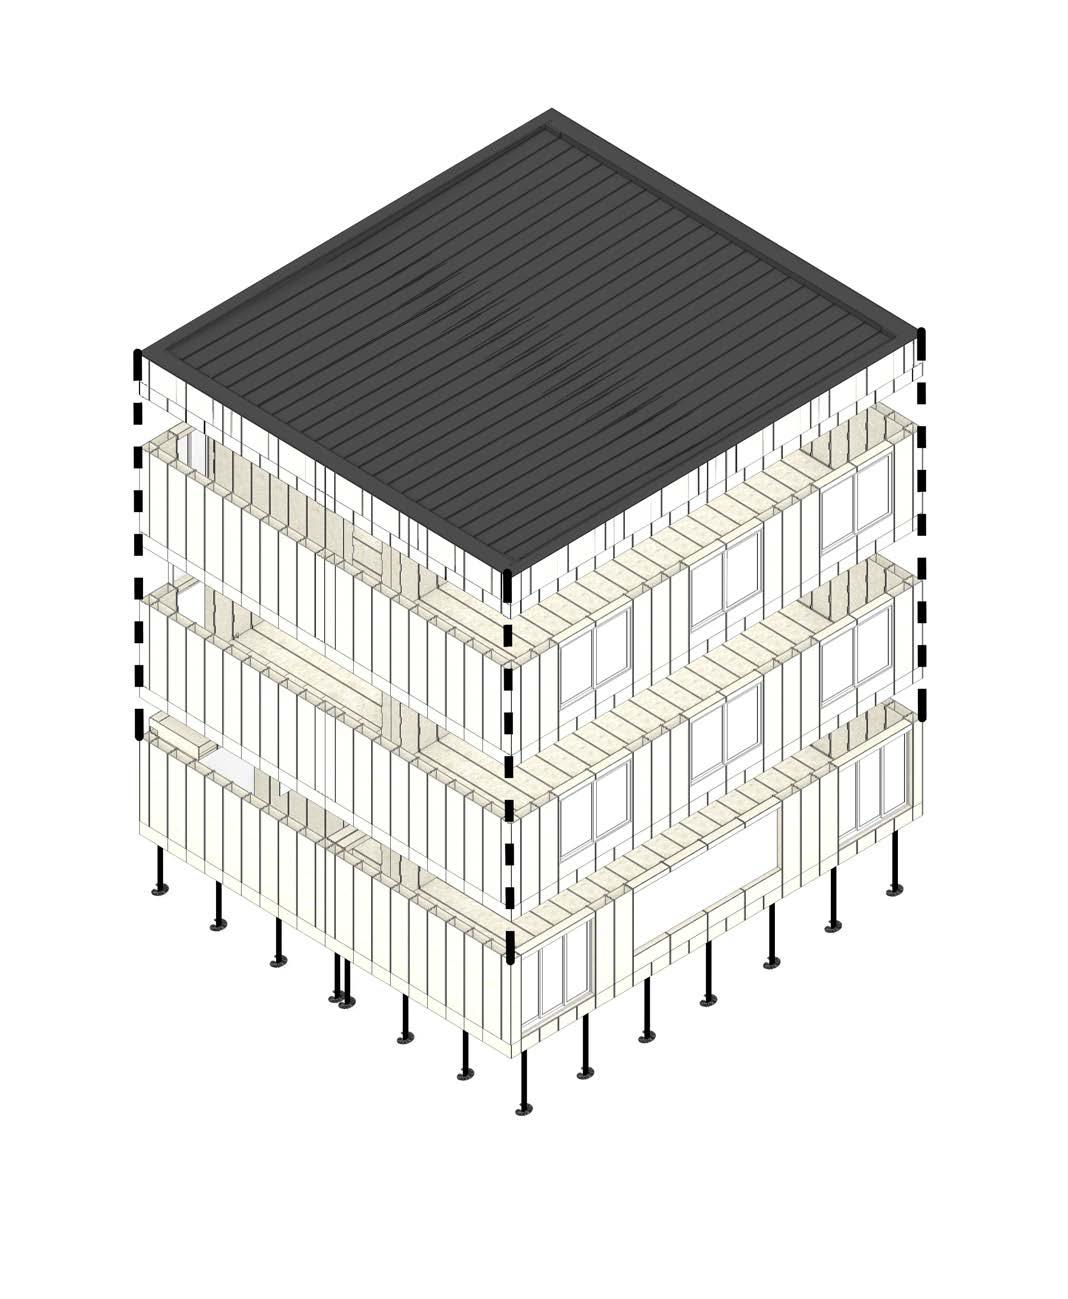
Construction Sequence
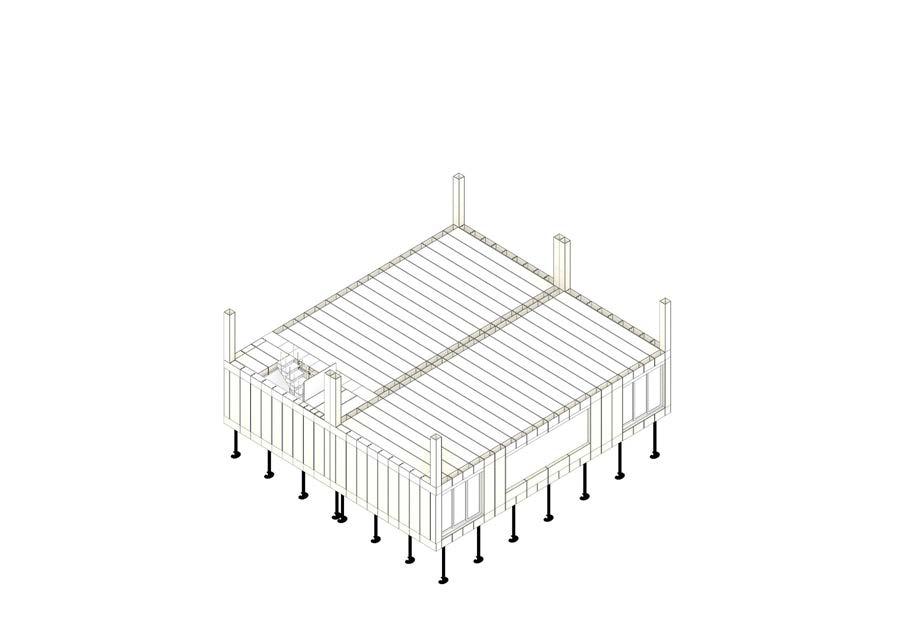
5. First Floor - Wall
6.First Floor - Door & Windows
7.Second Floor -Coner
8.Ground Floor - Walls
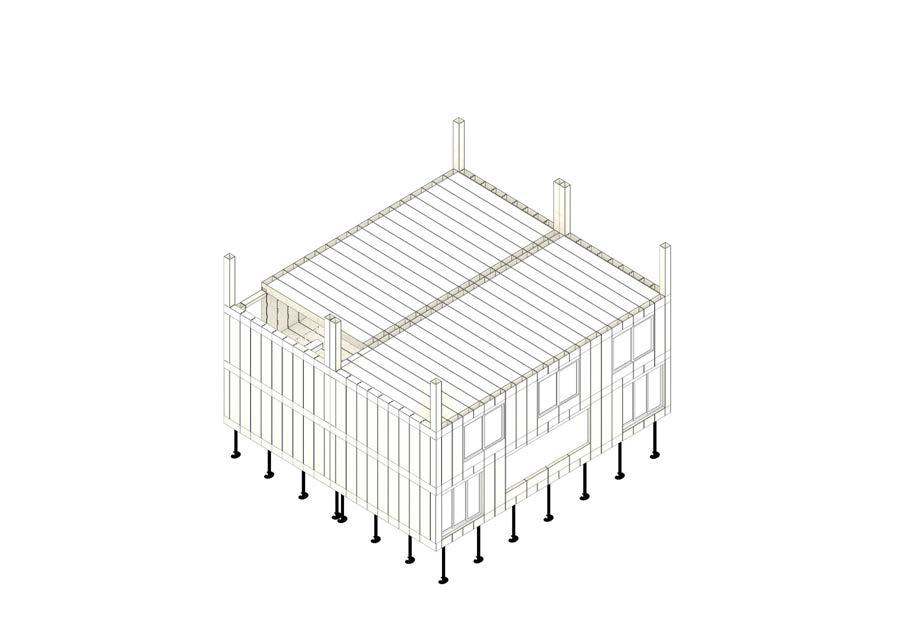
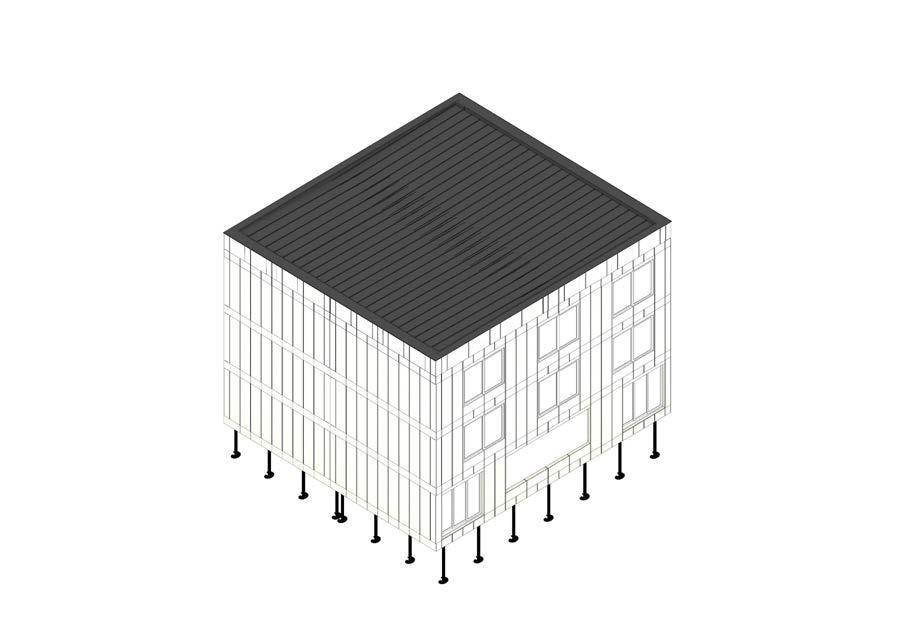
Construction Sequence
Drawingr
Traven Lam
9. Second Floor - Wall & Door & Windows
10.Flat Roof - Wall & Steel roofing & Gutter
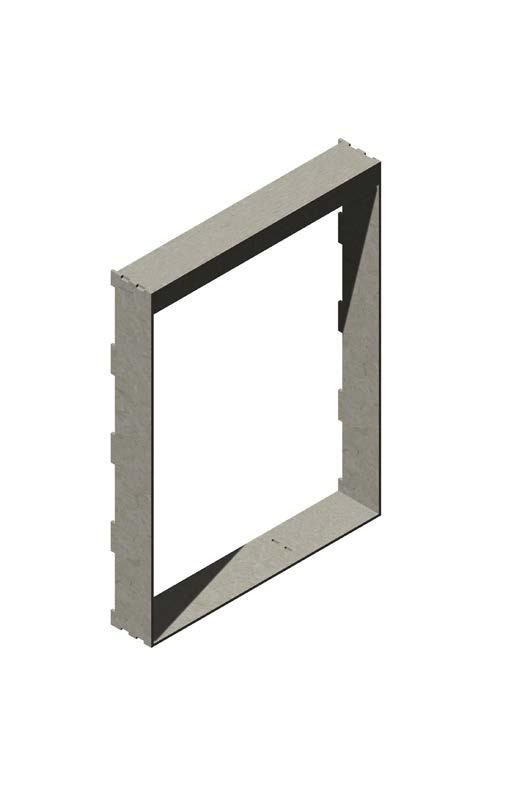
Custom Blocks
Custom Blocks
The door frame component has been modified to fit the corridor width and is applied at the central junction between two WikiHouse units. As such, two components are used simultaneously. This design will provide support for the second-floor ceiling above.
These blocks are custom-designed for our flat roof, tailored to fit the custom-length corner and wall components.
- Drawing by Yuan Xu
Custom roof wall block
Application of Customized Roof Modules
- Drawing by Yuan Xu
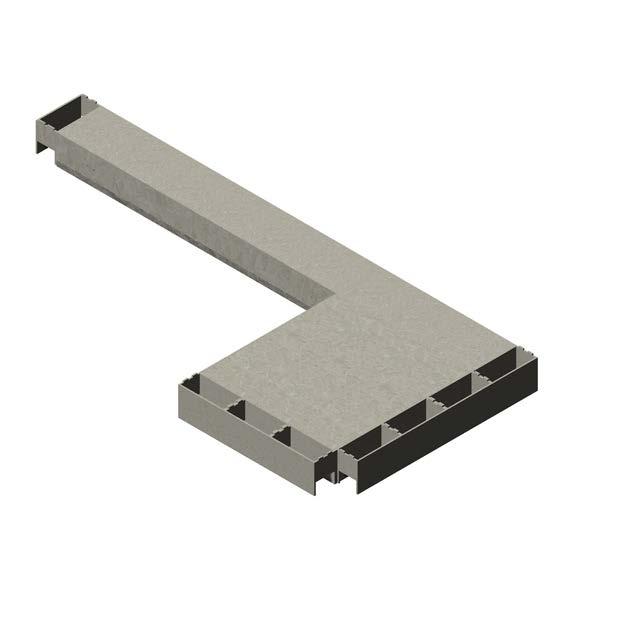
Custom floor block
Application of Customized Roof Modules
- Drawingr by Yuan Xu
- Drawingr by Yuan Xu
ANALYSIS
- Drawing by Traven Lam
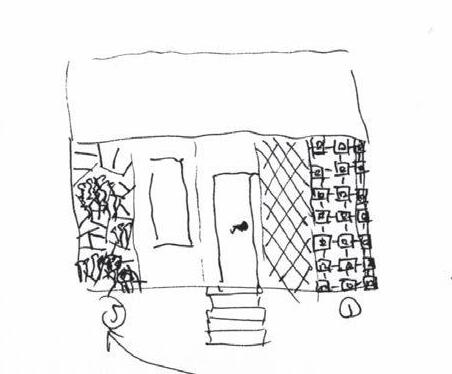
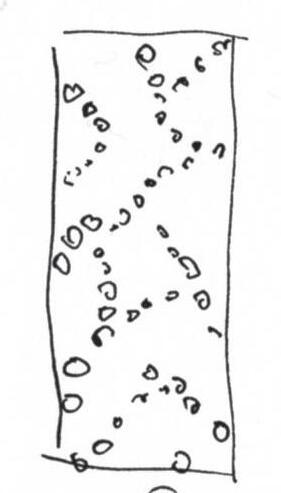
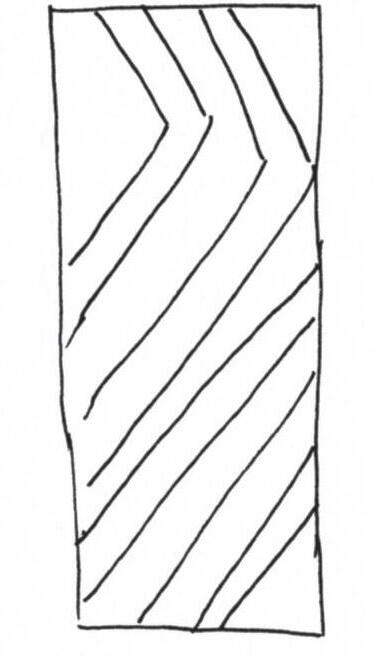
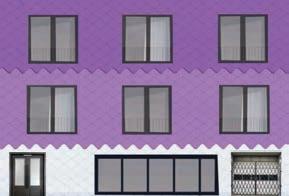
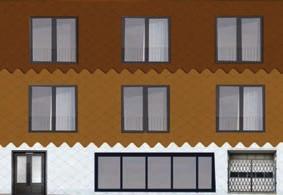
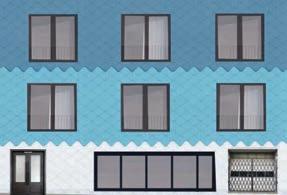
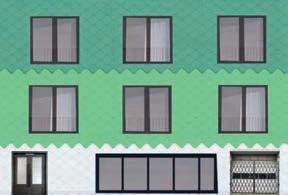
Color Exploration
EXPLORATION OF DIFFERENT TYPES OF COLORS USED
EXPLORATION OF DIFFERENT TYPES OF COLORS USED
- Drawing by Traven Lam
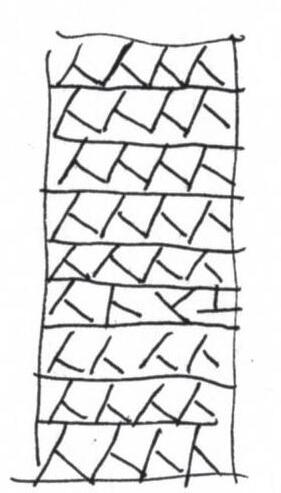
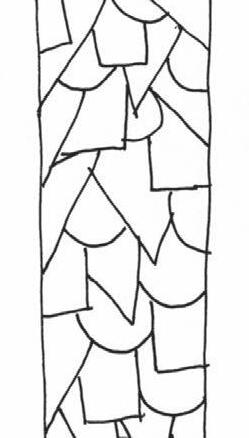
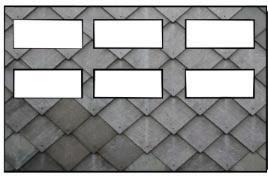
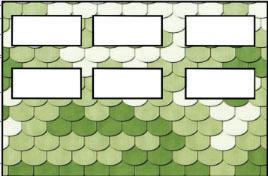
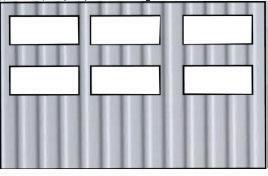
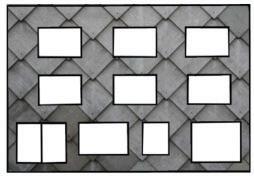
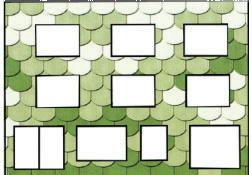
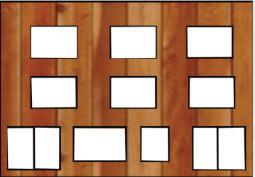
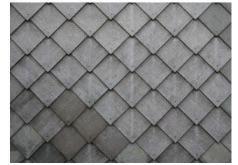
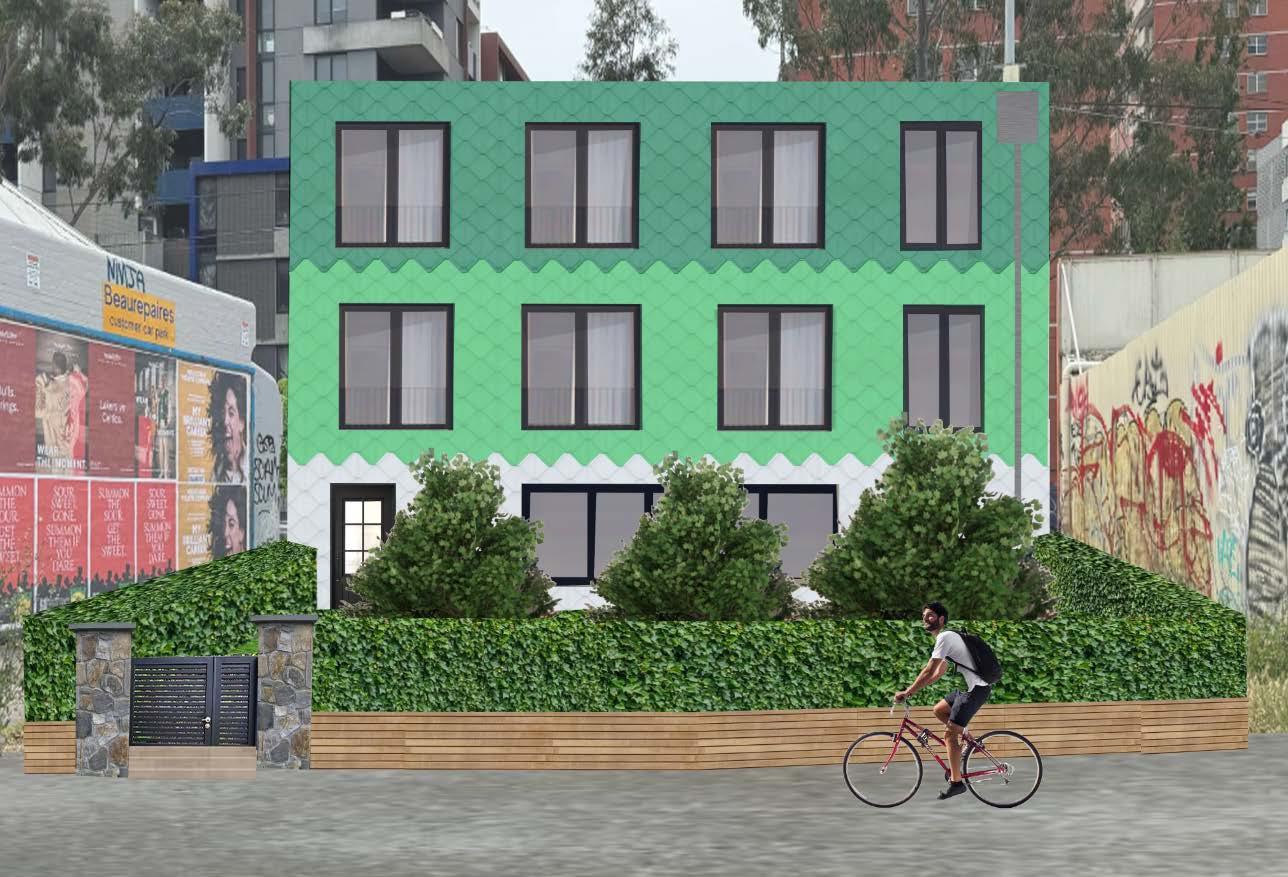
Our idea was to use similar colours to create a gradient with shingles
COLOUR EXPLORATION
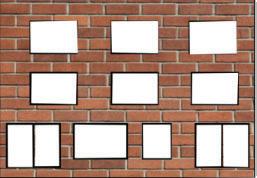
Our idea was to use similar colours to create a gradient with shingles
EXPLORATION OF DIFFERENT TYPES
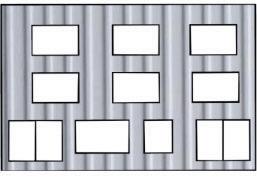
Our idea was to use similar colours to create a gradient with shingles cladding.
- Drawing by Traven Lam
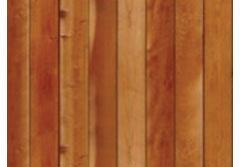
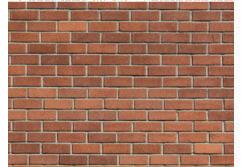
Purple Brown Green Tan Blue Red
Purple Brown
ORIGINAL LOOK
Material & Colours
Screw piles were used as it is sustainable form of footings with allows it to used without worrying about it being a finite resource
It is designed to create a modern shared living space that will allow about 20 people to living in this space to help counter the cost-of-living crisis within Carlton
Materials & Colours
Focus
Our focus is housing young people who commute by public transport or bicycle as well as around median age of 28 in the suburb of Carlton Aim
Our aim is to use renewable types of materials while making it cheaper to build and cheaper to afford.
Our house is meant to function as a shared living house allowing for more people toi live in a smaller space.
- Drawing by Traven Lam
Function
-Shingles for the wall cladding Alummimium
-Colour of the shingels
Ash Falls (Dulux Paint)
-Colour of the shingels
Garden Medley ( Taubman's Paint)
-Colour of the shingels
Emerald ( Taubman's Paint)
SHARED HOUSE LIVING
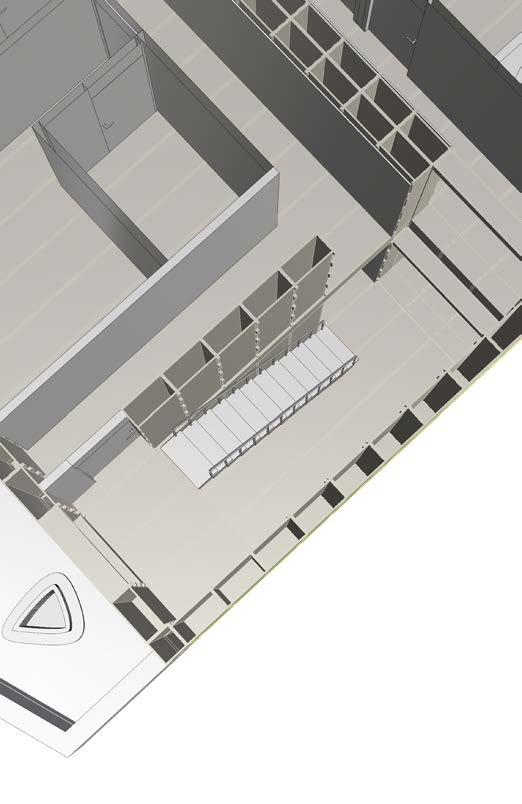
Physical Model Making
1 3 2 4
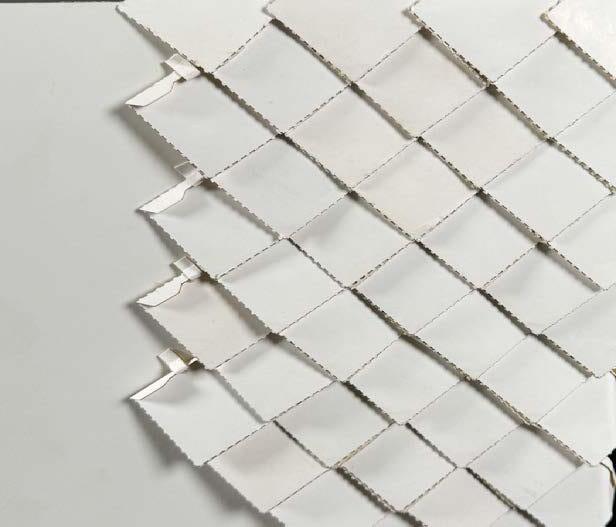
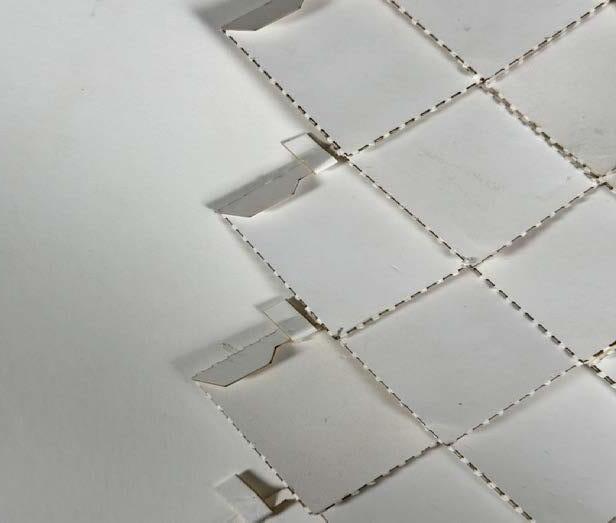
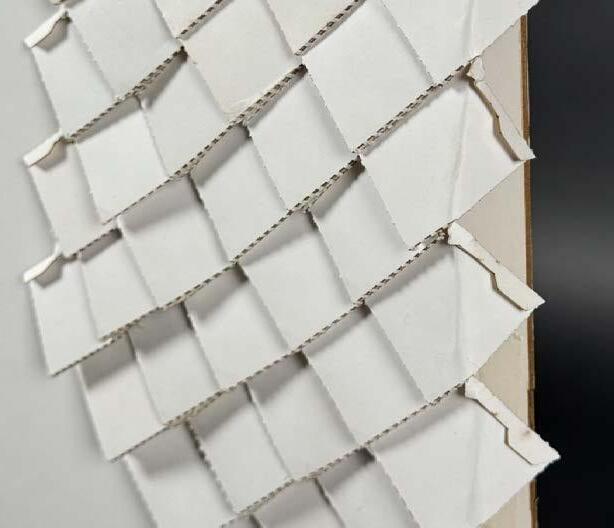
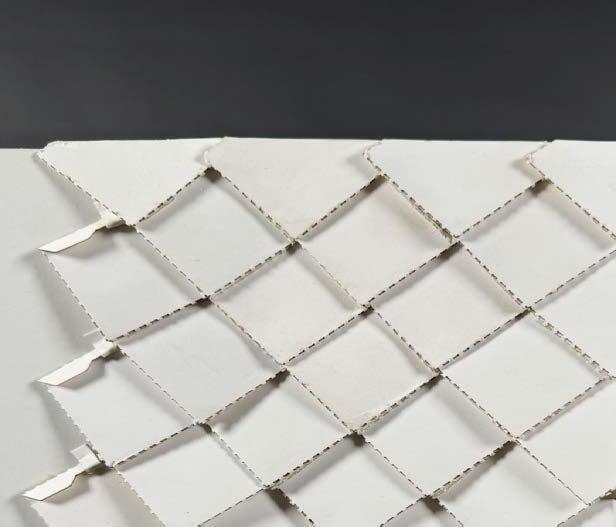
FIRST MODEL TEST
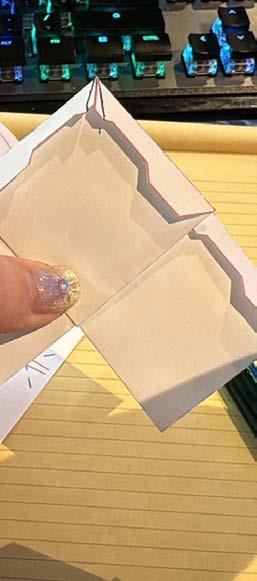
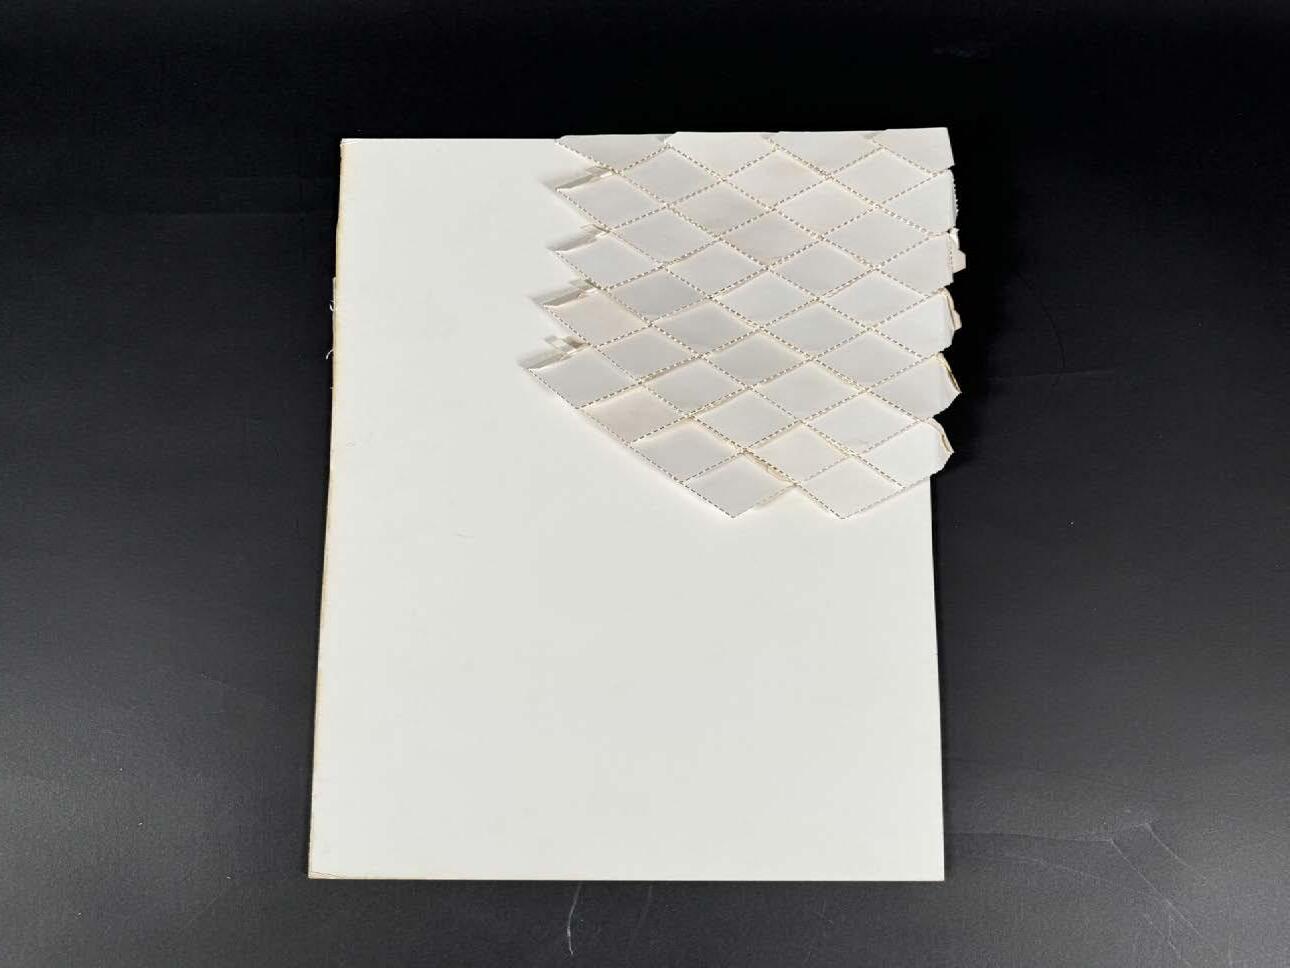
I used paper to print the first laser cutting document and tested the shingle size to fit the expectations. We will use metal shingle design with flat locks.
1. Part of the test sample overlaps, which becomes a big problem after changing the material of the object. The Shingle cannot be connected properly
2. Analytical overlap area
3. Discuss the correct end result with team members
4.Try combination join
5. Multiple combination connection back view
MATERIAL CHOOSE
The material selection uses a 0.5mm screen board from Protolab, which was found to be the most suitable material for the folder in previous studies and tests. We will create a facade model of the building.
Exterior wall installation
Wall component - Drawing by Traven Lam
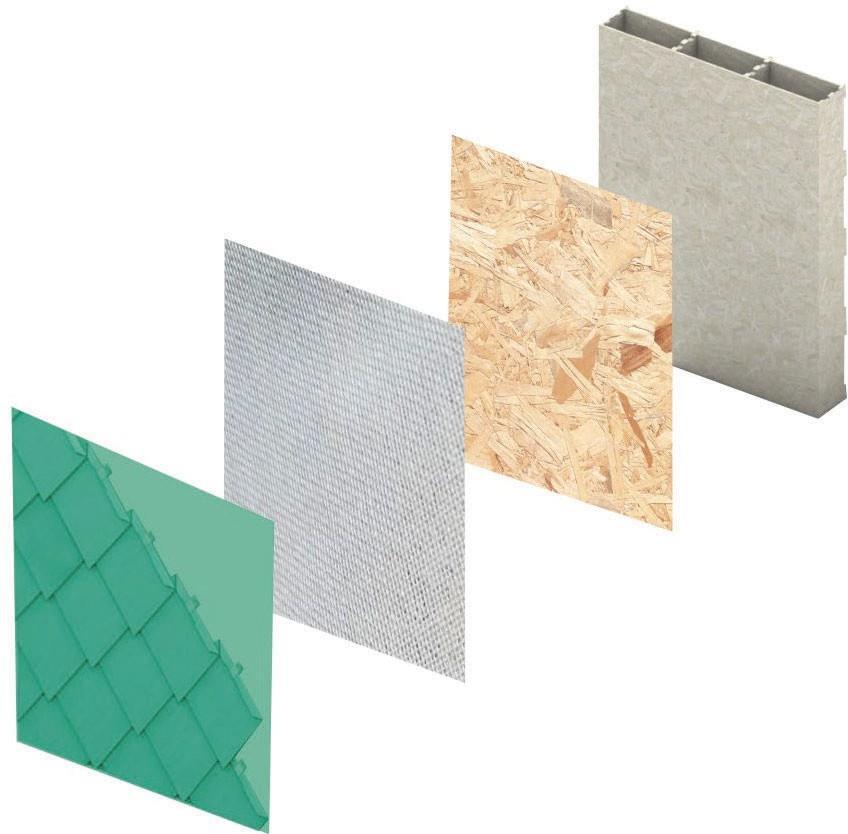
Plywood sheathing
Moisture Barrier( Waterproofing)
Wall cladding(Aluminium painted in Emerald Forest)
Wall cladding(Aluminium painted in Emerald Forest)
Wikihouse Wall component
Key details: Gutters & Services
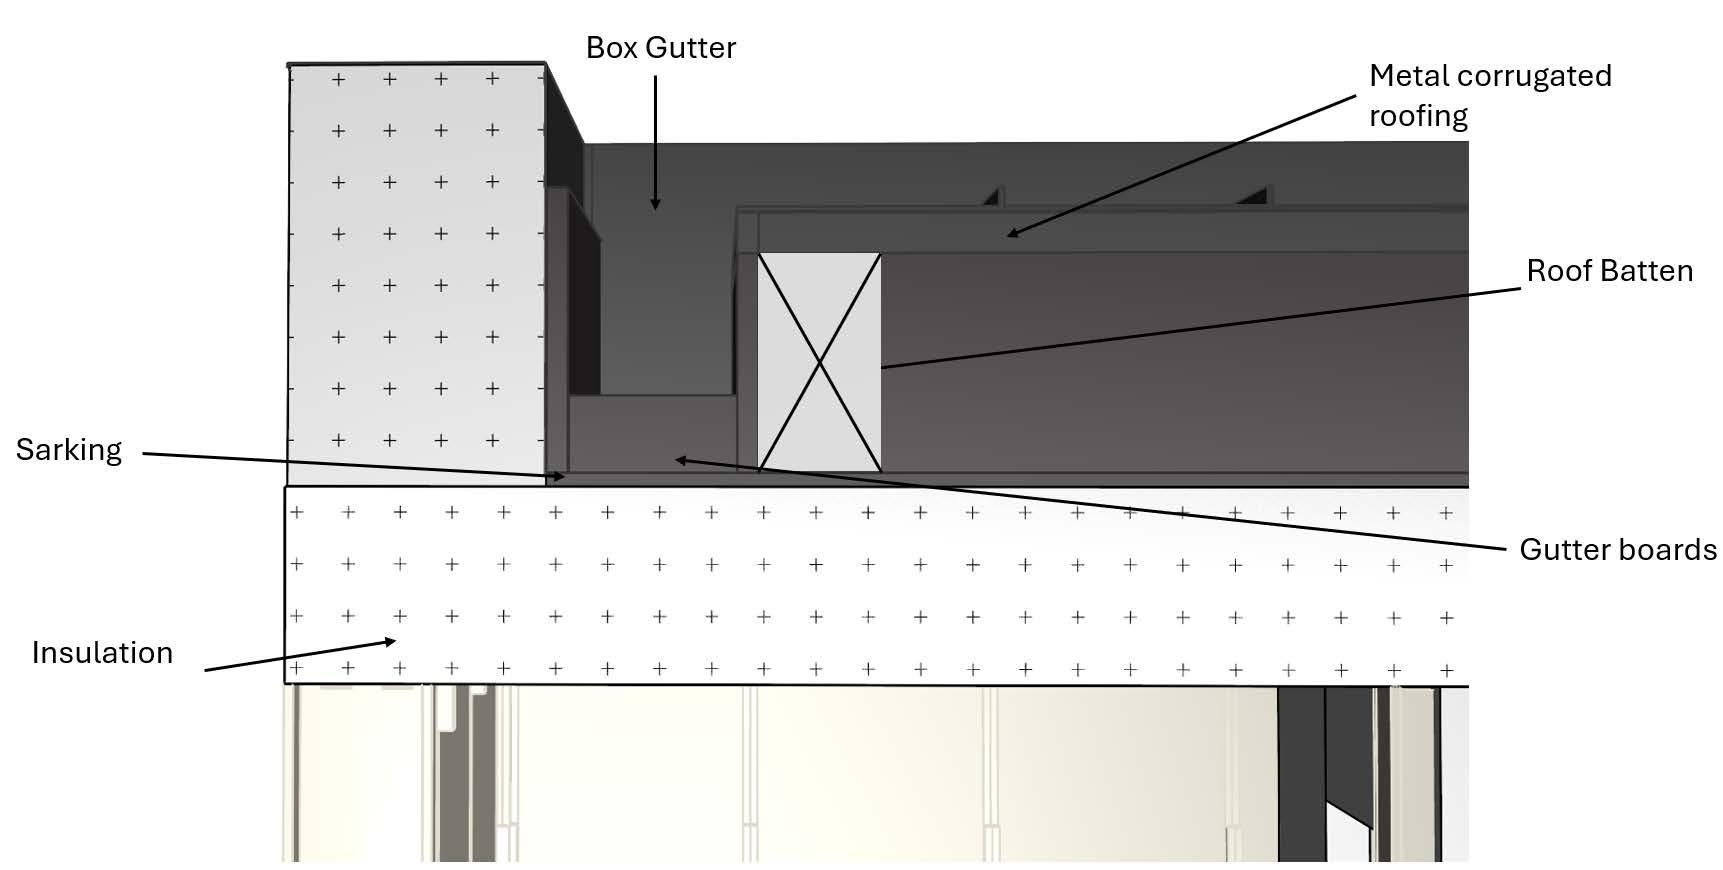
HIDDEN GUTTER DETAIL DRAWING
For our building, we have chosen a flat roof. The sloped metal corrugated roofing will direct water flow into a concealed gutter on one side. The gutter box will be located on the southern side of the building, ensuring the facade remains clean and unobstructed.
- Drawingr by Traven Lam
Key details: Gutters & Services
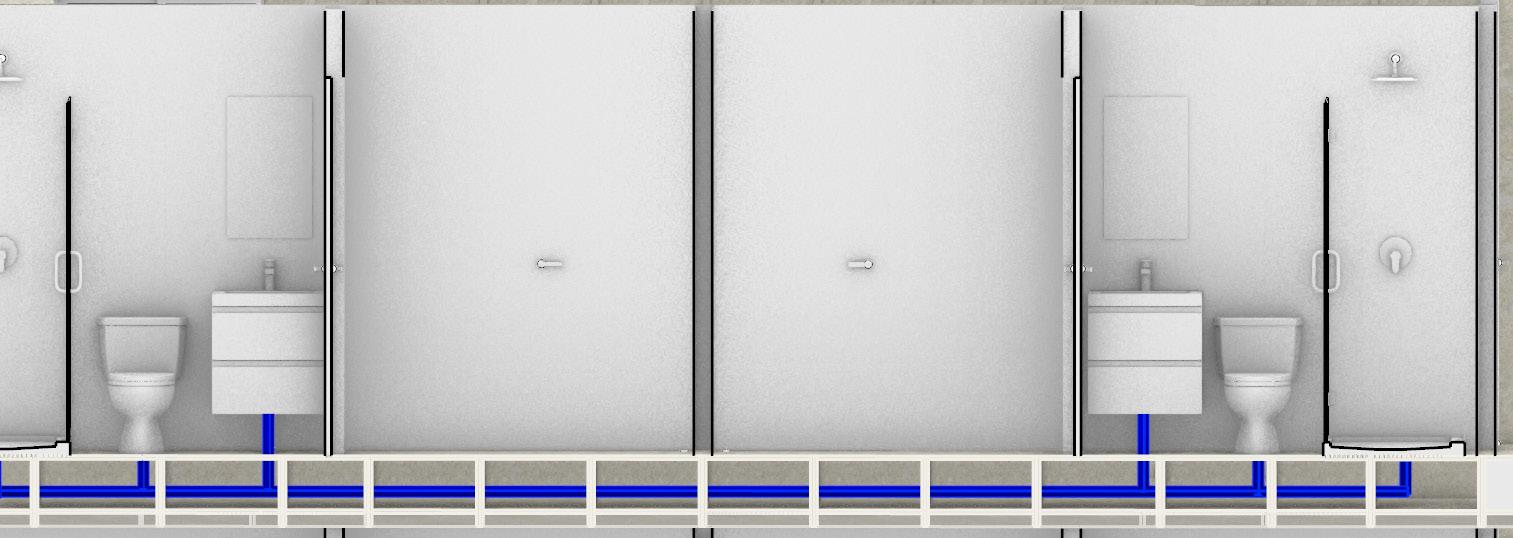
ELECTRICAL WITH WIKIHOUSE
The WikiHouse system is designed for efficiency and practicality, with water pipes distributed throughout the building and integrated into the walls for a clean and minimalist appearance. Key plumbing components are strategically placed to minimize exposure and maximize space usage. The electrical layout is efficient and discreet, with wiring integrated within the walls and ceilings, conduit channels planned to avoid visible disruption. Electrical outlets, switches, and lighting fixtures are positioned based on functional needs for convenience and safety. Circuit distribution is planned for balanced load management, with a central distribution panel for easy access and maintenance. Electrical connections to key appliances and systems are routed through the walls, keeping the design sleek and minimizing clutter.
WikiHouse addresses the housing problem with affordable, fast-to-build rental dwellings. This design's material cost estimate is here. All WikiHouse components cost 217,603 AUD, increasing the estimate to 487,831AUD. Since WikiHouse is made of wood, it will cut upfront carbon emissions by 132,000 kg, having a significant environmental impact.
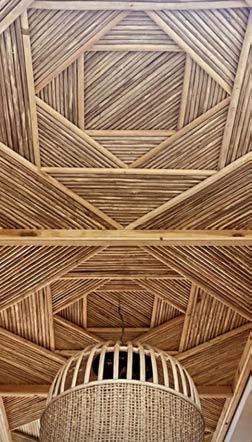
Mitra, S. (2019, October 21). The home icon comes to life in this one of a kind holiday home! Yanko Design - Modern Industrial Design News; Yanko Design. https://www.yankodesign. com/2019/10/21/the-home-icon-comes-to-life-inthis-one-of-a-kind-holiday-home/WALL-G42-6
Tenir Eco Hotels / Levelstudio. (2021, February 19). ArchDaily.https://www.archdaily.com/957188/ tenir-eco-hotels-levelstudio
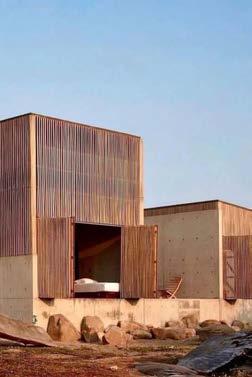
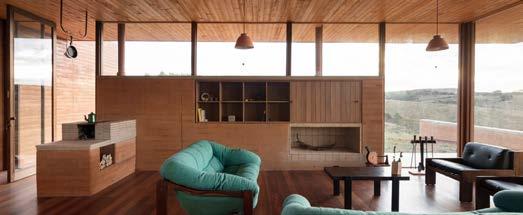
Cozy House / Hinzstudio. (2018, July 3). ArchDaily. https://www.archdaily.com/897378/cozy-househinzstudio
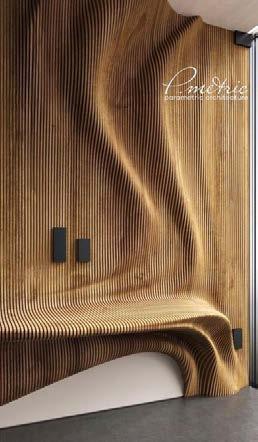
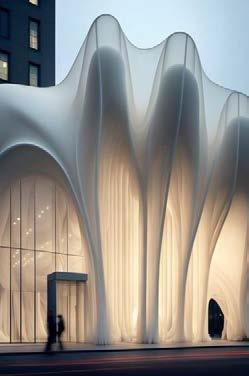
China. (2024). Tim Franco Seoul based Photographer in South Korea and China. Tim Franco Seoul Based Photographer in South Korea and China. https://www.timfranco.com/china/ luxury/ photographer/shanghai/retail/luxury-retail
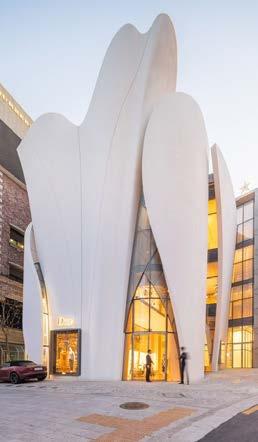
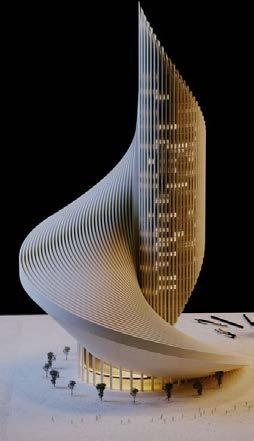
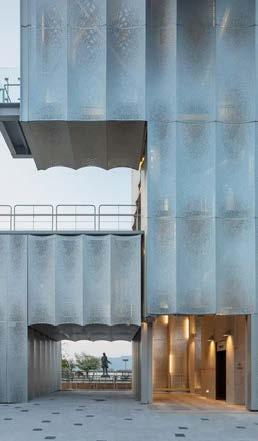
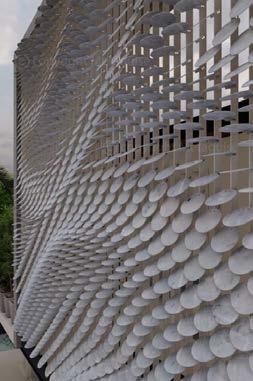
Gallery of A Thousand Plateaus Observatory / Emer-sys - 1. (2020). ArchDaily. https://www.archdaily.com/994543/ a-thousand-plateaus-observatory-emersys/63b410de987c9501706c2fcf-a- thousandplateaus-observatory-emer-sys-photo •https://www.freepik.com/premium-ai-image/ building-architectural-design-inspiration-with-frontview_54113921.htm
40
City of Melbourne (2024) Suburb map boundary [Online image]. Available at: https://mvga-prod-files.s3.ap-southeast-4. amazonaws.com/public/2024-05/suburbmap-boundary-city-of-melbourne.pdf (Accessed: 21 October 2024).
Become a WikiHouse provider. (2023). Wikihouse. cc. https://www.wikihouse.cc/become-a-provider
Carlton (Statistical Area, Melbourne, Australia) - Population Statistics, Charts, Map and Location. (2023). Citypopulation.de. https:// www.citypopulation.de/en/australia/ melbourne/206041117__carlton/
City of Melbourne, 2024. Suburb map boundary: City of Melbourne. [PDF] Available at: chromeextension://efaidnbmnnnibpcajpcglclefindmk aj/https://mvga-prod-files.s3.ap-southeast-4. amazonaws.com/public/2024-05/suburb-mapboundary-city-of-melbourne.pdf [Accessed 6 November 2024].
iStock, 2024. *Group of colleagues celebrating success*. [online image] Available at: <https:// media.istockphoto.com/id/1347652268/photo/ group-of-colleagues-celebrating-success.jpg?s=61 2x612&w=0&k=20&c=dojtkf9ItX21j3jtlGOGpbKDs 320TTAuofoGnNSZD8Y=> [Accessed 6 November 2024].
WikiHouse, 2024. Become a provider. Available at: <https://www.wikihouse.cc/become-a-provider> [Accessed 6 November 2024].
2021 Carlton, Census All persons QuickStats | Australian Bureau of Statistics. (n.d.). www.abs. gov.au. https://www.abs.gov.au/census/findcensus-data/quickstats/2021/206041117
Australian Bureau of Statistics (2024). Regional population: Greater Melbourne, population change. Retrieved from https://www.abs.gov.au/statistics/ people/population/regional-population/latestrelease
ABC News (2024). 90,000 extra construction workers needed to meet housing goals. Retrieved from https://www.abc.net.au/news/2024-0324/90-000-extra-construction-workers-needed-tobe-on-track-for-goal/103625934
Australian Parliament House (2024). Worsening rental crisis: Final report. Retrieved from https:// www.aph.gov.au/Parliamentary_Business/ Committees/Senate/Community_Affairs/ Worseningrentalcrisis/Final_Report
Housing Victoria (2024). Social housing initiatives. Retrieved from https://www.housing.vic.gov.au/ social-housing
DALGLEISH, S. (2023, July 20). Managing Demographic Changes in Carlton, VIC. ArcGIS StoryMaps; Esri. https://storymaps.arcgis.com/ stories/de7c625369e8437fa86ff4b3c954c1c
ABC News (2024). Anglicare Australia rental affordability report. Retrieved from https://www. abc.net.au/news/2024-04-23/anglicare-australiarental-affordability-report/103754274