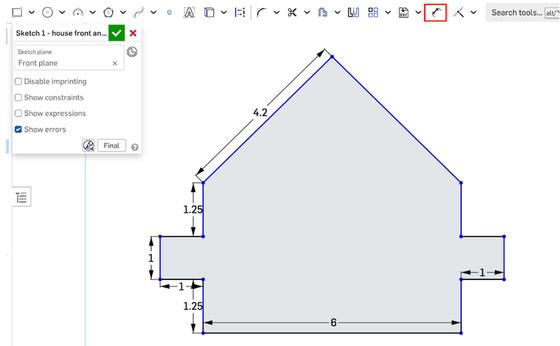
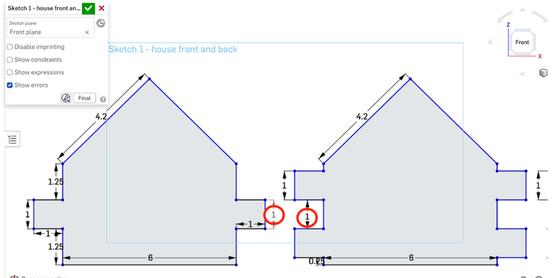
No part of this book may be reproduced, distributed, or transmitted in any form or by any means, including photocopying, recording, or other electronic or mechanical methods, without the prior written permission of the publisher, except in the case of brief quotations embodied in critical reviews and certain other non-commercial uses permittedbycopyrightlaw.
Thankyouforjoiningusonthisexcitingjourney!TheSKOOL21STEMInnovatorsseriesis designednotonlytoignitecuriosityinstudentsbutalsotoempowerteacherstolead meaningful, hands-on STEM learning experiences. Through this series, you will guide young innovators as they explore, design, and solve real-world challenges using science,technology,engineering,andmathematics(STEM).
BuildingonaStrongFoundation
EachleveloftheSKOOL21STEMseriesbuildsuponthepreviousone,creatingastrong continuum of learning — from simple machines to advanced 3D modeling. Students travel through key technological eras, from the Industrial Revolution to the innovations shaping our future. No matter their starting point, every learner will discovernewskillsanddeeperunderstandingalongtheway.
LearningbyDoing
At SKOOL21, we believe students learn best by doing. Each book comes with a comprehensive STEM kit, enabling students to build, test, and explore concepts through hands-on challenges. As a teacher, you will facilitate engaging projects where students actively create, problem-solve, and apply critical thinking skills — all whilehavingfun.
MakingaReal-WorldImpact
Every project is designed to connect learning to real-world issues, inspired by the SustainableDevelopmentGoals(SDGs).Throughthesechallenges,studentsseehow their ideas can contribute to solving problems like clean water access, renewable energy, and environmental conservation empowering them to envision a better world.
TeachingLikeaPro
The SKOOL21 STEM program aligns with international standards and best practices, ensuring that both teachers and students are developing the collaboration, innovation, and design thinking skills valued in today’s world. You’re not just supporting schoolwork — you’re preparing the next generation of thinkers, leaders, andchangemakers.
Each lesson in the handbook follows a structured format to ensure clarity and effective implementation. A sample solution is also found at the end of each lesson.Thestructureincludes:
TheEngineeringDesignProcess
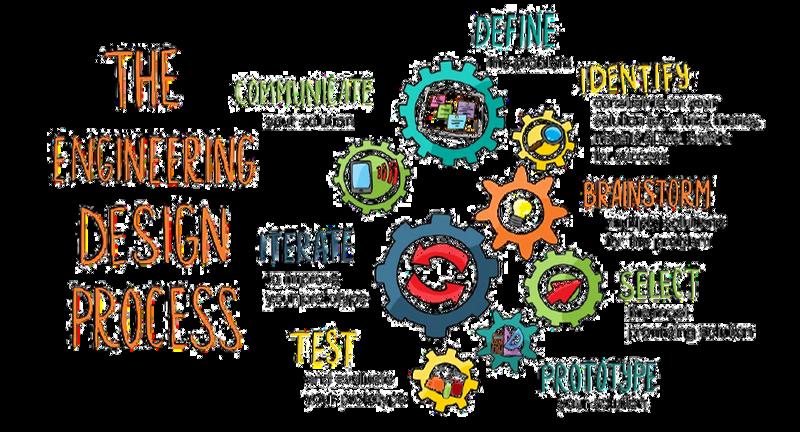
The Engineering Design Process (EDP) is a systematic approach used by engineers and designers to solve problems and create innovative solutions. It provides a structured framework for developing new products, processes, or systems by following a series of well-defined steps. This process is not only applicable in engineering, but is also widely used in various STEM disciplines to tacklechallengesanddevelopcreativesolutions.
For students in first grade and above, the typical Engineering Design Process follows multiple iterative steps, including identifying a problem, researching, brainstorming,designing,prototyping,testing,andrefiningsolutions.
This structured approach encourages creativity, critical thinking, and iteration, formingastrongfoundationforfutureSTEMlearning.
FosteringSocialSkills
STEM activities naturally build key social skills. Teachers can help students practice and strengthen these skills by guiding them during group work, discussions,andprojectchallenges
Teaching STEM also teaches students how to think, work, and lead. By actively supporting social skills during projects, teachers prepare students not just for academicsuccess,butforfuturecareersandlifechallenges.
2.Check that the laser cutter is set up, calibrated, and safety-tested before class Make sure thecuttingbediscleanandaligned
3. Prepare the approved material sheets (e.g., 3mm plywood, acrylic, or cardboard) cut to standardsizesthatfitthemachine’sworkingarea
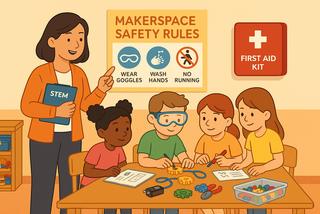
4. Print and display the laser cutter safety rules in the classroom. Review emergency stop proceduresandensurethatsafetygogglesareavailableforallstudents.
7. Test the file-to-machine workflow (exporting from CAD to laser cutter software) to avoid technicalissuesduringclass
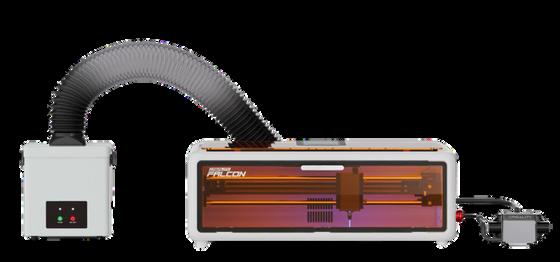
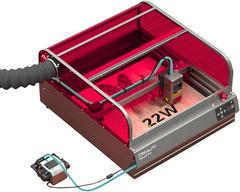
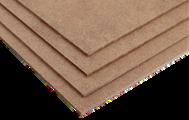
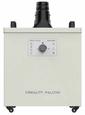
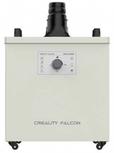
⅛”MDF LaserCutter SmokePurifier
LearningActivities(Session1)
1.Beginbydiscussingtheglobalchallengeofaffordablehousingandhowitaffectsbillionsof people around the world. Use this opportunity to highlight the importance of smart, spacesaving design in addressing housing shortages, especially in densely populated or lowincomecommunities
2.IntroducestudentstotheuseofCADsoftware(Onshape)forcreatingdigitalprototypesand the value of laser cutting for turning those designs into real-world models. Emphasize how precision design and efficient use of materials can lead to innovative construction solutions thatsavetime,reducewaste,andcutcosts
3.Askguidingquestionstopromptdiscussion: Whyisaffordablehousingimportantforcommunities? Howcanengineeringanddesignhelpsolvereal-worldproblemslikehousingshortages? What are the benefits of using digital tools like Onshape and laser cutters in construction design?
4. Clarify the learning goal: Students will design and assemble a scaled model of an affordable housing unit using computer-aided design (CAD) tools and laser cutting techniques
1. Read the “Define the Problem” section together with your students Encourage brief brainstormingtoexplorehowspace-savingandaffordabledesigncanmeethousingneeds.
2. Clearly explain the constraints (model size, joinery techniques) and criteria (efficiency, accuracy,andcommunityfit)theymustfollow
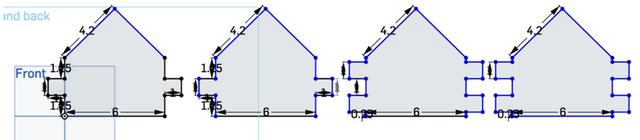
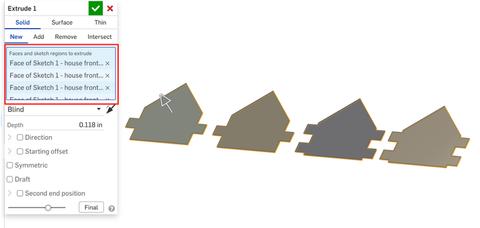
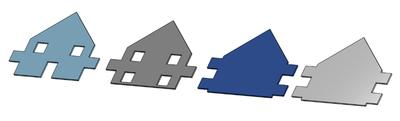
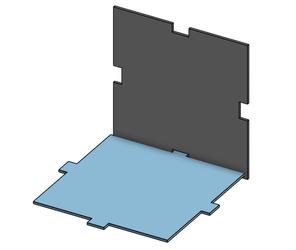
Havestudentscheckthe“MeasureYourSuccess”sectiontoconfirmthattheirhousingmodel has four interlocking sides, includes windows and a door, fits within the 400 x 415 mm cutting area, and is made only from laser cut materials Remind them to evaluate how well their modelfitstogetherusingjoinery.
Ask students to pair up and review each other’s models. Each student should share one feature they like and one improvement suggestion Encourage feedback focused on joinery quality, clarity of design features like windows and doors, and how well the model uses materialsefficiently.
Letstudentsexchangewallsketcheswithaclassmateforreview.Askthemtogiveonepiece of positive feedback and one suggestion for improving the fit or stability of the tabs. Encouragediscussionaboutwhatmakesjointsreliableandeasytoassemble
An affordable housing model made with laser cutting can help address zero poverty by providing a low-cost, scalable, and quick-to-produce design solutionthatsupportsaccesstosafeshelterforunderservedcommunities
LearningObjectives
Project2:PlanterBoxes
LessonPlan
Attheendofthelesson,thelearnerswill:
Duration: 90minutes
1.Explain the role of planter boxes in addressing food insecurity and describe how design can maximizegrowingspaceinsmallurbanenvironments.
2.Check that the laser cutter is set up, calibrated, and safety-tested before class. Make sure thecuttingbediscleanandaligned
3. Prepare the approved material sheets (e.g., 3mm plywood, acrylic, or cardboard) cut to standardsizesthatfitthemachine’sworkingarea.
4. Print and display the laser cutter safety rules in the classroom Review emergency stop proceduresandensurethatsafetygogglesareavailableforallstudents.
2.Emphasize how they can help people grow their food in small urban spaces or areas with limitedaccesstofreshproduce
3. Use the infographics to spark discussion about food security, plant needs, and how geometricdesigncanmaximizegrowingspacewhileminimizingmaterialuse.
Have students review the “Measure Your Success” section to ensure their planter box design uses interlocking joinery, fits within the laser cutter's size limits, and maximizes volume using minimal material. Encourage them to test how the parts fit together and if the structure is stableenoughtoholdsoilandplants
Pair students to give and receive feedback on their planter box designs. Each student should highlight one successful design choice and offer one suggestion for improvement. Guide them to focus on joinery accuracy, material efficiency, and whether the planter meets the goalofgrowingfoodinsmallorurbanspaces. --EndofSession1--
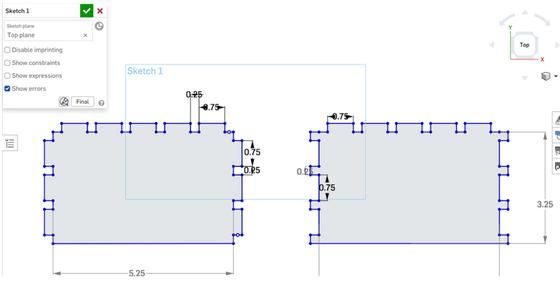
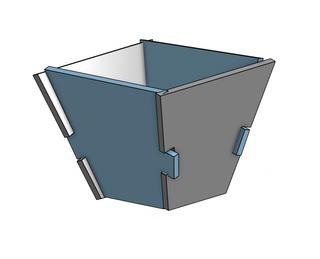
Ask students to test their complete box by checking if all six sides fit together using only the joinerydesign noglueortape.Makesurethedesignfitsthelasercutter’ssizelimitsandforms asturdy,sealedcontainersuitableforplanting
Pair students and have them share their completed designs. Ask them to evaluate if the joinery fits cleanly and if the structure holds together well Each student should give one compliment and one improvement idea, focusing on fit accuracy, material efficiency, and potentialweakspotsinthebox.
--EndofSession2--
AnswerKey
MATHANDSCIENCECONNECTION
ANSWER1
1.C=πd=12πcm≈38cm
ANSWER2
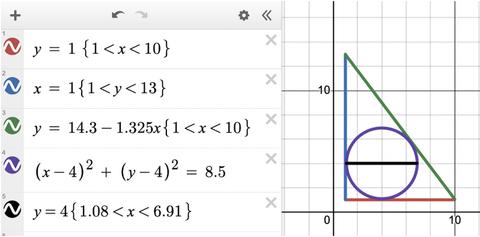
Students may draw the circle by hand with a protractor or use a website such as Desmos to findthelargestdiameter,whichis6.Theycanalsousetheformula: d=a+b-c=12+9-15=6
ANSWER3
Outdoor full sun is the best place to grow the tomato plants, since the yield at both 10,000 lumens and 25 ℃ is much higher than the yields at the light and temperature values of the indoorwindowsillandbasementartificiallight
Reflection
Planter boxes can help address the problem of zero hunger in food deserts by enabling people to grow fresh fruits and vegetables locally, even in limited
Project3:StandingDeskConverter
LessonPlan
LearningObjectives
Attheendofthelesson,thelearnerswill:
Duration: 90minutes
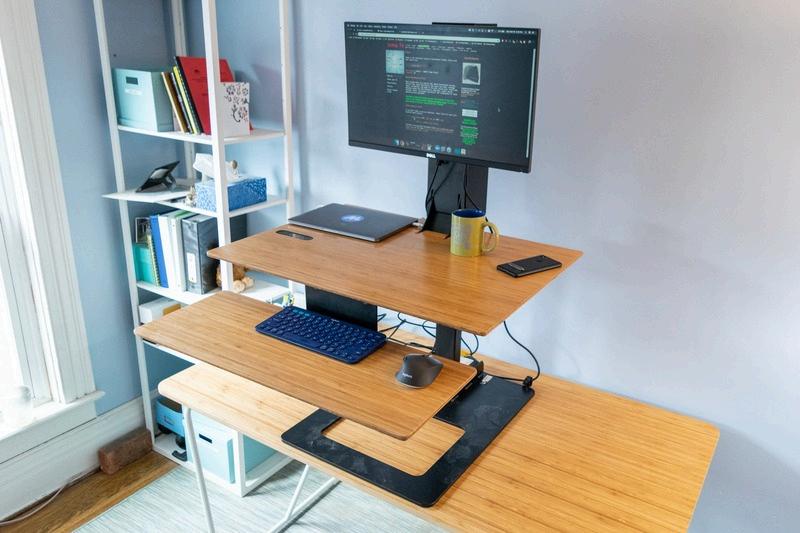
1. Explain how prolonged sitting impacts health and describe how ergonomic design can improveposture,energy,andproductivity.
2. Use CAD software to design a standing desk converter that includes adjustable features, stablejoinery,andfitswithinlasercutterconstraints
3. Assemble and evaluate a laser-cut desk converter, applying peer feedback to improve strength,adjustability,andusercomfort.
Materials
Vocabulary Ergonomic
Sedentary
Broducts designed to make the work environment more efficient,safe,andhealthy
2.Check that the laser cutter is set up, calibrated, and safety-tested before class Make sure thecuttingbediscleanandaligned
3. Prepare the approved material sheets (e.g., 3mm plywood, acrylic, or cardboard) cut to standardsizesthatfitthemachine’sworkingarea.
4. Print and display the laser cutter safety rules in the classroom Review emergency stop proceduresandensurethatsafetygogglesareavailableforallstudents
1. Read the problem scenario with students and clarify the client’s need for a heightadjustabledeskconverter
2.Reviewthekeydesignconstraints supportingalaptopatadjustableheights,flexibility,and comfort. Invite students to brainstorm what features would make the desk converter both user-friendlyandmechanicallyfunctional.
3. Prompt them to consider how they will approach designing a stable and adjustable structureusingOnshapeorphysicalmodeling.
Have students review the “Measure Your Success” section to confirm that their standing desk converterallowsforsmoothheightadjustment,supportstheweightofalaptop,andfitswithin any size or material constraints Encourage them to test the range of motion and stability of theirdesign,checkingwhetherthelaptopstayssecureatdifferentheightsandangles
Have students pair up and test each other’s standing desk models. Each student should identifyonefeaturethatsupportsergonomicuseandonesuggestiontoimproveadjustability or strength Encourage them to focus on hinge design, user comfort, and ease of use when offeringfeedback.
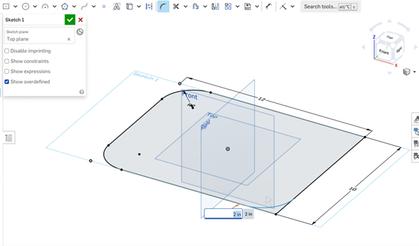
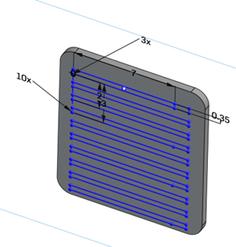
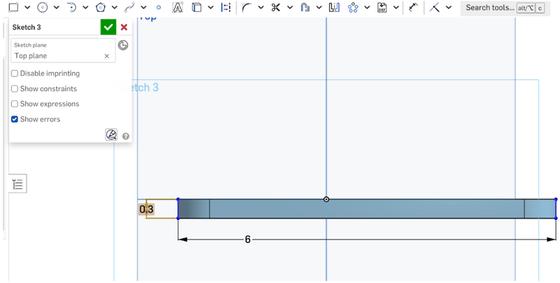
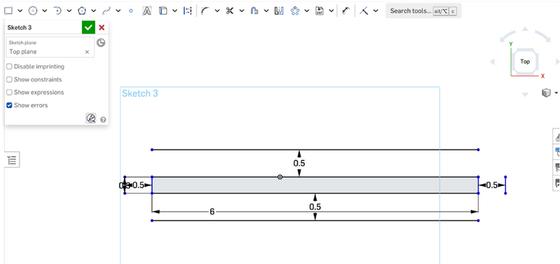
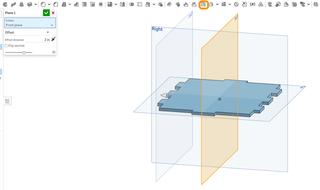
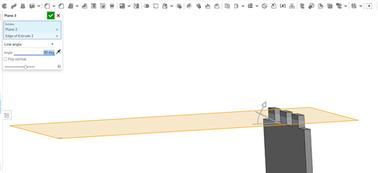
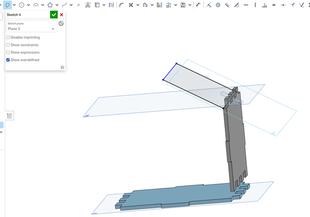
2. On the top side view draw the edges of the stand with the same dimensions as the first piece(thiswillbelikeaholeforittobeattachedtoit)
3.Use the offset tool to draw the edges of the hole which will hold the stand, then complete therectangle.
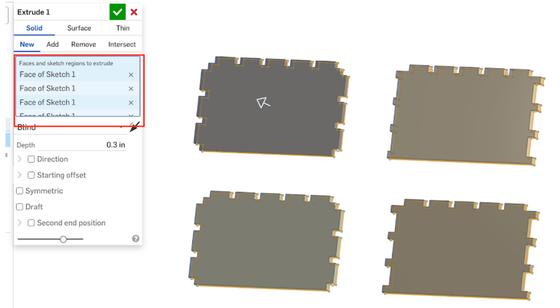
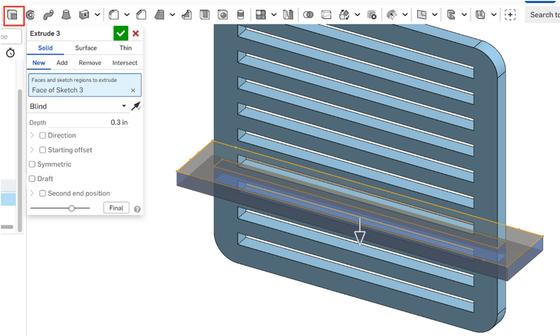
4.Extrudethefaceofthepiecewith0.3thickness.
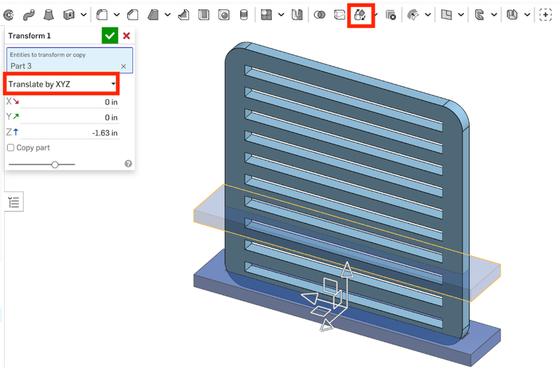
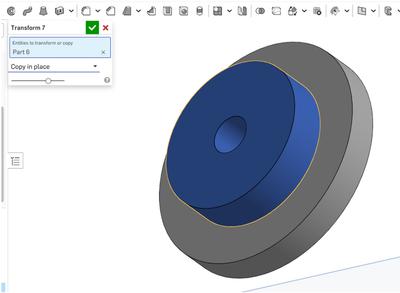
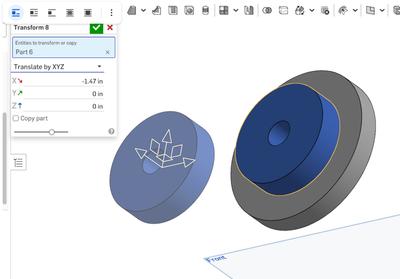
5.Move the position of the stand to the end of the object to support it. This can be done by using“transform”toolthenselect“translatebyx,y,z”thenmovingtheobjectonthezaxis
Have students check whether their bottom piece fits tightly into the stand and supports the overall structure They should review the joinery for stability and ensure the bottom prevents wobblingortippingwhenalaptopisplacedontop
Pair students to review each other’s designs Each student should identify one strength (eg, stability, good alignment) and offer one suggestion for improvement (e.g., tab size, material fit).Encouragefeedbackfocusedonstructuralsupportandhowwellthepieceintegrateswith theoverallstand
2.Check that the laser cutter is set up, calibrated, and safety-tested before class. Make sure thecuttingbediscleanandaligned.
3. Prepare the approved material sheets (eg, 3mm plywood, acrylic, or cardboard) cut to standardsizesthatfitthemachine’sworkingarea.
4. Print and display the laser cutter safety rules in the classroom Review emergency stop proceduresandensurethatsafetygogglesareavailableforallstudents
Read the “Define the Problem” section with your students. Emphasize that they are helping a physics class understand friction by designing cars that can be tested on various surfaces. Review the goals of accurate modeling and explain the importance of file design for laser cutting Encourage students to think about what features will affect the car’s speed and traction. LogintoyouronShapeaccount. ClickCreate->Document Namethefile“Project4:CarModel.”
Havestudentsrevisitthe"MeasureYourSuccess"sectionandtesttheircarmodelsondifferent surfacessuchaswood,carpet,andplastic Askthemtoobservehowfrictionaffectsthecar’s speed and movement on each surface Ensure that the models are fully assembled, stable, andcutaccuratelyfromthelaserfiles.Encouragestudentstorecordandcompareresultsto understandwhichdesignperformsbestunderdifferentfrictionconditions.
Pair students up to review each other’s car designs. Each student should point out one strengthintheirpartner’smodelandsuggestoneimprovement.Focusthediscussiononhow wellthecarmoves,howthematerialsandwheelplacementaffectperformance,andwhether the design could be adjusted to handle friction better. Guide students to make thoughtful changesbasedontestresultsandpeerfeedback.
--EndofSession1--
LearningActivities(Session2)
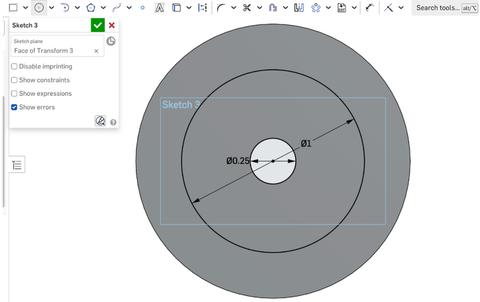
1. Open a new sketch on the face of oneofthewheels.UsetheDimension tool to draw a new inner circle that matches the shaft diameter of your motor or axle. Then, add a second circle with a smaller outer diameter thantheoriginalwheel
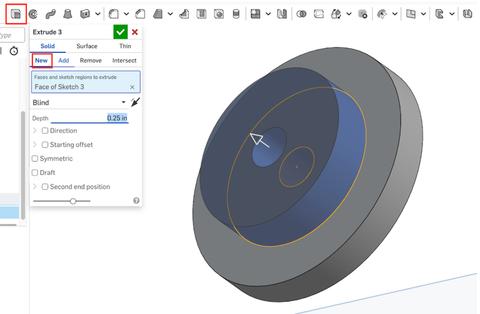
2.Select the new sketch and use the Extrudetool Besuretochoose“New” instead of “Add” so the extrusion becomes a separate part, not an extensionofthewheel
Havestudentstesttheircompletedcardesignsonvarioussurfacesandrecordhowfarorfast the cars move Guide them to compare performance and friction levels Encourage them to observe which materials produce the most and least resistance and use this data to rank surfacefrictionintheprovidedchart.
The rate of change of the car’s position on the smooth floor, moving from 0 to 9 cm in 6 seconds, is higher than the rate of change of the car’s position on the carpet, which moves from0to5cmin6seconds.Mathematically:
1. Explain why representation in STEM matters and describe how design choices can promote inclusion and challenge stereotypes.
2. Use CAD software to design a figurine with balanced proportions, interlocking joinery, and features that reflect a STEM professional
3. Assemble and test a laser-cut figurine, then evaluate its stability and visual impact while applying peer feedback to improve clarity, balance, and inspiration.
Materials
Vocabulary
Prototype
Marketing
An early version of a product that's used to test a concept orprocess
2.Check that the laser cutter is set up, calibrated, and safety-tested before class Make sure thecuttingbediscleanandaligned.
3. Prepare the approved material sheets (e.g., 3mm plywood, acrylic, or cardboard) cut to standardsizesthatfitthemachine’sworkingarea
4. Print and display the laser cutter safety rules in the classroom. Review emergency stop proceduresandensurethatsafetygogglesareavailableforallstudents.
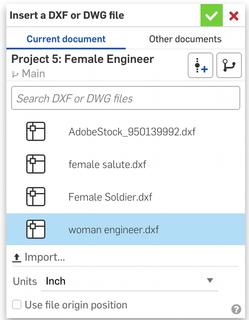
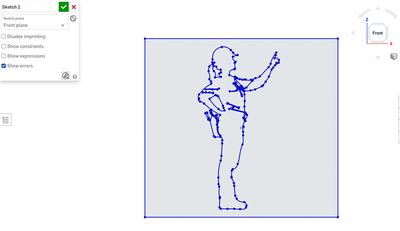
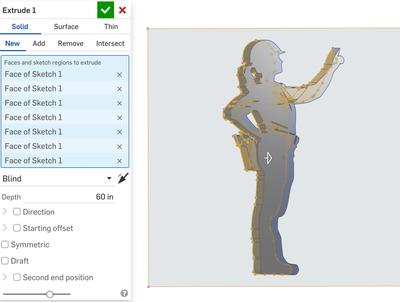
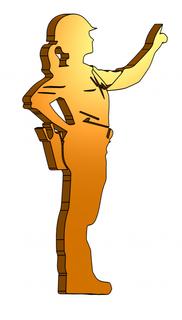
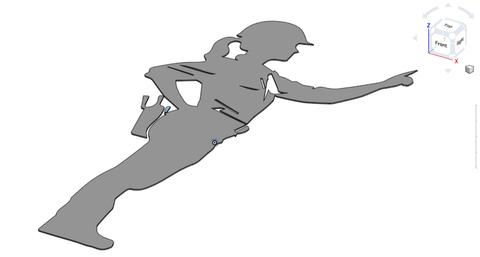
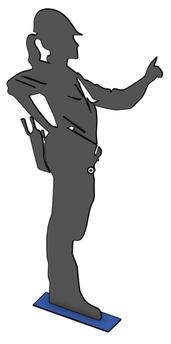
2. Explain that this project allows students to design and prototype toy figurines that reflect female engineers These figures serve as powerful visual tools that can inspire young girls to seethemselvesinSTEMcareers
Review the "Define the Problem" section together. Make it clear that their role is to support a physicsclassbydesigningtestablecarsthatdemonstratehowfrictionworksacrossdifferent surfaces Talk about why precision in digital design matters when preparing files for laser cutting. Help students consider what features like wheel size, weight, or axle placement could influence their car’s ability to move quickly and safely across materials like carpet, wood,ortile.
Have students revisit the "Measure Your Success" section and check if their figurine design meetstherequiredcriteriaforbalance,proportion,andrecognizableengineeringfeatures.Ask them to inspect the model for stability and whether it can be assembled cleanly from the laser-cutparts.Encouragethemtoreflectonhowwelltheirdesigncommunicatestheidentity ofafemaleSTEMprofessionalandifitcouldinspireyoungeraudiences.Ifpossible,allowbrief peertestingorviewingtoassessvisualimpact
Pairstudentstorevieweachother’sfigurinedesigns.Eachstudentshouldhighlightonestrong feature in their partner’s model such as pose, clothing details, or engineering tools and suggest one area for improvement Encourage thoughtful feedback on how well the figurine represents a confident, capable woman in STEM. Guide students to consider both aesthetic appeal and messaging in their revisions, helping them refine their design to better inspire inclusionandrepresentation.
--EndofSession1--
LearningActivities(Session2)
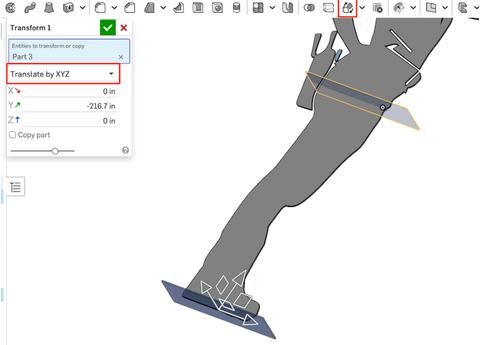
1. Identify the base or bottom face of the objectwherethestandwillbeattached.
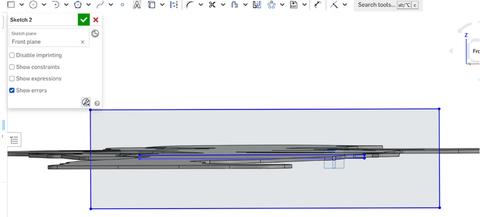
3. Create a new sketch on a plane that is perpendicular to the leg Draw a rectangle using the same width as the leg. Then, draw a circle around the rectangle to act asthebaseofthestand.
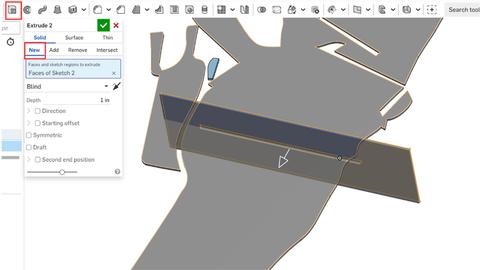
4. Select the new sketch and use the Extrude tool to give the stand its thickness. Make sure to select “New” instead of “Add” sothestandiscreatedasaseparatepart, notjoinedtotheoriginalobject.
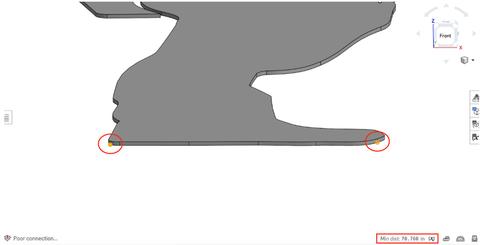
Have students check the “Measure Your Success” section to confirm that their base supports the figurine upright and fits the click-in connection Test that the figurine stands securely withoutwobblingandthatthebasefitswithinthedesignconstraints
Askstudentstopairupandgiveeachotherquickfeedback Eachstudentshouldmentionone thing that works well (eg, stability or fit) and one suggestion for improvement Encourage feedbackondesignclarity,balance,andfitaccuracy.
3. a. The average percent increase in interest from the aeronautical engineer was 7.75 while theaveragepercentincreaseininterestforthecivilengineerwas625 Thus,theaeronautical engineercausedahigherpercentincreasethanthecivilengineer.
b. The standard deviation for the aeronautical engineer was 2.39 while the standard deviation for the civil engineer was 554 This means there was more variety in the results for the civil engineer than for the aeronautical engineer If the organization had to only release onefigurine,theyshouldchoosetheaeronauticalfigurinefromthesedatapoints.
Reflection
An inclusive STEM figurine helps promote gender equality by providing visible, diverse role models that challenge stereotypes and encourage all genders to seethemselvesascapableandwelcomeinSTEMfields.
2. Use CAD software to design a lightweight rainwater collector with interlocking joinery and featuresthatallowforbothwatercollectionandpouring
3. Assemble and test a laser-cut rainwater collector, evaluate its stability and efficiency, and applypeerfeedbacktoimprovewaterflow,portability,andfitaccuracy.
2.Check that the laser cutter is set up, calibrated, and safety-tested before class. Make sure thecuttingbediscleanandaligned
3. Prepare the approved material sheets (eg, 3mm plywood, acrylic, or cardboard) cut to standardsizesthatfitthemachine’sworkingarea.
4. Print and display the laser cutter safety rules in the classroom Review emergency stop proceduresandensurethatsafetygogglesareavailableforallstudents.
Read the “Define the Problem” section with your students. Emphasize that they are helping a gear company create a lightweight and effective tool for clean water collection. Review the criteria (it must store and catch rainwater) and constraints (must be easy to carry) Encourage students to brainstorm what shape or mechanism would work best in real-life hikingsituations.
Havestudentsreviewthe“MeasureYourSuccess”sectionandcheckiftheirdesigncancatch and hold water securely Make sure it can be assembled or folded easily for storage and meets the lightweight requirement. Let them simulate rain using a spray bottle or cup and evaluatehowmuchwateriscollectedandretained.
Pairstudentstosharetheirdesigns Eachstudentshouldidentifyonesmartdesignfeaturein their partner’s model and suggest one improvement Encourage them to discuss portability, water collection efficiency, and how well the design could survive in outdoor conditions. Let themrefinetheirmodelsbasedontestingandpeerfeedback.
--EndofSession1--
LearningActivities(Session2)
Have students test whether their design allows water to be poured smoothly into a small opening,suchasafilterordrain Ensurethespoutorchannelispositionedcorrectlyandthat no water leaks from unintended areas. Remind them to check that the parts fit securely and thatthemodelstandssteadywheninuse.
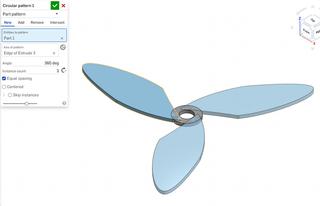
2. Use CAD software to design laser-cut turbine blades and hubs with features that support stability,airflow,andaccuratetesting.
3. Assemble and test airfoil models in a simulated wind environment, evaluate performance results,andapplypeerfeedbacktoimprovedesignefficiencyandstability
Materials
Vocabulary
Airfoil
Model
Turbine
A shaped surface, like a wing or blade, designed to generateliftorcontrolairflowwhenmovingthroughair
2.Check that the laser cutter is set up, calibrated, and safety-tested before class. Make sure thecuttingbediscleanandaligned.
3. Prepare the approved material sheets (eg, 3mm plywood, acrylic, or cardboard) cut to standardsizesthatfitthemachine’sworkingarea.
4. Print and display the laser cutter safety rules in the classroom Review emergency stop proceduresandensurethatsafetygogglesareavailableforallstudents
7. Test the file-to-machine workflow (exporting from CAD to laser cutter software) to avoid technicalissuesduringclass.
LaserCutter ⅛”MDF
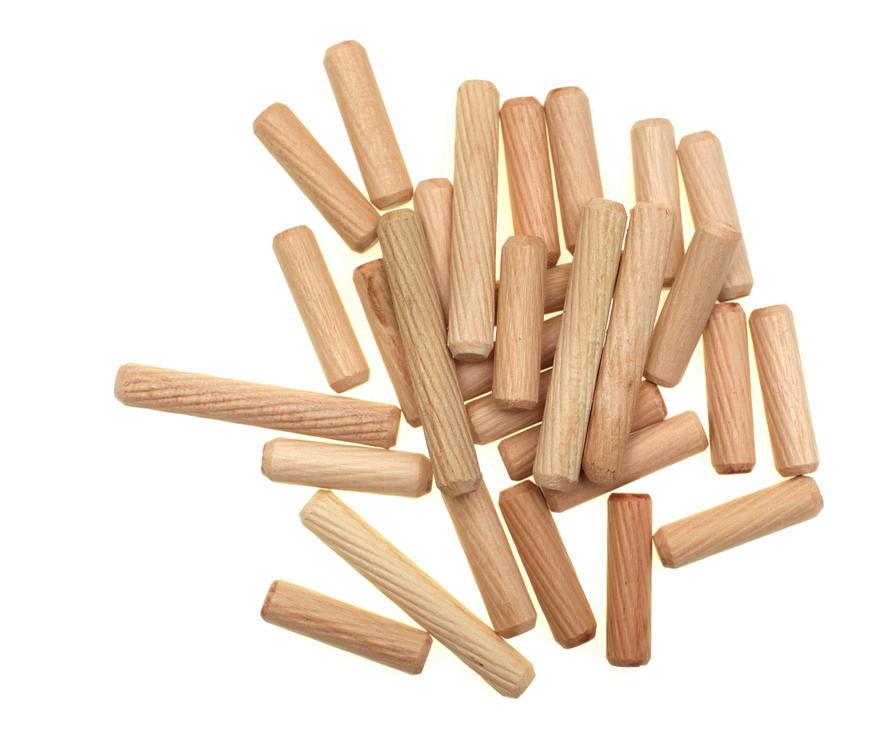
½”woodendowel SmokePurifier
LearningActivities(Session1)
1. Explain how wind turbines work by converting wind energy into electricity using rotating blades.Introducetheideathatbladeshapeaffectshowefficientlywindenergyiscaptured.
2.Let students know they will design and cut different blade airfoils using a laser cutter, then testtheirmodelsinasimulatedwindenvironmenttomeasureperformance
Read the "Define the Problem" section together Explain that students will act like engineers helping a clean energy company test airfoil designs Clarify that the focus is on designing small blades that are fast and affordable to produce and that can be evaluated for wind performance.Encouragebrainstormingaboutwhichdesignfeatures(likecurvatureorlength) mayleadtobetterresults
Havestudentsrefertothe"MeasureYourSuccess"sectionandtesttheirairfoilmodelsusinga fan or wind source Ask them to observe how fast each blade turns and how consistently it spins. Have them measure wind capture performance and compare results to identify which bladedesignismosteffective.
Pairstudentstogivefeedbackoneachother’sbladedesigns.Eachstudentshouldnameone strength and one improvement idea. Ask them to reflect on which design features made a difference in performance Encourage them to revise their models based on what they learnedfromtestingandpeerfeedback.
--EndofSession1--
LearningActivities(Session2)
Havestudentstesttheirairfoilhubandholderdesignsbyattachingtheairfoilsandusingafan tosimulatewind.Makesurethehubholdsthebladessecurelyandspinsfreely.Askstudentsto check if their design allows for stable rotation and accurate comparison between different blade shapes Remind them to refer to the “Measure Your Success” table to confirm that the setupmeetsthecriteriafortestingperformance
Pair students to observe each other’s hub and holder systems in action. Ask each student to point out one thing they like and one idea for improvement. Encourage them to discuss how the design supports airflow, stability, and test accuracy Students can make adjustments basedonwhattheylearnfromeachother’sfeedbackandtestingoutcomes
3. Assemble and test a bike rack model, evaluate its stability and usability, and apply peer feedbacktoimprovespaceefficiency,safety,anduserconvenience.
Materials
Vocabulary
Emissions
Commuter
A structure designed for securely holding or parking bicycles
Gases or substances released into the air, usually from vehicles,factories,orothersources
A person who travels regularly between home and work or school
2.Check that the laser cutter is set up, calibrated, and safety-tested before class. Make sure thecuttingbediscleanandaligned
3. Prepare the approved material sheets (e.g., 3mm plywood, acrylic, or cardboard) cut to standardsizesthatfitthemachine’sworkingarea
4. Print and display the laser cutter safety rules in the classroom Review emergency stop proceduresandensurethatsafetygogglesareavailableforallstudents.
Read the “Define the Problem” section together Explain that students will design a bike rack that is safe, space-efficient, and easy to access. Emphasize that the design should reduce clutter, encourage commuting by bike, and fit in front of office buildings. Ask students what featuresmakeabikerackeffectiveandsecure LogintoyourOnshapeaccount. ClickCreate->Document Namethefile“Project8:BikeRacks.”
1. Have students review the “Measure Your Success” section and check that their bike rack design:
Holdsatleasttwobikes
Fitswithinthedesignatedsize
Usesonlylaser-cutparts
2.Test the stability of the rack and how easily bikes can be locked and unlocked. Encourage teamstosimulaterealuseandensuresafetyandusability
Ask students to present their models and test results In pairs, each student should give one complimentandoneconstructiveideatoimprovethedesign.Guidethemtofocusonspace efficiency, sturdiness, and how inviting the rack is for everyday use. Suggest that they revise theirdesignsbasedonpeerandperformancefeedback
Pairstudentstorevieweachother’supgradeddesigns.Askeachstudenttogiveonepieceof positive feedback and one improvement suggestion focused on space, locking access, and easeofuse Encouragethemtoconsideruserconvenience,safety,andhowclearlythedesign communicateswherebikesshouldbeplaced.
--EndofSession1--
AnswerKey
MATHANDSCIENCECONNECTION
ANSWER1
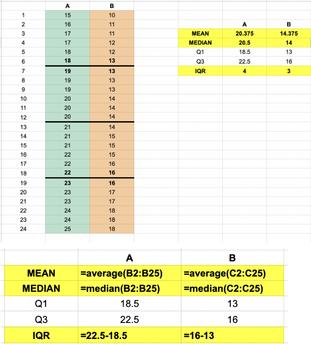
Studentsmaycalculatebyhandoruseaprogramasshownto findthemean,median,andIQR NotethattheQ1andQ3values are found as the median of the first half of the data and the medianofthesecondhalfofthedata,respectively.
The bike racks at the mall have a higher average usage, so additional racks could be most usefulthere Thedifferenceinspreadis4asopposedto3,sothatisnottooconcerningforthe planningboard.
Reflection
Project9:BrailleSignage
LessonPlan
LearningObjectives
Attheendofthelesson,thelearnerswill:
Duration: 90minutes
1. Explain the importance of Braille signage in promoting accessibility and describe how inclusivedesignsupportsindependenceforpeoplewithvisualimpairments.
3. Assemble and test Braille signage prototypes, evaluate tactile clarity and accuracy, and applypeerfeedbacktoimprovespacing,engravingdepth,andoverallaccessibility
Materials
Vocabulary
Braille Raster Engraving
Terminal
A writing system using raised dots that blind or visually impairedpeoplereadbytouch
A technique where the laser moves back and forth, like a printer, to engrave an image or text by burning away materialwithtinydots
2.Check that the laser cutter is set up, calibrated, and safety-tested before class Make sure thecuttingbediscleanandaligned.
3. Prepare the approved material sheets (e.g., 3mm plywood, acrylic, or cardboard) cut to standardsizesthatfitthemachine’sworkingarea
4. Print and display the laser cutter safety rules in the classroom. Review emergency stop proceduresandensurethatsafetygogglesareavailableforallstudents.
Read the “Define the Problem” section with your students Clarify that they are helping an airport create Braille signage to assist travelers with limited eyesight. Encourage them to consider what makes signage effective and inclusive. Remind them to think about clarity, readability,materialchoice,andplacementintheirdesign. LogintoyouronShapeaccount ClickCreate->Document. Namethefile“Project9:BrailleSignage.”
Have students check their designs against the “Measure Your Success” criteria. Ensure the Braille dots are spaced correctly, readable by touch, and aligned with the text message Test the design using sample surfaces and confirm that the engraved dots are clear and consistent.Verifythatthedesignfitsthelasercuttingguidelines.
Pair students to share and review each other's Braille signage Ask them to give one compliment and one suggestion for improvement. Encourage them to focus on the readability of the Braille, alignment with the printed text, and design simplicity. Support revisionsthatimproveaccessibilityandclarity
Have students pair up and test each other's signs by touch. Each student should give one pieceofpositivefeedbackandonesuggestionforimprovement,focusingonclarity,accuracy of the Braille pattern, and engraving quality Encourage them to make small adjustments to depth,spacing,orlayouttoenhanceaccessibility.
--EndofSession2--
AnswerKey
MATHANDSCIENCECONNECTION
ANSWER1
BrailleandOnTime:0.75x0.65=0.488x100=48.8%
StaffandOnTime025x085=0213x100=213%
Braille%:48.8/(48.8+21.3)=0.696
There is a 69.6%, almost 70% chance that the person who made it to the gate on time used Braillesignstonavigate
1. Explain how reusable and modular shipping containers reduce waste, save space, and support sustainable global trade.
2. Use CAD software to design a flat-pack shipping crate with interlocking joinery that allows for easy assembly, disassembly, and reuse
3. Assemble and test a laser-cut crate model, evaluate its stability and efficiency, and apply peer feedback to improve stacking strength, fit, and compact storage
Materials
Vocabulary
Freight
Adhesives
Goodsorcargotransportedbytruck,train,ship,orplane
Substances used to bond or stick materials together such astapeorglue
2.Check that the laser cutter is set up, calibrated, and safety-tested before class. Make sure thecuttingbediscleanandaligned.
3. Prepare the approved material sheets (eg, 3mm plywood, acrylic, or cardboard) cut to standardsizesthatfitthemachine’sworkingarea.
4. Print and display the laser cutter safety rules in the classroom. Review emergency stop proceduresandensurethatsafetygogglesareavailableforallstudents
7. Test the file-to-machine workflow (exporting from CAD to laser cutter software) to avoid technicalissuesduringclass.
Learning Activities (Session 1)
1. Explain that shipping containers are essential for global trade but often create environmentalchallengesduetoemissions,spaceusage,andwaste.
2. Introduce the idea that reusable containers designed with laser-cut modular parts can reducewarehousespace,cutcosts,andlowerenvironmentalimpact
3. Emphasize that the goal of this project is to rethink traditional shipping with smarter, flatpacked,andrepairablecontainerdesignsthatsupportsustainability.
Read the “Define the Problem” section with your students Clarify that the goal is to create a prototypeofareusableshippingcrateusingjoinerymethods.Reviewwhataprototypeis,and discusswhymodularityandspace-savingfeaturesareimportantinreal-worldshippingand storage Invite students to brainstorm how a container can be designed for easy assembly, disassembly,andreuse.
Have students review the "Measure Your Success" section Ask them to check that their crate design fits together using joinery, is able to be assembled and disassembled easily, and can lay flat when not in use. Encourage them to test the structural stability of the assembled prototypeandobservewhethertheconnectionsaretightandsecure
Pair students up to test each other’s designs. Each student should describe how their crate functionsandreceiveonepositivecommentandonesuggestionforimprovement.Encourage feedback on how easy it is to put together or store the crate, how compact it is when flatpacked,andwhetheranypartscouldberedesignedforbetterfitorstrength.
LearningActivities(Session2)
--EndofSession1--
Have students check whether their crate design snaps together securely without shifting Ask themtogentlyshakeormovethestackedcratestoseeifanypartsslideordisconnect Ensure that the joining features (slots, tabs, or connectors) are aligned properly and keep the crates stable during simulated movement. Encourage them to revise the design if it feels loose or unstable
Pair students and ask them to explain how their crates connect and stay secure during shipment Each partner should suggest one thing that works well and one way to make the connection stronger or easier to align Encourage feedback on slot placement, snapping strength,andhoweasilythecratescanbestackedorseparated.
--EndofSession2--
AnswerKey
MATHANDSCIENCECONNECTION
ANSWER1
Thevolumeofthecrateis2mx2mx3m=12m If10sculpturesneedtofitineachcrate,thenthelargestallowablevolumeis12/10=1.2m for eachsculpture.
1. Explain how marine debris affects ecosystems and describe how specialized cleanup tools canreduceplasticpollutionwhileprotectingaquaticlife.
2. Use CAD software to design a laser-cut aquatic cleanup hook that balances grip strength, efficiency,andsafetyformarineenvironments
3. Assemble and test a cleanup hook prototype, evaluate its ability to collect debris in water, andapplypeerfeedbacktoimprovestability,performance,andenvironmentalsafety.
Materials
Vocabulary
A tool that allows the user to make a geometry slightly largerorsmallerthanthepreviousshape
2.Check that the laser cutter is set up, calibrated, and safety-tested before class. Make sure thecuttingbediscleanandaligned.
3. Prepare the approved material sheets (eg, 3mm plywood, acrylic, or cardboard) cut to standardsizesthatfitthemachine’sworkingarea.
4. Print and display the laser cutter safety rules in the classroom. Review emergency stop proceduresandensurethatsafetygogglesareavailableforallstudents
7. Test the file-to-machine workflow (exporting from CAD to laser cutter software) to avoid technicalissuesduringclass.
LearningActivities(Session1)
1. Explain how marine debris threatens ocean life by entangling animals and polluting ecosystems. Introduce the idea that specialized tools like aquatic cleanup hooks can help safelycollectfloatingwastelikeplasticbottlesandnets.
2. Let students know they will design and laser cut their own cleanup hook, shaped to latch onto debris while minimizing harm to marine life They’ll test the hook’s effectiveness in simulatedcleanupscenarios.
3. Emphasize the real-world impact of this project on ocean conservation and sustainable design
Read the “Define the Problem” section with your students. Discuss how removing debris without harming marine life requires a specific design solution Encourage students to brainstorm ideas that balance strength, precision, and environmental safety Emphasize that theirgoalistohelpamarineresearchersafelycollectwastefromthewater.
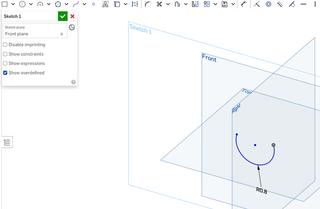
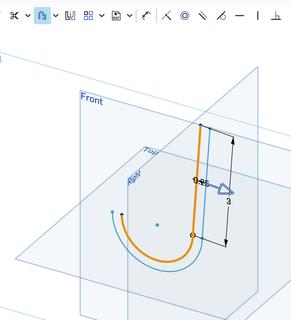
Usetheoffsettooltocreateanotheredge andthenconnectthebottomedgewitha point
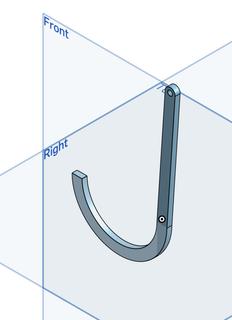
Createaloopatthetopforthehookto attachtoafishingline.Usethethree-point arctoolandacircletosubtractoutthe center
Askstudentstoreviewthe“MeasureYourSuccess”section Testthehook’sabilitytolatchonto common debris shapes (like mock bottles or nets) without slipping. Make sure it fits securely onto a pole and can handle underwater movement without damage. Have students observe whetherthehookcollectsdebrisefficientlyduringpracticeruns
Pairstudentsandhavethemrevieweachother’shooks.Askeachstudenttogiveonepieceof praise and one improvement suggestion, focusing on grip strength, shape efficiency, and safety for marine life Encourage revisions to improve how well the hook catches various objectsandremainsstablewheninuse.
Havestudentsattachtheirlaser-cutaquaticcleanuphookstoafishingpoleandtestthemin a tub filled with simulated plastic waste Observe how many pieces of debris the hook can collectinoneattempt.Remindstudentstocheckifthehook’sprongsareshapedwellenough to catch and hold trash without slipping. Encourage them to reflect on the effectiveness of theirdesignandhowitperformedinwater
Pair students to share feedback on each other’s designs. Each student should highlight one strength and suggest one improvement Focus their feedback on how many items the hook could pick up, how securely it held the debris, and how easy it was to maneuver in water Encouragethoughtfuladjustmentstoimprovecollectionefficiency.
Marine biologists assess the impact of debris on ecosystems, while environmental engineers develop tools and systems, like the cleanup hook, to efficientlyremovewasteandrestorewaterquality.
Project12:BeeNestingHouse
LessonPlan
LearningObjectives
Attheendofthelesson,thelearnerswill:
Duration: 90minutes
1.Explain the importance of solitary bees as pollinators and describe how design features like holesize,spacing,andmaterialsaffectbeesurvivalandnestingsuccess.
2. Use CAD software to design a laser-cut bee nesting house with secure structure, accurate holeplacement,andfeaturesthatsupportpollinatorhabitats
3.Assemble and test a nesting house prototype, evaluate its stability and suitability for bees, andapplypeerfeedbacktoimprovedesignstrength,layout,andecologicaleffectiveness.
Materials
Vocabulary
Ecosystem
Nesting Solitary A community of living organisms interacting with their environment theprocessofbuildingorselectingashelteredplacetolay eggsandraisetheiryoung Alone
2.Check that the laser cutter is set up, calibrated, and safety-tested before class. Make sure thecuttingbediscleanandaligned.
3. Prepare the approved material sheets (eg, 3mm plywood, acrylic, or cardboard) cut to standardsizesthatfitthemachine’sworkingarea.
4. Print and display the laser cutter safety rules in the classroom. Review emergency stop proceduresandensurethatsafetygogglesareavailableforallstudents
7. Test the file-to-machine workflow (exporting from CAD to laser cutter software) to avoid technicalissuesduringclass.
LearningActivities(Session1)
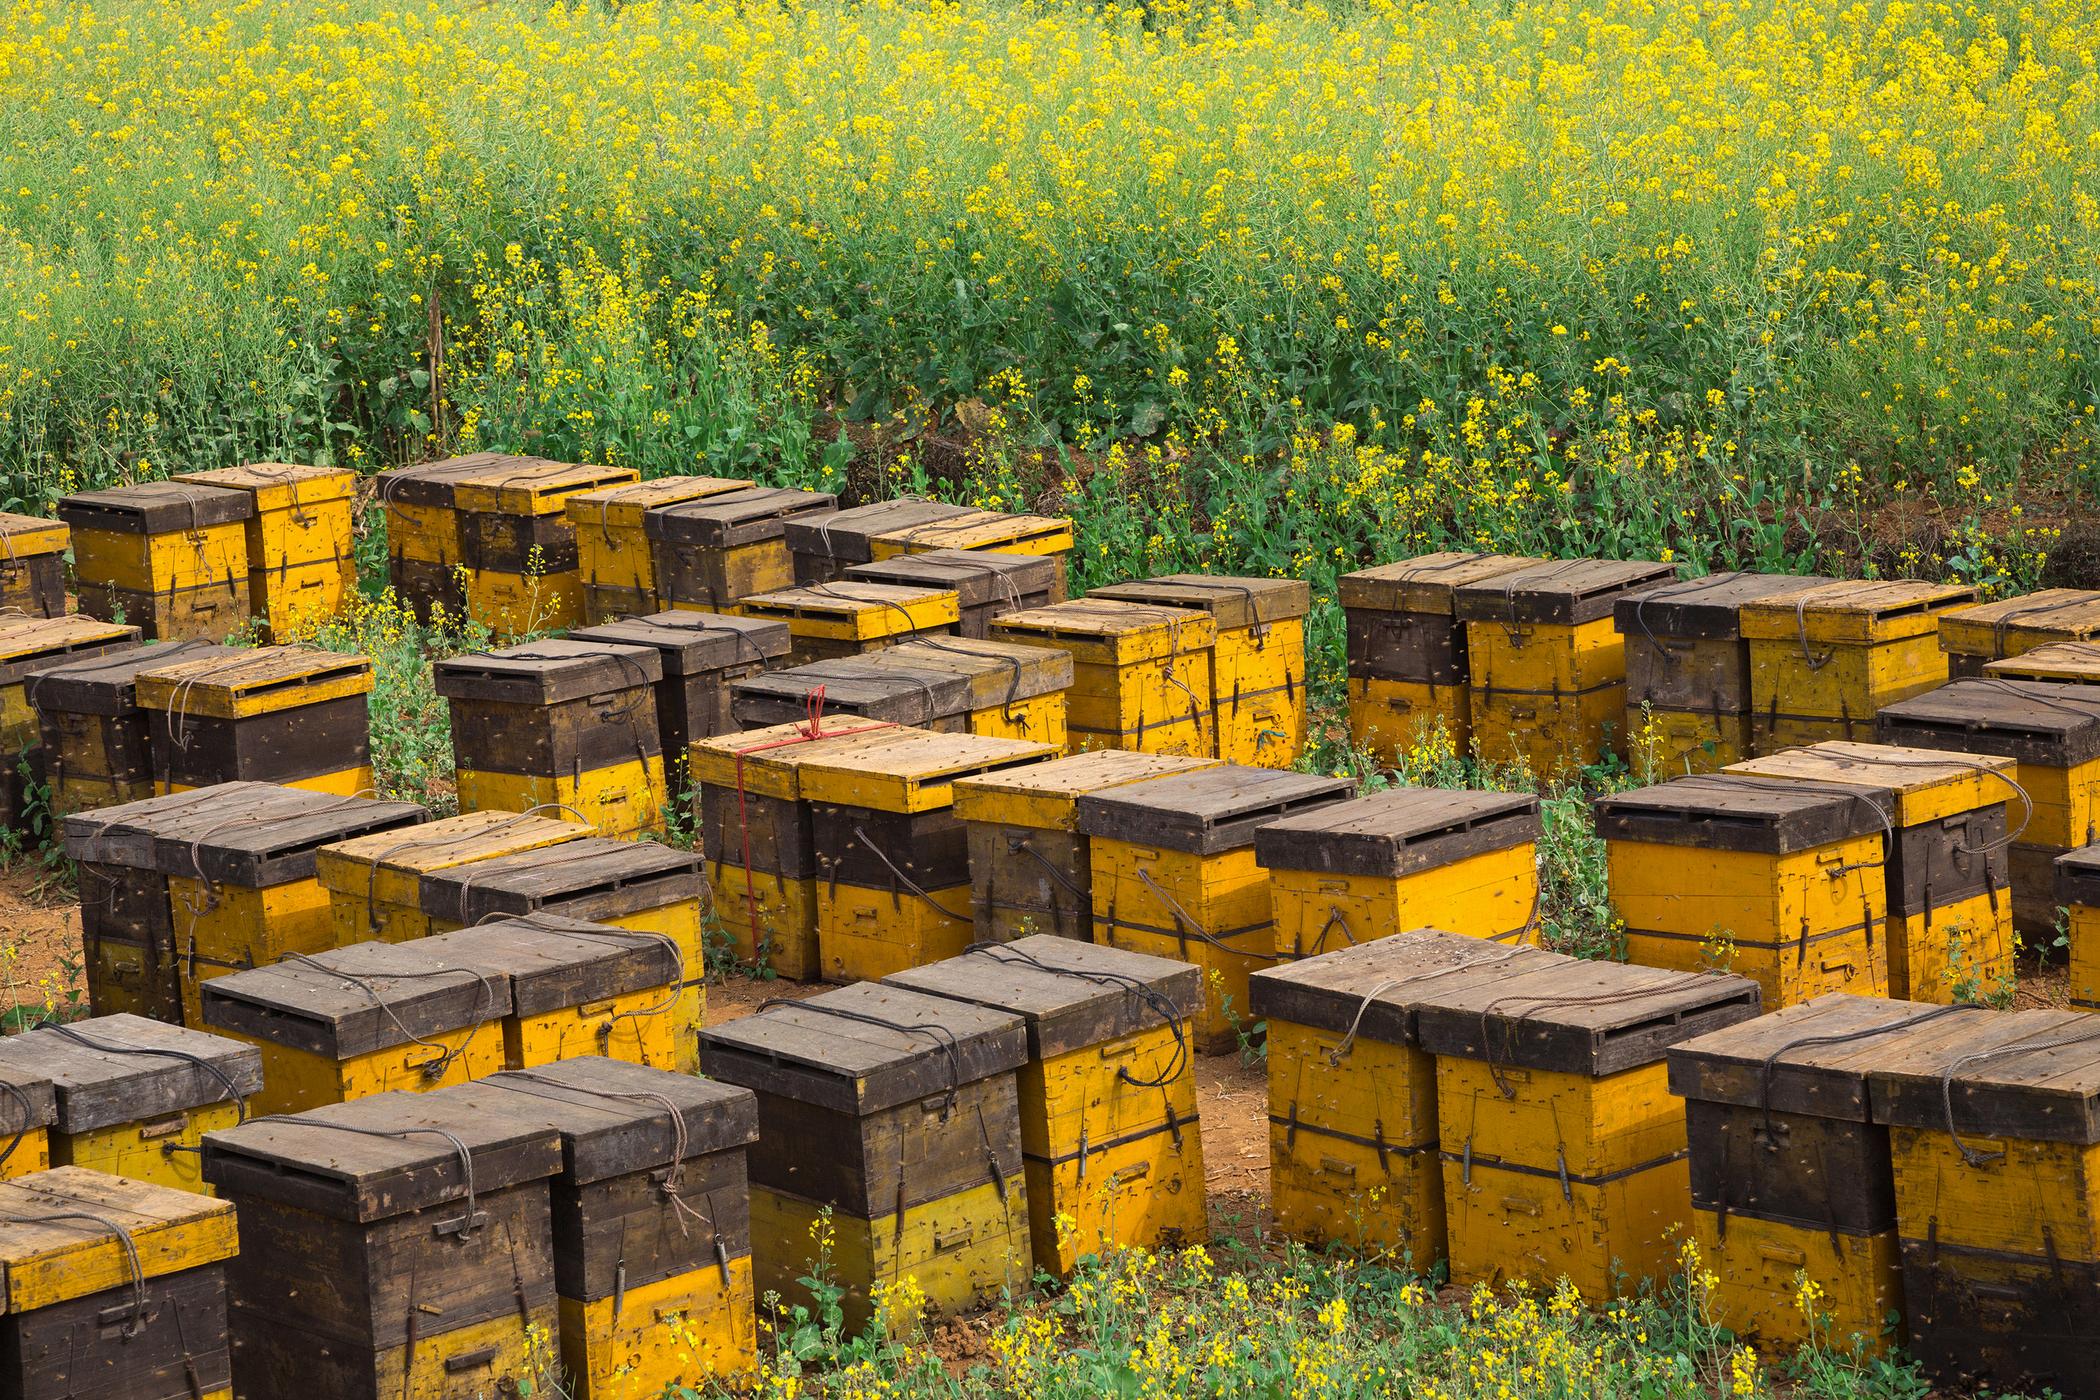
1.Solitary bees play a vital role in pollinating crops and flowers, yet many lack safe places to nest. By designing and laser-cutting custom bee nesting boxes, students can help provide habitatsfortheseimportantpollinators.
2. These boxes are made with hollow tubes or drilled holes sized for different bee species, keepingthemsafefrompredatorsandextremeweather
3. This hands-on project teaches students how design and engineering can support biodiversityandconservation.
Readthescenariotogether.Explainthatstudentsarehelpingabeekeeperbydesigningabee nesting box where solitary bees can safely lay eggsEmphasize that the goal is to create a design that supports pollination and protects bees. Encourage them to consider what featureswillattractbeesandkeepthemsafe.
Havestudentscheckthe“MeasureYourSuccess”sectiontoconfirmtheirnestingboxmeetsall requirements:correctnumberandsizeofholes,securestructure,andsuitablematerials Test the design by reviewing whether it would offer enough space and protection for different solitarybeespecies.
Pair up students and let them review each other’s designs Each student should share one thing they like and one suggestion to improve the box (e.g., more stable structure, better spacingofholes).Encouragethemtorefinethedesigntobettermeettheneedsofbeesand supportpollination
--EndofSession1--
LearningActivities(Session2)
Have students check if their design includes holes that are the correct size and spacing for solitary bees to enter Remind them to confirm the holes connect to the nesting tubes inside and that the front panel fits securely onto the box. If possible, test the fit of bamboo or cardboardtubestoensuretheyarestableandprovideadequatenestingspace.
Ask students to pair up and show each other their designs. Each student should identify one thingthatworkswellintheirpartner’sdesign(e.g.,goodholelayout,strongattachment)and suggest one improvement (eg, better spacing, stronger material) Encourage respectful feedbackfocusedonbeesafetyandnestingsuccess
2.Check that the laser cutter is set up, calibrated, and safety-tested before class. Make sure thecuttingbediscleanandaligned.
3. Prepare the approved material sheets (eg, 3mm plywood, acrylic, or cardboard) cut to standardsizesthatfitthemachine’sworkingarea.
4. Print and display the laser cutter safety rules in the classroom. Review emergency stop proceduresandensurethatsafetygogglesareavailableforallstudents
7. Test the file-to-machine workflow (exporting from CAD to laser cutter software) to avoid technicalissuesduringclass.
LearningActivities(Session1)
1. Introduce students to how libraries can promote justice through the books they display Explain that literature can inspire social awareness and critical thinking on moral and ethical issues.
2.Tellstudentstheywilldesignandlasercutsymbolicbookendsthathighlightjustice-themed literature
3. These bookends can help attract readers' attention and encourage them to explore powerfulideas.
Have students check that their bookends meet the “Measure Your Success” criteria: flat-pack construction, easy assembly, stable enough to hold books upright, and designed with a justice-relatedtheme Encouragethemtotestthefit,balance,andvisibilityoftheirdesignnext toarowofbooks.
Pair students to present and test each other’s bookends Each student should give one compliment and one improvement suggestion. Ask them to focus on how well the design communicatesamessage,howsturdyitis,andhoweffectivelyitdrawsattentiontothebooks itsupports.Encourageiterationandrefinement. --EndofSession1--
Answers will vary based on the strength of each student’s design Students should test their bookends and add books until the bookend slips. Then, they should try tactics such as changingtheheightandaddingweighttotheirbookendtoimprovetheirperformance.
ANSWER2
The force of friction opposes the weight of the books pressing against the bookend The normalforceofthebooksistheweightofthebooks
1. Explain how mini looms can support traditional crafts and describe how accessible tools createincomeopportunitiesforwomenworkingfromhome.
2. Use CAD software to design a laser-cut mini loom that is lightweight, stable, and easy to assembleforweavingactivities
3.Assemble and test a mini loom prototype, evaluate its usability and weaving performance, andapplypeerfeedbacktoimprovecomfort,stability,andefficiency.
Materials
Vocabulary
Loom
Microgrant
Weaving
Adeviceusedforweavingthreadsintofabric
A small amount of funding given to individuals or organizationstosupportprojectsorinitiatives
2.Check that the laser cutter is set up, calibrated, and safety-tested before class. Make sure thecuttingbediscleanandaligned
3. Prepare the approved material sheets (e.g., 3mm plywood, acrylic, or cardboard) cut to standardsizesthatfitthemachine’sworkingarea.
4. Print and display the laser cutter safety rules in the classroom Review emergency stop proceduresandensurethatsafetygogglesareavailableforallstudents.
2.Ask students to think about the features that would make a loom useful for beginners and easytoassemble.Discussconsiderationslikeportability,simplicity,andhowthetoolsupports productivity
Askstudentstoassembletheirminiloomandtestitsstabilityandusability Cantheloomhold thread under tension without bending or sliding? Does the spacing make it easy to weave evenly?Encouragethemtoactuallytryweavingafewlinestoassessperformance.
Have students pair up and review each other’s loom designs Each should give one complimentandonesuggestionforimprovement.Guidestudentstoconsidercomfortofuse, weaving clarity, and how easy the loom is to assemble or store. Suggest small adjustments thatcouldimproveweavingqualityorefficiency
Pairstudentstogivefeedbackoneachother’sloomdesigns.Eachstudentshouldnameone strength and one idea for improvement. Ask them to reflect on which features helped with weavingormadetheloommoreappealing Encouragestudentstorevisetheirdesignbased ontestresultsandpeersuggestions
AnswerKey
MATHANDSCIENCECONNECTION
ANSWER1
a.
--EndofSession2--
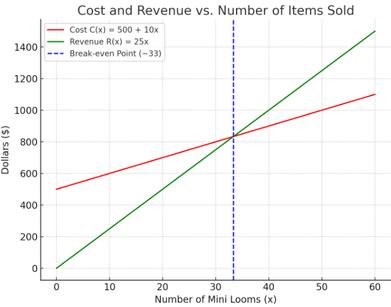
b.From the graph, the business breaks even (when cost equals revenue) at around 33 items sold.
e.Toincreaserevenue,reducingthecostperitemmaybemorepracticalthanraisingprices. Higher prices might reduce demand, while lowering production costs can increase profit marginswithoutaffectingsales
Reflection
Mini-looms offer a way for women and caregivers to generate sustainable income from home, supporting local economies and creating access to dignifiedandflexiblework.
Engineers, designers, and educators can develop affordable, scalable loom designs, support local training, and promote entrepreneurship, especially in underservedcommunities.
Project15:LivestockFeeder
LessonPlan
LearningObjectives
Attheendofthelesson,thelearnerswill:
Duration: 90minutes
1. Explain why consistent feeding is important for livestock health and describe how modular, laser-cutfeederssupportsustainableagriculture.
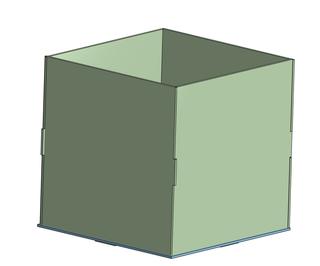
2.Use CAD software to design a flat-pack livestock feeder with interlocking joinery that allows foreasyassembly,disassembly,andefficientfeedflow
3. Assemble and test a feeder prototype, evaluate its stability and dispensing function, and applypeerfeedbacktoimprovedurability,usability,andshippingefficiency.
Materials
Vocabulary
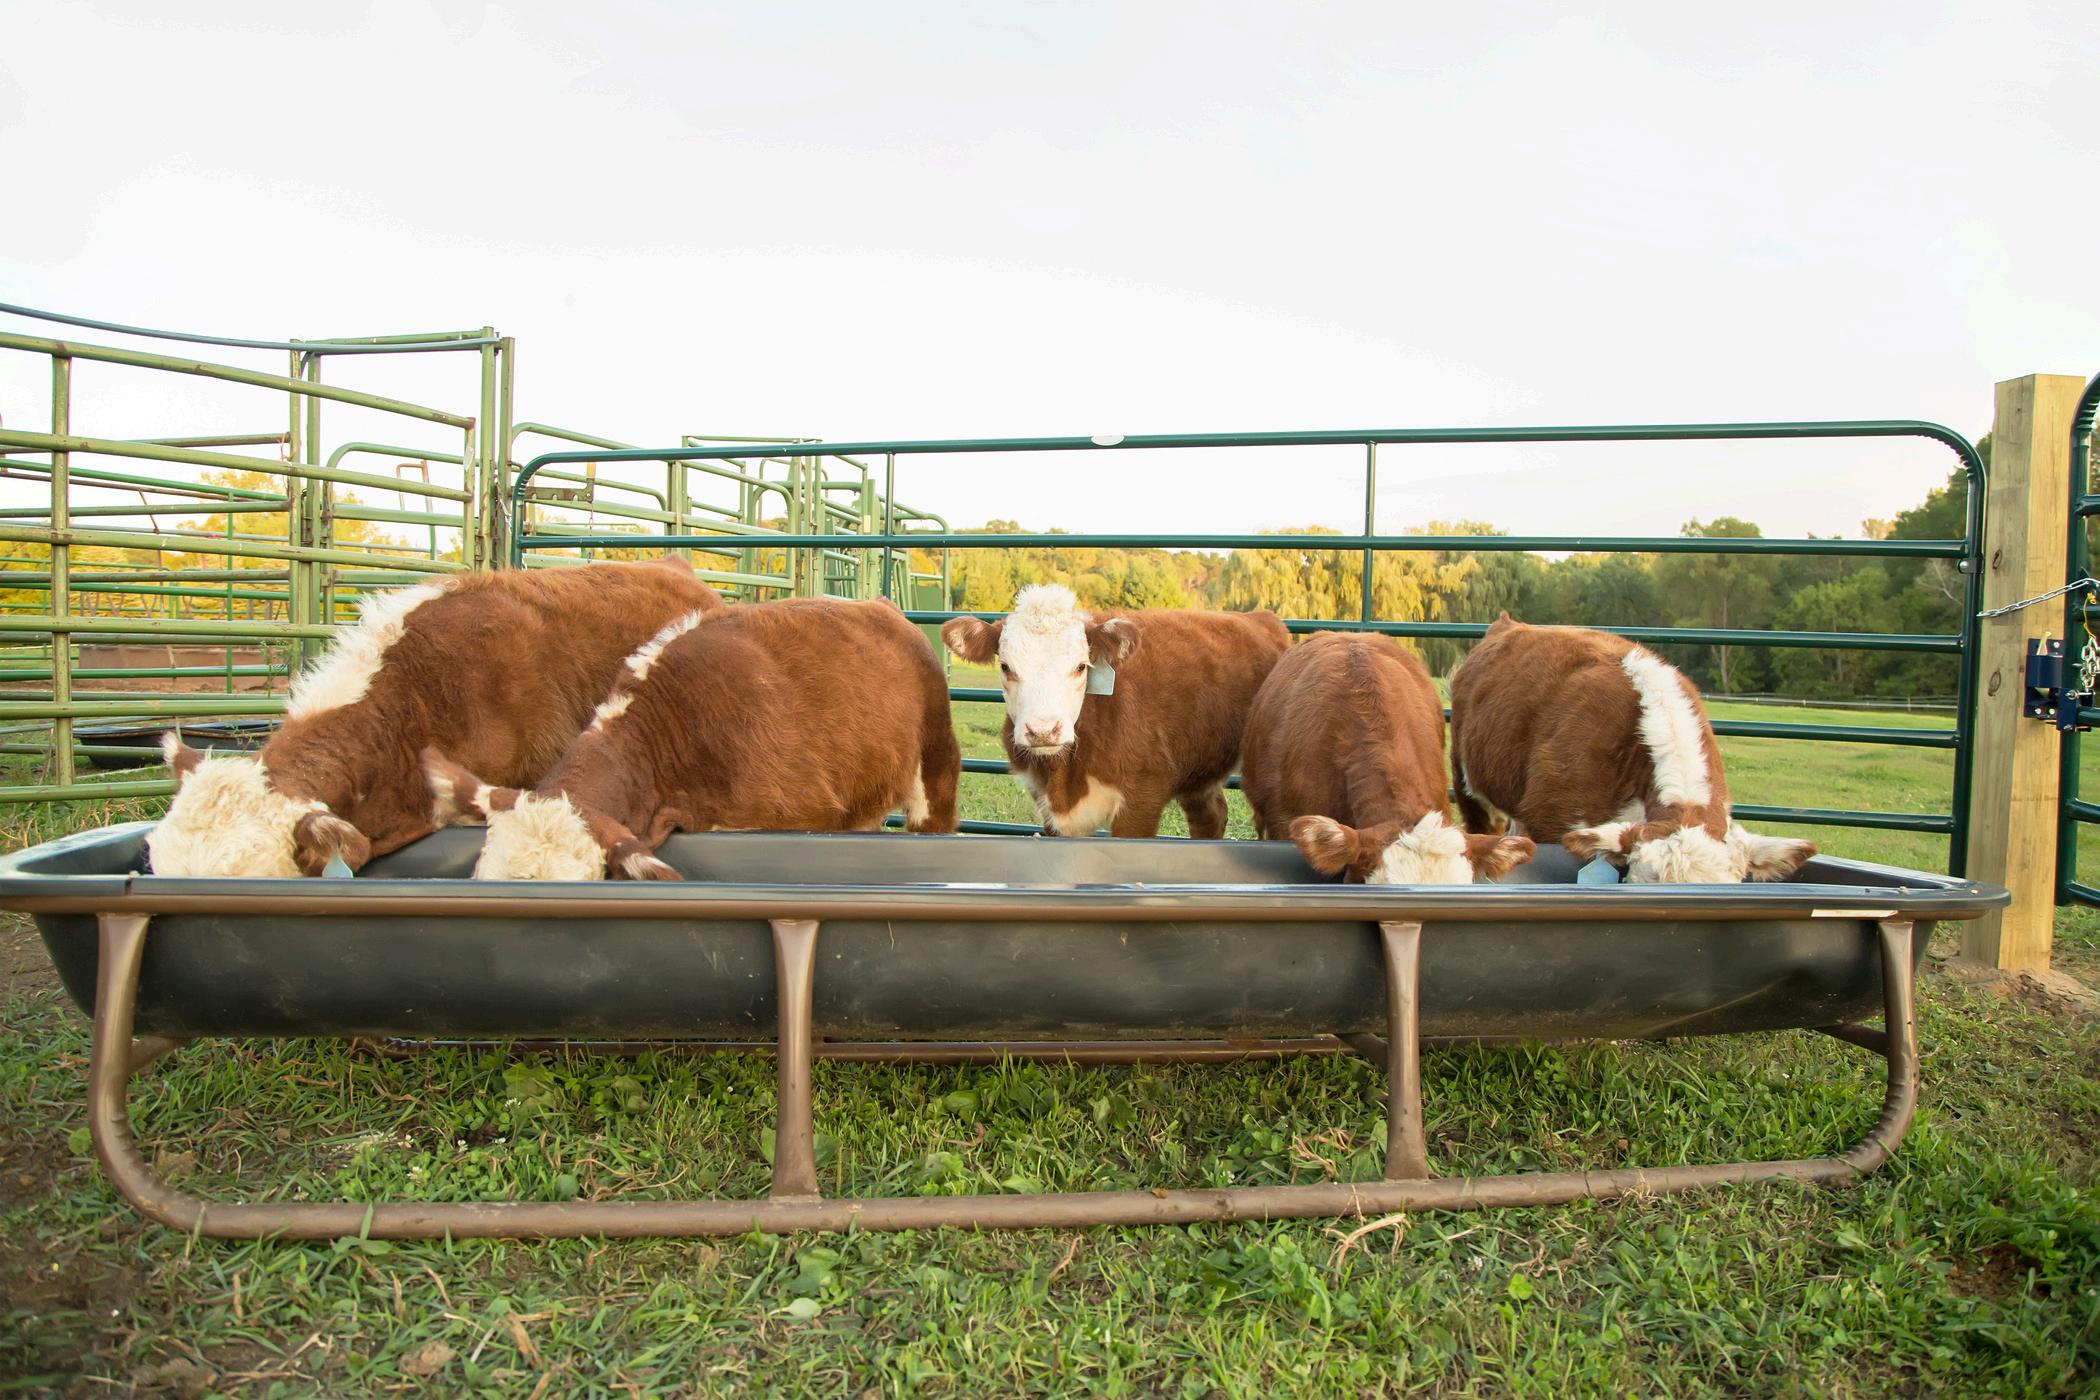
Livestock
Forum
Farm animals raised for food, work, or other agricultural purposes,suchascows,sheep,andchickens
A space, online or in person, where people discuss topics, shareideas,orexchangeinformation
2.Check that the laser cutter is set up, calibrated, and safety-tested before class. Make sure thecuttingbediscleanandaligned
3. Prepare the approved material sheets (e.g., 3mm plywood, acrylic, or cardboard) cut to standardsizesthatfitthemachine’sworkingarea.
4. Print and display the laser cutter safety rules in the classroom Review emergency stop proceduresandensurethatsafetygogglesareavailableforallstudents.
2.Ask students to think about what makes a feeder efficient, easy to assemble, and reliable Discusshowlasercuttingcanhelpachieveconsistentperformancewhileminimizingmaterial wasteandcost.
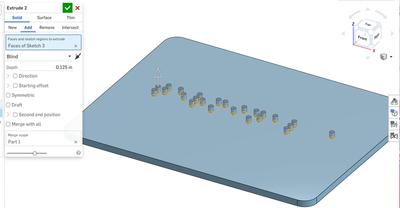
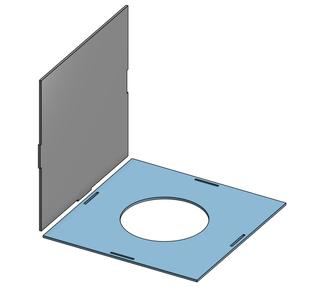
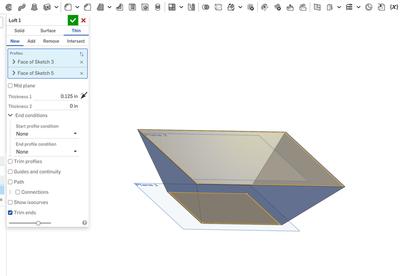
Createabaseforthetroughwithaholeforthefeedtoexitandslotsforthesidestonotch into Usethecircularpatterntooltomaketheslots
Ask students to assemble their feeder prototypes and test the feed dispensing function Can thefeederholdandreleasedrymaterialslikepelletsevenly?
Checkthatallpartsfitsecurelyandthedesigncanbedisassembledforshipping.Encourage studentstoobservetherateoffeedreleaseandwhetherthestructureremainsstableduring use
Focus on functionality, ease of use, and how well the feeder can be shipped flat Suggest modificationsthatimprovefeedflow,durability,oreaseofassembly.
LearningActivities(Session2)
Have students refer to the “Measure Your Success” section and test their trough design by pouringgrainintothefeeder Askthemtoobservewhetherthegrainexitssmoothlyandlands inthetroughwithoutspilling Havethemcheckifthetroughcatchesenoughfeedforlivestock andwhetheritispositionedsecurely.Studentsshouldevaluatehowwellthetroughintegrates withthebottomplateandsupportsfeedingefficiency.
Pairstudentstogivefeedbackoneachother’stroughdesigns.Eachstudentshouldnameone strength and one idea for improvement. Ask them to reflect on how the grain flows through their design and if the livestock would easily access it Encourage students to revise their trough shape or placement based on test results and peer suggestions to improve feeding reliabilityandreducemess.
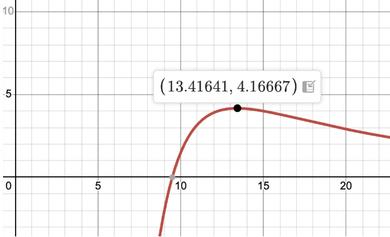
This means the feed is pouring out more slowly over time. This might represent a situation wherethefeedcontainerisrunningoutofmaterialorwheregravity/feedpressureisreduced overtime becomeslarger,sotheoverallrate decreases
Reflection
AssessmentGuide
At SKOOL21, assessments are a tool for learning and growth not just grading. From Pre-K to Grade 12, we use assessments to guide students in building skills, confidence, and a love of STEM learning. We focus on feedback, reflection, and continuousimprovementtohelpeverystudentreachtheirfullpotential.