
TEACHER GUIDE
STEM PROJECT THEMES:
Preface
Welcome to the STEM Innovators Handbook! This comprehensive guide is designed to ignite the spark of curiosity and empower young learners to become the problem-solvers and innovators of the future. Built upon the foundation of the Cambridge Science Curriculum, Next Generation Science Standards, and Common Core Mathematics, this handbook seamlessly integrates science, technology, engineering, and mathematics to provide a holistic learning experience.
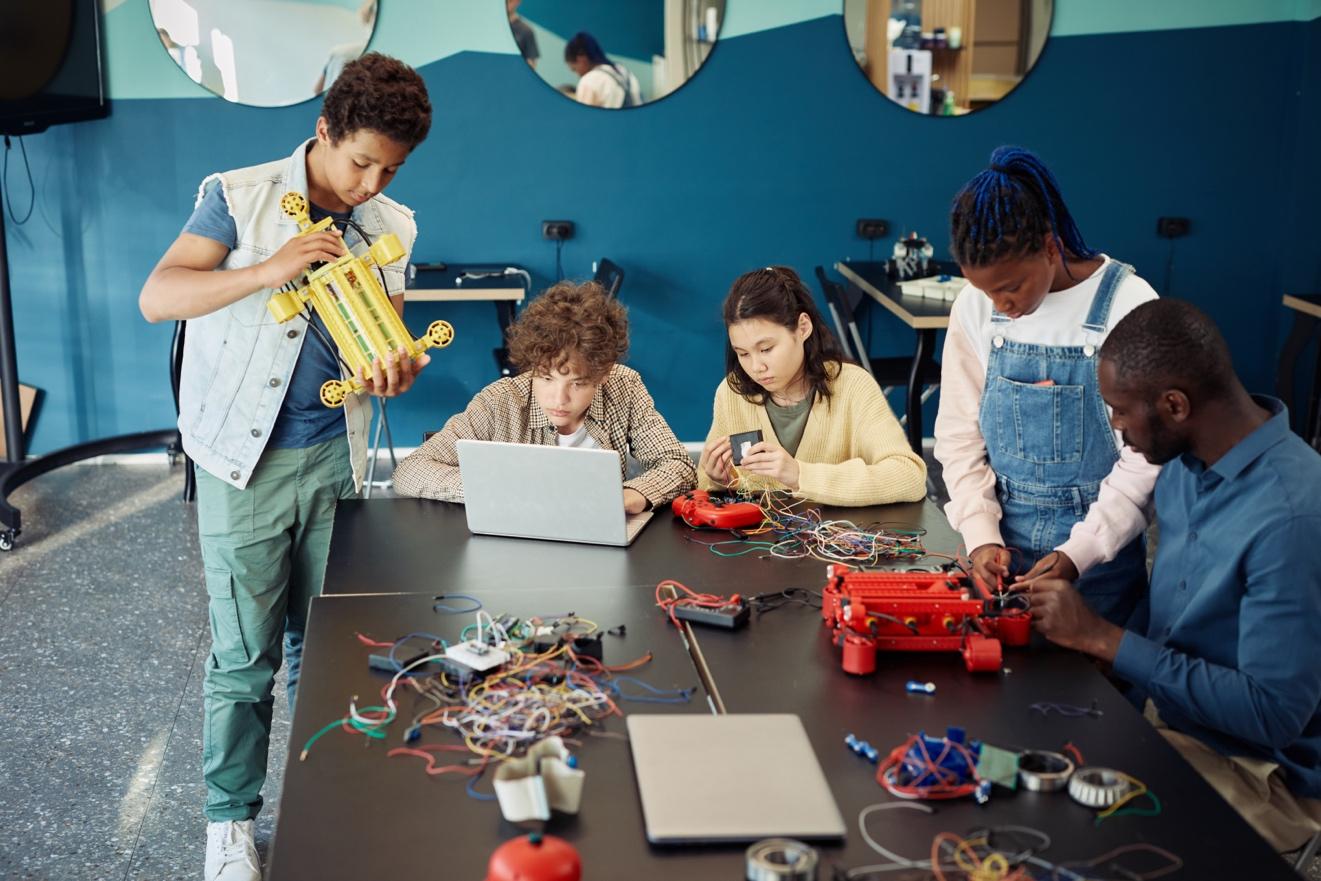
In today's rapidly changing world, it is crucial for students to develop a strong foundation in STEM disciplines and cultivate the skills necessary to tackle the complex challenges facing humanity. By exploring STEM principles in a hands-on and practical manner, students can reinforce their classroom learning and connect it to real-world problems. Each project presented in this handbook has been carefully crafted to reinforce core concepts learned in the classroom. From building circuits to constructing models, from coding programs to designing experiments, these projects provide a platform for learners to engage in experiential learning and develop a maker mindset.
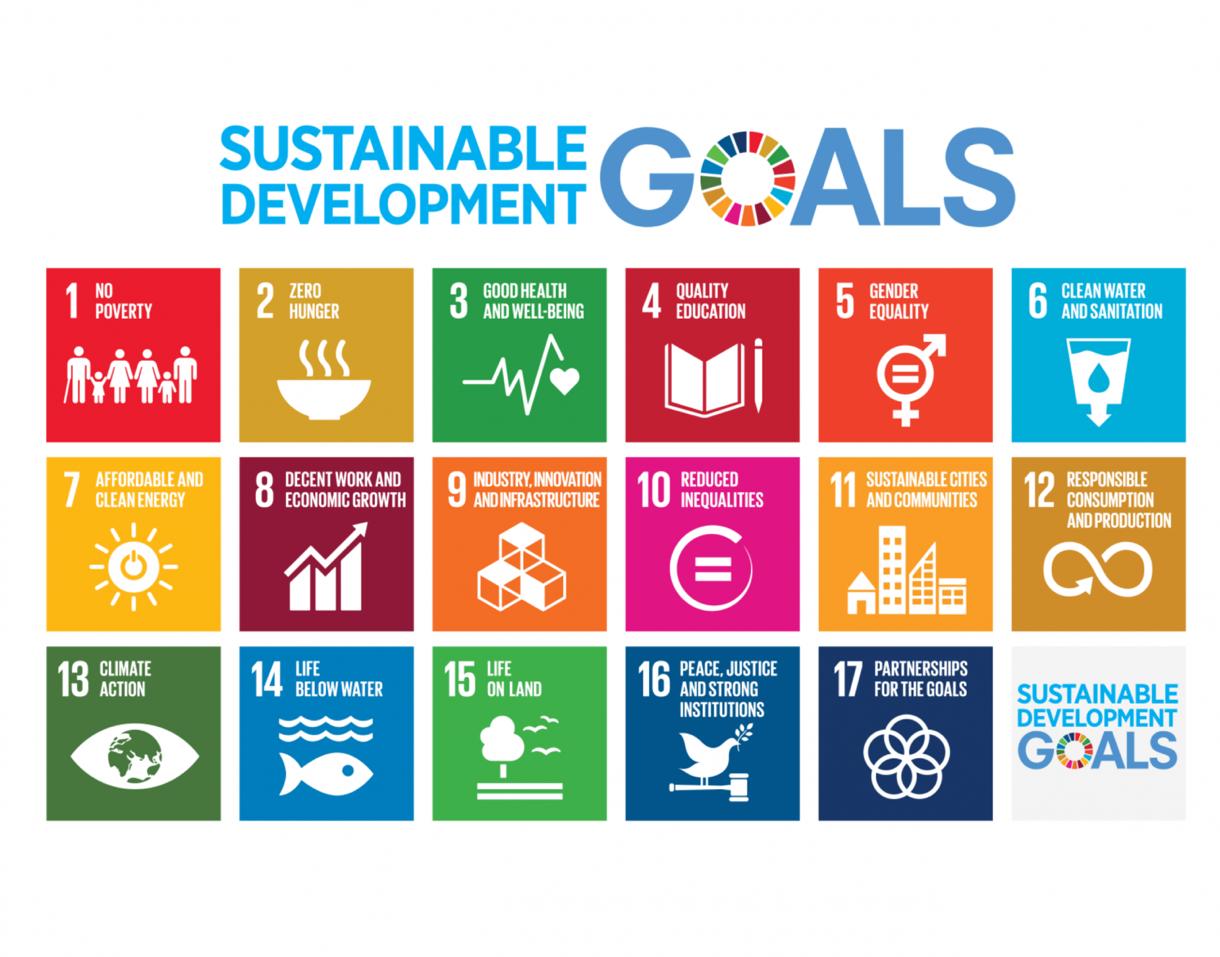
Furthermore, this handbook goes beyond traditional subject boundaries by connecting the projects to the United Nations Sustainable Development Goals (SDGs). By fostering an understanding of the SDGs and encouraging learners to reflect on their projects, we aim to instil a sense of purpose and inspire young innovators to create solutions that contribute to a sustainable future. The projects in this handbook encourage learners to think critically about the societal and environmental challenges we face and how their innovative ideas can make a positive impact.
One of the key objectives of this handbook is to develop technological literacy. By engaging with technology and exploring its applications, learners gain essential skills for the digital age. Through coding, robotics, data analysis, and other technological tools, students develop the confidence and competence to navigate the ever-evolving technological landscape. As learners progress through the projects in this handbook, they will develop problemsolving skills, critical thinking abilities, collaboration, and creativity. The process of designing, testing, and iterating will become second nature, empowering students to approach challenges with resilience and adaptability.
We invite educators, parents, and students to embark on this exciting journey of exploration and innovation. Together, let us nurture the STEM innovators of tomorrow equipped with the knowledge, skills, and passion to shape a sustainable future for all. May this handbook be your guide to unlocking the vast potential within each young mind and inspiring them to make a difference in our world.
Happy innovating!
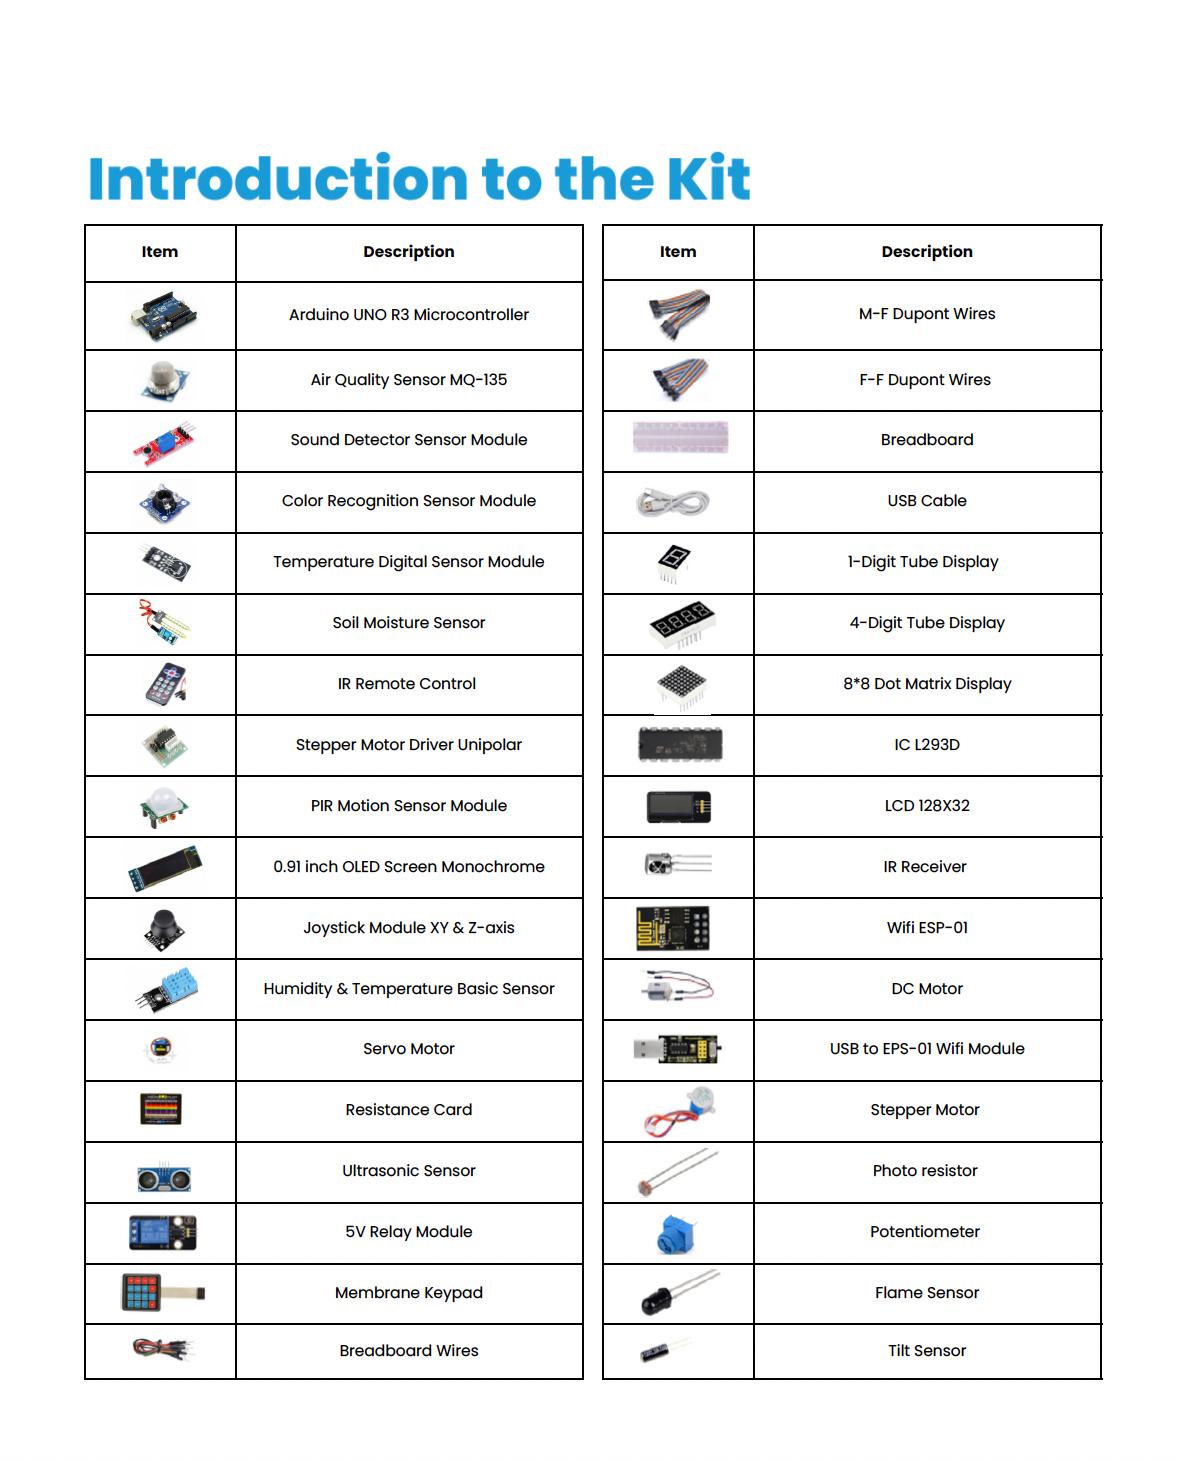
Introduction to the Kit
3D Printing Starter Guide
App


Game Development Starter Guide

Understanding the Structure of the Project
Alignment with the Sustainable Development Goals

NGSS Curriculum Linkage
Cambridge Science Curriculum Linkage
Technology Connection
Engineering Connection
Common Core for Mathematics Curriculum Linkage

Learning tools to use of the project.
Learning outcomes of the project.
Introduction to the project.

List of Materials requirement to complete the project.
Steps to follow to complete the project.


Curricular assessment for reinforcing core concepts.
Reflection is for the student to link back their learning to solving this particular sustainable development goal.

Alignment of Sustainable Development Goals
Sustainable Development Goals (SDGs) are a set of 17 global goals adopted by all United better and more sustainable future for all. Each goal has specific targets to be achieved by being for all at

Ensure inclusive and equitable quality education and learning opportunities for all.
Achieve gender equality and empower all women and
Ensure access to affordable, reliable, sustainable, and
Promote sustained, inclusive, and sustainable economic growth, full and productive employment,
Build resilient infrastructure, promote inclusive and sustainable industrialization, and foster innovation.
Take urgent action to combat climate change and its marine resources for sustainable development.
Protect, restore, and promote sustainable use of terrestrial ecosystems, halt deforestation, and desertification and biodiversity loss.
Promote peaceful and inclusive societies for sustainable development, provide access to justice for all, and build effective, accountable, and inclusive institutions at all levels.
Partnerships for Strengthen the means of implementation and revitalize the Global Partnership for Sustainable Development.
Now, let's see how the students' projects can be linked to these SDGs:
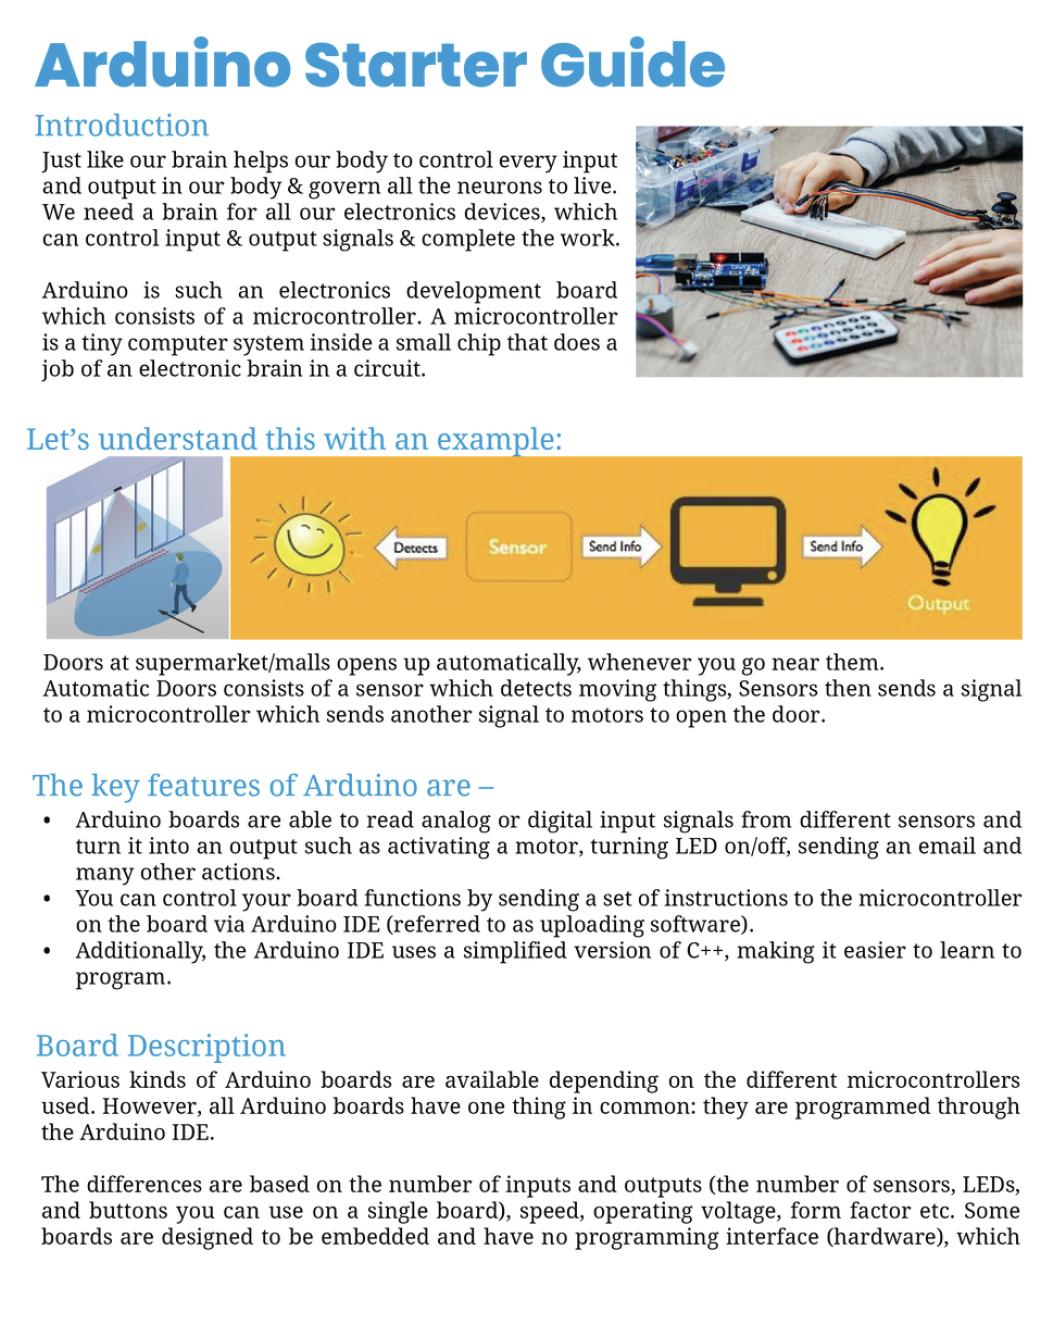
When students design projects using Arduino, Tinkercad, MIT App Inventor, and code.org for game development, they can focus on creating solutions that tackle real-world problems related to sustainable development. For example, they could create smart home systems that conserve energy (SDG 7 - Affordable and Clean Energy) or design a game that educates players about sustainable consumption and production (SDG 12 - Responsible Consumption and Production).
In DIY science materials projects, students can explore eco-friendly materials and develop alternatives to single-use plastics or other harmful materials, contributing to SDG 12 (Responsible Consumption and Production) and SDG 14 (Life Below Water).
Linking their projects to specific SDGs requires critical thinking and understanding of the global challenges we face today. For instance, students could create an app that helps raise awareness about endangered species and the importance of biodiversity conservation (SDG 15 - Life on Land).
Students can also focus on projects that address local community needs and align them with relevant SDGs. For instance, they might develop a water monitoring system to improve access to clean water in their community, which supports SDG 6 (Clean Water and Sanitation).
Encouraging students to consider the SDGs when designing their projects will help them understand the broader context of their work and how their technological and scientific skills can contribute to building a more sustainable and equitable world. This approach also empowers them to become responsible global citizens who actively engage with the challenges facing our planet.
Requirements for the makerspace
Creating an effective makerspace for conducting the STEM Innovators handbook projects requires careful consideration of the necessary equipment and space requirements. Here's a list of the essential items and recommended space allocation for the makerspace:
Computers
Internet Access
Arduino Kits
3D Design Tools
App Development Tools
The makerspace should be equipped with an adequate number of computers to support the use of digital tools like Tinkercad, MIT App Inventor, and code.org for game development. Depending on the number of students participating simultaneously, a computer-tostudent ratio of 1:3 or 1:4 is recommended.
A reliable internet connection is crucial for accessing online resources, software updates, and project research. Ensure that the internet connection is fast and stable to accommodate multiple users.
Since the projects involve using Arduino, it's essential to have a sufficient number of Arduino kits and accessories, such as sensors, motors, and breadboards. Aim for a ratio of at least 1 Arduino kit per 3-4 students to facilitate collaborative work.
For 3D design using Tinkercad, students will need access to design software and a 3D printer. Make sure the 3D printer(s) are in good working condition and capable of handling the complexity of the students' designs.
Provide access to computers and mobile devices for app development using MIT App Inventor. If possible, offer Android and iOS devices to allow students to test their apps on both platforms.
Game Development Tools
Tables and Chairs
Multimedia Resources
Storage Solutions
Safety and Prototyping Area
Access to computers and internet-enabled devices will be required for game development using code.org.
Arrange sturdy tables and comfortable chairs that accommodate individual and group work. Adjustable chairs are preferred, as they cater to students of different heights.
Install multimedia resources, such as projectors or smartboards, to facilitate presentations and demonstrations during project sharing and discussions.
Incorporate storage areas or cabinets to organize the tools, equipment, and student projects properly.
Allocate a designated space for hands-on work, prototyping, and experimenting. This area should have safety equipment, like safety goggles and fire extinguishers, as well as tools for cutting, soldering, and assembling projects.
Recommended Space Allocation:
The ideal size of the makerspace depends on the number of students and the available budget. However, a general guideline is to allocate at least 20-30 square feet per student. For example, if the makerspace is intended to accommodate 20 students, the total space required would be approximately 400-600 square feet.
Additionally, consider the layout to ensure an open and flexible environment that promotes collaboration and creativity. Create different zones for different activities, such as a computer station, 3D printing area, and prototyping space. Also, leave some space for group discussions and project presentations.
Lastly, consider the availability of power outlets and proper ventilation to support the equipment and ensure the comfort of the students and teachers in the makerspace.
Scheme of Work
Week
Resources Activity
Apply ratio and proportional reasoning to solve plantrelated math problems. ratios.
Week 1: Understanding
Explore the MIT App about the different parts of a plant and their
Design the interface of the plant parts app. Research and gather information on plant
Create interactive screens for different plant parts in
Integrate images and information related to
Test the app and gather
the concept of ratio and proportion using plant stem lengths. Develop math problems related to plant stem ratios.
Finalize the app, practice solving math problems, and test the app.
Present the app and discuss how it promotes understanding of plant
Sustainable Development
Week 1: Lung Structure
Introduce the DIY model for lungs using a plastic
Learn about the structure and function of the lungs in the respiratory system.
respiratory and circulatory systems. Apply ratio and proportional reasoning to solve lungrelated math problems. about lung structure and function. Math problems related to lung capacity ratios.
Week 2: Interactions and Adaptations
Construct the lung model and demonstrate its basic operation. 5
Discuss the interaction between the respiratory and circulatory systems. Explore the adaptations of lung tissues for efficient gas exchange. Test the lung model and observe its operation.
Week 3: Math
Application and Presentation
Introduce the concept of ratios in the context of lung capacity.
Develop math problems related to lung capacity and ratios.
Practice solving math problems and calculate lung capacity ratios. Present the lung model, discuss its significance, and connect it to Sustainable Development Goal 3.
Week 1: Hygiene and Disease Prevention
Introduce the concept of hygiene and its role in ease prevention. Explore the Arduino
Discuss potential impacts of effective hygiene practices on health and
Week 2: Developing the Touchless Hand Sanitizer
Learn about Arduino components and their
touchless hand sanitizer dispenser using Arduino. Test the dispenser and
Week 3: Reflection and
Understand the structure of an atom.
Explore 3D design tools and their applications.
3D design tools like Tinkercad,
Reflect on the design and functionality of the touchless hand sanitizer. Discuss the relationship between hygiene practices and disease prevention. Present the touchless hand sanitizer project and its contribution to Sustainable Development Goal 3.
Week 1: Atomic Structure
Basics
Introduce the concept of atoms and their components. Explore 3D design tools such as Tinkercad.
Begin designing the 3D model of an atom.
Week 2: Design and Construction
Continue designing and refining the 3D atom model.
Discuss the significance of understanding atomic structure for technology
and its relevance.
Analyze the relationship between substance properties and conductivity. bonds and conductivity.
Week 2: Conductivity
Experiments
Create an Arduino-based connectivity meter.
Test the conductivity of different solutions and collect data.
Analyze the data to identify patterns and relationships.
Week 3: Reflection and Presentation
Reflect on the relationship between substance properties and conductivity.
Discuss the importance of understanding conductivity for environmental monitoring.
Present the Arduino connectivity meter project and its contribution to Sustainable Development Goal 14.
Week 1: Chemical Changes and Reactions
Understand chemical changes and reactions.
Explore the concept of pH and acidity.
Analyze the impact of chemical changes on the environment.
Arduino pH sensor, materials for pH experiments, information about chemical changes and pH.
Introduce chemical changes and their characteristics.
Discuss the concept of pH and its measurement. Explore examples of chemical changes in everyday life.
Week 2: pH and AcidBase Reactions
Learn about the pH scale and its significance. Introduce the Arduinobased pH sensor.
Perform experiments to measure pH in different solutions.
Week 3: Reflection and Presentation
Reflect on the importance of understanding chemical changes and pH. Discuss the implications of pH on water quality and sanitation.
Present the Arduino pH sensor project and its
changes on the environment.
Understand the concept of energy transfer.
Explore the conservation of energy principle.
Analyze the applications of energy transfer in real-world scenarios.
Materials for constructing a Newton's Cradle, information about energy transfer and conservation.
of temperature measurement and control.
Discuss the implications of temperature changes on climate and environment.
Present the Arduino thermometer project and its contribution to Sustainable Development Goal 13.
Week 1: Energy Transfer
Basics
Introduce the concept of energy transfer.
Discuss the conservation of energy principle. Explore examples of energy transfer in daily life.
Week 2: Designing a Newton's Cradle
Learn about momentum and its relation to energy transfer.
Introduce the concept of Newton's Cradle.
Design and build a Newton's Cradle to demonstrate momentum.
Week 3: Reflection and Presentation
eflect on the significance of energy transfer and conservation.
Discuss real-world applications of energy transfer.
Present the Newton's Cradle project and its contribution to Sustainable Development Goal 12.
Week 1: Wave Properties
Introduce the concept of
Discuss the role of waves
Explore different types of
Week 2: 3D Design for a
Learn about sound waves and their transmission. Introduce 3D design tools for creating a sound
Design and build a 3D sound amplifier to demonstrate wave
Week 3: Reflection and
Reflect on the significance of wave properties and
Discuss the applications of wave amplification in
Present the 3D sound amplifier project and its contribution to Sustainable Development Goal 9.
28
Understand the properties of light waves.
Materials for constructing a pinhole camera,
Week 1: Properties of Light Waves
Introduce the properties of light waves.
Project 10: Light & Wave
information about light waves and image formation.
Discuss reflection and its role in vision and technology.
Explore the behavior of light waves in different media.
Week 2: Creating a Pinhole Camera
Learn about optics and the formation of images. Introduce the concept of pinhole cameras.
Design and build a pinhole camera to demonstrate image formation.
Week 3: Reflection and Presentation
Reflect on the significance of light wave properties and image formation. Discuss the applications of pinhole cameras in imaging technology. Present the pinhole camera project and its contribution to Sustainable Development Goal 9.
Week 1: Introduction to Motion
Introduce the concepts of motion, distance, speed, and time.
Discuss the importance of understanding motion in daily life.
Explore real-world examples of motion and its measurements.
Week 2: Creating a Motion Quiz App
Introduce the concept of app development for education.
Learn about the MIT App Inventor platform.
Design and build a motion-related quiz app for educational purposes.
Week 3: Reflection and Presentation
Reflect on the significance of motion concepts in education.
Understand concepts related to forces and motion.
Explore the relationships between force, mass, and acceleration.
Analyze the applications of force in
Materials for constructing a rubber bandpowered car, information about forces and energy.
Discuss how the quiz app promotes understanding of motion.
Present the motion quiz app project and its contribution to Sustainable Development Goal 4.
Week 1: Introduction to Forces
Introduce the concepts of force, mass, and acceleration.
Discuss Newton's laws of motion and their applications.
Explore real-world examples of forces and their effects.
Week 2: Designing a Rubber Band-Powered Car
Learn about kinetic and potential energy in the context of motion.
Introduce the concept of a rubber band-powered car.
Design and build a rubber band-powered car to demonstrate motion and energy transfer.
Week 3: Reflection and Presentation
38
39
and effects of static charge.
Analyze the applications of static electricity in daily life.
Explore real-world examples of static charge and its effects.
Week 2: DIY Static Electricity Experiments
Learn about DIY materials for static electricity experiments. Perform experiments to generate and observe static charge. Analyze the effects of static charge and its practical applications.
Week 3: Reflection and Presentation
Reflect on the significance of understanding static charge in technology.
Discuss real-world applications of static electricity.
Present the static electricity experiment project and its
Sustainable Development
Week 1: Introduction to
Introduce the concepts of magnetic
Discuss the properties and behavior of magnets. examples of magnetism and its applications.
Week 2: Investigating Magnetic Phenomena
Learn about different types of magnets and experiments to
Analyze the impacts of magnetism in technology
Week 3: Reflection and
Reflect on the significance technology and everyday life.
Discuss real-world applications of magnets and magnetic fields. Present the magnetism experiment project and its contribution to Sustainable Development Goal 9.
Week 1: Introduction to Space and Celestial
Introduce the concepts of lanets, and
Discuss the solar system and its components.
Week 2: Investigating
Learn about planetary gravity and its effects. experiments to differences in planetary
Analyze the behavior and characteristics of planets in the solar system.
Week 3: Reflection and
Reflect on the significance of space exploration and applications of space physics and research. Present the space physics experiment project and its contribution to Sustainable Development Goal 9.
Curriculum Mapping
S # Project
1 Project 1: Plant and Systems
Use App Developme nt to construct an application detailing parts of plants using MIT App Inventor.
MS-LS1-4: Use argument based on empirical evidence and scientific reasoning to support an explanation for how characteristi c animal behaviors and specialized plant structures affect the probability of successful reproductio n of animals and plants respectively .
Structure and function: Understand the structure and function of plants and animals.
7.RP: Analyze proportiona l relationship s and use them to solve realworld and mathematic al problems.
15 (Life on Land): Promote the sustainable use of terrestrial ecosystems and halt biodiversity loss.
2 Project 2: HUMAN ORGAN SYSTEM Use DIY tools to construct a model for the lungs.
MS-LS1-3: Use argument supported by evidence for how the body is a system of interacting subsystems composed of groups of cells.
Structure and function: Understand the structure and function of organs and organ systems.
7.RP: Analyze proportiona l relationship s and use them to solve realworld and mathematic al problems.
3 (Good Health and Well-being): Ensure healthy lives and promote well-being for all at all ages.
3
4
Project 3: HEALTHY LIFESTYLE
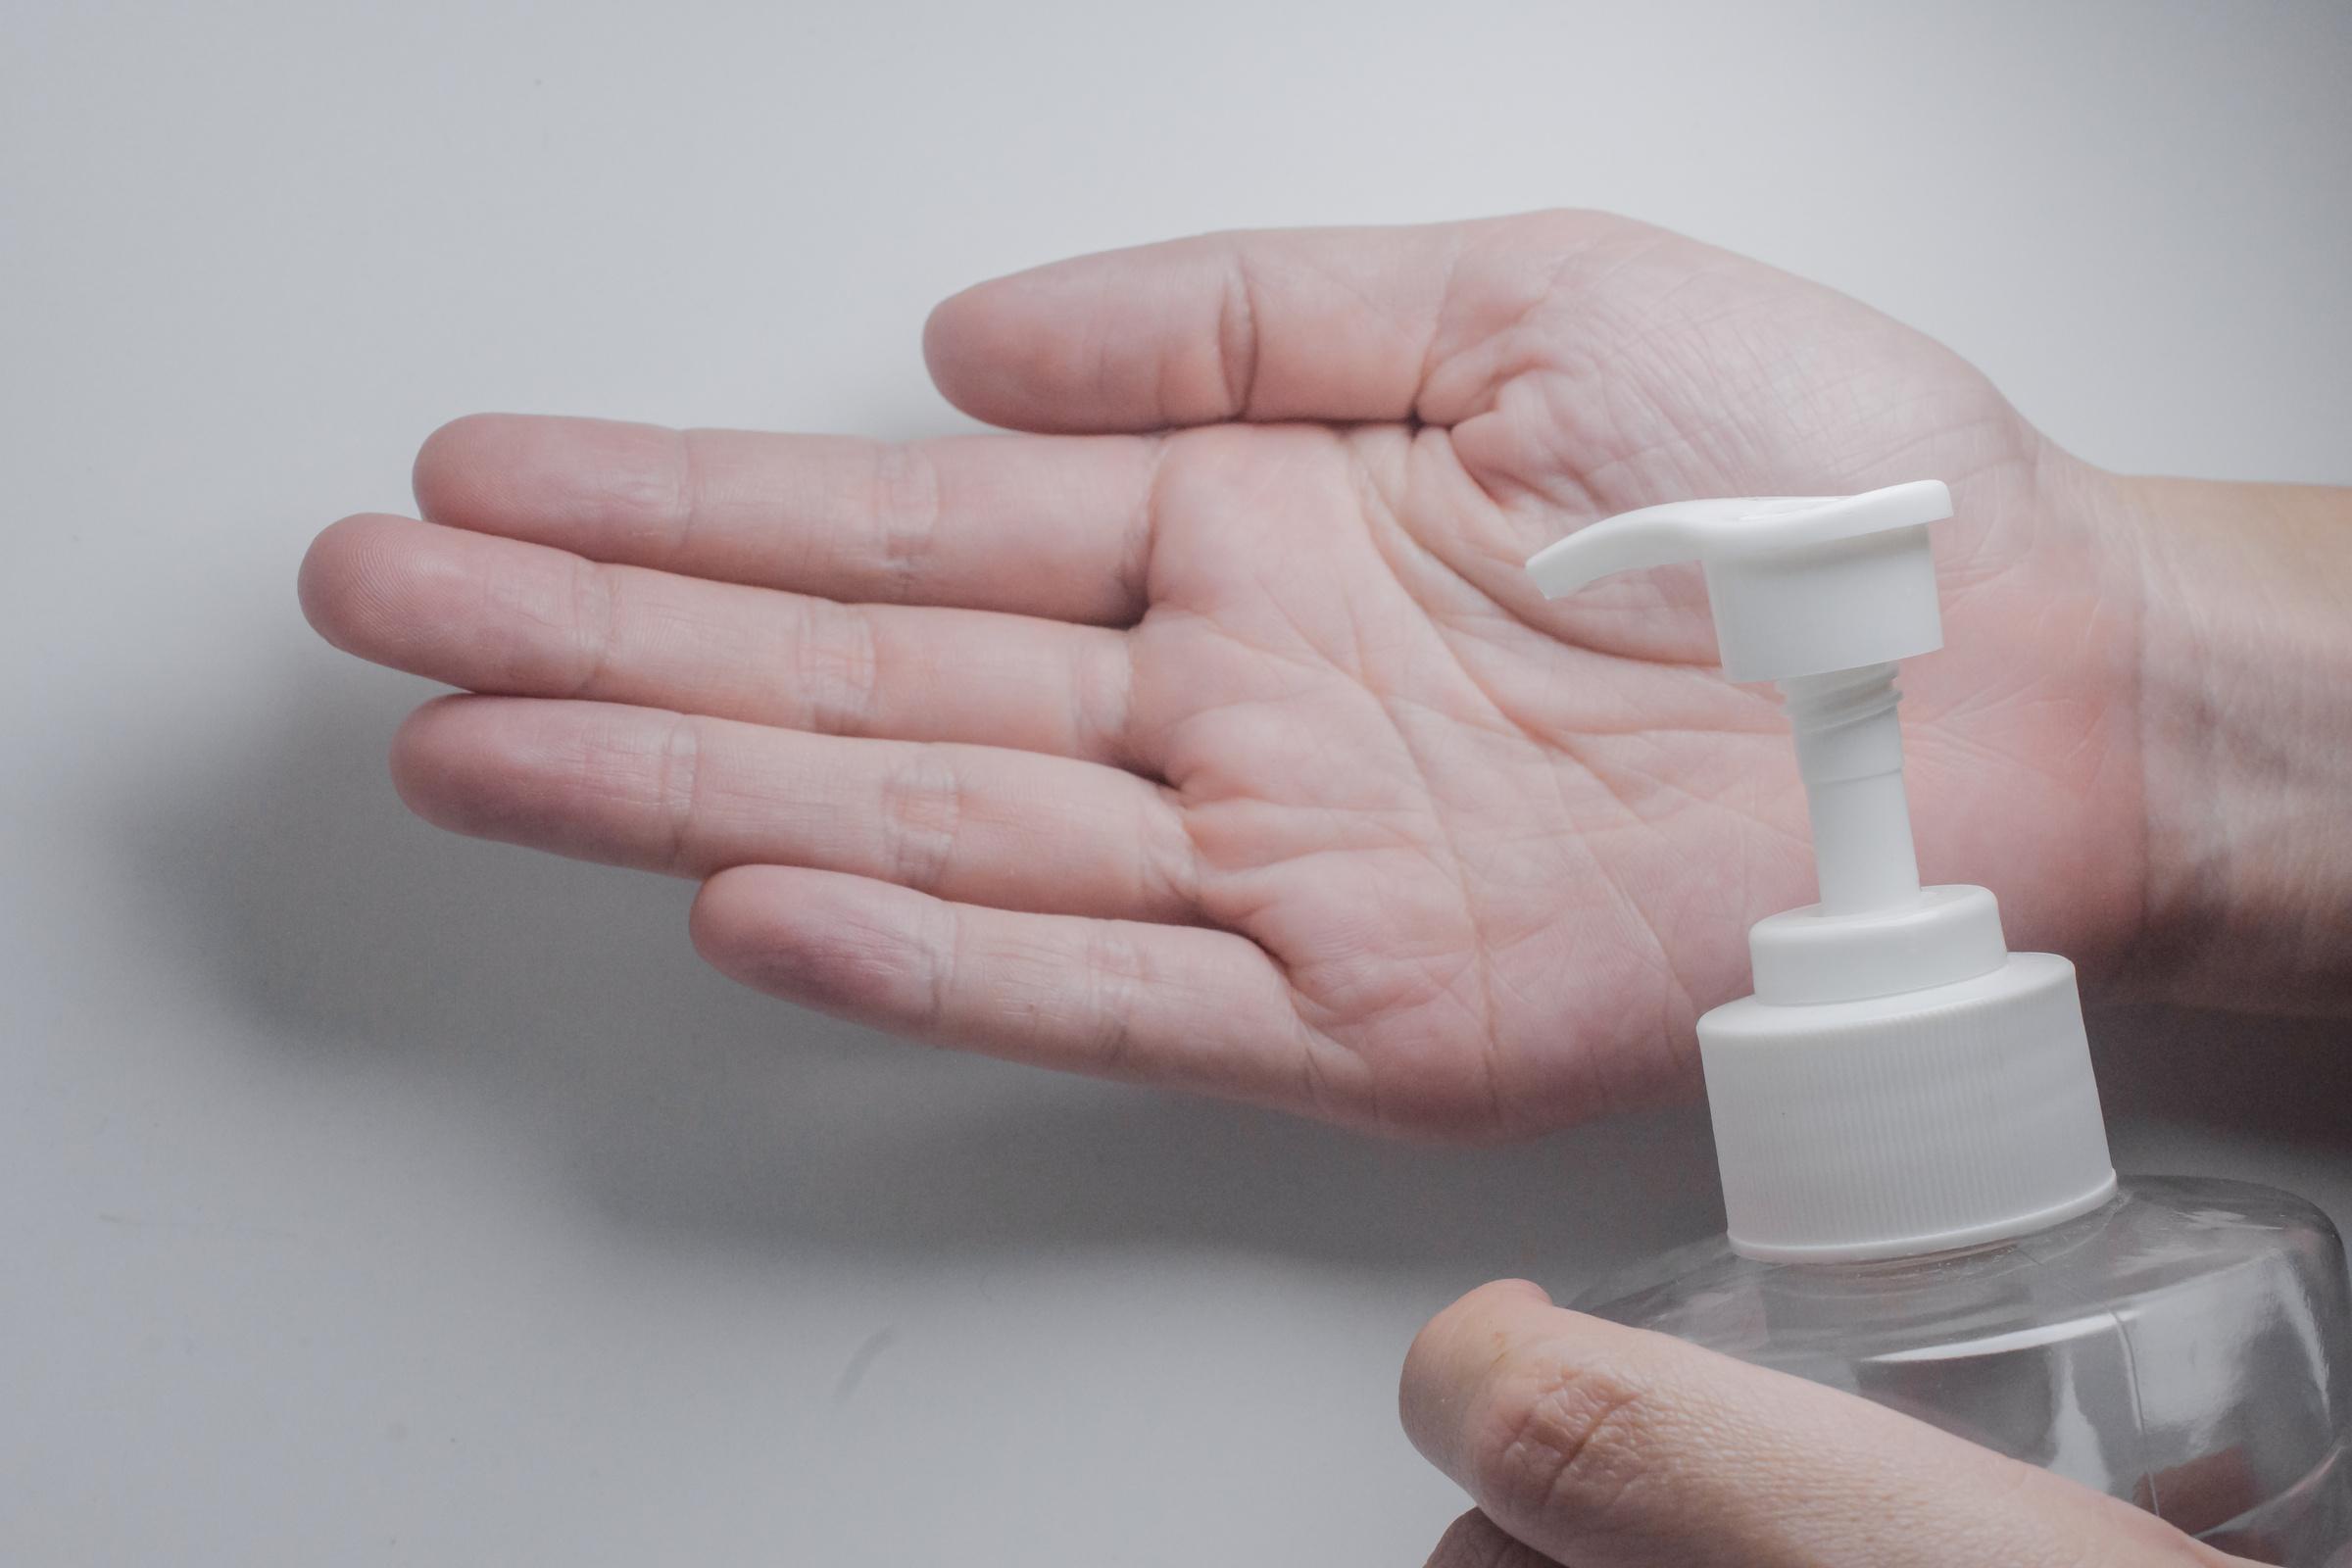
Develop a touchless hand sanitizer using Arduino.
MS-LS2-2: Construct an explanation that predicts patterns of interactions among organisms across multiple ecosystems. Life processes: Understand life processes and the interdepend ence of living organisms.
7.RP: Analyze proportiona l relationship s and use them to solve realworld and mathematic al problems.
3 (Good Health and Well-being): Ensure healthy lives and promote well-being for all at all ages.
5
Project 4: STRUCTURE OF AN ATOM Use 3D Design to construct an atom structure.
MS-PS1: Develop models to describe the atomic composition of simple molecules and extended structures.
Material properties: Investigate the properties of materials and their uses.
7.NS: Apply and extend previous understandi ngs of operations with fractions to add, subtract, multiply, and divide rational numbers.
9 (Industry, Innovation, and Infrastructur e): Build resilient infrastructur e, promote inclusive and sustainable industrializat ion, and foster innovation.
6
Project 5: CHEMICAL BONDS
Evaluate connectivit y in various solutions using Arduino and Electronics.
Project 6: CHEMICAL CHANGES Use Arduino with pH sensor to evaluate
MS-PS1-6: Undertake a design project to construct, test, and modify a device that either releases or absorbs thermal energy by chemical processes.
MS-PS1-2: Analyze and interpret data on the properties
Properties of materials: Investigate the properties of materials and their uses.
7.NS: Apply and extend previous understandi ngs of operations with fractions to add, subtract, multiply, and divide rational numbers.
14 (Life Below Water): Conserve and sustainably use the oceans, seas, and marine resources.
Properties of materials: Investigate the properties of 7.NS: Apply and extend previous understandi ngs of 6 (Clean Water and Sanitation): Ensure availability
7 Project 7: HEAT & TEMPERAT URE
the acidity of different solutions. of substances before and after the substances interact to determine if a chemical reaction has occurred.
materials and their uses. operations with fractions to add, subtract, multiply, and divide rational numbers. and sustainable managemen t of water and sanitation for all.
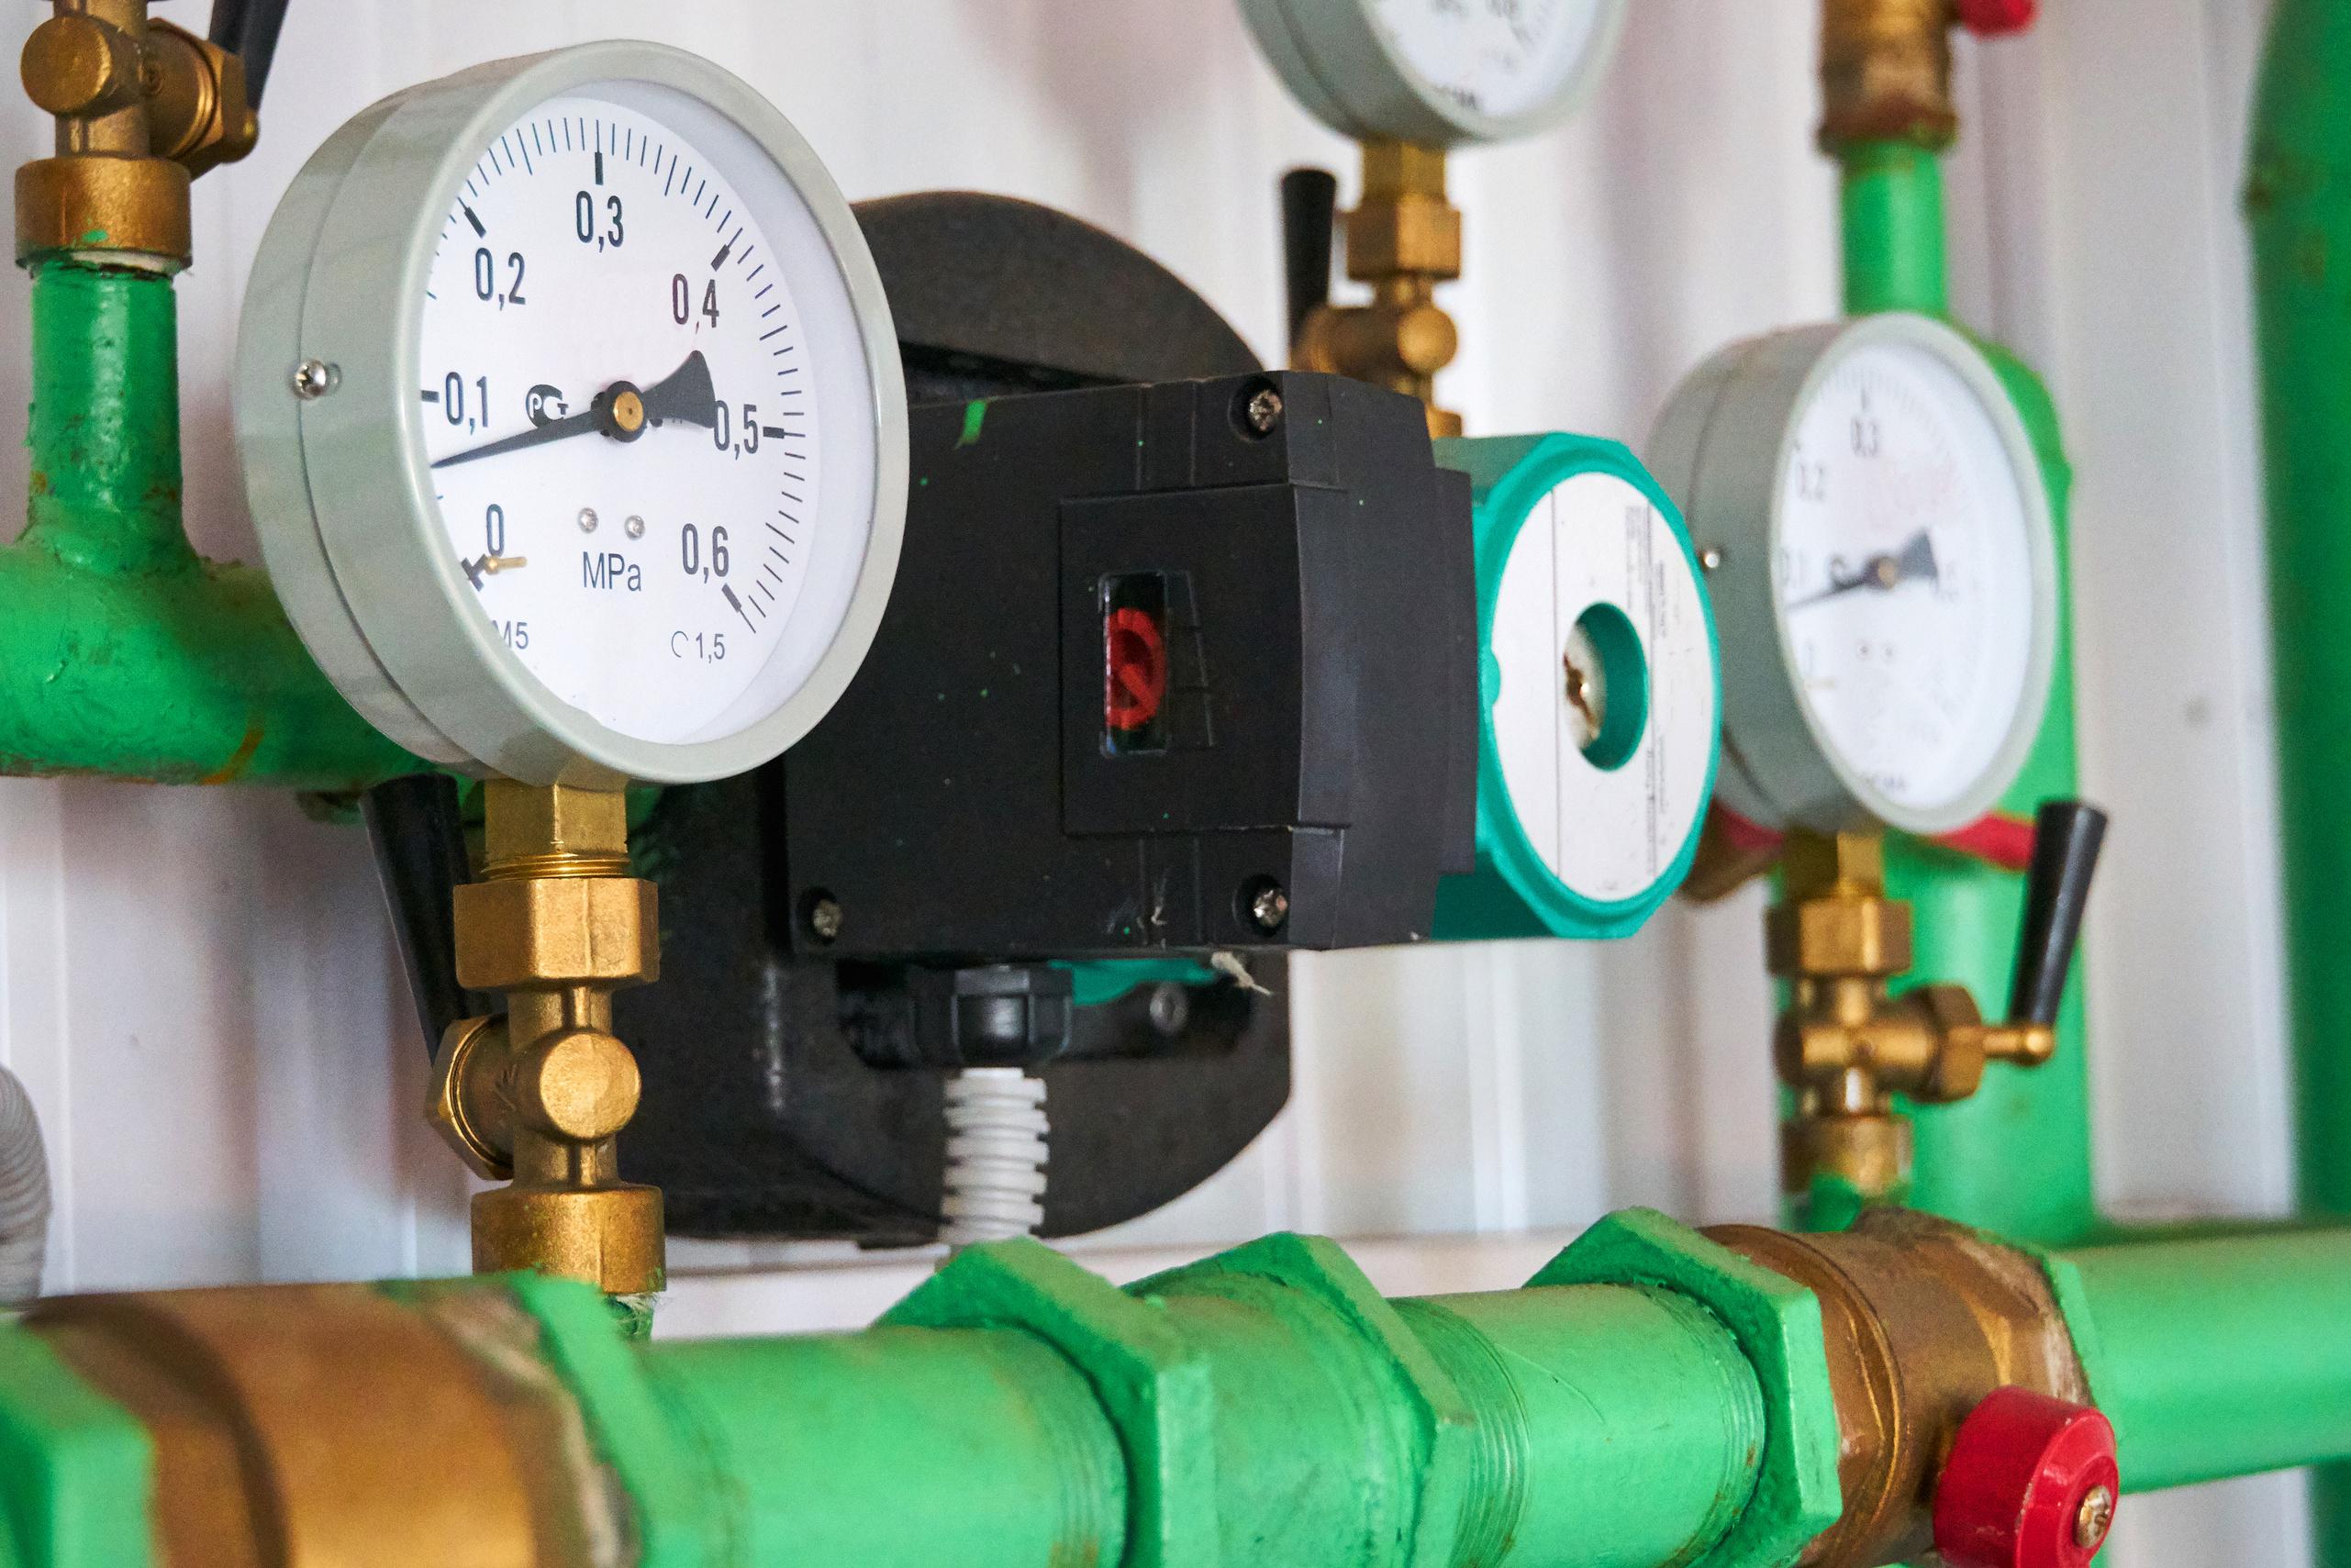
Design a water/liqui d thermomet er using the DS18B20 sensor and Arduino.
MS-PS3-4: Plan an investigatio n to determine the relationship s among the energy transferred, the type of matter, the mass, and the change in the average kinetic energy of the particles as measured by the temperatur e of the sample.
Forces and energy: Understand forces, motion, energy, and their relationships.
7.EE: Solve real-life and mathematic al problems using numerical and algebraic expressions and equations.
13 (Climate Action): Take urgent action to combat climate change and its impacts.
8 Project 8: Energy Transfer Use relevant tools to create Newton's Cradle, a classic science project demonstra ting
MS-PS3-2: Develop a model to describe that when the arrangemen t of objects interacting at a distance changes,
Forces and energy: Understand forces, motion, energy, and their relationships.
7.EE: Solve real-life and mathematic al problems using numerical and algebraic expressions and equations.
12 (Responsible Consumptio n and Production): Ensure sustainable consumption and production patterns.
momentu m. different amounts of potential energy are stored in the system.
9 Project 9: Energy & Wave Use 3D designing tools and techniques to develop a sound amplifier.
MS-PS4-1: Use mathematic al representati ons to describe a simple model for waves that includes how the amplitude of a wave is related to the energy in a wave.
Light and sound: Understand the properties of light and sound.
7.EE: Solve real-life and mathematic al problems using numerical and algebraic expressions and equations.
9 (Industry, Innovation, and Infrastructur e): Build resilient infrastructur e, promote inclusive and sustainable industrializat ion, and foster innovation.
1 0 Project 10: Light & Wave Use relevant tools to create a pinhole camera.
MS-PS4-2: Develop and use a model to describe that waves are reflected, absorbed, or transmitted through various materials.
1 1 Project 11: Motion Use app developme nt tools to create a science quiz app on motion.
Light and sound: Understand the properties of light and sound.
7.G: Draw, construct, and describe geometrical figures and describe the relationship s between them.
MS-PS2-2: Plan an investigatio n to provide evidence that the change in an object's motion depends on Forces and energy: Understand forces, motion, energy, and their relationships.
7.G: Draw, construct, and describe geometrical figures and describe the relationship
9 (Industry, Innovation, and Infrastructur e): Build resilient infrastructur e, promote inclusive and sustainable industrializat ion, and foster innovation.
4 (Quality Education): Ensure inclusive and equitable quality education and promote lifelong learning
1 2 Project 12: Forces Use 3D designing tools to create a rubber bandpowered car.
the sum of the forces on the object and the mass of the object.
MS-PS2-2: Plan an investigatio n to provide evidence that the change in an object's motion depends on the sum of the forces on the object and the mass of the object.
Forces and energy: Understand forces, motion, energy, and their relationships.
s between them. opportunitie s for all.
1 3 Project 13: Static Electricity Conduct experiment s on static charge and its effects.
MS-PS2-5: Conduct an investigatio n and evaluate the experiment al design to provide evidence that fields exist between objects exerting forces on each other even though the objects are not in contact.
1 4 Project 14: Magnetism Use game developme nt tools to innovate a
Electricity and Magnetism: Understand the properties of electricity and magnetism.
MS-PS2-5: Conduct an investigatio n and Forces and energy: Understand forces,
7.G: Draw, construct, and describe geometrical figures and describe the relationship s between them.
12 (Responsible Consumptio n and Production): Ensure sustainable consumption and production patterns.
7.G: Draw, construct, and describe geometrical figures and describe the relationship s between them.
8 (Decent Work and Economic Growth): Promote sustained, inclusive, and sustainable economic growth, full and productive employment , and decent work for all.
7.G: Draw, construct, and describe
9 (Industry, Innovation, and Infrastructur
1 5 Project 15: SPACE PHYSICS
game replicating the Gauss rifle phenomen on.
evaluate the experiment al design to provide evidence that fields exist between objects exerting forces on each other even though the objects are not in contact.
motion, energy, and their relationships.
geometrical figures and describe the relationship s between them.
e): Build resilient infrastructur e, promote inclusive and sustainable industrializat ion, and foster innovation.
Use game developme nt tools to innovate a game on the gravity of different planets.
MS-ESS1-2: Develop and use a model to describe the role of gravity in the motions within galaxies and the solar system.
Earth in space: Understand Earth's place in the universe and the solar system.
7.RP: Analyze proportiona l relationship s and use them to solve realworld and mathematic al problems.
9 (Industry, Innovation, and Infrastructur e): Build resilient infrastructur e, promote inclusive and sustainable industrializat ion, and foster innovation.
This detailed curriculum mapping provides teachers with a comprehensive guide to align the objectives and concepts of each STEM project with NGSS, Common Core Mathematics, Cambridge Science Curriculum, and the Sustainable Development Goals. Teachers can adapt and expand upon this mapping to ensure a seamless integration of the STEM projects into their grade 7 science and mathematics curriculum, promoting interdisciplinary learning and addressing real-world challenges.
Project-Wise Lesson
Plan and Answer key
PLANT&SYSTEMS

OBJECTIVES
At the end of this activity the learner will be able to demonstrate an understanding of the following:
Next Generation Science Standards
MS-LS1-4 From Molecules to Organisms: Structures and Processes
Conduct an investigation to provide evidence that living things are made of cells, either one cell or many different numbers and types of cells.
Cambridge Science Curriculum
Structure and function
7Bs.04 Describe the characteristics of the structures of plant and animal cells.

Technology Connection
Use App Development to construct an application detailing parts of plants.
Engineering Connection
Use the engineering design process to develop an application.
Common Core Mathematics
7 RP Ratios and Proportional relationships
Analyze proportional relationships and use them to solve real-world and mathematical problems.
Lesson Plan: Plant and Systems (Project 1)
Week 1: Introduction to Plants and App Development
Objective: Introduce students to the project and the basics of plant anatomy and its importance to survival.
Duration: 45 minutes
S# Phase Duration Details
1 Introduction to Plants 15 minutes
2 Introduction to MIT App Inventor 20 minutes
3 Brainstorming 10 minutes
4 Homework
• Display various images of plants and their parts.
• Discuss the basic functions of roots, stems, leaves, and flowers.
• Quick walkthrough of the interface.
• A brief overview of the tools available to them.
• Create a basic “Hello World!” app as an example.
• Have students brainstorm in pairs about what features they would like in their plant app.
• Research more about plant parts and their functions, and sketch a basic layout for the app.
Week 2: App Development and Mathematical Connection
Objective: Students begin creating their app, and understand the mathematical connection.
Duration: 45 minutes
S# Phase Duration Details
1 Starting the App Development 25 minutes
2 Mathematical Connection 15 minutes
3 Q&A Session 5 minutes
• Students start by creating the home screen of their app.
• Add sections for roots, stems, leaves, and flowers.
• Include brief descriptions and graphics for each part.
• Discuss the given problem: The ratio of the lengths of two different plant stems is 3:5.
• Teach the students to solve ratio problems, relating it to plant growth.
• Continue developing the app, adding more in-depth information and interactive features.
Week 3: Finalizing the App, Reflection, and Presentation
Objective: Students finalize their app, reflect on the project, and prepare for their presentations.
Duration: 45 minutes
S# Phase Duration Details
1 Final Touches on the App 20 minutes
2 Reflection 10 minutes
3 Presentation Preparation 15 minutes
4 Homework
Q# Answer
• Allow students to work on their apps, adding final touches.
• Teachers walk around, assisting and ensuring the apps meet the criteria.
• Discuss UN Sustainable Development Goal 15.
• Open discussion on how understanding plants and creating this app can contribute to this goal.
• Guide students on how to present their apps.
• Discuss the importance of linking their project to the sustainable development goals.
• Prepare a presentation for the next session.
Answer Key
1 Roots absorb water and nutrients, stems transport and provide support, leaves photosynthesize, and flowers reproduce.
2 Cacti have thick stems to store water, Venus flytraps have evolved leaves to capture insects, etc.
3 Knowing how roots work can inform how deeply to water plants, understanding photosynthesis can dictate where to place a plant in the sun, etc.
4 3 units = 12 cm, so 1 unit = 4 cm. The longer stem is 5 units or 20 cm.
5 Reflection:
The app on plant parts directly supports the UN Sustainable Development Goal 15 by enhancing awareness and appreciation for plants and their ecosystems. By delivering an educational platform, it deepens users' understanding of plant roles and their critical functions in our environment. Furthermore, it showcases the rich biodiversity inherent in the plant kingdom, urging users to value and protect it. Through actionable insights on sustainable gardening, the app promotes eco-friendly practices. Additionally, by targeting a tech-savvy generation, it crafts a foundation for future conservationists, ensuring continued emphasis on the importance of biodiversity and ecosystem protection.
HUMANORGANSYSTEM

OBJECTIVES
At the end of this activity the learner will be able to demonstrate an understanding of the following:
Next Generation Science Standards
MS-LS1-3 From Molecules to Organisms: Structures and Processes
Use argument supported by evidence for how the body is a system of interacting subsystems composed of groups of cells.
Cambridge Science Curriculum
Structure and function
7Bs.05 Understand that cells can be grouped together to form tissues, organs and organ systems.
Use DIY tools to construct a model for the lungs.
Use the engineering design process to develop the prototype of the organ lungs.
7.RP Ratios and Proportional relationships
Analyze proportional relationships and use them to solve real-world and mathematical problems.
Lesson Plan: HUMAN ORGAN SYSTEM (Project 2)
Week 1: Introduction and Project Initiation
Objective: Introduce the respiratory system and its components, and begin constructing the lung model.
Duration: 45 minutes
S# Phase Duration Details
1 Introduction to the Respiratory System 10 minutes
2 Project Explanation 5 minutes
3 Gathering Materials and Setting Up 15 minutes
4 Initial Steps of Model Construction 15 minutes
5 Homework
• Brief overview of the human respiratory system.
• Role of the lungs in the respiratory process.
• Explain the DIY project to the students and how it connects with the respiratory system.
• Distribute the materials: plastic bottle, bottle cap, scissor or sharp knife, balloons, straws, and tape.
• Demonstrate how to safely use the scissors or sharp knife.
• Cut the bottom off the plastic bottle.
• Place a balloon inside the bottle, stretching the open end over the cut bottom to represent the diaphragm.
• Discussion: Importance of the diaphragm in the breathing process.
• Research more about the structure and function of the lungs.
Week 2: Model Completion and Exploration
Objective: Complete the lung model and dive deep into its functions.
Duration: 45 minutes
S# Phase Duration Details
1 Completing the Lung Model 20 minutes
2 Function Demonstration 10 minutes
3 Discussion 15 minutes
• Insert two straws into the bottle cap, sealing it to ensure no air can escape.
• Attach balloons to the ends of the straws inside the bottle. These balloons represent the lungs.
• Screw the cap onto the bottle.
• When you pull the balloon at the bottom (diaphragm), the balloons (lungs) inside should expand, and when you push it, they should contract.
• Explanation: How this mimics the action of the lungs during breathing.
• Discuss the structure of the lungs and how it relates to their function.
4 Homework
• Introduction to different cells and tissues within the lungs.
• Prepare answers for the first two evaluation questions.
Week 3: Mathematical Connections, Evaluations, and Reflection
Objective: Dive into the mathematical component of the lungs, evaluate the project, and reflect on its implications for health and sustainability.
Duration: 45 minutes
S# Phase Duration Details
1 Math Connection: Surface Area and Volume 10 minutes
2 Discussion and Evaluation 25 minutes
3 Reflection 10 minutes
4 Homework
• Introduce the concept of the alveoli and their importance in oxygen exchange.
• Discuss the given ratio: Surface area of alveoli to the volume of the lungs (4:1).
• Problem-solving: Use the ratio to find the volume of the lungs.
• Students present their answers to the evaluation questions.
• Class discussion on the evidence supporting the importance of the lungs in the human body system.
• Discuss the UN Sustainable Development Goal 3 of promoting good health.
• Reflect on how understanding the structure and function of the lungs can contribute to this goal.
• Write a short essay on the importance of lung health and how it relates to global health initiatives.
Answer Key
Q# Answer
1 The structure of the lungs allows them to expand and contract, facilitating the exchange of oxygen and carbon dioxide. The alveoli, bronchioles, and other tissues/cells aid in this process.
2 The respiratory system provides oxygen to the circulatory system, which then transports it to cells throughout the body. In return, the circulatory system brings carbon dioxide from the body's cells to the lungs for exhalation. Together, these systems maintain cellular respiration and overall homeostasis.
3 The body requires oxygen to produce energy at a cellular level, and the lungs play a vital role in oxygenating the blood. Without functional lungs, cells would not receive the oxygen they need, leading to systemic failures and health complications.
4 Using the ratio 4:1 for surface area to volume, if the surface area is 100 square centimeters, the volume is 25 cubic centimeters.
5 Reflection:
Understanding the lungs' structure and function highlights the importance of respiratory health. By promoting good respiratory health, we can prevent numerous diseases, reducing the global health burden and ensuring healthier lives, in line with the UN's third sustainable development goal.
HEALTHYLIFESTYLE
OBJECTIVES
At the end of this activity the learner will be able to demonstrate an understanding of the following:
Next Generation Science Standards
MS-LS2-2 Ecosystems: Interactions, Energy, and Dynamics
Construct an explanation that predicts patterns of interactions among organisms across multiple ecosystems.
Cambridge Science Curriculum
Life processes
Discuss reasons for classifying viruses as living or non-living.
Technology Connection
Develop a touchless hand sanitizer using Arduino.
Engineering Connection
Use the engineering design process to develop a prototype for hand hygiene.
Common Core Mathematics
7.RP Ratios and Proportional relationships
Analyze proportional relationships and use them to solve real-world and mathematical problems.
Lesson Plan: HEALTHY LIFESTYLE (Project 3)
Week 1 - Introduction and Contextual Understanding
Objective: Introduce the topic, connect it to the curriculum objectives, and kick-start the Arduino project.
Duration: 45 minutes
S# Phase Duration Details
1 Introduction 10 minutes
2 Discussion 15 minutes
3 Arduino Kick-Off 20 minutes
4 Homework
• Briefly discuss the importance of hygiene practices and the role of technology in supporting these practices.
• Introduce the project: developing a touchless hand sanitiser using Arduino.
• Patterns of interactions among organisms and how they lead to disease spread.
• The role of touch in transmitting diseases.
• Introduction to viruses and their unique characteristics.
• Introduce Arduino and its components.
• Basic demonstration: how to program Arduino for touchless mechanism.
• Research about viruses and their patterns of interactions among organisms. Prepare for a group discussion next session.
Week 2 - Development and Application
Objective: Develop the touchless hand sanitiser and integrate mathematical concepts.
Duration: 45 minutes
S# Phase Duration Details
1 Group Discussion 15 minutes
• Discuss findings from the homework about viruses.
• Encourage students to share their thoughts on the characteristics of viruses and their patterns of interaction.
2 Arduino Development 20 minutes
3 Math Integration 10 minutes
4 Homework
• Continue developing the touchless mechanism.
• Incorporate the concept of releasing soap at the rate of 2 millilitres per second.
• Solve the problem: If the dispenser operates for 30 seconds, how many millilitres of soap will be dispensed?
• Introduce the mathematical concept and formulae required.
• Document the Arduino development process. Reflect on the potential impacts of using touch-less soap dispensers on human health and the surrounding ecosystems.
Week 3 - Evaluation and Reflection
Objective: Complete the touchless hand sanitiser project, evaluate, and reflect on its impact on sustainable development goals.
Duration: 45 minutes
S# Phase Duration Details
1 Project Finalization 10 minutes
2 Evaluation 20 minutes
3 Reflection 10 minutes
• Students showcase their touchless hand sanitiser.
• Discuss potential challenges and solutions.
• Discuss the project in relation to the evaluation questions provided.
• Encourage students to critically think about the broader implications of their project.
• Reflect on the UN Sustainable Development Goal 3 and the project's contribution.
• Discuss the structure and function of the lungs and their importance in promoting good health and well-being.
Answer Key
Q# Answer
1 Understanding patterns of interactions among organisms can guide the design of hygiene practices by pinpointing high-risk transmission pathways. A touch-less hand dispenser reduces direct touch interactions, minimizing a common transmission route for many pathogens.
2 Potential impacts:
Human Health: Reduced disease transmission, lesser direct contact with potentially contaminated surfaces, and promotion of hand hygiene. Surrounding Ecosystems: Increased use of soap/sanitizers might lead to more chemicals being washed into waterways, affecting aquatic life.
3 Viruses lack many characteristics of living organisms like metabolism, growth, and reproduction outside of a host cell. This unique nature influences the strategies developed to combat them. The touchless dispenser minimizes surface contact, reducing transmission opportunities for viruses, whether considered living or nonliving.
4 Using the formula, Rate x Time = Quantity 2 ml/second x 30 seconds = 60ml of soap will be dispensed.
5 Reflection:
Understanding the structure and function of the lungs highlights the importance of respiratory health. It emphasizes the need for clean air and the prevention of respiratory diseases. By promoting good hand hygiene, we reduce the transmission of respiratory infections, supporting the aim of SDG 3. This connects the physical project of the touchless dispenser with broader health concepts and global goals.
STRUCTUREOFANATOM

At the end of this activity the learner will be able to demonstrate an understanding of the following: OBJECTIVES
Next Generation Science Standards
MS-PS1 Matter and its Interactions
Develop models to describe the atomic composition of simple molecules and extended structures.
Cambridge Science Curriculum
Material properties
Describe the structure of an atom and learn about the methods and discoveries of Rutherford.
Technology Connection
Use 3D Design to construct an atom structure.
Engineering Connection
Use the engineering design process to 3D Design an atom prototype.
Common Core Mathematics
7.NS The Number System
Apply and extend previous understandings of operations with fractions to add, subtract, multiply, and divide rational numbers.
Lesson Plan: STRUCTURE OF AN ATOM (Project 4)
Week 1: Introduction and Design Foundations
Objective:
• Introduce the concept of atoms and their structure.
• Introduce the 3D design tool - Tinkercad.
Duration: 45 minutes
S# Phase Duration Details
1 Introduction to Atoms 10 minutes
2 Introduction to 3D Designing using Tinkercad 20 minutes
3 Initiating the 3D Design of an Atom 10 minutes
4 Homework & Reflection 5 minutes
• Brief overview of atoms: what they are, their importance.
• Explanation of the subatomic particles: electrons, protons, and neutrons.
• Sign up/Log in to Tinkercad (if required).
• Basic functions and tools in Tinkercad.
• Starting a new project.
• Drawing a simple nucleus and electron orbits.
• Research more about the atomic structure of a specific element.
• Reflect on the importance of atoms in our daily lives.
Week 2: Building the Atom
Objective:
• Deepen understanding of atomic structure.
• Continue and refine the 3D design.
Duration: 45 minutes
S# Phase Duration Details
1 Review and Discussion 10 minutes
2 3D Designing the Atom 25 minutes
3 Introduction to Atomic Mass 5 minutes
4 Reflection & Homework 5 minutes
• Quick recap of last week's concepts.
• Discuss students' findings from their research.
• Placing protons and neutrons in the nucleus.
• Setting electrons in orbits based on the atomic number.
• Labeling the components.
• Basic understanding of atomic mass and how it is calculated.
• Reflect on the intricacy of atomic structure.
• Homework: Research the atomic composition of simple molecules.
Objective:
Week 3 - Finalizing Design and Evaluation
• Finalize the 3D design.
• Evaluate and reflect on the project.
Duration: 45 minutes
S# Phase Duration Details
1 Final Adjustments to the 3D Design 15 minutes
2 Evaluation 15 minutes
3 Reflection 10 minutes
4 Wrap Up & Feedback 5 minutes
• Make any last-minute changes.
• Ensure labels are clear and accurate.
• Save and prepare for presentation.
• Students present their models and explain the atomic structures.
• Answer the evaluation questions:
o How does the 3D model of an atom help us understand the atomic composition of simple molecules and extended structures?
o What role do 3D models play in scientific research and the development of new materials or compounds?
o How does your 3D model of an atom illustrate the key components and their arrangement within an atom, and how does this structure contribute to the properties and behavior of different elements?
o If the atomic mass of an element is the sum of the protons and neutrons in its nucleus, and an atom of Element X has 8 protons and 10 neutrons, what is the atomic mass of Element X?
• Guided discussion on how understanding the structure of an atom contributes to advancements in technology and innovation, aligning with the UN Sustainable Development Goal 9.
• Collect feedback for improvement.
• Introduce potential follow-up projects or activities.
Answer Key
Q# Answer
1 3D models visually represent atomic composition, which helps understand the configuration and bonding potential of atoms in simple molecules and extended structures.
2 3D models allow scientists to visualize complex structures, make predictions, and potentially develop new materials based on these models.
3 The 3D model should clearly showcase the nucleus (with protons and neutrons) and electron orbits. The arrangement and number of these particles determine the properties and behavior of elements.
4 Atomic mass of Element X = 8 protons + 10 neutrons = 18.
5 Reflection:
Understanding atomic structures is fundamental in the fields of chemistry, physics, and material science. It aids in the development of new materials, technologies, and solutions, aligning with Sustainable Development Goal 9, which focuses on building resilient infrastructure, promoting inclusive and sustainable industrialization, and fostering innovation.
CHEMICALBONDS

OBJECTIVES
At the end of this activity the learner will be able to demonstrate an understanding of the following:
Next Generation Science Standards
MS-PS1-6 Matter and its Interactions
Undertake a design project to construct, test, and modify a device that either releases or absorbs thermal energy by chemical processes.
Cambridge Science Curriculum
Properties of materials
7Cp.01 Understand that all substances have chemical properties and physical properties.
Technology Connection
Evaluate connectivity in various solutions using Arduino and Electronics.
Engineering Connection
Utilize the engineering design process to construct, test, and assess connectivity using an Arduino meter.
Common Core Mathematics
7.NS The Number System
Apply and extend previous understandings of operations with fractions to add, subtract, multiply, and divide rational numbers.
Lesson Plan: CHEMICAL BONDS (Project 5)
Week 1: Introduction to Connectivity & Setting Up
Objective: Introduce students to electrical conductivity in solutions and provide a handson approach to setting up their Arduino connectivity meter.
Duration: 45 minutes
S# Phase Duration Details
1 Introduction 10 minutes
2 Arduino Connectivity Meter Setup 25 minutes
3 Discussion 10 minutes
• Briefly discuss chemical bonds and the movement of ions.
• Introduce the concept of electrical conductivity in solutions, focusing on the role of ions.
• Show a demo setup of the Arduino connectivity meter.
• Allow students to set up their meters with guidance.
• Demonstrate how the meter provides readings.
• Discuss the Sustainable Development Goal 14: Conserve and sustainably use the oceans, seas, and marine resources.
• Open a discussion on how conductivity in water could relate to marine ecosystems.
Week 2: Experimentation & Data Collection
Objective: Allow students to test various salt solutions with the Arduino and collect data on electrical conductivity.
Duration: 45 minutes
S# Phase Duration Details
1 Quick Recap 10 minutes
2 Experiment Setup 10 minutes
3 Data Collection 10 minutes
4 Data Discussion 10 minutes
• Recap the importance of electrical conductivity in solutions.
• Instruct students to create solutions with varying concentrations of salt.
• Ensure safety precautions are in place.
• Students test each solution with the Arduino meter, noting the conductivity on a scale of 0 to 10.
• They should ensure consistency in how they test each solution.
• Ask students to share their initial findings.
• Discuss factors affecting the variations in readings.
Week 3: Data Analysis & Reflection
Objective: Analyse data, discuss modifications for increased sensitivity, and reflect on the Sustainable Development Goal 14 in relation to the experiment.
Duration: 45 minutes
S# Phase Duration Details
1 Data Analysis 15 minutes
2 Arduino Modification 15 minutes
3 Reflection 15 minutes
• Discuss the question about the fraction or decimal that could represent the conductivity of the solution.
• Explore other substances and predict their conductivity based on their chemical properties.
• Discuss ways to modify the Arduino meter for increased sensitivity.
• Allow students to brainstorm solutions and share them.
• Discuss how monitoring salinity and pollution in marine ecosystems can help in the conservation of marine life.
• Encourage students to reflect on the broader implications of their experiment.
Answer Key
Q# Answer
1 The concentration of salt in a solution affects its ability to conduct electricity because as the concentration increases, the number of free ions that can carry electrical current also increases. Hence, a higher salt concentration will usually result in a higher conductivity.
2 To modify the Arduino connectivity meter for increased sensitivity:
• Use more sensitive probes.
• Incorporate a more refined scale of measurement.
• Use a more sensitive analog to digital converter.
• Amplify the signal before taking a reading.
3 Chemical properties affecting electrical conductivity:
• Presence of ions: Ionic compounds like salts generally conduct electricity in a solution.
• Concentration: The higher the concentration of ions, the better the conductivity.
• Temperature: Increases in temperature can sometimes increase conductivity.
• Nature of the solute: Some substances, like sugar, will not increase conductivity when dissolved because they don't dissociate into ions.
4 Fraction or Decimal Representation:
If the conductivity is 6 on a scale of 0 to 10, the fraction is 6/10 or 0.6 as a decimal.
5 Reflection:
The Arduino connectivity meter can help in monitoring the salinity of marine ecosystems. Excessive salinity can be harmful to certain marine organisms. Furthermore, monitoring conductivity can also help in detecting pollutants that may
conduct electricity. Achieving SDG 14 requires understanding and monitoring changes in marine environments, and tools like this can be invaluable.
CHEMICALCHANGES

OBJECTIVES
At the end of this activity the learner will be able to demonstrate an understanding of the following:
Next Generation Science Standards
MS-PS1-2 Matter and its Interactions
Analyze and interpret data on the properties of substances before and after the substances interact to determine if a chemical reaction has occurred.
Cambridge Science Curriculum
Properties of materials
7Cp.02
Understand that the acidity or alkalinity of a substance is a chemical property and is measured by pH.
Technology Connection
Use of Arduino with pH sensor.
Engineering Connection
Utilize the engineering design process to use evaluate the acidity of different solutions.
Common Core Mathematics
7.NS The Number System
Apply and extend previous understandings of operations with fractions to add, subtract, multiply, and divide rational numbers.
Objective:
Lesson Plan: CHEMICAL CHANGES (Project 6)
Week 1: Introduction to pH and the Arduino-pH Sensor
Introduce the concept of pH.
Understand the importance of pH in understanding chemical properties. Introduce the Arduino and how the pH sensor works.
Duration: 45 minutes
S# Phase Duration Details
1 Introduction to pH 10 minutes
2 Demonstration using pH paper 10 minutes
3 Arduino-pH Sensor Introduction 15 minutes
4 Hands-on Activity 10 minutes
Objective:
• Discuss what pH is and how it relates to acidity and alkalinity. Briefly explain the pH scale.
• Use pH paper to measure the pH of various samples. Discuss the colors and the results.
• Show students the Arduino and pH sensor. Explain how they work.
• Let students measure the pH of distilled water using the Arduino-pH sensor.
Week 2: Evaluating the Acidity of Different Solutions
Use the Arduino-pH sensor to measure the pH of various solutions.
Understand the implications of different pH values.
Begin to differentiate between chemical and physical changes using pH.
Duration: 45 minutes
S# Phase Duration Details
1 Measuring pH 20 minutes
2 Discussion 10 minutes
3 Differentiating Physical & Chemical Changes 10 minutes
• Students will use the Arduino-pH sensor to measure the pH of various solutions. They should record their findings.
• Discuss the different pH values of the solutions tested. Introduce the concept of neutral, acidic, and basic solutions.
• Give a brief introduction to chemical and physical changes. Show a simple example, like dissolving sugar in water (physical) versus mixing baking soda and vinegar (chemical).
Week 3: Evaluating Chemical Reactions and Sustainability Reflection
Objective:
Evaluate how pH changes in a chemical reaction. Reflect on the importance of pH in sustainability.
Duration: 45 minutes
S# Phase Duration Details
1 Chemical Reaction Experiment 15 minutes • Let students combine baking soda and vinegar. Before they combine them, measure the pH of each with the Arduino. After the reaction, measure the pH of the resulting solution.
2 Discussion 10 minutes • Discuss the changes in pH values before and after the reaction. How does this indicate a chemical reaction?
3 Reflection on Sustainable Development Goal 6 15 minutes • Discuss the importance of clean water and sanitation. How does knowing the pH of water sources contribute to this goal? Reflect on the implications of acidic or alkaline water sources on human health and the environment.
Answer Key
Q# Answer
1 The pH of a substance changes before and after it reacts with another substance because a chemical reaction might produce or consume ions that affect the acidity or alkalinity of the solution. This indicates that a new substance has been formed as a result of the chemical reaction.
2 The pH sensor can differentiate to some extent. Physical changes will not produce a change in the composition of a substance, and hence its pH will remain the same. On the other hand, a chemical change will produce a new substance, which might have a different pH value.
3 The pH value provides information about the concentration of H+ ions in the substance. A lower pH indicates a higher concentration of H+ ions, making the substance more acidic, and a higher pH indicates a lower concentration of H+ ions, making the substance more alkaline or basic.
4 If a substance has a pH of 3, it would be classified as acidic.
5 Reflection:
Knowing the pH of water sources is crucial for ensuring clean water and sanitation. Acidic or highly alkaline water can be harmful to consume and can negatively impact aquatic ecosystems. By monitoring and adjusting the pH of water sources, we can ensure that water is safe for consumption and minimize environmental damage, thereby supporting Sustainable Development Goal 6.
HEAT&TEMPERATURE
OBJECTIVES
At the end of this activity the learner will be able to demonstrate an understanding of the following:
Next Generation Science Standards
MS-PS3-4 Energy
Plan an investigation to determine the relationships among the energy transferred, the type of matter, the mass, and the change in the average kinetic energy of the particles as measured by the temperature of the sample.
Cambridge Science Curriculum
Forces and energy
Describe the difference between heat and temperature
Technology Connection
Use of Arduino with temperature sensor.
Engineering Connection
Utilize the engineering design process to use evaluate the temperature using Arduino.
Common Core Mathematics
7. EE Expressions and Equations
Solve real-life and mathematical problems using numerical and algebraic expressions and equations.
Lesson Plan: HEAT & TEMPERATURE (Project 7)
Objective:
Week 1: Introduction to Heat, Temperature & Materials
Understand the fundamentals of heat, temperature, and how materials interact with heat.
Duration: 45 minutes
S# Phase Duration Details
1 Icebreaker 5 minutes
2 Discussion 15 minutes
3 Activity 15 minutes
4 Homework 5 minutes
5 Wrap-up 5 minutes
• Quick quiz. Ask questions like, "What is temperature?”, “Give an example of something hot/cold”, “What is the use of a thermometer?”
• Define heat and temperature, highlighting the difference.
• Discuss how different materials (metal, wood, plastic) feel differently when they are cold or hot.
• Using different materials (metal spoons, plastic spoons, wooden spoons), students will hold them against ice and then touch to feel the difference.
• Discuss the observation on which material felt the coldest quickest.
• Assign students to observe and list down 5 items at home and how they feel (in terms of temperature) over different periods.
• Summarize the day's lesson and introduce next week's activity: Using the Arduino and DS18B20 sensor.
Week 2: Building a Thermometer using Arduino
Objective:
Understand how the DS18B20 sensor works with Arduino and how to convert temperature values.
Duration: 45 minutes
S# Phase Duration Details
1 Recap 5 minutes
2 Introduction 10 minutes
3 Activity 20 minutes
• Discuss the homework from last week and draw insights about different materials and their heat retention abilities.
• Brief about Arduino and DS18B20 sensor.
• Explain the significance of having electronic temperature sensors.
• Students will be given Arduino kits with DS18B20 sensors.
• Guide them through setting up the sensor with Arduino.
4 Mathematics Integration 5 minutes
5 Wrap-up 5 minutes
• Using the Arduino IDE, upload a basic code to read the temperature from the sensor.
• Measure room temperature.

• Discuss observations.
• Assign students to measure the temperature of different materials at home using their Arduino setup.
Week 3: Evaluation, Reflection, & Action on Climate Change
Objective:
Evaluate the understanding of the students and make connections to the larger issue of climate change.
Duration: 45 minutes
S# Phase Duration Details
1 Recap & Sharing 10 minutes
2 Evaluation Activity 20 minutes
3 Reflection Activity 10 minutes
4 Wrap-up 5 minutes
• Discuss the temperatures students recorded for their homework.
• Discuss how heat and temperature changes were observed in different materials.
• Q&A based on the listed evaluation questions.
• Make use of the Arduino setups to demonstrate some answers, especially the difference between heat and temperature.
• Discuss the importance of understanding temperature variations in the context of climate change.
• Highlight how the DS18B20 sensor can be used to monitor temperature changes in the environment over time and its relevance to Sustainable Development Goal 13.
• Emphasize the significance of being techliterate in the current age.
• Encourage students to think about how they can further use this knowledge to contribute positively to the environment.
Answer Key
Q# Answer
1 Materials and Heat: Different materials have different rates of heat conductivity. Metals typically conduct heat more rapidly than wood or plastic. Hence, they gain or lose heat quicker.
2 Mass and Heat Retention:
Objects with greater mass can retain more heat. It takes longer for larger objects to change temperature compared to smaller objects.
3 Heat vs. Temperature:
Heat is a form of energy, while temperature is a measure of how hot or cold something is. The Arduino temperature sensor measures the temperature, which gives an indication of the amount of heat present.
4

5 Reflection:
Regular and accurate temperature measurements can help in tracking patterns or changes in the environment. If temperatures are steadily rising, it could be an indication of global warming. With this data, appropriate measures can be taken to combat or adapt to climate change, in line with Sustainable Development Goal 13.
ENERGYTRANSFER

OBJECTIVES
At the end of this activity the learner will be able to demonstrate an understanding of the following:
Next Generation Science Standards
MS-PS3-2 Energy
Develop a model to describe that when the arrangement of objects interacting at a distance changes, different amounts of potential energy are stored in the system.
Cambridge Science Curriculum
Forces and energy
7Pf.01
Describe changes in energy that are a result of an event or process.
Technology Connection
Use of relevant tools to create a newton cradle.
Engineering Connection
Use the engineering design process to create a newton cradle.
Common Core Mathematics
7. EE Expressions and Equations
Solve real-life and mathematical problems using numerical and algebraic expressions and equations.
Lesson Plan: Energy Transfer (Project 8)
Week 1: Introduction to Energy Transfer and Building Newton’s Cradle
Objective:
Introduce students to the concept of energy transfer and guide them in building their own Newton’s Cradle.
Duration: 45 minutes
S# Phase Duration Details
1 Introduction 10 minutes
• Brief overview of energy transfer.
• Introduce Newton’s Cradle and its significance in demonstrating momentum and energy conservation.
2 Demonstration 5 minutes
3 Building Activity 25 minutes
4 Wrap-up 5 minutes
• Show a pre-built Newton’s Cradle in action.
• Provide students with the necessary tools and materials.
• Guide them step-by-step in constructing their own Newton’s Cradle.
• If using Tinkercad, they can design 3D models of the components.
• Reinforce the objectives of the lesson.
• Preview next week’s exploration and experimentation.
Week 2: Experimentation and Observations
Objective:
Guide students to conduct experiments using their Newton’s Cradle to answer the evaluation questions.
S#
1 Review 5 minutes
2 Experimentation 30 minutes
Duration: 45 minutes
• Briefly recap Week 1 and address any questions.
• Guide students through the following experiments:
o Changing the number of swinging pendulums.
o Lifting the initial pendulum to different heights.
• Instruct students to record their observations and findings.
3 Group Discussion 5 minutes
4 Assignment 5 minutes
• Let students share their preliminary findings.
• Assign homework: ask students to analyze their findings and attempt to answer the evaluation questions.
Week 3: Analysis, Reflection, and Evaluation
Objective:
Analyze findings, answer the evaluation questions, and reflect on the implications in terms of Sustainable Development Goal 12.
Duration: 45 minutes
S# Phase Duration Details
1 Analysis 10 minutes
2 Reflection 15 minutes
• Discussion and solution to the evaluation questions:
o Observation of transferred energy with different pendulums.
o Relation between pendulum height and energy transfer.
o Conservation of energy in the cradle.
o Simple math: 5 pendulums x 100 grams = 500 grams (total system mass).
• Discuss how Newton’s Cradle relates to responsible consumption and production (SDG 12).
o Concepts like the efficient transfer of energy, waste reduction, and the idea of "every action has an equal and opposite reaction" in the context of environmental responsibility.
3 Evaluation 15 minutes
4 Conclusion 5 minutes
• Allow students to present their findings and reflections.
• Provide feedback and encourage peer reviews.
• Recap the importance of energy conservation and responsible production/consumption.
• Preview the next project in the series.
Answer Key
Q# Answer
1 Only the pendulum(s) at the opposite end will swing, irrespective of how many pendulums are set into motion. For example, if one pendulum is swung, one on the opposite end will swing out; if two are swung, two will swing out, and so forth.
2 The greater the height from which the first pendulum is released, the higher the opposite pendulum(s) will swing. This demonstrates the direct relationship between potential energy (height) and kinetic energy (motion).
3 Energy in the Newton’s Cradle is conserved. As one pendulum slows down due to friction and air resistance, its energy is transferred to the next pendulum, keeping the total energy constant. However, over time, the energy is eventually lost due to these resistive forces, causing the pendulums to come to a stop.
4 The total mass of the system is 500 grams.
5 Reflection:
Newton’s Cradle showcases how energy is efficiently transferred without wastage. It can serve as a metaphor for responsible consumption and production. Just as we need to ensure energy is not wasted in the cradle, in the real world, we need to ensure resources are used efficiently, waste is minimized, and production is sustainable to protect our planet.
ENERGY&WAVE

OBJECTIVES
At the end of this activity the learner will be able to demonstrate an understanding of the following:
Next Generation Science Standards
MS-PS4-1 Waves and their Applications in Technologies for Information Transfer
Use mathematical representations to describe a simple model for waves that includes how the amplitude of a wave is related to the energy in a wave.
Cambridge Science Curriculum
Light and sound
7Ps.01 Describe the vibration of particles in a sound wave and explain why sound does not travel in a vacuum.
Technology Connection
Use of 3D designing tools and technique to develop a sound amplifier.
Engineering Connection
Using engineering design process to develop a prototype of the sound amplifier.
Common Core Mathematics
7. EE Expressions and Equations
Solve real-life and mathematical problems using numerical and algebraic expressions and equations.
Objective:
Lesson Plan: Energy & Wave (Project 9)
Week 1: Understanding the Basics
Introduce students to the concepts of sound waves, amplitude, and energy.
Duration: 45 minutes
S# Phase Duration Details
1 Introduction to Sound Waves 10 minutes
2 Amplitude and Energy 20 minutes
3 Interactive Demonstration 10 minutes
4 Homework Assignment 5 minutes
• Discuss how sound is produced.
• Explain vibrations and how they relate to sound waves.
• Introduce amplitude as the height of the wave.
• Discuss how amplitude relates to the loudness and energy of sound.
• Show mathematical representation of waves, including amplitude.
• Use a tuning fork or speaker to demonstrate sound waves and their properties.
• Visualize amplitude and wave patterns.
• Assign students to research the principles of sound amplifiers and how they increase the volume of sound.
Week 2: Designing the 3D Sound Amplifier
Objective:
Provide students with hands-on experience in 3D design to create a functional sound amplifier.
Duration: 45 minutes
S# Phase Duration Details
1 Introduction to 3D Designing Tools 15 minutes
2 Designing the Sound Amplifier 20 minutes
3 Group Discussion 5 minutes
4 Homework Assignment 5 minutes
• Briefly introduce Tinkercad and its features.
• Show some basic techniques for designing objects.
• Guide students to design a simple sound amplifier using Tinkercad.
• Discuss how the design can influence the amplification of sound (shape, size, materials).
• Allow students to share their designs with the class.
• Discuss how each design might affect the amplitude and energy of sound waves.
• Students should finalize their 3D sound amplifier designs in Tinkercad.
Objective:
Week 3: Evaluating & Reflecting on the 3D Sound Amplifier
Evaluate students’ understanding and application of the knowledge and reflect on its implications in real-world scenarios.
Duration: 45 minutes
S# Phase Duration Details
1 Demonstration of 3D Sound Amplifiers 15 minutes
2 Evaluation Discussion 15 minutes
• Allow students to present their 3D printed sound amplifiers and demonstrate their effectiveness.
• Discuss the results and how the design impacts the amplification.
• Use the evaluation questions from the project:
o Discuss how design affects amplitude and energy.
o Explain the mathematical relationship between amplitude and energy.
o Explore the role of particle vibrations in sound transmission and the absence of sound in a vacuum.
o Solve the mathematical problem about amplitude and volume.
3 Reflection 10 minutes
4 Feedback and Closing 5 minutes
• Discuss Sustainable Development Goal 9 and how the 3D sound amplifier project contributes to it.
• Allow students to share their perspectives on the importance of innovation in promoting sustainable infrastructure.
• Provide feedback on students' participation and understanding.
• Encourage them to apply these concepts in future projects and real-life situations.
Answer Key
Q# Answer
1 The design of the 3D sound amplifier can affect the amplitude and energy by focusing and channeling the sound waves. The shape, size, and material of the amplifier can either amplify or dampen the sound.
2 The amplitude represents the maximum height of a wave from its resting position. A greater amplitude means more energy in the wave. So, the more the sound is amplified, the higher its amplitude and energy.
3 Sound waves are mechanical waves that require a medium (like air, water, or solids) to travel. The vibrations of particles in this medium contribute to the transmission of sound. In a vacuum, there are no particles to vibrate, so sound cannot travel.

Reflection:
Students should relate their sound amplifier to Sustainable Development Goal 9 by discussing how innovations like their sound amplifier can contribute to developing resilient infrastructures, like efficient public address systems or emergency communication systems. The promotion of such innovative solutions can lead to a more sustainable future by providing more efficient, effective, and environmentally friendly ways of addressing everyday challenges.
LIGHT&WAVE

At the end of this activity the learner will be able to demonstrate an understanding of the following: OBJECTIVES
Next Generation Science Standards
MS-PS4-2 Waves and their Applications in Technologies for Information Transfer
Develop and use a model to describe that waves are reflected, absorbed, or transmitted through various materials.
Cambridge Science Curriculum
Light and sound
Describe reflection at a plane surface and use the law of reflection.
Technology Connection
Use relevant tools to create a pinhole camera.
Engineering Connection
Using the engineering design process to develop a prototype of a pinhole camera.
Common Core Mathematics
7. G Geometry
Solve real-life and mathematical problems involving angle measure, area, surface area, and volume.
Lesson Plan: Light & Wave (Project 10)
Week 1: Introduction to Light & Wave and Pinhole Camera Concept
Objective:
Understand the basic concepts of light and how a pinhole camera works.
Duration: 45 minutes
S# Phase Duration Details
1 Introduction 10 minutes
2 Pinhole Camera Concept 20 minutes
3 Activity 10 minutes
4 Discussion 5 minutes
• Brief introduction to the concepts of light and waves.
• Discuss the relevance of light in daily life and the phenomena associated with it.
• Introduction to the concept of a pinhole camera.
• Show an example of a pinhole camera.
• Explanation of how a pinhole camera works, emphasizing the importance of the pinhole size.
• Provide each student with a cardboard box, aluminum foil, white paper, and a pin.
• Demonstrate how to create a simple pinhole camera.
• Discuss students' observations and reflections on the process.
Week 2: Experimenting with Pinhole Size & Screen Materials
Objective:
Understand the relationship between pinhole size and image quality, and the impact of different screen materials.
Duration: 45 minutes
S# Phase Duration Details
1 Pinhole Size 20 minutes
2 Screen Materials 20 minutes
3 Discussion 5 minutes
• Ask students to make three different pinholes of varying sizes in their cameras.
• Test each pinhole size and observe the quality and clarity of the image formed on the screen.
• Provide students with different materials like tracing paper, wax paper, and a fine cloth.
• Students replace the original screen with each material and observe the transmission and formation of the image.
• Discuss the findings and answer the evaluation questions related to the pinhole size and screen materials.
Week 3: Reflection, Image Formation, and Mathematics
Objective: Understand the concept of reflection in image formation and calculate the scale factor of the pinhole camera.
Duration: 45 minutes
S# Phase Duration Details
1 Discussion on Reflection 10 minutes
2 Image Inversion 10 minutes
3 Sustainable Development Discussion 15 minutes
4 Wrap-up 10 minutes
• Discuss the concept of reflection and the law of reflection.
• Link the discussion to the formation of images in the pinhole camera.
• Explain why the image formed by a pinhole camera is inverted.
• Use the given data to calculate the scale factor of the pinhole camera.
• Introduce Sustainable Development Goal 9.
• Discuss how the construction and use of the pinhole camera can promote sustainable and resilient infrastructure and foster innovation.
• Encourage students to brainstorm more ways in which understanding light and optics can contribute to innovative sustainable solutions.
• Address any remaining questions and provide guidance on any further research or reading they might be interested in.
• Inform them about the next project.
Answer Key
Q# Answer
1 The size of the pinhole affects the quality and clarity of the image. A smaller pinhole gives a sharper image, but it is dimmer. A larger pinhole gives a brighter image but less sharp.
2 Different screen materials can affect the sharpness, brightness, and clarity of the image. For example, wax paper might diffuse the light more, resulting in a softer image. Tracing paper might give a clearer image than a cloth.
3 The pinhole camera works on the principle of linear propagation of light. The law of reflection isn’t directly involved in pinhole image formation. Instead, each point on the object emits light rays in all directions, and only those rays which are directed straight towards the pinhole will pass through it and form an image.
4 The scale factor is the ratio of the image height to the object height. Scale factor = Image height / Object height = 4 cm / 15 cm = 4/15 = 0.267 or approximately 1:3.75.
5 Reflection:
The construction of the pinhole camera encourages innovative thinking in terms of using simple materials to understand complex concepts. It showcases that with minimal resources, effective tools can be developed. This aligns with the idea of
building sustainable and resilient infrastructures, emphasizing the importance of innovation even with limited resources.
MOTION

OBJECTIVES
At the end of this activity the learner will be able to demonstrate an understanding of the following:
Next Generation Science Standards
MS-PS2-2 Motion and Stability: Forces and Interactions
Plan an investigation to provide evidence that the change in an object's motion depends on the sum of the forces on the object and the mass of the object.
Cambridge Science Curriculum
Forces and energy
7Pf.01
Describe changes in energy that are a result of an event or process.
Technology Connection
Use app development tools to create a quiz app.
Engineering Connection
Using the engineering design process to develop an app prototype.
Common Core Mathematics
7. G Geometry
Solve real-life and mathematical problems involving angle measure, area, surface area, and volume.
Lesson Plan: Motion (Project 11)
Week 1: Introduction to Motion and App Design Objective:
Introduce the concept of motion and begin the process of app development. Duration: 45 minutes
S# Phase Duration Details
1 Introduction 10 minutes
• Briefly explain the concept of motion.
• Introduce the Sustainable Development Goal 4 (Quality Education) and its relevance.
• Describe the objective of the project: Creating an app-based quiz.
2 Brainstorming Session 20 minutes
3 Introduction to MIT App Inventor 10 minutes
4 Homework
• Divide the students into groups.
• Each group will brainstorm questions based on the concepts of motion for their quiz.
• Show the basics of the MIT App Inventor platform.
• Provide students with resources or a tutorial to help them begin their app creation.
• Students should finalize the questions for their quiz.
• Begin designing the layout of their app using MIT App Inventor.
Week 2: App Development and Core Concepts Reinforcement
Objective:
Continue the app development process and reinforce motion concepts.
S# Phase Duration
1 Review of Concepts 10 minutes
Duration: 45 minutes
• Quick quiz on the basics of motion to recap last week's session.
• Discuss the evaluation questions (provided above).
2 MIT App Inventor Handson Session 30 minutes
3 Wrap Up & Homework 5 minutes
• Students should begin coding their apps.
• Include quiz functionality, multiple-choice questions, and scoring.
• Teachers circulate, assisting and guiding where necessary.
• Remind students to finish a working prototype of their app for the next session.
• Encourage students to explore the evaluation questions more deeply.
Week 3: Evaluation, Reflection, and Concluding the Project Objective:
Test the apps, evaluate knowledge on motion, and reflect on the project's broader implications.
Duration: 45 minutes
S # Phase Duration Details
1 App Demonstration 20 minutes • Allow each group to demonstrate their app.
• Classmates can try out each app and provide feedback.
2 Evaluation Discussion 15 minutes • Discuss the answers to the evaluation questions.
• Emphasize the application of mathematical and scientific concepts.
3 Reflection 10 minutes • Engage in a group discussion about the importance of quality education.
• Discuss how their app-based quiz can contribute to Sustainable Development Goal 4.
Answer Key
Q# Answer
1 The mass of the car inversely affects its acceleration. The more massive the car, the less it will accelerate given the same force.
2 If two objects with different masses are pushed with the same force, the object with less mass will accelerate more than the object with more mass.
3 The skateboarder possesses potential energy at the top of the ramp. As they move downhill, this potential energy gets converted into kinetic energy.
4 Using the formula d = rt, where r = 60 km/hr and t = 3 hours: d = 60 x 3 = 180 kilometres.
5 Reflection: The app-based science quiz promotes quality education by providing an interactive tool that enhances the understanding of motion concepts. The use of technology in education keeps students engaged, fosters critical thinking, and prepares them for a tech-savvy future. Addressing SDG 4, it also promotes lifelong learning opportunities and ensures inclusive and equitable quality education.
FORCES
OBJECTIVES
At the end of this activity the learner will be able to demonstrate an understanding of the following:
Next Generation Science Standards
MS-ETS1-4 Engineering Design
Develop a model to generate data for iterative testing and modification of a device such as a rubber band car to determine its strength, reliability, and effectiveness.
Cambridge Science Curriculum
Forces and energy
7Pf.01 Describe changes in energy that are a result of an event or process.
Technology Connection
Use 3D designing tools to create a rubber band powered car .
Engineering Connection
Using the engineering design process to develop a 3D design rubber band car prototype.
Common Core Mathematics
7. G Geometry
Solve real-life and mathematical problems involving angle measure, area, surface area, and volume.
Objective:
Lesson Plan: Forces (Project 12)
Week 1: Introduction and Initial Design
Understand the concept of forces and energy.
Introduce the idea of rubberband-powered cars.
Initial design of the rubber band-powered car using 3D designing tools.
Duration: 45 minutes
S# Phase Duration Details
1 Introduction 10 minutes
2 Exploration 10 minutes
3 Designing 20 minutes
• Begin with a discussion on forces, particularly focusing on the potential energy stored in stretched materials like rubber bands.
• Introduce the idea of transforming this potential energy into kinetic energy using the example of a rubberband-powered car.
• Show a sample or video of a rubberbandpowered car in action.
• Discuss how various factors (e.g., wheel size, car weight, rubber band tension) might affect the car's performance.
• Introduce students to the 3D design platform.
• Guide students through designing a basic framework for their rubber band-powered car.
• Encourage students to be innovative with their designs, but also stress the importance of stability and functionality.
4 Closing 5 minutes
• Recap what was learned during the session.
• Set expectations for the next session: building and testing initial designs.
Week 2: Building and Initial Testing
Objective:
Build a rubberband-powered car using the 3D design from the previous session.
Test the car's functionality and gather initial data on its performance.
Duration: 45 minutes
S# Phase Duration Details
1 Building 20 minutes
2 Testing 15 minutes
• Provide students with materials (like 3D printed parts based on their design).
• Guide students through assembling their rubberband-powered car.
• Set up a straight track for students to test their cars.
3 Discussion 10 minutes
• Allow each student/group to test their car, measuring the distance it travels.
• Encourage students to note any performance issues (e.g., if the car veers to the side, doesn't move at all, etc.).
• Discuss the initial tests' results.
• Introduce the idea of iterative design: making improvements based on test results.
Week 3: Refinement, Final Testing, and Reflection
Objective:
Modify the car design to improve its strength and reliability. Conduct final tests on the car's design. Reflect on the project's sustainability goal.
Duration: 45 minutes
S # Phase Duration Details
1 Refinement 15 minutes
2 Final Testing 15 minutes
3 Reflection and Evaluation 15 minutes
• Based on the previous session's observations, guide students in making modifications to their designs.
• Students can make changes to their 3D design and/or the physical car model.
• Re-test the cars on the same track.
• Compare the results to the initial tests, noting improvements or changes in performance.
• Discuss the project evaluation questions:
o How did you modify the design of your rubber band car to improve its strength and reliability?
o What evidence did you gather to demonstrate the effectiveness of your rubber band car design?
o Explain the changes in energy that occur during the operation of your rubber band powered car.
o Mathematical exercise: If the rubber band's length in the model car is 12 centimeters, and the dimensions of the rubber bandpowered car are scaled down by a factor of 1/4, calculate the length of the rubber band in the actualsized car.
• Reflect on how the 3D designed rubber band-powered car contributes to promoting responsible consumption and production.
Answer Key
Q# Answer
1 Answers will vary based on individual or group designs.
2 The evidence is the distance the car traveled in the final test compared to the initial test and any other observed performance improvements.
3 The potential energy stored in the stretched rubber band is transformed into kinetic energy as the rubber band unwinds and propels the car forward. Once the rubber band is fully unwound, the car may continue to coast forward due to its momentum until friction and other forces slow it down and stop it.
4 Length = 12 cm × 4 = 48 cm
5 Reflection: Answers will vary, but students should be able to connect the idea of designing efficient, low-waste toys (like their rubber band-powered car) to the broader goal of sustainable consumption and production. They might mention aspects like reusable materials, the educational value of the toy, or the longevity and durability of the design.
STATICELECTRICITY

OBJECTIVES
At the end of this activity the learner will be able to demonstrate an understanding of the following:
Next Generation Science Standards
MS-PS4-2 Waves and their Applications in Technologies for Information Transfer
Use the principles of wave behavior and wave interactions with matter to transmit information.
Electricity and magnetism
Use diagrams and conventional symbols to represent, make and compare circuits that include cells, switches, lamps and buzzers.
Technology Connection
Use tools to create a a static charge.
Engineering Connection
Using the engineering design process to develop prototypes and test static electricity.
Common Core Mathematics
7. RP Ratios and Proportional Relationships
Analyze proportional relationships and use them to solve real-world and mathematical problems.
Objective:
Lesson Plan: Static Electricity (Project 13)
Week 1: Introduction and Setup
To introduce the concept of static electricity and guide students to set up the first experiment.
Duration: 45 minutes
S# Phase Duration Details
1 Introduction to Static Electricity 10 minutes
2 Discussion on the Materials 5 minutes
3 Setup of Experiment 1 20 minutes
4 Discussion and Journaling 10 minutes
• What is static electricity?
• Real-world examples: getting a shock when touching a doorknob, hair standing on end when removing a hat, etc.
• Overview of the provided materials and how each will be used.
• Distribute materials to each group.
• Guide students through the steps 1-4 of Experiment 1, ensuring that they understand and follow each step correctly.
• Allow students to discuss their observations.
• Have students start a journal where they note down their observations, predictions, and questions.
Week 2: Experiment 1 Completion and Experiment 2 Setup
Objective:
To complete the first experiment and set up the second.
Duration: 45 minutes
S# Phase Duration Details
1 Review 5 minutes
2 Continuation of Experiment 1 15 minutes
3 Setup of Experiment 2 15 minutes
4 Discussion and Continuation of Journaling 10 minutes
Objective:
• Quick recap of last week's lesson and any observations made.
• Guide students through steps 5-8.
• Ensure students record their observations in their journals.
• Guide students through steps 1-6 of Experiment 2, emphasizing the importance of accurate timing and observation.
• Discuss initial observations from Experiment 2.
• Add to journals.
Week 3: Conclusion and Reflection
To complete the experiments, reflect on findings, and understand the connection to Sustainable Development Goal 8.
Duration: 45 minutes
S
1 Completion of Experiment 2 10 minutes
2 Discussion on Static Electricity 10 minutes
3 Reflection 20 minutes
• Complete the remaining steps of Experiment 2.
• Allow students to discuss and share their findings.
• Why does static electricity occur?
• How does the rubbing generate static charge?
• Which materials are most effective in creating static electricity and why?
• Guide students to reflect on the experiments.
• Engage in a class discussion on how conducting an experiment on static charge can contribute to achieving the UN Sustainable Development Goal 8. Ideas include innovation in electronics, safety in workplaces related to electronics, potential economic growth from technological advancements, etc.
• Allow students to share their thoughts and journal entries.
4 Wrap-up 5 minutes
Q# Answer
• Recap the project's objectives and the importance of understanding scientific principles.
• Discuss potential next steps or further experiments students could conduct at home or in future classes.
Answer Key
Experiment 1
1 Yes, the balloon should attract some pepper.
2 The closer the balloon, the more pepper it picks up.
3 Rubbing more should increase the amount of pepper attracted due to an increase in charge.
4 Rubbing back and forth may reduce the amount of static built up because of friction in opposite directions.
5 Rubbing one way (same direction) consistently creates a stronger static charge.
Experiment 2
1 The balloon should stick to the wall due to static charge.
2 More rubbings usually result in the balloon sticking longer due to a stronger static charge.
3 Different materials will produce different results. Hair is often a strong producer of static electricity.
Reflection
1 Reflection
Conducting an experiment on static charge helps students understand fundamental physics. This knowledge can drive innovation in electronics and other fields. Understanding these principles can potentially drive technological advancements, leading to economic growth. Moreover, safety protocols related to static electricity in workplaces can be established, ensuring decent work conditions.
MAGNETISM

OBJECTIVES
At the end of this activity the learner will be able to demonstrate an understanding of the following:
Next Generation Science Standards
MS-PS2-5 Motion and Stability: Forces and Interactions
Conduct an investigation and analyze data to provide evidence that electric and magnetic fields exist and can be manipulated.
Forces and energy
7Pf.01 Describe changes in energy that are a result of an event or process.
Technology Connection
Use game development tools to innovate a game replicating the Gauss rifle phenomena.
Engineering Connection
Use the engineering design process to structure a game on the concept of a Gauss rifle.
Common Core Mathematics
7. RP Ratios and Proportional Relationships
Analyze proportional relationships and use them to solve real-world and mathematical problems.
Objective:
Lesson Plan: Magnetism (Project 14)
Week 1: Understanding the Gauss Rifle and its Physics
Introduce students to the concept of the Gauss rifle and the principles behind it. Discuss energy transfer and the transformation of potential to kinetic energy.
Duration: 45 minutes
S# Phase Duration Details
1 Introduction 10 minutes
• Quick overview of what a Gauss rifle is.
• Show a short video or animation demonstrating how the Gauss rifle operates.
2 Discussion 15 minutes
3 Group Activity 15 minutes
4 Closure 5 minutes
5 Homework
• Talk about the transformation of potential to kinetic energy.
• Introduce the concept of energy transfer between the marbles.
• In groups, students brainstorm ways to depict the energy transfer in a game.
• Each group sketches a simple game idea.
• Share group ideas and prepare students for the next session (building the game).
• Research how games developed on platforms like code.org portray energy transformations. Write a short summary.
Week 2: Game Development – The Gauss Rifle Game
Objective:
Introduce students to the game development tools. Start building the Gauss Rifle game.
Duration: 45 minutes
S# Phase Duration Details
1 Introduction to Game Development Tools 10 minutes
2 Game Development 30 minutes
3 Closure 5 minutes
4 Homework
• Brief demo of the game development tool from code.org.
• Students, in pairs or small groups, begin developing their Gauss rifle game.
• The game should portray the transfer of energy between the marbles and reflect the 75% energy transfer rule.
• Share progress and troubleshoot any issues with the class.
• Prep for the next session (game completion and testing).
• Complete a basic framework of the game and come up with ideas on how to depict energy transformation visually.
Objective:
Week 3: Game Testing, Evaluation, and Reflection
Test the Gauss Rifle games developed by students. Evaluate understanding of the concepts and reflect on the sustainability connection.
Duration: 45 minutes
S # Phase Duration Details
1 Game Testing 20 minutes • Students play each other's games.
• They take notes on how the game represents the energy transformation and the Gauss rifle phenomena.
2 Discussion and Evaluation 20 minutes Review the evaluation questions:
• How does the energy transfer occur in your Gauss Rifle game?
• Investigate the relationship between initial potential and kinetic energy in your Gauss Rifle game.
• Describe the changes in energy that occur during the operation of your Gauss Rifle game.
• Calculate the kinetic energy received by the third marble.
3 Reflection 5 minutes
4 Homework
• Discuss the concept of energy transfer in relation to promoting sustainable infrastructure and innovation.
• Write a short essay on how the Gauss rifle game’s energy transfer can serve as a metaphor for sustainable energy transfer in real-life infrastructures.
Answer Key
Q# Answer
1 Energy in the Gauss Rifle game is transferred from one marble to the next using magnetic forces. Initially, there's potential energy in the first marble; upon release, it converts to kinetic energy, which is then partially transferred to the next marble upon collision.
2 The energy conservation principle indicates that the total energy in a closed system remains constant. In the game, the sum of the potential and kinetic energy remains consistent, but the energy is transferred between marbles.
3 Initially, the marble has potential energy. As it moves, it transforms to kinetic energy. When it hits the next marble, some of this kinetic energy is transferred, and the process continues.
4 First marble = 60 joules
Second marble receives 75% of 60, so 0.75 * 60 = 45 joules
Third marble receives 75% of 45, so 0.75 * 45 = 33.75 joules
5 Reflection:
The concept of energy transfer in the Gauss rifle game can be likened to the efficiency and sustainability of energy transfer in infrastructure. Just as not all energy is transferred between marbles, so in real-world applications, we must strive for maximum efficiency and sustainable methods to get the most out of our energy sources.
SPACEPHYSICS

OBJECTIVES
At the end of this activity the learner will be able to demonstrate an understanding of the following:
Next Generation Science Standards
MS-ESS1-2 Earth's Place in the Universe
Develop and use a model to describe the role of gravity in the motions within galaxies and the solar system.
Earth in space
7ESs.02 Know that gravity is the force that holds components of the Solar System in orbit around the Sun.
Technology Connection
Use game development tools to innovate a game on the gravity of different plants.
Engineering Connection
Use the engineering design process to structure a game on gravity comparisons of different planets.
Common Core Mathematics
7. RP Ratios and Proportional Relationships
Analyze proportional relationships and use them to solve real-world and mathematical problems.
Objective:
Lesson Plan: SPACE PHYSICS (Project 15)
Week 1: Understanding Gravity & Introduction to Game Design
Understand the gravity of different planets and its effects. Start conceptualizing their game based on their understanding.
Duration: 45 minutes
S# Phase Duration Details
1 Introduction 10 minutes
2 Discussion on Game Development 15 minutes
3 Brainstorming and Sketching 20 minutes
4 Homework
• Brief discussion about space physics and gravity.
• Discuss the gravity of different planets in our solar system.
• Introduction to code.org game development tools.
• Discuss the idea of simulating the gravity of different planets in a game.
• Students brainstorm and sketch their game ideas.
• Discuss game mechanics, how gravity will affect objects in their game.
• Research more on the gravity of different planets and come up with game mechanics that accurately represent this.
Week
2: Game Development
Objective:
Develop a basic prototype of the game. Implement game mechanics related to gravity.
Duration: 45 minutes
S# Phase Duration Details
1 Recap and Group Discussion 10 minutes
2 Hands-on Game Development 30 minutes
3 Sharing and Feedback 5 minutes
4 Homework
• Discuss homework and gather ideas from students on game mechanics.
• Students start to develop their game using code.org.
• Implement the gravity mechanics they conceptualized.
• A few students showcase their progress.
• Get feedback from peers.
• Continue developing the game. Ensure that the game mechanics accurately reflect the gravity of the planets chosen.
Week 3: Finalize Game and Evaluation
Objective: Complete game development.
Evaluate understanding through game presentation and answers to evaluation questions. Duration: 45 minutes
S # Phase Duration Details
1 Game Development 15 minutes • Students make final touches to their games.
• Ensure game mechanics align with the objectives.
2 Game Showcase 20 minutes • Students present their games to the class.
• Discussion on the gravity mechanics implemented and its relation to realworld gravity of planets.
3 Evaluation and Reflection 10 minutes • Distribute the evaluation questions to students.
• Discuss the sustainable development goal and how their game relates to it.
4 Homework
• Complete the evaluation questions and reflection at home.
Answer Key
Q# Answer
1 In your gravity comparison game, how does the strength of gravity on different planets affect the motion of objects? Provide examples from your game to support your answer.
• Answer will vary based on student's game design. Look for examples where objects move slower or faster based on the gravity of the planet being simulated.
2 Describe how your gravity comparison game models the interactions between celestial bodies within the solar system. How does gravity play a role in the motions of planets, moons, or other celestial objects?
• Answer will vary. Look for descriptions of how objects in the game orbit planets, or how they're attracted to larger bodies.
3 How does your game demonstrate the role of gravity in keeping planets in orbit around the Sun within the Solar System?
• Answer will vary. Look for explanations on how objects in the game stay in orbit around larger objects due to gravitational forces.
4 In your gravity comparison game, the strength of gravity on Planet A is twice as strong as the strength of gravity on Planet B. If the weight of an object on Planet B is 40 pounds, what would be its weight on Planet A?
• 80 pounds.
5 Reflection:
Answers will vary. Students should demonstrate an understanding of how the comparison of gravity between planets can inspire innovation in understanding our solar system and contribute to the broader goal of sustainable infrastructure in terms of space exploration or potential colonization.


EM kits with the implementation of an innovative STEM approach through these Resource Books, schools can join the worldwide league of STEM.org USA accredited schools.