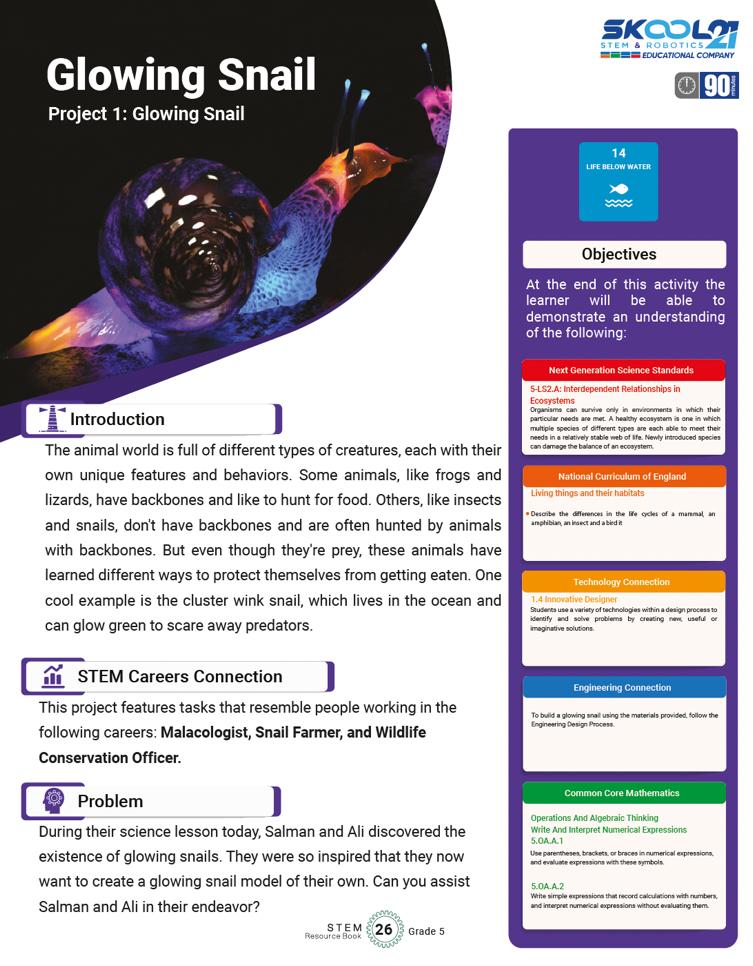
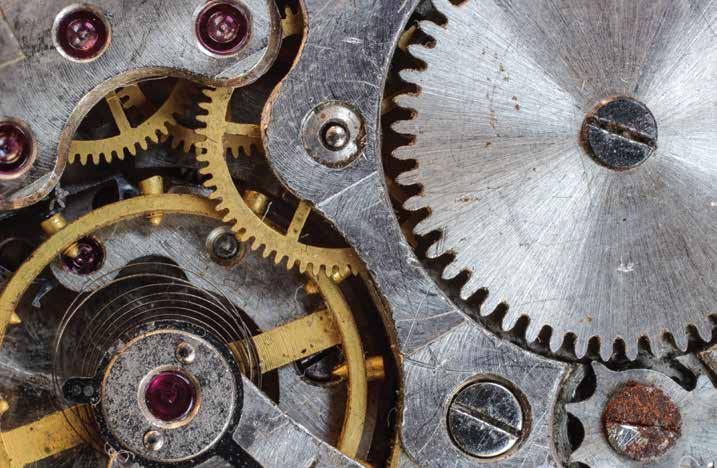
The projects in the STEM Resource Book reinforce the following concepts using Powered Machines Kit:
Forces and Interactions
Animals, including Humans
Forces and Magnets
Operations & Algebraic Thinking
Electricity
Geometry
Measurement & Data
Uses of Everyday Materials
Numbers & Operation
Stars and the Solar System
Preface
Education has always existed since the inception of the human race. However, it was informal in the beginning but took a more formal and structured shape later. The objective remained the same: to prepare the inquisitive learners of today for the challenges of tomorrow. Now, we are in the 21st century, where dynamic curriculum, engaging pedagogy, and performance-based assessments are the essential elements for an impactful education system, where integration of technology is indispensable and inseparable due to the extensive exposure of learners to media and information. These circumstances make the establishment of engaging and relevant education a true challenge for educators.
It is an open fact that the challenges of the 4th industrial revolution cannot be encountered through conventional educational approaches. Our STEM education model, based on STEM Resource books and makerspace, is developed according to the Science, Technology, Engineering, Mathematics (STEM) approach, inter-disciplinary and integrated learning that engages learners in learning, inculcates skills development and enhances problem-solving abilities.
STEM challenges in this book are developed by STEM-certified educators, based on Next Generation Science Standards, The National Curriculum of England and the Common Core for Mathematics. These challenges were then reviewed by international STEM experts & organizations, including STEM.org, an eminent research & accrediting body in the United States. These challenges and pedagogy were put to the test in a long & robust process of prototyping on students & their teachers for their feedback on learning attainment and experience.
Expert teachers appreciate and endorse the systematic initiative of STEM programs in schools, through which learners are challenged to solve problems of real-world situations and emerge as innovators and inventors. Apart from developing collaboration and communication skills, students choose their career paths and achieve their goals in life.
Introduction to the Kit
8x
Plat e, 1x2, blue 302323
4x
Plat e, 1x4, blue 371023
6x
Plat e with holes, 2x4, blue 370923
8x
Plat e with holes, 2x6, blue 41 14027
10x
Connect or peg with fric tion, 3-module, blue 4514553
8x Angular beam, 4x2-module, blue 41681 14
4x Angular beam, 4x6-module, blue 4182884
2x
Plat e with holes, 2x8, blue 373823
4x
Studded beam, 1x2, blue 370023
4x
Studded beam, 1x4, blue 370123
4x
Studded beam, 1x6, blue 389423
4x
Studded beam, 1x8, blue 370223
2x
Angular beam, 3x7-module, blue 41 12000
4x
Studded beam, 1x12, blue 389523
4x
Studded beam, 1x16, blue 370323
Connect or peg with bushing, red 4140806 14x Axle, 2-module, red 4142865
4x Angular block, 2 (180º), red 4234429 14x
4x
Cross block, 3-module, red 4175442 10x Angular block with crosshole, red 41 18897
4x
Beam, 9-module, whit e 4156341
8x
Beam, 15-module, whit e 4542578
2x
Tube, 2-module, red 4526984
4x Studded beam, 1x2 with crosshole, whit e 4233486
2x
Brick, 2x4, whit e 300101
2x
Brick, 2x2 round, whit e 614301
4x
Roof brick, 1x2/45º , whit e 4121932
2x Tile, 1x4, whit e 243101
2x
Beam, 3-module, whit e 4208160
2x Beam, 5-module, whit e 4249021
2x Beam, 7-module, whit e 4495927
2x St eering arm, black 41 14670
2x
Bearing for st eering arm, black 41 14671
4x
Angular block, 1 (0°), dark grey 4210658
4x
Angular block, 3 (157,5º), black 4107082
28x
Connect or peg with fric tion, black 4121715
4x Tyre, 30,4x4, black 281526
4x
Tyre, 30,4x14, black 4140670
4x
Tyre, 43,2x22, black 4184286
12x
Connect or peg with axle, beige 4186017
4x
Connect or peg, 3-module, beige 4514554
16x
Bushing, ½-module, yellow 4239601
4x
Connect or peg, handle, grey 421 1688
8x
Connect or peg, grey 421 1807
16x
Bushing, grey 421 1622
8x
Axle ex t ender, 2-module, grey 4512360
8x
Axle, 3-module, grey 421 1815
4x
Axle, 5-module, grey 421 1639
8x
Axle, 4-module, black 370526
2x Axle, 6-module, black 370626
2x
Axle, 8-module, black 370726
2x
Axle, 10-module, black 373726
6x
Axle, 12-module, black 370826
1x
Minifigure, pony tail wig, black 609326
1x
Minifigure, cap, red 448521
2x
Minifigure, head, yellow 9336
1x
Minifigure, body, whit e with sur fer 4275606
1x
Minifigure, body, whit e with flowers 4275536
1x
Minifigure, legs, orange 4120158
1x
Minifigure, legs, green 74040
2x
Gear, 16-t ooth, grey 421 1563
4x
Gear, 24-t ooth crown, grey 421 1434
2x
Gear, 40-t ooth, grey 4285634
2x
Gear, 10-t ooth rack, grey 421 1450
2x Worm gear, grey 421 1510
1x
Differential, 28-t ooth, dark grey 4525184
4x
Gear, 24-t ooth, dark grey 4514558
6x
Gear, 8-t ooth, dark grey 4514559
2x
Gear, 12-t ooth double bevel, black 417 7431
1x
Gear, 14-t ooth rack, black 4275503
6x
Gear, 12-t ooth bevel, beige 4514556
2x
Gear, 20-t ooth bevel, beige 4514557
2x
Gear, 20-t ooth double bevel, beige 4514555
2x
Belt , 33 mm, yellow 4544151
2x
Belt , 24 mm, red 4544143
2x
Belt , 15 mm, whit e 4544140
1x
Universal joint , 3-module, grey 4525904
4x
Hub, 18x14, grey 4490127
4x
Hub, 24x4, grey 4494222
4x
Hub, 30x20, grey 4297210
6x
Connect or peg, 1½-module, dark grey 421 1050
4x
Axle with knob, 3-module, dark grey 421 1086
4x
Cam wheel, dark grey 4210759
1x
Bobbin, dark grey 4239891
2x ½ beam, triangle, dark grey 4210689
2x String, 40-module with knobs, black 4528334
1x Plastic forms sheet 4500588
1x Weight element , black 73843
1x Conver t er cable, black 4514332
1x String, 2 m, black 4276325
1x Bat t er y box, 9V, grey 4506078
1x Mot or, 9V, grey 4506083
Understanding the Structure of the Lesson
Requirements for the project
Team Roles in the Team
Alignment with the Sustainable Development Goals
NGSS Curriculum Linkage
Cambridge Science Curriculum Linkage
Technology Connection
Engineering Connection
Common Core for Mathematics Curriculum Linkage
After brainstorming Learners create their model.
Evaluation is the phase where learners reflect on the performance of their model and link it to their classroom learning.
Learners write about the project they are building
Learners sketch their model and label as many parts for clarity in execution.
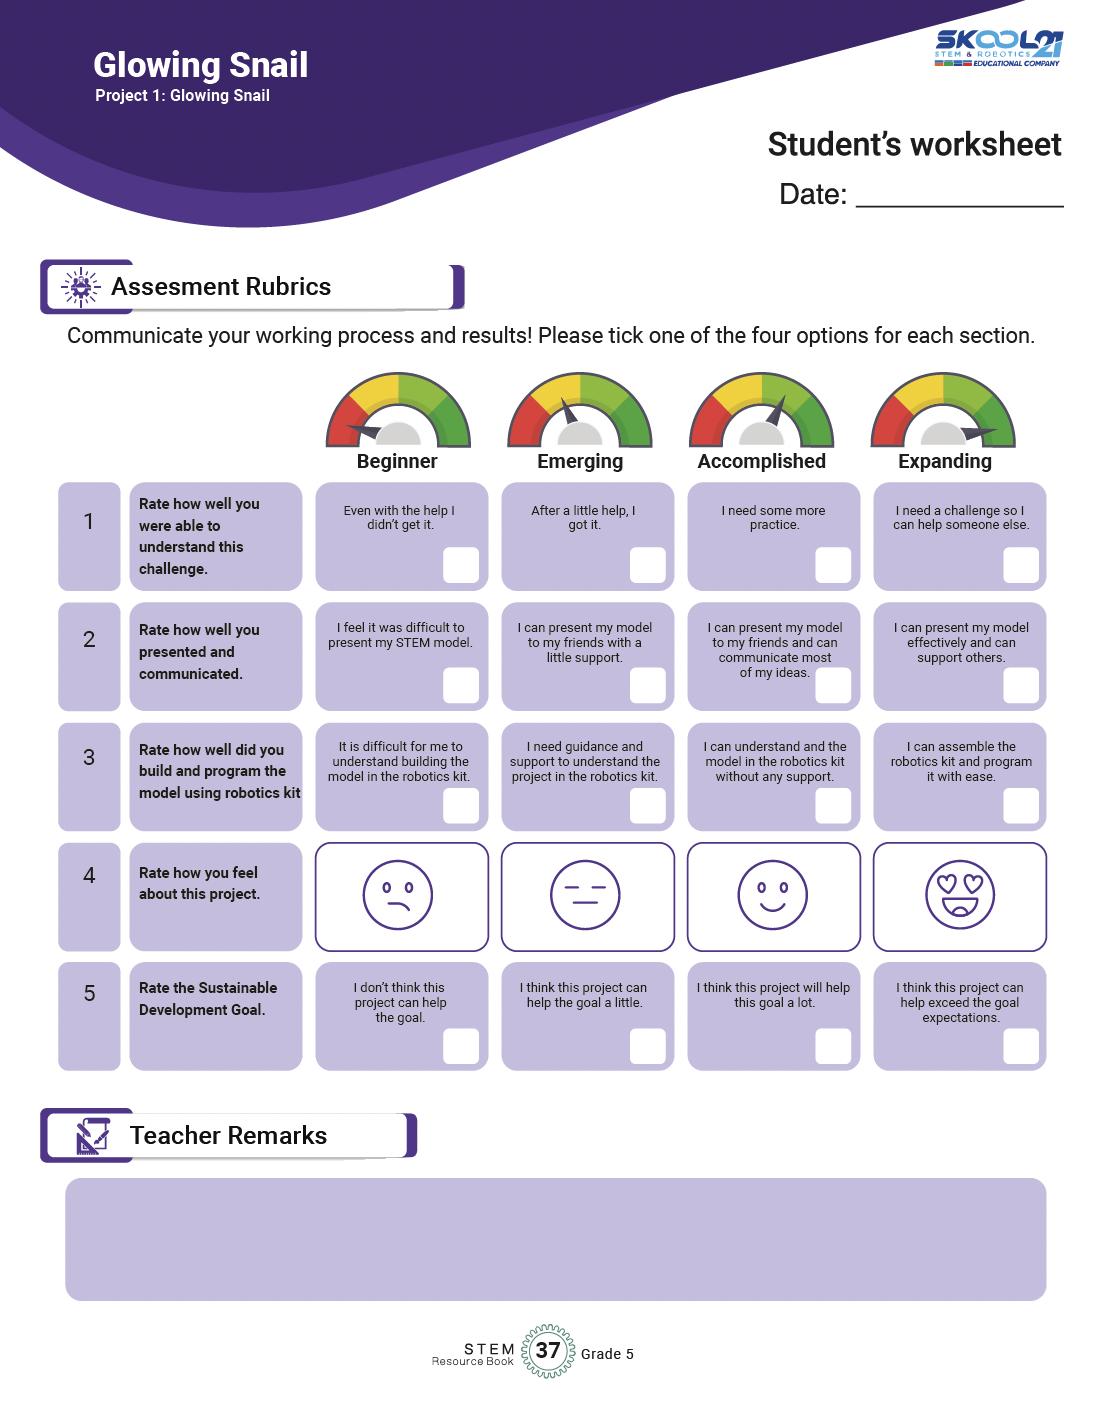
Assessment rubrics is a grid for teachers and learners to reflect on their progress in each of the project.
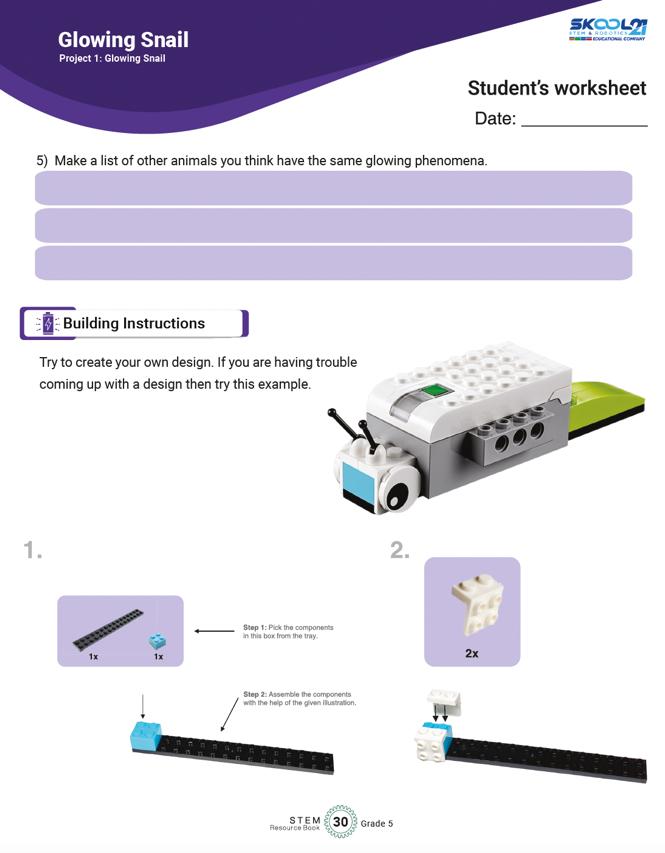
Building instructions are also provided to help learners get started, If they struggling in the first phase.
This space is for teachers to provide any remarks if needed on the participation of the learner in each of the project.
Alignment with the Sustainable Development Goals
Sustainable Development Goals (SDGs) are a set of 17 global goals adopted by all United Nations Member States in 2015 as part of the 2030 Agenda for Sustainable Development. eved by being for all at
Ensure inclusive and equitable quality education and promote lifelong learning opportunities for all. empower all women and
Ensure access to affordable, reliable, sustainable, and
Promote sustained, inclusive, and sustainable economic growth, full and productive employment, Build resilient infrastructure, promote inclusive and nable industrialization, and foster innovation.
Take urgent action to combat climate change and its marine resources for sustainable development.
Protect, restore, and promote sustainable use of terrestrial ecosystems, halt deforestation, and combat desertification and biodiversity loss.
Promote peaceful and inclusive societies for sustainable development, provide access to justice for all, and build effective, accountable, and inclusive institutions at all levels.
Partnerships for Strengthen the means of implementation and revitalize the Global Partnership for Sustainable Development.
Now, let's see how the students' projects can be linked to these SDGs:
When students design projects using STEM Resource Book and Wedo 2.0 Kit, they can focus on creating solutions that tackle real-world problems related to sustainable development. For example, they could create smart home systems that conserve energy (SDG 7Affordable and Clean Energy) or design a production (SDG 12
Linking their projects to specific SDGs requires critical thinking and understanding of the global challenges we face today. Students can also focus on projects that address local community needs and align them with relevant SDGs.
Encouraging students to consider the SDGs when designing their projects will help them understand the broader context of their work and how their technological and scientific skills can contribute to building a more sustainable and equitable world. This approach also empowers them to become responsible global citizens who actively engage with the challenges facing our planet.
crucial for overall health and well-being.
them to reflect on how their knowledge of nutrition can help promote sustainable
Explore the role of
to reflect on the importance of partnerships and collaborations in
Project 4: Electric Fan
efficiency and its impact on reducing carbon emissions. energy and reducing environmental impact. Encourage them to think about how their knowledge of electric fans and energy consumption can contribute to achieving sustainable energy goals.
Discuss how understanding force and motion can lead to more efficient transportation systems, reducing fuel consumption and emissions.
Encourage students to reflect on how their understanding of force and motion can contribute to responsible consumption and production. Ask them to consider how innovations in transportation can contribute to a more sustainable future.
Discuss how knowledge of levers can contribute to
Guide students to reflect on how their understanding of levers can contribute to creating safe and resilient cities. Ask
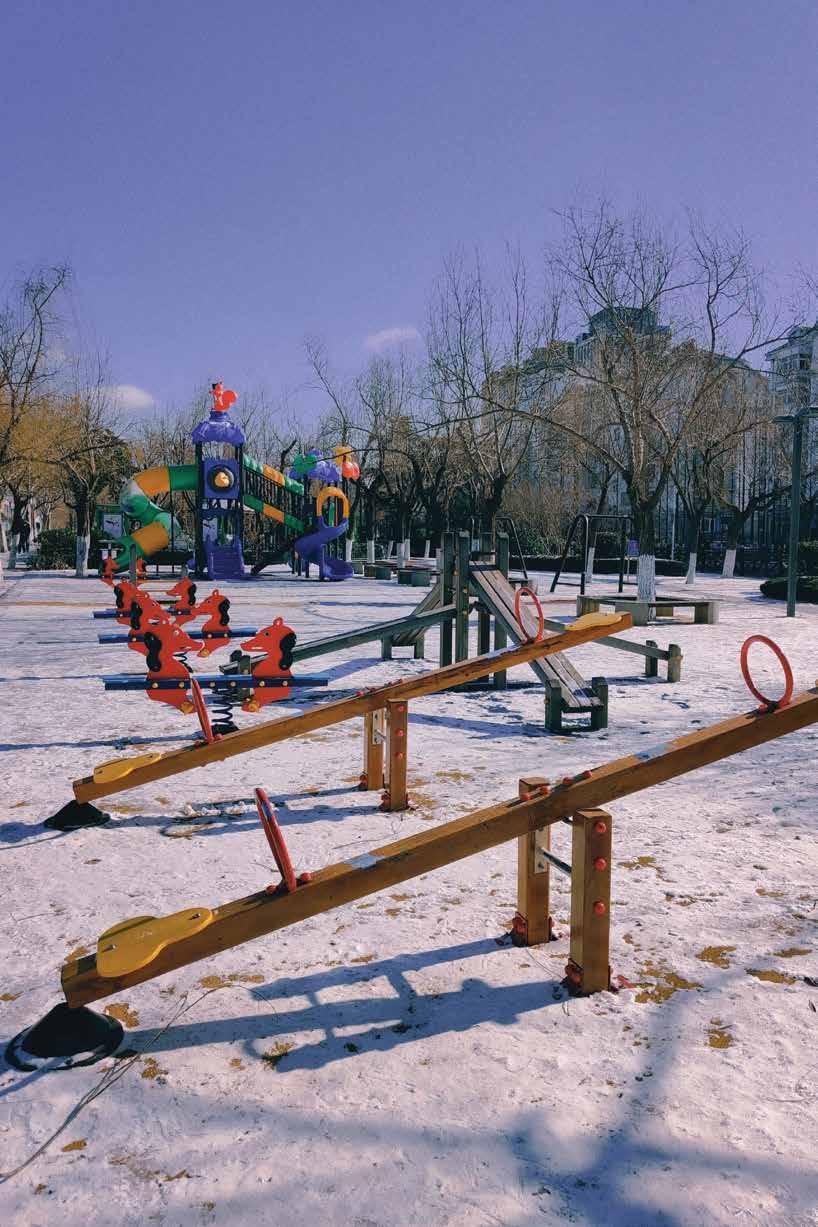
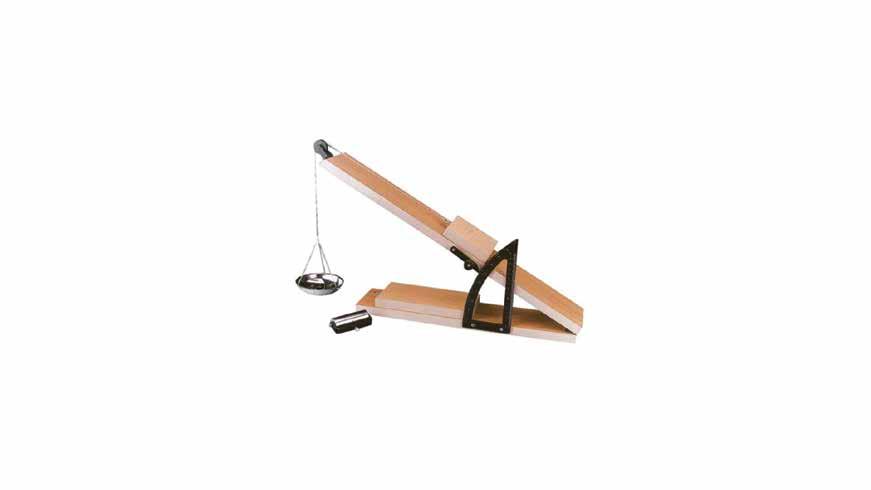
Project 7: Seesaw
Discuss how knowledge of gears can be applied in designing efficient transportation systems, elevators, and machinery used in urban settings.
Connect the concept of pulleys to the construction sportation industries, highlighting their role in lifting heavy loads and building
Discuss how the concept of inclined planes is relevant to designing accessible infrastructure and transportation systems in
transformation can contribute to creating accessible and sustainable energy sources.
Guide students to reflect on how their understanding of gears can contribute to creating efficient and sustainable urban infrastructure. Encourage them to think about how innovations in gear technology can enhance transportation and industrial processes.
Encourage students to reflect on how their understanding of pulleys can contribute to creating safe and efficient urban environments. Ask them to consider how pulley systems can be applied in construction, transportation, and other industries to improve efficiency and safety.
Guide students to reflect on how their understanding of inclined planes can contribute to creating inclusive and accessible urban environments. Encourage them to think about how innovations in engineering can
make cities safer and more sustainable for all residents. Encourage teachers to reflect on how their understanding of conveyor belts can contribute to creating a more equal society. Ask them to consider how technological
12
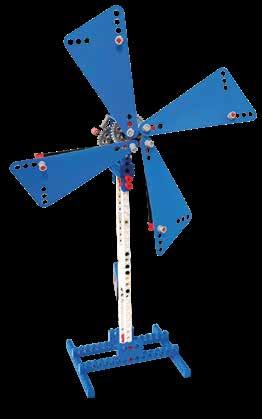
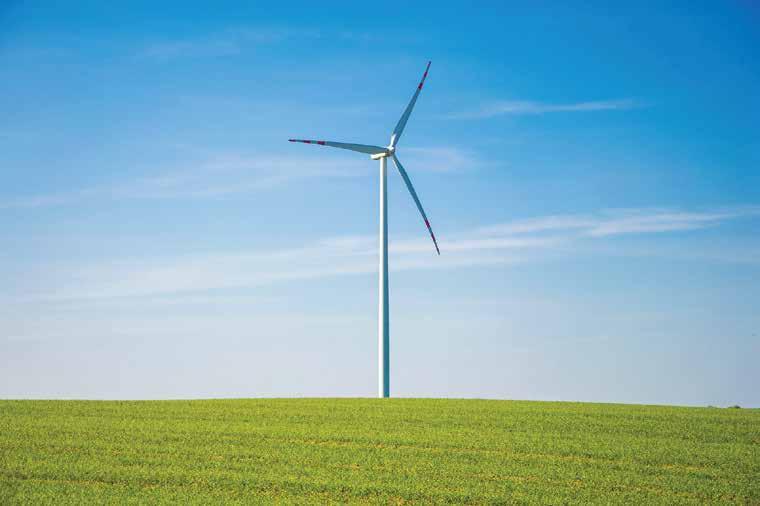
Project 12: Renewable
advancing our understanding of the universe. Ask them to consider how their knowledge of astronomy can inspire curiosity and foster innovation among their
Guide teachers to reflect on the role of wheels and axles in transportation and infrastructure.
Encourage them to think about how technological advancements have accessibility and connectivity.
Encourage teachers to reflect on the role of innovation in the automotive industry and its impact on transportation systems. Ask them to consider how their ding of steering mechanisms can contribute to designing more efficient and sustainable vehicles.
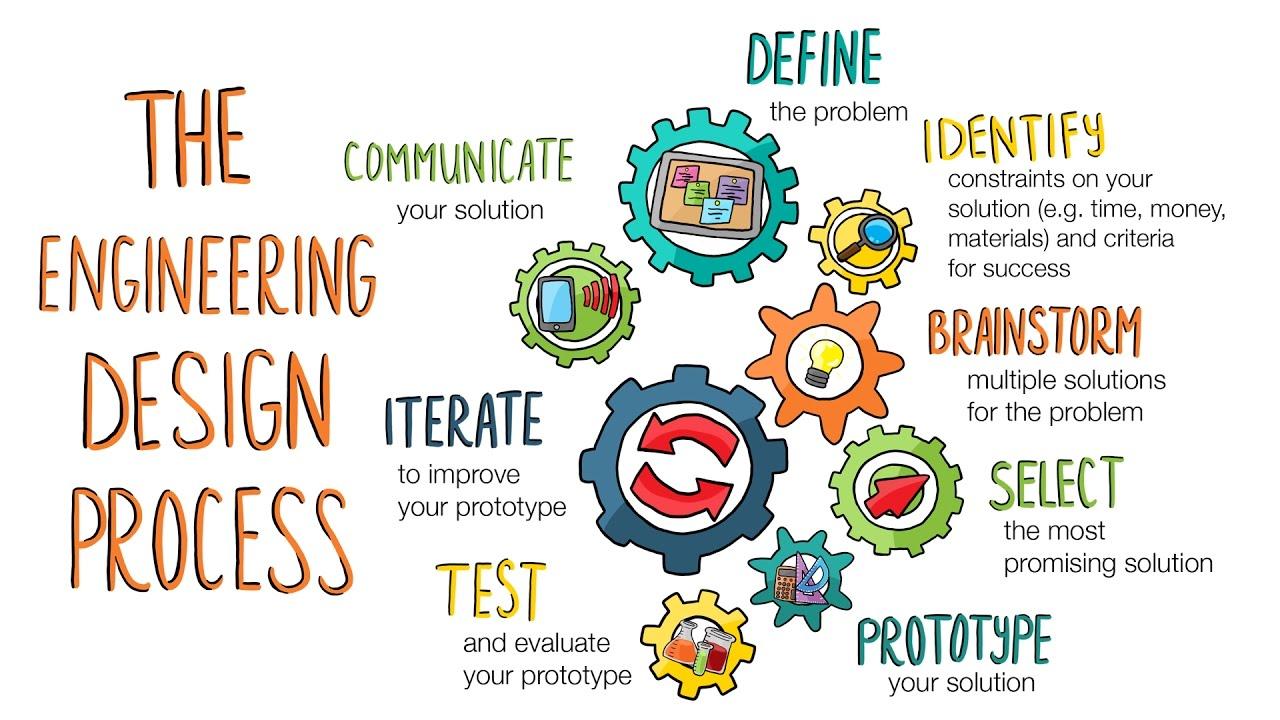
The Engineering Design Process
The Engineering Design Process is a systematic approach used by engineers and designers to solve problems and create innovative solutions. It provides a structured framework for developing new products, processes, or systems by following a series of well-defined steps. This process is not only applicable in engineering but is also widely used in various STEM disciplines to tackle challenges and develop creative solutions.
The typical steps of the Engineering Design Process are: Icons Phases
Define the Problem
Brainstorm Ideas
Design and Plan
Details
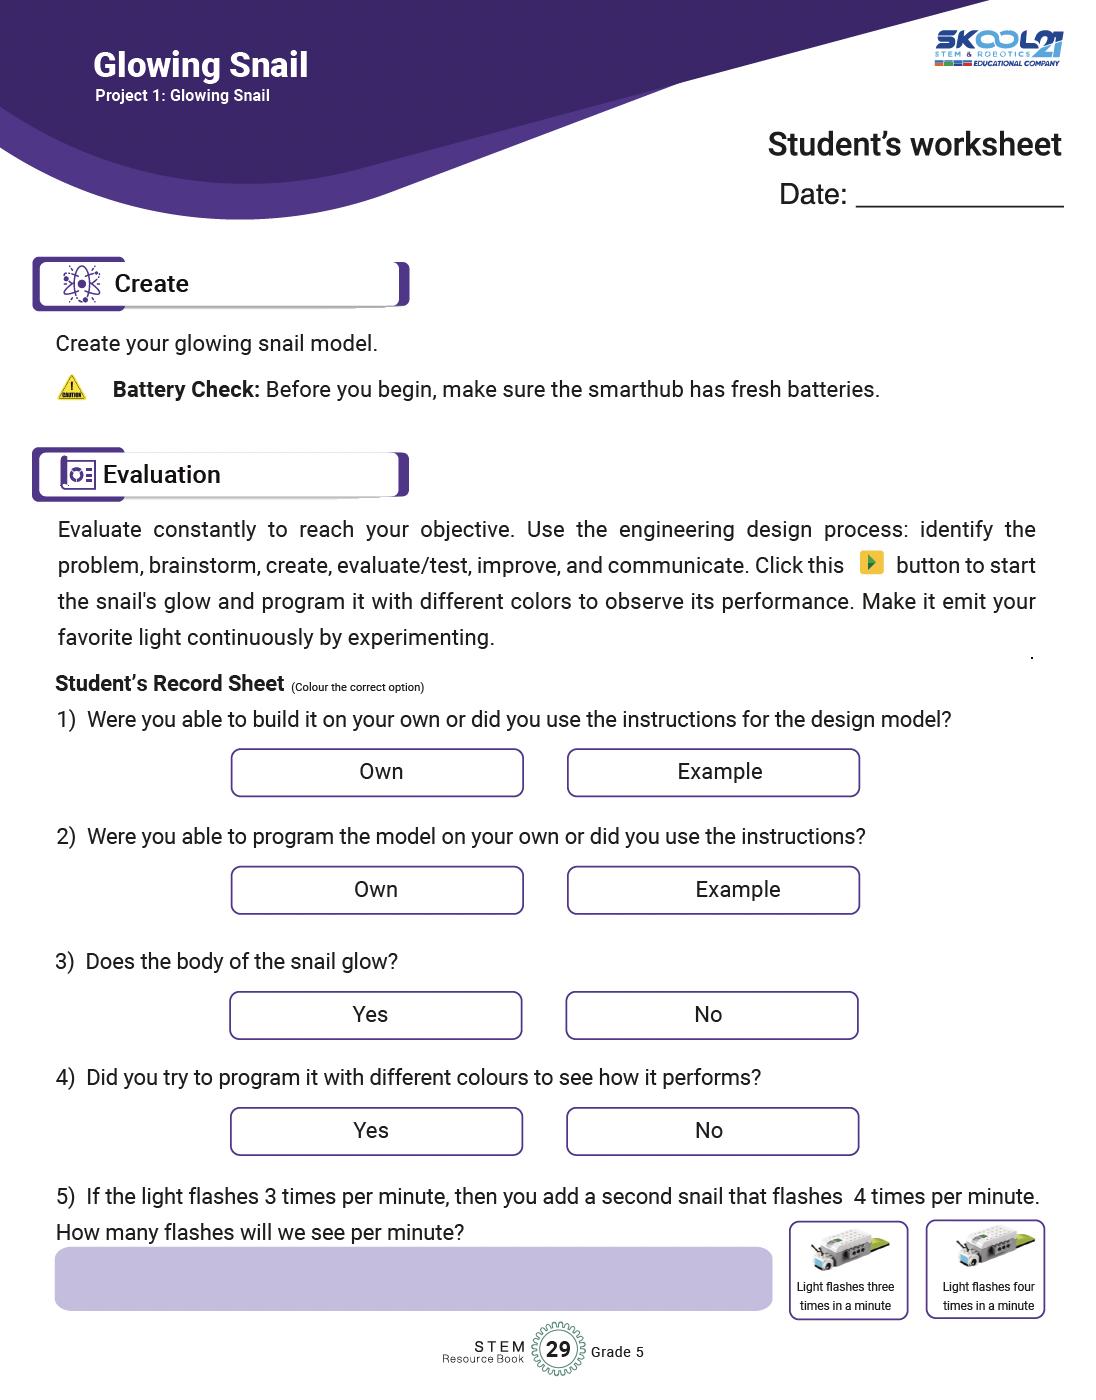
• Present the project's objectives and requirements to students, such as building a model, attaching it to the smarthub, and programming it.
• Encourage students to understand the purpose of the project, its context, and what they need to achieve.
• Engage students in brainstorming sessions where they envision and sketch possible solutions.
• Encourage creativity and diverse ideas, allowing students to explore various design options.
• Guide students to describe their chosen model's structure and function in detail.
• Help them plan how to use STEM Kit components effectively to build their models.
• Facilitate discussions on how they intend to program the model to perform specific
Build and Create
Test and Evaluate
Iterate and Improve
Communicate and Share
actions.
• Provide assistance as needed while students assemble their models.
• Encourage hands-on exploration, experimentation, and iteration as they build and refine their designs.
• Support students in testing their models and programming, providing guidance for troubleshooting.
• Ask questions to help them critically assess whether the model meets the specified requirements.
• Encourage students to identify areas for improvement based on testing outcomes.
• Guide them in making iterative changes to their designs to enhance performance and functionality.
• Organize opportunities for students to present their projects to peers or the class.
• Encourage them to explain their design choices, programming logic, and problemsolving strategies.
Fostering Social Skills
The STEM projects outlined in the "STEM Resource Book" provide opportunities for students to develop important social skills alongside their technical knowledge. These social skills are crucial for effective collaboration, communication, and engagement in real-world scenarios. Here's a brief introduction to some of the key social skills covered in these projects:
S# Social Skills
1 Collaboration
Details
Working together is a fundamental skill across all projects. Students learn to cooperate, share ideas, delegate tasks, and contribute collectively to achieve project goals. They experience the benefits of pooling strengths and perspectives to create more comprehensive and innovative solutions.
2 Communication Effective communication is vital in sharing ideas, presenting findings, and troubleshooting challenges. Through the projects, students practice articulating their thoughts clearly, listening actively to peers, and engaging in meaningful discussions that promote understanding.
3 ProblemSolving
4 Empathy and Respect
Engaging in the engineering design process exposes students to various challenges. They learn to approach problems analytically, brainstorm solutions, evaluate alternatives, and make decisions collaboratively. These skills are applicable beyond STEM and are valuable in everyday decision-making.
Encouraging students to appreciate different viewpoints, respect diverse ideas, and consider the feelings of their peers fosters a positive and inclusive learning environment. These skills promote effective teamwork and strengthen relationships within the group.
5 Critical Thinking
6 Time Management
As students work on designing, building, testing, and refining their projects, they enhance their critical thinking abilities. They learn to analyze situations, make informed judgments, and consider implications and consequences of their choices.
Working on projects requires efficient time management. Students develop skills in setting priorities, allocating time to tasks, meeting deadlines, and juggling multiple responsibilities –all of which are valuable in academic and professional contexts.
7 Conflict Resolution Collaboration can sometimes lead to disagreements or conflicts. Through open discussions and respectful negotiations, students learn how to address conflicts, find common ground, and work towards mutually satisfactory solutions.
8 Presentation Skills
9 Reflection
Sharing their projects with peers and instructors hones students' presentation skills. They practice structuring their thoughts, speaking confidently, and using visuals effectively to convey complex information.
After completing each project, students reflect on their experiences, successes, challenges, and lessons learned. This practice encourages self-awareness, self-assessment, and the
ability to apply insights from one project to others.
By incorporating these social skills into STEM projects, educators prepare students not only for academic success but also for success in their future careers and personal lives. These skills empower students to collaborate effectively, contribute meaningfully to teams, and navigate the complexities of a rapidly changing world.
S# Project
1 Project 1: Balanced Diet
2 Project 2: Transformation of Energy
Core - Social Skills
Collaboration: Students can collaborate in designing the fishing rod, sharing ideas, and working together to ensure the components fit well.
Communication: Students need to effectively communicate their design ideas, challenges faced, and solutions to their peers and instructors.
Problem-Solving: Students must identify the best way to design a functional fishing rod, taking into account structural stability and the mechanism for releasing and retracting the string.
Empathy and Respect: Encourage students to consider each other's perspectives during the design process, promoting a respectful and empathetic environment.
Critical Thinking: Students must critically assess their design's efficiency in catching fish and evaluate the different components' roles.
Time Management: Students need to allocate time for brainstorming, building, and testing their fishing rod within the project timeline.
Conflict Resolution: In cases of differing design opinions, students can learn to address conflicts and find common ground to improve the fishing rod's design.
Presentation Skills: Students can present their fishing rod design to the class, discussing the design process, rationale, and challenges faced.
Reflection: Encourage students to reflect on how their fishing rod design can improve food sustainability and contribute to SDG 2.
Collaboration: Students can collaborate on building the machine and sharing insights about energy transformation.
Communication: Students must communicate effectively to discuss design aspects, energy conversion mechanisms, and project progress.
Problem-Solving: Students must find solutions to convert electrical energy into mechanical energy efficiently.
Empathy and Respect: Encourage students to appreciate diverse ideas during brainstorming and discussions.
Critical Thinking: Students should critically analyze how different components contribute to energy transformation.
Time Management: Students need to manage time effectively to complete the machine within the project timeline.
Conflict Resolution: In case of design disagreements, students can practice resolving conflicts constructively.
Presentation Skills: Students can present their energy transformation machine, explaining design choices and energy conversion.
Reflection: Encourage students to reflect on how their energy transformation project aligns with SDG 7 and the importance of sustainable energy access.
Collaboration: Students can collaborate to design and build the musical device, pooling their creative ideas.
Communication: Students must communicate to discuss sound production, vibration, and design modifications.
Problem-Solving: Students need to find effective ways to convert electrical energy into sound energy.
Empathy and Respect: Encourage students to appreciate each other's contributions to the musical device's design.
Critical Thinking: Students should critically analyze the device's components, their roles, and the resulting sound quality.
Time Management: Students need to manage their time effectively to complete the musical device on schedule.
Conflict Resolution: In case of disagreements, students can learn to resolve conflicts amicably during the design process.
3 Project 3: Sound Energy
4 Project 4: Electric Fan
Presentation Skills: Students can present their musical device, explaining its functioning, sound production, and design considerations.
Reflection: Encourage students to reflect on how their musical device can contribute to creative arts and entertainment, supporting SDG 17.
Collaboration: Students can work together to design and build the cooling device, sharing insights and suggestions.
Communication: Students must communicate to discuss air circulation, cooling mechanisms, and design refinements.
Problem-Solving: Students need to identify the best way to produce airflow and cool the surroundings effectively.
Empathy and Respect: Encourage students to respect each other's ideas and contribute collaboratively.
Critical Thinking: Students should critically assess the device's components, their roles, and their impact on cooling efficiency.
Time Management: Students need to manage time effectively to complete the cooling device within the project timeline.
Conflict Resolution: In case of design disagreements, students can practice resolving conflicts professionally.
Presentation Skills: Students can present their cooling device, explaining its airflow mechanism and cooling efficiency.
Reflection: Encourage students to reflect on how their cooling device can contribute to maintaining comfortable living conditions, supporting SDG 7.
Collaboration: Students can collaborate in designing the car model, sharing ideas about force and motion concepts.
Communication: Students must communicate effectively to discuss force application, motion prediction, and design adjustments.
5 Project 5: Force and Motion
Problem-Solving: Students need to find solutions to make the car move smoothly up an inclined plane.
Empathy and Respect: Encourage students to respect and consider their peers' suggestions during the design process.
Critical Thinking: Students should critically assess how force, friction, and inclined planes impact the car's movement.
Time Management: Students need to manage time efficiently to complete the car model within the project timeline.
Conflict Resolution: In case of differing design opinions, students can practice resolving conflicts constructively.
Presentation Skills: Students can present their car model, explaining force application and motion on inclined planes.
Reflection: Encourage students to reflect on how their understanding of force and motion can contribute to improving transportation systems, supporting SDG 12.
Collaboration: Students can collaborate to design different types of levers, sharing insights and optimizing designs together.
Communication: Students must communicate effectively to discuss lever types, weight distribution, and design modifications.
Problem-Solving: Students need to identify the best lever type for specific tasks, considering weight distribution and mechanical advantage.
Empathy and Respect: Encourage students to appreciate each other's ideas during lever design discussions.
Critical Thinking: Students should critically analyze the mechanical advantage of each lever type and its suitability for different tasks.
Time Management: Students need to manage time effectively to complete the lever models within the project timeline.
Conflict Resolution: In case of design disagreements, students can practice resolving conflicts constructively.
Presentation Skills: Students can present their lever models, explaining the mechanics of each lever type.
Reflection: Encourage students to reflect on how their understanding of lever mechanics can contribute to improving structures and mechanisms, supporting SDG 11.
7 Project 7: Seesaw Collaboration: Students can collaborate in designing the seesaw
6
Project 6: Levers
model, discussing balance and weight distribution.
Communication: Students must communicate effectively to discuss fulcrum placement, balance, and design refinements.
Problem-Solving: Students need to find solutions to create a balanced seesaw that can carry the weight of characters.
Empathy and Respect: Encourage students to respect each other's ideas and work collaboratively to achieve balance.
Critical Thinking: Students should critically assess fulcrum placement, weight distribution, and seesaw mechanics.
Time Management: Students need to manage time effectively to complete the seesaw model within the project timeline.
Conflict Resolution: In case of differing design opinions, students can practice resolving conflicts professionally.
Presentation Skills: Students can present their seesaw model, explaining fulcrum placement and balance considerations.
Reflection: Encourage students to reflect on how their seesaw design promotes balance and inclusivity, supporting SDG 7.
Collaboration: Students can collaborate in designing gear models, sharing insights about gear ratios and mechanical advantage.
Communication: Students must communicate effectively to discuss gear ratios, speed, and torque in their designs.
Problem-Solving: Students need to identify the appropriate gear ratios to achieve desired speed and torque in their models.
Empathy and Respect: Encourage students to appreciate each other's ideas during gear design discussions.
Critical Thinking: Students should critically analyze gear combinations and their impact on speed and torque.
Time Management: Students need to manage time effectively to complete the gear models within the project timeline.
Conflict Resolution: In case of design disagreements, students can practice resolving conflicts professionally.
8 Project 8: Gear
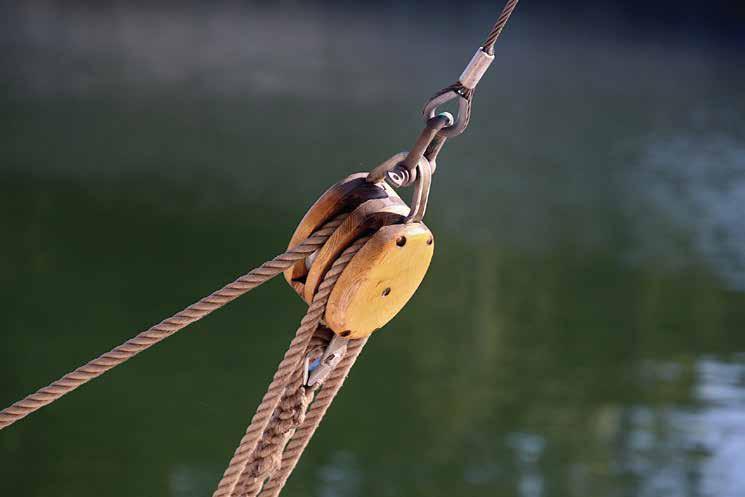
9 Project 9: Pulley
Presentation Skills: Students can present their gear models, explaining gear ratios, speed, and mechanical advantage.
Reflection: Encourage students to reflect on how their understanding of gear mechanics can contribute to improving machinery efficiency, supporting SDG 11.
Collaboration: Students can collaborate in designing pulley models, discussing mechanical advantage and load distribution.
Communication: Students must communicate effectively to discuss pulley mechanisms, load distribution, and design refinements.
Problem-Solving: Students need to find solutions to create functional pulley systems with different mechanical advantages.
Empathy and Respect: Encourage students to appreciate each other's ideas and collaborate to optimize pulley designs.
Critical Thinking: Students should critically analyze the pulley's mechanical advantage, load distribution, and efficiency.
Time Management: Students need to manage time effectively to complete the pulley models within the project timeline.
Conflict Resolution: In case of design disagreements, students can practice resolving conflicts professionally.
Presentation Skills: Students can present their pulley models, explaining mechanical advantage, load distribution, and design considerations.
Reflection: Encourage students to reflect on how their understanding of pulley mechanics can contribute to efficient load lifting systems, supporting SDG 11.
Collaboration: Students can collaborate to design inclined plane models, sharing insights about force and motion on slopes.
10 Project 10:
Communication: Students must communicate effectively to discuss inclined plane angles, force application, and design adjustments.
Problem-Solving: Students need to find solutions to create efficient inclined planes for different tasks.
Empathy and Respect: Encourage students to respect each other's ideas and collaborate to optimize inclined plane designs.
Inclined Planes
Critical Thinking: Students should critically analyze inclined plane angles, force distribution, and mechanical advantage.
Time Management: Students need to manage time effectively to complete the inclined plane models within the project timeline.
Conflict Resolution: In case of differing design opinions, students can practice resolving conflicts professionally.
Presentation Skills: Students can present their inclined plane models, explaining force application, mechanical advantage, and design choices.
Reflection: Encourage students to reflect on how their understanding of inclined plane mechanics can contribute to efficient transportation and load movement, supporting SDG 11.
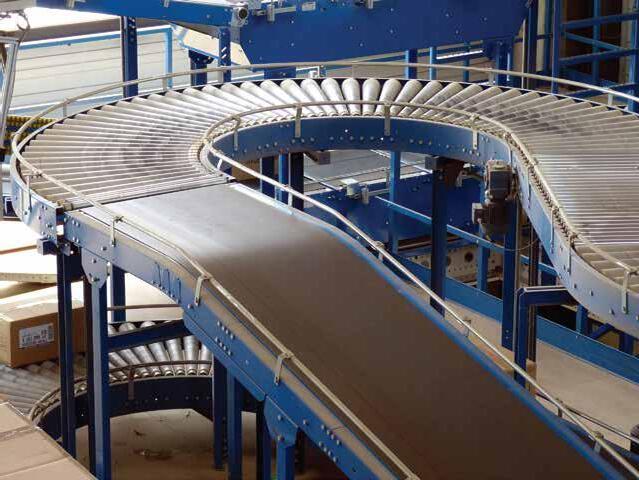
Collaboration: Students can collaborate in designing the conveyor belt model, discussing mechanisms and material movement.
Communication: Students must communicate effectively to discuss the design of the conveyor belt and its components.
Problem-Solving: Students need to find solutions to create a functional conveyor belt that can carry materials uphill.
Empathy and Respect: Encourage students to respect each other's ideas and collaborate to optimize the conveyor belt design.
Critical Thinking: Students should critically analyze the conveyor belt design, considering weight distribution and efficiency.
Time Management: Students need to manage time effectively to complete the conveyor belt model within the project timeline.
Conflict Resolution: In case of differing design opinions, students can practice resolving conflicts professionally.
Presentation Skills: Students can present their conveyor belt model, explaining the mechanism and material movement.
Reflection: Encourage students to reflect on how their conveyor
Project 11: Conveyor Belt
12
Project 12: Renewable Resources
belt design can enhance efficiency in material transportation, supporting SDG 10.
Collaboration: Students can collaborate to design the windmill model, sharing insights about wind energy and mechanical systems.
Communication: Students must communicate effectively to discuss wind energy conversion, blade movement, and design improvements.
Problem-Solving: Students need to find solutions to create a windmill model that effectively converts wind energy to mechanical energy.
Empathy and Respect: Encourage students to appreciate each other's ideas and work collaboratively to optimize windmill design.
Critical Thinking: Students should critically analyze blade design, wind energy capture, and mechanical efficiency.
Time Management: Students need to manage time effectively to complete the windmill model within the project timeline.
Conflict Resolution: In case of design disagreements, students can practice resolving conflicts constructively.
Presentation Skills: Students can present their windmill model, explaining blade movement, energy conversion, and design choices.
Reflection: Encourage students to reflect on how their windmill design supports the utilization of renewable energy, supporting SDG 7.
Collaboration: Students can collaborate in designing the Earth and Moon model, sharing insights about celestial mechanics.
Communication: Students must communicate effectively to discuss the positions of the Earth, Moon, and Sun in the model.
13
Project 13: Earth in the Solar System
Problem-Solving: Students need to find solutions to create an accurate model of Earth's movement around the Sun and the Moon's movement around the Earth.
Empathy and Respect: Encourage students to respect each other's ideas and collaborate to accurately represent the solar system.
Project 14: Wheel and Axle
Critical Thinking: Students should critically analyze the positions of the Earth, Moon, and Sun in the model and their relationships.
Time Management: Students need to manage time effectively to complete the solar system model within the project timeline.
Conflict Resolution: In case of differing model ideas, students can practice resolving conflicts professionally.
Presentation Skills: Students can present their solar system model, explaining celestial movements, eclipses, and their representation in the model.
Reflection: Encourage students to reflect on how their solar system model promotes understanding of celestial mechanics and the Earth's position, supporting SDG 9.
Collaboration: Students can collaborate in designing the wheel and axle model, sharing insights about rotational motion.
Communication: Students must communicate effectively to discuss the mechanics of the wheel and axle and how they function together.
Problem-Solving: Students need to find solutions to create a functional wheel and axle model with efficient rotational movement.
Empathy and Respect: Encourage students to appreciate each other's ideas and work collaboratively to optimize the model.
Critical Thinking: Students should critically analyze the mechanics of the wheel and axle, focusing on efficiency and rotational motion.
Time Management: Students need to manage time effectively to complete the wheel and axle model within the project timeline.
Conflict Resolution: In case of differing design opinions, students can practice resolving conflicts constructively.
Presentation Skills: Students can present their wheel and axle model, explaining the mechanics of rotational motion and its applications.
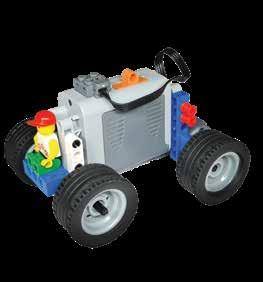
15 Project 15: Steering Car
Reflection: Encourage students to reflect on how their wheel and axle model can be applied to various machinery and systems, supporting SDG 9.
Collaboration: Students can collaborate in designing the steering car model, sharing insights about steering mechanisms.
Communication: Students must communicate effectively to discuss the design of the steering mechanism and its functionality.
Problem-Solving: Students need to find solutions to create a steering car model with functional left and right turns.
Empathy and Respect: Encourage students to respect each other's ideas and collaborate to optimize the steering mechanism.
Critical Thinking: Students should critically analyze the steering mechanism's design, focusing on its efficiency and maneuverability.
Time Management: Students need to manage time effectively to complete the steering car model within the project timeline.
Conflict Resolution: In case of differing design opinions, students can practice resolving conflicts in a constructive manner.
Presentation Skills: Students can present their steering car model, explaining the steering mechanism, gear ratio, and its role in steering.
Reflection: Encourage students to reflect on how their steering car model demonstrates the mechanics of turning and steering systems, supporting SDG 9.
By guiding students through these projects, educators can help them develop a diverse range of social skills that are essential for effective collaboration, communication, problemsolving, empathy, critical thinking, time management, conflict resolution, presentation skills, and reflection. These skills equip students with the ability to work effectively in teams, adapt to various challenges, and navigate complex scenarios, preparing them for success in both academic and real-world contexts.
Makerspace
What is a Makerspace?
A makerspace is a collaborative workspace inside a school, library, or public/private facility for making, learning, exploring, and sharing. Here, students have the tools and resources to design, experiment, build, and invent. Makerspaces typically include a variety of materials and equipment, ranging from high-tech to no-tech, all aimed at fostering creativity, problem-solving, and critical thinking.
Features of an Ideal Makerspace
1. Space: The ideal makerspace should be spacious enough to accommodate groups of students working on projects. It should be well-lit and have areas for both individual and group work.
2. Furniture:
• Flexible Seating: Chairs and tables that are easily movable and can be reconfigured for different tasks.
• Storage Units: Shelves and drawers for organizing tools, materials, and student projects.
• Workbenches: Sturdy surfaces for hands-on activities.
• Display Boards: Walls or boards to showcase projects, ideas, or instructions.
3. Equipment Needed:
• Electronics STEM Kits: A core tool for the Grade 5 makerspace, these kits integrate hardware and software to produce a comprehensive learning tool.
• Computers or Tablets: For programming and accessing digital resources.
• General STEM Tools: Rulers, protractors, magnifying glasses, and basic lab equipment.
• Safety Equipment: Safety goggles, first aid kit, gloves, etc.
4. STEM Resource Book: This will guide students and educators in carrying out projects aligned with NGSS, the National Curriculum of England, and the Common Core State Standards for Mathematics.
Importance of a Makerspace in Schools
1. Enhanced Learning: Makerspaces enable hands-on learning, making complex concepts more accessible.
2. Fosters Creativity: Provides an environment where students can freely express and test out their ideas.
3. Teamwork: Students learn to collaborate, delegate tasks, and work towards a common goal.
4. Problem-solving: Tackling real-world challenges makes students more adept at thinking critically.
5. Prepares for the Future: Engaging with technology and tools prepares students for future job roles and challenges.
Executing STEM Activities in the Makerspace
1. Planning: Begin with the end in mind. Identify the learning outcomes you aim to achieve from the activity.
2. Group Formation: Divide students into small groups to encourage collaboration.
3. Introduction: Introduce the Electronics STEM Kit and how it can be used. Brief students on the activity using the STEM Resource Book.
4. Hands-on Activity: Allow students to build, experiment, and iterate using the kits. Ensure that they refer to the STEM Resource Book for guidance.
5. Reflection: Post-activity, allow students to discuss their findings, challenges faced, and what they learned.
6. Showcase: Encourage students to display their projects, explaining the science and math concepts they applied.
7. Safety: Always stress the importance of following safety guidelines, especially when using tools and equipment.
Standard Operating Procedure (SOP) for a Makerspace
1. Objective:
Provide a safe, organized, and productive environment for students to explore, invent, and learn using various tools and materials available in the makerspace.
2. Scope:
This SOP applies to all students, educators, and visitors within the makerspace area.
3. Responsibilities:
• Educators/Staff: Supervise activities, ensure the safety and proper use of tools/equipment, provide necessary training, and maintain equipment.
• Students: Comply with all guidelines, work safely, and respect all equipment and fellow makers.
4. Access:
• Makerspace access should be limited to authorized personnel and students during scheduled times.
• All users must sign in and out of the makerspace, noting their purpose of visit.
5. Safety:
• Before using any tool or equipment, students must receive proper training.
• Safety equipment like goggles, gloves, and aprons should be worn as required.
• No food or drink is allowed in the makerspace.
• First aid kits and fire extinguishers should be easily accessible.
6. Equipment Usage:
• All equipment should have clear, written instructions posted nearby.
• Users must report any damage or malfunction immediately.
• After use, equipment must be returned to its designated place and left in a clean and usable state for the next user.
7. Materials:
• All materials must be stored in their designated areas.
• Users must log materials used for inventory and restocking purposes.
• Waste should be disposed of properly in the provided bins.
8. Conduct:
• Respect fellow makers; do not interrupt or hinder someone else’s project.
• Clean up after completing a project or task.
• Notify staff of any issues, concerns, or suggestions.
• Always ask if unsure about equipment use or any makerspace procedure.
9. Training:
• Regular workshops should be held to train students on the use of new equipment or software.
• New users should undergo an orientation session before accessing the makerspace.
10. Maintenance:
• A routine check of all tools and equipment should be carried out to ensure they are in good working condition.
• Expired or worn-out materials should be discarded and replaced.
• Cleaning routines must be established to maintain the hygiene and tidiness of the makerspace.
11. Project Storage:
• Designate a space where students can store ongoing projects.
• All projects should be labeled with the student's name, class, and date.
12. Showcase:
• A dedicated space should be available for showcasing exemplary projects.
• Educators can rotate the showcased projects based on relevance, innovation, and educational value.
13. Continuous Improvement:
• Collect feedback regularly from users to understand what can be improved.
• Explore new tools, materials, and technologies to keep the makerspace updated.
14. Emergency Procedures:
• Clearly display emergency procedures, including evacuation routes.
• Train staff and students on how to respond to emergencies like fires, electrical failures, or injuries.
15. Periodic Review:
• This SOP should be reviewed at least annually to ensure its relevance and effectiveness.
In conclusion, a well-structured SOP ensures that the makerspace remains a hub of creativity while being safe and organized. Adhering to these procedures ensures that the makerspace is beneficial for all and remains a vital resource for students for years to come.
Scheme of Work
Week 1: Introduction to Balanced Diet
Introduce the concept of a balanced diet and its importance.
Discuss different food groups and their nutritional value.
Simple & Powered Machines Kit
Pencil Crayons
STEM
Resource Book – Grade 3
Brainstorm and design the machine for energy transformation using the Simple & Powered Machines Kit. Explore mechanisms for converting electrical energy into mechanical energy.
Week 3: Building and Evaluation
Assemble the energy transformation model using the Simple & Powered Machines Kit. Evaluate the model's functionality, make improvements if necessary. Discuss the role of renewable energy in achieving affordable and clean energy for all.
Week 1: Introduction to Sound Energy
Introduce the concept of sound energy and its characteristics. Discuss how sound is produced and transmitted. Explain the project's challenge: Design and build a musical device.
Week 2: Musical Device Design
Brainstorm and design the musical device using the Simple & Powered Machines Kit. Explore mechanisms for creating vibrations and producing sound.
Week 3: Building and Evaluation
Assemble the musical device model using the Simple & Powered Machines Kit
Evaluate the model's sound production, make adjustments if needed.
Discuss the role of partnerships in
promoting innovation and achieving sustainable goals.
Week 1: Introduction
Understand the concepts of force and motion.
Design and build a model car that demonstrates motion on an inclined plane.
Simple & Powered Machines Kit
Pencil Crayons STEM Resource Book – Grade 3
Discuss the role of clean and sustainable energy sources in addressing energy needs.
Week 1: Introduction to Force and Motion
Introduce the concepts of force, motion, and inclined planes.
Discuss how forces influence the motion of objects.
Explain the project's challenge: Design and build a model car for inclined planes.
Week 2: Model Car
Design
Brainstorm and design the model car using the Simple & Powered Machines Kit
Explore mechanisms for movement on inclined planes and wheels.
Week 3: Building and Evaluation
Assemble the model car on the inclined plane using the Simple & Powered Machines Kit.
Evaluate the model's motion and observe the effects of different forces. Discuss responsible consumption and production in the context of transportation.
Week 1: Introduction to Levers and Lever Types
Introduce the concept of levers and their importance
Explain the project: Design models of different types of levers
Simple & Powered Machines Kit
Pencil Crayons STEM Resource Book – Grade 3
Brainstorming: Discuss lever structure and mechanisms
Students design their lever models on paper Week 2: Building the Lever Models Review concepts of levers and their classes.
Students start building their lever models using the kit.
Week 3: Testing and Reflection
Students test their lever models and evaluate their designs. Discuss the results and reflect on the design process.
Group discussion on building sustainable cities and communities.
Simple & Week 1: Introduction
Seesaw
concept of seesaws and balance.
Design and build a seesaw model with specified requirements.
Explore the application of seesaws in realworld scenarios.
Powered Machines Kit
Pencil Crayons
STEM Resource Book – Grade 3
to Seesaws and Balance
Introduce the concept of seesaws and balance.
Explain the project: Design a seesaw model with specific requirements.
Brainstorming: Discuss seesaw structure and mechanisms for balance.
Students design their seesaw model on paper.
Week 2: Building the Seesaw Model
Review concepts of seesaws and balance. Students start building their seesaw models using the kit.
Week 3: Testing and Reflection
Simple & Powered Machines Kit
Pencil Crayons
STEM Resource Book – Grade 3
Students test their seesaw models and evaluate their designs. Discuss the results and reflect on the design process.
Group discussion on building sustainable cities and communities.
Week 1: Introduction to Gears and Gear Ratios
Introduce the concept of gears and gear ratios.
Explain the project: Design models with specific gear combinations.
Brainstorming: Discuss gear structure and mechanisms for different ratios. Students design their gear models on paper.
Week 2: Building the Gear Models
Review concepts of gears and gear ratios. Students start building
their gear models using the kit.
Week 3: Testing and Reflection
Students test their gear models and evaluate their designs. Discuss the results and reflect on the design process.
Group discussion on building sustainable cities and communities.
Simple & Powered Machines Kit
Pencil Crayons
STEM Resource Book – Grade 3
Week 1: Introduction to Pulleys and Pulley Types
Introduce the concept of pulleys and their types.
Explain the project: Design models of different pulley types. Brainstorming: Discuss pulley structure and mechanisms for different types. Students design their pulley models on paper.
Week 2: Building the Pulley Models
Review concepts of pulleys and their types. Students start building their pulley models using the kit.
Week 3: Testing and Reflection
Students test their pulley models and evaluate their designs. Discuss the results and reflect on the design process.
Group discussion on building sustainable cities and communities.
Simple & Powered Machines Kit
Pencil Crayons
Week 1: Introduction to Inclined Planes and Their Importance
Introduce the concept of inclined planes and their applications. Explain the project:
models of inclined planes with varying lengths.
Explore the application of inclined planes in real-world scenarios.
Resource Book – Grade 3
Design models of inclined planes with varying lengths.
Brainstorming: Discuss inclined plane structure and mechanisms.
Students design their inclined plane models on paper.
Week 2: Building the Inclined Plane Models
Review concepts of inclined planes and their applications.
Students start building their inclined plane models using the kit.
Week 3: Testing and Reflection
Students test their inclined plane models and evaluate their designs.
Discuss the results and reflect on the design process.
Group discussion on building sustainable cities and communities.
Week 1: Introduction to Simple Machines and Automation
Introduce the concept of simple machines and their types.
Explain the project: Design a conveyor belt model using simple machines.
Brainstorming: Discuss conveyor belt structure and mechanisms.
Students design their conveyor belt model on paper.
Week 2: Building the Conveyor Belt Model
Review concepts of simple machines and automation.
Students start building their conveyor belt models using the kit.
Week 3: Testing and Reflection
Students test their conveyor belt models and evaluate their designs.
Discuss the results and reflect on the design process.
Group discussion on the impact of automation on reducing inequalities.
Week 1: Introduction to Renewable Energy
reflect on the design
Group discussion on the significance of renewable energy
Week 1: Introduction to Earth's Position in the Solar System
Introduce the Earth's position in the solar system and its orbital
38
a model demonstrating the Earth-MoonSun relationship.
Explore the role of astronomy in fostering innovation.
Crayons STEM Resource Book – Grade 3 motion.
Explain the project: Design a model demonstrating the Earth-Moon-Sun relationship.
Brainstorming: Discuss model structure and mechanisms.
Students design their Earth-Moon-Sun model on paper.
Week 2: Building the Earth-Moon-Sun Model
Review concepts of the solar system and orbital motion.
Students start building their Earth-Moon-Sun models using the kit. 39
41
Week 3: Testing and
Students test their Sun models and evaluate
Discuss the results and reflect on the design
Group discussion on the role of astronomy in fostering innovation and infrastructure
Week 1: Introduction to Wheel and Axle Introduce the concept of a wheel and axle and its mechanical
Explain the project: Design a model of a
Brainstorming: Discuss
Students design their wheel and axle model on paper.
Week 2: Building the Wheel and Axle Model
Review concepts of wheel and axle and
mechanical advantage. Students start building their wheel and axle models using the kit.
Week 3: Testing and
Students test their wheel and axle models and evaluate their results and reflect on the design
Group discussion on the role of wheel and axle in transportation and infrastructure.
Week 1: Introduction to Gear Ratio and Steering Mechanisms Introduce the concept gear ratio and its
Explain the project: Design a steering car model with gear
Brainstorming: Discuss car model structure and gear mechanisms. Students design their steering car model on paper.
Week 2: Building the Steering Car Model Review concepts of gear ratio and steering mechanisms.
Students start building their steering car models using the kit.
Week 3: Testing and Reflection
Students test their steering car models and evaluate their designs.
Discuss the results and reflect on the design process.
Group discussion on the role of gear mechanisms in automotive engineering.
Curriculum Mapping
1 Project 1: Balanced Diet
Understand the importance of a balanced diet for overall health. Design and construct a fishing rod using simple machines to catch fish. Apply multiplicatio n skills to calculate fish caught by groups.
3-PS2-2: Make observations and/or measuremen ts of an object’s motion to provide evidence that a pattern can be used to predict future motion.
Animals, including humansExplore nutrition and food groups for a healthy lifestyle.
3.OA.A.1: Interpret products of whole numbers, e.g., interpret 5 × 7 as the total number of objects in 5 groups of 7 objects each.
Goal 2: Zero HungerPromote sustainable agriculture, ensure access to nutritious food, and end malnutrition
NutritionistGuide individuals to make healthy food choices; FishermanEmploy sustainable fishing practices; ManufacturerProduce fishing equipment and components.
2 Project 2: Transformati on of Energy
Investigate the conversion of electrical energy to mechanical energy. Design a machine to lift construction material using pulleys. Apply multiplicatio n to calculate the number of offices in a skyscraper.
3-PS2-2: Make observations and/or measuremen ts of an object’s motion to provide evidence that a pattern can be used to predict future motion.
Forces and magnetsExplore forces and mechanisms for construction and transportation
3.OA.A.4: Determine the unknown whole number in a multiplicatio n or division equation relating three whole numbers.
Goal 7: Affordable and Clean EnergyEnhance energy efficiency, expand use of renewable energy, and improve access to electricity.
Construction Engineer - Design and oversee construction projects; Sustainability EngineerDevelop energyefficient and ecofriendly solutions.
3 Project 3: Sound Energy
Explore the conversion of electrical energy into sound energy. Design and build a musical device using gears and axles. Apply multiplicatio n to calculate sound frequency in vibrations per second.
1-PS4-1: Plan and conduct investigation s to provide evidence that vibrating materials can make sound and that sound can make materials vibrate.
Sound - Study sound production, vibrations, and frequency.
3.OA.D.9: Identify arithmetic patterns and explain them using properties of operations.
Goal 17: Partnerships for the Goals - Strengthen global partnerships to achieve sustainable developmen t.
Audio EngineerDesign and manipulate sound systems; Sound Designer - Create audio effects for various media; Game DesignerIncorporate sound effects into video games.
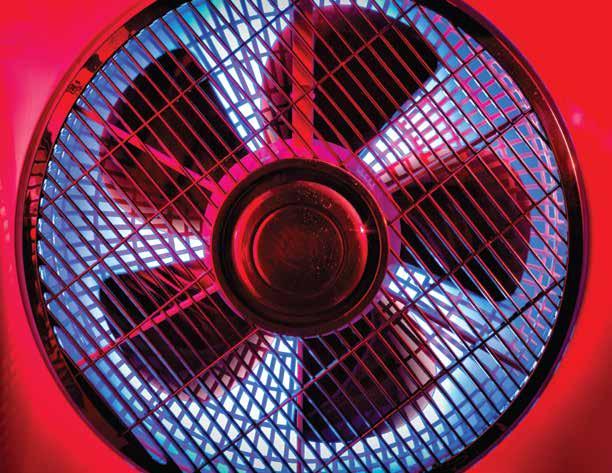
Project 4: Electric Fan
5 Project 5: Force and Motion
Understand the transformati on of electrical energy into mechanical energy. Design and construct an electric fan using gears and motors. Apply geometry to analyze fan blade design.
Explore force, motion, and inclined planes. Design and construct a car model to understand motion on inclined planes. Apply measuremen t skills to analyze speed and distance.
3-PS2-3: Ask questions to determine cause and effect relationships of electric or magnetic interactions between two objects not in contact with each other.
ElectricityInvestigate electrical circuits and energy transformatio ns.
3.G.A.2: Partition shapes into parts with equal areas. Express the area of each part as a unit fraction of the whole.
Goal 7: Affordable and Clean EnergyPromote efficient energy consumptio n and access to modern energy sources.
PhysicianPromote health through temperature control; Air Conditioning EngineerDevelop cooling and ventilation systems; Industrial EngineerOptimize manufacturing processes.
6 Project 6: Levers
Understand the concept of levers and their mechanical advantage. Design and build lever models representing different classes. Apply mathematica l concepts to calculate mechanical advantage.
3-PS2-1: Plan and conduct an investigation to provide evidence of the effects of balanced and unbalanced forces on the motion of an object.
Forces and magnetsInvestigate forces and their impact on motion.
3.MD.A.1: Tell and write time to the nearest minute and measure time intervals in minutes.
Goal 12: Responsible Consumptio n and ProductionEncourage sustainable practices in resource utilization.
3-PS2-1: Plan and conduct an investigation to provide evidence of the effects of balanced and unbalanced forces on the motion of an object.
Explore the principles of balance and mechanical advantage. Design and construct seesaw models with specific
3-PS2-1: Plan and conduct an investigation to provide evidence of the effects of balanced and unbalanced forces on the
Forces and magnetsStudy forces and mechanisms used in buildings.
3.MD.B.4: Generate measureme nt data by measuring lengths using rulers marked with halves and fourths of an inch.
Goal 11: Sustainable Cities and Communitie s - Enhance urban planning and infrastructur e for sustainable developmen t.
Manufacturing EngineerOptimize production processes; Civil Engineer - Design and maintain infrastructure; Construction EngineerOversee building projects.
Forces and magnetsInvestigate forces and mechanisms in everyday objects.
3.G.A.2: Partition shapes into parts with equal areas. Express the area of each part as a unit fraction of the
Goal 7: Affordable and Clean EnergyPromote access to reliable and sustainable energy sources.
Architect - Design and plan public spaces; Civil EngineerDevelop safe structures; Transportation Engineer - Design safe play equipment.
requirements Apply geometry to analyze balance and fulcrum position. motion of an object. whole.
Understand the concepts of gears, gear ratios, and torque.
8 Project 8: Gear
9 Project 9: Pulley
Design and build gear models with specific gear ratios. Apply multiplicatio n to calculate gear ratios and speed.
Explore the mechanisms and applications of pulleys. Design and build pulley models with different mechanical advantages. Apply geometry to analyze force distribution in pulley systems.
3-PS2-1: Plan and conduct an investigation to provide evidence of the effects of balanced and unbalanced forces on the motion of an object.
Forces and magnetsExplore mechanisms and devices using gears.
3.MD.A.1: Tell and write time to the nearest minute and measure time intervals in minutes.
Goal 11: Sustainable Cities and Communitie s - Improve urban planning and managemen t for sustainable living.
3-PS2-1: Plan and conduct an investigation to provide evidence of the effects of balanced and unbalanced forces on the motion of an object.
Understand the principles of inclined planes and mechanical advantage. Design and construct inclined plane models of varying lengths. Apply geometry to analyze force distribution in inclined planes.
1 1 Project 11: Conveyor Belt
3-PS2-1: Plan and conduct an investigation to provide evidence of the effects of balanced and unbalanced forces on the motion of an object.
Forces and magnetsStudy forces and mechanical systems.
3.MD.A.1: Tell and write time to the nearest minute and measure time intervals in minutes.
Goal 11: Sustainable Cities and Communitie s - Enhance inclusive and sustainable urbanization . Mechanical Engineer - Design mechanical systems; Construction EngineerImplement lifting mechanisms; Water EngineerDevelop water supply systems.
Forces and magnetsInvestigate forces in simple machines.
3.MD.B.4: Generate measureme nt data by measuring lengths using rulers marked with halves and fourths of an inch.
3.MD.B.4: Generate measureme nt data by measuring lengths using rulers marked with halves and fourths of an inch.
Electrical Engineer: Develop communication systems and signaling technologies. Telecommunicatio ns Operator: Manage and maintain telecommunicatio n networks.
Design and create a machine to automatically transport
3-PS2-1: Plan and conduct an investigation to provide Forces and magnetsExplore forces and mechanisms in
heavy materials uphill. Understand and apply concepts of simple machines. Use multiplicatio n skills to calculate yurt distribution.
Design a machine to harness wind energy and convert it into mechanical energy. Explore concepts of renewable resources and energy conversion. Apply measuremen t skills to assess windmill performance.
evidence of the effects of balanced and unbalanced forces on the motion of an object. the real world. factor problem. within and among countries.
Oversee construction of infrastructure; Transportation EngineerOptimize transportation systems.
3-PS2-1: Plan and conduct an investigation to provide evidence of the effects of balanced and unbalanced forces on the motion of an object.
Uses of everyday materialsInvestigate materials and their uses in various systems.
3.MD.B.4: Generate measureme nt data by measuring lengths using rulers marked with halves and fourths of an inch.
Goal 7: Affordable and Clean EnergyPromote access to reliable, sustainable, and modern energy.
Wind Farm Developer - Plan and implement wind energy projects; Wind Turbine ManufacturerProduce wind energy equipment; Materials EngineerDevelop efficient materials for renewable energy systems.
1 3
Project 13: Earth in the Solar System
Build a model to demonstrate the EarthMoon-Sun relationship and eclipses. Understand celestial movements and their effects. Apply mathematics to predict lunar orbits.
AstronomerStudy celestial bodies and phenomena; Atmospheric Scientist - Analyze Earth's atmosphere and weather; MeteorologistForecast weather patterns and events. 1 4 Project 14: Wheel and Axle
Design and construct a model of a wheel and axle. Explore the mechanical advantage of the wheel and axle. Apply measuremen t skills to assess
3-PS2-1: Plan and conduct an investigation to provide evidence of the effects of balanced and unbalanced forces on the motion of an object.
3-PS2-1: Plan and conduct an investigation to provide evidence of the effects of balanced and unbalanced forces on the motion of an object.
Light - Explore the behavior of light and its interaction with objects.
3.NBT.A.3: Multiply one-digit whole numbers by multiples of 10 in the range 1090.
Goal 9: Industry, Innovation, and Infrastructur e - Foster innovation in astronomy and space exploration.
Forces and magnetsInvestigate mechanisms and forces in everyday objects.
3.MD.A.2: Measure and estimate liquid volumes and masses of objects using standard units of grams (g), kilograms (kg), and
Goal 9: Industry, Innovation, and Infrastructur e - Foster innovation in automotive and engineering fields.
Auto ManufacturerProduce vehicles for various purposes; Automotive Engineer - Design vehicle systems for efficiency; Mechanical EngineerDevelop mechanical solutions for
1 5 Project 15: Steering Car
performance. liters (l). different industries.
Design and build a model of a steering car with effective leftright turning. Explore gear ratios and their impact on performance. Apply principles of mechanical energy conversion.
3-PS2-1: Plan and conduct an investigation to provide evidence of the effects of balanced and unbalanced forces on the motion of an object.
Forces and magnetsStudy forces and mechanisms in vehicles.
3.NF.A.3: Explain equivalence of fractions and compare fractions by reasoning about their size.
Goal 9: Industry, Innovation, and Infrastructur e - Foster innovation in automotive and transportati on sectors.
Automotive Engineer - Design steering and control systems; Transportation EngineerDevelop safe and efficient transportation solutions; Mechanical EngineerInnovate mechanical designs for various applications.
Project-wise Lesson Plan and Answer Key
Balanced Diet
Project 1: Fishing Rod
There are various types of food that we eat in our daily lives. Foods can be divided into four main groups, namely the Dairy group, the Grain group, the Meat group, and the Fruit and vegetable group. The Meat group includes beef, mutton, fish, chicken, and eggs, among others. Fish is an important source of healthy proteins, calcium, and vitamins. Health experts recommend eating fish at least twice a week as a part of a healthy diet.
STEM Careers Connection
This project features tasks that resemble people working in the following careers: Nutritionist, Fisherman, and Manufacturer.
Problem
Mohammad went to a health expert to get recommendations for a healthy diet. The Health expert recommended eating more foods from the meat group, especially fish, as it is a good source of healthy proteins, calcium, and vitamins, which provide many health benefits. Mohammad decided to go on a hiking trip to catch plenty of fish in the river. However, he realized he will need a fishing rod to catch fish.
be able to demonstrate an understanding of the following:
Objective:
Lesson Plan: Balanced Diet (Project 1)
Week 1: Introduction to Balanced Diet and Fishing Rod Design
Introduce the concept of a balanced diet and its importance. Familiarize students with the Fishing Rod design project. Explore the components of the Simple & Powered Machines Set.
Duration: 45 minutes
S# Phase Duration Details
1 Introduction to Balanced Diet 15 minutes
2 Project Introduction 15 minutes
3 Exploring Set Components 15 minutes
• Explain the concept of a balanced diet and its impact on health.
• Discuss the different food groups and their nutritional contributions.
• Highlight the Sustainable Development Goal 2 related to zero hunger.
• Present the Fishing Rod design project to the students.
• Explain the objectives, NGSS standards, curriculum connections, and STEM career options.
• Distribute the Simple & Powered Machines Set and materials.
• Guide students through the components of the Simple & Powered Machines Set.
• Discuss how these components can be used to build the fishing rod.
Week 2: Building the Fishing Rod
Objective:
Build the fishing rod using the Simple & Powered Machines Set. Understand the mechanisms involved in the fishing rod's design. Duration: 45 minutes
S#
1 Building the Fishing Rod 40 minutes
• Provide step-by-step instructions for building the fishing rod.
• Assist students as they assemble the fishing rod components.
• Encourage collaboration and problemsolving.
2 Testing and Observations 5 minutes
• Allow students to test the fishing rod's mechanism.
• Observe how the fishing rod releases and retracts the string.
• Address any questions or challenges that arise.
Objective:
Week 3: Evaluating the Fishing Rod and Reflection
Evaluate the fishing rod's design and functionality. Reflect on the importance of balanced diets and their connection to Sustainable Development Goals.
Duration: 45 minutes
S# Phase Duration Details
1 Fishing Rod Evaluation 20 minutes
• Ask students to evaluate their fishing rods based on functionality and design.
• Discuss the success of each design and how well it fulfills the objectives.
• Address any improvements or modifications that can be made.
2 Balanced Diet Reflection 15 minutes
3 Individual Reflection 10 minutes
• Engage students in a group discussion about the importance of balanced diets.
• Explore how proper nutrition contributes to health and well-being.
• Discuss how a balanced diet aligns with Sustainable Development Goal 2.
• Provide reflection prompts related to the fishing rod project and balanced diets.
• Encourage students to write their thoughts in their STEM Resource Book.
Answer Key
Q# Answer
1 Were you able to make your own design or did you use the example? (Mine / Example)
Answer: Mine.
2 Try it. Does your design work perfectly? (Yes / No)
Answer: The students should test their design and provide their observation.
3 If Mohammed takes 2 friends with him and all 3 of them catch 5 fish, how many fish will they have?
Answer: 3 friends * 5 fish = 15 fish in total.
4 Fish belongs to which food group?
Answer: Protein food group.
5 Look at the list of behaviors below to color healthy behavior with green and unhealthy behavior with red.
Answer: The students should complete the task based on the provided list.
6 This part of the mechanism is called a ratchet. Test and observe the role of the ratchet in the fishing rod, write your observation below.
Answer: Students should describe the role of the ratchet in the fishing rod's mechanism.
7 Why do we need a balanced diet in our lives? Explain. Answer: Students should provide explanations related to nutrition, health, and wellbeing.
8
How can building a rod and learning to fish help end world hunger?
Answer: Students should discuss how fishing skills and balanced nutrition contribute to addressing hunger.
9 Reflection Question Guide:
Based on your new learning, what do you suggest be done towards ending hunger, food insecurities, improving nutrition, and promoting sustainable agriculture?
Guide students to reflect on the role of balanced diets and sustainable agriculture in addressing hunger and promoting food security.
Encourage them to think creatively about solutions and actions that can be taken at individual, community, and global levels.
Discuss the importance of education, awareness, and sustainable practices in achieving these goals.
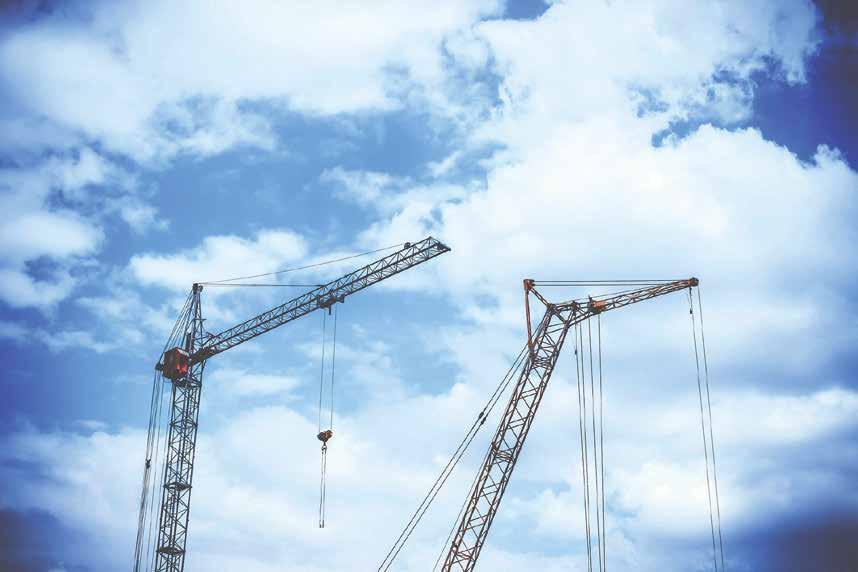
Transformation of Energy
Project 2: Tower Crane
Introduction
The ability of a body to do work is called energy. While energy transformation is the process where energy converts from one form to the other. For example, in this project of a tower crane, chemical energy is stored in AA batteries. It is converted into electrical energy by the rotation of the motor. Finally, the electrical energy is converted into mechanical energy, which helps lift the construction material on the tower crane to the top floor.
STEM Careers Connection
This project features tasks that resemble people working in the following careers: Construction Engineer and Sustainability Engineer.
Problem
Ahmad is a chief engineer working in a construction company in Karachi. His company is building a skyscraper (a very tall building) for an emerging technology company. He knows that he needs some kind of machine to help lift the construction materials to the top floor, as it takes too much time and effort to take materials like cement and bricks using manpower. Ahmad is looking for young engineers to help him solve this problem.
Lesson Plan: Transformation of Energy (Project 2)
Objective:
Week 1: Introduction to Energy Transformation and Machine Design
Introduce the concept of energy transformation and its relevance. Familiarize students with the Transformation of Energy project. Explore the components of the Simple & Powered Machines Set.
Duration: 45 minutes
S# Phase Duration Details
1 Introduction to Energy Transformation 15 minutes
• Explain the concept of energy transformation and its importance in various systems.
• Discuss real-life examples of energy conversion from one form to another.
• Highlight the Sustainable Development Goal 7 related to affordable and clean energy.
2 Project Introduction 15 minutes
• Present the Transformation of Energy project to the students.
• Explain the objectives, NGSS standards, curriculum connections, and STEM career options.
• Distribute the Simple & Powered Machines Set and materials.
3 Exploring Set Components 15 minutes
• Guide students through the components of the Simple & Powered Machines Set.
• Discuss how these components can be used to build the energy transformation machine.
Week 2: Building the Energy Transformation Machine
Objective:
Build the energy transformation machine using the Simple & Powered Machines Set. Understand the process of transforming electrical energy into mechanical energy. Duration: 45 minutes
S# Phase Duration Details
1 Building the Machine 40 minutes
• Provide step-by-step instructions for building the energy transformation machine.
• Assist students as they assemble the machine's components.
• Encourage collaboration and problemsolving.
2 Testing and Observations 5 minutes
• Allow students to test the energy transformation machine's functionality.
• Observe how electrical energy is transformed into mechanical energy.
• Address any questions or challenges that arise.
Objective:
Week 3: Evaluating the Machine and Reflection
Evaluate the energy transformation machine's design and efficiency. Reflect on the importance of energy conversion and its impact on sustainable development.
Duration: 45 minutes
S# Phase Duration Details
1 Machine Evaluation 20 minutes
2 Energy Conversion Reflection 15 minutes
3 Individual Reflection 10 minutes
• Ask students to evaluate their energy transformation machines based on functionality and design.
• Discuss how well the machine demonstrates energy conversion principles.
• Address any improvements or modifications that can be made.
• Engage students in a group discussion about energy conversion's significance.
• Explore how energy transformation is utilized in various technologies.
• Discuss the connection between energy conversion and Sustainable Development Goal 7.
• Provide reflection prompts related to the energy transformation project and sustainable energy.
• Encourage students to write their thoughts in their STEM Resource Book.
Answer Key
Q# Answer
1 Were you able to make your own design or did you use the example? (Mine / Example)
Answer: Mine.
2 Try it. Does your design work perfectly? (Yes / No)
Answer: The students should test their design and provide their observation.
3 If Ahmad’s skyscraper has 34 floors and each floor has 10 offices, how many offices are in the building?
4 Which form of energy is transformed into mechanical energy in this project?
Answer: Electrical energy is transformed into mechanical energy.
5 In this model, which form of energy is used to lift objects in an upward direction? Answer: Mechanical energy is used to lift objects.
6 Electric cars are getting popular because they produce less carbon dioxide which increases global warming. Find out what kind of energy transformation takes place when driving an electric car.
Answer: Electrical energy is transformed into mechanical energy to drive the car.
7
Make a chart to show the transformation of energy in the tower crane model.
Answer: Students should create a chart depicting the energy transformation stages.
8 Reflection Question Guide:
Based on your new learning, why is it important to provide access to affordable, reliable, sustainable, and modern energy for all?
Guide students to reflect on the significance of access to clean and modern energy sources.
Encourage them to explore the impact of energy access on various aspects of life, including health, education, and economic development. Discuss the role of technology and sustainable energy solutions in achieving the goals of energy access for all.
Sound Energy
Project 3: Musical Device
Introduction
Sound is a form of energy that is produced by the vibrations of objects. These vibrations produce sound. Most sounds reach us by traveling through air molecules.
STEM Careers Connection
This project features tasks that resemble people working in the following careers: Audio Engineer, Sound Designer, and Game Designer.
Problem
Hassan has learned that 2 objects that vibrate at a different speeds also sound differently. Using his understanding of sound energy, Hassan wants to build a musical device that transforms electrical energy into sound energy.
Challenge
Can you help Hassan design and build a musical device that converts electrical energy into sound energy?
of this
the learner will be able to demonstrate an
Objective:
Lesson Plan: Sound Energy (Project 3)
Week 1: Introduction to Sound Energy and Musical Device Design
Introduce students to the concept of sound energy and its applications. Familiarize students with the Sound Energy project. Explore the components of the Simple & Powered Machines Set.
Duration: 45 minutes
S# Phase Duration Details
1 Introduction to Sound Energy 15 minutes
2 Project Introduction 15 minutes
3 Exploring Set Components 15 minutes
• Explain the concept of sound energy and how it is produced.
• Discuss real-life examples of sound energy and its importance.
• Highlight the Sustainable Development Goal 17 related to partnerships for the goals.
• Present the Sound Energy project to the students.
• Explain the objectives, NGSS standards, curriculum connections, and STEM career options.
• Distribute the Simple & Powered Machines Set and materials.
• Guide students through the components of the Simple & Powered Machines Set.
• Discuss how these components can be used to build the musical device.
Week 2: Building the Musical Device
Objective:
Build the musical device using the Simple & Powered Machines Set. Understand how electrical energy is converted into sound energy.
S#
1 Building the Device 40 minutes
2 Testing and Sound Generation 20 minutes
Duration: 45 minutes
• Provide step-by-step instructions for building the musical device.
• Assist students as they assemble the device's components.
• Encourage creativity in designing the musical device.
• Allow students to test their musical devices and observe sound generation.
• Discuss the role of electrical energy in producing sound.
• Address any questions or challenges that arise.
Objective:
Week 3: Sound Frequency and Reflection
Explore the concept of sound frequency and its measurement. Reflect on the importance of sound energy and its applications.
Duration: 45 minutes
S# Phase Duration Details
1 Sound Frequency Measurement
20 minutes
2 Sound Energy Reflection 15 minutes
3 Individual Reflection 10 minutes
• Explain the concept of sound frequency and its measurement in Hertz (Hz).
• Provide examples of different sound frequencies and their sources.
• Guide students in measuring the sound frequency produced by their musical devices.
• Engage students in a group discussion about the significance of sound energy.
• Explore various applications of sound energy, such as music, communication, and technology.
• Discuss how sound energy contributes to Sustainable Development Goal 17.
• Provide reflection prompts related to the sound energy project and its impact.
• Encourage students to write their thoughts in their STEM Resource Book.
Answer Key
Q# Answer
1 Were you able to make your own design or did you use the example? (Mine / Example) Answer: Mine.
2 Try it. Does your design work perfectly? (Yes / No)
Answer: The students should test their design and provide their observation.
3 Sound frequency is often measured in "Hertz" (Hz) which is how many vibrations per second. If the sound from Hassan’s device is measured at 73 vibrations per second, what is the sound frequency of his device?
Answer: Sound frequency = 73 Hz.
4 In this model, which form of energy makes the gears spin?
Answer: Electrical energy is transformed into mechanical energy to spin the gears.
5 In this model, which form of energy is used in your musical device to create sound?
Answer: Electrical energy is transformed into sound energy to create sound.
6 Explain how electrical energy is transformed into sound energy in your model. Answer: Electrical energy powers the mechanism that causes vibrations, producing sound.
7 Reflection Question Guide:
Based on your new learning, how can your challenge solution be implemented in the real world?
Guide students to reflect on the practical applications of sound energy and their musical devices.
Encourage them to consider how their knowledge of sound energy can contribute to fields such as music, communication, and technology.
Discuss potential real-world scenarios where their challenge solution could be utilized to improve people's lives.
STEM Challenge
Project 4: Electric Fan
Introduction
Electrical energy (electricity) is produced through generators. This electricity is supplied to our homes through wires. The path of the current through which the electrical energy flows is called an electric circuit. Cells and batteries are also sources of electrical energy. Electrical energy can be transformed into other forms of energy, including light energy, heat energy, sound energy, wind energy, etc.
STEM Careers Connection
This project features tasks that resemble people working in the following careers:
Physician, Air Conditioning Engineer and Industrial Engineer.
Problem
It's a hot summer day. Sara has just recovered from heat stroke, yet the weather is once again extremely hot and Alina is worried it will affect Sara again. Alina has thought of a bright idea to solve this problem. She wants to build a machine for Sara that can convert electrical energy into wind energy. What kind of machine does Alina need for Sara?
At the end of this activity the learner will be able to demonstrate an understanding of the following: Objectives
Objective:
Lesson Plan: Electric Fan (Project 4)
Week 1: Introduction to Electric Fans and Design Requirements
Introduce students to the concept of electric fans and their applications. Familiarize students with the Electric Fan project and design requirements. Explore the components of the Simple & Powered Machines Set. Duration: 45 minutes
S# Phase Duration Details
1 Introduction to Electric Fans 15 minutes
2 Project Introduction and Design Requirements 15 minutes
3 Exploring Set Components 15 minutes
• Explain the purpose and function of electric fans in keeping spaces cool.
• Discuss the challenges of hot weather and the importance of cooling solutions.
• Highlight the Sustainable Development Goal 7 related to affordable and clean energy.
• Present the Electric Fan project to the students.
• Explain the objectives, NGSS standards, curriculum connections, and STEM career options.
• Describe the design requirements for the electric fan project.
• Guide students through the components of the Simple & Powered Machines Set.
• Discuss how these components can be used to build an electric fan.
Week 2: Designing and Building the Electric Fan
Objective:
Design and build the electric fan according to the design requirements. Understand the conversion of electrical energy into mechanical energy for air circulation. Duration: 45 minutes
S# Phase Duration Details
1 Design and Planning 15 minutes
2 Building the Electric Fan 25 minutes
3 Testing and Functionality 5 minutes
• Instruct students to brainstorm and sketch their electric fan designs.
• Encourage creativity while ensuring adherence to design requirements.
• Provide step-by-step instructions for building the electric fan.
• Guide students as they assemble the components and structure.
• Emphasize the role of the motor in converting electrical energy into motion.
• Allow students to test their electric fans and observe air circulation.
• Discuss how the conversion of energy
powers the motion of the fan blades.
Week 3: Energy Efficiency and Reflection
Objective:
Explore the concept of energy efficiency in cooling devices. Reflect on the role of technology in improving energy consumption practices.
Duration: 45 minutes
S# Phase Duration Details
1 Energy Efficiency Discussion 20 minutes
2 Reflection and Discussion 15 minutes
3 Individual Reflection 10 minutes
• Engage students in a discussion about energy efficiency in electric fans.
• Compare the advantages and disadvantages of electric fans with other cooling methods.
• Discuss the importance of using energyefficient appliances.
• Lead a group reflection on the broader impact of energy-efficient technologies.
• Encourage students to share their thoughts on the role of technology in sustainable energy practices.
• Relate the discussion to Sustainable Development Goal 7.
• Provide reflection prompts related to the electric fan project and energy efficiency.
• Encourage students to write their reflections in their STEM Resource Book.
Answer Key
Q# Answer
1 Does your device produce air? (Yes / No) Answer: Yes.
2 Does your device stand by itself? (Yes / No) Answer: Yes.
3 Is your device powered by an energy source? (Yes / No)
Answer: Yes.
4 In this model, which form of energy is used in your fan to create air?
Answer: Electrical energy is transformed into mechanical energy to create air movement.
5 Reflection Question Guide:
Based on your new learning, why is it important to provide access to affordable, reliable, sustainable, and modern energy for all?
Guide students to reflect on the significance of energy access and energy-efficient technologies. Encourage them to consider how technologies like electric fans contribute to improving living conditions.
Discuss the importance of sustainable energy solutions in addressing global
challenges.
Force and Motion
Project 5: Car
Introduction
In this lesson, we will learn about force, motion, and friction. Force is the push or pull of a body that produces motion in an object. Friction is a force between two surfaces that are sliding, or trying to slide, across each other. You are expected to make a model vehicle. With this vehicle, we will explore what happens when a force is applied to a body at rest and how friction is useful in different situations.
STEM Careers Connection
This project features tasks that resemble people working in the following careers:
Automotive Engineer and Transportation Engineer.
Problem
Ahmad and Ali live in a hilly area; the street leading to their neighborhood has an incline of almost 40 degrees. The problem with the street is that some vehicles can drive it up, while others fail. Ahmad and Ali want to investigate why this is happening. To find out, they want to make a prototype vehicle that they can use force and motion to solve the problem.
At the end of this activity the learner will be able to demonstrate an understanding of the following:
Objective:
Lesson Plan: Force and Motion (Project 5)
Week 1: Introduction to Force and Motion
Introduce students to the concepts of force, motion, and inclined planes. Familiarize students with the Force and Motion project and its objectives. Discuss the NGSS standards and STEM career connections.
Duration: 45 minutes
S# Phase Duration Details
1 Introduction to Force and Motion 15 minutes
2 Project Introduction and Objectives 15 minutes
3 Exploring Inclined Planes
15 minutes
• Explain the fundamental concepts of force and motion.
• Discuss how these concepts are relevant in everyday life and engineering.
• Highlight the Sustainable Development Goal 12 related to responsible consumption and production.
• Present the Force and Motion project to the students.
• Explain the objectives, curriculum connections, and STEM career possibilities.
• Describe the focus on designing a car that can climb an inclined plane.
• Introduce the concept of inclined planes and their applications.
• Discuss how inclined planes reduce the effort needed to lift objects.
• Relate the concepts to real-world examples, such as ramps and hills.
Week 2: Car Design and Building
Objective:
Guide students in designing and building a model car for the inclined plane challenge. Understand the relationship between force, motion, and inclined planes.
Duration: 45 minutes
S# Phase Duration Details
1 Car Design and Planning 15 minutes
• Instruct students to brainstorm and sketch their car designs.
• Discuss factors that affect the car's ability to climb the inclined plane.
• Emphasize the connection between force, motion, and the car's performance.
2 Building the Model Car 25 minutes
• Provide step-by-step instructions for building the model car.
• Guide students as they assemble the components and structure.
• Discuss how the car's design affects its
3 Testing and Reflection 5 minutes
motion on the inclined plane.
• Allow students to test their model cars on the inclined plane.
• Ask students to observe and record the car's performance and speed.
Week 3: Analysis and Reflection
Objective:
Analyze the observations and data from the car's performance on the inclined plane. Reflect on the principles of force, motion, and their application.
Duration: 45 minutes
S# Phase Duration Details
1 Data Analysis 20 minutes
2 Reflection and Discussion 15 minutes
3 Individual Reflection 10 minutes
• Guide students in analyzing the data collected during the car testing.
• Discuss the factors that influenced the car's performance, such as friction and design.
• Lead a group discussion on the insights gained from the data analysis.
• Encourage students to reflect on the relationship between force, motion, and inclined planes.
• Relate the discussion to Sustainable Development Goal 12.
• Provide reflection prompts related to the Force and Motion project.
• Encourage students to write their reflections in their STEM Resource Book.
Answer Key
Q# Answer
1 Were you able to make your own design or did you use the example? (Mine / Example)
Answer: Own.
2 Try it. Does your design work perfectly? (Yes / No) Answer: The students should test their car design and provide their observation.
3 Time how long it takes for the car to get to the top of the ramp.
Answer: Students should measure and record the time taken for the car to reach the top.
4 What were your observations regarding force and motion in your model car?
Answer: Students should describe their observations related to force and motion during the car's motion.
5 Reflection Question Guide: Based on your new learning, how can you practice sustainable consumption?
Guide students to reflect on the principles of sustainable consumption. Encourage them to consider how engineering and design can contribute to
responsible consumption.
Discuss the importance of making environmentally conscious choices and minimizing waste.
Simple Machines
Project 6: Levers
Introduction
A lever is a type of simple machine that can be used to move or lift heavy objects. It is simply a solid bar on a fulcrum that helps us to transfer force. Using levers, we can lift heavy things with less effort. By applying force to one end of the lever, the weight (load) at the other end is lifted.
STEM Careers Connection
This project features tasks that resemble people working in the following careers: Manufacturing Engineer, Civil Engineer, and Construction Engineer.
Problem
Aarav and Joone are learning about simple machines. They want to build levers to help them understand how they work.
Challenge
Design and build models of levers
At the end of this activity the learner will be able to demonstrate an understanding of the following: Objectives
Objective:
Lesson Plan: Levers (Project 6)
Week 1: Introduction to Levers
Introduce students to the concept of levers and their applications. Familiarize students with the Levers project and its objectives. Discuss the NGSS standards and STEM career connections.
Duration: 45 minutes
S# Phase Duration Details
1 Introduction to Levers 15 minutes
• Explain the fundamental concept of levers and their role in mechanical systems.
• Discuss how levers are used in everyday life and various engineering fields.
• Highlight the connection to Sustainable Development Goal 11 related to sustainable cities and communities.
2 Project Introduction and Objectives 15 minutes
3 Exploring Different Types of Levers 15 minutes
• Present the Levers project to the students.
• Explain the objectives, curriculum connections, and STEM career possibilities.
• Describe the focus on designing and building models of different types of levers.
• Introduce the three classes of levers and their characteristics.
• Discuss real-world examples of each type of lever and their applications.
• Emphasize the significance of levers in engineering and innovation.
Week 2: Building First and Second Class Levers
Objective:
Guide students in building models of first and second class levers. Understand the mechanical principles and advantages of each lever class.
Duration: 45 minutes
S# Phase Duration Details
1 Building First Class Lever 20 minutes
• Provide step-by-step instructions for building the first class lever model.
• Explain the mechanics of the lever, including the role of the fulcrum and effort arm.
• Emphasize the importance of balance in first class levers.
2 Building Second Class Lever 20 minutes
• Instruct students on building the second class lever model.
• Discuss the differences between first and second class levers.
• Guide students in understanding the mechanical advantage of second class levers.
3 Observation and Discussion 5 minutes
• Allow students to observe and compare the functioning of the first and second class levers.
• Lead a brief discussion on the observed differences and advantages of each lever type.
Week 3: Building Third and Inverse Levers
Objective:
Guide students in building models of third class and inverse levers. Understand the mechanics and applications of these lever types.
Duration: 45 minutes
S# Phase Duration Details
1 Building Third Class Lever 20 minutes
2 Building Inverse Lever 20 minutes
3 Testing and Observation 5 minutes
• Provide instructions for building the third class lever model.
• Explain the mechanics of third class levers, including effort arm and resistance arm.
• Discuss the trade-off between force and distance in third class levers.
• Instruct students on building the inverse lever model.
• Discuss the unique mechanics and applications of inverse levers.
• Emphasize the role of inverse levers in engineering and construction.
• Allow students to test their third class and inverse lever models.
• Ask them to observe and record the behavior and balance of the levers.
Answer Key Q# Answer
1 Were you able to make your own design or did you use the example? (Mine / Example) Answer: Own.
2 Which class of lever is a nail cutter? Answer: First class lever.
3 A seesaw is a first-class lever. If the lever is 10cm long, where would the fulcrum need to be placed so that it will be balanced? Answer: At the midpoint, 5cm from either end.
4 How can levers make your everyday life easier? Explain. Answer: Levers provide mechanical advantage, making it easier to perform tasks with less effort.
5 Reflection Question Guide: How can you help work towards this goal with what you have learned in this lesson?
Guide students to reflect on the connection between lever mechanics and Sustainable Development Goal 11.
Encourage them to explore how their understanding of levers can contribute to designing sustainable cities and communities.
Discuss the role of engineering in creating efficient and innovative solutions for urban challenges.
STEM Challenge
Project 7: Seesaw
Architect, Civil Engineer and Transportation Engineer.
Problem
Najma and Alina are sitting on a seesaw in a playground. it is a long, narrow board supported by a single pivot point in the middle; as one end goes up, the other goes down. They don't understand how a seesaw works.
Challenge
Your challenge this week is to design and create your own seesaw model.
of this activity the
will be able to demonstrate an understanding
Objective:
Lesson Plan: Seesaw (Project 7)
Week 1: Introduction to Seesaw Design
Introduce students to the concept of designing a seesaw model. Familiarize students with the Seesaw project objectives and components. Discuss the NGSS standards and STEM career connections.
Duration: 45 minutes
S# Phase Duration Details
1 Introduction to Seesaw Design 15 minutes
2 Project Introduction and Objectives 15 minutes
3 Exploring Components and Requirements 15 minutes
• Explain the purpose and function of a seesaw in a playground.
• Discuss the importance of balance and movement in seesaw design.
• Relate the concept of a seesaw to the idea of balanced force and motion.
• Present the Seesaw project to the students.
• Describe the objectives, curriculum connections, and STEM career possibilities.
• Highlight the focus on designing a seesaw that maintains balance and carries weight.
• Introduce the components required for building a seesaw.
• Discuss the design requirements such as fulcrum placement, balance, and weight capacity.
• Emphasize the role of STEM principles in designing functional seesaw models.
Week 2: Seesaw Prototype Design and Construction
Objective:
Assist students in designing and constructing their own seesaw prototypes. Understand the principles of balance and weight distribution in seesaw design.
Duration: 45 minutes
S# Phase Duration Details
1 Prototype Design and Planning 20 minutes
2 Prototype Construction 20 minutes
• Instruct students to design a prototype of a seesaw that meets the design requirements.
• Explain the significance of fulcrum placement in maintaining balance.
• Encourage creativity and innovation in seesaw design.
• Guide students through the process of building their seesaw prototypes.
• Assist them in assembling the components while maintaining balance.
• Encourage them to document their construction process and decisions.
3 Testing and Adjustment 5 minutes
• Allow students to test their seesaw prototypes and observe their behavior.
• Encourage them to make adjustments to achieve optimal balance and functionality.
Week 3: Presentation and Reflection
Objective:
Provide students with the opportunity to present their seesaw prototypes. Reflect on the physics principles and engineering concepts applied in seesaw design. Discuss the broader impact of balanced force and motion in engineering.
Duration: 45 minutes
S# Phase Duration Details
1 Presentation Preparation 15 minutes
• Have each group prepare a presentation about their seesaw prototype design.
• In their presentations, students should explain the physics principles involved and design considerations.
• Encourage the use of visual aids and clear explanations.
2 Group Presentations 20 minutes
• Allow each group to present their seesaw prototypes to the class.
• Provide time for questions, comments, and discussions after each presentation.
• Encourage students to provide constructive feedback to their peers.
3 Reflection and Discussion 10 minutes
• Lead a group discussion on the broader impact of balanced force and motion in engineering.
• Discuss how understanding equilibrium and motion principles contributes to designing stable structures.
• Emphasize the application of seesaw concepts in various engineering fields.
Answer Key
Q# Answer
1 Is the fulcrum in the middle of the lever? (Yes / No) Answer: Yes.
2 Is the seesaw able to maintain balance? (Yes / No) Answer: Yes.
3 Is the seesaw able to carry the weight of 2 characters? (Yes / No) Answer: Yes.
4 Is the seesaw powered by electrical energy? (Yes / No) Answer: No.
5 Did you label the load in your diagram? (Yes / No) Answer: Yes.
6
Did you label the fulcrum in your diagram? (Yes / No)
Answer: Yes.
7 Did you label the effort in your diagram? (Yes / No)
8
Answer: Yes.
Reflection Question Guide:
Based on your new learning, why is it important to provide access to affordable, reliable, sustainable, and modern energy for all?
Guide students to reflect on the broader implications of balanced force and motion in the context of energy access.
Encourage them to explore how concepts learned in the seesaw project can contribute to sustainable and equitable living standards. Discuss the role of engineering in creating structures that promote safety, accessibility, and balance in communities.
Simple Machines
Project 8: Gear
Introduction
Gears are an important part of nearly every mechanism. We can use gears to transfer force, change the direction of a force, and increase or decrease the magnitude of force. Gears are wheels that have teeth on the outside. These teeth connect with the teeth on another gear to transfer force.
STEM Careers Connection
This project features tasks that resemble people working in the following careers: Automotive Engineer, Transportation Engineer and Elevator Engineer.
Problem
You want to learn more about how gears work. You think it would be a good idea to build models to be able to see how they work.
Challenge
Design and build a model of the gear.
At the end of this activity the learner will be able to demonstrate an understanding of the following: Objectives
Objective:
Lesson Plan: Gear (Project 8)
Week 1: Introduction to Gears and Gear Ratios
Introduce students to the concept of gears and gear ratios. Familiarize students with the components required for building gear systems. Discuss the NGSS standards and STEM career connections related to gear mechanisms.
Duration: 45 minutes
S# Phase Duration Details
1 Introduction to Gears 15 minutes
• Explain the purpose and function of gears in various machines and devices.
• Discuss real-life examples where gears are used to transmit motion and power.
• Highlight the importance of gear mechanisms in various engineering fields.
2 Understanding Gear Ratios 15 minutes
• Introduce the concept of gear ratios and their significance in mechanical systems.
• Explain how gear ratios determine the relationship between the sizes of gears.
• Discuss how gear ratios influence speed, torque, and mechanical advantage.
3 Exploring Gear Components 15 minutes
• Present the gear components required for building gear systems.
• Demonstrate the different types of gears such as spur gears, worm gears, and bevel gears.
• Emphasize the role of gear teeth and sizes in determining gear ratios.
Week 2: Building Gear Systems
Objective:
Assist students in building and understanding gear systems. Apply the concept of gear ratios to design functional mechanisms.
Duration: 45 minutes
S# Phase Duration Details
1 Gear System Design 20 minutes
• Instruct students to design a gear system using the provided components.
• Explain the concept of gear ratio and its influence on the gear sizes.
• Encourage students to plan their gear systems based on specific mechanical goals.
2 Building Gear Systems 20 minutes
• Guide students through the process of assembling their gear systems.
• Assist them in connecting the gears and ensuring proper alignment.
• Encourage them to document their gear
3 Testing and Observation 5 minutes
system designs and connections.
• Allow students to test their gear systems and observe their behavior.
• Discuss the observed changes in speed and torque based on gear ratio changes.
Week 3: Gear System Analysis and Reflection
Objective:
Provide students with the opportunity to analyze and reflect on their gear systems. Reflect on the application of gear mechanisms in real-world scenarios. Discuss the broader impact of gear systems in engineering and technology.
Duration: 45 minutes
S# Phase Duration Details
1 Gear System Analysis
20 minutes
2 Reflection and Discussion 20 minutes
• Instruct students to analyze the performance of their gear systems.
• Have them change gear ratios and observe the resulting effects on speed and torque.
• Discuss the trade-offs between speed and torque in gear systems.
• Lead a group discussion on the broader impact of gear mechanisms.
• Discuss how gear systems are used in various industries, including automotive, manufacturing, and robotics.
• Encourage students to reflect on the engineering principles learned and their potential applications.
Answer Key
Q# Answer
1 Evaluation for 1:1 Gear Combination:
Turn the handle in the model and describe the speeds of the drive gear and driven gear.
Answer: The drive gear and driven gear rotate at the same speed.
2 Evaluation for 1:3 Gear Combination:
Turn the handle in the model and describe the speeds of the drive gear and driven gear.
Answer: The drive gear rotates three times for every one rotation of the driven gear.
3 Reflection Question Guide: Based on your new learning, what can you do to make cities and human settlements safe?
Guide students to reflect on the broader impact of gear mechanisms on safety and technology.
Encourage them to explore how gear systems contribute to the functioning of various devices and machines. Discuss the role of engineering in creating safe and efficient mechanisms that enhance urban and human environments.
Simple Machines
Project 9: Pulley
Introduction
A pulley is a system of rope wrapped over one or more wheels to make it easier to lift heavy objects. Pulling the rope downward creates an upward force on the load.
STEM Careers Connection
This project features tasks that resemble people working in the following careers: Mechanical Engineer, Construction Engineer and Water Engineer.
Problem
You want to learn more about how pullies work. You think it would be a good idea to build models to be able to see how they work.
Challenge
Design and build a model of the pulley.
At the end of this activity the learner will be able to demonstrate an understanding of the following: Objectives
Objective:
Lesson Plan: Pulley (Project 9)
Week 1: Introduction to Pulley Systems
Introduce students to the concept of pulley systems and their applications. Familiarize students with the components required for building pulley systems. Discuss the NGSS standards and STEM career connections related to pulleys.
Duration: 45 minutes
S# Phase Duration Details
1 Introduction to Pulleys 15 minutes
• Explain the purpose and function of pulley systems in various applications.
• Discuss real-life examples where pulleys are used to transmit force and lift objects.
• Highlight the significance of pulley mechanisms in engineering and everyday life.
2 Understanding Pulley Mechanics 15 minutes
• Introduce the basic principles of pulley mechanics, including fixed and movable pulleys.
• Explain how pulleys change the direction of force and provide mechanical advantage.
• Discuss the concept of load, effort, and the role of pulleys in lifting heavy objects.
3 Exploring Pulley Components 15 minutes
• Present the components required for building pulley systems, including ropes and pulleys.
• Demonstrate the different types of pulleys, including single fixed, single movable, and compound pulleys.
• Emphasize the importance of proper pulley alignment and arrangement.
Week 2: Building Pulley Systems
Objective:
Assist students in building and understanding pulley systems. Apply the principles of pulley mechanics to design functional lifting mechanisms.
Duration: 45 minutes
S# Phase Duration Details
1 Pulley System Design
20 minutes
2 Building Pulley 20 minutes
• Instruct students to design a pulley system using the provided components.
• Explain the different types of pulley configurations and their applications.
• Encourage students to plan their pulley systems based on lifting goals and mechanical advantage.
• Guide students through the process of assembling their pulley systems.
Systems
3 Testing and Observation 5 minutes
• Assist them in setting up the ropes and pulleys according to their design.
• Ensure that the pulleys are aligned and functional.
• Allow students to test their pulley systems by lifting objects of varying weights.
• Discuss the observed changes in force required based on the type of pulley system used.
Week 3: Pulley System Analysis and Reflection
Objective:
Provide students with the opportunity to analyze and reflect on their pulley systems. Reflect on the application of pulley mechanisms in real-world scenarios. Discuss the broader impact of pulley systems in engineering and technology.
Duration: 45 minutes
S# Phase Duration Details
1 Pulley System Analysis
20 minutes
2 Reflection and Discussion 20 minutes
• Instruct students to analyze the performance of their pulley systems.
• Have them change pulley configurations and observe the resulting effects on force required.
• Discuss the trade-offs between mechanical advantage and distance traveled in pulley systems.
• Lead a group discussion on the broader impact of pulley mechanisms.
• Discuss how pulley systems are used in various industries, including construction, transportation, and entertainment.
• Encourage students to reflect on the engineering principles learned and their potential applications.
Answer Key
Q# Answer
1 Evaluation for Type A Pulley:
Turn the handle and describe the speeds of the drive gear and pulley wheels. Answer: The pulley wheel rotates at the same speed as the drive gear.
2 Evaluation for Type B Pulley:
Turn the handle and describe the speeds of the drive gear and pulley wheels. Answer: The pulley wheel rotates three times for every one rotation of the drive gear.
3 Reflection Question Guide:
Based on your new learning, what can you do to make cities and human settlements safe?
Guide students to reflect on the broader impact of pulley mechanisms on safety and technology.
Encourage them to explore how pulley systems contribute to the functioning of various systems and structures.
Discuss the role of engineering in creating efficient and reliable mechanisms that enhance urban and human environments.
Simple Machines
Project 10: Inclined Planes
Introduction
An inclined plane is a tilted surface, such as a ramp, that is used to lift objects. When you use an inclined plane to lift an object to a certain height, the object must move a longer distance, but with less effort than the one used to the object were to be lifted straight up. Common examples of inclined planes are staircases, ladders, and ramps.
STEM Careers Connection
This project features tasks that resemble people working in the following careers: Civil Engineer, Mechanical Engineer and Transit Authority Officer.
Problem
You want to learn more about how inclined planes work. You think it would be a good idea to build models to be able to see how they work.
Challenge
Design and build a model of an inclined plane.
At the end of this activity the learner will be able to demonstrate an understanding of the following: Objectives
Objective:
Lesson Plan: Inclined Planes (Project 10)
Week 1: Introduction to Inclined Planes
Introduce students to the concept of inclined planes and their applications. Familiarize students with the components required for building inclined plane models. Discuss the NGSS standards and STEM career connections related to inclined planes.
• Explain the purpose and function of inclined planes in various contexts.
• Discuss real-life examples where inclined planes are used to reduce effort in lifting objects.
• Highlight the significance of inclined planes in engineering and everyday life.
• Introduce the basic principles of inclined plane mechanics, including mechanical advantage.
• Explain how inclined planes reduce the force required to move objects along a slope.
• Discuss the relationship between inclined plane length and height.
• Present the components required for building inclined plane models, including ramps and objects to be moved.
• Demonstrate the variations in inclined plane angles and their effects on force required.
• Emphasize the importance of friction and angle in inclined plane mechanics.
Week 2: Building Inclined Plane Models
Objective:
Assist students in building and understanding inclined plane models. Apply the principles of inclined plane mechanics to design functional systems.
Duration: 45 minutes
S# Phase Duration Details
1 Inclined Plane Model Design
20 minutes
2 Building Inclined Plane Models
20 minutes
• Instruct students to design an inclined plane model using the provided components.
• Explain the relationship between inclined plane angle and mechanical advantage.
• Encourage students to plan their models to showcase the benefits of inclined planes.
• Guide students through the process of assembling their inclined plane models.
• Assist them in setting up the ramps and
3 Testing and Observation 5 minutes
objects to be moved.
• Ensure that the models are aligned properly and functional.
• Allow students to test their inclined plane models by moving objects along the ramps.
• Discuss the observed reduction in effort required when using inclined planes.
Week 3: Inclined Plane Analysis and Reflection
Objective:
Provide students with the opportunity to analyze and reflect on their inclined plane models.
Reflect on the application of inclined plane mechanisms in real-world scenarios. Discuss the broader impact of inclined planes in engineering and technology.
Duration: 45 minutes
S# Phase Duration Details
1 Inclined Plane Analysis 20 minutes
2 Reflection and Discussion 20 minutes
• Instruct students to analyze the performance of their inclined plane models.
• Have them measure the force required to move objects along different angles of inclined planes.
• Discuss the relationship between inclined plane angle, mechanical advantage, and friction.
• Lead a group discussion on the broader impact of inclined planes.
• Discuss how inclined plane mechanisms are used in various industries, including transportation, construction, and accessibility.
• Encourage students to reflect on the engineering principles learned and their potential applications.
Answer Key
Q# Answer
1 Evaluation for Inclined Plane Analysis:
Have students measure the force required to move objects along different angles of inclined planes.
2 Reflection Question Guide:
Based on your new learning, how can you practice sustainable consumption?
Guide students to reflect on the broader impact of inclined planes on sustainable consumption and technology.
Encourage them to explore how inclined plane mechanisms contribute to efficient resource utilization and reduced effort. Discuss the role of engineering in creating systems that promote sustainable practices and enhance efficiency in various domains.
STEM Challenge
Project 11: Conveyer Belt
Introduction
A simple machine is a device, which makes your work easier. There are six types of simple machines. They are the wheel and axle, the lever, the inclined plane, the pulley, the screw, and the wedge. For example, a conveyer belt is an example of an inclined plane.
STEM Careers Connection
This project features tasks that resemble people working in the following careers: Architect, Civil Engineer, and Transportation Engineer.
Problem
Malik and Ameer are teenage students who live near a town with a high-poverty level. They want to try and help the people. They did some research and found a business that will donate the materials and labor to build 20 yurts for the town but they require a device that will automatically carry all the materials from the trailer truck on the road up the hill where the yurts will be built.
of
an understanding of the
Objective:
Lesson Plan: Conveyor Belt (Project 11)
Week 1: Introduction to Conveyor Belt Design
Introduce students to the concept of designing a conveyor belt machine. Familiarize students with the Lego Simple & Powered Machines Set 9686. Discuss the NGSS standards, curriculum connections, and STEM career possibilities.
Duration: 45 minutes
S# Phase Duration Details
1 Introduction to Conveyor Belts
15 minutes
2 Understanding Simple Machines 15 minutes
3 Brainstorming Conveyor Belt Design
15 minutes
• Explain the purpose of conveyor belts in industries and transportation.
• Discuss real-life examples of conveyor belt systems and their applications.
• Highlight the importance of designing efficient and automated systems.
• Introduce the concept of simple machines and their role in conveyor belt design.
• Present the Lego Simple & Powered Machines Set 9686 as a tool for building the conveyor belt model.
• Discuss how simple machines like pulleys and inclined planes can be utilized.
• In groups, have students brainstorm and sketch their conveyor belt design.
• Encourage them to consider the structure, movement mechanism, and efficient material transportation.
• Discuss their design ideas and address any questions.
Week 2: Building the Conveyor Belt Model
Objective:
Assist students in constructing a functional conveyor belt model. Apply the principles of simple machines to create an automated material transport system.
Duration: 45 minutes
S# Phase Duration Details
1 Conveyor Belt Model Construction
25 minutes
2 Testing and Adjustment
15 minutes
• Instruct students to build their conveyor belt models using the Lego set components.
• Guide them through the assembly of pulleys, belts, and other necessary parts.
• Ensure that the model is aligned with their initial design sketches.
• Allow students to test their conveyor belt models with lightweight materials.
• Discuss the performance of the models and
3 Reflection and Discussion 5 minutes
identify any areas for improvement.
• Guide students in making necessary adjustments to enhance the functionality.
• Lead a brief discussion on the importance of conveyor belt systems in modern industries.
• Ask students to share their observations and insights from building and testing the models.
Week 3: Application and Future Innovations
Objective:
Provide students with the opportunity to apply their understanding of conveyor belt systems.
Encourage students to think about innovative improvements for conveyor belt technology.
Duration: 45 minutes
S# Phase Duration Details
1 Conveyor Belt Applications
20 minutes
2 Future Innovations and Discussion 20 minutes
• Instruct students to brainstorm and present various applications of conveyor belts.
• Discuss how conveyor belts are used in manufacturing, logistics, and other industries.
• Encourage students to explore the benefits of automated material handling.
• Guide students in thinking about potential innovations to enhance conveyor belt systems.
• Discuss concepts like smart conveyor belts, energy efficiency, and safety features.
• Encourage students to envision the role of technology in shaping the future of material transportation.
Answer Key
Q# Answer
1 Evaluation for Model Testing:
Allow students to test their conveyor belt models with lightweight materials.
2 Reflection Question Guide:
Based on your new learning, how can automated conveyor belt systems contribute to more efficient and sustainable industries?
Guide students to reflect on the role of conveyor belts in improving industrial processes.
Encourage them to consider how automation and innovation can lead to reduced waste, energy efficiency, and streamlined operations.
Discuss the potential impact of conveyor belt technology on achieving sustainable development goals, such as responsible consumption and production.
Renewable Resources
Project 12: Windmill
Engineers have a good understanding of energy, so they collaborate to develop new and more efficient ways to generate electricity from renewable energy sources such as wind, water, and solar energy. The wind is a renewable energy source because the wind will continually be produced as long as the sun shines on the Earth to produce sea and land breezes. Windmills utilize the power of the wind and convert it to mechanical energy to perform work without polluting the environment. In this unit, you will use wind energy to lift a treasure.
STEM Careers Connection
This project features tasks that resemble people working in the following careers: Wind Farm Developer, Wind Turbine Manufacturer, Materials Engineer, and Biochemists.
Problem
On a hiking trip, Ahmad and Ali found a treasure, but it is in a deep pit. As strong wind started to blow. Ahmad as an engineer thought of a bright idea to use the power of the wind and convert it into mechanical energy to lift the treasure out of the deep pit.
At the end of this activity the learner will be able to demonstrate an understanding of the following: Objectives
Objective:
Lesson Plan: Renewable Resources (Project 12)
Week 1: Introduction to Wind Energy and Design
Introduce students to the concept of renewable energy, focusing on wind energy. Familiarize students with the Lego Simple & Powered Machines Set 9686. Discuss the NGSS standards, curriculum connections, and STEM career possibilities.
Duration: 45 minutes
S# Phase Duration Details
1 Introduction to Renewable Energy 15 minutes
2 Exploring Wind Energy 15 minutes
3 Brainstorming Windmill Design 20 minutes
• Explain the importance of renewable energy sources for a sustainable future.
• Introduce wind energy as a form of renewable energy generated from the wind's kinetic energy.
• Discuss the environmental and societal benefits of wind energy.
• Present wind turbines as devices that convert wind energy into mechanical energy.
• Show images and videos of wind turbines in action and discuss their components.
• Highlight the role of wind farms in harnessing wind energy on a larger scale.
• In groups, have students brainstorm and illustrate their windmill design ideas.
• Encourage them to consider the structure, blades, and mechanisms for capturing wind energy.
• Discuss the factors that affect wind turbine efficiency.
Week 2: Building the Windmill Model
Objective:
Assist students in constructing a functional windmill model. Apply the principles of wind energy conversion to their designs.
Duration: 45 minutes
S# Phase Duration Details
1 Windmill Model Construction 25 minutes
2 Testing and Optimization 15 minutes
• Instruct students to build their windmill models using the Lego set components.
• Guide them through the assembly of blades, axle, and gear mechanisms.
• Ensure that the model captures wind energy and converts it into motion.
• Allow students to test their windmill models using a fan or blowing air.
• Discuss the performance of the models and
3 Reflection and Discussion 5 minutes
their ability to rotate and generate motion.
• Guide students in optimizing the design for better wind energy capture.
• Lead a discussion on the potential of wind energy as a renewable resource.
• Ask students to share their observations and insights from building and testing the models.
Week 3: Renewable Energy Applications and Innovation
Objective:
Provide students with the opportunity to explore practical applications of wind energy. Encourage students to think about innovative improvements for wind turbine technology.
Duration: 45 minutes
S# Phase Duration Details
1 Wind Energy Applications
20 minutes
2 Innovation and Future Prospects
20 minutes
• Instruct students to research and present various applications of wind energy.
• Discuss how wind turbines are used for electricity generation in wind farms.
• Explore the benefits of wind energy in reducing greenhouse gas emissions.
• Guide students in thinking about innovations in wind turbine technology.
• Discuss concepts like vertical-axis wind turbines, offshore wind farms, and energy storage.
• Encourage students to envision the role of wind energy in a transition to sustainable power generation.
Allow students to test their windmill models using a fan or blowing air. 2 Reflection Question Guide:
Based on your new learning, how can wind energy contribute to addressing the challenges of global energy demand while promoting environmental sustainability?
Guide students to reflect on wind energy's potential as a clean and abundant resource.
Encourage them to explore the advantages of wind energy in reducing dependence on fossil fuels and mitigating climate change.
Discuss the role of wind energy in achieving Sustainable Development Goal 7 (Affordable and Clean Energy) and its impact on a cleaner and more sustainable
Earth in the Solar System
Project 13: Movement of the Earth and the Moon around the Sun
Introduction
The Sun is at the centre of the solar system.The solar system consists of all the planets that revolve around the Sun. The elliptical (ovalshaped) path of a planet around the Sun is called an orbit. The planet Earth not only revolves in its orbit around the Sun but also rotates on its own axis. The Moon, on the other hand, revolves around the Earth. It takes 27.3 days for the Moon to complete one orbit of the Earth.
STEM Careers Connection
This project features tasks that resemble people working in the following careers: Astronomers, Atmospheric Scientists, and Meteorogist.
Problem
Sara wants to be an astronomer when she grows up. Learning about the solar system has always excited her. Today she wants to design and build a model that demonstrates the movement of the Earth and the Moon around the Sun.
Challenge
Design and build a model that demonstrates the movement of the Earth and the Moon around the Sun.
At the end of this activity the learner will be able to demonstrate an understanding
5. Space Systems: Stars and the Solar System*
Lesson Plan: Earth in the Solar System (Project 13)
Week 1: Introduction to Earth's Movement in the Solar System
Objective:
Introduce students to the movement of the Earth, Moon, and Sun in the solar system. Familiarize students with the Lego Simple & Powered Machines Set 9686. Discuss the NGSS standards, curriculum connections, and STEM career possibilities.
Duration: 45 minutes
S# Phase Duration Details
1 Introduction to Solar System
15 minutes
2 Understanding Earth's Orbit 15 minutes
3 Brainstorming Solar System Model 15 minutes
• Explain the concept of the solar system and its components: Sun, planets, and moons.
• Introduce the Earth-Moon-Sun system and their respective motions.
• Discuss the Earth's orbit around the Sun and its implications for seasons.
• Explain the rotation of the Earth on its axis and its effects on day and night.
• In groups, have students brainstorm and illustrate their solar system model ideas.
• Encourage them to consider the relative positions and movements of the Earth, Moon, and Sun.
• Discuss the importance of accurate scale and distances in their models.
Week 2: Building the Solar System Model
Objective:
Assist students in constructing a functional model that demonstrates Earth's movement in the solar system.
Apply their understanding of orbits and rotations to their models.
Duration: 45 minutes
S# Phase Duration Details
1 Solar System Model Construction 25 minutes
2 Demonstrating Orbital Motion 15 minutes
• Instruct students to build their solar system models using the Lego set components.
• Guide them through the assembly of the Earth, Moon, and Sun representations.
• Emphasize the importance of scale and accurate positioning.
• Have students rotate the beam of their models to observe the positions of the Earth, Moon, and Sun.
• Guide them in understanding how Earth's orbit affects its relationship with the Sun and Moon.
• Encourage students to explain day-night cycles and lunar phases using their models.
3 Reflection and Discussion 5 minutes
• Lead a discussion on the significance of understanding Earth's movement in the solar system.
• Ask students to share their observations and insights from building and interacting with the models.
Week 3: Solar and Lunar Eclipses
Objective:
Explore the concepts of solar and lunar eclipses and their occurrence in the Earth-MoonSun system.
Enable students to simulate and understand the mechanics of eclipses.
Duration: 45 minutes
S# Phase Duration Details
1 Introduction to Eclipses
20 minutes
2 Eclipse Simulation 15 minutes
• Explain the difference between solar and lunar eclipses.
• Discuss the conditions that lead to each type of eclipse and their significance.
• Demonstrate the occurrence of solar and lunar eclipses using the flashlight, Earth, Moon, and Sun models.
• Guide students through the steps of creating shadows and aligning the models for each eclipse.
Answer Key
Q# Answer
1 Demonstrating Solar and Lunar Eclipses:
Have students use their models and a flashlight to simulate the occurrence of solar and lunar eclipses.
2 Reflection Question Guide:
Based on your new learning, how can understanding the movement of celestial bodies in the solar system contribute to advancements in astronomy and our understanding of the universe?
Guide students to reflect on the significance of studying celestial motions. Encourage them to explore how the knowledge of eclipses and orbits contributes to astronomical discoveries.
Discuss the role of astronomers and atmospheric scientists in studying these phenomena and expanding our understanding of the universe.
Technology - Wheel
Project 14: Wheel and Axle
Introduction
A circular object that revolves on an axle is called a wheel. The wheel and axle will always rotate at the same speed. The larger the circumference of the wheel, the more distance it will cover in one rotation. Placing a load on a wheeled car will usually reduce friction, compared to dragging the load on the ground. There are different kinds of wheels: wheels with grooves are called pulleys, and wheels with teeth are called gears.
STEM Careers Connection
This project features tasks that resemble people working in the following careers: Auto Manufacturer, and Automotive Engineer.
Problem
Aryan is fascinated with cars. He would like to learn how cars work by creating a model of a wheel and axle so that when he is old enough he can work on real automobiles.
At the end of this activity the learner will be able to demonstrate an understanding of the following: Objectives
Objective:
Lesson Plan: Wheel and Axle (Project 14)
Week 1: Introduction to Wheel and Axle
Introduce students to the concept of a wheel and axle as a simple machine. Familiarize students with the Lego Simple & Powered Machines Set 9686. Discuss the NGSS standards, curriculum connections, and STEM career possibilities.
Duration: 45 minutes
S# Phase Duration Details
1 Introduction to Simple Machines
15 minutes
2 Understanding Wheel and Axle 15 minutes
3 Brainstorming Wheel and Axle Model 15 minutes
• Explain the concept of simple machines and their role in making work easier.
• Introduce the idea of a wheel and axle as a specific type of simple machine.
• Describe the components and mechanics of a wheel and axle.
• Discuss real-world examples of wheel and axle systems, such as a bicycle.
• In groups, have students brainstorm and illustrate their ideas for a wheel and axle model.
• Encourage them to think about the purpose and applications of their models.
Week 2: Building the Wheel and Axle Model
Objective:
Assist students in designing and constructing functional models of a wheel and axle. Apply their understanding of the mechanics of a wheel and axle to their models.
Duration: 45 minutes
S# Phase Duration Details
1 Model Design and Construction 25 minutes
• Instruct students to use the Lego components to build their wheel and axle models.
• Guide them through the process of designing the wheel, axle, and their interactions.
2 Testing and Refining Models 15 minutes
3 Reflection and Discussion 5 minutes
• Have students test their models to ensure the wheel and axle mechanism works smoothly.
• Encourage them to refine their designs if needed and explore different configurations.
• Lead a discussion on the role of wheel and axle systems in various applications.
• Ask students to share their experiences in building and testing their models.
Objective:
Week 3: Applications and Innovation
Explore real-world applications of wheel and axle systems.
Enable students to reflect on the impact of innovation in automotive engineering.
Duration: 45 minutes
S# Phase Duration Details
1 Applications of Wheel and Axle
2 Innovation in Automotive Engineering
20 minutes
15 minutes
3 Reflection and Discussion 10 minutes
• Discuss everyday applications of wheel and axle systems, such as vehicles, gears, and mechanical advantage.
• Highlight the significance of these systems in modern transportation and machinery.
• Introduce students to the field of automotive engineering and its connection to wheel and axle technology.
• Discuss innovations in automotive design, such as hybrid and electric vehicles.
• Lead a group discussion about the broader impact of energy-efficient air conditioning in hospitality.
• Discuss how technology contributes to sustainable energy consumption practices.
Answer Key
Q# Answer
1 Reflection Question Guide:
Based on your new learning, how can your community contribute to fostering innovation in automotive engineering and transportation systems?
Guide students to reflect on the potential role of their community in advancing automotive technology.
Encourage them to explore ways in which local industries and educational institutions can collaborate to drive innovation.
Discuss the importance of sustainable transportation solutions and the role of engineers in shaping the future of mobility.
STEM Challenge
Project 15: Steering Car
Introduction
It would be hard to push a cart around a store if it did not have wheels because you would be pushing against a force. A wheel is a round circle combined with a rod, called an axle, that goes right through the very center of the wheel to help it move and stay in place. The wheel and axle allow us to push or pull a very heavy object with ease.
STEM Careers Connection
This project features tasks that resemble people working in the following careers: Automotive Engineer, and Transportation Engineer.
Problem
Nikil and Natasha went for a walk and they saw a family pulling two children in a wagon. They were amazed at how easy it was to pull the children and steer the wagon around any obstacles. They wondered if they could make a steering car that would work the same as the wagon.
end of this activity
learner will be able to demonstrate an understanding of the following:
Objective:
Lesson Plan: Steering Car (Project 15)
Week 1: Introduction to Steering Car Design
Introduce students to the concept of designing a steering car model. Familiarize students with the Lego Simple & Powered Machines Set 9686. Discuss the NGSS standards, curriculum connections, and STEM career possibilities. Duration: 45 minutes
S# Phase Duration Details
1 Introduction to Steering Cars 15 minutes
2 Understanding Gear Ratio 15 minutes
3 Brainstorming Steering Car Model 15 minutes
• Explain the purpose and function of steering systems in vehicles.
• Introduce the challenge of designing a steering car model that can turn left and right.
• Define gear ratio and its significance in mechanical systems.
• Discuss how gear ratios affect the performance of a steering car.
• In groups, have students brainstorm and illustrate their ideas for a steering car model.
• Encourage them to consider the gear ratio and power source for their designs.
Week 2: Building the Steering Car Model
Objective:
Assist students in designing and constructing functional steering car models. Apply their understanding of gear ratios and mechanical advantage to their designs. Duration: 45 minutes
S#
1 Model Design and Construction 25 minutes
• Instruct students to use the Lego components to build their steering car models.
• Guide them through the process of incorporating a gear ratio and steering mechanism.
2 Testing and Refining Models 15 minutes
3 Reflection and Discussion 5 minutes
• Have students test their models to ensure smooth steering and proper functionality.
• Encourage them to fine-tune their designs to achieve better performance.
• Lead a discussion on the importance of steering systems in vehicles.
• Ask students to share their experiences in building and testing their steering car models.
Objective:
Week 3: Innovation in Automotive Engineering
Explore the role of innovation in automotive engineering and transportation systems. Enable students to reflect on how their steering car models relate to real-world applications.
Duration: 45 minutes
S# Phase Duration Details
1 Innovation in Automotive Engineering
20 minutes
2 Connection to RealWorld Applications
15 minutes
• Discuss recent innovations in automotive technology, such as autonomous vehicles and electric powertrains.
• Highlight the impact of innovation on safety, efficiency, and sustainability in transportation.
• Guide students to reflect on how their steering car models relate to real vehicles.
• Discuss the similarities and differences between their models and actual steering systems.
Answer Key
Q# Answer
1 Reflection Question Guide:
Based on your new learning, how can your community contribute to fostering innovation in automotive engineering and transportation systems?
Guide students to reflect on the potential role of their community in advancing automotive technology.
Encourage them to explore ways in which local industries and educational institutions can collaborate to drive innovation.
Discuss the importance of sustainable transportation solutions and the role of engineers in shaping the future of mobility.
Cambridge Curriculum Alignment:
Scientific Enquiry:
Engage students in hands-on investigations related to nutrition and food groups.
Encourage students to explore the importance of a balanced diet for overall health, aligning with the National Curriculum of England objective.
Forces and Motion:
1 Project 1: Balanced Diet
2 Project 2: Transformation of Energy
Introduce students to the concept of motion, including making observations and measurements of an object's motion.
Relate the construction of a fishing rod using simple machines to the concept of motion and mechanical advantage.
Mathematics Integration:
Apply multiplication skills to calculate the fish caught by groups, reinforcing mathematical concepts within the context of the project.
Scientific Enquiry:
Engage students in hands-on investigations related to the conversion of electrical energy to mechanical energy. Encourage students to design a machine using pulleys to lift construction material, emphasizing forces and mechanisms, which align with the National Curriculum of England objective.
Forces and Motion:
Explore the concept of forces and mechanisms, particularly in the context of construction and transportation. Relate the design and operation of the machine to the principles of motion and energy transformation.
Mathematics Integration:
Apply multiplication skills to calculate the number of offices in a skyscraper, reinforcing mathematical concepts within the context of the project.
Scientific Enquiry:
Engage students in hands-on investigations related to sound energy and vibrations.
3 Project 3: Sound Energy
Encourage students to explore the conversion of electrical energy into sound energy, aligning with the NGSS objective.
Forces and Motion:
4 Project 4: Electric Fan
5 Project 5: Force and Motion
Introduce students to the concept of vibrations and sound production.
Relate the design and construction of a musical device using gears and axles to the generation of sound through vibrations.
Mathematics Integration:
Apply multiplication skills to calculate sound frequency in vibrations per second, reinforcing mathematical concepts within the context of the project.
Scientific Enquiry:
Engage students in hands-on investigations related to electricity and energy transformation. Encourage students to ask questions and determine cause and effect relationships in electric or magnetic interactions, aligning with the NGSS objective.
Electricity and Energy Transformation:
Introduce students to the concept of electrical energy transformation into mechanical energy, which is a fundamental aspect of the project. Focus on investigating electrical circuits and energy transformations, as specified in the National Curriculum of England.
Engineering and Design:
Encourage students to design and construct an electric fan using gears and motors, applying engineering principles to create a functional device.
Geometry Integration:
Apply geometry skills to analyze fan blade design, connecting mathematical concepts to the project's practical applications.
Forces and Motion:
Engage students in hands-on investigations related to force and motion, with a focus on inclined planes. Encourage students to design and construct a car model to explore and understand motion on inclined planes, aligning with the National Curriculum of England objective.
Scientific Enquiry:
Plan and conduct an investigation to provide evidence of the effects of balanced and unbalanced forces on the motion of an object, aligning with the NGSS objective.
Measurement and Data Analysis:
6 Project 6: Levers
7 Project 7: Seesaw
8 Project 8: Gear
Apply measurement skills to analyze speed and distance in the context of the car model and inclined planes, reinforcing mathematical concepts within the project.
Scientific Enquiry:
Engage students in hands-on investigations related to levers and their mechanical advantage. Encourage students to plan and conduct an investigation to provide evidence of the effects of balanced and unbalanced forces on the motion of objects, aligning with the NGSS objective.
Forces and Mechanisms:
Study forces and mechanisms used in buildings, which may include an exploration of levers as simple machines. Design and build lever models representing different classes, allowing students to apply their understanding of forces and mechanisms.
Mathematics Integration:
Apply mathematical concepts to calculate mechanical advantage, reinforcing mathematical skills within the context of levers.
Scientific Enquiry:
Engage students in hands-on investigations related to the principles of balance and mechanical advantage. Encourage students to design and construct seesaw models with specific requirements, aligning with the National Curriculum of England objective related to forces and mechanisms in everyday objects.
Forces and Motion:
Introduce students to the effects of balanced and unbalanced forces on the motion of objects, aligning with NGSS objectives. Explore the concept of balance and fulcrum position in the context of seesaw design.
Geometry Integration:
Apply geometry skills to analyze balance and fulcrum position in the context of designing seesaw models, reinforcing mathematical concepts within the project.
Scientific Enquiry:
Engage students in hands-on investigations related to mechanisms and devices using gears, aligning with the National Curriculum of England objective.
9
10
Encourage students to design and build gear models with specific gear ratios, promoting understanding of mechanical concepts.
Forces and Motion:
Introduce students to the concepts of gears, gear ratios, and torque.
Relate the construction of gear models to the effects of balanced and unbalanced forces on the motion of objects, aligning with the NGSS objective.
Mathematics Integration:
Apply multiplication skills to calculate gear ratios and speed, reinforcing mathematical concepts within the context of the project.
Scientific Enquiry:
Engage students in hands-on investigations related to forces and mechanical systems, specifically focusing on pulleys.
Encourage students to plan and conduct investigations to provide evidence of the effects of balanced and unbalanced forces on the motion of objects, aligning with the NGSS objective.
Forces and Mechanical Systems:
Explore the mechanisms and applications of pulleys, introducing students to the concept of mechanical advantage.
Design and build pulley models with different mechanical advantages, allowing students to apply their knowledge to practical systems.
Mathematics Integration:
Apply geometry concepts to analyze force distribution in pulley systems, reinforcing mathematical and geometrical understanding within the context of the project.
Scientific Enquiry:
Engage students in hands-on investigations related to the principles of inclined planes and mechanical advantage. Encourage students to design and construct inclined plane models of varying lengths, which can serve as simple machines.
Forces and Motion:
Plan and conduct investigations to provide evidence of the effects of balanced and unbalanced forces on the motion of objects, aligning with NGSS.
Project 9: Pulley
Project 10: Inclined Planes
11 Project 11: Conveyor Belt
12 Project 12: Renewable Resources
Geometry Integration:
Apply geometry concepts to analyze force distribution in inclined planes, fostering an understanding of how shapes and angles affect mechanical advantage.
Simple Machines:
Investigate forces in simple machines, including inclined planes, as specified in the National Curriculum of England.
Scientific Enquiry:
Engage students in hands-on investigations related to forces and mechanisms.
Encourage students to design and create a machine for transporting materials uphill, which involves the application of concepts related to simple machines and forces.
Forces and Motion:
Explore the effects of balanced and unbalanced forces on the motion of an object, aligning with the NGSS objective. Relate the design and operation of the conveyor belt machine to real-world forces and mechanisms, in line with the National Curriculum of England.
Mathematics Integration:
Use multiplication skills to calculate yurt distribution, reinforcing mathematical concepts within the context of the project.
Scientific Enquiry:
Engage students in a hands-on investigation related to renewable energy resources, specifically wind energy. Encourage students to design a windmill machine to harness wind energy and convert it into mechanical energy.
Forces and Motion:
Introduce students to concepts related to forces and motion, such as the effects of balanced and unbalanced forces on the motion of objects. Relate the design and performance assessment of the windmill to the effects of forces on its motion.
Materials and Their Uses:
Investigate materials and their uses in various systems, including the design and construction of a windmill machine.
Measurement Skills:
13 Project 13: Earth in the Solar System
14 Project 14: Wheel and Axle
15 Project 15: Steering Car
Apply measurement skills to assess the performance of the windmill, such as measuring the mechanical energy output or the efficiency of wind energy conversion.
Scientific Enquiry:
Engage students in a hands-on investigation to build a model demonstrating the Earth-Moon-Sun relationship and eclipses.
Encourage students to explore celestial movements and their effects, aligning with the National Curriculum of England objective related to the behavior of light.
Forces and Motion:
Although the project primarily focuses on celestial movements, you can relate it to the concept of forces and motion by discussing the gravitational forces between celestial bodies and their effects on orbits.
Mathematics Integration:
Apply mathematics to predict lunar orbits, fostering mathematical skills and the application of mathematical concepts in a real-world context.
Forces and Motion:
Engage students in hands-on investigations related to forces and mechanisms in everyday objects, aligning with the National Curriculum of England objective.
Encourage students to design and construct a model of a wheel and axle, exploring the mechanical advantage of this simple machine.
Scientific Enquiry:
Plan and conduct an investigation to provide evidence of the effects of balanced and unbalanced forces on the motion of an object, aligning with the NGSS objective.
Measurement Skills:
Apply measurement skills to assess the performance of the wheel and axle model, reinforcing the importance of accurate measurements in scientific investigations.
Scientific Enquiry:
Engage students in a hands-on investigation related to forces and mechanisms in vehicles.
Encourage students to design and build a model steering car, exploring principles of mechanical energy conversion and the effects of balanced and unbalanced forces on its motion, aligning with the NGSS objective.
Forces and Motion:
Study forces and mechanisms in vehicles, including the effects of forces on the motion of objects. Investigate gear ratios and their impact on the performance of the steering car, providing practical evidence of the effects of balanced and unbalanced forces.