Education has always existed since the inception of the human race. However, it was informal in the beginning but took a more formal and structured shape later. The objective remained the same: to prepare the inquisitive learners of today for the challenges of tomorrow. Now, we are in the 21st century, where dynamic curriculum, engaging pedagogy, and performance-based assessments are the essential elements for an impactful education system, where integration of technology is indispensable and inseparable due to the extensive exposure of learners to media and information. These circumstances make the establishment of engaging and relevant education a true challenge for educators.
It is an open fact that the challenges of the 4th industrial revolution cannot be encountered through conventional educational approaches. Our STEM education model, based on STEM Resource books and makerspace, is developed according to the Science, Technology, Engineering, Mathematics (STEM) approach, inter-disciplinary and integrated learning that engages learners in learning, inculcates skills development and enhances problem-solving abilities.
STEM challenges in this book are developed by STEM-certified educators, based on Next Generation Science Standards, The National Curriculum of England and the Common Core for Mathematics. These challenges were then reviewed by international STEM experts & organizations, including STEM.org, an eminent research & accrediting body in the United States. These challenges and pedagogy were put to the test in a long & robust process of prototyping on students & their teachers for their feedback on learning attainment and experience.
Expert teachers appreciate and endorse the systematic initiative of STEM programs in schools, through which learners are challenged to solve problems of real-world situations and emerge as innovators and inventors. Apart from developing collaboration and communication skills, students choose their career paths and achieve their goals in life.
5x Axle, 8-module, green 652128 2x Belt, blue 71059 1x Gear block, transparent 41 13297
4502103
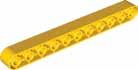
4x Beam, 1 1-module, yellow 652524
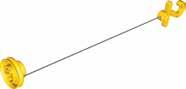
2x String with hook, yellow 75536
1x Worm gear, blue 4271573
Brick, 2x 4, green 301 128
Brick, 2x 4, red 301 121 3x Brick, 2x 2, green 343728
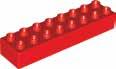
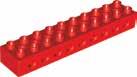
Brick with holes, 2x 10, red 75350 2x Plate, 2 x 4, yellow 4160152 2x Bridge element, 2x4x 2, yellow 4221004 1x Brick with eyes, oval, 2 x4x 2, yellow 81981
4x Tyre, black 451441 1
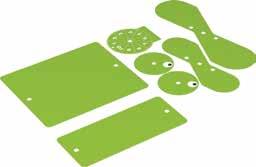
1x Plastic forms sheet, green 4520270
2x Gear, 24-tooth crown, blue 4501054
2x Gear, 24-tooth crown, red 652921
2x Axle with gear, 8-module, 8-tooth, blue 41 13296
4x Axle with gear, 5-module, 8-tooth, blue 652323
1x LEGO ® DUPLO ® girl 427151 1 4x Brick with arch, 2x 3, red 230221 4x Brick with holes, 2 x 4, red 75349 3x Brick, 2x 2, yellow 343724 5x Brick, 2x 4, yellow 301 124 2x Brick, 2x 2, red 343721
6x Connector peg, handle, yellow 4493718
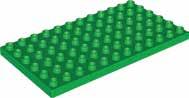
1x Plate, 6 x12, green 4281607
2x
Understanding the Structure of the Lesson
Requirements for the project
Team Roles in the Team
Alignment with the Sustainable Development Goals
NGSS Curriculum Linkage
Cambridge Science Curriculum Linkage
Technology Connection
Engineering Connection
Common Core for Mathematics Curriculum Linkage
After brainstorming Learners create their model.
Evaluation is the phase where learners reflect on the performance of their model and link it to their classroom learning.
Learners write about the project they are building
Learners sketch their model and label as many parts for clarity in execution.
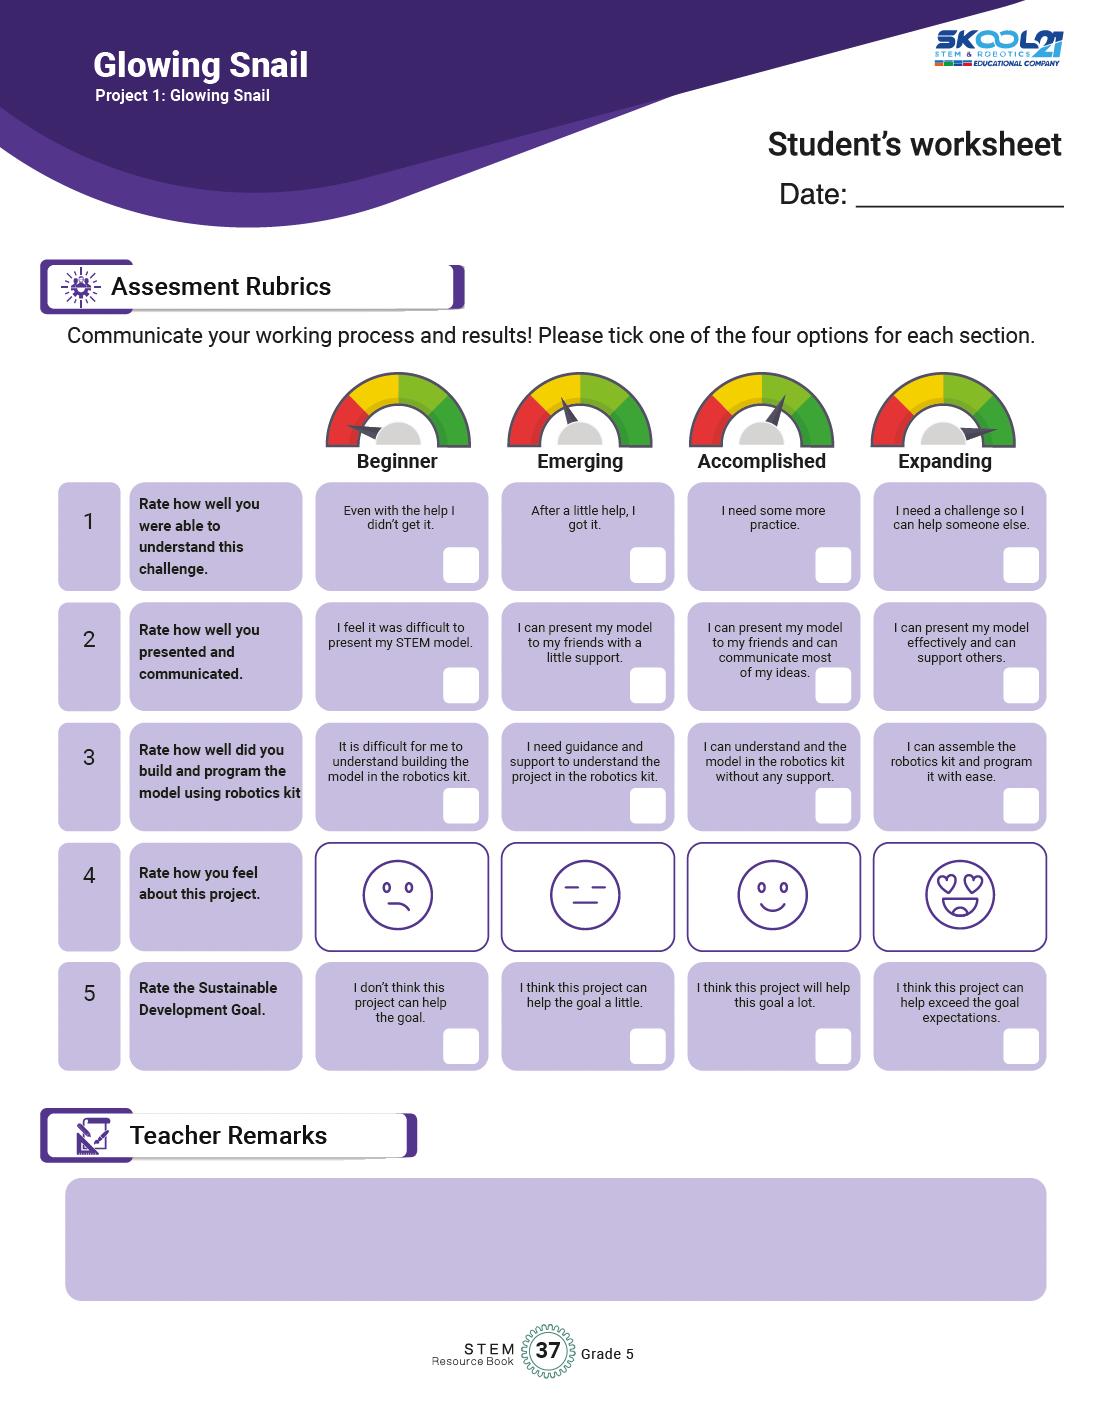
Assessment rubrics is a grid for teachers and learners to reflect on their progress in each of the project.
Building instructions are also provided to help learners get started, If they struggling in the first phase.
This space is for teachers to provide any remarks if needed on the participation of the learner in each of the project.
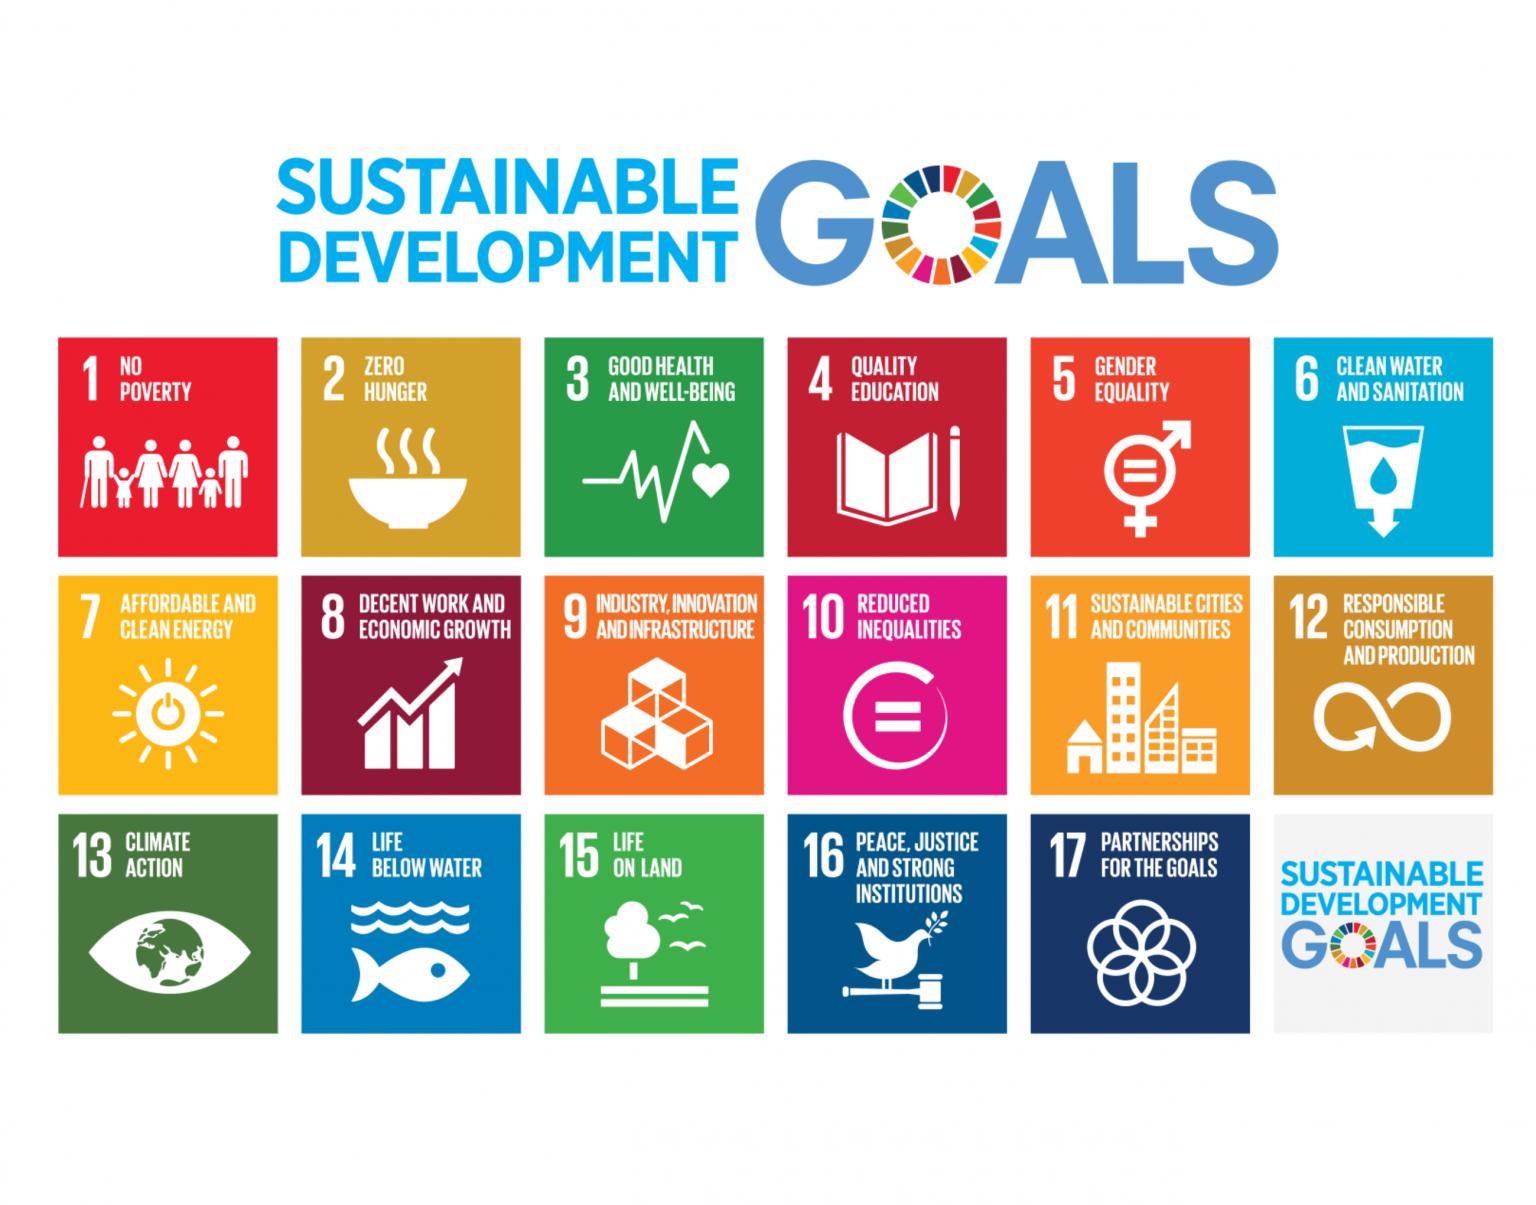
Alignment with the Sustainable Development Goals
Sustainable Development Goals (SDGs) are a set of 17 global goals adopted by all United Nations Member States in 2015 as part of the 2030 Agenda for Sustainable Development. eved by being for all at
Ensure inclusive and equitable quality education and promote lifelong learning opportunities for all. empower all women and
Ensure access to affordable, reliable, sustainable, and
Promote sustained, inclusive, and sustainable economic growth, full and productive employment, Build resilient infrastructure, promote inclusive and nable industrialization, and foster innovation.
Take urgent action to combat climate change and its marine resources for sustainable development.
Protect, restore, and promote sustainable use of terrestrial ecosystems, halt deforestation, and combat desertification and biodiversity loss.
Promote peaceful and inclusive societies for sustainable development, provide access to justice for all, and build effective, accountable, and inclusive institutions at all levels.
Partnerships for Strengthen the means of implementation and revitalize the Global Partnership for Sustainable Development.
Now, let's see how the students' projects can be linked to these SDGs:
When students design projects using STEM Resource Book and Wedo 2.0 Kit, they can focus on creating solutions that tackle real-world problems related to sustainable development. For example, they could create smart home systems that conserve energy (SDG 7Affordable and Clean Energy) or design a production (SDG 12
Linking their projects to specific SDGs requires critical thinking and understanding of the global challenges we face today. Students can also focus on projects that address local community needs and align them with relevant SDGs.
Encouraging students to consider the SDGs when designing their projects will help them understand the broader context of their work and how their technological and scientific ilding a more sustainable and equitable world. This approach also empowers them to become responsible global citizens who actively engage with the
Reflection
Based on your new learning, how can you protect, restore, and promote sustainable use of ecosystems?
Based on your new learning, how can your community help foster innovation?
Based on your new learning, how can your community help foster innovation?
Based on your new learning, how can we work together to ensure healthy lives and promote wellbeing for all at all
Based on your new learning, how can your community help foster innovation?
Based on your new learning, what can you do to make cities and human settlements safe? Based on your new learning, how can you protect, restore,
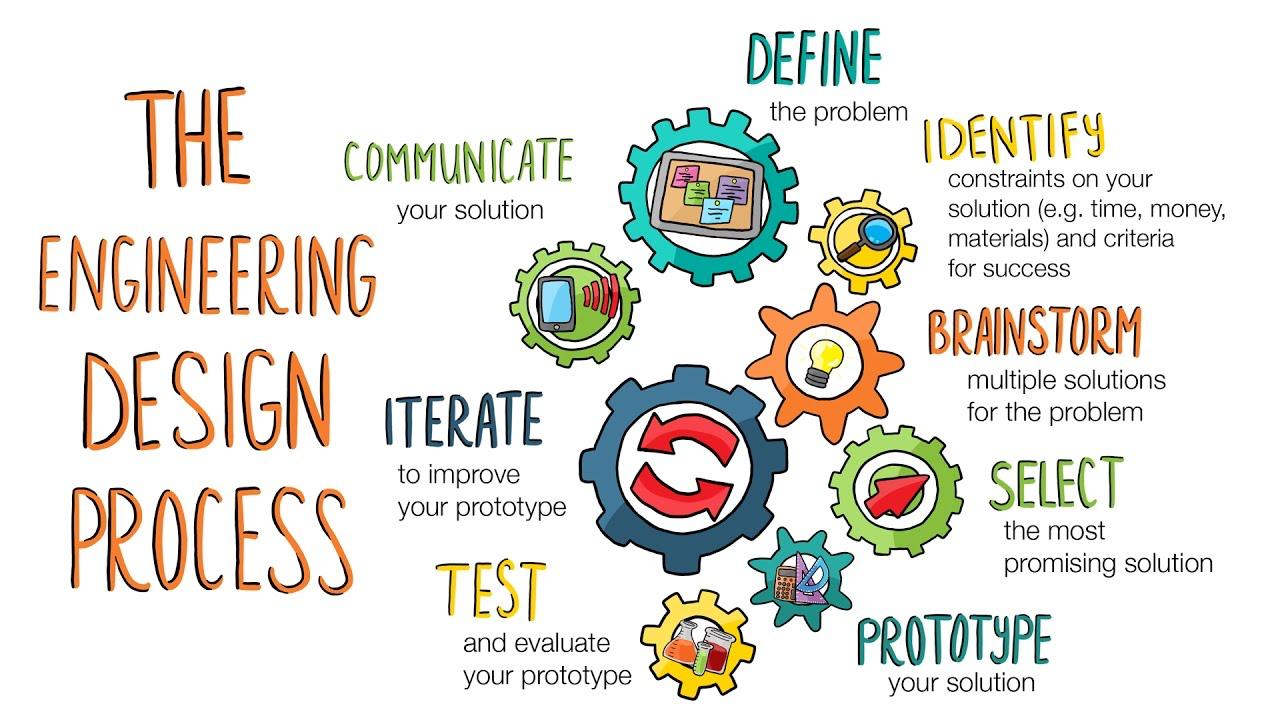
The Engineering Design Process
The Engineering Design Process is a systematic approach used by engineers and designers to solve problems and create innovative solutions. It provides a structured framework for developing new products, processes, or systems by following a series of well-defined steps. This process is not only applicable in engineering but is also widely used in various STEM disciplines to tackle challenges and develop creative solutions.
The typical steps of the Engineering Design Process are: Icons Phases
Define the Problem
Brainstorm Ideas
Design and Plan
Details
• Present the project's objectives and requirements to students, such as building a model, attaching it to the smarthub, and programming it.
• Encourage students to understand the purpose of the project, its context, and what they need to achieve.
• Engage students in brainstorming sessions where they envision and sketch possible solutions.
• Encourage creativity and diverse ideas, allowing students to explore various design options.
• Guide students to describe their chosen model's structure and function in detail.
• Help them plan how to use STEM Kit components effectively to build their models.
• Facilitate discussions on how they intend to program the model to perform specific
Build and Create
Test and Evaluate
Iterate and Improve
Communicate and Share
actions.
• Provide assistance as needed while students assemble their models.
• Encourage hands-on exploration, experimentation, and iteration as they build and refine their designs.
• Support students in testing their models and programming, providing guidance for troubleshooting.
• Ask questions to help them critically assess whether the model meets the specified requirements.
• Encourage students to identify areas for improvement based on testing outcomes.
• Guide them in making iterative changes to their designs to enhance performance and functionality.
• Organize opportunities for students to present their projects to peers or the class.
• Encourage them to explain their design choices, programming logic, and problemsolving strategies.
Fostering Social Skills
The STEM projects outlined in the "STEM Resource Book" provide opportunities for students to develop important social skills alongside their technical knowledge. These social skills are crucial for effective collaboration, communication, and engagement in real-world scenarios. Here's a brief introduction to some of the key social skills covered in these projects:
S# Social Skills
1 Collaboration
Details
Working together is a fundamental skill across all projects. Students learn to cooperate, share ideas, delegate tasks, and contribute collectively to achieve project goals. They experience the benefits of pooling strengths and perspectives to create more comprehensive and innovative solutions.
2 Communication Effective communication is vital in sharing ideas, presenting findings, and troubleshooting challenges. Through the projects, students practice articulating their thoughts clearly, listening actively to peers, and engaging in meaningful discussions that promote understanding.
3 ProblemSolving
4 Empathy and Respect
Engaging in the engineering design process exposes students to various challenges. They learn to approach problems analytically, brainstorm solutions, evaluate alternatives, and make decisions collaboratively. These skills are applicable beyond STEM and are valuable in everyday decision-making.
Encouraging students to appreciate different viewpoints, respect diverse ideas, and consider the feelings of their peers fosters a positive and inclusive learning environment. These skills promote effective teamwork and strengthen relationships within the group.
5 Critical Thinking
6 Time Management
As students work on designing, building, testing, and refining their projects, they enhance their critical thinking abilities. They learn to analyze situations, make informed judgments, and consider implications and consequences of their choices.
Working on projects requires efficient time management. Students develop skills in setting priorities, allocating time to tasks, meeting deadlines, and juggling multiple responsibilities –all of which are valuable in academic and professional contexts.
7 Conflict Resolution Collaboration can sometimes lead to disagreements or conflicts. Through open discussions and respectful negotiations, students learn how to address conflicts, find common ground, and work towards mutually satisfactory solutions.
8 Presentation Skills
9 Reflection
Sharing their projects with peers and instructors hones students' presentation skills. They practice structuring their thoughts, speaking confidently, and using visuals effectively to convey complex information.
After completing each project, students reflect on their experiences, successes, challenges, and lessons learned. This practice encourages self-awareness, self-assessment, and the
ability to apply insights from one project to others.
By incorporating these social skills into STEM projects, educators prepare students not only for academic success but also for success in their future careers and personal lives. These skills empower students to collaborate effectively, contribute meaningfully to teams, and navigate the complexities of a rapidly changing world.
S# Project
1 Project 1: A Bridge
2 Project 2: A Raft
3 Project 3: A Pinwheel
Core - Social Skills
• Collaboration: Students work together to brainstorm and build a bridge, learning to share ideas and tasks effectively.
• Communication: They discuss bridge designs and coordinate their efforts, learning to express their thoughts clearly.
• Problem-Solving: Students encounter challenges in building the bridge and collaboratively find solutions to ensure its stability.
• Empathy and Respect: Through teamwork, students understand the importance of valuing each other's contributions and perspectives.
• Critical Thinking: They analyze different bridge models and evaluate their feasibility to choose the best design.
• Time Management: Students allocate time for planning, building, and testing the bridge within the project timeframe.
• Collaboration: Students collaborate to design and build a raft, understanding the benefits of combining their skills.
• Communication: They discuss the structural components and design choices, learning to convey their ideas effectively.
• Problem-Solving: When the raft faces buoyancy issues, students work together to adjust its design for better functionality.
• Empathy and Respect: Collaborative efforts teach students to respect each other's viewpoints and work towards a common goal.
• Critical Thinking: Students evaluate different sail designs and make informed decisions about which one to use.
• Time Management: They manage their time to complete the raft design, construction, and testing phases.
• Collaboration: Students collaborate to design and build pinwheels, acknowledging the value of shared creativity.
• Communication: They share ideas on pinwheel designs and mechanics, enhancing their ability to express concepts.
4 Project 4: A Hot Day
• Problem-Solving: Students address design challenges, working together to optimize pinwheel performance.
• Empathy and Respect: Collaborative work nurtures empathy and respect for each other's contributions and viewpoints.
• Critical Thinking: Students analyze how pinwheels work and make design decisions based on their understanding.
• Time Management: They allocate time for designing, building, and testing pinwheels.
• Collaboration: Students collaborate on designing cooling devices, experiencing the benefits of teamwork.
• Communication: They discuss cooling mechanisms, improving their communication skills to convey technical concepts.
• Problem-Solving: Students tackle challenges related to heat relief, collectively finding effective solutions.
• Empathy and Respect: Teamwork encourages students to appreciate diverse viewpoints and work harmoniously.
• Critical Thinking: Students critically evaluate cooling strategies and apply their understanding to device design.
• Time Management: They manage time to construct and test cooling devices within the project timeline.
• Collaboration: Students collaborate on designing a hockey player model, highlighting the power of joint efforts.
• Communication: They share ideas on player design and functionality, enhancing their ability to articulate concepts.
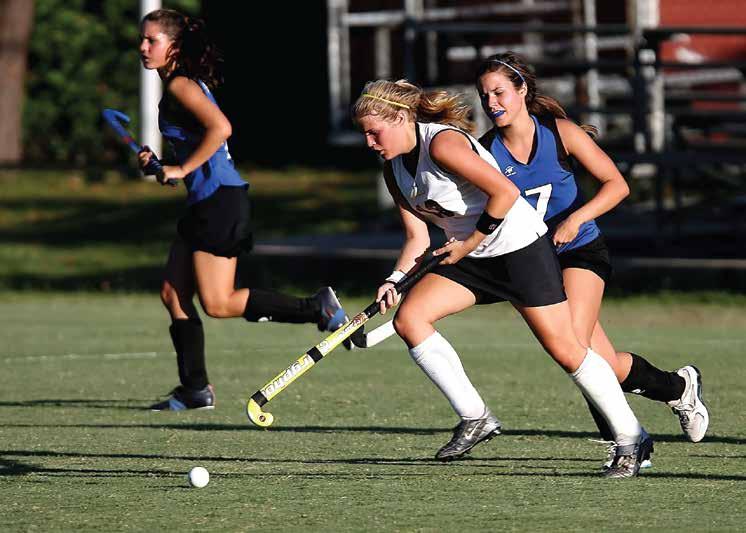
5 Project 5: A Hockey Player
• Problem-Solving: Students address challenges related to player movement, collectively devising solutions.
• Empathy and Respect: Teamwork fosters empathy and respect for each other's contributions and opinions.
• Critical Thinking: Students critically analyze player design elements and make informed decisions.
• Time Management: They manage time to construct the hockey player model and test its functionality.
• Collaboration: Students collaborate on designing and building an odometer, recognizing the value of shared knowledge.
6 Project 6: An Odometer
• Communication: They discuss and share ideas on odometer functionality, improving their communication skills.
• Problem-Solving: Students collectively address challenges related to measurement accuracy and gear
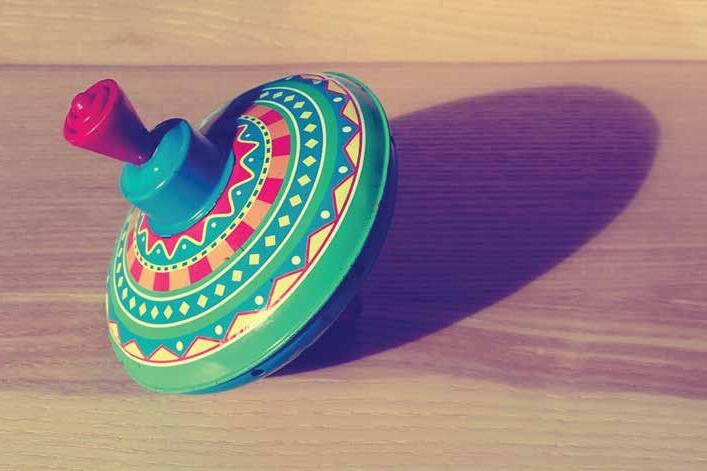
7 Project 7: A Spinning Top
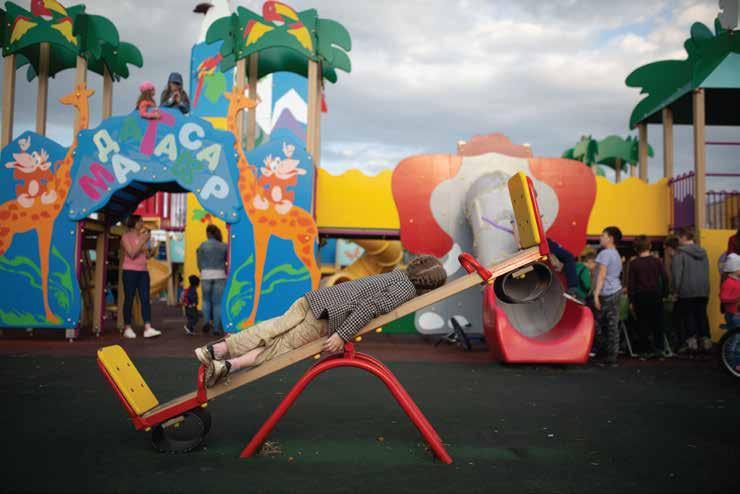
8 Project 8: A Seesaw
9 Project 9: A Car Launcher
mechanisms.
• Empathy and Respect: Teamwork cultivates empathy and respect for each other's contributions and insights.
• Critical Thinking: Students critically assess the components needed for accurate measurement and integrate them into their design.
• Time Management: They manage their time effectively to construct the odometer and conduct measurement tests.
• Collaboration: Students collaborate on designing and building spinning tops, realizing the power of combined creativity.
• Communication: They discuss and share ideas on top design and mechanics, enhancing their communication skills.
• Problem-Solving: Students work together to optimize spinning top performance and overcome design challenges.
• Empathy and Respect: Teamwork fosters empathy and respect for different perspectives and collaborative efforts.
• Critical Thinking: Students analyze spinning top mechanics and choose design elements for optimal performance.
• Time Management: They manage their time efficiently to construct spinning tops and measure their spinning duration.
• Collaboration: Students collaborate on designing and building a seesaw, experiencing the benefits of joint problem-solving.
• Communication: They discuss and share ideas on seesaw structure and balance, enhancing their communication skills.
• Problem-Solving: Students work together to achieve seesaw balance and make necessary adjustments.
• Empathy and Respect: Teamwork nurtures empathy and respect for each other's viewpoints and contributions.
• Critical Thinking: Students critically evaluate seesaw components and make informed decisions for balance.
• Time Management: They manage time effectively to construct the seesaw and test its balance.
• Collaboration: Students collaborate on designing and building a car launcher, recognizing the value of shared insights.
• Communication: They discuss and share ideas on launcher mechanics, improving their communication skills.
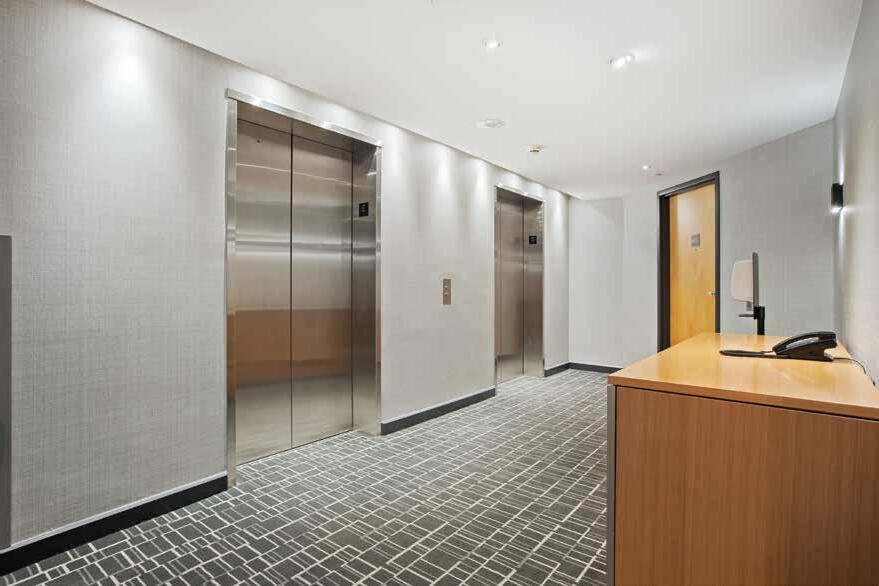
10 Project 10: An Elevator
• Problem-Solving: Students collectively address challenges related to launcher performance and energy transfer.
• Empathy and Respect: Teamwork fosters empathy and respect for diverse perspectives and collaborative efforts.
• Critical Thinking: Students critically analyze launcher mechanics and choose design elements for optimal performance.
• Time Management: They manage their time efficiently to construct the car launcher and measure car launch distances.
• Collaboration: Students collaborate on designing and building an elevator, realizing the importance of shared expertise.
• Communication: They discuss and share ideas on elevator design and mechanics, enhancing their communication skills.
• Problem-Solving: Students work together to optimize elevator functionality and address design challenges.
• Empathy and Respect: Teamwork cultivates empathy and respect for each other's viewpoints and collaborative efforts.
• Critical Thinking: Students critically assess elevator mechanics and make informed decisions for optimal design.
• Time Management: They manage their time effectively to construct the elevator and test its lifting mechanism.
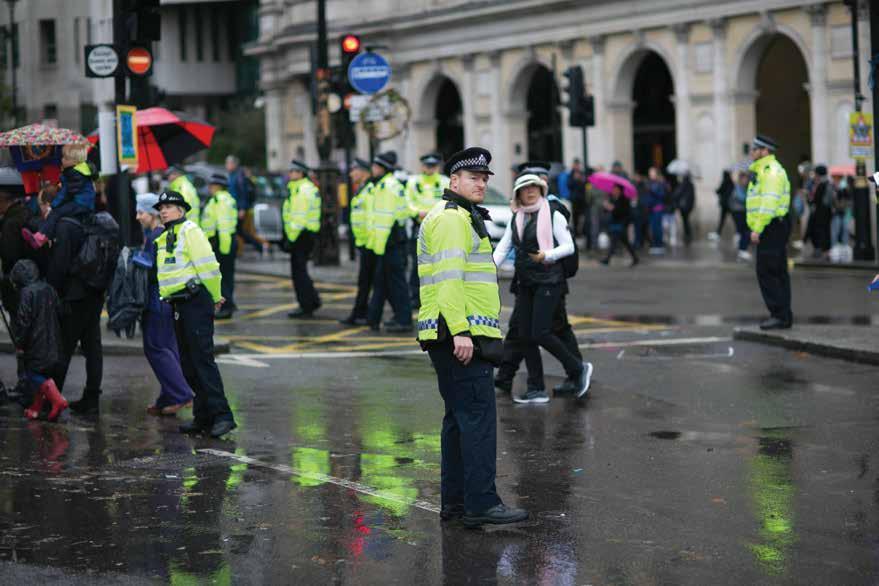
• Collaboration: Students collaborate on designing and building a robotic traffic police officer, recognizing the importance of pooling their skills.
• Communication: They discuss and share ideas on robot design and movement, enhancing their communication skills.
• Problem-Solving: Students work together to ensure the robot turns efficiently and directs traffic effectively.
11 Project 11: A Traffic Police
12
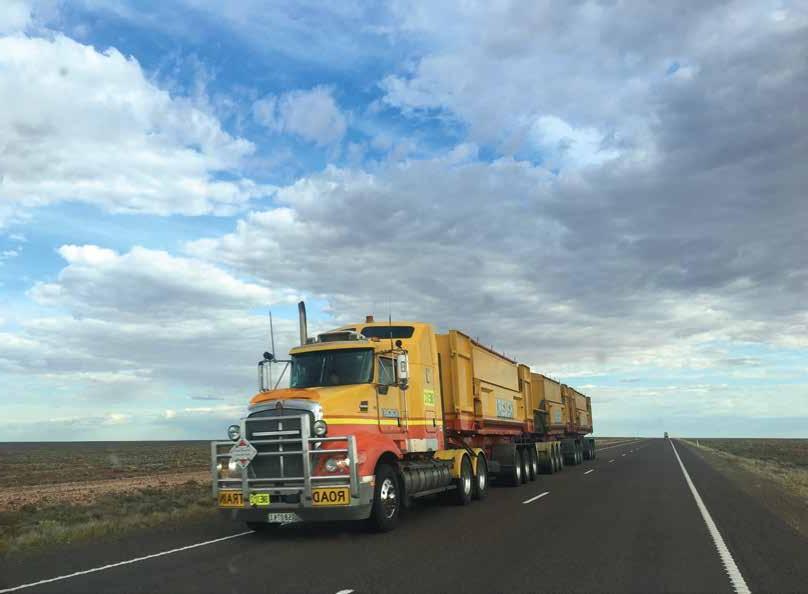
Project 12: A Dump Truck
• Empathy and Respect: Teamwork fosters empathy and respect for different viewpoints and the value of collective efforts.
• Critical Thinking: Students critically analyze the robot's movement mechanisms and make design decisions for optimal performance.
• Time Management: They manage their time effectively to construct the robotic traffic police officer and test its turning ability.
• Collaboration: Students collaborate on designing and building a dump truck, realizing the benefits of
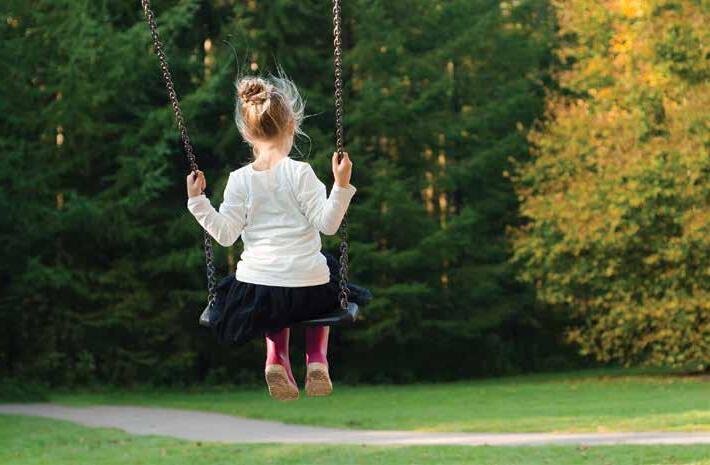
13 Project 13: Playground Improvement
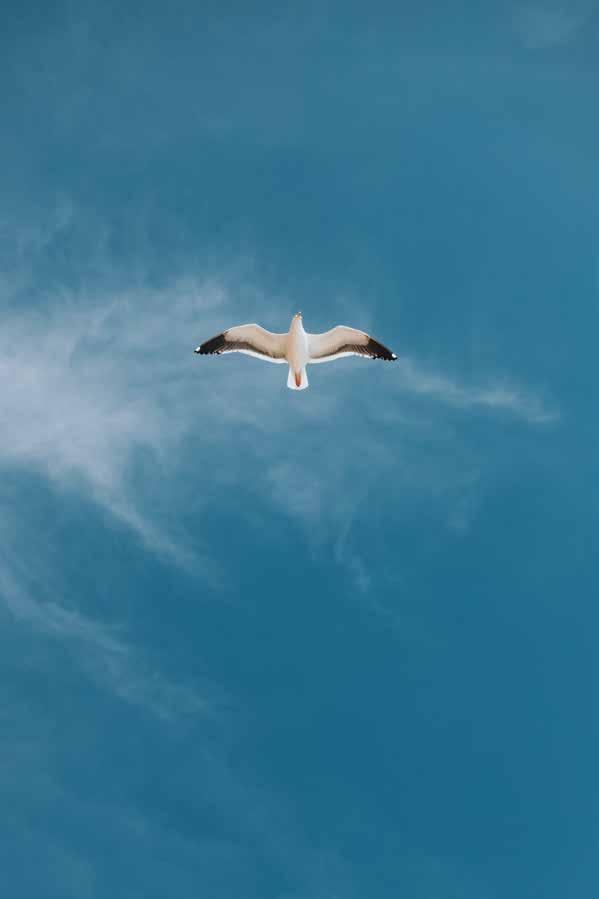
14 Project 14: A Bird
combining their ideas.
• Communication: They discuss and share ideas on dump truck structure and lifting mechanism, enhancing their communication skills.
• Problem-Solving: Students work together to ensure the dump truck's stability and effective lifting functionality.
• Empathy and Respect: Teamwork nurtures empathy and respect for diverse perspectives and collaborative efforts.
• Critical Thinking: Students critically assess dump truck mechanics and make informed choices for stability and lifting.
• Time Management: They manage time effectively to construct the dump truck and test its lifting mechanism.
• Collaboration: Students collaborate on designing and building a swing for the community playground, understanding the value of collective creativity.
• Communication: They discuss and share ideas on swing design and construction, enhancing their communication skills.
• Problem-Solving: Students work together to ensure the swing's stability, safety, and swinging motion.
• Empathy and Respect: Teamwork cultivates empathy and respect for different contributions and the significance of cooperation.
• Critical Thinking: Students critically analyze swing mechanics and design elements to create a safe and enjoyable swing.
• Time Management: They manage their time efficiently to construct the swing and test its stability and swinging motion.
• Collaboration: Students collaborate on designing and building a robotic bird, recognizing the value of shared knowledge and creativity.
• Communication: They discuss and share ideas on bird design and wing movement, enhancing their communication skills.
• Problem-Solving: Students work together to ensure the bird's wings move as intended and the robot functions properly.
• Empathy and Respect: Teamwork fosters empathy and respect for different viewpoints and collaborative efforts.
• Critical Thinking: Students critically analyze bird mechanics and choose design elements for optimal wing movement.
• Time Management: They manage their time effectively
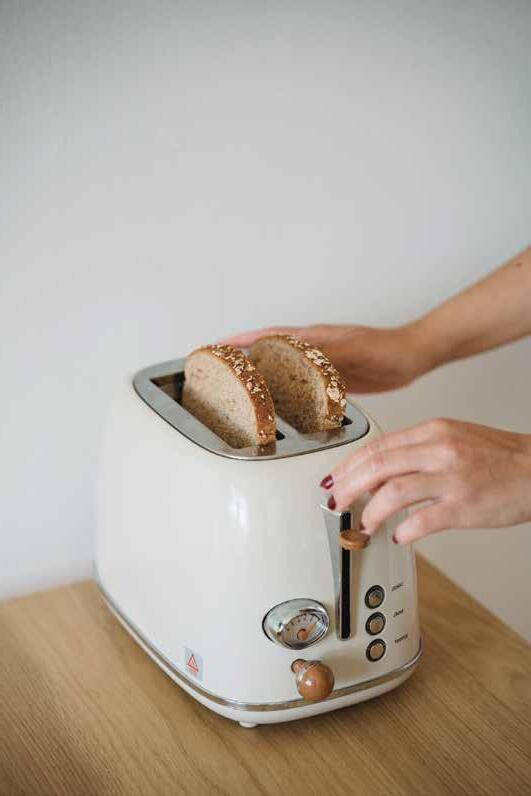
15 Project 15: A Toaster
to construct the robotic bird and test its wing movement.
• Collaboration: Students collaborate on designing and building a toaster, realizing the value of combined insights for functionality.
• Communication: They discuss and share ideas on toaster design and mechanics, enhancing their communication skills.
• Problem-Solving: Students work together to ensure the toaster functions properly and ejects toast safely.
• Empathy and Respect: Teamwork nurtures empathy and respect for diverse contributions and viewpoints.
• Critical Thinking: Students critically assess toaster mechanics and design elements for effective toasting and ejection.
• Time Management: They manage their time efficiently to construct the toaster and test its toasting and ejection mechanisms.
By guiding students through these projects, educators can help them develop a diverse range of social skills that are essential for effective collaboration, communication, problemsolving, empathy, critical thinking, time management, conflict resolution, presentation skills, and reflection. These skills equip students with the ability to work effectively in teams, adapt to various challenges, and navigate complex scenarios, preparing them for success in both academic and real-world contexts.
Makerspace
What is a Makerspace?
A makerspace is a collaborative workspace inside a school, library, or public/private facility for making, learning, exploring, and sharing. Here, students have the tools and resources to design, experiment, build, and invent. Makerspaces typically include a variety of materials and equipment, ranging from high-tech to no-tech, all aimed at fostering creativity, problem-solving, and critical thinking.
Features of an Ideal Makerspace
1. Space: The ideal makerspace should be spacious enough to accommodate groups of students working on projects. It should be well-lit and have areas for both individual and group work.
2. Furniture:
• Flexible Seating: Chairs and tables that are easily movable and can be reconfigured for different tasks.
• Storage Units: Shelves and drawers for organizing tools, materials, and student projects.
• Workbenches: Sturdy surfaces for hands-on activities.
• Display Boards: Walls or boards to showcase projects, ideas, or instructions.
3. Equipment Needed:
• Electronics STEM Kits: A core tool for the Grade 5 makerspace, these kits integrate hardware and software to produce a comprehensive learning tool.
• Computers or Tablets: For programming and accessing digital resources.
• General STEM Tools: Rulers, protractors, magnifying glasses, and basic lab equipment.
• Safety Equipment: Safety goggles, first aid kit, gloves, etc.
4. STEM Resource Book: This will guide students and educators in carrying out projects aligned with NGSS, the National Curriculum of England, and the Common Core State Standards for Mathematics.
Importance of a Makerspace in Schools
1. Enhanced Learning: Makerspaces enable hands-on learning, making complex concepts more accessible.
2. Fosters Creativity: Provides an environment where students can freely express and test out their ideas.
3. Teamwork: Students learn to collaborate, delegate tasks, and work towards a common goal.
4. Problem-solving: Tackling real-world challenges makes students more adept at thinking critically.
5. Prepares for the Future: Engaging with technology and tools prepares students for future job roles and challenges.
Executing STEM Activities in the Makerspace
1. Planning: Begin with the end in mind. Identify the learning outcomes you aim to achieve from the activity.
2. Group Formation: Divide students into small groups to encourage collaboration.
3. Introduction: Introduce the STEM Kit and how it can be used. Brief students on the activity using the STEM Resource Book.
4. Hands-on Activity: Allow students to build, experiment, and iterate using the kits. Ensure that they refer to the STEM Resource Book for guidance.
5. Reflection: Post-activity, allow students to discuss their findings, challenges faced, and what they learned.
6. Showcase: Encourage students to display their projects, explaining the science and math concepts they applied.
7. Safety: Always stress the importance of following safety guidelines, especially when using tools and equipment.
Standard Operating Procedure (SOP) for a Makerspace
1. Objective:
Provide a safe, organized, and productive environment for students to explore, invent, and learn using various tools and materials available in the makerspace.
2. Scope:
This SOP applies to all students, educators, and visitors within the makerspace area.
3. Responsibilities:
• Educators/Staff: Supervise activities, ensure the safety and proper use of tools/equipment, provide necessary training, and maintain equipment.
• Students: Comply with all guidelines, work safely, and respect all equipment and fellow makers.
4. Access:
• Makerspace access should be limited to authorized personnel and students during scheduled times.
• All users must sign in and out of the makerspace, noting their purpose of visit.
5. Safety:
• Before using any tool or equipment, students must receive proper training.
• Safety equipment like goggles, gloves, and aprons should be worn as required.
• No food or drink is allowed in the makerspace.
• First aid kits and fire extinguishers should be easily accessible.
6. Equipment Usage:
• All equipment should have clear, written instructions posted nearby.
• Users must report any damage or malfunction immediately.
• After use, equipment must be returned to its designated place and left in a clean and usable state for the next user.
7. Materials:
• All materials must be stored in their designated areas.
• Users must log materials used for inventory and restocking purposes.
• Waste should be disposed of properly in the provided bins.
8. Conduct:
• Respect fellow makers; do not interrupt or hinder someone else’s project.
• Clean up after completing a project or task.
• Notify staff of any issues, concerns, or suggestions.
• Always ask if unsure about equipment use or any makerspace procedure.
9. Training:
• Regular workshops should be held to train students on the use of new equipment or software.
• New users should undergo an orientation session before accessing the makerspace.
10. Maintenance:
• A routine check of all tools and equipment should be carried out to ensure they are in good working condition.
• Expired or worn-out materials should be discarded and replaced.
• Cleaning routines must be established to maintain the hygiene and tidiness of the makerspace.
11. Project Storage:
• Designate a space where students can store ongoing projects.
• All projects should be labeled with the student's name, class, and date.
12. Showcase:
• A dedicated space should be available for showcasing exemplary projects.
• Educators can rotate the showcased projects based on relevance, innovation, and educational value.
13. Continuous Improvement:
• Collect feedback regularly from users to understand what can be improved.
• Explore new tools, materials, and technologies to keep the makerspace updated.
14. Emergency Procedures:
• Clearly display emergency procedures, including evacuation routes.
• Train staff and students on how to respond to emergencies like fires, electrical failures, or injuries.
15. Periodic Review:
• This SOP should be reviewed at least annually to ensure its relevance and effectiveness.
In conclusion, a well-structured SOP ensures that the makerspace remains a hub of creativity while being safe and organized. Adhering to these procedures ensures that the makerspace is beneficial for all and remains a vital resource for students for years to come.
Introduction to the project and SDG.
Explain what a bridge
freshwater habitats and their importance.
Explore wind energy and its potential.
Understand the concept of renewable energy sources.
Early Simple Machines Kit
Rulers Pencil STEM Resource Book – Grade 2
how oceans and marine resources can be conserved.
Introduction to the project and SDG.
Discuss the importance of renewable energy and introduce wind energy. Brainstorm and plan the pinwheel design using the kit. Explore how wind energy can be harnessed.
Build and test the pinwheel model. Observe its rotation using wind energy.
actions to combat
Introduction to the project and SDG. Discuss the role of physical activity in
Brainstorm and plan the hockey player model using the kit. Explore kinetic energy and its connection to
Build and test the hockey player model. Understand how kinetic energy is used in sports. Reflect on maintaining a healthy
Introduction to the project and SDG.
importance of energy-
Brainstorm and plan the odometer design
Understand how energy is converted into distance.
Build and test the odometer model. Measure distances and understand energy conversion. Reflect on
transportation and and plan the car launcher design using the kit.
Explore how force and motion interact.
Build and test the car launcher model.
Understand how propulsion works and
its application in transportation. Reflect on the importance of
Introduction to the project and SDG.
significance of vertical transportation and
Brainstorm and plan the elevator design using the kit. Explore the mechanics of
Build and test the elevator model. Understand how pulleys lift objects vertically. Reflect on the importance of industry, innovation, and infrastructure. Introduction to the project and SDG.
importance of traffic control and safety. Brainstorm and plan the robotic traffic police design using the kit. Explore the basics
Build and test the robotic traffic police model. Understand its movement and role in traffic control. Reflect on the intersection of technology and wellSTEM Resource Book – Grade 2
Introduction to the project and SDG. Discuss the role of construction and urban development. Brainstorm and plan the dump truck design using the kit. Explore the mechanics of lifting and dumping. Build and test the dump truck model. Understand its lifting mechanism and role in
construction. Reflect on the importance of sustainable cities and communities.
Early Simple Introduction to the project and SDG.
community spaces and Brainstorm and plan the playground swing design using the kit. Explore creative design
Build and test the playground swing model. Understand its construction and role engagement. Reflect sustainable cities and
Introduction to the project and SDG. an life and
Understand the concept of energy conversion and responsible use of resources.
Explore the engineering behind everyday appliances.
Book – Grade 2
Early Simple Machines Kit
Rulers Pencil STEM Resource
Book – Grade 2
Brainstorm and plan the robotic bird design using the kit. Explore the mechanics of bird
Build and test the robotic bird model. Understand its wing movement and connection to avian behavior. Reflect on the intersection of technology and terrestrial ecosystems.
Introduction to the project and SDG. Discuss responsible consumption and energy usage.
Brainstorm and plan the toaster design using the kit. Explore the mechanics of toasting.
Build and test the toaster model. Understand its energy conversion and
responsible use of resources. Reflect on the importance of sustainable consumption and production.
Curriculum Mapping
1 Project 1: A Bridge Understand basic engineering concepts related to bridge construction. Explore the function of simple machines in building structures.
2-PS1-3: Make observations and measurements to identify materials based on their properties.
2-PS1-2: Analyze data obtained from testing different materials to determine which materials have the properties that are best suited for an intended purpose.
Living things and their habitats
2.MD.A.1: Measure the length of an object by selecting and using appropriate tools. Goal 9Industry, Innovation, and Infrastructure
Civil Engineer: Design and build infrastructure projects.
Architect: Design and plan structures.
2 Project 2: A Raft
Understand the principles of buoyancy and flotation. Explore the concept of weight distribution in watercraft.
2-PS1-1: Plan and conduct an investigation to describe and classify different kinds of materials by their observable properties.
2-PS1-4: Construct an argument with evidence that some changes caused by heating or cooling can be reversed and some cannot. Uses of everyday materials.
2.G.A.1: Recognize and draw shapes having specified attributes. Goal 14 - Life Below Water
Ship Captain: Operate and manage watercraft. Marine Engineer: Design and maintain marine vehicles and structures.
3 Project 3: A Pinwheel Understand the concept of wind energy and its conversion. Explore the potential of renewable energy sources.
2-PS1-3: Make observations and measurements to identify materials based on their properties.
2-PS1-4: Construct an argument with evidence that some changes caused by Uses of everyday materials.
2.MD.A.3: Estimate lengths using units of inches, feet, centimeters, and meters. Goal 7Affordable and Clean Energy
Wind Farm Developer: Design and manage wind energy projects. Materials Engineer: Study and design materials for specific purposes.
4
Project 4: A Hot Day Understand the greenhouse effect and its relationship to global warming. Explore cooling mechanisms and their energy efficiency.
heating or cooling can be reversed and some cannot.
2-ESS2-3: Obtain information to identify where water is found on Earth and that it can be solid or liquid.
2-ESS2-2: Develop a model to represent the shapes and kinds of land and bodies of water in an area.
Uses of everyday materials.
5 Project 5: A Hockey Player Understand kinetic energy and its relation to sports. Explore the importance of physical activity for well-being.
2-PS1-1: Plan and conduct an investigation to describe and classify different kinds of materials by their observable properties.
2-LS2-2: Develop a simple model that mimics the function of an animal in dispersing seeds or pollinating plants.
Uses of everyday materials.
2.MD.A.3: Estimate lengths using units of inches, feet, centimeters, and meters.
6 Project 6: An Odometer Understand distance measurement and energy conversion. Explore the concept of energyefficient transportation.
2-PS1-1: Plan and conduct an investigation to describe and classify different kinds of materials by their observable properties.
2-PS1-4: Construct an argument with evidence that some changes caused by heating or cooling can be reversed and some cannot.
Uses of everyday materials.
2.MD.D.10: Draw a picture graph and a bar graph to represent a data set with up to four categories.
Goal 13Climate Action
Wind Farm Developer: Design and manage wind energy projects.
Materials Engineer: Study and design materials for specific purposes.
Goal 3 - Good Health and Well-Being
2.OA.A.1: Use addition and subtraction within 100 to solve oneand two-step word problems. Goal 7Affordable and Clean Energy
Athletes: Engage in sports and physical activities professionally. Manufacturing Engineers: Design and improve products and processes.
Auto Mechanic: Repair and maintain vehicles.
Auto Manufacturer: Design and produce automobiles.
7
Project 7: A Spinning Top Understand rotational motion and energy conservation. Explore the potential of renewable energy sources.
8 Project 8: A Seesaw
9 Project 9: A Car Launcher
Understand balance and fulcrum. Explore the mechanics of seesaw motion.
2-PS1-2: Analyze data obtained from testing different materials to determine which materials have the properties that are best suited for an intended purpose.
2-PS1-3: Make observations and measurements to identify materials based on their properties. Uses of everyday materials.
2-PS1-3: Make observations and measurements to identify materials based on their properties. Uses of everyday materials.
2.MD.C.7: Tell and write time from analog and digital clocks to the nearest five minutes.
10 Project 10: An Elevator
Explore energy transfer and propulsion mechanisms. Understand the principles of launching.
Understand vertical motion and lifting mechanisms. Explore the principles of pulleys and gears.
11
Project 11: A Traffic Police Explore motion and direction.
2-PS1-3: Make observations and measurements to identify materials based on their properties.
Uses of everyday materials.
2.MD.A.4: Measure to determine how much longer one object is than another, expressing the length difference in terms of a standard length unit.
2.MD.A.4: Measure to determine how much longer one object is than another, expressing the length difference in terms of a standard length unit.
2-PS1-3: Make observations and measurements to identify materials based on their properties.
Uses of everyday materials.
2.G.A.2: Partition a rectangle into rows and columns of same-size squares and count to find the total number of them.
Goal 7Affordable and Clean Energy
Windmill Manufacturing: Produce wind energy equipment. Mechanical Engineer: Design mechanical systems and components.
Goal 8Decent Work and Economic Growth
Architect: Design and plan structures. Civil Engineer: Design and construct infrastructure projects.
Goal 9Industry, Innovation, and Infrastructure
Aerospace Engineer: Design and develop aircraft and spacecraft. Spacecraft Structure Engineer: Design the structural components of spacecraft.
Goal 9Industry, Innovation, and Infrastructure
Mechanical Engineer: Design and analyze mechanical systems. Elevator Mechanic: Install, maintain, and repair elevators.
2-LS4-1: Make observations of plants and Living things and their
2.OA.A.1: Use addition and subtraction
Goal 3 - Good Health and Well-being
Police officers: Ensure public safety and
12
Project 12: A Dump Truck
Understand the role of traffic police in ensuring safety. animals to compare the diversity of life in different habitats. habitats. within 100 to solve oneand two-step word problems. enforce laws. Civil Engineers: Design and plan transportation systems.
Explore loadcarrying mechanisms and design. Understand simple mechanisms in transportation.
2-LS4-1: Make observations of plants and animals to compare the diversity of life in different habitats. Living things and their habitats.
2.G.A.2: Partition a rectangle into rows and columns of same-size squares and count to find the total number of them.
Goal 9Industry, Innovation, and Infrastructure Construction Engineers: Design and manage construction projects. Civil Engineers: Plan and oversee infrastructure development.
13
Project 13: Playground Improvement
Explore playground design and innovation. Understand the role of community contributions.
14 Project 14: A Bird Understand biodiversity and habitats. Explore the characteristics of birds and their adaptations.
2-PS1-3: Make observations and measurements to identify materials based on their properties. Uses of everyday materials.
2-LS4-1: Make observations of plants and animals to compare the diversity of life in different habitats. Living things and their habitats.
2.MD.C.7: Tell and write time from analog and digital clocks to the nearest five minutes.
2.OA.A.1: Use addition and subtraction within 100 to solve oneand two-step word problems.
Goal 11Sustainable Cities and Communities
City Planner: Design and plan urban spaces. CAD Playground Designer: Design and plan play areas using ComputerAided Design.
Goal 15 - Life on Land
15 Project 15: A Toaster
Understand food preparation and energy use.
Explore the principles of toasting.
2-PS1-3: Make observations and measurements to identify materials based on their properties. Uses of everyday materials.
2.MD.C.8: Solve word problems involving dollar bills, quarters, dimes, nickels, and pennies, using $ and ¢ symbols appropriately.
Ornithologist: Study birds and their behavior. Wildlife Biologist: Study and manage wildlife populations.
Goal 2 - Zero Hunger Electrical Engineers: Design and develop electrical systems. Auto Mechanic: Repair and maintain vehicles.
Project-wise Lesson Plan and Answer Key
A Bridge
Project 1: A Bridge
Introduction
A habitat is a place where a plant or animal naturally or normally lives and grows. For example, freshwater is a type of water habitat. It includes rivers, lakes, and ponds. These freshwater habitats are home to 100,000 species of plants and animals including snails, fish, turtles, alligators, snakes, and many types of insects.
STEM Careers Connection
This project features tasks that resemble people working in the following careers:
Civil Engineer, Architect
Problem
Faryal, Maliha, and their friends are exploring the freshwater habitat of alligators in a river. Some of their friends are stuck on the other side of the river, therefore, Faryal and Maliha need to help their friends by some means to cross the river.
Challenge
Faryal and Maliha are tasked to help their friends by building a bridge over the river so their friends can cross it.
At the end of this activity the learner will be able to demonstrate an understanding
Lesson Plan: A Bridge (Project 1)
Week 1: Introduction to Bridges and Brainstorming Objective:
Understand the concept of bridges and their purpose.
Brainstorm ideas for designing a bridge using simple machine components.
Duration: 45 minutes
S# Phase Duration Details
1 Introduction 5 minutes
2 Brainstorming 15 minutes
3 Kit Exploration 15 minutes
4 Design Sketch 10 minutes
• Introduce the project: Building a bridge over the river to help friends cross.
• Discuss the objectives and goals of the project.
• Ask students to share their ideas about bridges and how they can be built.
• Encourage creative thinking and collaboration.
• Provide examples of different types of bridges.
• Distribute the Early Simple Machines Kit.
• Allow students to explore the components and identify parts that can be used for bridge construction.
• Ask students to draw their initial design ideas for the bridge using the kit components.
• Emphasize the use of simple machines and stability in their designs.
Week 2: Building the Bridge Model
Objective:
Construct a bridge model using the kit components.
Understand the importance of stability and load-bearing in bridge design.
Duration: 45 minutes
S#
1 Review 5 minutes
2 Bridge Construction 30 minutes
3 Testing 10 minutes
• Briefly discuss what was covered in the previous session.
• Guide students in using the kit components to build their bridge models.
• Emphasize stability and load distribution in their designs.
• Test the bridge models to see if they can hold any weight.
• Discuss the results and observations.
Week 3: Evaluation and Reflection
Objective:
Evaluate the bridge models for design and functionality.
Reflect on the bridge-building process and its connection to STEM concepts.
Duration: 45 minutes
S# Phase Duration Details
1 Review and Discussion 15 minutes
2 Evaluation 15 minutes
3 Reflection 15 minutes
• Review the construction and testing of the bridge models.
• Discuss the challenges faced and lessons learned during the process.
• Students evaluate their own bridge models based on criteria such as stability, loadbearing capacity, and design creativity.
• Engage in a class discussion about the importance of bridges and how engineering concepts were applied during the project.
• Ask students to share their thoughts on how bridges contribute to sustainable development (SDG 15).
Answer Key
Q# Answer
1 Were you able to make your own design or did you use the example? (Mine / Example) Answer may vary.
2 What is the length of your model? Answer will vary based on the design.
3 What is the height of your model? Answer will vary based on the design.
4 Did you test your model to see if it can hold any weight? Yes / No
5 Write the name of one species found in a freshwater habitat. Answers may include fish, frogs, turtles, etc.
6 Why do you think a cat will also use a bridge instead of going in the river? Possible answer: Cats don't like water and prefer to stay dry, so they might use a bridge to cross the river.
7 Guide for Reflection Question:
Ask students to think about ways in which bridges contribute to the conservation and restoration of natural habitats, such as rivers and streams. Encourage students to discuss the importance of designing bridges that allow for the movement of animals and the protection of their habitats.
A Raft
Project 2: A Raft
All physical objects are composed of matter, and an easily observable property of different matters is its state. The classical states of matter are solid, liquid and gas. Water is the most common substance on Earth, but it is also the only substance that commonly appears as solid, liquid, and gas within the normal range of Earth's temperatures. This makes water a good model for discussing the states of matter.
STEM Careers Connection
This project features tasks that resemble people working in the following careers:
Ship Captain, Marine Engineer.
Problem
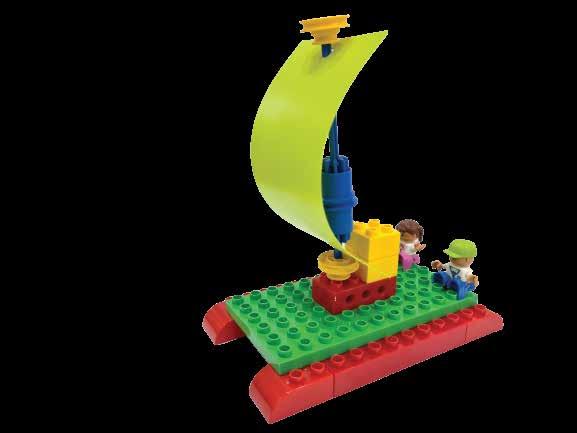
Salim and Ali both love exploring new things. Today they saw a raft sailing across the sea. They were curious as to how the raft (solid) floats on water(liquid). They wanted to explore it.
Challenge
Can you help Salim and Ali to make a raft?
At the end of this activity the learner will be able to demonstrate an understanding of the following: Objectives
Objective:
Lesson Plan: A Raft (Project 2)
Week 1: Introduction to Rafts and Brainstorming
Understand the concept of rafts and their use in water. Brainstorm ideas for designing a raft using simple machine components.
Duration: 45 minutes
S# Phase Duration Details
1 Introduction 5 minutes
2 Brainstorming 15 minutes
3 Kit Exploration 15 minutes
4 Design Sketch 10 minutes
• Introduce the project: Designing a raft that can float on water and move using a sail.
• Discuss the objectives and goals of the project.
• Discuss different types of watercraft and their purposes.
• Brainstorm ideas for designing a raft and its sail using the kit components.
• Distribute the Early Simple Machines Kit.
• Allow students to explore the components and identify parts that can be used for the raft and sail.
• Ask students to sketch their initial ideas for the raft and sail.
• Emphasize the use of simple machines for movement.
Week 2: Building the Raft Model
Objective:
Construct a raft model using the kit components. Understand how the sail mechanism works.
Duration: 45 minutes
S# Phase Duration Details
1 Review 5 minutes
2 Raft Construction 30 minutes
3 Testing 10 minutes
• Briefly review the concept of rafts and sail mechanisms.
• Guide students in using the kit components to build their raft models.
• Ensure that the sail mechanism is incorporated into the design.
• Test the raft models in a container of water to observe their floating ability and the movement of the sail.
Week 3: Evaluation and Reflection
Objective:
Evaluate the raft models for design, floating ability, and sail functionality. Reflect on the raft-building process and its connection to STEM concepts.
Duration: 45 minutes
1 Review and Discussion 15 minutes
2 Evaluation 15 minutes
3 Reflection 15 minutes
• Review the construction, testing, and functionality of the raft models.
• Discuss any challenges faced during the process.
• Students evaluate their own raft models based on criteria such as floating ability, sail effectiveness, and design creativity.
• Engage in a class discussion about the importance of water transportation and the role of sail mechanisms.
• Ask students to reflect on how the design of their raft models contributes to sustainable development (SDG 14).
Answer Key
Q# Answer
1 Were you able to make your own design or did you use the example? (Mine / Example) Answer may vary.
2 How did your model react in water? (Float / Sink) Answer may vary based on the design.
3 Did water take the shape of the container in which it was placed? (Yes / No) Yes / No
4 Your raft model is in the state of_____________. Floating
5 What shape did you choose to use for the sail for this project? Answers may vary based on the design.
6 Guide for Reflection Question:
Ask students to consider the environmental impact of using water transportation methods like rafts with sail mechanisms compared to motorized boats. Encourage them to discuss the benefits of using renewable energy sources (wind) for movement on water.
A Pinwheel
Project 3: A Pinwheel
Introduction
The ability to do work is called energy. There are many sources of energy, like wind, sun, water, oil, gas, water waves, etc. In the case of the pinwheel, it is a toy consisting of a wheel of paper curls, attached at its axle to a stick by a pin. It is designed to spin whenblown upon by the wind. Wind acts as a source of energy and enablesus to do work.
STEM Careers Connection
This project features tasks that resemble people working in the following careers: Wind Farm Developer, Wind Turbine Manufacturer, Materials Engineer, Biochemist
Problem
Crossing the street, Hassan and Ali passed by a stand of pinwheels on their way back home. It looked very interesting and beautiful as the pinwheels spanned with the flow of the wind. They wanted to try different kinds of pinwheels out at home, for example, pinwheels with big, wide wings and small, narrow wings.
At the end of this activity the learner will be able to demonstrate an understanding of the
Objective:
Lesson Plan: A Pinwheel (Project 3)
Week 1: Introduction to Pinwheels and Brainstorming
Understand the concept of pinwheels and wind energy.
Brainstorm ideas for designing a pinwheel using simple machine components.
Duration: 45 minutes
S# Phase Duration Details
1 Introduction 5 minutes
2 Brainstorming 15 minutes
3 Kit Exploration 15 minutes
4 Design Sketch 10 minutes
• Introduce the project: Creating a pinwheel that spins in the wind.
• Discuss the objectives and goals of the project.
• Discuss how pinwheels work and the role of wind energy.
• Brainstorm ideas for designing a pinwheel using the kit components.
• Distribute the Early Simple Machines Kit.
• Allow students to explore the components and identify parts that can be used for the pinwheel.
• Ask students to sketch their initial ideas for the pinwheel design.
• Emphasize the connection between wind energy and motion.
Week 2: Building the Pinwheel Model
Objective:
Construct a pinwheel model using the kit components. Understand the principles of wind energy conversion.
Duration: 45 minutes
S# Phase Duration Details
1 Review 5 minutes
2 Pinwheel Construction 30 minutes
3 Testing 10 minutes
• Briefly review the concept of pinwheels and wind energy.
• Guide students in using the kit components to build their pinwheel models.
• Ensure that the design includes wings that can catch the wind.
• Test the pinwheel models in front of a fan to observe their spinning motion due to wind energy.
Week 3: Evaluation and Reflection
Objective:
Evaluate the pinwheel models for design, wind-catching ability, and spinning motion. Reflect on the pinwheel-building process and its connection to STEM concepts.
Duration: 45 minutes
S# Phase Duration Details
1 Review and Discussion 15 minutes
2 Evaluation 15 minutes
3 Reflection 15 minutes
• Review the construction, testing, and spinning motion of the pinwheel models.
• Discuss any challenges faced during the process.
• Students evaluate their own pinwheel models based on criteria such as windcatching ability, spinning speed, and design creativity.
• Engage in a class discussion about the use of wind energy in real-life applications, such as wind turbines for electricity generation.
• Ask students to reflect on how their pinwheel designs relate to sustainable consumption (SDG 12).
Answer Key
Q# Answer
1 Were you able to make your own design or did you use the example? (Mine / Example)
Answer: Mine.
2 Is energy required to do work? (Yes / No) Yes
3 The pinwheel rotates with the help of _____________ energy. Wind / Air
4 Predict (guess) which of the pinwheels will start turning near the fan. Answers may vary based on design.
5 Predict (guess) which of the pinwheels will start turning far from the fan.
Answers may vary based on design.
6 Test the small pinwheel and estimate how close it was to the fan when it started turning.
Answers may vary based on observation.
7 Test the big pinwheel and estimate how close it was to the fan when it started turning.
Answers may vary based on observation.
8 Guide for Reflection Question:
Encourage students to think about ways in which renewable energy sources like wind can be harnessed to reduce the consumption of non-renewable resources. Discuss the importance of making conscious choices to reduce energy consumption in daily life.
A Hot Day
Project 4: A Hot Day
Heatstroke is a condition caused by the body overheating, usually as a result of prolonged exposure to or physical exertion in high temperatures. A warming climate because of global warming can contribute to the intensity of heat waves by increasing the chances of very hot days and nights.
STEM Careers Connection
This project features tasks that resemble people working in the following careers:
Wind Farm Developer, Wind Turbine Manufacturer
Problem
It's a hot summer day. Ahmad has just recovered from a heat stroke, yet the weather is once again extremely hot and Muhammad is worried it will affect Ahmad again. Mohammad went to the makerspace to make a machine that can generate wind which could be used to make Ahmad feel better.
At the end of this activity the learner will be able to demonstrate an understanding of the following: Objectives
National Curriculum of
Objective:
Lesson Plan: A Hot Day (Project 4)
Week 1: Introduction to Cooling Mechanisms and Brainstorming
Understand the concept of cooling mechanisms and their importance. Brainstorm ideas for designing a cooling device using simple machine components.
Duration: 45 minutes
S# Phase Duration Details
1 Introduction 5 minutes
2 Brainstorming 15 minutes
3 Kit Exploration 15 minutes
4 Design Sketch 10 minutes
• Introduce the project: Creating a cooling device to beat the heat on a hot day.
• Discuss the objectives and goals of the project.
• Discuss different methods of cooling and the importance of staying cool on a hot day.
• Brainstorm ideas for designing a cooling device using the kit components.
• Distribute the Early Simple Machines Kit.
• Allow students to explore the components and identify parts that can be used for the cooling device.
• Ask students to sketch their initial ideas for the cooling device design.
• Emphasize the concept of heat transfer and how their device will work.
Week 2: Building the Cooling Device Model
Objective:
Construct a cooling device model using the kit components.
Understand the principles of heat transfer and cooling mechanisms.
Duration: 45 minutes
S# Phase Duration Details
1 Review 5 minutes
2 Cooling Device Construction 30 minutes
3 Testing 10 minutes
• Briefly review the concept of cooling mechanisms and heat transfer.
• Guide students in using the kit components to build their cooling device models.
• Ensure that the design incorporates components for heat absorption and dissipation.
• Test the cooling device models using a heat source and observe how they work to cool down the area.
Week 3: Evaluation and Reflection
Objective:
Evaluate the cooling device models for design, cooling effectiveness, and heat transfer mechanisms.
Reflect on the cooling device-building process and its connection to STEM concepts.
Duration: 45 minutes
S# Phase Duration Details
1 Review and Discussion 15 minutes
2 Evaluation 15 minutes
3 Reflection 15 minutes
• Review the construction, testing, and cooling effectiveness of the device models.
• Discuss any challenges faced during the process.
• Students evaluate their own cooling device models based on criteria such as cooling effectiveness, heat transfer mechanisms, and design creativity.
• Engage in a class discussion about the importance of energy-efficient cooling solutions and their role in mitigating climate change.
• Ask students to reflect on how their cooling device designs contribute to responsible consumption and production (SDG 12).
Answer Key
Q# Answer
1 Were you able to make your own design or did you use the example? (Mine / Example) Answer may vary.
2 What are the two main steps of testing the model? Heating and cooling
3 List two things you learned from this activity. Answers may vary based on observations and understanding.
4 Guide for Reflection Question:
Encourage students to consider the environmental impact of traditional cooling methods and the importance of energy-efficient alternatives. Discuss the significance of using sustainable materials and technologies in designing cooling solutions.
A Hockey Player
Project 5: A Hockey Player
Introduction
Playing sports is essential to maintain a healthy life. Sports are rapidly becoming important for improving muscles and bones. Besides the healthy benefits of exercise, fit kids sleep well.
STEM Careers Connection
This project features tasks that resemble people working in the following careers: Athletes, Manufacturing Engineers, and Robotics Engineers
Problem
Ali and Aslam have learned about the health benefits of exercising and sports. They challenge their friends for a 3-on-3 friendly match of hockey in their playground. However, they need a third player for the match. Ali thought of building a structure of a hockey player that can hit the ball towards the goal.
STEM Challenge
Can you make a model of a hockey player and goalpost using a mechanism that allows it to hit the ball?
At the end of this activity the learner will be able to demonstrate an understanding of the following: Objectives
Objective:
Lesson Plan: A Hockey Player (Project 5)
Week 1: Design and Brainstorm
Introduce the project and brainstorm design ideas.
Duration: 45 minutes
S# Phase Duration Details
1 Introduction 10 minutes
• Introduce the project: Design and build a model of a hockey player and goalpost that can hit the ball.
• Discuss the NGSS, England Curriculum, Common Core Mathematics, SDGs, and STEM career connections related to the project.
• Display the requirements: Early Simple Machines Kit, pencil, ruler.
2 Brainstorming 20 minutes
3 Design Sketch 15 minutes
• Engage students in a group brainstorming session.
• Discuss the purpose of the project and the concept of mechanisms.
• Ask students to share their ideas on how they would design the hockey player and goalpost using the kit.
• Encourage students to illustrate their design ideas on paper.
• Have students draw their design sketches, labeling different parts and mechanisms.
• Discuss each design in the class, emphasizing the mechanisms and functionality.
Week 2: Model Building
Objective:
Build the model of the hockey player and goalpost.
Duration: 45 minutes
S# Phase Duration Details
1 Model Building 40 minutes
• Provide each student or group with the Early Simple Machines Kit.
• Guide students as they construct their models based on their design sketches.
• Emphasize the use of mechanisms like levers or other simple machines to achieve the desired motion.
• Encourage students to test their models as they build to ensure functionality.
Week 3: Testing and Reflection
Objective:
Test the models and reflect on the project.
S#
1 Testing 25 minutes
2 Reflection 15 minutes
Duration: 45 minutes
• Set up a mock hockey playing field.
• Have each student or group test their model's ability to hit the ball into the goalpost.
• Measure the shooting zones and distances to record the results.
• Discuss the test results as a class, comparing predictions with actual outcomes.
• Reflect on the importance of physical activity and energy in sports.
• Address the reflection questions provided in the project description.
Answer Key
Q# Answer
1 (Mine / Example)
2 Answers may vary. Encourage students to share their feelings and experiences related to playing sports.
3 Answers may vary. Discuss the importance of regular exercise and physical activity for a healthy lifestyle.
4 Students measure the shooting zones and enter the distances.
5 Predictions may vary. Discuss factors that could affect a player's ability to make a shot.
6 Test results may vary. Discuss which model had more difficulty making the shot.
7 Guide for Reflection Question:
Encourage students to think about how teamwork, cooperation, and sportsmanship contribute to healthy lives and well-being. Discuss how participating in team sports or physical activities can build strong bonds within communities and foster a sense of unity and belonging.
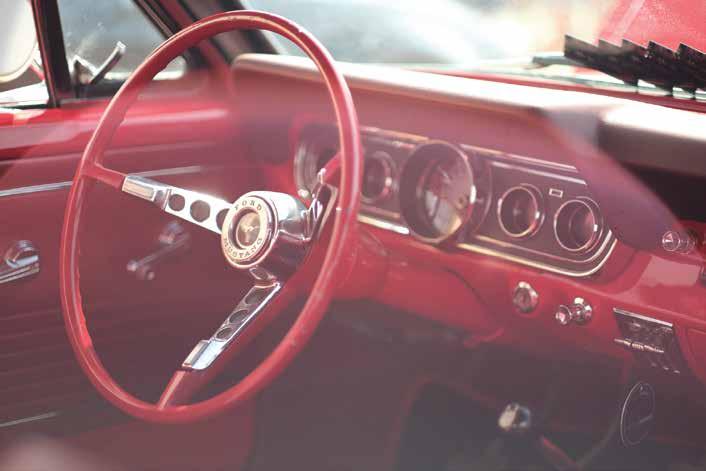
An Odometer
Project 6: An Odometer
Introduction
Odometer is a device used to measure the distance traveled. It was invented in 1847 by William Clayton. The odometer was attached to a wheel. The revolution of the wheel determined the distance covered. Today cars have digital odometers that calculate the distance covered by a car.
STEM Careers Connection
This project features tasks that resemble people working in the following careers: Auto Mechanic, Auto Manufacturer, Insurance Agent.
Problem
Tom and Kate are traveling to their friend but they have no idea how to record this journey's length. Can you help them build an odometer that they can attach to their car to record their distance?
Challenge
Design and build an odometer attached to a vehicle.
At the end of this activity the learner will be able to demonstrate an understanding of the following: Objectives
Objective:
Lesson Plan: An Odometer (Project 6)
Week
1: Design and Brainstorm
Introduce the project and brainstorm design ideas for the odometer. Duration: 45 minutes
S# Phase Duration Details
1 Introduction 10 minutes
2 Brainstorming 20 minutes
• Introduce the project: Design and build an odometer attached to a vehicle.
• Discuss the NGSS, England Curriculum, Common Core Mathematics, SDGs, and STEM career connections related to the project.
• Display the requirements: Early Simple Machines Kit, pencil, ruler.
• Engage students in a group brainstorming session.
• Discuss the purpose of an odometer and its role in measuring distance.
• Ask students to share their ideas on how they would design an odometer vehicle using the kit.
• Encourage students to illustrate their design ideas on paper.
3 Design Sketch 15 minutes
• Have students draw their design sketches, labeling different parts and mechanisms.
• Discuss each design in the class, emphasizing the mechanisms and functionality.
Week 2: Model Building
Objective:
Build the model of the odometer vehicle.
Duration: 45 minutes
S# Phase Duration Details
1 Model Building 40 minutes
• Provide each student or group with the Early Simple Machines Kit.
• Guide students as they construct their odometer vehicle models based on their design sketches.
• Emphasize the use of mechanisms to track and display distance.
• Encourage students to test their models as they build to ensure functionality.
Week 3: Testing and Reflection
Objective:
Test the odometer vehicle models and reflect on the project.
Duration: 45 minutes
S# Phase Duration Details
1 Testing 25 minutes
2 Reflection 15 minutes
• Set up a testing ground as described in the project.
• Have each student or group test their odometer vehicle's ability to measure and display distance.
• Record the results of how far each car rolled down from different start lines.
• Discuss the test results as a class, comparing predictions with actual outcomes.
• Reflect on the importance of accurate distance measurement and odometers in vehicles.
• Address the reflection questions provided in the project description.
Answer Key
Q# Answer
1 Were (Mine / Example)
2 Predictions may vary. Discuss the importance of exercise and staying active.
3 Answers may vary. Discuss how access to modern and affordable energy can improve lives and contribute to sustainable development.
4 Students measure the distances the car rolled down from the start lines.
5 Discuss the differences between predicted and actual distances.
6 Guide for Reflection Question:
Encourage students to think about the significance of providing access to energy, especially in modern vehicles. Discuss how energy-efficient transportation systems and vehicles contribute to sustainability and the reduction of carbon emissions.
A Spinning Top
Project 7: A Spinning Top
Introduction
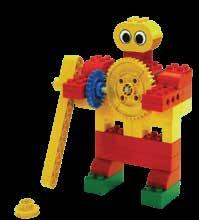
Gears are wheels that have teeth on the outside. These teeth connect with the teeth on another gear to transfer force. Early examples of gears date from the 4th century BC in China, which have been preserved at the Luoyang Museum of Henan Province, China. Gears are used for a wide range of speed ratios today in a variety of applications, such as clocks, pumps, watering systems, cars, airplanes, and clothes washing machines etc
STEM Careers Connection
This project features tasks that resemble people working in the following careers:
Windmill Manufacturing, Mechanical Engineer.
Problem
A spinning top is a wonderful toy; it is fascinating for young kids because when spinning it holds its position. In this lesson, you are going to make a spinning top and have a competition among the students
At the end of this activity the learner will be able to demonstrate an understanding of the following: Objectives
Objective:
Lesson Plan: A Spinning Top (Project 7)
Week
1: Design and Brainstorm
Introduce the project and brainstorm design ideas for the spinning top. Duration: 45 minutes
S# Phase Duration Details
1 Introduction 10 minutes
2 Brainstorming 20 minutes
• Introduce the project: Design and build a spinning top with a gear mechanism.
• Discuss the NGSS, England Curriculum, Common Core Mathematics, SDGs, and STEM career connections related to the project.
• Display the requirements: Early Simple Machines Kit, pencil, ruler.
• Engage students in a group brainstorming session.
• Discuss the purpose of a spinning top and its spinning mechanism.
• Ask students to share their ideas on how they would design a spinning top using the kit.
• Encourage students to illustrate their design ideas on paper.
3 Design Sketch 15 minutes
• Have students draw their design sketches, labeling different parts and mechanisms.
• Discuss each design in the class, emphasizing the spinning mechanism and balance.
Week 2: Model Building
Objective:
Build the model of the spinning top.
Duration: 45 minutes
S# Phase Duration Details
1 Model Building 40 minutes
• Provide each student or group with the Early Simple Machines Kit.
• Guide students as they construct their spinning top models based on their design sketches.
• Emphasize the use of gear mechanisms to achieve smooth spinning motion.
• Encourage students to test their models as they build to ensure proper spinning.
Week 3: Testing and Reflection
Objective:
Test the spinning top models and reflect on the project.
Duration: 45 minutes
S# Phase Duration Details
1 Testing 25 minutes
2 Reflection 15 minutes
• Have each student or group test their spinning top's spinning duration using a timer.
• Record the spinning times and discuss which design achieved the longest spin.
• Discuss the test results as a class, comparing spinning times and design differences.
• Reflect on the principles of balance, motion, and the use of gears in the spinning top.
• Address the reflection questions provided in the project description.
Answer Key
Q# Answer
1 (Mine / Example)
2 Test results will vary. Discuss factors affecting spinning duration.
3 Answers may vary. Discuss how access to affordable, reliable, and sustainable energy is important for various applications.
4 Students can measure the time each top spins and write the times in the provided boxes.
5 Discuss the differences between predicted and actual spinning times.
6 Guide for Reflection Question:
Encourage students to consider how access to affordable, reliable, and sustainable energy contributes to various innovations and industries, including windmill manufacturing and mechanical engineering.
A Seesaw
Project 8: A Seesaw
Introduction
GA simple machine is a device, which makes your work easier. There are six types of simple machines. They are the wheel and axle, the lever, the inclined plane, the pulley, the screw, and the wedge. For example, a seesaw is an example of a lever.
STEM Careers Connection
This project features tasks that resemble people working in the following careers: Architect, Civil Engineer, Transportation Engineer.
Problem
Najma and Alina are sitting on a seesaw in a playground. lt is a long, narrow board supported by a single pivot point in the middle; as one end goes up, the other goes down. They don't understand how a seesaw works.
Challenge
Help them understand how a seesaw works by designing and building a seesaw using the component in the kit.
At the end of this activity the learner will be able to demonstrate an understanding of the following:
Objective:
Lesson Plan: A Seesaw (Project 8)
Week 1: Design and Brainstorm
Introduce the project and brainstorm design ideas for the seesaw. Duration: 45 minutes
S# Phase Duration Details
1 Introduction 10 minutes
2 Brainstorming 20 minutes
3 Design Sketch 15 minutes
Objective:
Build the model of the seesaw.
• Introduce the project: Design and build a seesaw using the kit's components.
• Discuss the NGSS, England Curriculum, Common Core Mathematics, SDGs, and STEM career connections related to the project.
• Display the requirements: Early Simple Machines Kit, pencil, ruler.
• Engage students in a group brainstorming session.
• Discuss the concept of a seesaw and its balancing mechanism.
• Ask students to share their ideas on how they would design a seesaw using the kit.
• Encourage students to illustrate their design ideas on paper.
• Have students draw their design sketches, labeling different parts and mechanisms.
• Discuss each design in the class, emphasizing balance and stability.
Week 2: Model Building
Duration: 45 minutes
S# Phase Duration Details
1 Model Building 40 minutes
• Provide each student or group with the Early Simple Machines Kit.
• Guide students as they construct their seesaw models based on their design sketches.
• Emphasize the need for balance and the placement of the pivot point.
• Encourage students to test their models as they build to ensure proper balancing.
Week 3: Testing and Reflection
Objective:
Test the seesaw models and reflect on the project.
S#
1 Testing 25 minutes
2 Reflection 15 minutes
Duration: 45 minutes
• Set up the seesaw models and test their balance using various objects as weights.
• Have each student or group adjust their seesaw to achieve balance.
• Discuss the test results as a class, sharing strategies for achieving balance.
• Reflect on the principles of balance, leverage, and mechanical advantage in a seesaw.
• Address the reflection questions provided in the project description.
Answer Key
Q# Answer
1 (Mine / Example)
2 The seesaw mechanism is a lever.
3 Predictions will vary. Discuss factors affecting balance.
4 Test results will vary. Discuss why some seesaws balanced while others didn't.
5 Measure the distances from the middle to the end of the (2x2) bricks on the balanced model.
6 Guide for Reflection Question: Encourage students to think about how STEM professionals collaborate to create solutions that benefit diverse communities and ensure inclusive development.
A Car Launcher
Project 9: A Car Launcher
Introduction
Force is a push or a pull of an object that causes the object to speed up, slow down, or stay in one place. When an object is pushed, it tends to move away, for example kicking a ball or pushing a trolley. When an object is pulled, it tends to move
STEM Careers Connection
This project features tasks that resemble people working in the following careers: Aerospace Engineer, Spacecraft Structure Engineer, and Navel Launching Designer, NASA
Problem
Tanweer and Sadiq are having a fantastic time racing down the hill with their super-fast cars. The steep hill behind their house makes a great ramp and it is a lot of fun racing down it. But once the car stopped, it was hard work pushing the car back up to the top again. Tanweer believes there must be an easier way of getting the car up the hill. "An aircraft catapult or launcher," says Sadiq. He has seen an aircraft catapult while he was watching a video of an aircraft carrier on YouTube. He suggested that they should build some kind of car launcher that should work similarly to the aircraft launcher.
Objective:
Lesson Plan: A Car Launcher (Project 9)
A Car Launcher
Introduce the project and brainstorm design ideas for the car launcher.
Duration: 45 minutes
S# Phase Duration Details
1 Introduction 10 minutes
2 Brainstorming 20 minutes
• Introduce the project: Design and build a car launcher using the kit's components.
• Discuss the NGSS, England Curriculum, Common Core Mathematics, SDGs, and STEM career connections related to the project.
• Display the requirements: Early Simple Machines Kit, pencil, ruler.
• Engage students in a group brainstorming session.
• Discuss the concept of a car launcher and the mechanism needed to propel the car.
• Ask students to share their ideas on how they would design a car launcher using the kit.
• Encourage students to illustrate their design ideas on paper.
3 Design Sketch 15 minutes
• Have students draw their design sketches, labeling different parts and mechanisms.
• Discuss each design in the class, emphasizing the concept of energy transfer for propulsion.
Week 2: Model Building
Objective:
Build the model of the car launcher.
Duration: 45 minutes
S# Phase Duration Details
1 Model Building 40 minutes
• Provide each student or group with the Early Simple Machines Kit.
• Guide students as they construct their car launcher models based on their design sketches.
• Emphasize the principles of energy transfer, force, and motion in the launcher's mechanism.
• Encourage students to test their models as they build to ensure effective car launching.
Objective:
Week 3: Testing and Reflection
Test the car launcher models and reflect on the project.
Duration: 45 minutes
S# Phase Duration Details
1 Testing 25 minutes
2 Reflection 15 minutes
• Set up the car launcher models and test their ability to propel a toy car forward.
• Have each student or group measure the distance the car travels and record the results.
• Discuss the test results as a class, comparing the distances traveled by different car launchers.
• Reflect on the concepts of energy conversion, force, and motion in the context of the project.
• Address the reflection questions provided in the project description.
Answer Key
Q# Answer
1 (Mine / Example)
2 A launcher has more force due to the mechanism used for propulsion.
3 Predictions will vary. Discuss factors affecting the launch distance.
4 Test results will vary. Discuss differences in design and performance.
5 Reflections will vary. Guide students to consider the role of innovation in their community.
Guide for Reflection Question:
Encourage students to think about how their community can support and foster innovation through education, resources, and collaboration.
An Elevator
Project 10: An Elevator
Imagine a football lying on the ground. The football will not move unless someone applies force by kicking it. It means that we require force to move a body from one place to another. For example, an elevator uses force to lift objects from one place to the other. The more you apply force on an object the faster it will move. Similarly, if we apply less force, the object will move slowly.
STEM Careers Connection
This project features tasks that resemble people working in the following careers:
Mechanical Engineer, Construction Worker, Elevator Mechanic
Problem
Shuja and Muhammad have to take boxes full of stationary to the fourth floor of a multi-story building. They need a machine that can help them lift things to the fourth floor as the stationary items are very heavy to carry through the stairs. How can you help them complete their task using the elements in the kit?
Objective:
Lesson Plan: An Elevator (Project 10)
Week 1:
Design and Brainstorm
Introduce the project and brainstorm design ideas for the elevator. Duration: 45 minutes
S# Phase Duration Details
1 Introduction 10 minutes
2 Brainstorming 20 minutes
3 Design Sketch 15 minutes
Objective:
Build the model of the elevator.
• Introduce the project: Design and build an elevator using the kit's components.
• Discuss the NGSS, England Curriculum, Common Core Mathematics, SDGs, and STEM career connections related to the project.
• Display the requirements: Early Simple Machines Kit, pencil, ruler.
• Engage students in a group brainstorming session.
• Discuss the concept of an elevator and the mechanism required for vertical movement.
• Ask students to share their ideas on how they would design an elevator using the kit.
• Encourage students to illustrate their design ideas on paper.
• Have students draw their design sketches, labeling different parts and mechanisms.
• Discuss each design in the class, emphasizing the concepts of vertical motion and support.
Week 2: Model Building
Duration: 45 minutes
S# Phase Duration Details
1 Model Building 40 minutes
• Provide each student or group with the Early Simple Machines Kit.
• Guide students as they construct their elevator models based on their design sketches.
• Emphasize the mechanisms that facilitate vertical movement and stability.
• Encourage students to test their models as they build to ensure proper functionality.
Week 3: Testing and Reflection
Objective:
Test the elevator models and reflect on the project.
Duration: 45 minutes
S# Phase Duration Details
1 Testing 25 minutes
2 Reflection 15 minutes
• Set up the elevator models and test their ability to move vertically.
• Discuss the concepts of pulleys, gears, and mechanical advantage in elevators.
• Discuss the test results as a class, sharing observations about the elevator's performance.
• Reflect on the principles of vertical motion, mechanical advantage, and load-bearing structures.
• Address the reflection questions provided in the project description.
Answer Key
Q# Answer
1 (Mine / Example)
2 The elevator transfers force using gears and pulleys.
3 The columns on each side consist of rectangles and squares. Discuss the student's choice of shapes.
4 Reflections will vary. Guide students to think about the importance of elevators in daily life.
Guide for Reflection Question:
Encourage students to consider the role of elevators in providing access to different levels in buildings and their significance in ensuring inclusive environments for all individuals.
A Traffic Police
Project 11: A Traffic Police
Introduction
The government works to meet people's needs in the country. For example, the government has appointed traffic police to manage traffic in an area, make sure that the drivers are obeying the traffic rules, facilitate tourists, and provide help in any road accidents. Citizens need to support the government for example in traffic, people should obey traffic rules such as parking in the right spots,
STEM Careers Connection
This project features tasks that resemble people working in the following careers: Police officers, Civil Engineers, Traffic Engineers
Problem
Salim lives in a community which is a place where groups of people live. His community consists of 1000 families living in the same area near each other. He realized an increase in traffic problems in his community. As a welfare activity, Salim wants to design a robotic traffic police officer to manage the traffic in his community.
Challenge
Design and build a robotic police officer.
At the end of this activity the learner will be able to demonstrate an understanding of the following: Objectives
Objective:
Lesson Plan: A Traffic Police (Project 11)
Week 1: Design and
Brainstorm
Introduce the project and brainstorm design ideas for the robotic traffic police. Duration: 45 minutes
S# Phase Duration Details
1 Introduction 15 minutes
• Introduce the project: Design and build a robotic traffic police officer using the kit's components.
• Discuss the NGSS, England Curriculum, Common Core Mathematics, SDGs, and STEM career connections related to the project.
• Display the requirements: Early Simple Machines Kit, pencil, ruler.
2 Brainstorming 20 minutes
3 Design Sketch 15 minutes
• Engage students in a group brainstorming session.
• Discuss the concept of a robotic traffic police officer and its role in directing traffic.
• Ask students to share their ideas on how they would design a robotic traffic police officer using the kit.
• Encourage students to illustrate their design ideas on paper.
• Have students draw their design sketches, labeling different parts and mechanisms.
• Discuss each design in the class, emphasizing the concept of movement and turning in the robotic police officer.
Week 2: Model Building
Objective:
Build the model of the robotic traffic police officer.
Duration: 45 minutes
S# Phase Duration Details
1 Model Building 40 minutes
• Provide each student or group with the Early Simple Machines Kit.
• Guide students as they construct their robotic traffic police officer models based on their design sketches.
• Emphasize the mechanism that allows the robot to turn around and direct traffic effectively.
Week 3: Testing and Reflection
Objective:
Test the robotic traffic police officer models and reflect on the project.
Duration: 45 minutes
S# Phase Duration Details
1 Testing 25 minutes
2 Reflection 20 minutes
• Set up the robotic traffic police officer models and test their ability to turn around and direct traffic.
• Discuss the importance of mobility, turning radius, and control in robotic movement.
• Discuss the test results as a class, sharing observations about the robot's ability to turn and direct traffic.
• Reflect on the role of robotics in traffic management and safety.
• Address the reflection questions provided in the project description.
Answer Key
Q# Answer
1 (Mine / Example)
2 Yes, the traffic cop can turn to direct traffic.
3 The traffic cop turns using gears.
4 Reflections will vary. Encourage students to consider the impact of traffic police officers on daily life.
Guide for Reflection Question: Encourage students to think about the ways in which traffic police officers contribute to ensuring safety and order on the roads, and how their community can work together to promote well-being and safety.
A Dump Truck
Project 12: A Dump Truck
Introduction
Often, we see that whenever it rains, the streets and the roads are filled with rainwater. The reason for this is that we have a poor drainage system. The sewerage waste from houses usually blocks the drains and when it rains all the water overflows towards roads and causes inconvenience. Although it is the responsibility of the government to keep the drainage system clean we as citizens are also equally responsible. If we dispose of plastic waste properly, we can minimize the issue.
STEM Careers Connection
This project features tasks that resemble people working in the following careers: Construction Engineers, Civil Engineers, and Emergency Management Engineers
Problem
Aslam, Hassan, and Sara study in grade 2. On their way home, they are stuck because the road has flooded due to heavy rain. All drainage is blocked because of which the sewerage water is not flowing. They want to play their role in being good citizens by contributing to solving the problem of their community. They need your help in designing a vehicle that can collect the plastic waste in the drainage that is preventing the water from flowing properly. At the end of this activity the learner will be able to demonstrate an understanding of the following: Objectives
Objective:
Lesson Plan: A Dump Truck (Project 12)
Week 1: Design and Brainstorm
Introduce the project and brainstorm design ideas for the dump truck.
Duration: 45 minutes
S# Phase Duration Details
1 Introduction 10 minutes
2 Brainstorming 20 minutes
• Introduce the project: Design and build a dump truck using the kit's components.
• Discuss the NGSS, England Curriculum, Common Core Mathematics, SDGs, and STEM career connections related to the project.
• Display the requirements: Early Simple Machines Kit, pencil, ruler.
• Engage students in a group brainstorming session.
• Discuss the concept of a dump truck and its purpose in construction and transportation.
• Ask students to share their ideas on how they would design a dump truck using the kit.
• Encourage students to illustrate their design ideas on paper.
3 Design Sketch 20 minutes
• Have students draw their design sketches, labeling different parts and mechanisms.
• Discuss each design in the class, emphasizing the concept of loading and unloading in a dump truck.
Week 2: Model Building
Objective:
Build the model of the dump truck.
Duration: 45 minutes
S# Phase Duration Details
1 Model Building 40 minutes
• Provide each student or group with the Early Simple Machines Kit.
• Guide students as they construct their dump truck models based on their design sketches.
• Emphasize the mechanism that enables the dump truck to lift and lower its load.
Week 3: Testing and Reflection
Objective:
Test the dump truck models and reflect on the project.
Duration: 45 minutes
S# Phase Duration Details
1 Testing 25 minutes
2 Reflection 15 minutes
• Set up the dump truck models and test their ability to lift and lower a load of blocks.
• Discuss the concepts of leverage, loadbearing, and mechanical advantage.
• Discuss the test results as a class, sharing observations about the dump truck's ability to lift and transport a load.
• Reflect on the role of dump trucks in construction and transportation.
• Address the reflection questions provided in the project description.
Answer Key
Q# Answer
1 (Mine / Example)
2 Yes, the dump truck can carry a load of blocks.
3 The dump truck lifts the load using a lever mechanism.
4 Reflections will vary. Encourage students to think about the role of dump trucks in daily life.
Guide for Reflection Question:
Encourage students to consider the significance of dump trucks in construction, transportation, and infrastructure development, and how these activities contribute to their community's growth.
Playground Improvement
Project 13: Playground Improvement
Introduction
The government provides facilities to its citizens, like hospitals, post offices, schools, roads, playgrounds, etc. The government constructs these playgrounds for kids to play. The responsibility of kids as good citizens should be to use these playgrounds responsibly by keeping them clean and tidy. Atif has a playground in his neighborhood where he plays with his friends. Atif and his friends love this facility, and they take care of it.
STEM Careers Connection
This project features tasks that resemble people working in the following careers:
City Planner, CAD Playground
Designer.
STEM Challenge
Atif wants to contribute to his community playground by making a swing for the community playground as his contribution. He needs engineers like you to make the swing for him. Can you help him?
At the end of this activity the learner will be able to demonstrate an understanding of the following: Objectives
Lesson Plan: Playground Improvement (Project 13)
Week
1: Design and Brainstorm
Objective:
Introduce the project and brainstorm design ideas for the playground swing.
Duration: 45 minutes
S# Phase Duration Details
1 Introduction 10 minutes
• Introduce the project: Design and build a playground swing using the kit's components to contribute to the community playground.
• Discuss the NGSS, England Curriculum, Common Core Mathematics, SDGs, and STEM career connections related to the project.
• Display the requirements: Early Simple Machines Kit, pencil, ruler.
2 Brainstorming 20 minutes
3 Design Sketch 15 minutes
• Engage students in a group brainstorming session.
• Discuss the concept of a swing and its role in play and physical activity.
• Ask students to share their ideas on how they would design a playground swing using the kit.
• Encourage students to think about stability, movement, and safety features of the swing.
• Have students draw their design sketches, labeling different parts and mechanisms.
• Discuss each design in the class, emphasizing the concepts of balance and motion in swings.
Week 2: Model Building
Objective:
Build the model of the playground swing.
S#
1 Model Building 40 minutes
Duration: 45 minutes
• Provide each student or group with the Early Simple Machines Kit.
• Guide students as they construct their playground swing models based on their design sketches.
• Emphasize the importance of stability, balance, and safety in the swing's design.
Week 3: Testing and Reflection
Objective:
Test the playground swing models and reflect on the project.
Duration: 45 minutes
S# Phase Duration Details
1 Testing 25 minutes
2 Reflection 15 minutes
• Set up the playground swing models and test their stability and movement.
• Discuss the concepts of balance, motion, and safe design in playground equipment.
• Discuss the test results as a class, sharing observations about the swing's stability and motion.
• Reflect on the role of playground equipment in promoting physical activity and social interaction.
• Address the reflection questions provided in the project description.
Answer Key
Q# Answer
1 (Mine / Example)
2 Yes, the figure can sit on the swing.
3 Yes, the swing is stable and can swing without breaking or swaying.
4 Reflections will vary. Encourage students to think about the importance of safe and enjoyable playground equipment.
Guide for Reflection Question: Encourage students to think about the role of playground equipment in promoting physical activity, social interaction, and the well-being of children in their community.
A Bird
Project 14: A Bird
Problem
Ali's neighbors have decided to move and Ali is very sad. His best friend, after Hassan of course, is Buddy, the bird from next door. Buddy is the cutest bird with big wings and funny eyes. This is going to change how that Buddy is moving!
At the end of this activity the learner will be able to demonstrate an understanding of the following: Objectives
Make observations of plants and animals to compare the diversity of
National Curriculum of England
Living things and their habitats
identify that most living things live in habitats to which they are suited and describe how different habitats provide for the basic needs of different kinds of animals and plants, and how they depend on each other
Objective:
Lesson Plan: A Bird (Project 14)
Week 1: Design and Brainstorm
Introduce the project and brainstorm design ideas for the robotic bird.
Duration: 45 minutes
S# Phase Duration Details
1 Introduction 10 minutes
• Introduce the project: Design and build a robotic bird with movable wings using the kit's components.
• Discuss the NGSS, England Curriculum, Common Core Mathematics, SDGs, and STEM career connections related to the project.
• Display the requirements: Early Simple Machines Kit, pencil, ruler.
2 Brainstorming 20 minutes
3 Design Sketch 15 minutes
• Engage students in a group brainstorming session.
• Discuss the concept of a robotic bird and its role in mimicking natural bird movements.
• Ask students to share their ideas on how they would design a robotic bird using the kit.
• Encourage students to think about wing movement and the mechanisms that can achieve it.
• Have students draw their design sketches, labeling different parts and mechanisms.
• Discuss each design in the class, emphasizing the concept of wing flapping and stability.
Week 2: Model Building
Objective:
Build the model of the robotic bird.
Duration: 45 minutes
S#
1 Model Building 40 minutes
• Provide each student or group with the Early Simple Machines Kit.
• Guide students as they construct their robotic bird models based on their design sketches.
• Emphasize the mechanism that allows the bird's wings to move.
Week 3: Testing and Reflection
Objective:
Test the robotic bird models and reflect on the project.
Duration: 45 minutes
S# Phase Duration Details
1 Testing 25 minutes
2 Reflection 15 minutes
• Set up the robotic bird models and test their wing movement and flapping.
• Discuss the principles of bird flight and how robotics can imitate natural movements.
• Discuss the test results as a class, sharing observations about the bird's wing movement.
• Reflect on the significance of biomimicry and robotics in studying and replicating nature's mechanisms.
• Address the reflection questions provided in the project description.
Answer Key
Q# Answer
1 (Mine / Example)
2 Yes, the wings on the bird move.
3 The bird wings move using an axle mechanism.
4 Reflections will vary. Encourage students to think about how technology can learn from nature.
Guide for Reflection Question:
Encourage students to explore the concept of biomimicry and how engineers and scientists draw inspiration from nature to create innovative solutions.
A Toaster
Project 15: A Toaster
Introduction
An electric toaster has two main functions: to toast the bread and eject the toast when it is ready. The toaster contains a heating element that converts electrical energy to heat energy that toasts the bread. It will also have a way for the toast be be ejected fron the toaster, either by a manual lever or an automatic spring.
STEM Careers Connection
This project features tasks that resemble people working in the following careers: Electrical Engineers, Moving Companies, Auto Mechanic.
Problem
Ali and Hassan eat an egg with 2 slices of toast each morning. Today, due to an electric breakdown the toaster fused. This caused the toaster to stopped working.
Challenge
Can you design a toaster for Ali and Hassan?
At the end of this activity the learner will be able to demonstrate an understanding of the following: Objectives
Objective:
Lesson Plan: A Toaster (Project 15)
Week 1: Design and Brainstorm
Introduce the project and brainstorm design ideas for the toaster.
Duration: 45 minutes
S# Phase Duration Details
1 Introduction 10 minutes
2 Brainstorming 20 minutes
3 Design Sketch 15 minutes
Objective:
Build the model of the toaster.
• Introduce the project: Design and build a toaster using the kit's components to make a contribution.
• Discuss the NGSS, England Curriculum, Common Core Mathematics, SDGs, and STEM career connections related to the project.
• Display the requirements: Early Simple Machines Kit, pencil, ruler.
• Engage students in a group brainstorming session.
• Discuss the concept of a toaster and its role in heating bread.
• Ask students to share their ideas on how they would design a toaster using the kit.
• Encourage students to think about the mechanism for heating and popping bread.
• Have students draw their design sketches, labeling different parts and mechanisms.
• Discuss each design in the class, emphasizing the concepts of heating and safety.
Week 2: Model Building
Duration: 45 minutes
S# Phase Duration Details
1 Model Building 40 minutes
• Provide each student or group with the Early Simple Machines Kit.
• Guide students as they construct their toaster models based on their design sketches.
• Emphasize the importance of safety features and effective heating mechanisms.
Week 3: Testing and Reflection
Objective:
Test the toaster models and reflect on the project.
Duration: 45 minutes
S# Phase Duration Details
1 Testing 20 minutes
2 Reflection 15 minutes
• Set up the toaster models and test their mechanisms for heating and popping bread.
• Discuss the principles of heat transfer and the role of engineering in everyday appliances.
• Discuss the test results as a class, sharing observations about the toaster's functionality.
• Reflect on the role of engineering in designing household appliances that make daily life more convenient.
• Address the reflection questions provided in the project description.
Answer Key
Q# Answer
1 (Mine / Example)
2 Yes, the toaster can heat and pop the bread.
3 The toaster uses an inclined plane mechanism to pop the bread.
4 Reflections will vary. Encourage students to consider the impact of technology on everyday life.
Guide for Reflection Question:
Encourage students to think about how engineering innovations, like toasters, contribute to improving daily routines and making life more comfortable.
Cambridge Curriculum Alignment:
Scientific Enquiry:
Engage students in hands-on investigations related to engineering concepts and the function of simple machines in building structures. Encourage students to make observations and measurements to identify materials based on their properties, aligning with the NGSS objective.
1 Project 1: A Bridge
2 Project 2: A Raft
3 Project 3: A Pinwheel
Materials and Their Properties:
Explore materials used in bridge construction and analyze data obtained from testing different materials to determine which materials have properties best suited for the intended purpose of building a bridge.
Engineering and Design:
Foster an understanding of basic engineering concepts related to bridge construction, providing students with practical insights into the world of engineering.
Scientific Enquiry:
Engage students in hands-on investigations related to buoyancy, flotation, and weight distribution in watercraft. Encourage students to plan and conduct an investigation to describe and classify different kinds of materials by their observable properties, aligning with the NGSS objective.
Materials and Their Properties:
Explore the materials used in constructing a raft and classify them based on their observable properties, such as buoyancy and flotation characteristics.
Physical Changes:
Foster an understanding of changes caused by heating or cooling, helping students construct an argument with evidence that some changes can be reversed while others cannot, aligning with NGSS.
Scientific Enquiry:
Engage students in hands-on investigations related to wind energy and its conversion, aligning with the NGSS objective. Encourage students to make observations and measurements to identify materials based on their properties, supporting scientific inquiry.
Materials and Their Properties:
4 Project 4: A Hot Day
Explore the materials used in constructing the pinwheel and their properties, such as flexibility and durability.
Energy Sources:
Promote an understanding of wind energy as a potential renewable energy source.
Encourage students to investigate and discuss the concept of renewable energy sources in the context of the pinwheel project.
Scientific Enquiry:
Engage students in hands-on investigations related to the greenhouse effect, global warming, and cooling mechanisms.
Encourage students to obtain information about water's forms (solid or liquid) and the representation of land and bodies of water in an area, aligning with the NGSS objectives.
Earth and Space:
Explore concepts related to Earth's water and landforms, helping students develop an understanding of the Earth's geography and water distribution.
Materials and Their Properties:
Introduce the concept of everyday materials in the context of cooling mechanisms and energy efficiency, which can be related to the National Curriculum of England objectives.
Scientific Enquiry:
Engage students in hands-on investigations related to kinetic energy and its relation to sports, emphasizing the importance of physical activity for well-being.
Encourage students to plan and conduct an investigation to describe and classify different kinds of materials by their observable properties, aligning with the NGSS objective.
5 Project 5: A Hockey Player
6 Project 6: An Odometer
Materials and Their Properties:
Explore materials used in sports equipment and consider their properties in relation to their function in activities like hockey.
Ecosystem Interactions:
Develop an understanding of the function of animals in activities like seed dispersal or pollination, connecting this concept to the natural world and ecosystem interactions.
Scientific Enquiry:
Engage students in hands-on investigations related to distance measurement and energy conversion.
7
8
Project 7: A Spinning Top
Project 8: A Seesaw
Encourage students to plan and conduct an investigation to describe and classify different kinds of materials by their observable properties, aligning with the NGSS objective.
Materials and Their Properties:
Explore materials used in the construction of an odometer and understand how changes caused by heating or cooling can be reversed or irreversible, as required by the NGSS objective.
Transportation and Energy Efficiency:
Explore the concept of energy-efficient transportation and relate it to the construction and operation of an odometer.
Scientific Enquiry:
Engage students in hands-on investigations related to rotational motion and energy conservation, particularly through the exploration of a spinning top. Encourage students to make observations and measurements to identify materials based on their properties, aligning with the NGSS objective.
Materials and Their Properties:
Analyze data obtained from testing different materials (e.g., materials used for spinning tops) to determine which materials have properties best suited for the intended purpose.
Energy and Renewable Resources:
Explore the potential of renewable energy sources, linking the concept of energy conservation to everyday objects like spinning tops.
Scientific Enquiry:
Engage students in hands-on investigations related to balance and fulcrum, exploring the mechanics of seesaw motion.
Encourage students to make observations and measurements to identify materials based on their properties, aligning with the NGSS objective.
Materials and Their Properties:
Explore the use of materials in constructing a seesaw and analyze their properties.
Relate the choice of materials and their properties to the effectiveness of the seesaw as a simple machine.
Physics Concepts:
9 Project 9: A Car Launcher
10 Project 10: An Elevator
11 Project 11: A Traffic Police
Foster an understanding of basic physics concepts related to balance, fulcrum, and motion, providing students with practical insights into these principles.
Scientific Enquiry:
Engage students in hands-on investigations related to energy transfer and propulsion mechanisms, specifically exploring the principles of launching.
Encourage students to make observations and measurements related to materials and their properties, aligning with the NGSS objective.
Materials and Their Properties:
Investigate materials used in the construction of a car launcher and their properties. Analyze data related to the materials' properties to understand their suitability for launching mechanisms.
Energy Transfer and Propulsion:
Explore the concept of energy transfer in the context of launching.
Foster an understanding of propulsion mechanisms, particularly in the context of a car launcher.
Scientific Enquiry:
Engage students in hands-on investigations related to vertical motion and lifting mechanisms, which are essential concepts in understanding the principles of pulleys and gears.
Encourage students to make observations and measurements to identify materials based on their properties, aligning with the NGSS objective.
Materials and Their Properties:
Explore materials used in the construction of lifting mechanisms, such as pulleys and gears.
Foster an understanding of how materials' properties influence their suitability for specific purposes.
Mechanisms and Machines:
Introduce students to the principles of pulleys and gears, emphasizing their role in creating mechanical advantage for lifting.
Scientific Enquiry:
Engage students in hands-on investigations related to motion and direction, emphasizing the practical aspects of traffic management and safety.
12 Project 12: A Dump Truck
13 Project 13: Playground Improvement
Encourage students to make observations and comparisons related to the diversity of life in different habitats, which aligns with the NGSS objective.
Living Things and Their Habitats:
Explore the role of traffic police in ensuring safety within the context of living things and their habitats.
Foster an understanding of how traffic police contribute to the safety and well-being of individuals and communities.
Scientific Enquiry:
Engage students in hands-on investigations related to loadcarrying mechanisms and design, specifically in the context of a dump truck.
Encourage students to make observations and comparisons related to the mechanisms used in transportation, aligning with the NGSS objective.
Living Things and Their Habitats:
Explore how various living things and their habitats are connected to transportation, possibly focusing on the movement of materials, plants, and animals between habitats.
Foster an understanding of the interactions between living organisms and their environments, which can be related to transportation mechanisms.
Scientific Enquiry:
Engage students in a project that encourages them to explore playground design and innovation.
Foster an understanding of materials used in playground construction and the role of community contributions in creating and improving public spaces.
Materials and Their Properties:
Encourage students to make observations and measurements to identify materials based on their properties, aligning with the NGSS objective.
Investigate the uses of everyday materials, including those used in playground equipment and design, in line with the National Curriculum of England objective.
Community and Collaboration:
Highlight the role of community contributions in enhancing playgrounds and public spaces, promoting teamwork and community engagement.
14 Project 14: A Bird
Scientific Enquiry:
Engage students in hands-on investigations related to biodiversity and habitats, focusing on birds and their adaptations.
Encourage students to make observations of birds and their characteristics to compare the diversity of life in different habitats, aligning with the NGSS objective.
Living Things and Their Habitats:
Explore the concept of habitats and how they support various forms of life, with a specific focus on birds as part of different ecosystems.
Foster an understanding of the interrelationship between living organisms and their environments, aligning with the National Curriculum of England objective.
15 Project 15: A Toaster Scientific Enquiry:
Engage students in hands-on investigations related to food preparation and the principles of toasting.
Encourage students to make observations and measurements to identify materials based on their properties, aligning with the NGSS objective.
Materials and Their Properties:
Explore materials used in the construction of a toaster and analyze their properties in the context of everyday materials and their uses.
Energy Use:
Foster an understanding of energy use, particularly in the context of toasting and food preparation.
Encourage students to consider the role of materials in energy-efficient appliances like toasters.