Volvo Penta TD1030ME VE TWD1030ME TWD1031VE TAD1031GE TAD1231GE TWD1231VE TAD1232GE Workshop Manual

Page 35

Engine body - Service procedures

Valves, adjustment Special tools: 3590 1 Valve adjustment must only be done when the engine is stopped: cold or at operating temperature. Make sure that the stop control is pulled out and that the starting key is at “OFF”. NOTE! Valve clearance must not be adjusted with the engine running since the pistons could hit the valves. The valves can be adjusted according to the two-position method. 2 Remove the valve covers. 3 Crank the engine round in its direction of rotation until 1st piston is at T.D.C. after compression. (The valves of the 6th cylinder are rocking, 0° on the flywheel).

Cylinder liners and pistons, removing Special tools: 1801, 2013, 6394 (2 pcs), 6395 (2 pcs), 6645 10 ltr engines: 2089, 2666 (2 pcs) 12 ltr engines: 2955, 8043 (2 pcs)

Note! Piston and liner are a matched pair.

1 Remove the cylinder head and oil sump. If the cylinder liner is to remain on the engine when the pistons are removed, the holders 2666 (10 ltr) resp. 8043 (12 ltr) must be fitted so that the liner is not moved out of position. If the liner should glide up during removal of the piston then the liner should also be removed, since there is considerable risk that impurities will fall down between liner and block and cause leakage. 2

4 Adjust the valves according to Workshop Manual, Technical Data for each engine concerned.

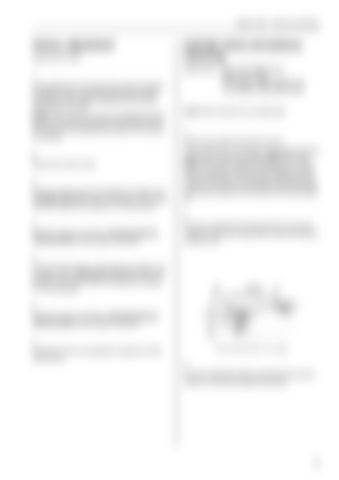
Turn the crankshaft so that the piston for the actual cylinder is in the top firing position. Remove the piston cooling nozzle.

5 Crank the engine again in the direction of rotation (one complete turn) until 6th piston is at T.D.C. after compression. (The valves of the 1st cylinder are rocking, 0° on the flywheel). 6 Adjust the valves according to Workshop Manual, Technical Data for each engine concerned. 7 Piston cooling nozzle, 10 ltr. engine

Change the valve cover gaskets if required an fit the valve covers. 3

Turn the crankshaft until the connecting rod comes in position to remove the bigend cap screws.

33


Turn static files into dynamic content formats.

Create a flipbook

Articles inside

Troubleshooting

1min
pages 160-161, 163

Electricalsystem

2min
pages 148-149

Cooling system - Service Procedures

5min
pages 144-147

Cooling system - Service Procedures

2min
pages 142-143

Cooling system - Service Procedures

3min
pages 140-141

Cooling system - Service Procedures

1min
pages 138-139

Cooling system

1min
pages 128-129

Schwitzer turbocharger

8min
pages 121-127

Intake and exhaust systems - Service procedures

3min
pages 118-120

Service procedures

3min
pages 111-114

Intake and exhaust systems

1min
pages 109-110

Fuel system - Service procedures

1min
pages 106-107

Fuel system - Service procedures

1min
pages 104-105

Fuel system - Service procedures

2min
pages 102-103

Fuel system - Service procedures

2min
pages 100-101

Fuel system - Service procedures

3min
pages 98-99

Fuel system - Service procedures

6min
pages 84-91

Service procedures

1min
pages 82-83

Fuel system - Design and function

1min
pages 80-81

Fuel system

3min
pages 74-79

Oil cooler, leakage test

1min
page 73

Lubricating system - Service procedures

1min
pages 68-69

Lubricating system Design and function

1min
pages 64-65

Engine body - Service procedures

1min
pages 58-59

Engine body - Service procedures

2min
pages 54-55

Engine body - Service procedures

3min
pages 50-53

Engine body - Service procedures

4min
pages 44-49

Valves, adjustment

11min
pages 35-43

Engine body - Service procedures

2min
pages 32-34

Engine body - Service procedures

3min
pages 28-31

Engine body - Service procedures

1min
pages 26-27

Engine body - Service procedures

2min
pages 24-25

Engine body Design

2min
pages 18-21

Repair instructions

6min
pages 9-12

General information

2min
page 8

Safety Precautions

6min
pages 5-7
Issuu converts static files into: digital portfolios, online yearbooks, online catalogs, digital photo albums and more. Sign up and create your flipbook.