5 minute read
User Mode


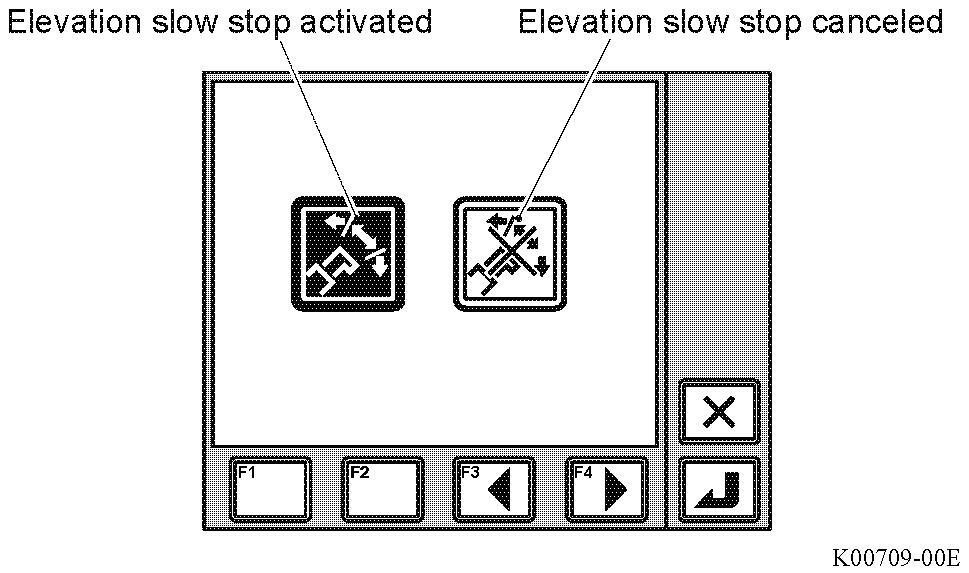
4.6 8 Activate/deactivate boom elevation slow stop function
Notice
If the boom elevation slow stop function is deactivated, automatic stop can cause the load slewed and it can damage the mach ine. Slowly operate the boom elevation.
To decrease the load sway, this function decreases the boom elevating speed when the boom elevation operation stops. Select the elevation slow stop activated or the elevation slow stop deactivated.
1. Select the activate/deactivate elevation slow stop function icon and press the set key.
• The pop-up window for the icon appears on the display panel.
2. Press the < > key (backward) or the < > key (forward) to select the icon.
• The selected icon is highlighted.
3 Press the < > key (set)
• After the registration is completed, the pop- up window closes and the AML returns to the initial display.
• When the elevation slow stop canceled is registered, the icon for the elevation slow stop canceled appears.
When you stop registration, press the cancel key. The pop-up window closes and the AML returns to the initial display without completing the registration.
Even after you turn off the AML, the registered information is retained. When the AML is turned on, the operation starts with the retained information.
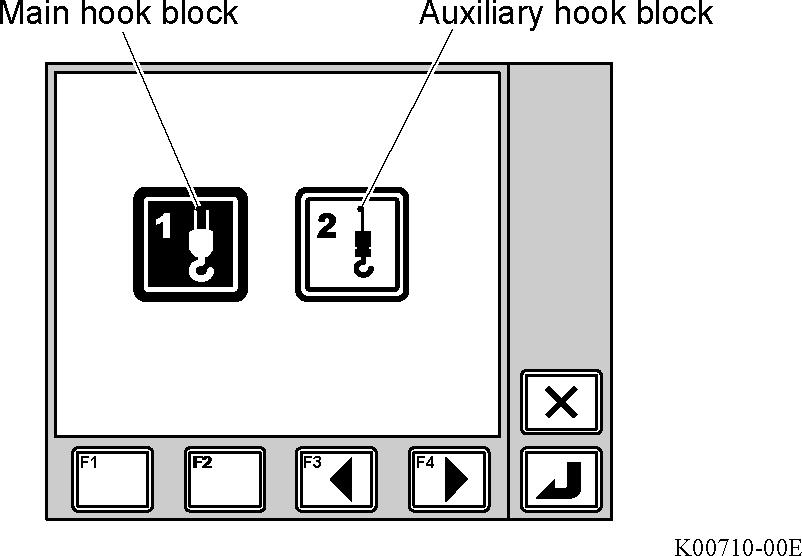
4.6.9 Adjustment of hook block travel amount
When the setting becomes inaccurate, use this function to adjust the hook block travel amount.
1. Register the lift status and the number of parts of line to the AML.
For the registration of the lift status and the number of parts of line, refer to "B-2 Registration of Operating Status and AML Function Check"
When you adjust the main winch hook block, set the boom lift status. When you adjust the auxiliary winch hook block, set the single top lift status or jib lift status.
2. Select the hook block travel amount adjustment icon, and press the < > key (set)
• The pop-up window for the menu appears on the display panel.
3. Press the < > key (backward) or < > key (forward) to select the icon.
• The selected icon is highlighted.
4. Lower the hook block so that it contacts the ground slightly.
There are no restrictions for the length or angle of the boom and jib.
5. Press the < > key (set)
• When the adjustment is com pleted, the pop-up window closes and the AML returns to the initial display.
• The displayed value of the hook block travel amount becomes approximately "0.00 m".
4.6 10 Adjustment of display panel contrast
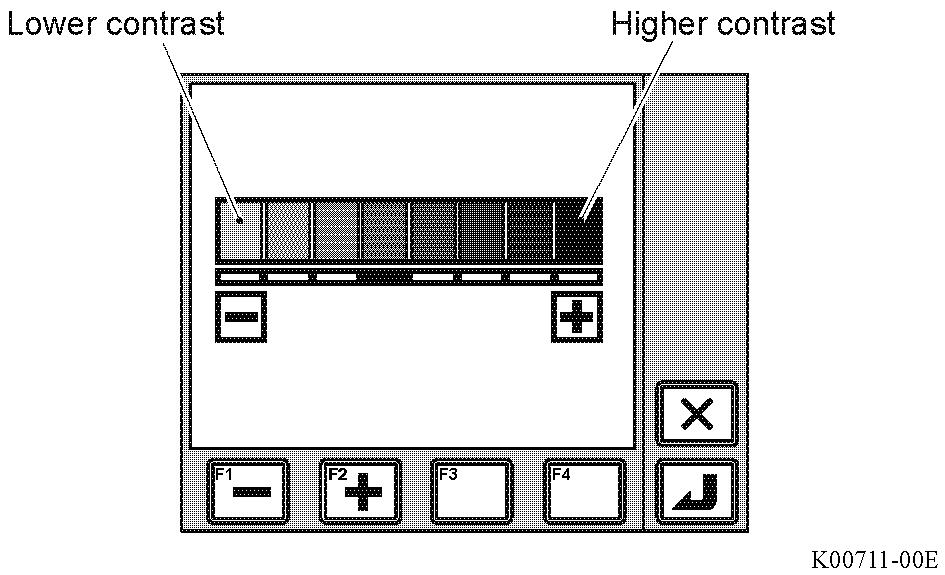
1. Select the contrast adjustment menu icon, and press the < > key (set)
• The pop-up window for contrast adjustment appears on the display panel.
2. Press the < > key (-) or < > key (+) to adjust the contrast.
• Press the < > key (+) to increase contrast and the < > key (-) to decrease contrast.
3. Press the < > key (set).
• When registration is completed, the pop-up window closes and the AML returns to the crane operation state.
To cancel the registration, press the < > key (cancel). The pop-up window closes and the AML returns to the crane operation state without changing registration.
If you press the < > key (cancel) for 3 seconds or more, the contrast returns to the initial setting.
Even after the AML is turned off, the registered information is retained. When the AML is turned on, the operation starts with the retained information.
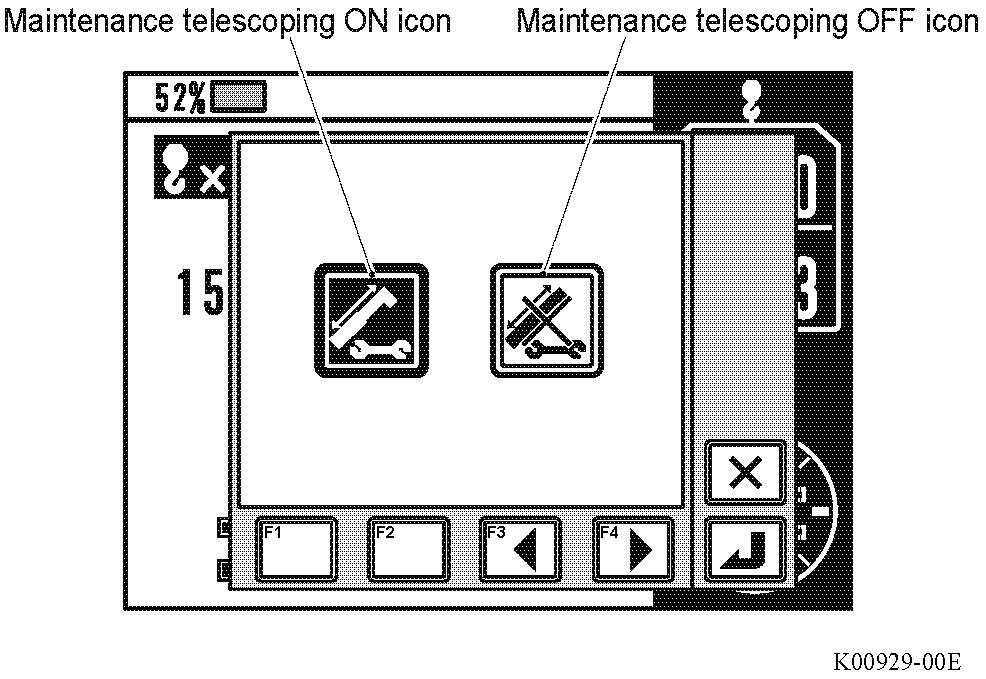
4.6 11 Maintenance telescoping mode
Warning
Never perform crane operation in the maintenance telescoping mode. The crane may overturn or be damaged, resulting in an accident. Restrict the use of this mode on ly for maintenance.
The m aintenance telescoping mode is necessary when the operation such as boom grease-up is performed.
1. Press the preset menu key.
• The pop-up window for the preset menu selection is displayed on the display panel.
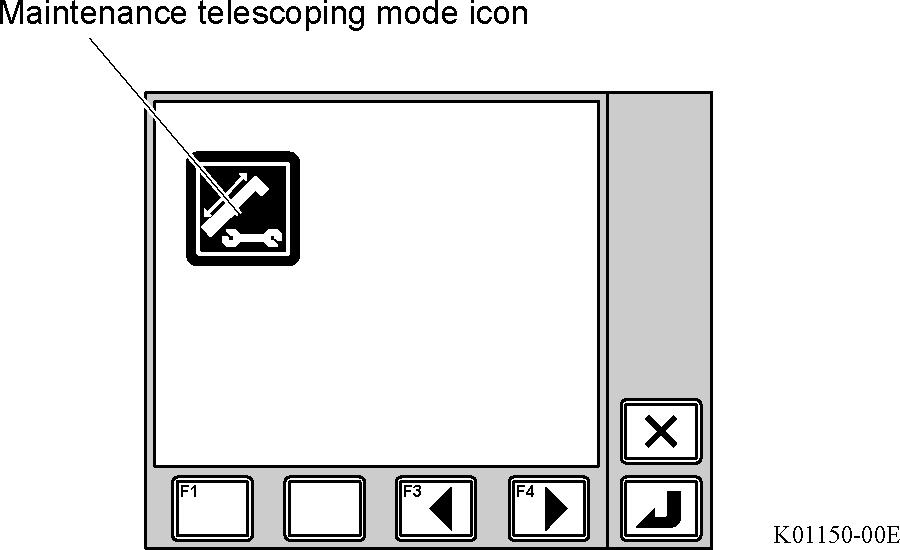
2. Press the < > key (backward) or the < > key (forward) to select the maintenance telescoping mode icon.
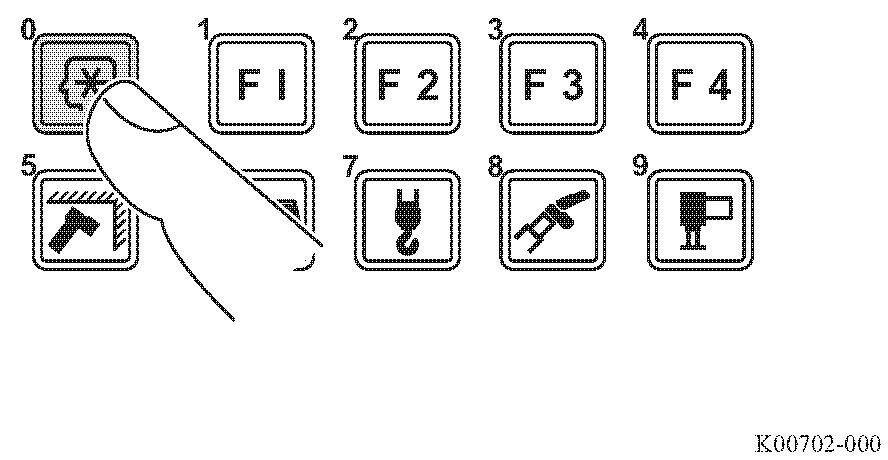
• The maintenance telescoping mode icon is highlighted.
When you stop the maintenance telescoping mode, press the cancel key. The pop-up window closes and the AML returns to the status before start of the registration.
3. Press the < > key (set).
4. Press the < > key (backward) or the < > key (forward) to select the maintenance telescoping ON icon.
• The maintenance telescoping ON icon is highlighted.
When you select the maintenance telescoping OFF icon, the maintenance telescoping mode is canceled.
5. Press the set key to register the setting.
• After registration is completed, the pop-up window closes, and starts the maintenance telescoping mode.
6. While you press the switch for the boom you want to telescope, operate the boom telescoping lever.
• Pressing the 2nd/3rd boom section emergency telescoping switch telescopes the 2nd/3rd boom sections regardless the state of the 4th/5th/top boom sections.
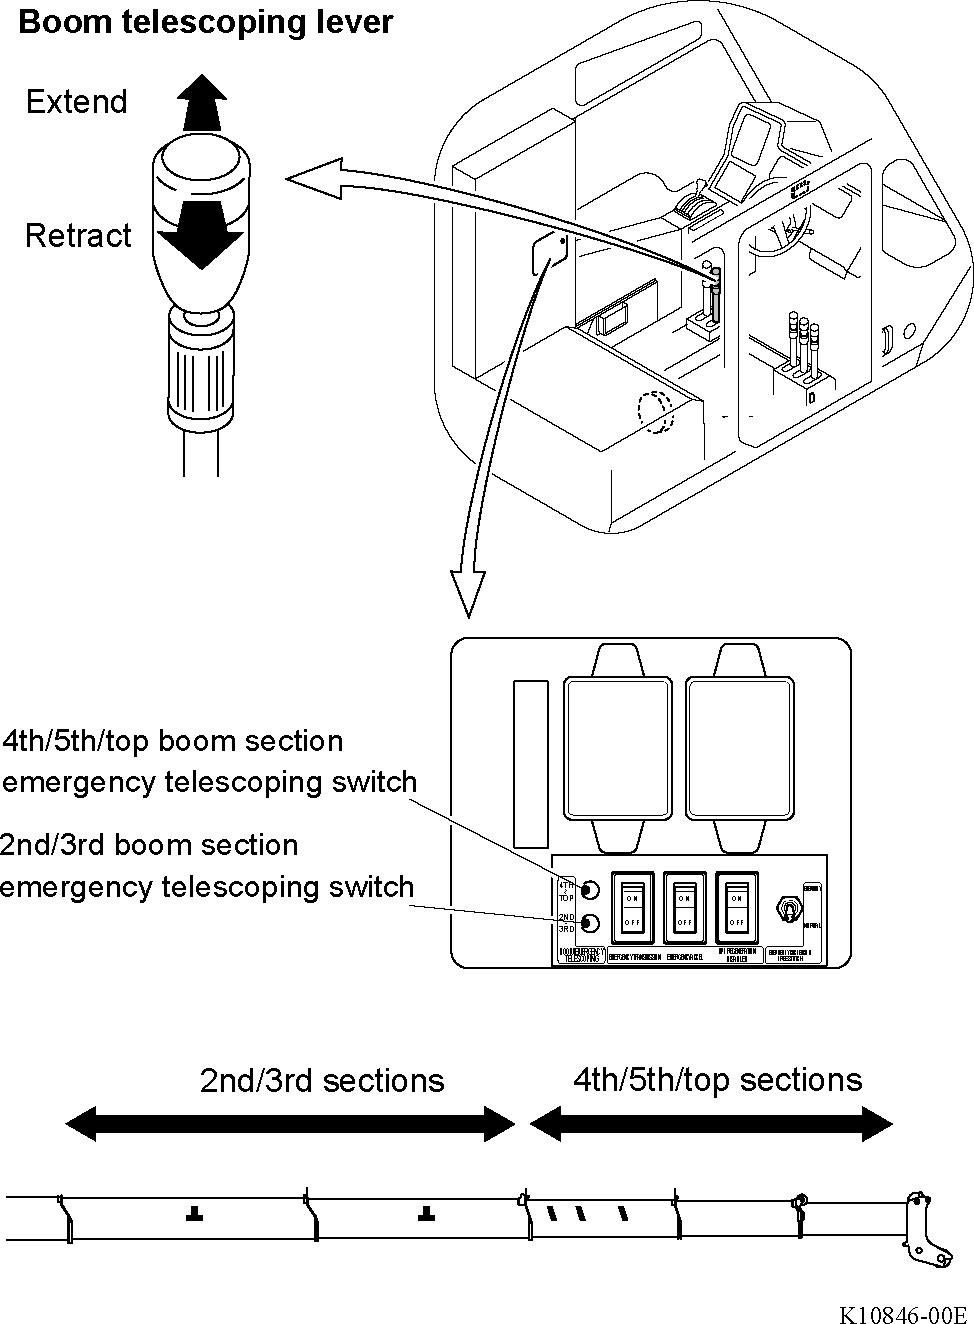
• Pressing the 4th/5th/top boom section emergency telescoping switch telescopes the 4th/5th/top boom sections regardless of the state of the 2nd/3rd boom sections.
(GR-700N-1)
The boom length designated for the maintenance telescoping mode is 30.3 m. Only extend the 4th/5th/top boom sections when maintenance is performed on the 4th/5th/top boom sections.
(GR-700N-1)
When the over-front special capacity is selected, the boom can be fully extended only within the effective area of the overfront special capacity.
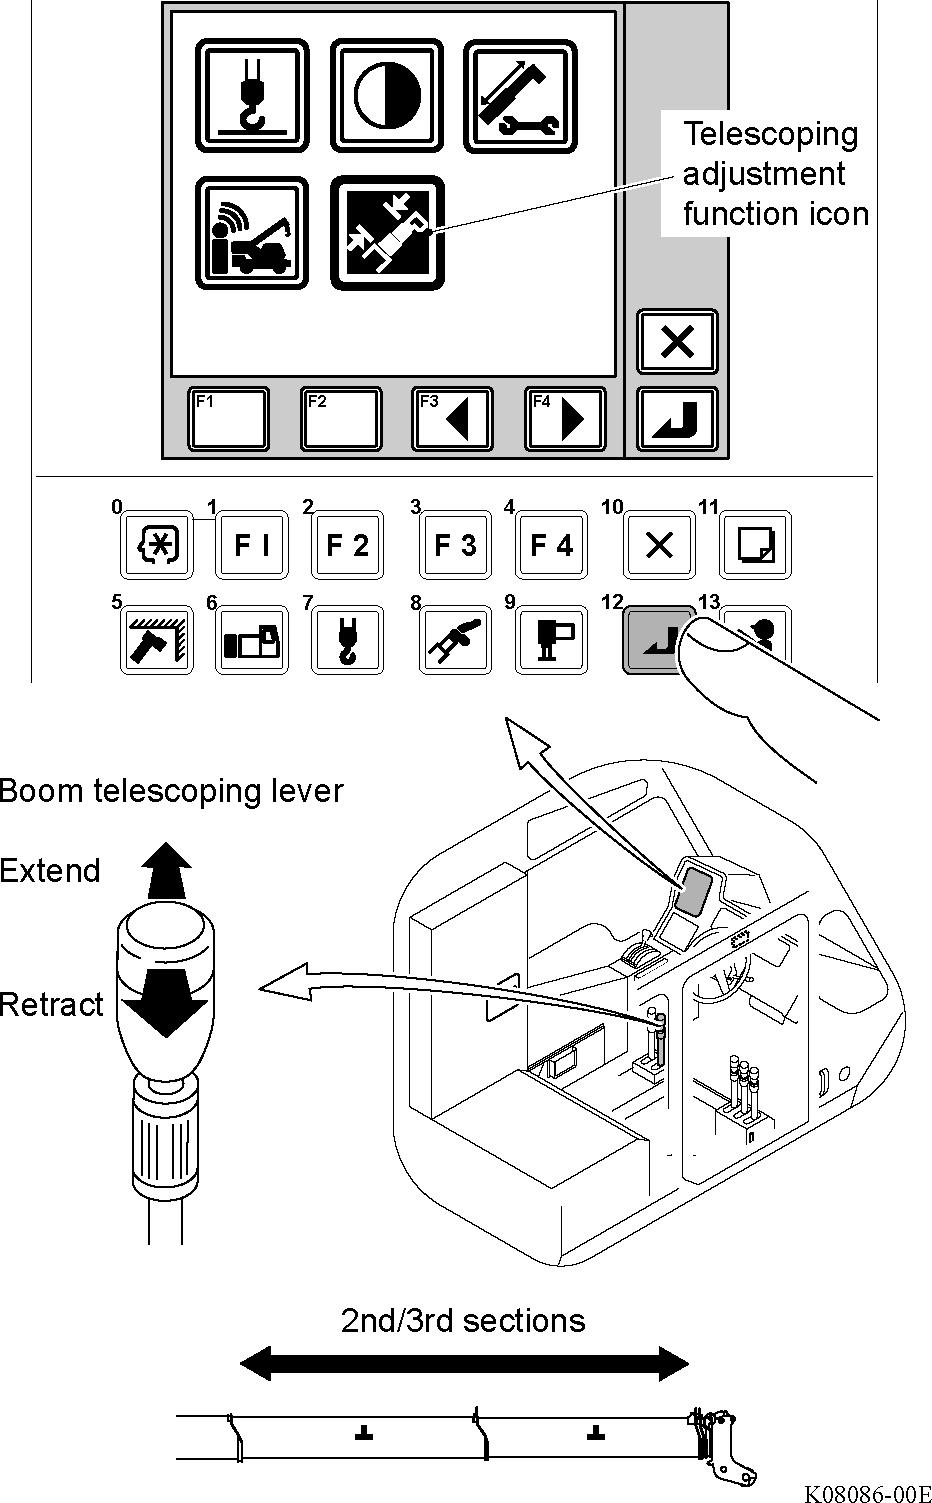
4.6 12 Telescoping correction function
(Applicable model: GR-700N-1)
- When the boom length is out of the specified lengths
If the displayed boom length on the AML is out of specified lengths (full telescoping: 23.5 m, full retraction: 9.8 m ) when the 2nd/3rd boom section is fully extended (retracted), follow the following procedure to adjust the boom length.
1. When a load is lifted, unwind the winch to lower the load.
2. Set the cursor on the telescoping adjustment function icon, and while pressing the set key, operate the boom telescoping lever and adjust the boom.
3. Check that the displayed boom length on the AML is the specified boom length.
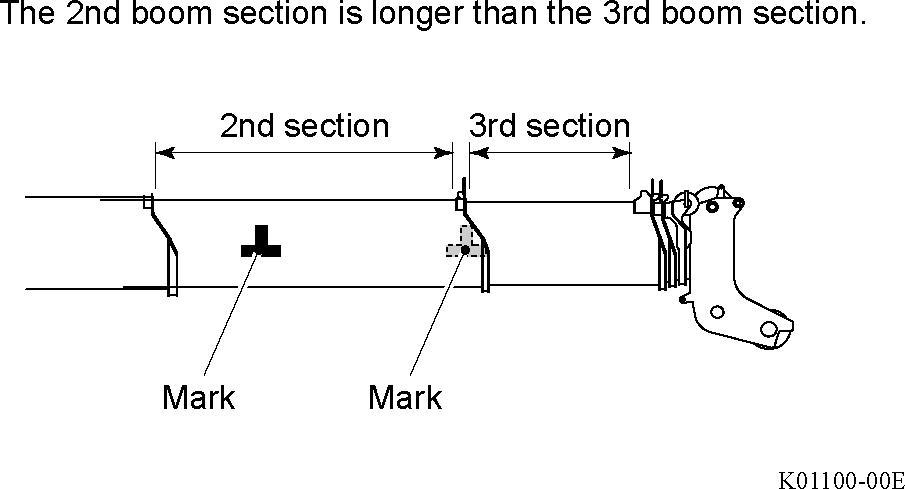
- Each boom section is not extended equally
Check the marks on side of the boom. If each boom section is not extended equally, follow the following procedure to adjust.
1. When a load is lifted, unwind the winch to lower the load to the ground.
2. Extend or retract the 2nd/3rd boom section fully.
3. Check that each boom section is extended/retracted equally.
If each boom section is not equal, follow the Step. 2 of the procedure of "When the boom length is out of the specified lengths".
The length of the mark is an allowable limits of difference.
4.6 13 Telematics data transmission
The crane status is transmitted to the HELLO-NET server by using the transmission function provided in the machine.
1. Select the telematics data transmission icon, and press the set key.

• The pop-up window for telematics data transmission appears on the display panel.
2. Press the < > key (backward) or < > key (forward) to select the icon.
• Current location data transmission: The current position information detected by GPS is transmitted.
• Crane status data transmission: The current crane status information is transmitted.
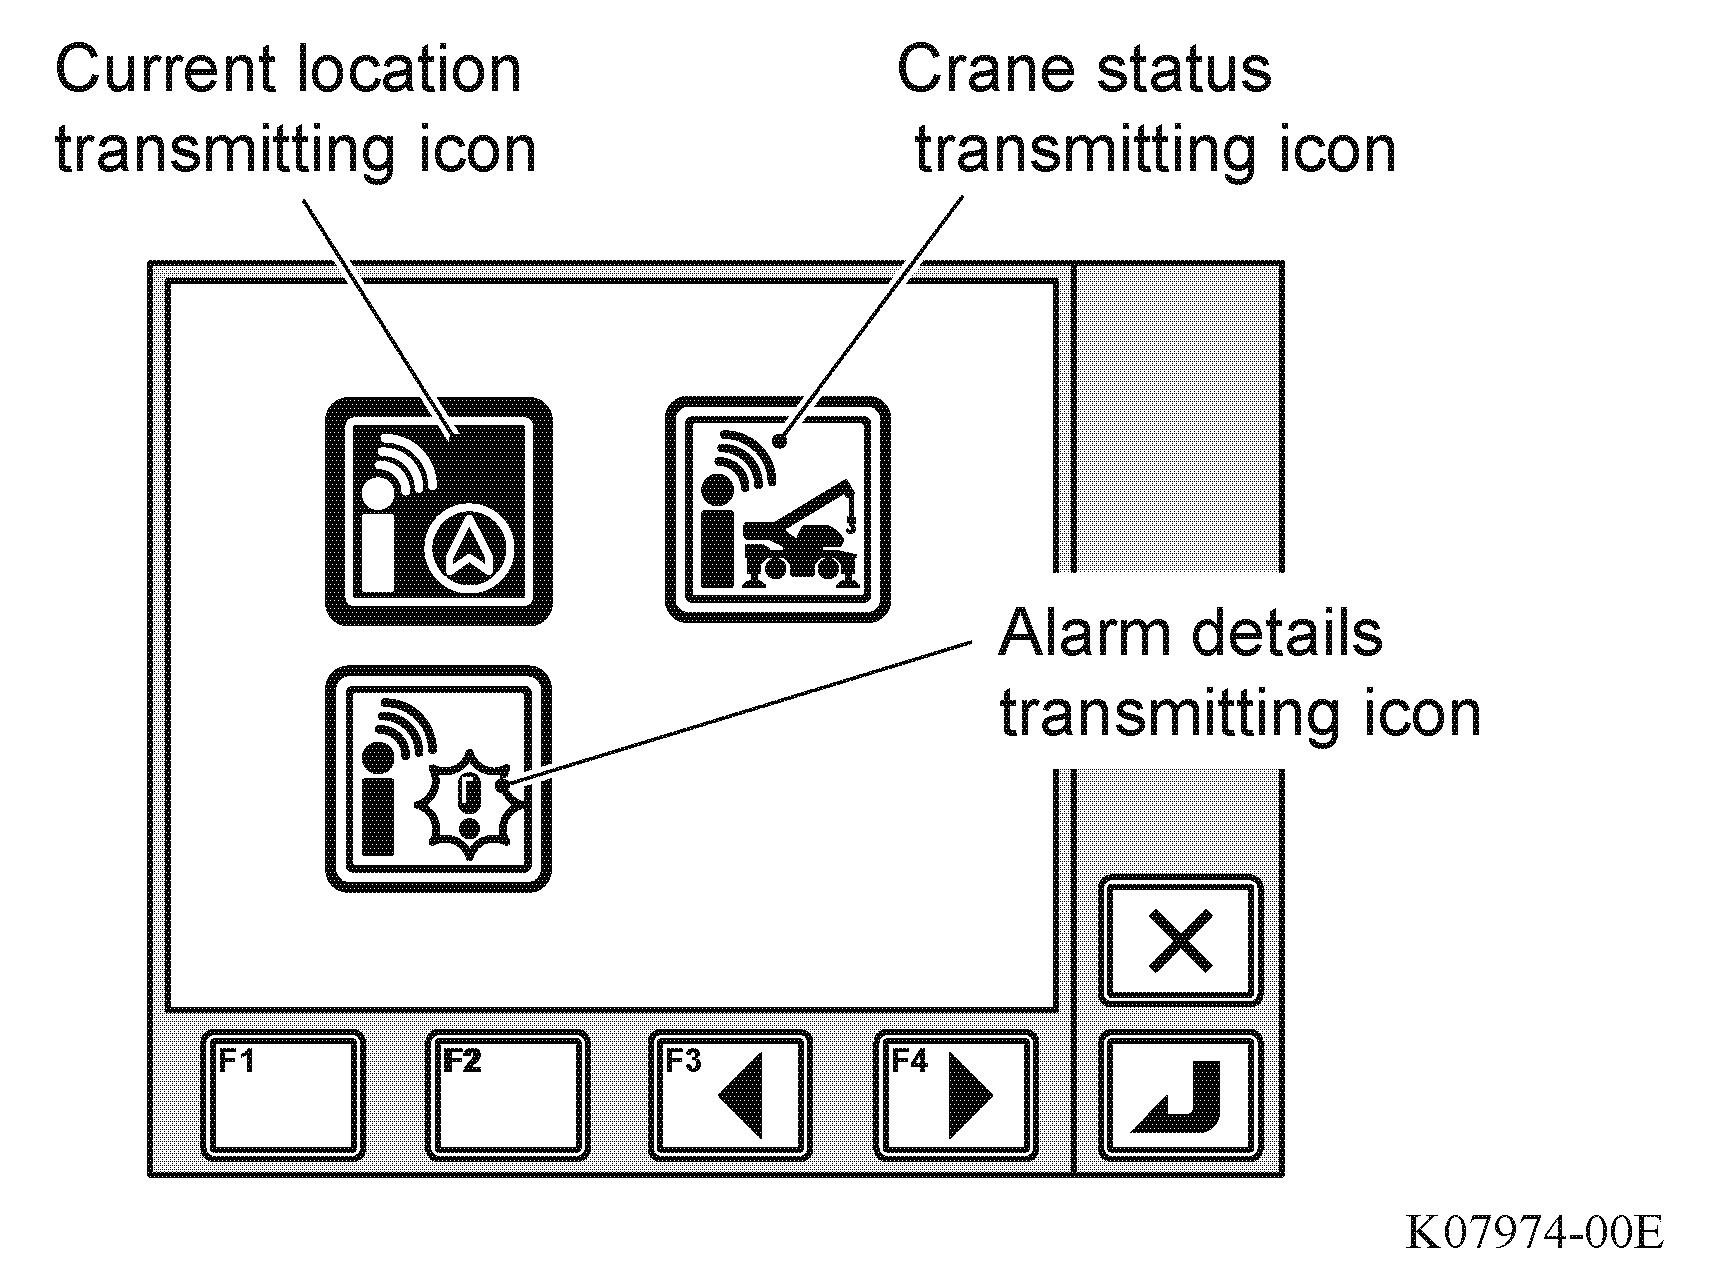
• Alarm data transmission: When an alarm (error) occurs, the detailed information is transmitted.
3. Press the < > key (set)
• After the registration of data transmission is completed, the pop-up window closes and the AML returns to the initial display.
When the registration of data transmission is completed, it actually takes more time to complete the data transmission. The time required differs depending on the peripheral communication environment.
Communication is impossible in the environment such as a tunnel or indoors where radio waves can be hardly received. Move the machine to outdoors with a good communication environment.
During the data transmission, the telematics data transmission icon in the preset menu is displayed in gray, and a new transmission data cannot be received. Wait until the icon displayed in gray returns to perform another data transmission.
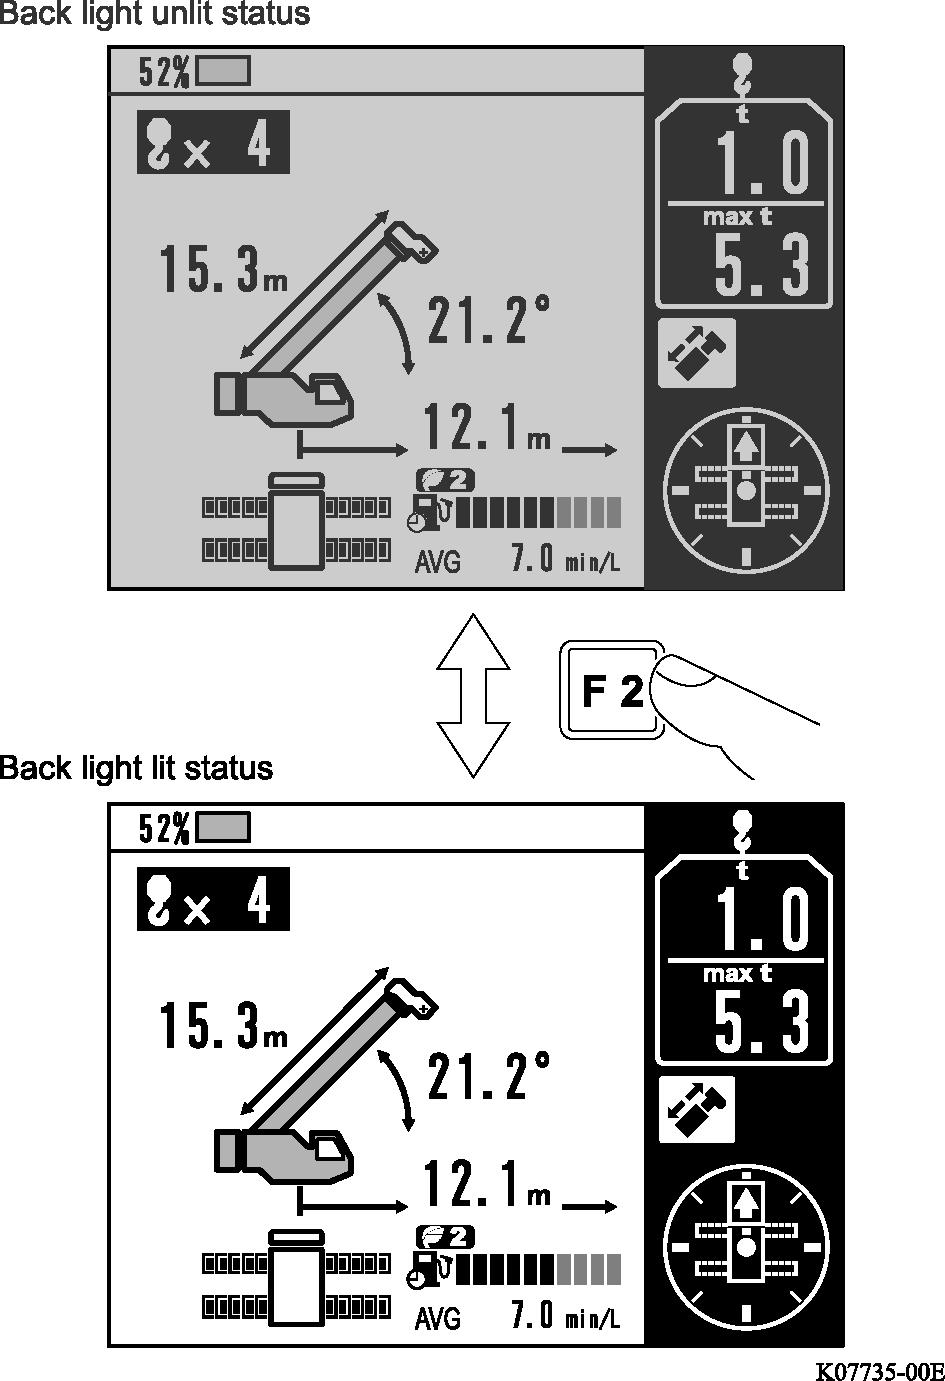
4.7 Back light lit (unlit) function
The back light can be turned on (off) when the light switch is set to OFF.
Press and hold the < > key to turn on the AML back light.
Press and hold the < > key again to turn off the AML back light.