6 minute read
User Mode Chapter B Chapter B


B - 4 Other Functions
There are other 7 functions as shown below.
No. Functions
1 Working range limit function
2 TARE function
3 Fuel consumption indication function
4 Mute alarm function
5 Selection of over-front special capacity
6 Preset menu
-1 – Selection of Eco mode
-2 – Boom elevation speed adjustment
-3
-4
Initialization of hook block position
Activating/deactivating the winch drum rotation buzzer function
-5 – History indication of fuel consumption
-6 – Activate/deactivate boom elevation slow stop function
-7 – Adjustment of hook block travel amount
-8 – Adjustment of display panel contrast
-9
Maintenance telescoping m ode
-10 – Telescoping correction function
-11 – Telematics data transmission
7 Back light lit (unlit) function
4.1 Working range limit function
Notice
If the work range limit is registered close to an obstacle, the machine can hit the obstacle depending on the crane configuration and operation methods. Consider a sufficient allowance when you register the limit.
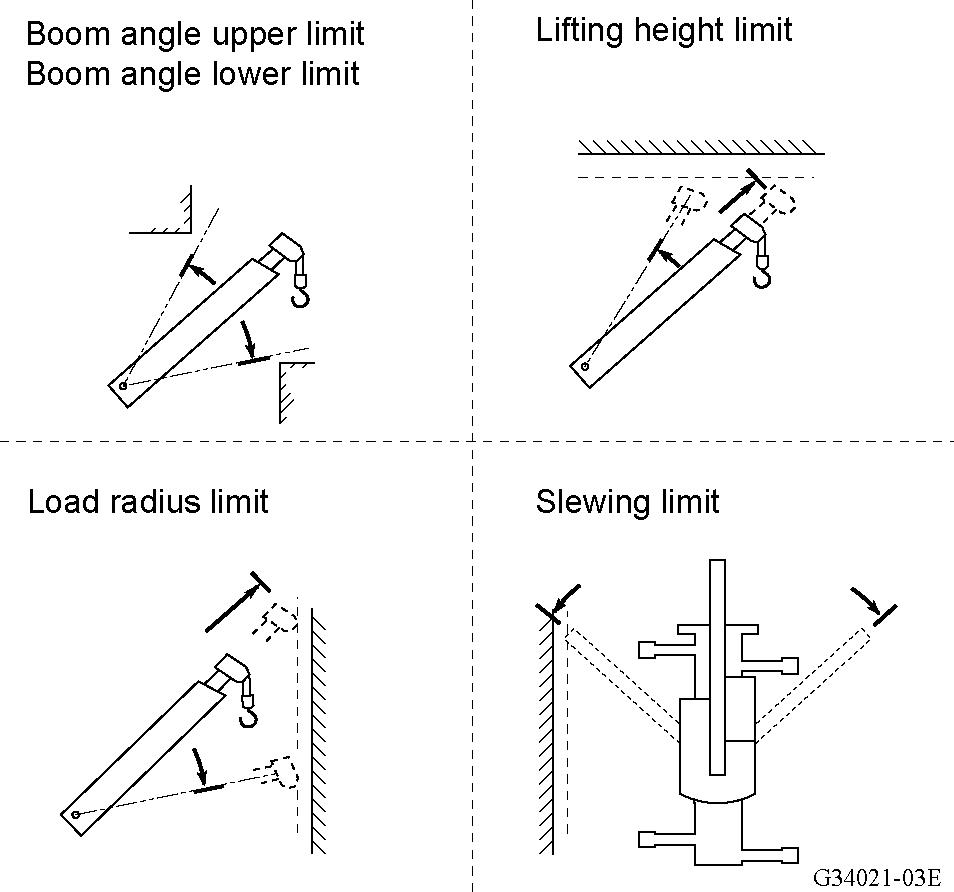
The work range limit function restricts the operation of the crane to the pre-registered boom angle (upper limit, lower limit), lifting height, load radius, and slewing angle (left, right). Use this function when operating the machine in a place where there are obstacles around the machine or when requiring the working range limit of the boom
When the crane reaches the registered working range, the limit function activates as follows:
Working range limit function Action
Boom angle upper limit
Boom angle lower limit
Lifting height limit
Load radius limit
Left slewing limit
Right slewing limit
• Crane stops automatically.
• AML built-in buzzer
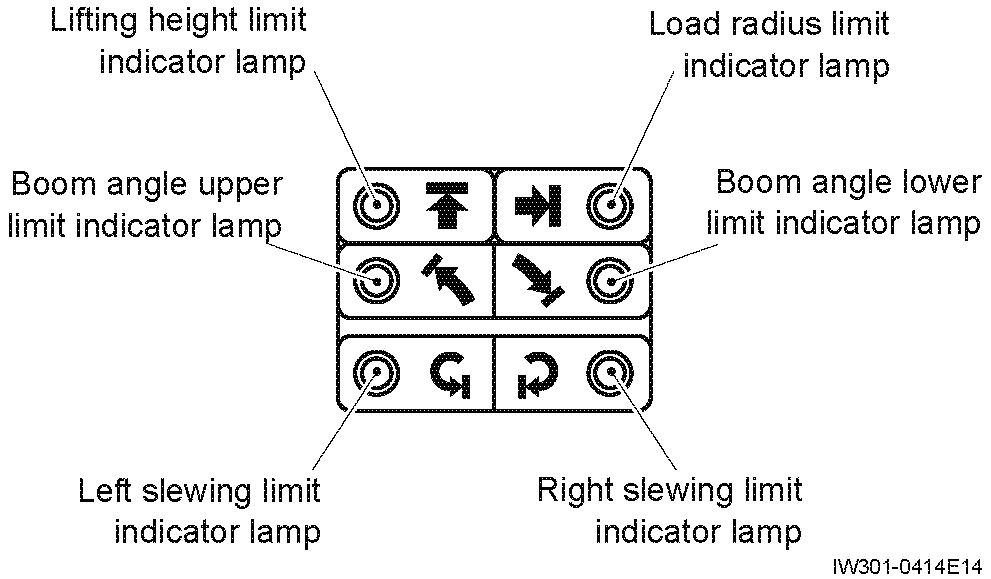
4.1.1 Display of limit function status
You can monitor the registered state of the work range limit by the limit indicator lamps on the LED display. The limit indicator lamps representing the work range limit currently activated lights up. When the crane reaches the limit and stops automatically, the condition of the limit indicator lamp changes from "staying lit" to "flashing".
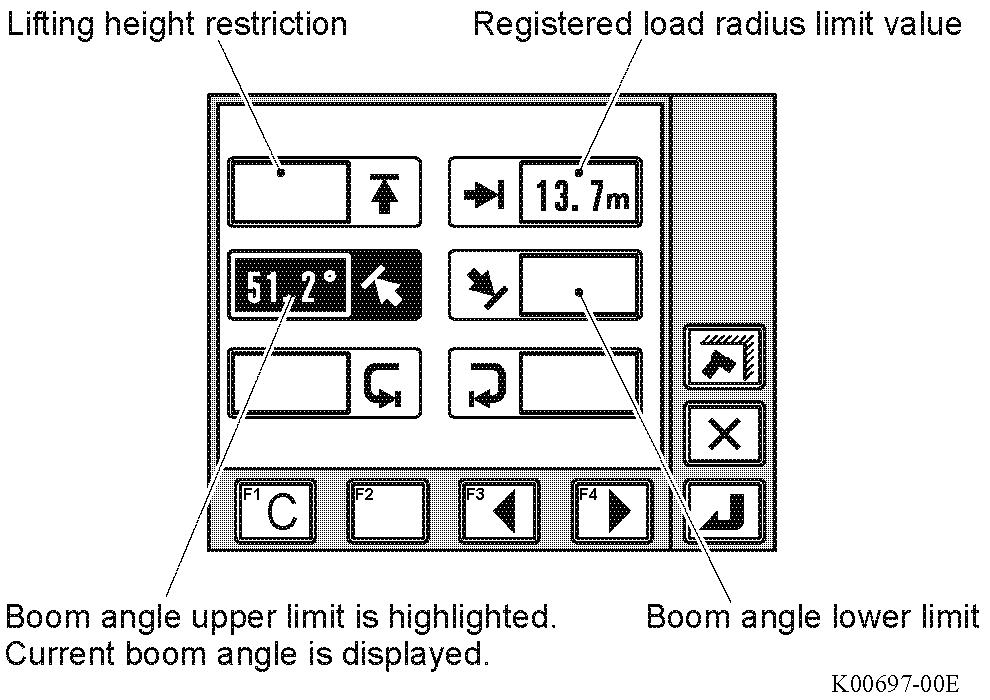
4.1.2 Registering boom slewing angle, lifting height, and load radius limit
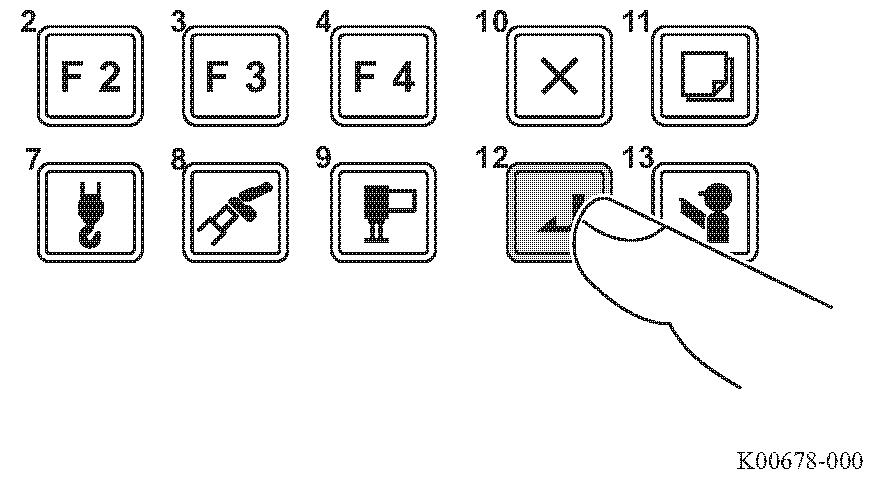
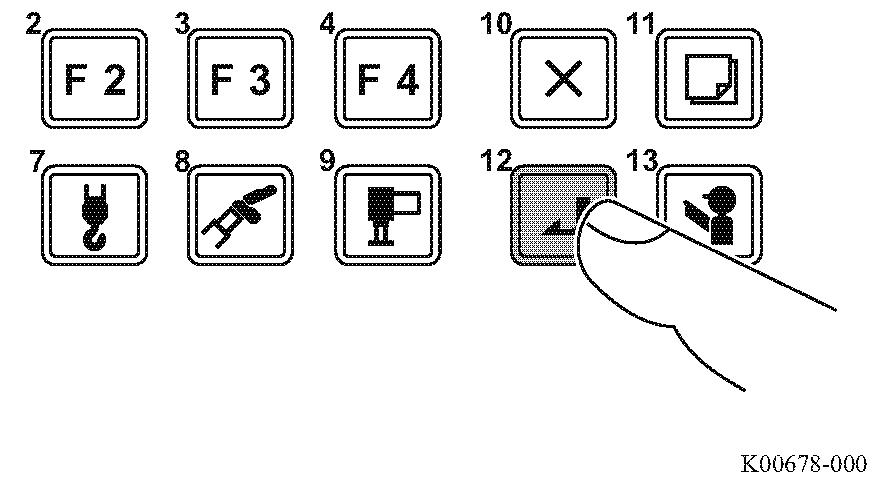
1. Press the < > key (working range limit) to select the item to be registered.
• The pop-up window for work range limit registration appears on the display panel.
• Every time you press the < > key (working range limit), the item to be selected changes in the following sequence.
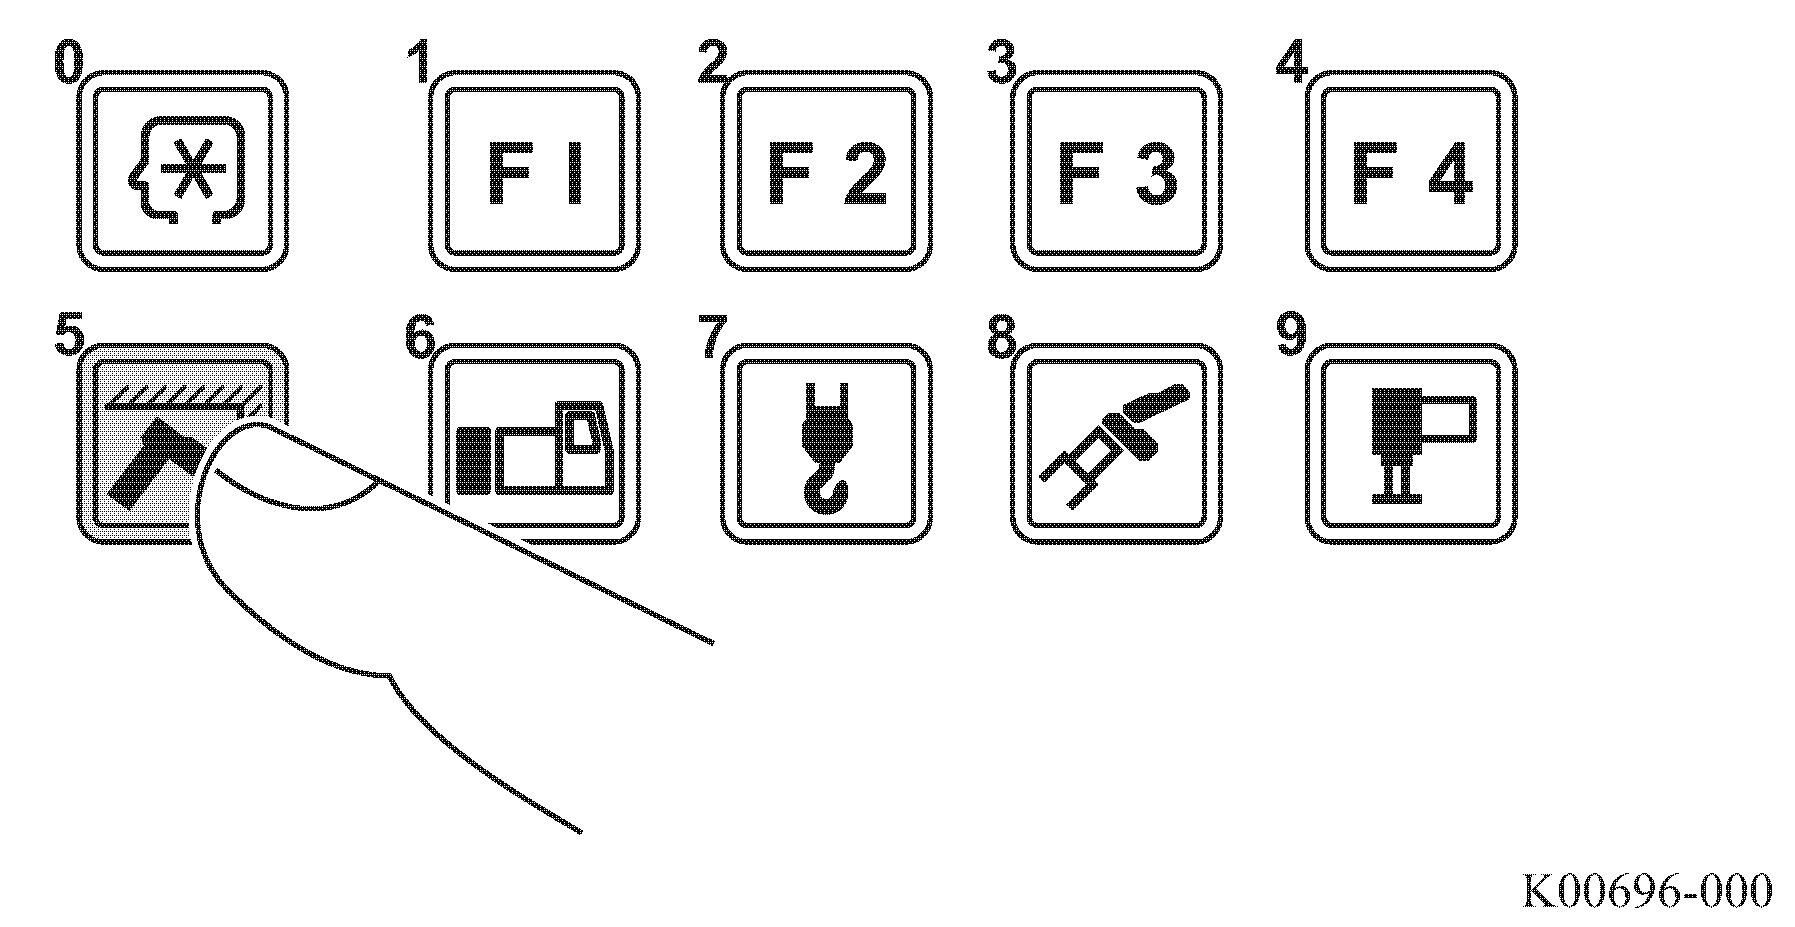
1. Lifting height limit
2. Load radius limit
3. Boom angle upper limit
4. Boom angle lower limit
5. Left slewing limit
6. Right slewing limit
• The illustration on the right shows an example of display where "load radius limit" is registered and "boom angle upper limit" is selected.
Instead of the< > key (working range limit), you can use the < > key (backward) or < > key (forward) to change the display of the item to be selected.
When you stop registration, press the < > key (cancel). The pop-up window closes and the AML returns to the status before start of the registration.
2. After you operate the boom (jib) to the desired boom angle, height, and load radius, press the < > key (set).
• The corresponding limit indicator flashes in the LED display, and the work range limit is registered.
• After registration is completed, the pop-up window closes and the AML returns to the crane operation state.
If you select the item with the limit value already registered, rem ember that pressing the < > key (set) cancels the registration of the work range limit.
3. Move the boom (jib) within the limit range.
• The indicator lamp turns to staying lit.
• When the boom reaches a registered limit, the indicator lamp flashes. The corresponding operation of the boom (jib) automatically stops, and the error code is shown on the display panel. The AML built-in buzzer sounds
4. To cancel the limit function, press the < > key (working range limit) to select the item to be canceled.
• The pop-up window for work range limit registration appears on the display panel.
5. Press the < > key (set).
• The corresponding limit indicator lamp goes out.
• The pop-up window closes and the AML returns to the basic display.
When you press the < > key (clear), all the work range limits are canceled.
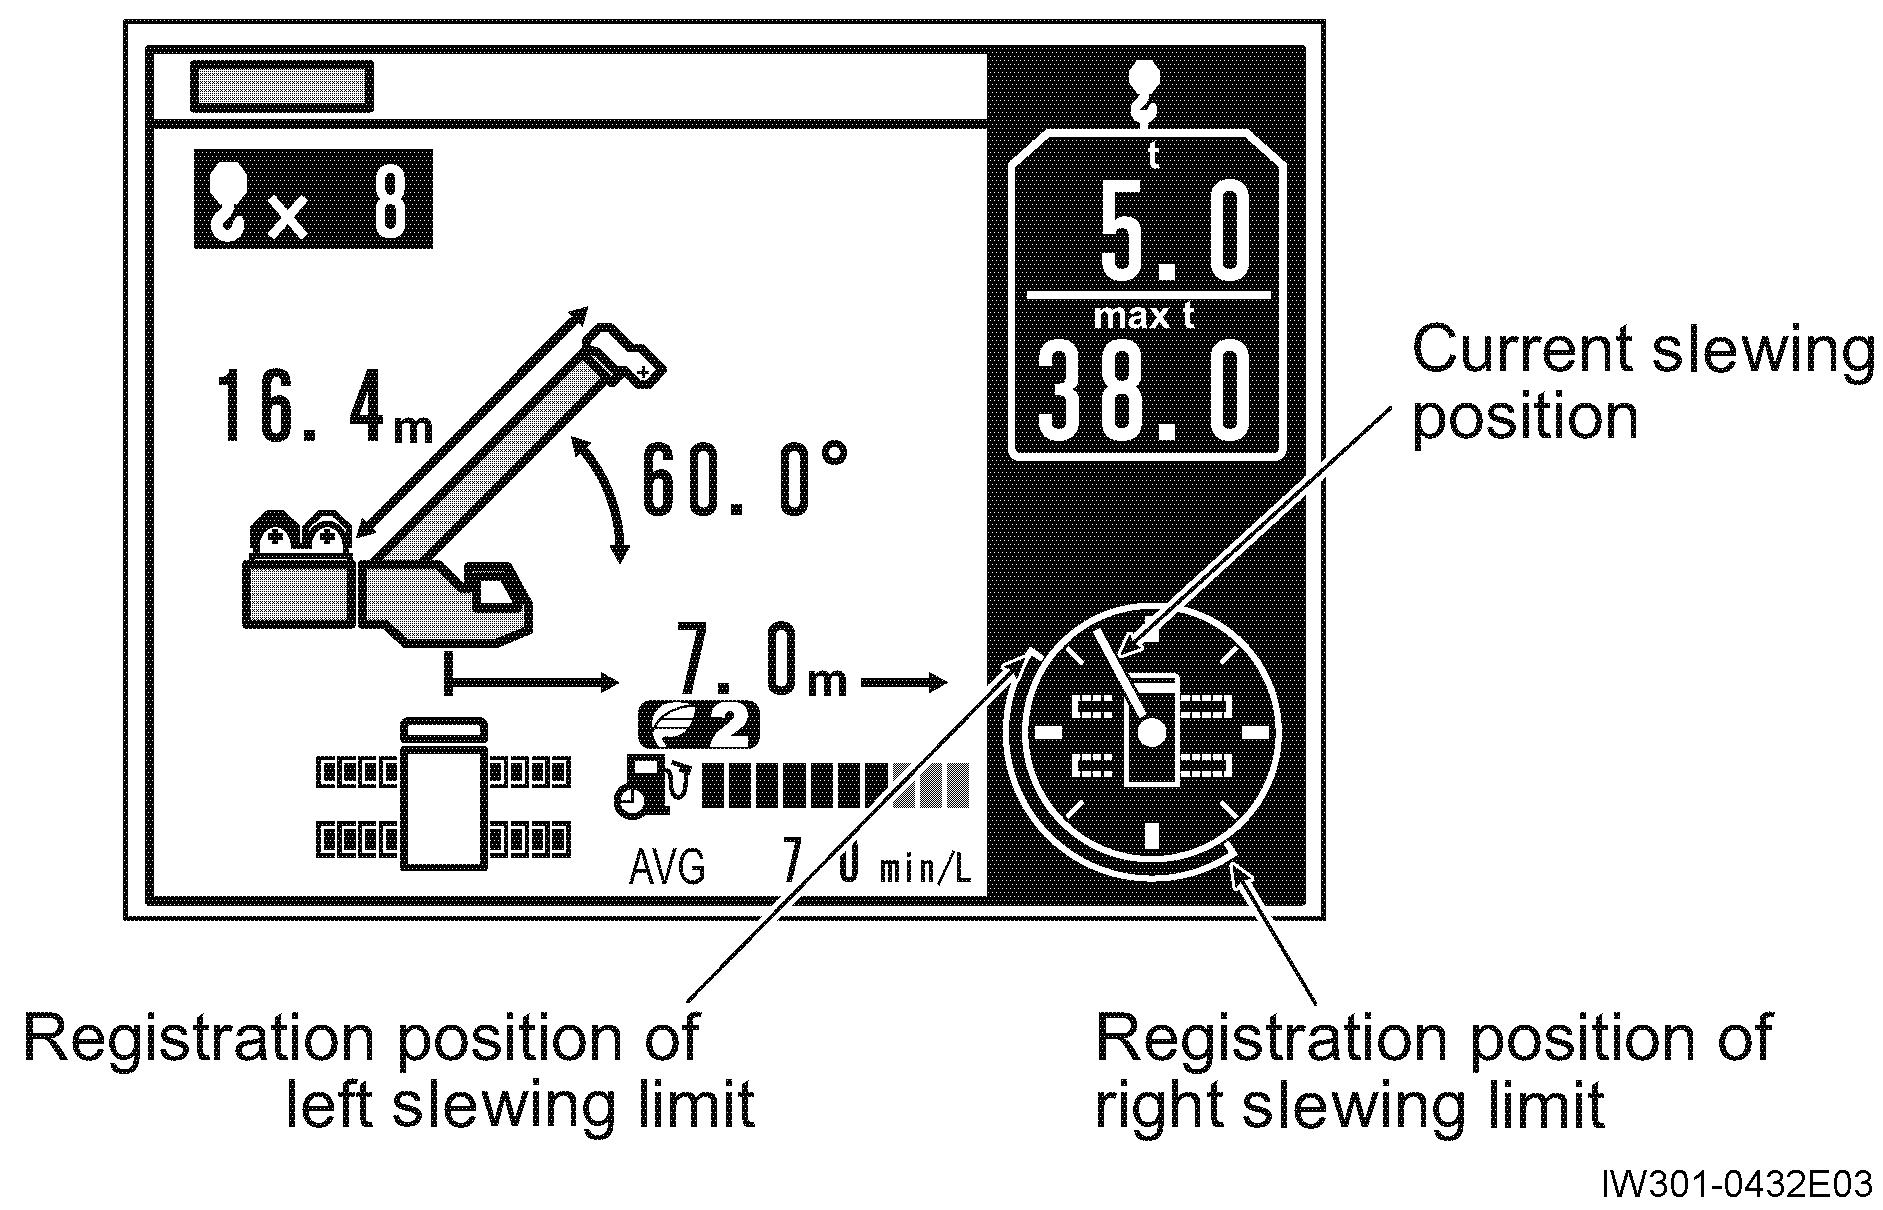
4.1.3 Registration of slewing range limit function
1. Press the < > key (working range limit) repeatedly and select the item (left slewing limit or right slewing limit) to be registered.
• The symbol for the selected item flashes.
• Every time you press the< > key (working range limit), the item to be selected changes in the following sequence.
1. Lifting height limit
2. Load radius limit
3. Boom angle upper limit
4. Boom angle lower limit
5. Left slewing limit
6. Right slewing limit
• The illustration on the right shows an example of the display where "left slewing limit" is selected.

Instead of the < > key (working range limit), you can use the < > key (backward) or < > key (forward) to change the display of the item to be selected.
When you stop registration, press the < > key (cancel). The pop-up window closes and the AML returns to the status before start of the registration.
2. After you slewing the boom to the desired position where the limit is to be set, press the < > key (set).
• The corresponding limit indicator lamp flashes, and the slewing limit is registered.
• After registration is completed, the pop-up window closes and the AML returns to the crane operation state.
If you select the item with the limit value already registered, remember that pressing the < > key (set) cancels the registration of the work range limit.
• The illustration on the right shows an example of display, in which "slewing limit" is registered.
Notice
Registration of slewing range limit is the function to set the allowable slewing range. Register it for both the left slewing and right slewing.
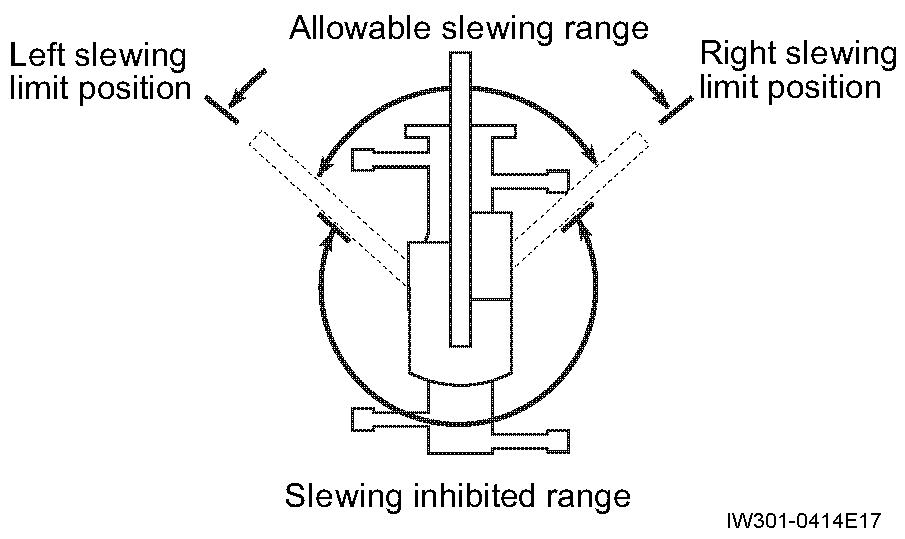
If only the slewing range limit on one side (right or left) is registered, the crane does not operate properly.
3. Move the boom (jib) within the limit range.
• The indicator lamp turns to staying lit.
• When the boom reaches a registered slewing limit, the indicator lamp flashes. The slewing operation automatically stops, and error code appears on the display panel. The AML built-in buzzer sounds.
4. To cancel the limit function, press the < > key (working range limit) to select the item to be canceled.
• The pop-up window for work range limit registration appears on the display panel.
5. Press the < > key (set).
• The corresponding limit indicator lamp goes out.
• The pop-up window closes and the AML returns to the crane operation state.
When you press the < > key (clear), all the work range limits are canceled.
Even after you turn off the AML, the registered information is retained for approximately 2 hours. When the AML is turned on, the operation starts with the retained information. The registered information is erased approximately 2 hours after the AML is turned off. In this case, it is necessary to register the operation state from the beginning.
4.1.4 Alarm for work range limit and recovery operation
When the crane state reaches the registered limit value, the AML buzzer sounds, and the error code appears on the display panel. Examine the meaning of the warning code, and perform recovery operation.
[W0026]
"Stopped at upper boom angle limit restriction"
[W0027]
"Stopped at lower boom angle limit restriction"
[W0028]
"Stopped at lifting height limit restriction"
[W0029]
"Stopped at load radius limit restriction"
[W0042]
"Right slewing restriction limit"
[W0043]
"Left slewing restriction limit"
AML built-in buzzer:
The boom angle reaches the upper limit.
The boom angle reaches the lower limit.
The boom head or jib head reaches the lifting height limit.
The load radius reaches the limit.
The boom is slewed to the slewing limit.
Lower the boom.
Raise the boom.
Retract or lower the boom , or retract the jib
Retract or raise the boom , or retract the jib
Slewing the boom in the opposite direction.
4.2 TARE function
The mass of the load only is shown on the hook load display.
1. Before you lift a load, press the < > key (TARE).
• The indication of the hook load display turns to "0", and the TARE indicator lamp lights up.
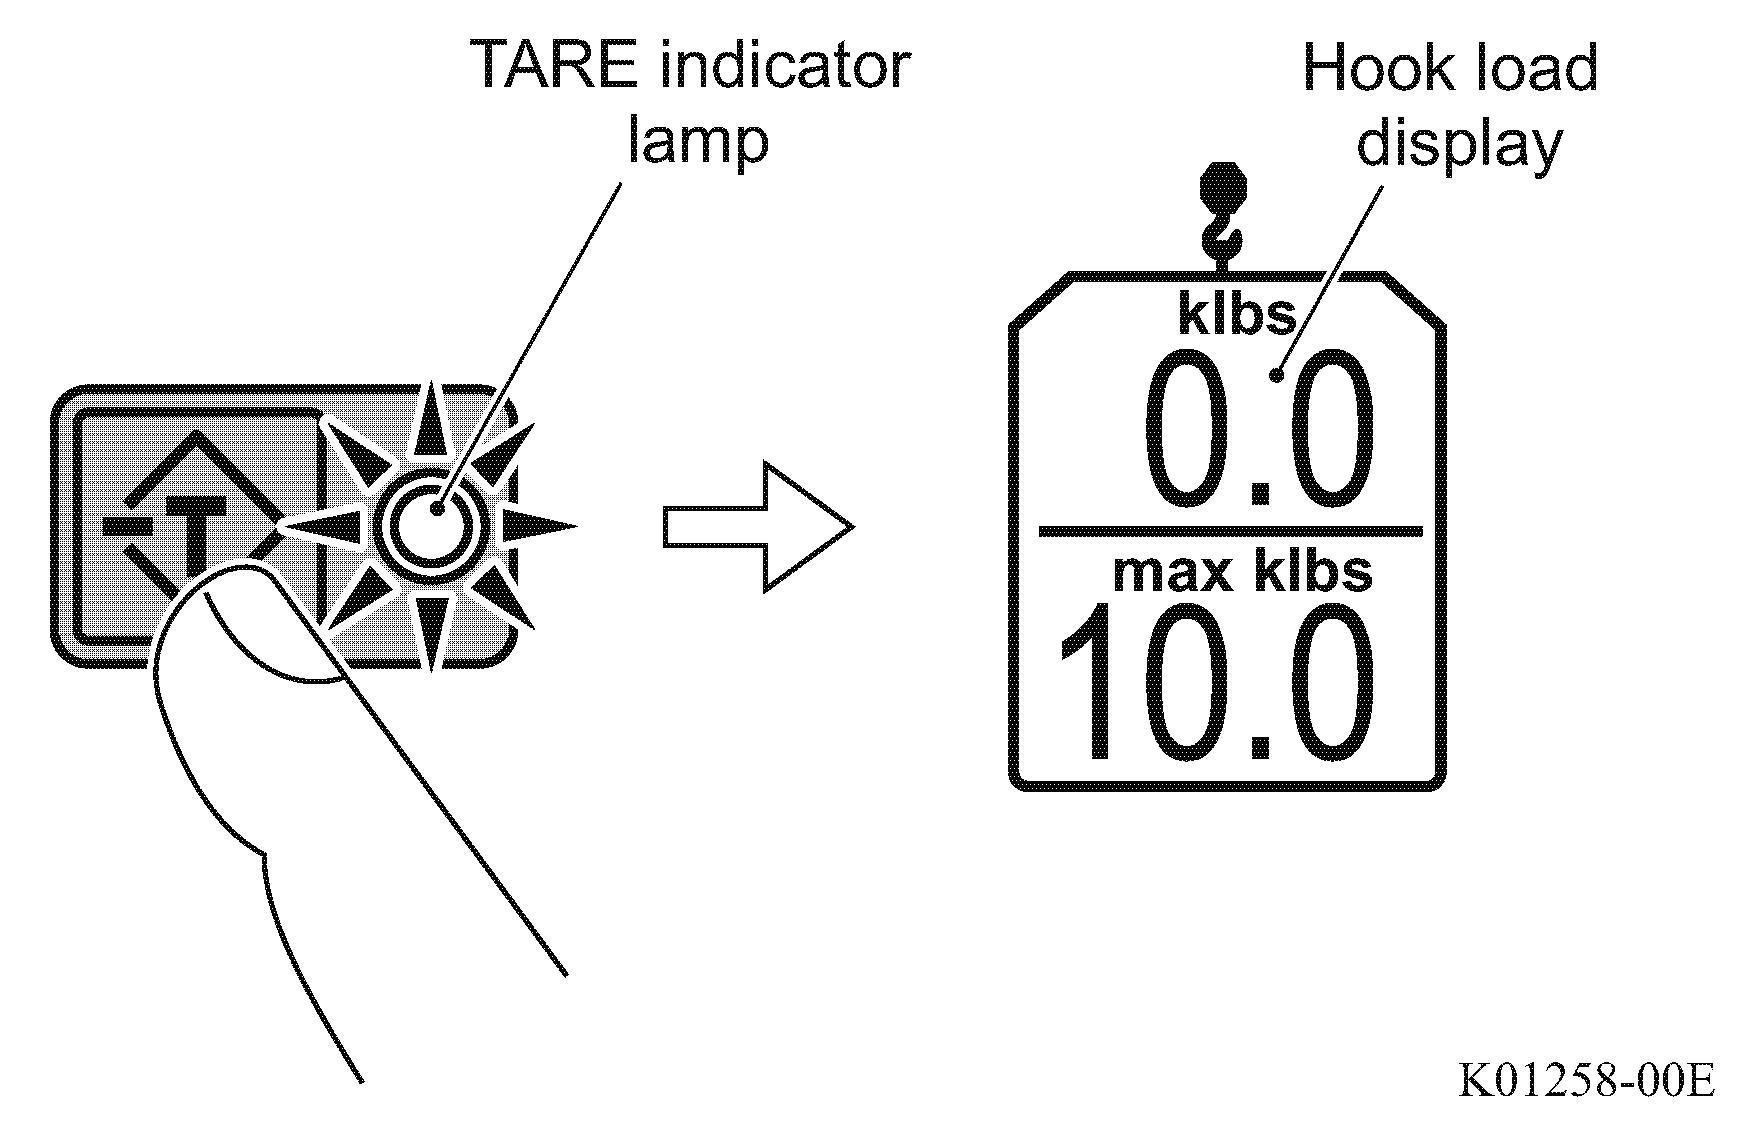
2. Perform hoisting up operation to lift up the load.
• The mass of the load is shown on the hook load display.
3. To cancel the TARE function, press the < > key (TARE) again.
• The hook load display returns to the normal hook load display, and the TARE indicator lamp goes out.