6 minute read
Control and operation


The access and the outfit of the cab
Lateral emergency exit
You can use the rear left window of the cab as an emergency exit.
To open the emergency exit:
If the rear left window has an emergency handle: Pull the emergency handle on the inside of the window. The window seal breaks into two parts and the window is released. Push the window out.
If the rear left window does not have an emergency handle: Breakthewindowwiththeemergencyhammerwhichisinstalledbetweenthetwo left windows of the cab.
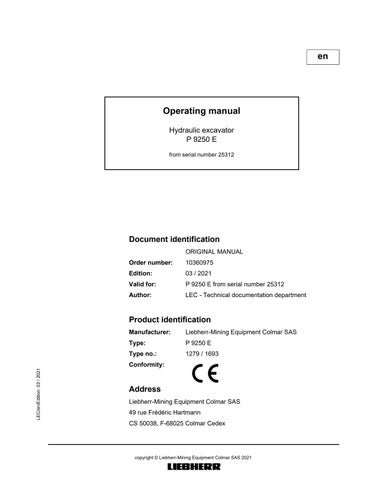
3.2.7Interior lightings
The interior lightings are switched on using the switch S41 on the Keypad. Press the switch S41 The lights E7 are switched on. Press the switch S41 again. Interior lighting E7 are switched off.
3.2.8Fire extinguisher
Theinterior of the cab is fittedwithfixingpoints allowing themounting of afireextinguisher. These fixing points are on the right side wall of the cab, on the frame between the two windows.
Note!
It is the responsibility of the owner of the machine to decide if it must be fittedwith afire extinguisher or not, considering the operating conditions and the regulations which apply in the country and at the point of use of the machine.
Caution!
If yourmachine is fitted with a fire extinguisher: Always comply with the operating guide on the body of the extinguisher, Make sure, all the inspections of the fire extinguisher which are prescribed by the regulations applicable to the operating place of the machine are accomplished.
3.2.9Windscreen wiper
Windscreen wiper
When the ignition is switched on, pressing switch S14 will activate the windscreen wiper.
Press switch. Intermittent switching LED I in the switch illuminates.
Press switch again. Continuous operation. LED C in the switch illuminates. LED I in the switch goes out.
Press switch again.
Windscreen wiper is switched off. LED C in the switch goes out.
Setting the interval time for the intermittent switching
The interval time can be set when the ignition is on by pressing switch S14.
Pressthe switch until the windscreen wiper is switchedoff (LED I in switchgoes out)
Press and hold switch. LED I in the switch flashes.
Release the switch when the desired interval time has been reached. The interval time can be set to between 2 and 10 seconds.
Windshield washer installation
When the ignition is switched on, pressing button S11 will activate the electric windscreen washer installation.
Press and hold button. Washingwaterwillbesprayedontothewindscreenthroughtheoutletnozzles. The windshield washer runs continuously.
Release the button.
Washing water will be stopped. Windshield washer will run continuously for approx. another 3 seconds.
Windscreen washing fluid container
3-40 Windscreen washing fluid container
The containerfor the windscreen washing fluid is located under the cabin in thecab elevation.

The container can be refilled via the service trap with ordinary windscreen washing fluid.
Volume: see lubricant chart
3.2.10Lighting
Regularly check lighting devices for condition. If necessary: ce to get access to them.
For maintenance intervals, refer to the control and maintenance chart.
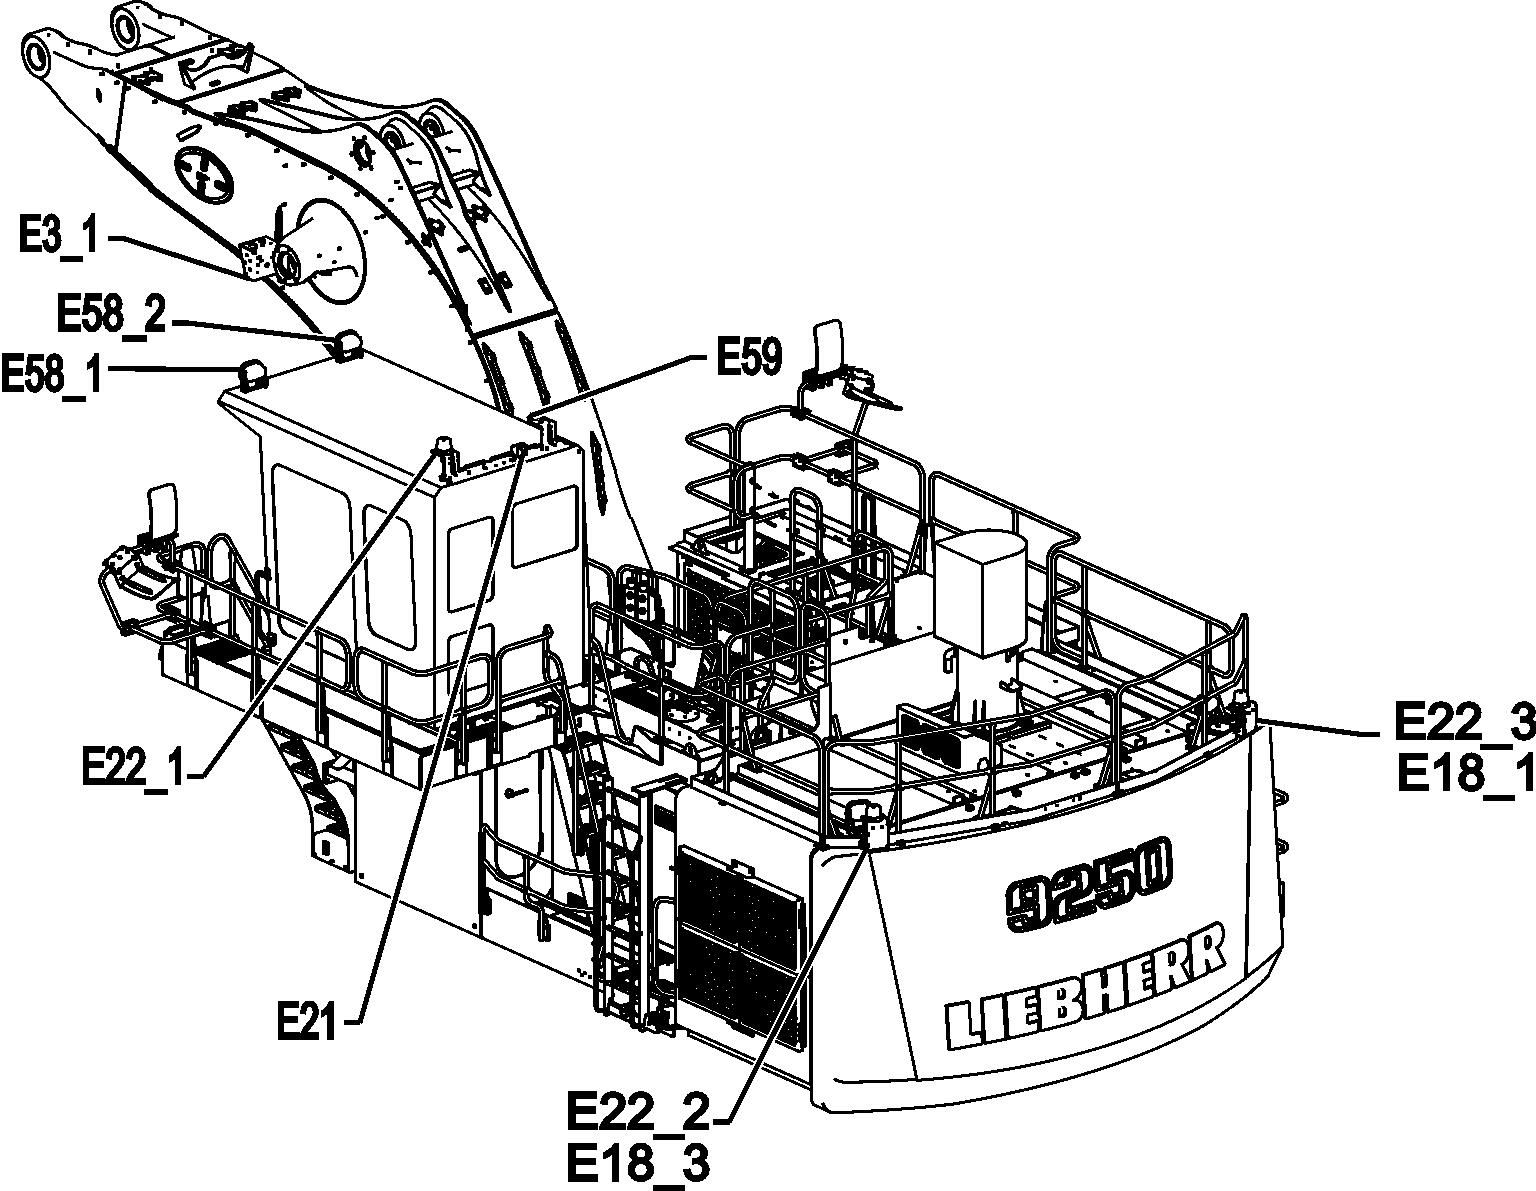
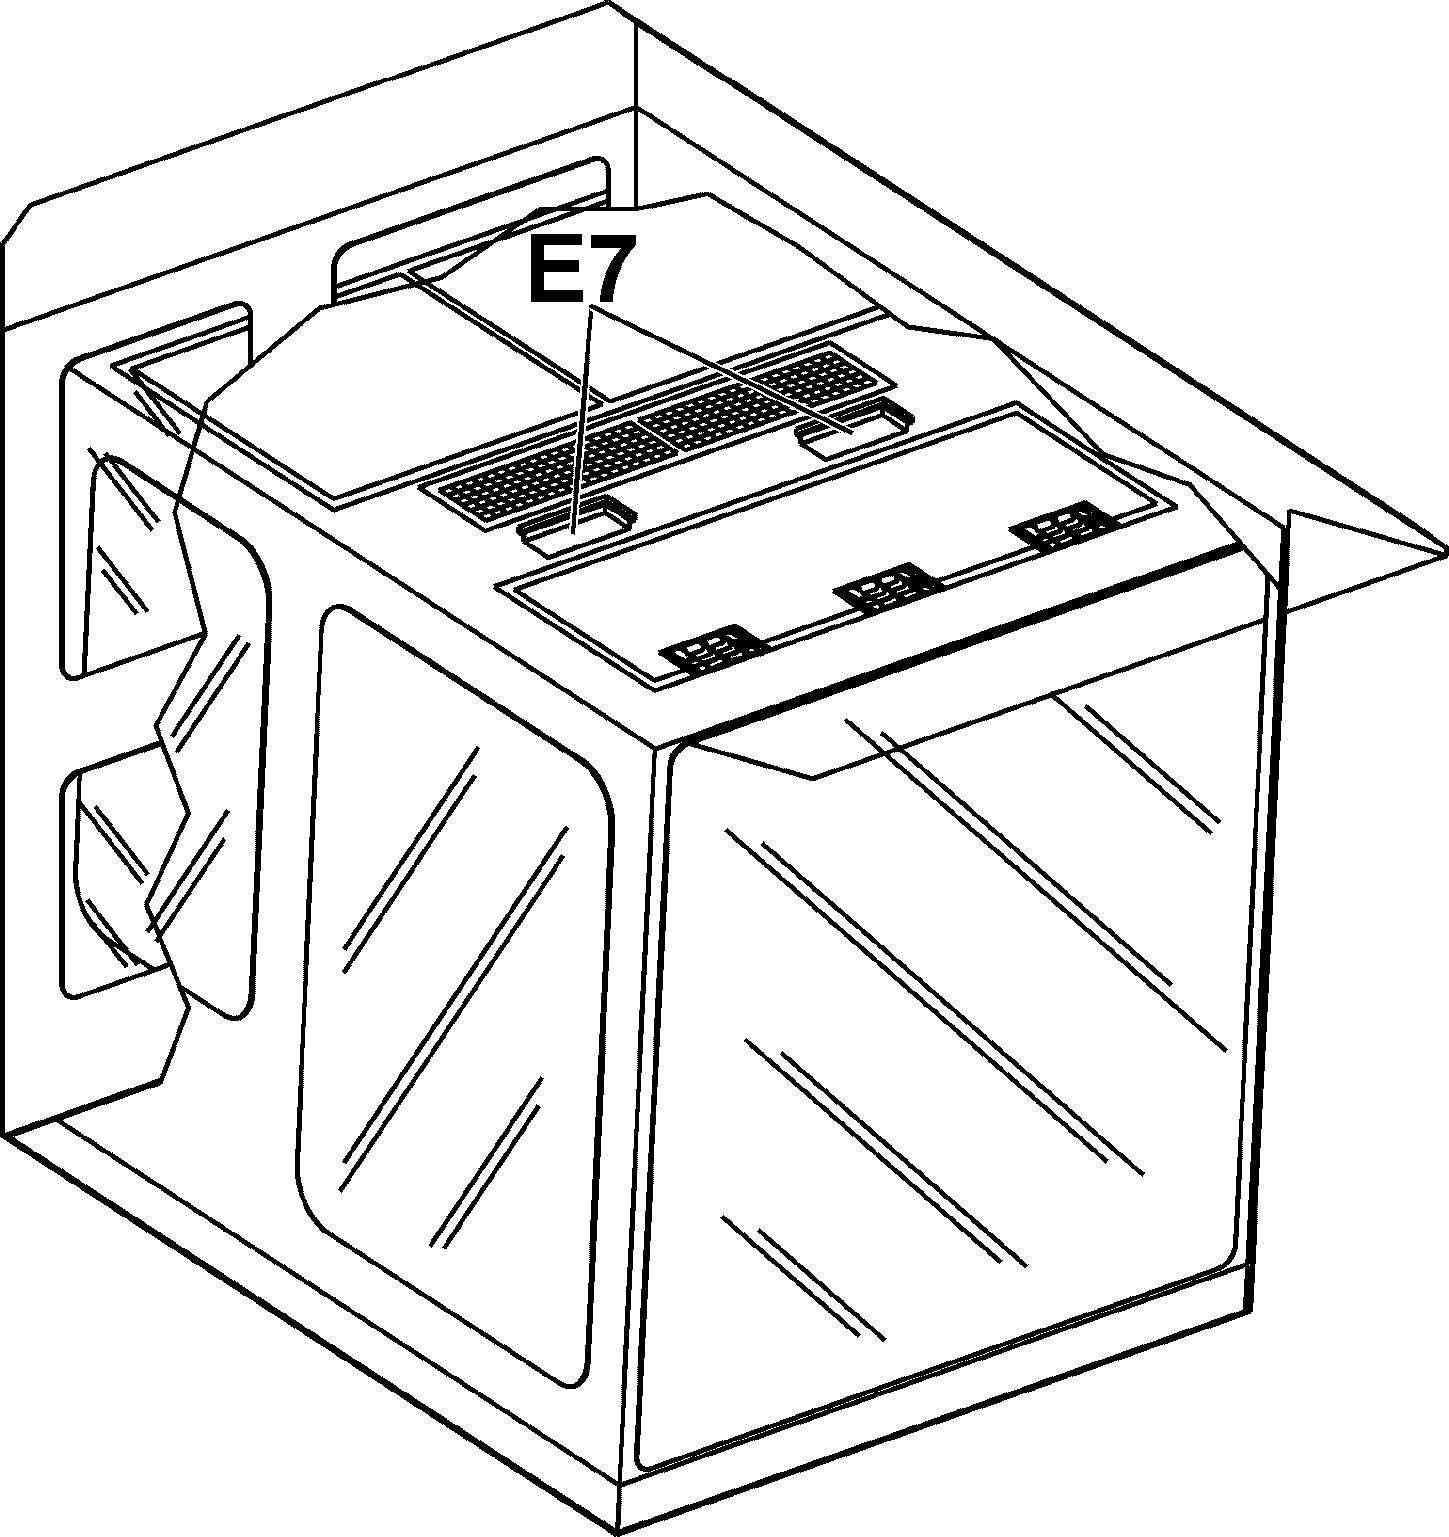
E6_1 Cabin catwalk floodlight E22_3 Counterweight floodlight (option)
E6_2 Cabin catwalk floodlight (option, not represented) E58_1 Top of cabin floodlight
E18_1 Counterweight floodlight (option) E58_2 Top of cabin floodlight
E18_3 Counterweight floodlight (option) E59_1 Service floodlight swing gear
Attachmentlights,fueltanklights,catwalklightsand topof cabin lights
The fuel tank lights (E1_1), the catwalk lights (E6_1 and E6_2) and the top of cabin lights (E58_1 and E58_2) are the driving lights.
The driving lights and the attachment headlights (E2_1 and E3_1) are activated by pushing button S10
Push the button.
Driving lights are activated. LED 1 in thebutton comes on.
Push the button again.
Driving lights are deactivated. LED 1 in thebutton goes off.
Attachment headlights are activated. LED 2 in thebutton comes on.
Push the button again.
Driving lights and attachment headlights are activated. LEDs1 and 2 in the button come on.
Push the button again.
Driving lights and attachment headlights are deactivated. LEDs1 and 2 in the button go off.
Counterweight headlights (optional extra)
E18_1, E18_3, E22_2 and E22_3 are the counterweight headlights. Pushing button S22 when the ignition is on activates the counterweight headlights and the under uppercarriage lights.
Push the button.
Counterweight headlights and the under uppercarriage lights are activated. LED in button comes on.
Push the button again.
Counterweight headlights andthe underuppercarriagelights aredeactivated. LED in the button goes off.
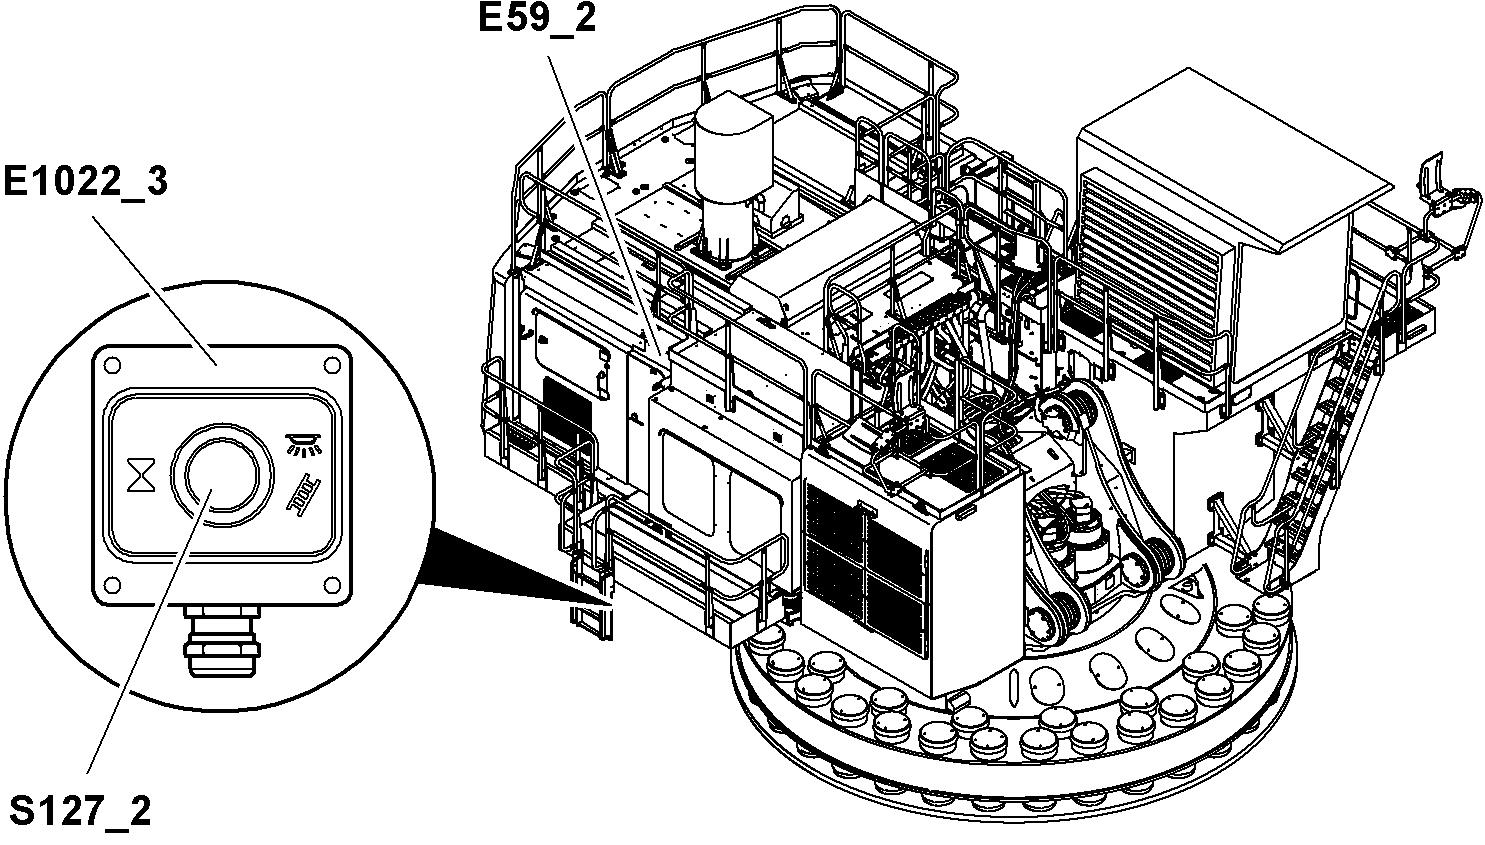
The access and the outfit of the cab
Top of cabin light
E59_1 Top of cabin light
E1022_2 Connection box ladder
S127_1 Switch timer top of cabin lighting
E59_2 Right side lighting
E1022_3 Connection box ladder
S127_2 Switch timer top of cabin lighting
3.2.11Heating/air-conditioning system
A heater and an air conditioner are installed in the cab as standard equipment. The heater is installed on the cab floor. The evaporator for the air conditioning system is integrated in the roof of the cab, and the condenser is installed on the side of the cabin.


For type 1693
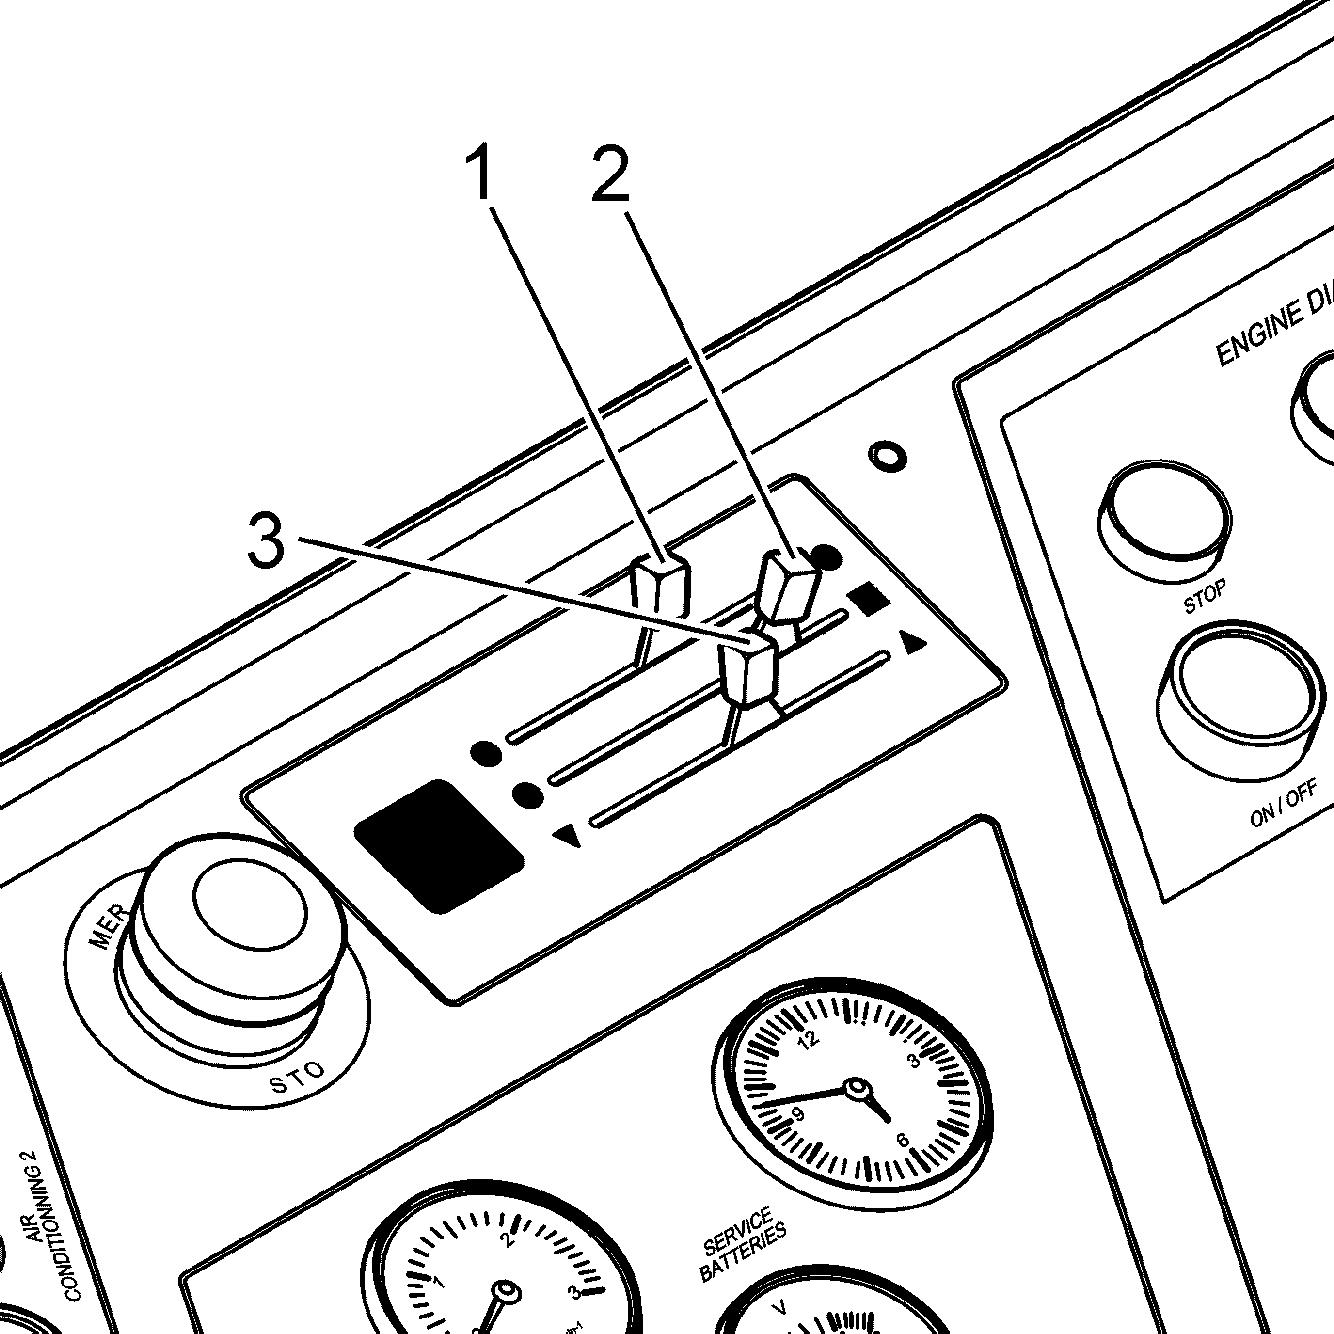
Control unit front panel
Control
Note!
If the control unit recognizes asystem errorin the heating /air conditioningcircuit, a flashing error code number F0-F5 is displayed. Refer to the section "Error code charts" further in this manual.
Switch on the control unit
Push button 4.
Thecontrolunitrunsaself-testforapproximately5seconds(softwareversion and equipment function is shown on field 17).
Then the operating hours is shown on field 17.
And then the last stored temperature adjustment is shown on field 17. By default, control unit is in automatic mode and symbol 12 is shown on display 19.
Set temperature
Push button 2 to increase the temperature. Push button 3 to decrease the temperature.
The selected temperature is shown on field 17. The new set value is stored 5 seconds after last button pushing.
Switch ON/OFF the air conditioning unit
Push button 1.
Air conditioning mode is activated. Symbol 11 is shown on display 19.
Press button 1 again. Air conditioning mode is deactivated. Symbol 11 goes off from display 19.
Note!
In caseof high outside temperature, and especially if the cab has been heated up by thesun, decreasethetemperatureinsidethecabas faras possiblebeforeturning on the air conditioner.
Open the windows for a few minutes and adjust blower speed to maximum speed via buttons 5 and 2.
Switch ON/OFF the reheat mode
Inordertoachieveaquickdehumidificationofthecabwhensettingthemachineinto operation, it may be advisable to briefly turn on the air conditioning operation when the heater is already operative.
Push button 6.
Reheat mode is activated. Symbol 10 is shown on display 19. Theblowerspeedisraisedto100%.Ifnecessarythecontrolunitswitchesthe heating on, to keep ambient temperature at the desired value.
Push button 6 again.
Reheat mode is deactivated. Symbol 10 goes off from display 19.
Note!
Reheat mode is automatically limited on 10 minutes. Ifthemachineisusedforalongerperiod of timewithout using the airconditioner,push the reheat button6 about every 2 weeks so toturnonthe compressor.
Set the evaporator blower speed manually
Push button 5.
Blower speed manual setting is activated. Indicationbar13isshownondisplay19andgivescurrentlysetblowerspeed.
Automatic mode symbol 12 goes off from display 19.
Manual blower mode symbol 14 flashes on display 19 for 5 seconds.
Duringthese5seconds,evaporatorblowerspeedcanbeincreasedwithbutton2 or decreased with button 3 in steps of 10%.
Push button 5 two times.
Manual mode is deactivated.
Symbols 13 and 14 go off from display 19.
Automatic mode is activated again.
Symbol 12 is shown again on display 19.
Switch ON/OFF the heating mode
Push button 7.
Heating mode is activated.
Symbol 15 is shown on display 19. Push button 7 again.
Heating mode is deactivated.
Symbol 15 goes off from display 19.
Fresh air / recirculated air mode
Push button 8.
Control unit switches from fresh air to recirculated air mode.
Fresh air flap is closed.
Symbol 9 is shown on display 19.
Push button 8 again.
Control unit switches from circulated air to fresh air mode.
Fresh air flap is open.
Symbol 9 goes off from display 19.
Switch the temperature unit from °Celcius to °Fahrenheit
Push and hold button 8.
Push button 3 additionally.
Temperature unit indication 18 switches over into °Fahrenheit. Do the same procedure to switch back temperature unit indication to °Celcius.
For type 1279 Cab ventilation
3-44 Ventilation system
The heater as well as the air conditioner can both be used, at the same time and independently of each other to ventilate the cab.
Ventilation via the heater
Push the lever 1 all the way forward. The water supply is closed.
Push button S12 to select desired air flow. The fresh airenters into the cab via openings on the steps and via the vents on the left and right front.
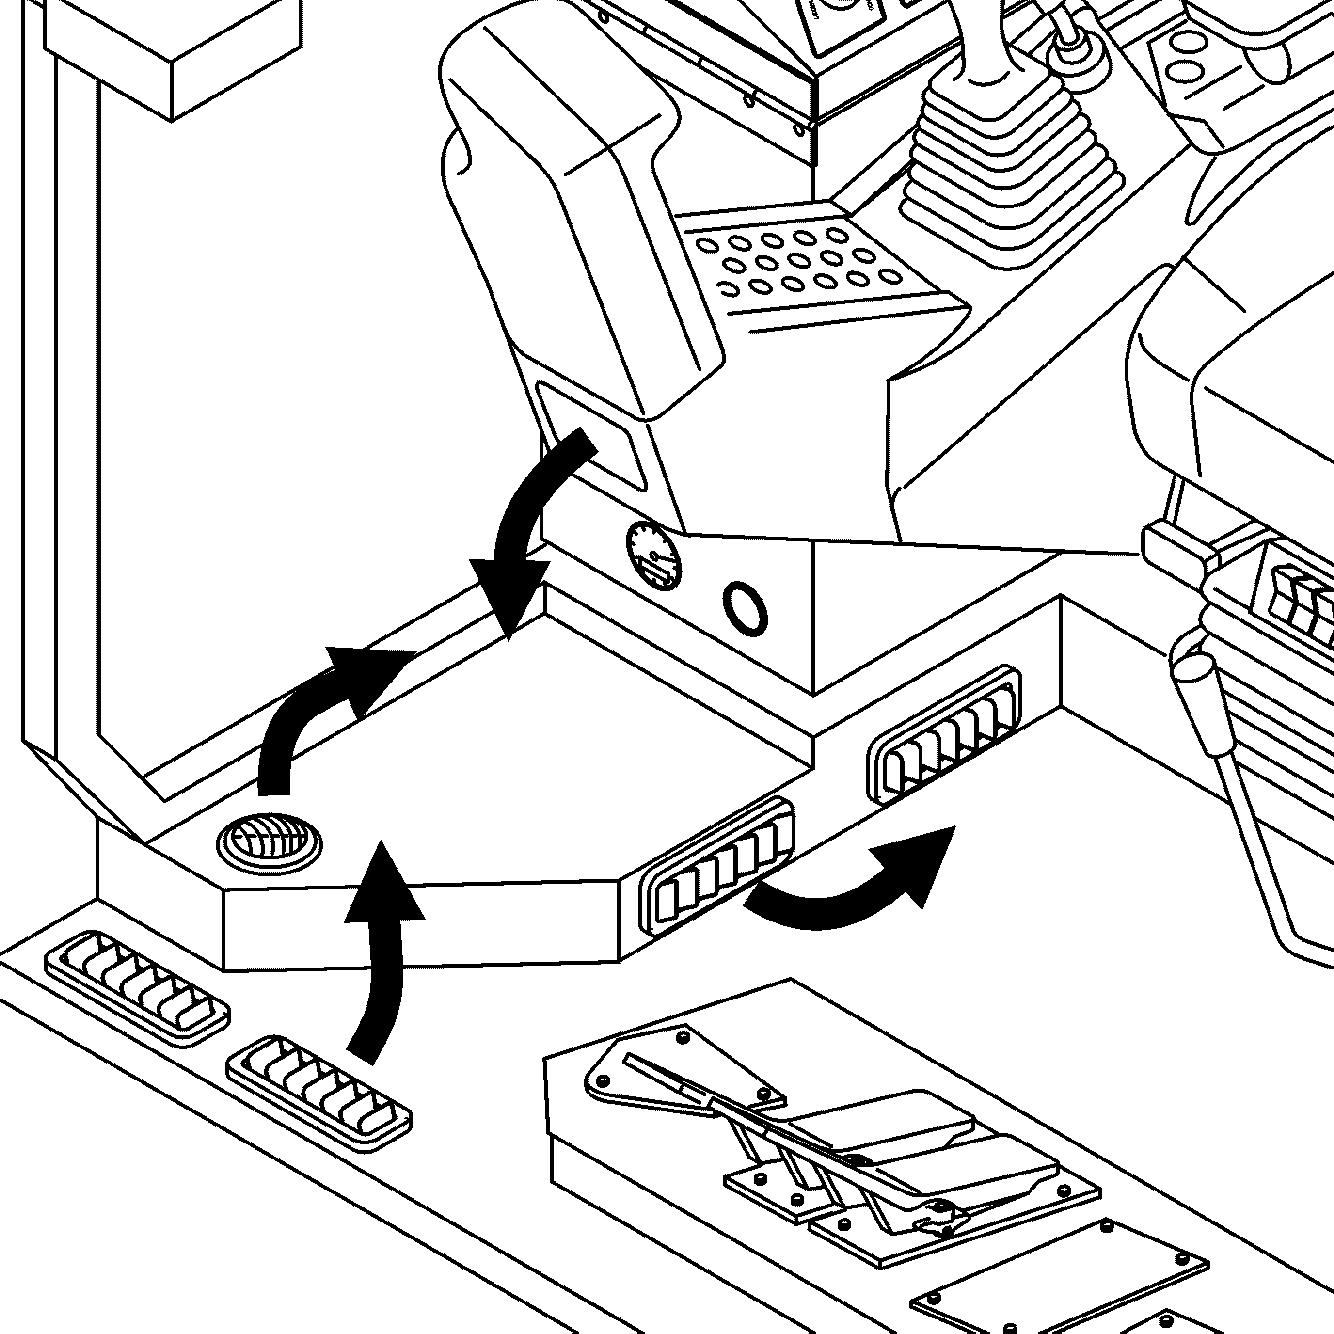
Movethe lever 2 to regulate the amount offresh air/ recirculatedair cominginto the cab.
If lever 2 is pushed forward, the fan recirculates the air in the cab.
Ventilation via the air conditioner
To ventilate the cab via the evaporator in the roof of the cab.
Turn the air conditioner off via button S2

Turn the blower fans on.
SelectthedesiredairflowviatherotaryswitchS1andtheventsoftheevaporator.