10 minute read
CHAPTER 12 STORAGE
The following items are recommended for off-season storage of the Baler:
1.Remove all crop material and debris from behind the Sprockets, Sheaves, ends of the Rollers, Pickup . . . etc.
2.Grease all Fittings and make sure the Telescoping PTO Drive is completely greased. Repack the Wheel Bearings. Also, apply a light coat of grease to the Twine Knife.
3.Release tension on the Belts by locking out the Belt Shuttle.
4.Release tension from the V-belt which drives the Pickup.
5.Hydraulic Cylinder should be fully retracted and exposed Cylinder Rods should be coated with grease.
6.Apply motor oil to all Roller Chains, Telescoping Drive Shields and Guard Door Hinges.
7.Store the unit inside a shed, if possible, or cover the top half of the unit to protect the Belts, if stored outside.
8.Reorder and replace any required parts so that the Baler will be ready to operate at the start of the next baling season.
9.Cover and protect all exposed electrical connectors from dirt and corrosion.
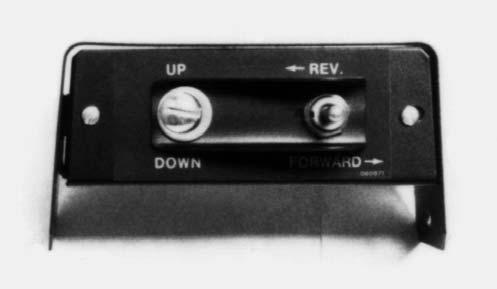
10.Store Control Boxes in a protected dry area out of the weather.
NOTE: Before starting up next season, go over the Checklists, chapter 3 in the front of this manual.
Protection Of Unpainted Surfaces
Apply a rust preventative oil or grease to the following unpainted surfaces:
All Roller Chains and Sprockets
The Front PTO Drive Yoke and PTO Shaft Inside Side Sheets where paint is worn off
Chapter 13 Troubleshooting
NOTE: This Troubleshooting guide presents problems, causes and suggested remedies beyond the extent of loose, worn or missing parts and it was developed with the understanding that the machine is in otherwise good operating condition. Refer to the index at the back of this manual for Chapter and Topic page references. BE SURE to exercise the MANDATORY SAFETY SHUTDOWN PROCEDURE (page 10), BEFORE making any adjustments or repairs.
Bale Appearance
Problem Cause Remedy
Bale density is greater in the center than on the ends (bale is barrel-shaped).
Improper placement of material along edge of bale.
Adjustable Relief Valve pressure is set too low.
Bale Density
Rerake material into a proper width windrow or drive Baler in a weaving fashion.
Increase Relief Valve pressure.
Low Bale Density. Adjustable Relief Valve pressure is set too low. Increase Relief Valve pressure.
Low Reservoir pressure. Increase air pressure to between 140 to 150 PSI (980 to 1050 kPa).
Trip Spacer on Trip Arm is not engaging the Valve Trip Mechanism. Adjust so that they are in line.
Poppet in adjustable Relief Valve not seating properly or, 3/8″ diameter Poppet is grooved.
Air in the hydraulic lines or fluid level too low in Reservoir.
BALE FILLING & BELTS
Bale fails to rotate or rotates sporadically.
Faulty Scraper Roller Overrunning Clutch Sprocket assembly.
Remove, inspect and clean Relief Valve Cartridge per instructions in Service chapter. Repair with part #094193 Seal Kit.
Re-prime system. Refill with correct oil.
Lubricate Clutch. Check with wrench to see if clutch is free and overrunning in a clockwise direction.
Material has too high of a moisture content. Stop baling and wait for material to dry out.
Pressure Relief setting too low. Increase Relief pressure setting.
Low pressure in Reservoir. Increase AIR to between 140 to 150 PSI (980 to 1050 kPa).
BALE FILLING & BELTS (cont.)
Problem Cause Remedy
Belts getting under Bale Starter Fingers when closing Gate.
Bale Starter sticking in Up Position.
Lubricate all of the pivots on the Bale Starter assembly. Leave PTO running while closing Gate.
Low Reservoir pressure. Increase pressure to between 140 to 150 PSI (980 to 1050 kPa). Extremely cold conditions. When ejecting bale, open Gate with PTO off, wait until Shuttle Stops, engage PTO and close and latch Gate.
TDC oil too thick for cold conditions. Use recommended oil for TDC system; see Lubrication chapter.
Belt Lacing Hooks tearing out frequently.
Bale improperly formed. Correctly form next bale; see “Baling” topic in Operation chapter.
Lacing Pin worn. Replace the Lacing Pin.
Belt improperly laced. Correctly lace Belt.
Belt NOT tracking properly. Correct Belt tracking; see Adjustments chapter.
Build-up on Scraper or Rollers. Remove build-up.
Conditions too wet. Stop baling and wait for material to dry.
Hooks improperly installed. Correct Hooks and clinch them over.
Adjustable Relief Valve pressure too high for crop conditions. Reduce Relief Valve pressure.
Belts are making squealing noise. Baler is being run empty for too long a period of time. Run Baler empty for a shorter time.
Gate End Roller improperly adjusted. Readjust End Roller; see Adjustments chapter.
Shuttle returning too slow. Increase Reservoir pressure to between 140 to 150 PSI (980 to 1050 kPa).
Belts rubbing together in rear. Reduce bale diameter.
Belts traveling to the side (excessively).
Lacing is NOT square to Belt edge. Properly square edge and relace Belt.
Belt Shuttle NOT square. Readjust Belt Shuttle; see Adjustments chapter.
Belt length variation greater than 2-1/2″ (64 mm).
Relace or replace Belts that are too short.
Belt Tracking Roller improperly adjusted. Readjust Belt Tracking Roller; see Adjustments chapter.
BALE FILLING & BELTS (cont.)
Problem Cause Remedy
Gate opens prematurely while bale is still being formed.
Gate Cylinders are NOT fully retracted to activate Latch.
Fully retract Cylinders. If NOT possible, check tractor and Baler circuits.
Gate Latch improperly adjusted. Readjust Latch; see Adjustments chapter.
Improper use of tractor hydraulics or closing the Gate with the hydraulics in the float position.
When closing the Gate, tractor hydraulics should go to the Relief Pressure to insure that Gate is latched.
Tractor has faulty hydraulics. Refer to tractor manual for repair. Tractor has low GPM output. Close Gate as quickly as possible to force Hooks to engage Pins.
Excessive amount of material peeling off the bale resulting in large trash build-up.
Improper baling speed. Reduce the PTO speed and increase the ground travel speed.
Adjustable Relief Valve pressure is too high. Reduce Relief Valve pressure.
Material wrapping around Rollers. Moisture content too high. Stop baling and wait for material to dry.
Adjustable Relief Valve pressure is high. Reduce Relief Valve pressure.
Scraper improperly adjusted. Readjust Scraper; see Adjustments chapter.
Excessive PTO speed causing material to peel off the bale. Reduce the PTO speed.
Crop Related Problems
Problem Cause Remedy
Difficulty encountered in baling corn stalks, cane, etc.
Improper baling speed. Reduce the PTO speed and increase the ground travel speed.
Improper material preparation. Rake windrow into a full 45″ (1140 mm) (1475) or 61″ (1550 mm) (1875) wide row.
Improper clearance between Packing Roller and Lower Roller. Readjust clearance; see Adjustments chapter.
Higher Belt Tension is applied too soon.
Lower position of the Trip Spacer.
Material will NOT feed under Packing Roller. Adjust Wheel Spindle positions to raise Baler so that Pickup can be carried lower. Install Packing Roller Lagging Kit and/or remove right hand and left hand Crop Deflectors.
CROP RELATED PROBLEMS (cont.)
Problem Cause Remedy
Difficulty getting bale to grow in light windrow.
Material is deteriorating on bale ends. Too much time spent forming bale.
Rake light windrows together.
Gate End Roller to 16″ Lower Roller clearance too great. Reduce clearance; see Adjustments chapter.
Material kicking ahead of Pickup. Improper baling speed. Reduce the PTO speed and increase ground travel speed.
Improper material preparation. Increase or decrease the windrow size, as necessary.
Material wraps on Packing Roller. Bale Starter does NOT drop down. Lubricate all of the pivots on the Bale Starter assembly. Leave PTO running while closing Gate.
Material has too high a moisture content. Stop baling and wait for material to dry.
Feeding Into Baler
Pickup can NOT be adjusted high enough or low enough.
Axle height improperly set. Readjust Axle height; see Adjustments chapter.
Tractor drawbar height does NOT meet specifications. Readjust the drawbar height in accordance with specified dimensions listed in the Preparing for Field Operation chapter of this manual.
Material NOT feeding between Packing Roller and 8″ Lower Roller.
Packing Roller too slippery. Install Packing Roller Lagging Kit.
Windguard set too high. Reduce Windguard’s upward travel.
Improper Packing Roller to Lower Roller clearance. Readjust clearance; see Adjustments chapter.
If occurring while starting a bale. Feed crop evenly until bale has started to rotate.
Pickup is being carried too high for heavy windrows. Adjust Wheel Spindle positions to raise Baler so that Pickup can be carried lower.
Material passes through the Baler. Gate NOT closed and latched. Close and latch Gate.
Gate End Roller to 16″ Lower Roller clearance too great.
Readjust clearance; see Adjustments chapter.
Miscellaneous Problems
Problem Cause Remedy
Belts return too slow or fail to return. Reservoir pressure too low. Increase pressure to 140-150 PSI (980-1050 kPa).
Faulty Check Valve on Density Cylinders. Replace or repair faulty Check Valve.
Oil level is too low in Reservoir. Re-prime system.
Defective or contaminated Relief Valve. Remove, inspect and clean relief Valve per instructions in Service chapter.
Operating in extremely cold conditions. Fill Reservoir with recommended hydraulic oil (see Lubrication chapter) and set Reservoir pressure to 140-150 PSI (980-1050 kPa).
Drive Chain heating. Lack of lubrication. Install Accessory Chain Oiler. Refer to Lubrication chapter.
Poor Chain alignment. Realign Sprockets. Relief Valve pressure is too high for crop conditions. Decrease Relief Valve pressure.
Material has too high a moisture content. Stop baling and wait for material to dry.
Pickup will NOT go into “Transport” position.
Mechanism blocked by debris. Remove debris from on top of either the Pickup Header or Pivot Links. “Transport” position improperly adjusted. Correctly adjust Pickup for transport.
Picking Up Material
Pickup kicks up corn stalks or other lightweight materials.
Improper baling speed. Reduce the PTO speed and increase ground travel speed.
Improper material preparation. Increase the windrow size by combining windrows.
Pickup is NOT completely cleaning material off the field.
Improper baling speed. Increase the PTO speed and reduce ground travel speed. Broken or missing Tines. Replace broken or missing Tines. Pickup set too high off the ground. Readjust Pickup to lower the setting or lower the Baler Axle.
Windrow’s too wide or the material (such as straw) is falling to the sides of the Pickup.
Obtain and install Crowder Wheels.
PICKING UP MATERIAL (cont.)
Problem Cause Remedy
Pickup NOT running or running at below full speed. Pickup set too low to the ground. Readjust Pickup to raise the setting or raise the Baler Axle.
Improper Drive Belt tension. Readjust the tension; see Adjustments chapter.
Pickup mechanism jammed. Clean out blockage.
Overfill Clutch mechanism activated. Wrap and eject bale and make smaller bale the next time.
Overfill Clutch improperly adjusted. Readjust Clutch mechanism and linkage.
Starting The Bale
Difficulty is encountered in starting the bale to rotate.
RPM too high. Reduce the PTO RPM to 300 on 540 RPM Balers and 700 RPM on 1000 RPM Balers.
Packing Roller too slippery. Install Packing Roller Lagging Kit.
Material is NOT being fed in uniformly. Feed crop evenly until bale has started to rotate.
Material is extremely dry and windrows are too small, making it impossible for a sufficient amount of material to get into the Bale Chamber quick enough to start the core rolling.
Increase the windrow size by combining windrows. Use Shuttle Stops to provide slackened Belts during core formation.
Material wraps on Packing Roller. Bale Starter does NOT drop down. Lubricate all of the pivots on the Bale Starter assembly. Leave PTO running while closing Gate.
Material has too high a moisture content. Stop baling and wait for material to dry.
Baling below 50% moisture when making balage.
WRAPPING & EJECTING BALE
Bale at moisture levels between 50% and 70%.
Twine falls off left edge of bale. Twine Tube is being extended too far to the left. Adjust Twine Arm Stop.
Twine improperly wrapped around the bale.
When starting to wrap the bale with Twine, place two wraps of Twine at the center of the bale to secure the Twine on the bale.
Bale improperly formed. Feed more material on the edges of the bale on the next bale formed; see “Baling” topic in Operation chapter.
WRAPPING & EJECTING BALE (cont.)
Twine will NOT start into the bale. Twine not routed properly. Reroute.
Insufficient amount of material is being fed in with twine. Feed in more material.
Twine tails not long enough Adjust Clamp Jaw Rod.
Twine itself is excessively kinky; poorly made or wet. Change the type of twine.
Twine prematurely slipping out of Clamp Jaws.
Deburr the edges of the Clamp Jaws, and/or increase the Spring tension on the Clamp Jaws.
Twine will not be placed on the left side of the Baler.
Obstruction in path of Twine Arm. Remove obstruction.
Feeding too much crop when starting twine. Reduce amount of crop.
Twine will NOT cut. Clamp Jaws will NOT latch open properly.
Twine Arm is NOT being extended far enough to the left side and/or Spring Slide Rod adjustment is too long.
Clamp Jaw Spring tension is too tight. Readjust tension; see Adjustments chapter.
Twine Knife NOT sharp. Sharpen or replace Knife.
Gate will NOT open. Gate Latch improperly adjusted. Readjust Gate Latch; see Adjustments chapter.
Improper hydraulics connections. Check, repair or replace connections.
Gate Cylinder seals bad. Replace seals.
Tractor has faulty hydraulics. Refer to tractor manual for repair.
Bale will NOT fall out of Baler when baling cornstalks or haylage.
Twine breaks when bale hits ground.
Bale Ramps stop bale from falling. Remove Bale Ramps.
Insufficient number of wraps for size of bale and type of Twine. Increase number of wraps or reduce the size of the next bale.
Twine is being cut between 8″ roller and Packing Roller.
Maintain clearance of 1/4″ (6 mm) above rods.
Automatic Twine Wrap System Troubleshooting
NOTE: This Troubleshooting guide presents problems, causes and suggested remedies beyond the extent of loose, worn or missing parts and it was developed with the understanding that the machine is in otherwise good operating condition. BE SURE to exercise the MANDATORY SAFETY SHUTDOWN PROCEDURE (see page 10) BEFORE making any adjustments or repairs.
Problem Cause Remedy
System will not power up at all. Poor connection with Wiring Harness at tractor power source. Check for poor connections or broken wires in Power Harness. Repair any bare or broken wires in Harness.
Blown fuse in Baler power Harness.
The word “SET” appears in the Control Box Digital Display while operating in the AUTO mode.
Twine Arm is not in “park” (home) position.
Replace with 20 amp automotive type fuse.
1.Switch the Mode Switch to MANUAL.
2.Using the Actuator Switch, RETRACT the Twine Arm to the “park” position.
3.Switch the Mode Switch back to AUTO.
Twine Arm Position (Channel 5) setting is too high.
Check Channel 5 on the Display. If the reading is above 5.0 for a model 1475 Baler:
1.Using the DECREASE Switch, change the setting to 5.0 or lower.
2.Switch the Mode Switch to MANUAL.
3.Using the EXTEND/RETRACT Switch, RETRACT the Twine Arm to the “park” position.
4.Switch the Mode Switch back to AUTO.
If the reading is below 5.5, do Steps 2 through 4, only. If the problem continues, see your dealer.
Insufficient power to the Control Box. The system requires a minimum of 11 volts D.C. and 20 amps to operate. Check all power connections and power source.
Twine Arm is not in “park” (home) position.
1.Switch the Mode Switch to MANUAL
2.Using the EXTEND/RETRACT Key, RETRACT the Twine Arm to the “park” position.
3.Switch the Mode Switch back to AUTO.
End Wrap Pause Switch is not adjusted properly. Refer to the End Wrap Pause Switch Adjustment topic in the Operator’s Manual.

