7 minute read
CHAPTER 1 INTRODUCTION

Your decision to purchase this piece of GEHL equipment was a good one. We are sure that your decision was strongly considered and that you are looking forward to many seasons of reliable performance from this machine.
We, as a Company, have invested a great deal of time and effort in developing our lines of equipment. The equipment you have purchased is built with a great deal of pride and designed to give you long life, efficient operation, durability and dependability.
This manual was developed specifically for the machine you have purchased. The information within is for your assistance in preparing, adjusting, maintaining and servicing your machine. More importantly, this manual provides an operating plan for safe and proper use of your machine. Major points of safe operation are detailed in the SAFETY chapter of this manual. Refer to the Table of Contents for an outline (by chapters) of this manual. Use the Index, located at the back of this manual, for specific chapter and topic/page number references.
This GEHL equipment is provided with a Pocket on the inside of the Right Twinebox for storing the Operator’s Manual. After using it, please return the Manual to the Pocket and keep it with the unit at all times! Furthermore, we recommend that if this machine is re-sold, this Manual accompany the unit.
Modern machinery has become more sophisticated and, with that in mind, Gehl Company asks that you read and understand the contents of this manual COMPLETELY and become familiar with your new machine, BEFORE attempting to operate it.
The Gehl dealer organization stands ready to provide you with any assistance you may require and carries genuine Gehl service parts. All parts should be obtained from or ordered through your Gehl Dealer. Give complete information about the part and include the model and serial numbers of your machine. Record the serial number in the space provided on the pictorial, as a handy record for quick reference.
The model number and serial number for the Baler is on a decal located under the Top Channel, near the Center Column of the Right Frame Assembly. If equipped with the Quick Wrap, the Quick Wrap model and serial number is on a decal located on the Left Panel Assembly behind the Left Shield Door. “Right’’ and “Left’’ are determined from a position standing at the rear of the unit facing the direction of travel. From this position, the Baler Drive Sprocket on the Transmission Output Shaft is on the left side.
Gehl Company reserves the right to make changes or improvements in the design or construction of any part without incurring the obligation to install such changes on any unit previously delivered.
Standard hardware torques appear in a chart at the end of the manual.
Throughout this manual, information is provided which is set in italic type and introduced by the word NOTE or IMPORTANT. BE SURE to read carefully and comply with the message or directive given. Following this information will improve your operating or maintenance efficiency, help you avoid costly breakdowns or unnecessary damage and extend your machine’s life.
The Gehl Company, in cooperation with the American Society of Agricultural Engineers and the Society of Automotive Engineers, has adopted this SAFETY ALERT SYMBOL to pinpoint characteristics which, if not properly followed, can create a safety hazard. When you see this symbol in this manual or on the unit itself, you are reminded to BE ALERT! Your personal safety is involved.
Chapter 2 Specifications
All Dimensions are in Inches (Millimeters) Unless Otherwise Noted
Baler Specifications
Model & DescriptionRB1475 and RB1875 . . . . . . . . Round Balers
PowerFrom and Hydraulic Circuit of 540 RPM tractor with Minimum power of 50 hp
Constant Velocity Drive Line with Shear Bolt Overload Protection and Overrunning Clutch
Two 3-Ball Twineboxes (6 Ball Total Capacity)
Dual Twine Wrapping Mechanism with Electric Actuator Control
Visual Bale Size Indicator (Manual Control Models Only)
Self-contained Hydraulic Total Density Control System
Bale Discharge Ramps with Adjustable Incline
Textured (One side) Belts
Adjustable Shuttle Stops
Crop Hold-down for Pickup
Fenders
Bale Counter (Manual Control Models Only)
Transport Lights
Optional Features & Accessories
(Customer Selected):
Automatic Bale Control System
Automatic Twine Wrap System
Manual Twine Wrap System
Quick Wrap Bale Wrap System
Crowder Wheel Kit
Packing Roller Lagging Kit
Chain Oiler Kit
Pickup Hydraulic Lift Kit
1000 RPM Conversion Kit
Safety Chain
Service Accessories
Belt Dutchman
Shear Bolts (8-pack)
Belt Re-lacing Kit
Standard Features (Common to both Balers):
Four-Bar Closed-Reel Pickup with Crowder Shields
Infinitely Adjustable Pickup Height
Hydraulically Operated Rear Gate
Hydraulic Valve Gate Cylinder Lock
Belt Lacing Kit
Net Stripper Kit
Various Connector Repair Kits
Twine Sensor Jumper Kit
2 Magnet Twine Wheels
Automatic Bale Control Specifications
1 – Liquid Crystal Display (LED Back–Lit)
Automatic Twine Wrap Control Specifications
Chapter 3 Checklists
PRE-DELIVERY
After the Baler has been completely set up, the following inspections MUST be made before delivering it to the Customer. Check off each item after prescribed action is taken.
Check that:
NO parts of the unit have been damaged in shipment. Check for such things as dents and loose or missing parts; correct or replace components as required.
All Grease Fittings have been properly lubricated and the Gearbox is filled to the proper level; see Lubrication chapter of this manual.
All Guards, Shields and Decals are in place and securely attached.
All fasteners and Wheel Lug Nuts are properly secured.
All Adjustments are made to comply with settings given in the Adjustments chapter of this manual.
Model and Serial Numbers for the Baler and Quick Wrap (if so equipped) are recorded in the spaces provided on this page and page 2.
The following items are furnished attached to the Baler or in the Baler Twinebox:
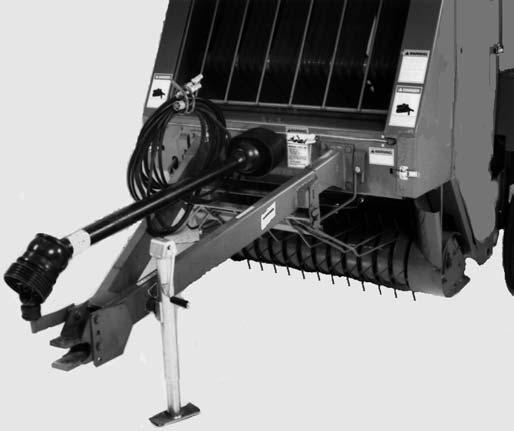
Bale Ramps & Mounting Hardware; Reversing Wrench; Hitchjack,; (4) Drive Line Shear Bolts; Hitch Pin and Washers, Nut and Hairpin Cotterpin; 72″ Belt Lacing Cable; Operator’s Manual; Baler Control Box & Cable; Front PTO half; Hose & Cable Support.
Hook the Baler onto the appropriate RPM tractor and test run the unit while checking that proper operation is exhibited by all components.
Check that:
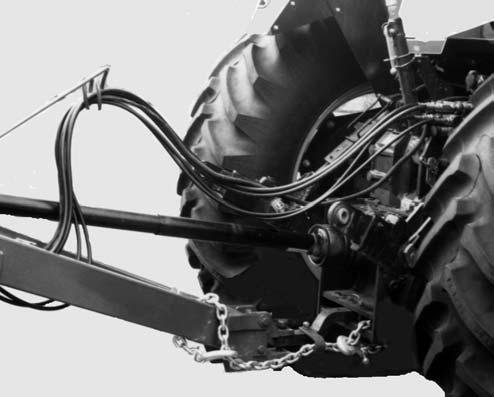
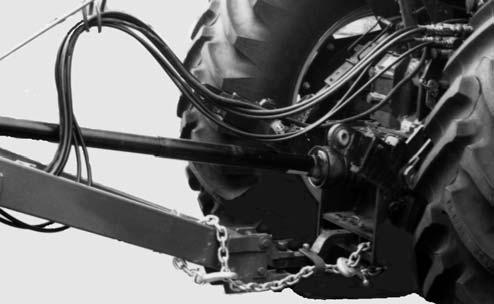
The Telescoping PTO Drive turns freely inside the Drive Shield Tubes.
Hydraulic Hoses and all connections do NOT leak under pressure.
Tailgate opens and closes without binding.
Drives, Rollers and Belts are rotating smoothly and operating properly and Belts are tracking properly.
TDC Reservoir pressure is at least 150 PSI (1050 kPa) and Reservoir oil is at proper fill level.
I acknowledge that the pre-delivery procedures were performed on this unit as outlined.
Dealership’s Name
Dealer Representative’s Name
Date Checklist Filled out
Baler Model NumberSerial Number
Quick Wrap Model NumberSerial Number
Delivery
The following Checklist is an important reminder of valuable information that MUST be passed on to the Customer at the time the unit is delivered. Check off each item as you explain it to the Customer.
Give the Customer his Operator’s Manual. Instruct him to be sure to read and completely understand its contents BEFORE operating the unit.
Direct the Customer on how to use the Index of this manual as a quick page number locating guide.
Explain and review with the Customer the Safety and Controls & Safety Equipment chapters of this manual. Explain that regular lubrication is required for continued proper operation and long life. Review with him the Lubrication chapter of this manual.
Explain and review the Service chapter of this manual with the customer.
Explain and review with the customer the bale tying and/ or wrapping system that the Baler is equipped with.
Explain the function and adjustment of the Total Density Control (TDC) system.
Demonstrate the proper use of the spring-loaded PTO Locking Device, Shuttle Locks, Rear Gate Cylinder Locks, Reversing Wrench and Hitchjack.
Explain and review both the Operation and Preparing for Field Operation chapters of this manual.
Completely fill out the Owner’s Registration, including Customer’s signature, and return it to the Gehl Company.
I acknowledge that the above points were reviewed with me at the time of delivery.
Customer’s Signature
Date Delivered (Dealer’s File Copy)
Chapter 3 Checklists
PRE-DELIVERY
After the Baler has been completely set up, the following inspections MUST be made before delivering it to the Customer. Check off each item after prescribed action is taken.
Check that:
NO parts of the unit have been damaged in shipment. Check for such things as dents and loose or missing parts; correct or replace components as required.
All Grease Fittings have been properly lubricated and the Gearbox is filled to the proper level; see Lubrication chapter of this manual.
All Guards, Shields and Decals are in place and securely attached.
All fasteners and Wheel Lug Nuts are properly secured.
All Adjustments are made to comply with settings given in the Adjustments chapter of this manual.
Model and Serial Numbers for the Baler and Quick Wrap (if so equipped) are recorded in the spaces provided on this page and page 2.
The following items are furnished attached to the Baler or in the Baler Twinebox:
Bale Ramps & Mounting Hardware; Reversing Wrench; Hitchjack,; (4) Drive Line Shear Bolts; Hitch Pin and Washers, Nut and Hairpin Cotterpin; 72″ Belt Lacing Cable; Operator’s Manual; Baler Control Box & Cable; Front PTO half; Hose & Cable Support.
Hook the Baler onto the appropriate RPM tractor and test run the unit while checking that proper operation is exhibited by all components.
Check that:
The Telescoping PTO Drive turns freely inside the Drive Shield Tubes.
Hydraulic Hoses and all connections do NOT leak under pressure.
Tailgate opens and closes without binding.
Drives, Rollers and Belts are rotating smoothly and operating properly and Belts are tracking properly.
TDC Reservoir pressure is at least 150 PSI (1050 kPa) and Reservoir oil is at proper fill level.
I acknowledge that the pre-delivery procedures were performed on this unit as outlined.
Dealership’s Name
Dealer Representative’s Name
Date Checklist Filled out
Baler Model NumberSerial Number
Quick Wrap Model NumberSerial Number
Delivery
The following Checklist is an important reminder of valuable information that MUST be passed on to the Customer at the time the unit is delivered. Check off each item as you explain it to the Customer.
Give the Customer his Operator’s Manual. Instruct him to be sure to read and completely understand its contents BEFORE operating the unit.
Direct the Customer on how to use the Index of this manual as a quick page number locating guide.
Explain and review with Customer the Safety and Controls & Safety Equipment chapters of this manual.
Explain that regular lubrication is required for continued proper operation and long life. Review with him the Lubrication chapter of this manual.
Explain and review the Service chapter of this manual with the customer.
Explain and review with the customer the bale tying and/ or wrapping system that the Baler is equipped with. Explain the function and adjustment of the Total Density Control (TDC) system.
Demonstrate the proper use of the spring-loaded PTO Locking Device, Shuttle Locks, Rear Gate Cylinder Locks, Reversing Wrench and Hitchjack.
Explain and review both the Operation and Preparing for Field Operation chapters of this manual.
Completely fill out the Owner’s Registration, including Customer’s signature, and return it to the Gehl Company.
I acknowledge that the above points were reviewed with me at the time of delivery.
Customer’s Signature
Date Delivered
(Pages 7 & 8 Have Been Removed at Perforation)