3 minute read
“T2 + T3 TELESCOPES ASSEMBLY” REFIT

The “T3 Telescope refi t” operation should be done.
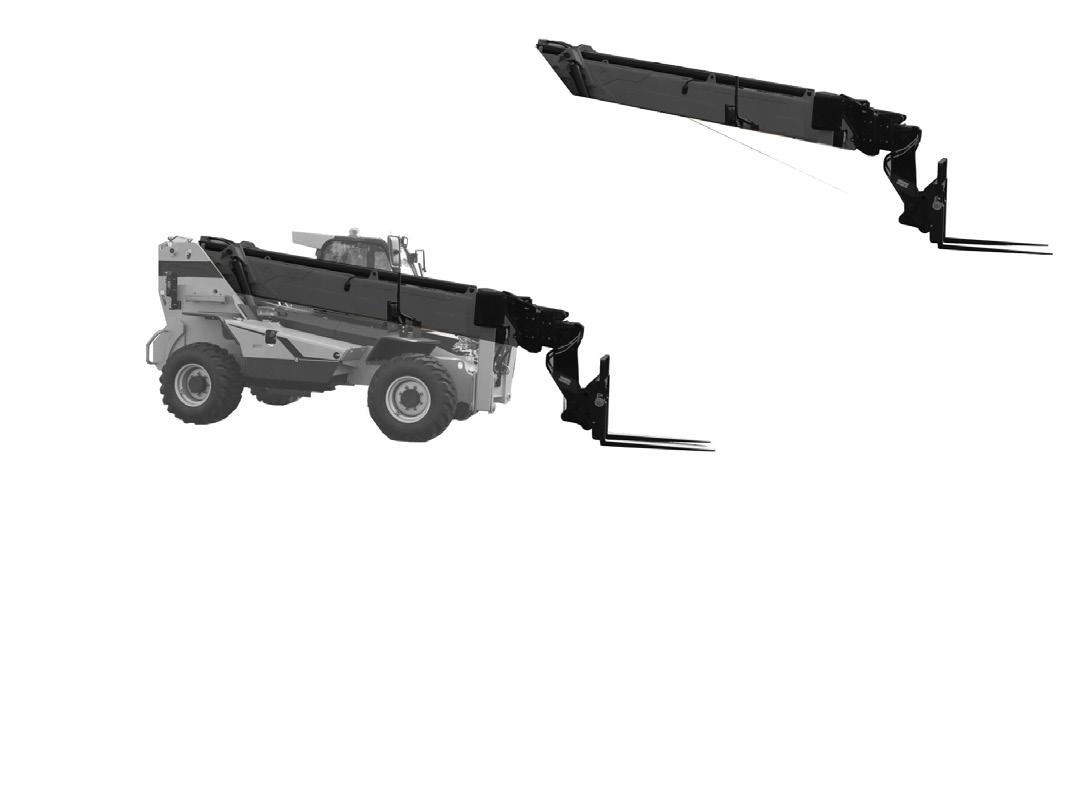
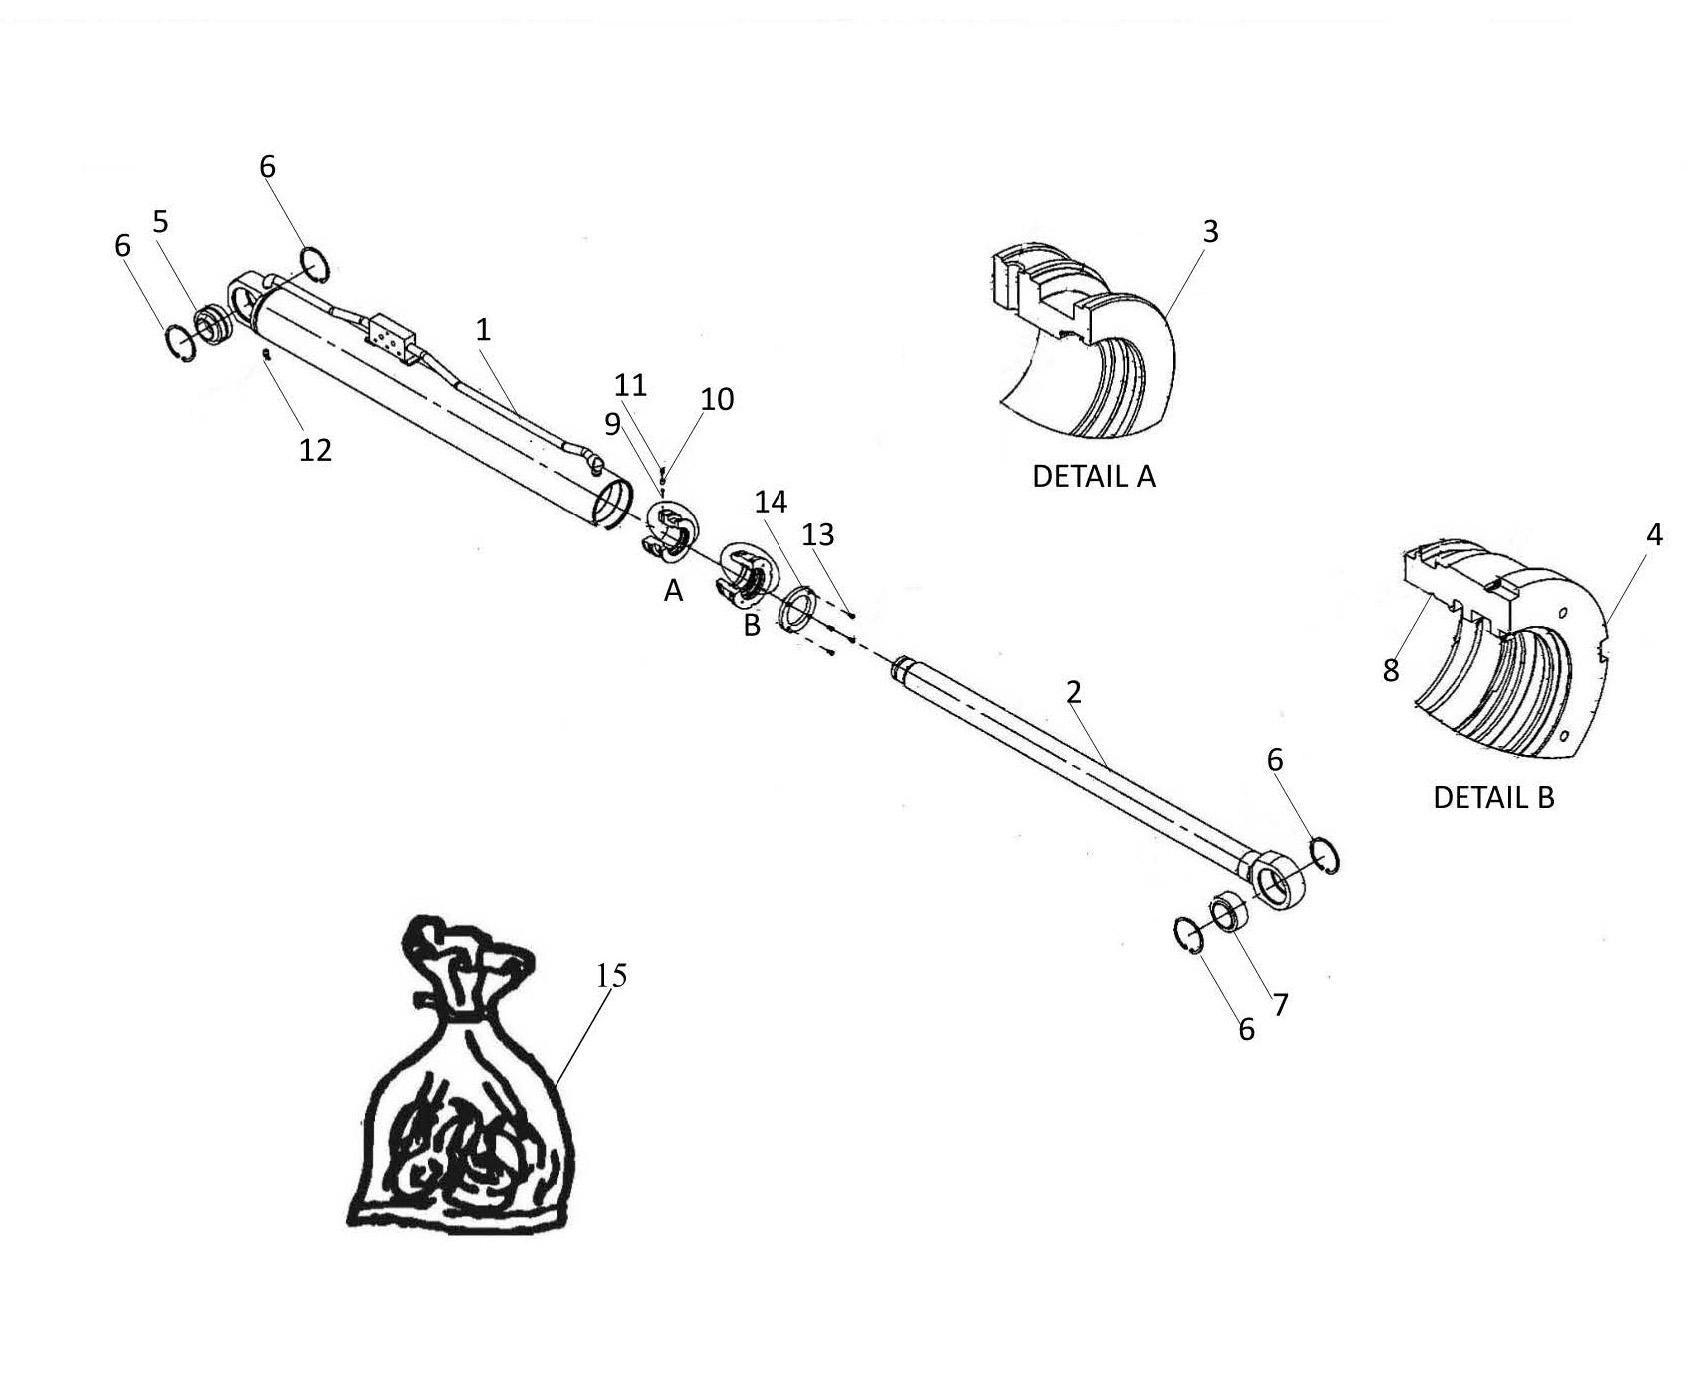
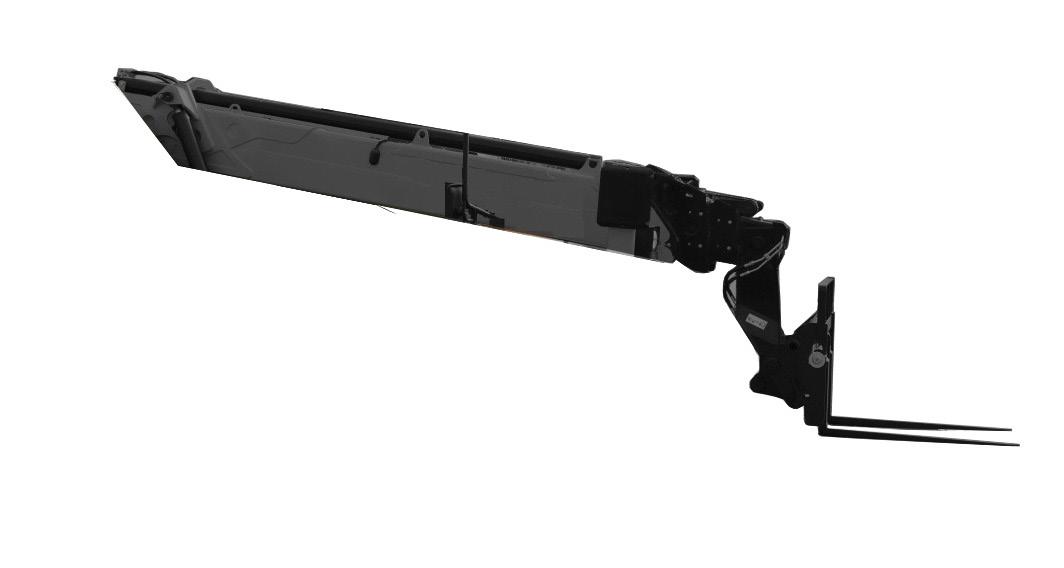
- Use sling + hoist ( Item1 ) to insert “ T2 + T3 telescopes ” assembly ( Item 2 ) into T1 telescope ( Item3 ).
- During this operation, check that the “ T3 retract chain ” goes in smoothly and is always intension.

- Put “ T2 extend chains ” in T2 centre to ensure that they do not slide on the sides.
- Position temporary chocks ( Item 4 ) between T1 telescope ( Item 3 ) and T2 telescope ( Item 5 ).
- This operation protects the right boom and prevents crushing of the “ T3 retraction chain ” ( Item6 ) when shifting sling ( Item1 ) to boom head.


- Reposition sling ( Item 1 ) to boom head then insert “ T2 + T3 telescopes ” assembly into T1 telescope ( Item 3 ).
Comment:
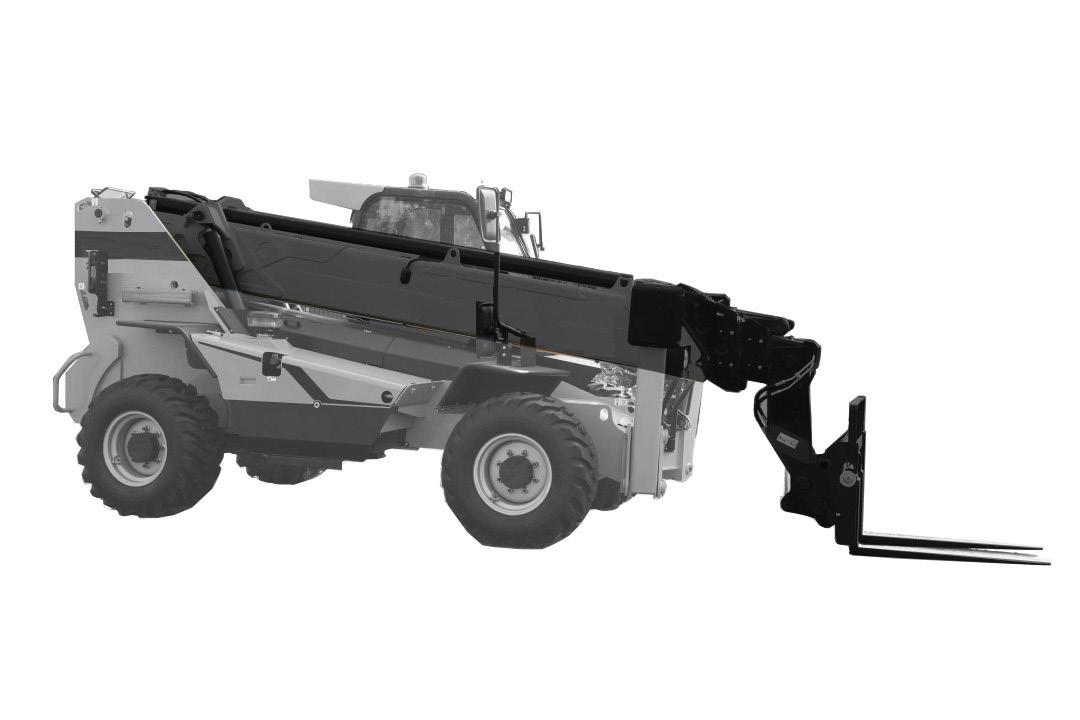
- Do not insert T2 + T3 assembly fully into T1. Leave about 30 cm clearance.
- Lift the T2 + T3 assembly and take out temporary chocks (Item 4).
-
- Tighten up their rods + position rings + nuts. Apply “ Loctite 243 normal thread lock ” to all screw/ insert and nut/screw interfaces only on boom inside.
Observe tightening torques and assembly recommendations.
C1 = 15 N.m ±15%
C2 = 92 N.m ±15%
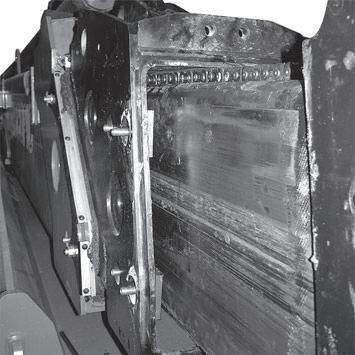
- Insert 2 pads ( Item12 ) + shims ( Item 13 ) into T1 telescope top ( Item 11 ).
- Use a presser foot tool to butt up T2 telescope head on T1 telescope right side.
- Measure “ J1 ” clearance between the two telescopes on left hand side. Divide this clearance figure by 2 to find the thickness of the shim to be inserted on each side of T1 telescope.
Shim thickness = J1/2
- Insert one shim on each side of T1 telescope.
Total clearance between 0 and 0,5 mm.
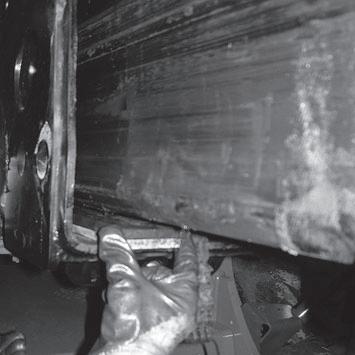
- Find the “ J2 ” clearance between shim ( Item 13 ) and T3 telescope lower side.
- Insert shims ( Item14 )to each pad to take up this clearance.
- Tighten up pad nuts ( Item 15 ) to recommended torque.


C1 = 15 N.m ±15%
C2 = 92 N.m ±15%
- Fix “ T3 retract chain ” ( Item 16 )to its tensioner ( Item17 ). Replace hinge pin and split pin ( Item18 ).

- Then fully insert “ T2 + T3 telescopes ” assembly into T1 telescope.
- Use a presser foot tool to butt T2 telescope foot against T1 telescope foot right side.
- Measure “J3 ” clearance between the two telescopes on left hand side. Divide this clearance figure by 2 to find the thickness of the shim to be inserted on each side of the T2 telescope. Shim thickness = J3/2
- Insert one shim ( Item 19 ) to each side of the T2 telescope.
- Find the “ J4 ” clearance between upper pad ( Item 20 ) and T2 telescope upper side.
- Insert a shim ( Item 21 ) to each pad ( Item 20 ) to take up this clearance.
- Tighten up their rods + position rings + nuts ( Item 22 ).
Apply “Loctite 243 normal thread lock” to all screw/ insert and nut/screw interfaces only on boom inside.
- Observe tightening torques and assembly recommendations.
- Insert “ T2 + T3 ” assembly completely into T1.
- Fix two “ T2 retract chain plates ” ( Item 23 ) to T2 telescope foot ( Item 24 ). To do that, do up 4 screws ( Item 25 ) to a 95 N•m. tightening torque.


- Apply “ Loctite 243 normal threadlock ” to fasteners. Put blade stub in place before tightening screws. Then tighten up blade fixing screws.
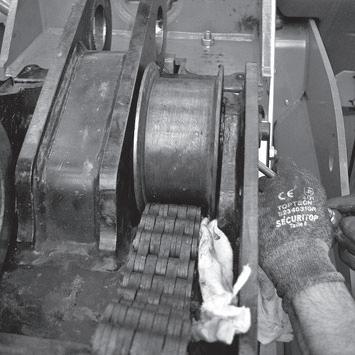
- Before repositioning two rollers ( Item 26 ) on the T1 telescope, place a temporary rag ( Item 27 ) between T2 telescope ( Item 28 ) and T1 telescope ( Item 29 ) to prevent any washer falling into the boom.
- Put roller (Item 26) + its washer (Item 30) in place.
- Insert “ roller pin ” ( Item 31 ). Take out rag and place it on the other side.
-
Carry out same operation for the second roller.
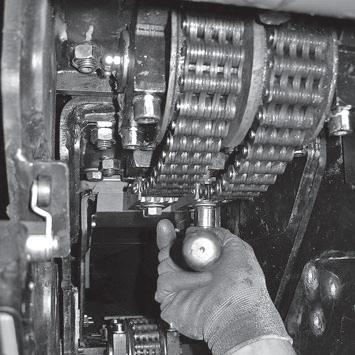
- After putting the second roller + its washer in place, use a mallet to fully insert “ roller pin ” ( Item 31 ).
- Remove the rag then screw and tighten the pin locking screw on T1 telescope ( Item 29 ).

Fix two “ T2 extend chain tensioners ” ( Item 35 ) with pins and split pins ( Item 36 ).

NOTE !
Pay attention to the direction of the washers assembly.
- Carry out “ T2 retract chains ” tension pre-setting in order to obtain dimension X1.
“ Chain tension pre-settings during reassembly ”
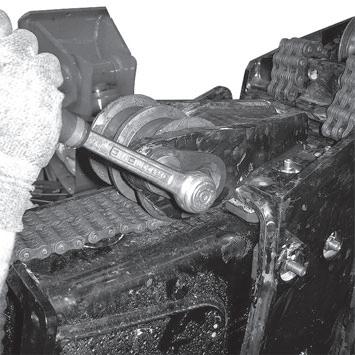
- Use sling + hoist ( Item41 ) to put cylinder ( Item42 ) in place on T1 telescope ( Item43 ).

Use a mallet to insert its hinge pin in T1 telescope ( Item 43 ) then put its circlips in place.
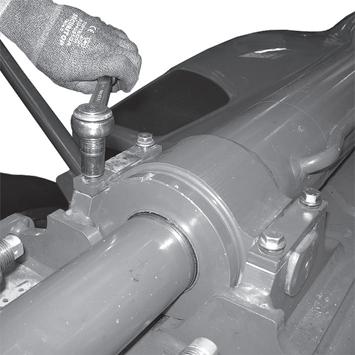
- Replace and tighten up plates ( Item 44 ) on each side of cylinder ( Item 42 ) by screwing in 4 screws ( Item45 ).
Pay attention to the stacking direction of the Belleville washers (Item 47).