3 minute read
“ T2 + T3 TELESCOPES ASSEMBLY ” REMOVAL

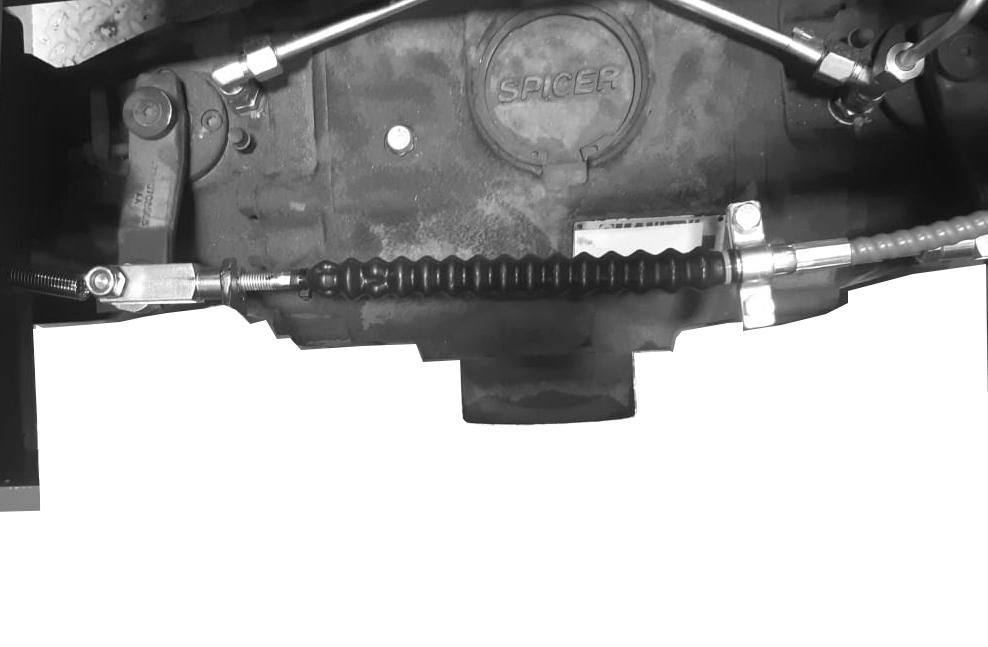
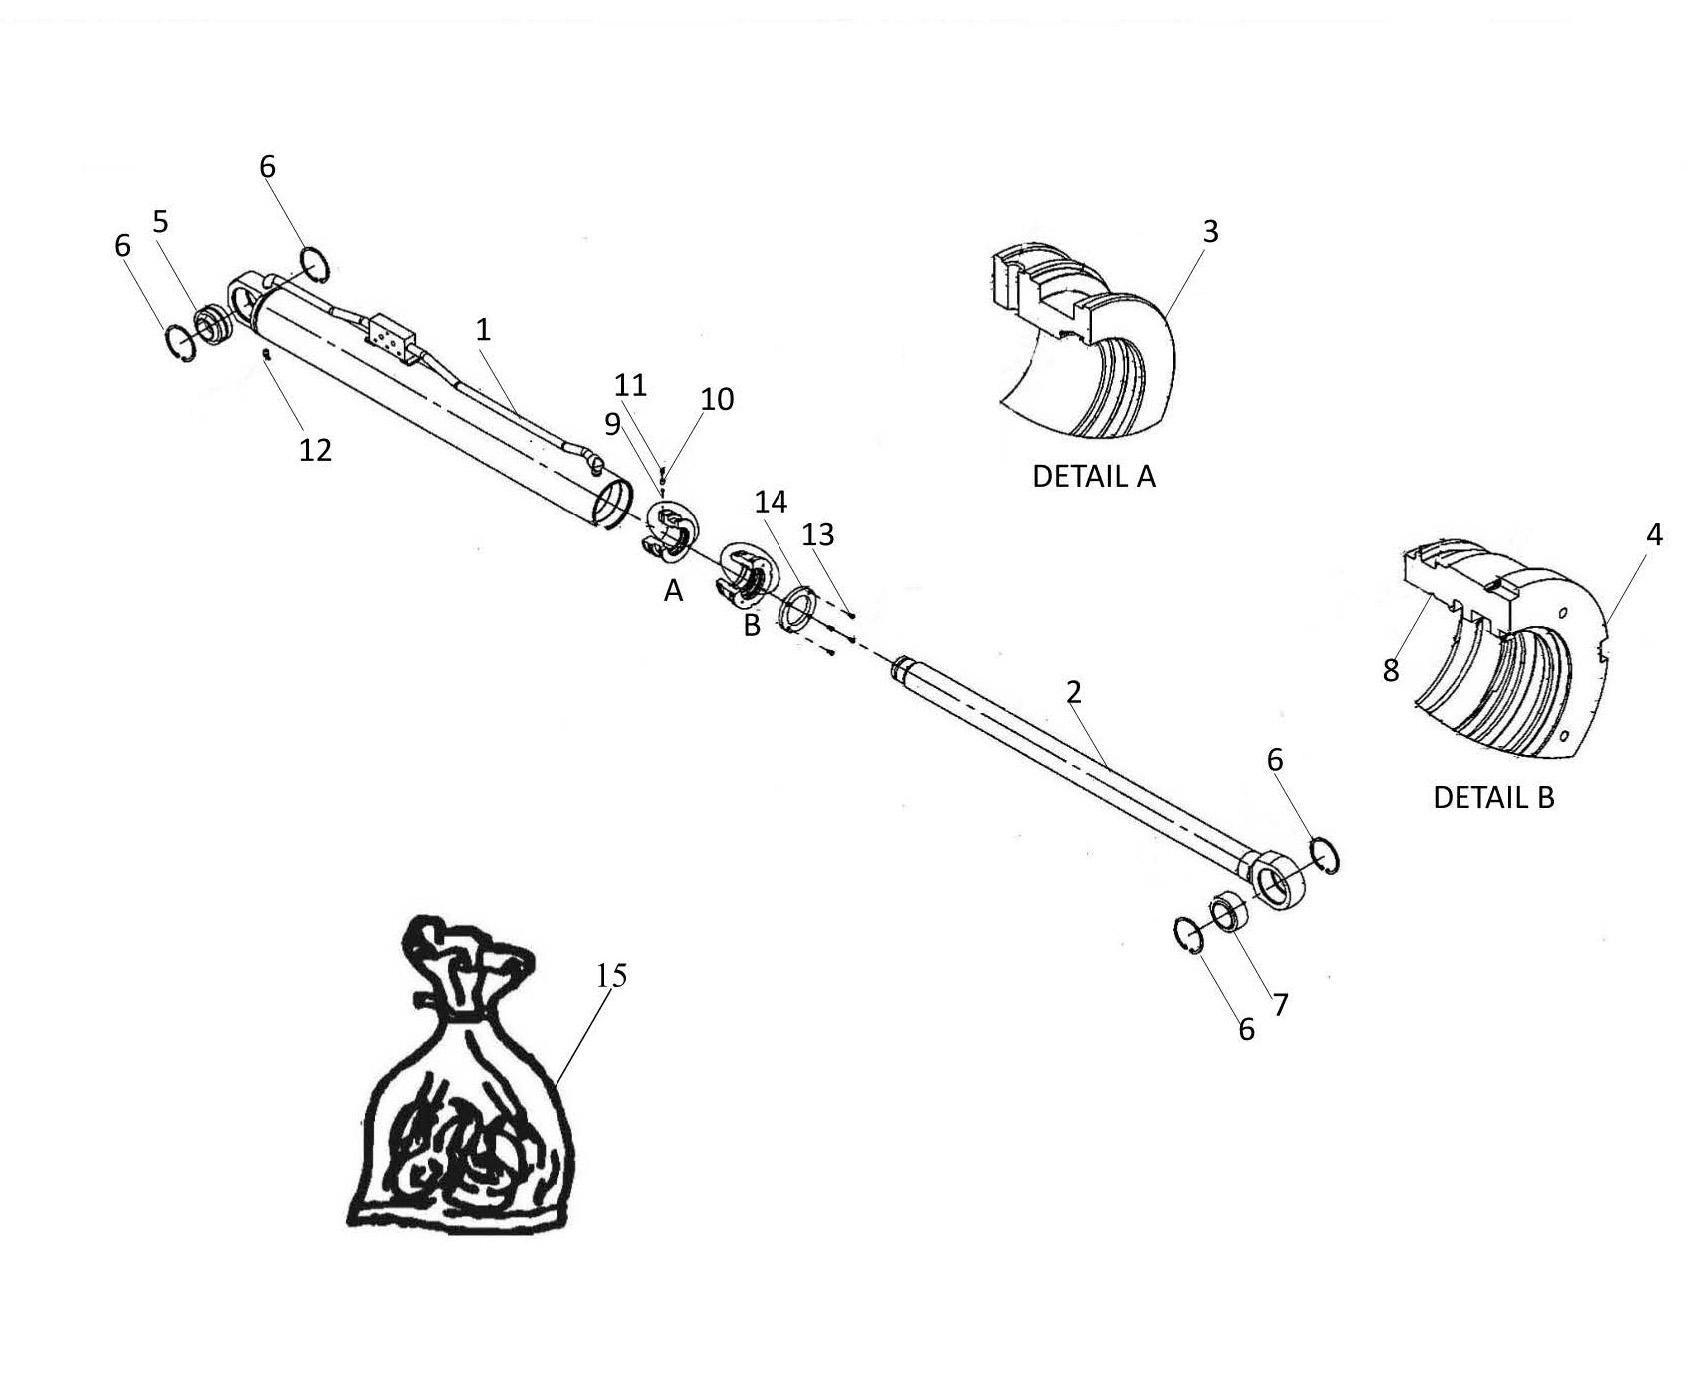
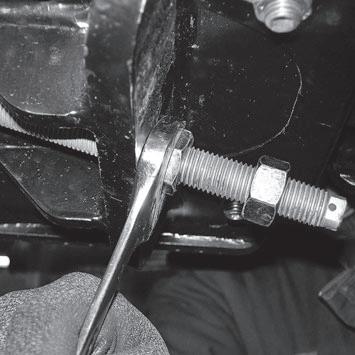
- Use 24 mm wrench to undo nuts and locknuts ( Items 1 & 2 ) on the “ T3 extend chain tensioners ” ( Item 3 ) attached to T1 telescope ( Item 4 ).
- Take out Belleville washers ( Item 5 ).
- Remove two T3 telescope chain tensioners ( Item 3 ).
- Use 36 mm wrench to undo nuts and locknuts ( Items 6 & 7 ) on the “ T2 extend chain tensioners ” ( Item 8 ) attached to boom foot ( Item 9 ).
- Take out Belleville washers ( Item 10 ).
- Remove two T2 telescope chain tensioners ( Item 8 ).

- Take out two “ T2 extend chain tensioners ” ( Item 8 ) by removing pins and axles ( Items 9 & 10 ).


-
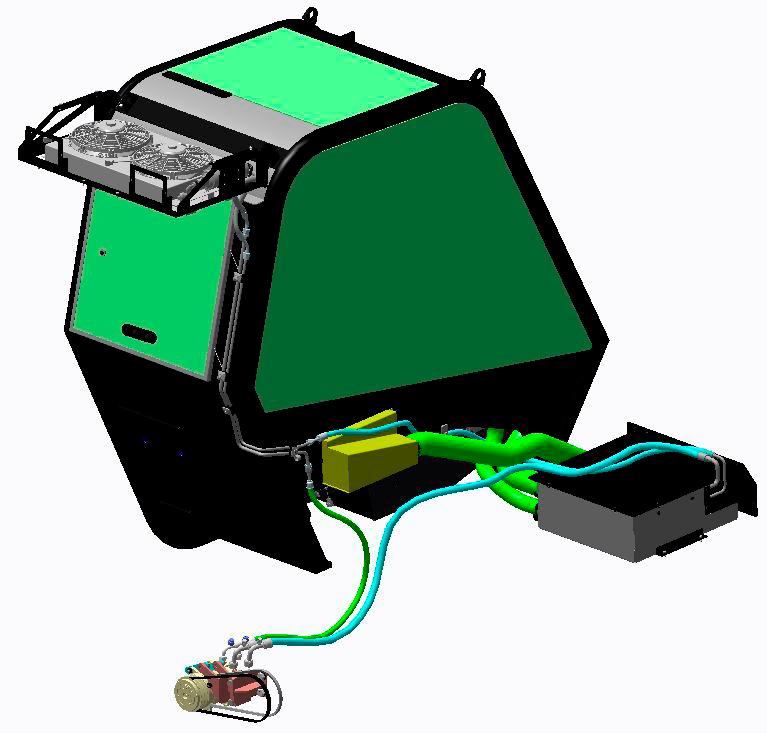
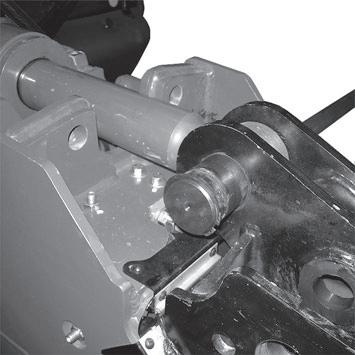
- Use sling and hoist ( Item 22 ) gently to lift cylinder ( Item 23 ) whilst pulling out cylinder rod ( Item 24 ).

- Use a tube and mallet ( Item 25 ) to dislodge cylinder rod.

- Raise cylinder sufficiently to gain access to four nuts ( Item 26 ).
- Put a wooden chock ( Item 27 ) between cylinder ( Item 23 ) and boom foot ( Item 28 ).
- Loosen four “ T2 chain tensioner ” ( Item 29 ) nuts ( Item 26 ) without taking them out.
Loosen four “T2 retract chain blade” (Item 31) screws (Item 30) fixed on rear of T2 telescope.
- Take off two “ T3 retract chain tensioner ” ( Item33 ) nuts ( Item32 ) on T1 telescope front.
- Take out left and upper pads ( Item 35 ) + shims ( Item 36 ) + screws and nuts ( Item37 ) from T2 telescope foot ( Item34 ).
This operation gives some clearance to facilitate T2 + T3 assembly extraction.
- Remove sealing blade ( Item 38 ) at bottom of boom foot ( Item 39 ).
- Remove sealing blade assembly ( Item 40 ) on T1 telescope ( Item 41 ).

-
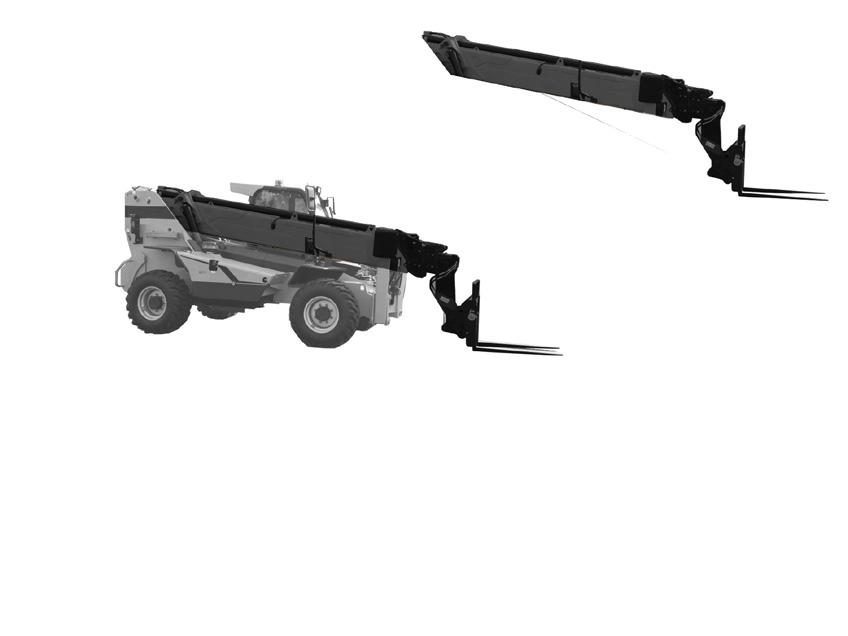
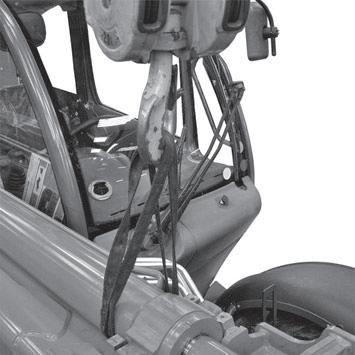
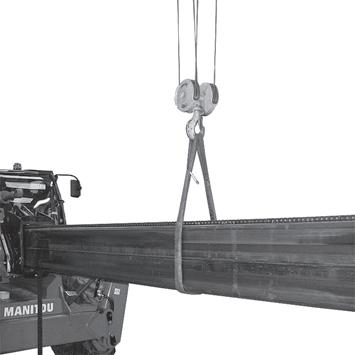
- Use sling and hoist ( Item 51 ) to pull out “ T2 + T3 telescopes ” assembly ( Item 52 ) whilst using cord ( Item 53 ) to pull on “T3 retraction chain ”.
Check that “ T3 retraction chain ” remains intension during T2 + T3 assembly extraction.
- Pull on the “ T2 + T3 telescopes ” assembly but do not pull it out completely. - Place container ( Item 54 ) to collect “ T3 retraction chain ” ( Item 55 ).
- Position temporary chocks (Item 56) between T1 telescope ( Item 57 ) and T2 telescope ( Item 58 ).
- This operation protects the right boom and prevents crushing of the “ T3 retraction chain ” when shifting sling to the T2 + T3 assembly centre of gravity.


- Reposition sling (Item 59) to “ T2 + T3 Telescopes ” assembly centre of gravity for balance during removal.
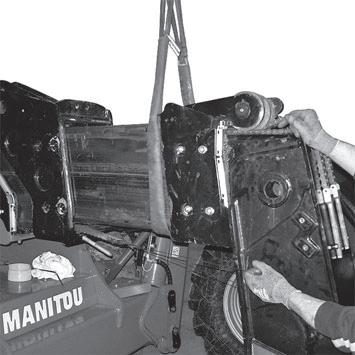
Take out temporary chocks.
- Completely remove “ T2 + T3 telescopes ” assembly and place it on two trestles.
“ T3 TELESCOPE ” REMOVAL
The “ Hydraulic kit removal ” and “ T2 + T3 Telescopes assembly removal ” operations should be carried out.
- Take out left and upper pads ( Item 5 ) + shims ( Item 6 ) + screws and nuts ( Item 7 ) from T3 telescope foot ( Item3 ).
- This operation gives some clearance to facilitate T3 telescope extraction.
Undo two “ pad support bracket ” ( Item 9 ) nuts ( Item 8 ).

- Remove support bracket.
- Loosen two “ T3 retract chain blade ” ( Item 11 ) nuts ( Item 10 ) at T3 telescope rear.
- Remove blade.

-


- Pull on T3 telescope ( Item 21) but do not pull it out completely.
- Place a wooden chock ( Item 22 ) under boom head.
- This operation stabilises the boom during the shifting of the sling to the T3 telescope centre of gravity.
- Reposition sling ( Item 20 ) to the T3 telescope centre of gravity for balance during removal.
- Fully remove T3 telescope and set it aside.

General Information
In order to better understand chain boom operation and reassembling procedure:

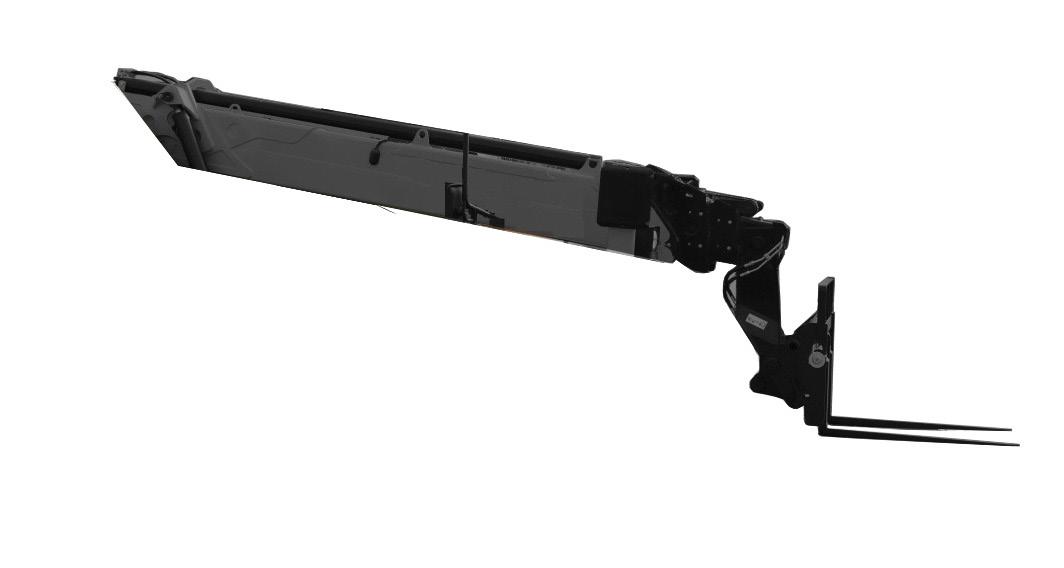
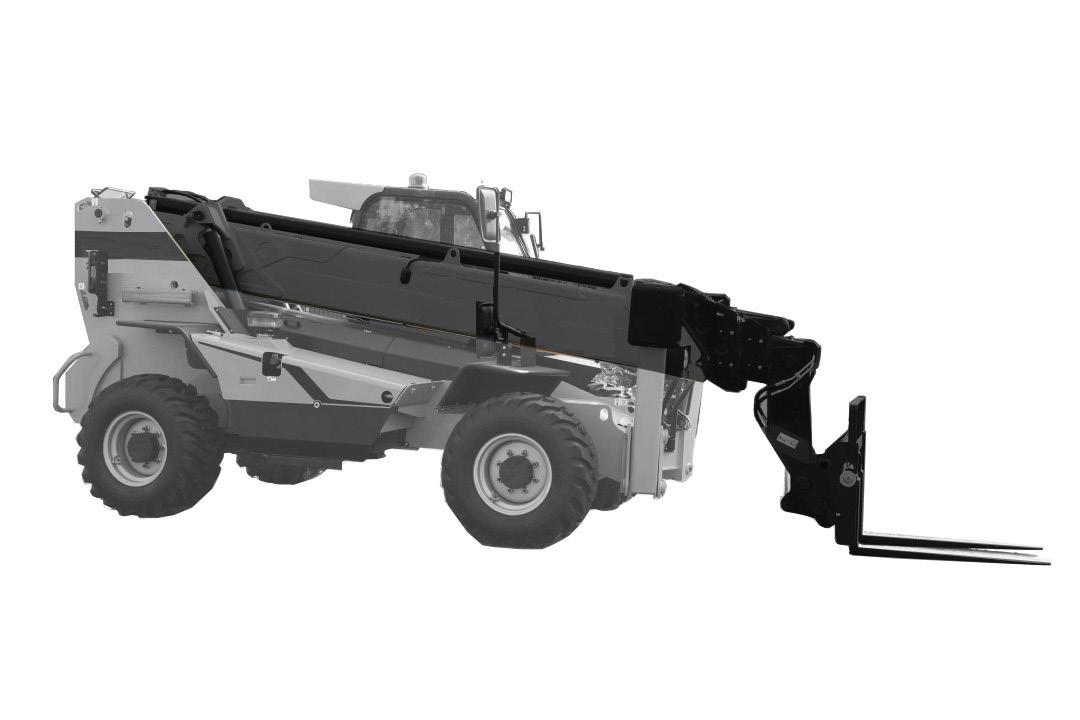
50 “ Boom Schematic Diagram”
The “chain boom component reassembly” operation is done in several stages:
“ T3 Telescope ” refit.
“ T2 + T3 Telescopes assembly ” refit. The “ T3 Telescope refit ” operation should be done.
- “ Hydraulic kit ” refit.
The “ T3 Telescope refit ” and “ T2 + T3 Telescopes assembly refit ” operations should be carried out.
These various stages are detailed below in this chapter.
During the reassembly procedure:
- Grease each pad sliding face before putting them in place.
- Grease telescope sliding faces.