1 minute read
HYDRAULICS


Intentionally Left Blank
Table Of Contents
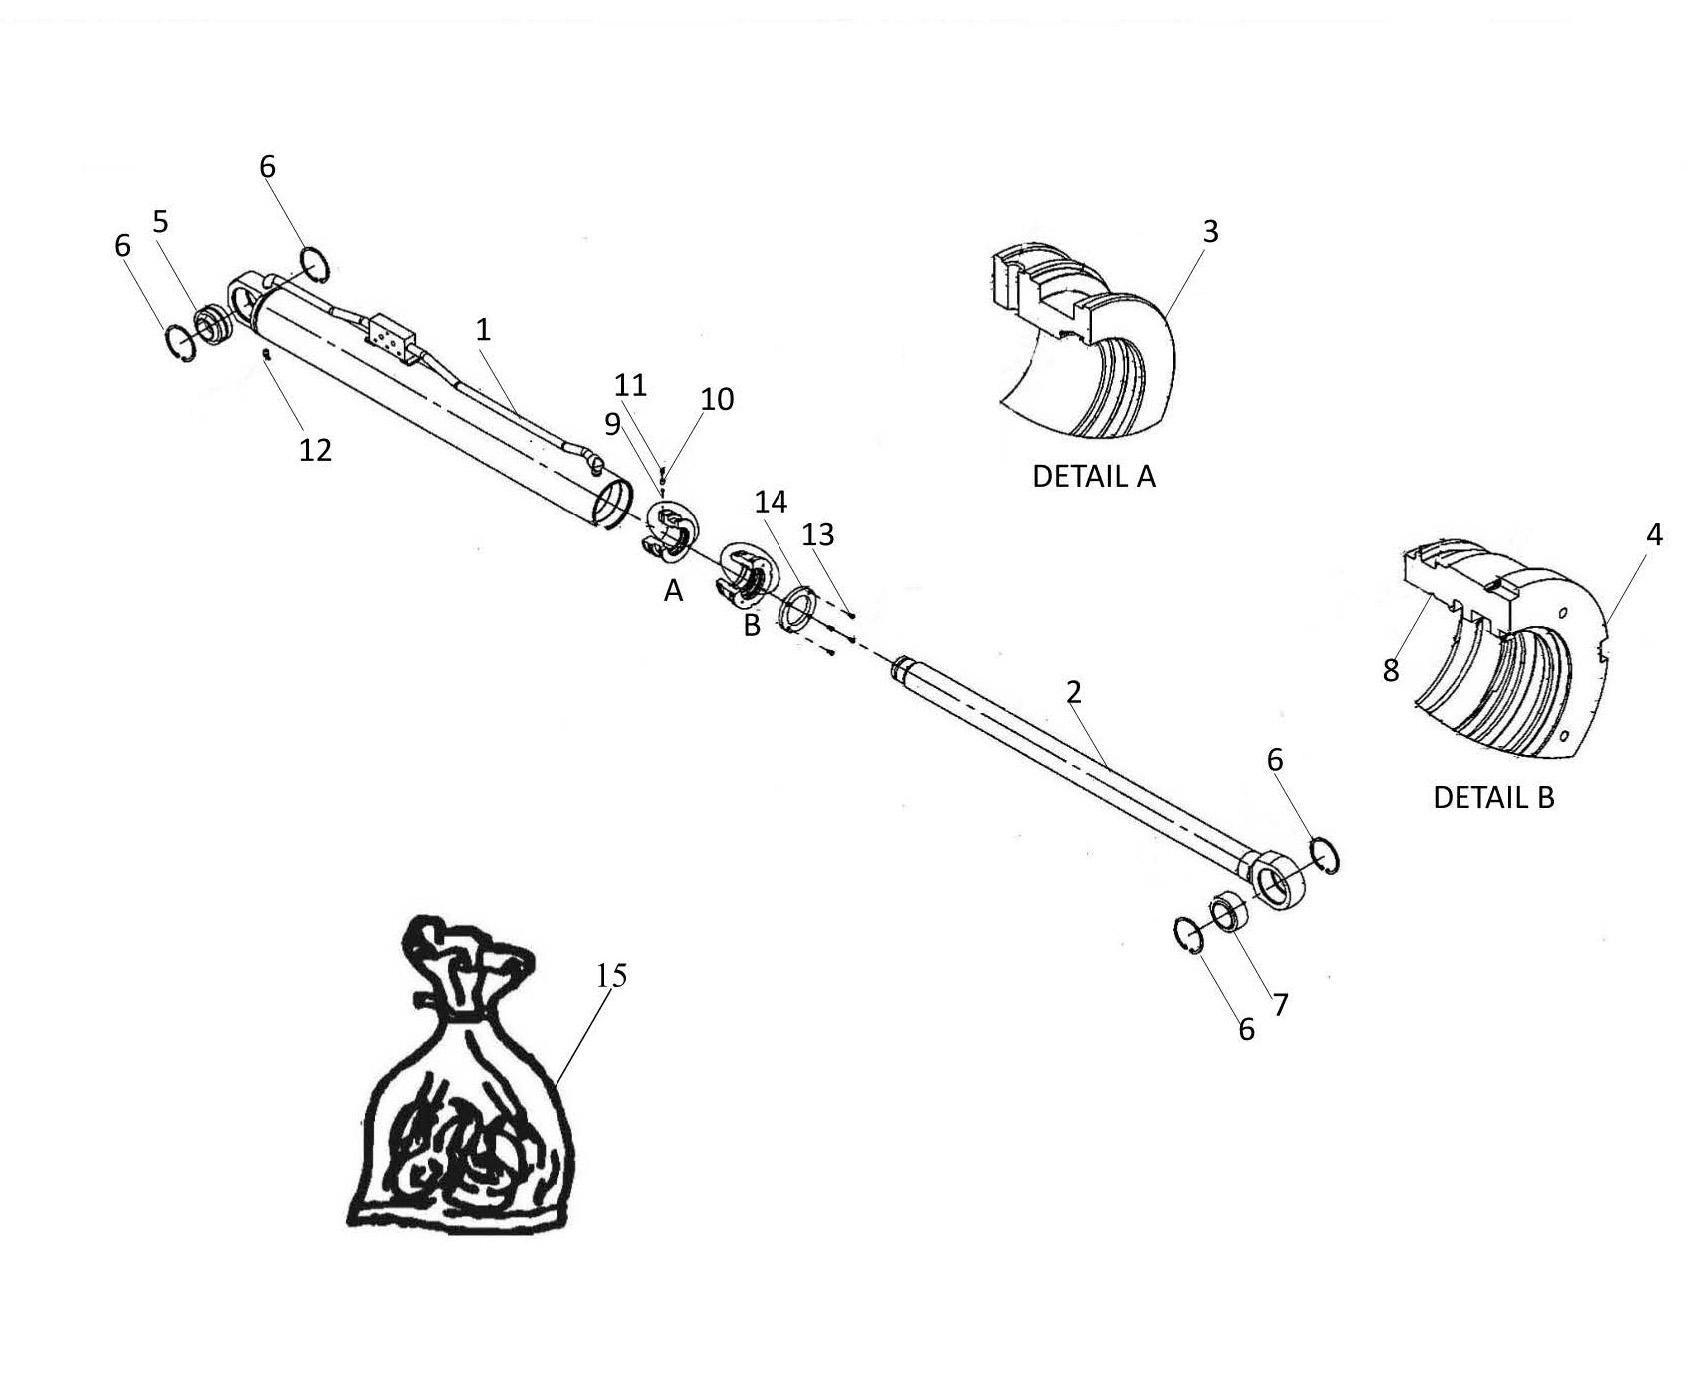
70.1.1 REMOVAL AND REASSEMBLY OF THE COMPLETE STEM REMOVAL
- Place the cylinder in a vice fitted with false jaws.
- Tighten the vice, ensuring that the body does not get distorted.
- Free locking ring 2 (Fig. 1) using a spanner wrench.
- If you find it difficult to free the ring, see subsection “REMOVAL” in section 70.1.5
- Completely unscrew locking ring 2 (Fig. 1).
- Extract the complete stem from the cylinder body.
NOTE : VERY LONG CYLINDERS
Take out the stem over 200 mm maximum. Give a half turn to the locking ring to loosen it (very slowly and evenly).
Take out the stem by about 2500 mm.
Support the stem end to prevent it from weighing on the locking ring (Fig. 2).
Carry on unscrewing the locking ring. If the effort is excessive, lift and lower the stem to reduce the friction.
NOTE !
Never force the ring when unscrewing it as this could cause it to seize.
INSPECTION
- Degrease and clean the cylinder chamber.
- Visually inspect the cylinder chamber, there should be no scratches, burrs, oxidisation,etc...
- Apply hydraulic oil on the piston seals and ring, using a brush.
- Reassemble the complete stem inside cylinder body 3 (Fig. 1).
- Ensure that the seals are not damaged while passing through the inside thread in the cylinder body.
- Apply hydraulic oil to the outside seals on the locking ring.
- Apply Loctite 222 (See section 70.1.5) on the locking ring (Fig. 3).
- Screw the ring in.
- Block using a spanner wrench and a torque wrench, see table for the tightening torque (Fig. 4).
- Give one turn to the screw to ensure that the seals are correctly positioned.
Remark
- We advise completing a hydraulic test of the cylinder before reassembling it on the machine.
- Operate the stem several times in both directions.
-