3 minute read
33. TRANSAXLE SERVICE AND MAINTENANCE: HYDROSTATIC GT

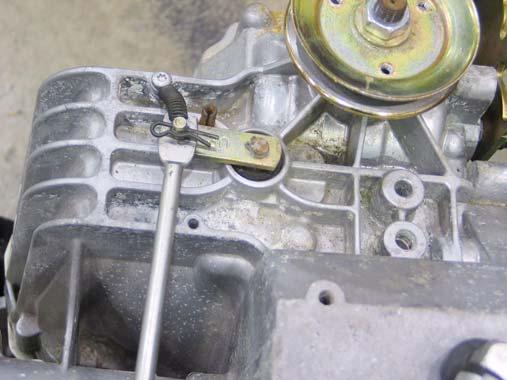
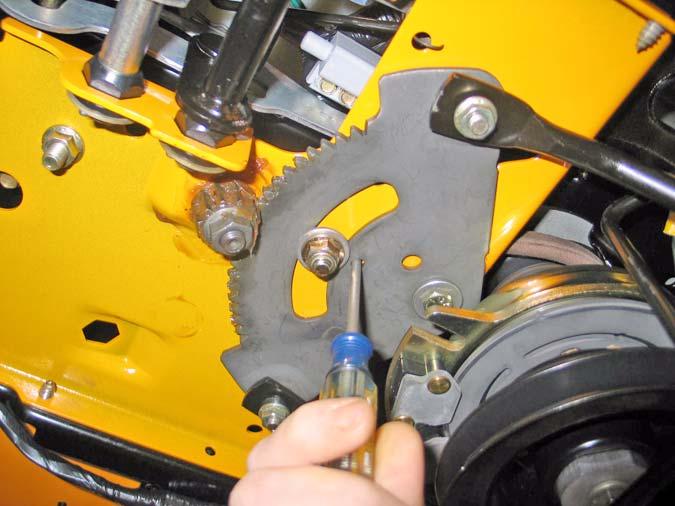
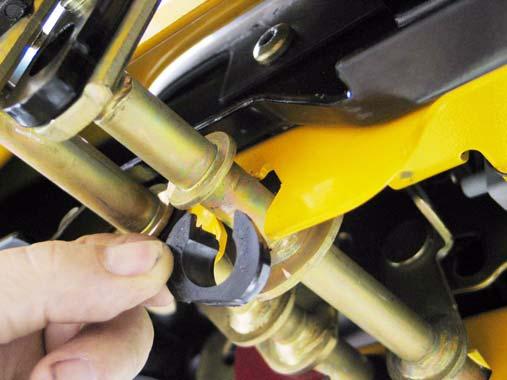
32.34.Press the brake pedal shaft as far outward as possible, and pry the worn bushing out of the bracket. See Figure 32.34.
Figure 32.34
NOTE: A pair of vice-grips and a plate can be used to press the end of the shaft flush with the edge of the bracket NOTE: The inner bushing is a hex flange bushing. The outer bushing is similar, but has one open side. The “tooth” in the top facet of the bracket that supports the bushing registers in open side of the bushing. 32.35.Clean any corrosion or dirt from the surfaces where the pedal shaft contacts the the bushing, and slip the new bushings into place.
Clean
Figure 32.35
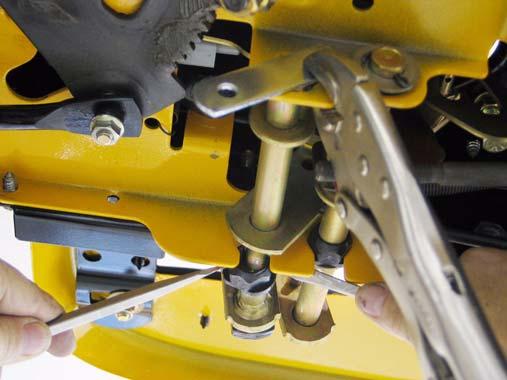
NOTE: Lubrication with grease may accelerate busing wear. If lubrication is applied it should be in dry form such as graphite or PTFE (Teflon). 32.36.Secure the inner bushing with a new cotter pin and the flat washer that was previously removed.
32.37.Move the pedal through it’s range of travel to check for bind. If binding is encountered: • Bind in a portion if the travel may be caused by a bent pedal shaft. • Constant bind is likely to be caused by a bent bracket.
• Also check for interference between the park brake and cruise control interlocks.
32.38.Correct any binding condition. 32.39.Connect the brake rod to the brake pedal shaft, and secure it with a new cotter pin. 32.40. After any brake service is performed, test the brakes as described in steps 24.2 through 24.4, then test-drive the tractor in a safe area that is free of hazards, obstacles, and by-standers before returning the tractor to service.
33. TRANSAXLE SERVICE AND MAINTENANCE: HYDROSTATIC GT
33.1. In normal use, the transaxle should last the life of the tractor with minimal maintenance.
33.2. Because the transaxle dissipates heat through air-cooling of the housing, it must be kept clean of dirt and debris, and the cooling fan should be replaced immediately if damaged. 33.3. Cleanliness is vitally important when doing any service work that might expose the fluid or inter nal parts to any form of contamination. Clean thoroughly around any fittings, parts, or seals that are to be removed prior to removal. 33.4. Pressure washing is not recommended, and may contaminate the transmission fluid. Dam age caused by contaminated fluid is not warrantable.
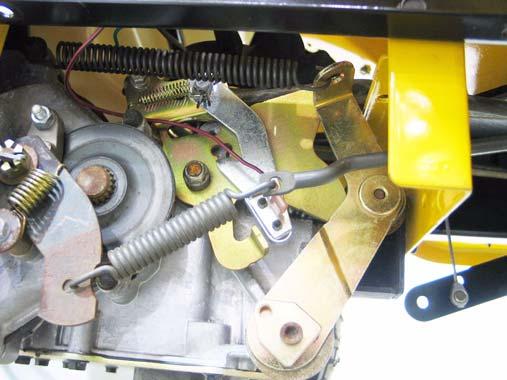
33.5. Before commencing internal repairs, eliminate all possible external performance issues: • Dragging brake • Maladjusted linkage • Partially open relief valve • Slipping traction drive belt/ low engine speed
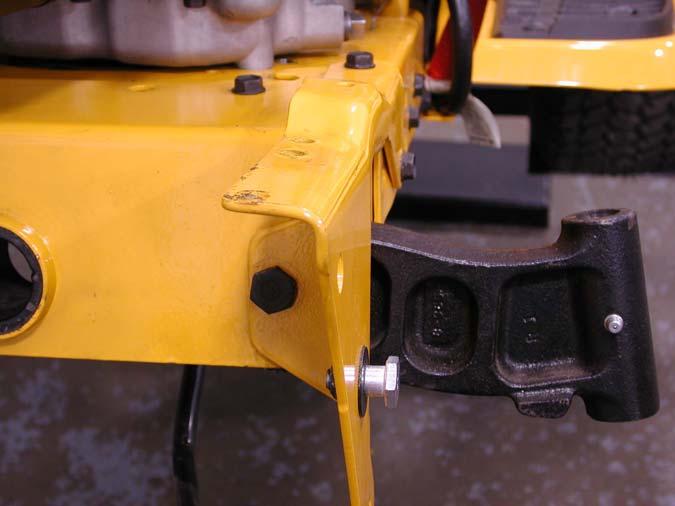
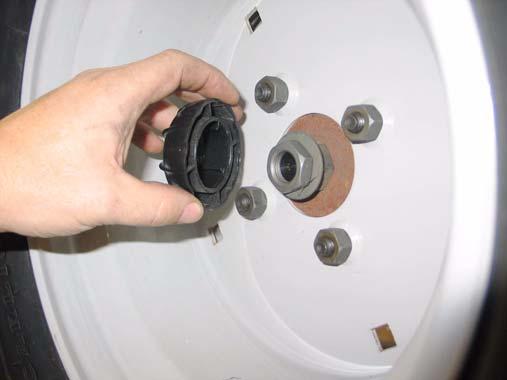
33.6. The transaxle contains .95 gal (116.5 fl.oz) of 20W-50 motor oil with an API classification of SH/CD. See Figure 33.6.
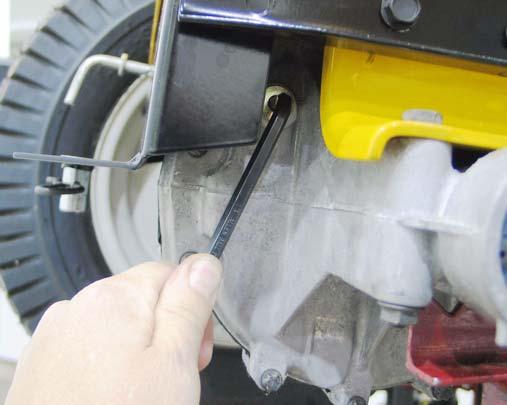
Oil level plug
Figure 33.6
NOTE: Check the fluid level at the fluid level port near the back of the right side axle housing. The plug can be removed with a 1/4” Allen wrench. NOTE: This oil (fluid) should not have to be changed in the normal service life of the tran saxle unless it develops a leak or becomes contaminated. 33.7. If the transaxle develops a leak, identify and repair the leak to prevent further damage. 33.8. To drain the oil, Hydro-Gear recommends removal of the transaxle, for draining through the fill port. To drain the oil and replace the filter: 33.9. Index-mark the charge pump housing for orientation, then remove it using a 5mm Allen wrench.
See Figure 33.9. Charge pump housing
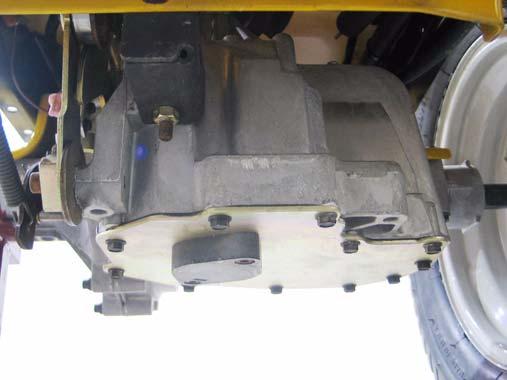
Figure 33.9
NOTE: Place a large catch pan under the transaxle.
33.10.The charge pump housing will come down with the gerotor pump it contains, an O-ring seal, and 116.5 fl. oz. of 20W50 motor oil.
33.11. Remove the 11 perimeter screws that hold the lower cover to the transaxle using a #8 internal Torx bit. See Figure 33.9. 33.12.Remove the lower cover and clean all sealant from the mating surfaces. 33.13.Remove the charge pump housing screw Orings from the charge manifold. 33.14.Remove the charge check valve spring and ball. 33.15.Remove the filter, charge manifold, and the Oring that seals the charge manifold to the pump center section.
33.16.It is highly recommended that the transaxle be reassembled using new O-ring seals and a new filter.
33.17.Inspect the geroter pump. Replace it if it is visibly worn.
33.18.Reverse the order of disassembly to reassemble the transaxle:
• Install the O-ring onto the pump center section. • Install the filter and charge manifold. • Install the charge check ball and spring.