1 minute read
11. DECK LIFT SHAFT ASSEMBLY

11. DECK LIFT SHAFT ASSEMBLY
11.1. If the deck lift shaft itself requires removal, first remove the cutting deck. 11.2. Remove the fenders as described in the FENDER REMOVAL section of this manual.
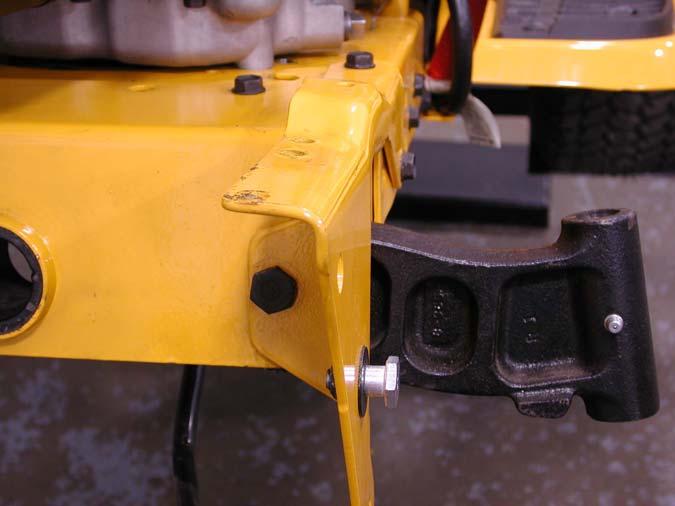
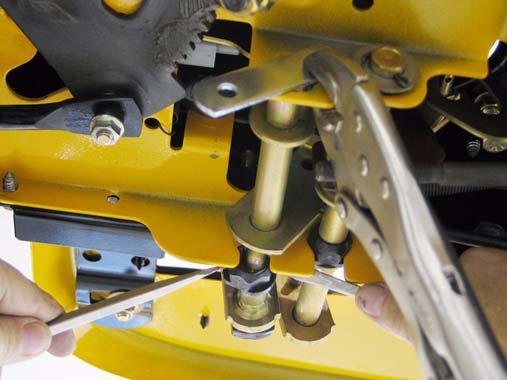
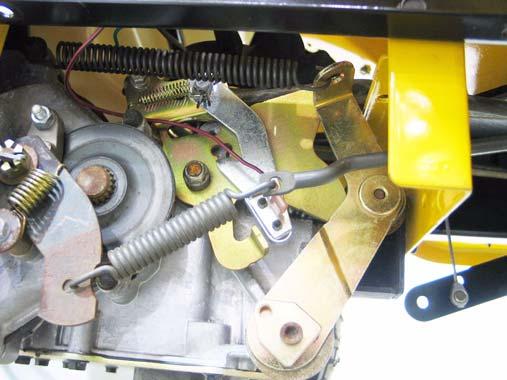
11.3. Disconnect the deck lift assist spring that extends from the deck lift shaft to the transaxle torque bracket using a length of starter rope or a spring tool. See Figure 11.3.
Deck Lift Assist Spring
Figure 11.3
11.4. On models built in 2004 and prior, the lift assist springs extend rearward to a pair of openings with mounting tabs in the back surface of the upper frame. See Figure 11.4. Mounting Tabs
Figure 11.4
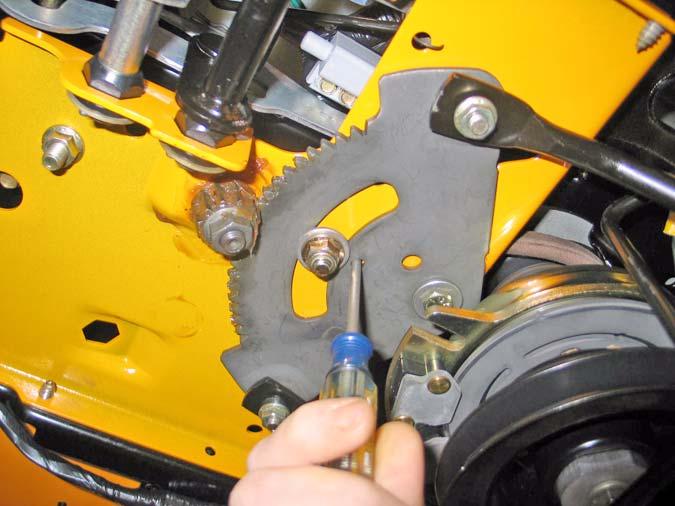
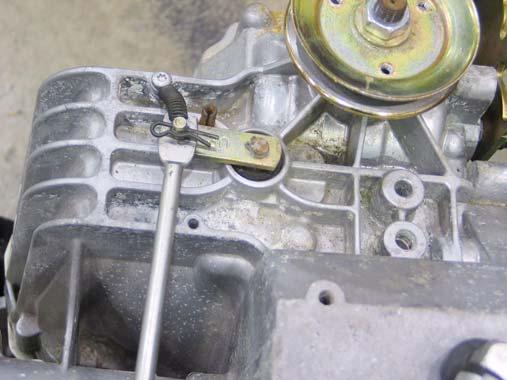
11.5. Unbolt the seat bracket mounting plate from the frame (4 screws) using a 1/2” wrench. This will allow the fuel tank to be lifted slightly for clear ance, but the tank need not be removed. 11.6. With the deck height control lever all the way forward, remove the hairpin clips that secure the deck lift cables to the arms on the deck lift shaft. See Figure 11.6.

Deck Lift Cable
Figure 11.6
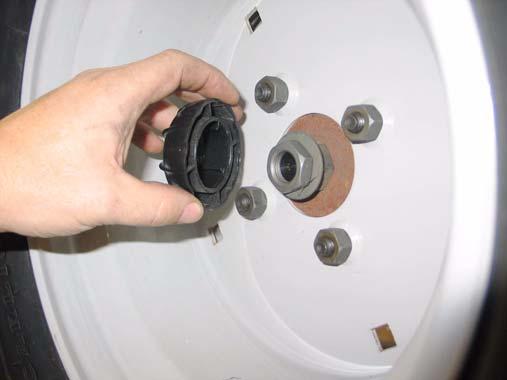
11.7. Remove the E-clip from each end of the lift-shaft. See Figure 11.7.
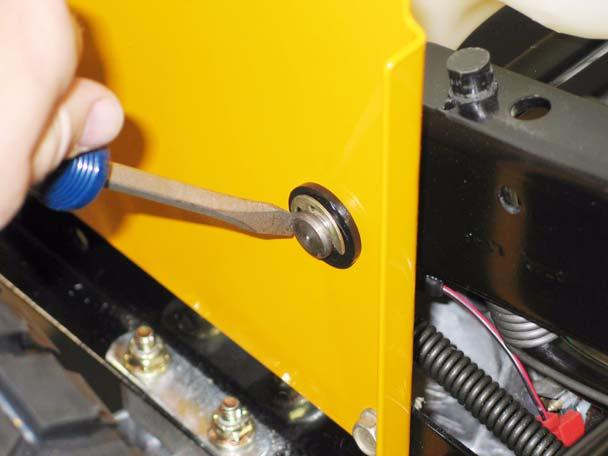
E-clip

Figure 11.7
11.8. Pry the bushings that support the lift shaft out of
the frame.