5 - ASSEMBLY
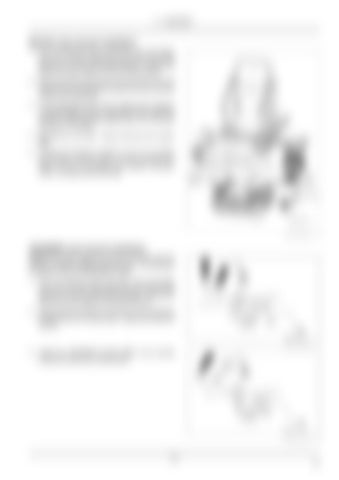
MILSCO seat armrest installation 1. From the left-hand side of the seat move the plastic pad cover and then disassemble the pad and the pad support by removing the fixing hardware. Discard the pad and the pad support and the fixing hardware. 2. Slide forward the cab seat and remove the two rear seat fixing bolt, then slide back the seat and remove the two remain front fixing bolts. 3. On the right-hand side of seat, install the two washers 10.6x25x6 (28) and then on left-hand side install the joystick armrest assembly (30) between the seat plate as shown in the figure. 4. Reinstall the cab seat. Secure with the four screws (32). 5. Connect the harness connector X-LFT_A to existing cab harness connector CAB_L and the harness connector X-LFT_2 to existing cab harness connector CAB_L2 located behind the seat.
LEIL17WHL1712BB
14
LEIL17WHL0418AB
15
LEIL17WHL1713AB
16
GRAMMER seat armrest installation NOTE: the joystick steering armrest is provided with the MILSCO bracket installed on the armrest. It is necessary to replace it with the GRAMMER bracket. 1. From the left-hand side of the seat, move the plastic pad cover and then disassemble the pad and the pad support by removing the fixing hardware. Discard the pad and the pad support and fixing hardware. 2. Disassemble the MILSCO bracket from the armrest by removing the four fixing screws. Discard the MILSCO bracket.
3. Install the GRAMMER bracket (33) to the armrest reusing the same four fixing screws.
25 EN


